2×4 Christmas Crafts: 15 Cute Builds From One Cheap Board
2×4 Christmas crafts are proof that the sweetest holiday decor can start in the lumber aisle for just a few dollars. One plain board, a little paint and an afternoon at the kitchen table can give you a whole porch full of snowmen, trees and reindeer. This month, a simple tree built from two boards pulled in about 57,700 reactions and 3,100 shares on Facebook, and the comments were full of people asking how to make one. We get it. There is something special about a chunky wooden piece that you made yourself, one that will come out of the box year after year. Below you will find 15 cheerful builds, from tiny gnomes to a tall stepped floor tree. An adult should do all the sawing, but kids can sand, paint and add the cute details. Let’s get building..
1. Stacked Block Trees, the Classic 2×4 Christmas Crafts Build
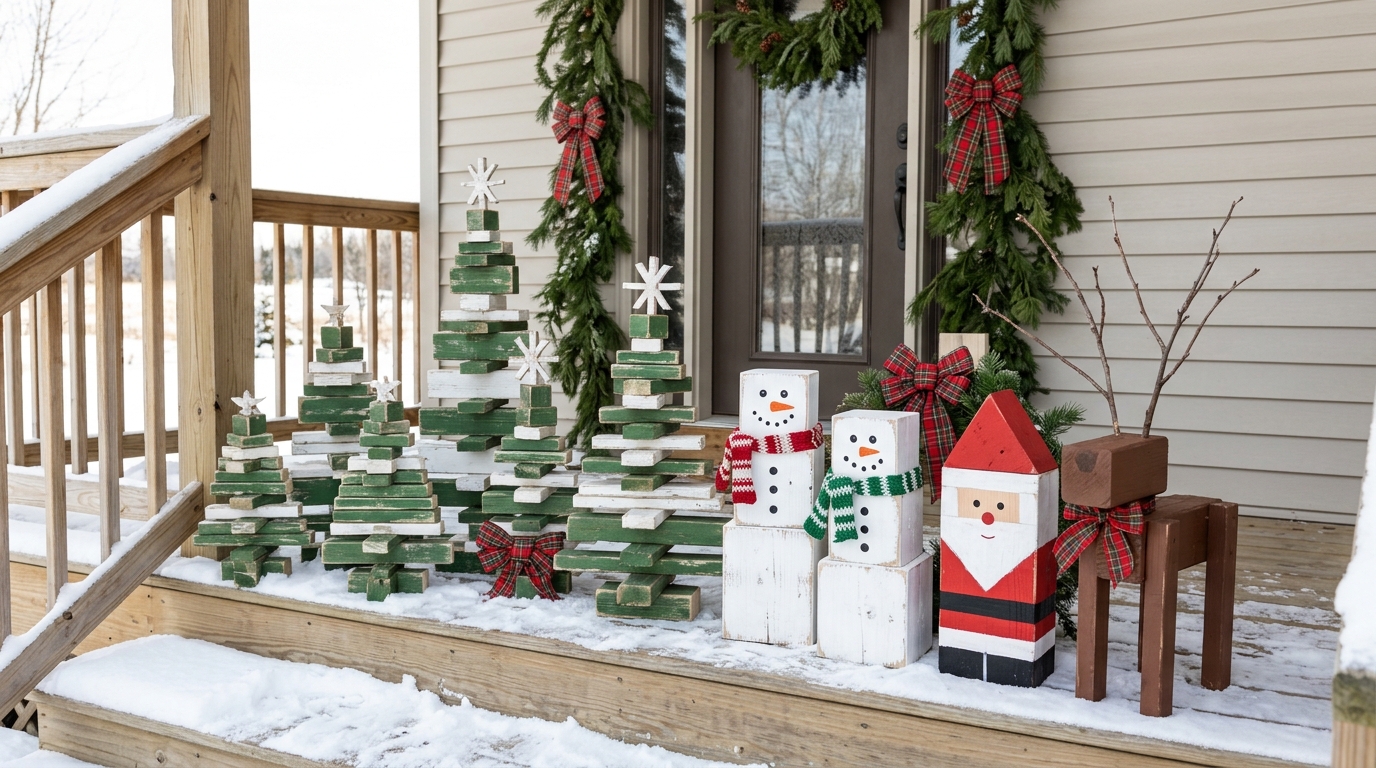
This is the build that starts all 2×4 Christmas crafts. You cut a board into short blocks, each one a little smaller than the last, then stack them up into a chunky tree. Paint some green, leave some white, and you get that soft, layered look that fits any porch. Make three in different heights and they look like a little forest by the door. The best part is that a single eight foot board can make two or three trees, so this one costs almost nothing. Which colors would you pick for your porch..
You will need: one 2×4 board, a saw (adult use only), sandpaper, wood glue, green and white craft paint, a short scrap block for the trunk, a small wooden star.
How to make it: 1. Have an adult cut five blocks, about 10, 8, 6, 4 and 2 inches long. 2. Sand the edges smooth and paint each block. 3. Glue them in a stack from biggest to smallest, add the trunk block underneath and glue a star on top.
2. Painted 2×4 Snowmen Family
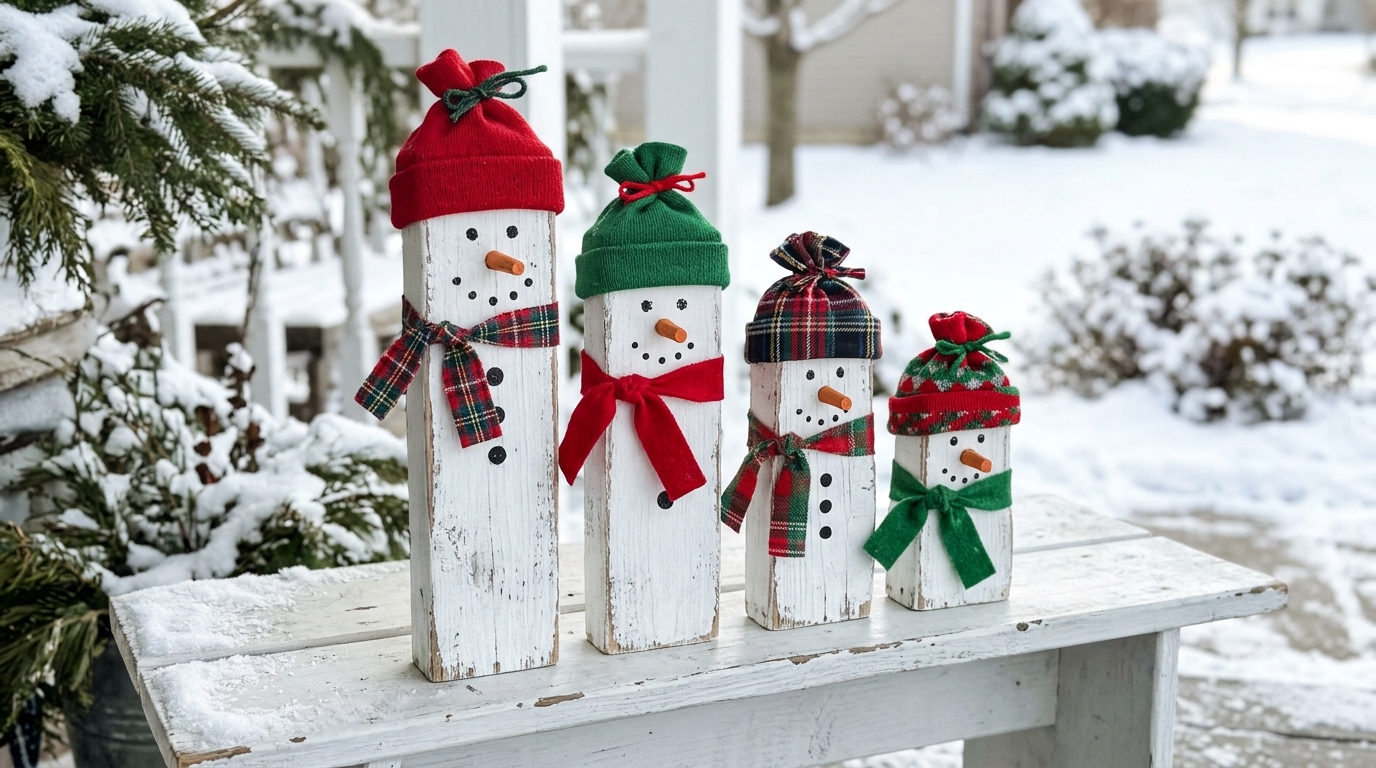
Snowmen are the easiest 2×4 Christmas crafts to begin with, because the board is already the right shape. Just cut pieces in four heights, paint them white and give each one a face. The magic is in the little extras. An old sock turns into a knit hat in seconds, and a strip of flannel makes a cozy scarf. Line them up from tallest to smallest and you have a whole family waving at the neighbors. Kids love this one because they can paint the faces themselves. Will your family get names?
You will need: 2×4 scraps cut in four heights, white and orange paint, a black paint pen, old socks, flannel strips, hot glue (adult help), small buttons.
How to make it: 1. Have an adult cut blocks about 12, 10, 8 and 6 inches tall. 2. Paint them white, then add dot eyes, a carrot nose and button dots. 3. Cut the cuff off a sock, slide it on as a hat, tie a rubber band near the top and add a flannel scarf.
3. Rustic 2×4 Reindeer With Branch Antlers
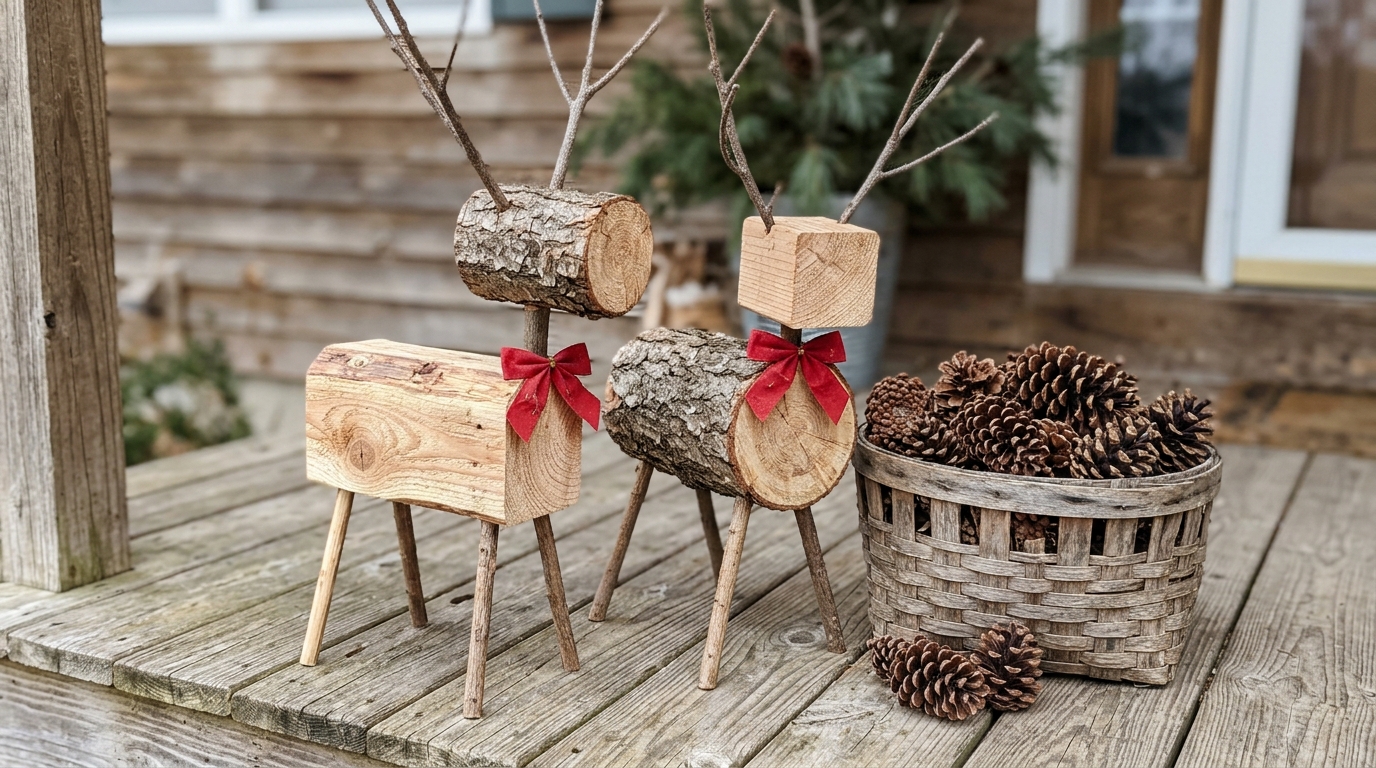
These reindeer look like they came from a country gift shop, but they are mostly scrap wood and backyard twigs. A longer block becomes the body, a shorter one the head, and thin sticks become legs. The antlers are just forked twigs you can pick up on a walk. Leave the wood bare to show off the grain, or brush on a light stain for a warmer tone. A pair of them on the front step feels like a welcome from the North Pole. Have you got a twig pile waiting in the yard?
You will need: 2×4 blocks, four thin dowels or sticks for legs, forked twigs, a drill (adult use only), wood glue, red ribbon.
How to make it: 1. Have an adult cut a 10 inch body block and a 4 inch head block. 2. Drill small holes for the legs, neck and antlers, then glue in the sticks and twigs. 3. Glue the head to a short neck stick and tie a red bow around it.
4. 2×4 Santa With a Red Hat

Among 2×4 Christmas crafts, a block Santa is pure folk art charm. You paint the top third red for his hat, add a small peach area for his face, then glue on a big fluffy beard. A white pompom on the hat makes him look extra jolly. Make one or a whole row of them in different heights for your mantel. They also make sweet gifts for teachers and neighbors, and 2×4 Christmas crafts like this sell well at craft fairs because people love a chunky Santa. Will yours be classic red or a cozy plaid version?
You will need: 2×4 blocks, red, peach, black and white paint, white faux fur, small white pompoms, a wooden bead for a nose, hot glue (adult help).
How to make it: 1. Paint the top third red, a band of peach under it, and the rest red with a black belt line. 2. Glue a wooden bead nose on the peach area. 3. Cut a beard shape from faux fur, glue it under the nose and add a pompom on top.
5. Mini 2×4 Gnomes
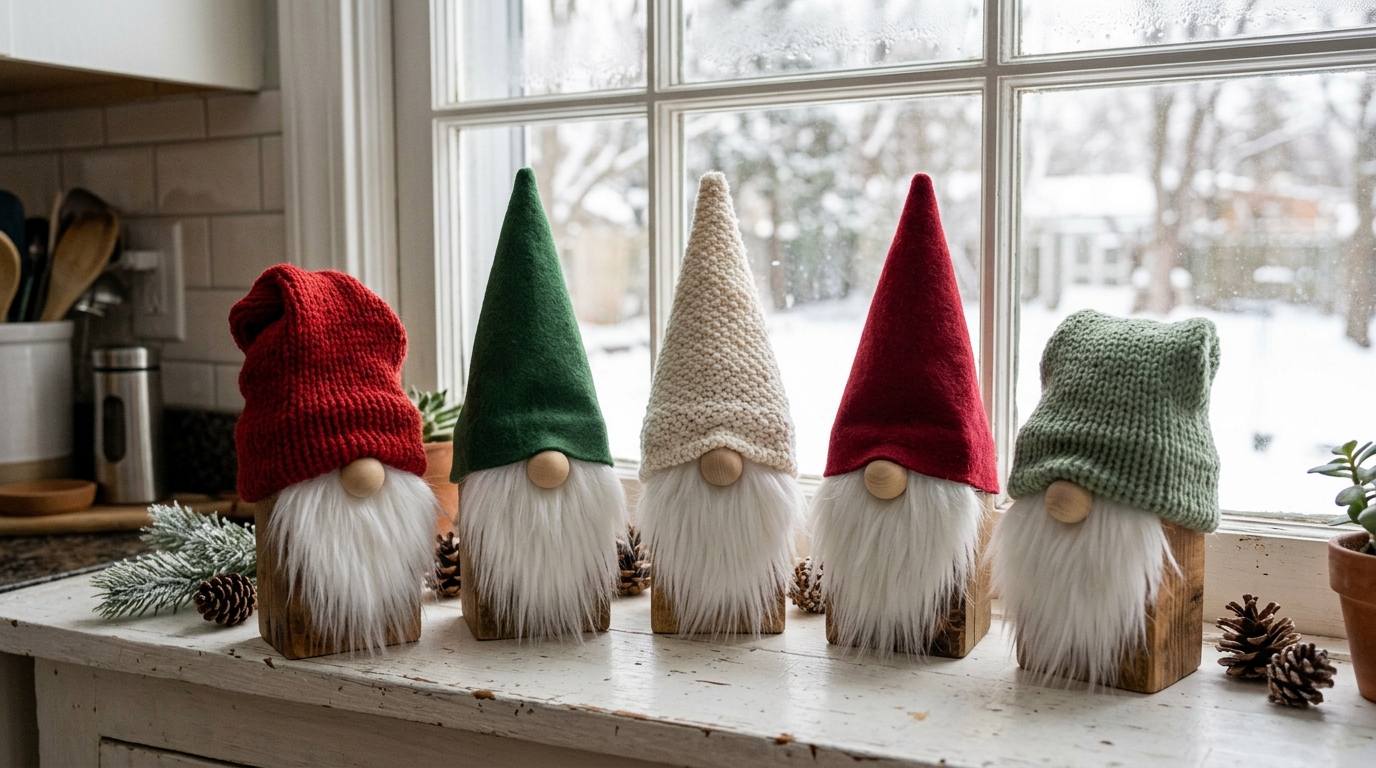
Gnomes are everywhere at Christmas, and the wooden kind are the easiest of all. Since the hat and beard cover almost everything, you barely need to paint. A short block, a cone of felt or knit fabric and a fluffy beard is all it takes. Push the hat down low so it rests right on the bead nose, and that classic gnome look appears like magic. Make a whole crew in red, green and cream for a windowsill or a tiered tray. How many gnomes can one board make? More than you think!
You will need: short 2×4 blocks, felt or old sweater sleeves, white faux fur, wooden beads, hot glue (adult help), twine.
How to make it: 1. Have an adult cut blocks 4 to 6 inches tall and sand the edges. 2. Glue a strip of faux fur on the front as a beard. 3. Roll felt into a tall cone hat, glue it over the top so it sits low, and add a bead nose.
6. 2×4 Candy Cane Porch Posts
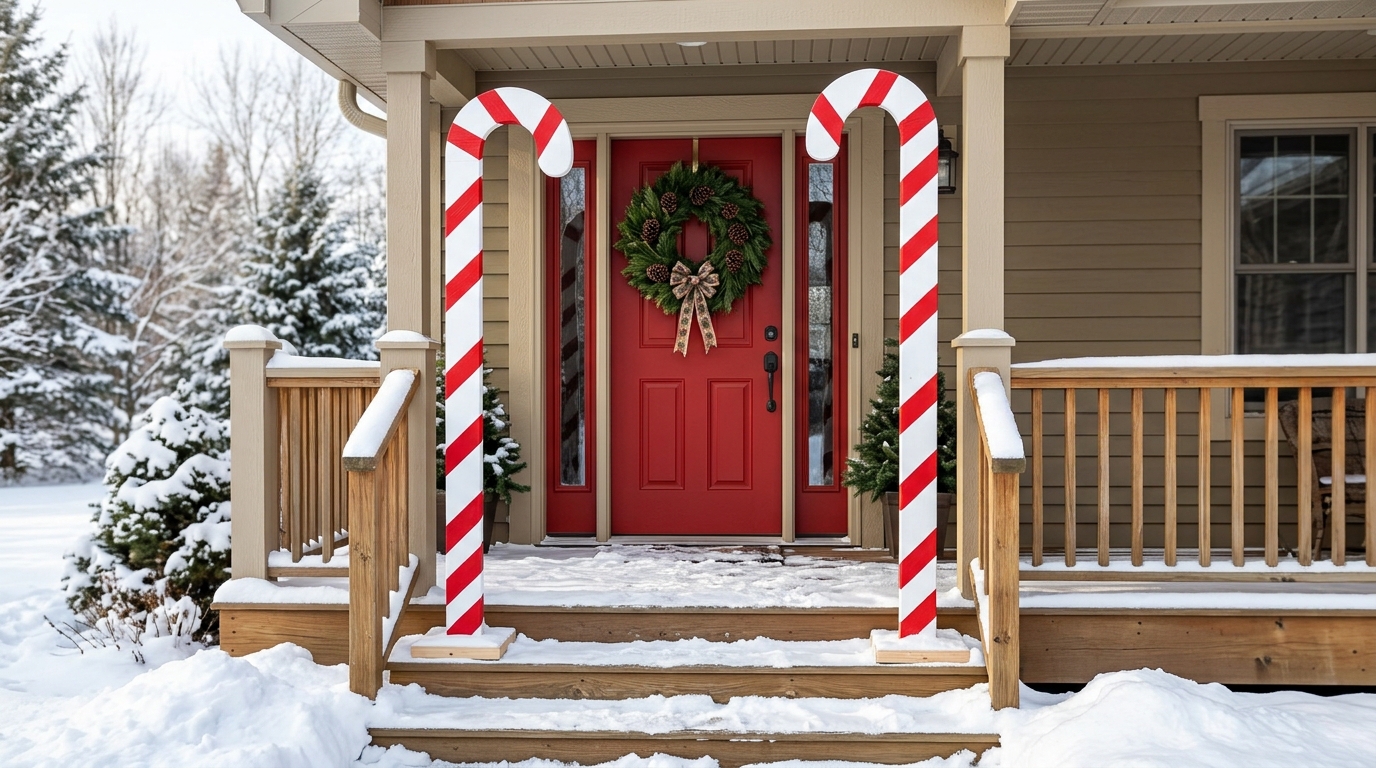
Nothing says Christmas from the street quite like giant candy canes by the front door. These are made from a long board with a curved piece joined at the top to make the hook. Painter’s tape makes the stripes easy, so even beginners get clean lines. Put one on each side of the steps and your porch looks like a storybook. If you want to keep it simple, skip the hook and just paint straight striped posts. Which side of the door gets the first one?
You will need: two 2×4 boards about 3 feet long, a curved piece cut from a 2×6 (adult use only), wood screws, white and red outdoor paint, painter’s tape, a flat base block.
How to make it: 1. Have an adult cut the curved hook and screw it to the top of the post. 2. Paint everything white and let it dry. 3. Wrap tape in a diagonal spiral, paint red between the lines, peel the tape and screw the post to a base block.
7. Stepped Floor Tree, the Viral 2×4 Christmas Crafts Star
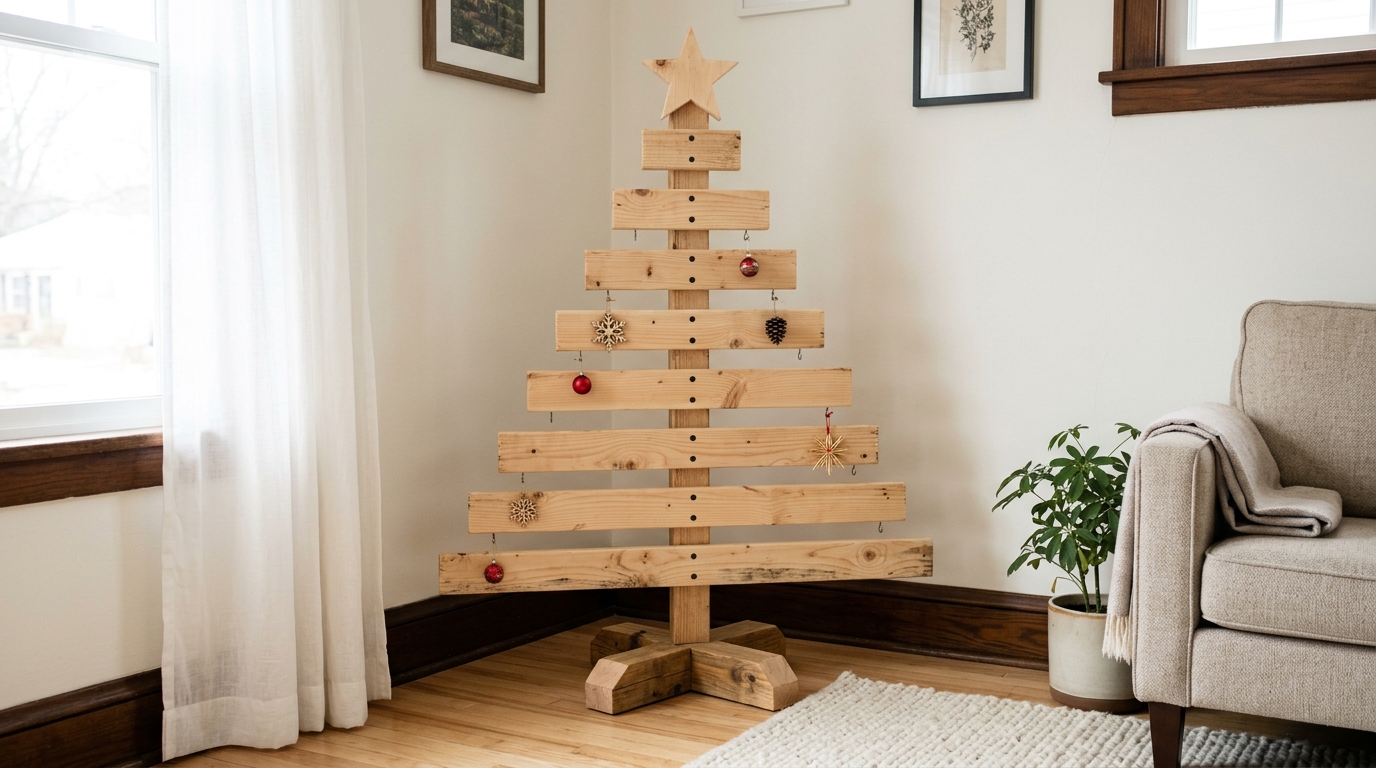
This is the big showstopper, and it is the build behind those huge numbers in the wooden Christmas tree videos on Facebook. You cut wider boards in steps, from long at the bottom to short at the top, and screw them to a center board. Leaving the screw heads showing gives it a modern rustic look. It stands in a corner like a real tree, but takes up less space and never drops needles. Hang a few small ornaments on the boards and top it with a wooden star. Would this work in your smallest room?
You will need: one 2×4 for the center post, several 2×6 boards, a saw and drill (adult use only), dark wood screws, sandpaper, a wide base block, a wooden star.
How to make it: 1. Have an adult cut 2×6 boards in lengths that shrink by about 3 inches each step. 2. Sand them and screw each board across the center post with a small gap between. 3. Screw the post to a wide base so it stands steady and add the star.
8. 2×4 Gingerbread Men
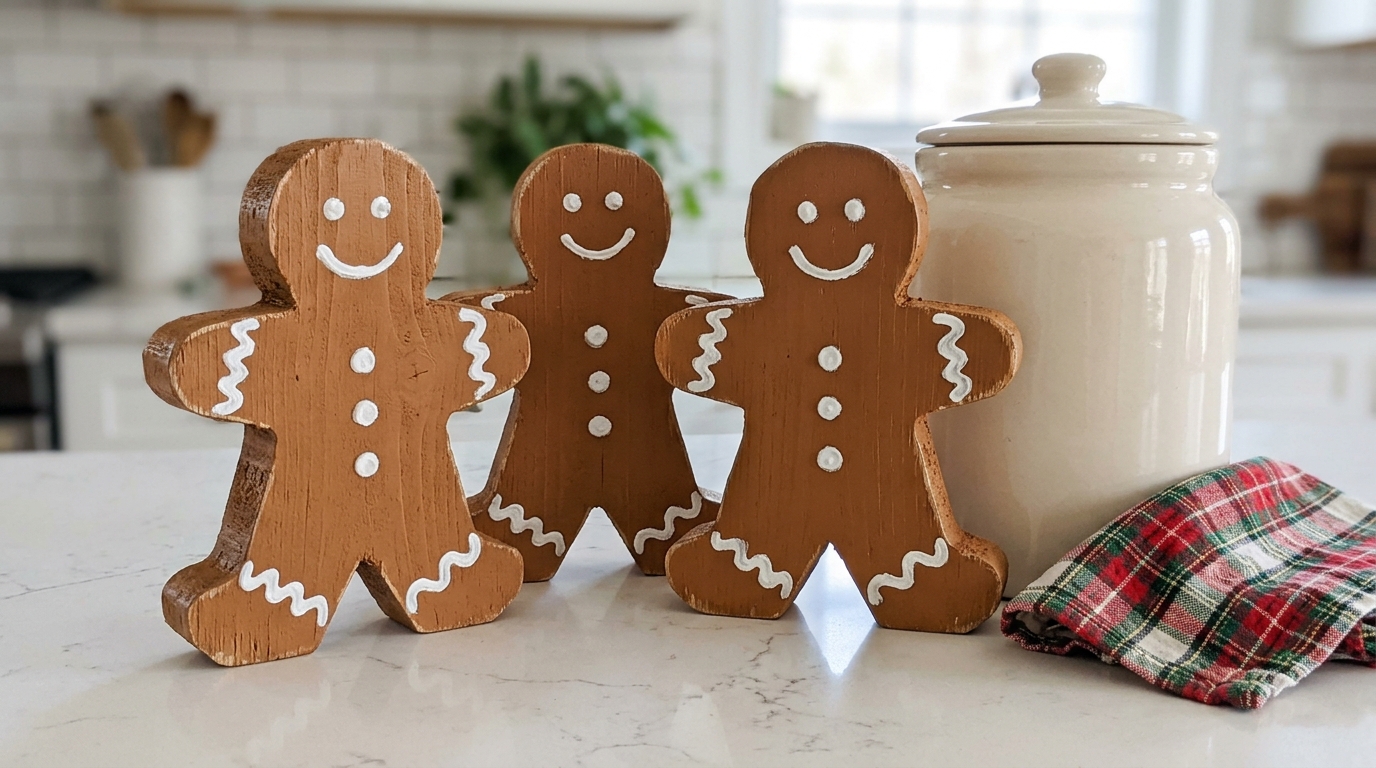
These little cookies will never go stale. An adult cuts a simple gingerbread shape from a short board, and the fun part is the icing. A white paint pen makes it easy to draw squiggles, buttons and smiles, just like piping real frosting. Make a batch and set them on the kitchen counter, or tie twine around their necks and hang them on the tree. They also look adorable lined up on a shelf next to a cookie jar. Who in your house will draw the best smile?
You will need: 2×4 blocks, a scroll saw or jigsaw (adult use only), sandpaper, brown paint, a white paint pen, small red buttons, twine.
How to make it: 1. Trace a gingerbread shape on the block and have an adult cut it out. 2. Sand the edges and paint the whole piece warm brown. 3. Draw icing lines and a smile with the white pen and glue on two red buttons.
9. 2×4 Christmas Crafts Countdown Blocks
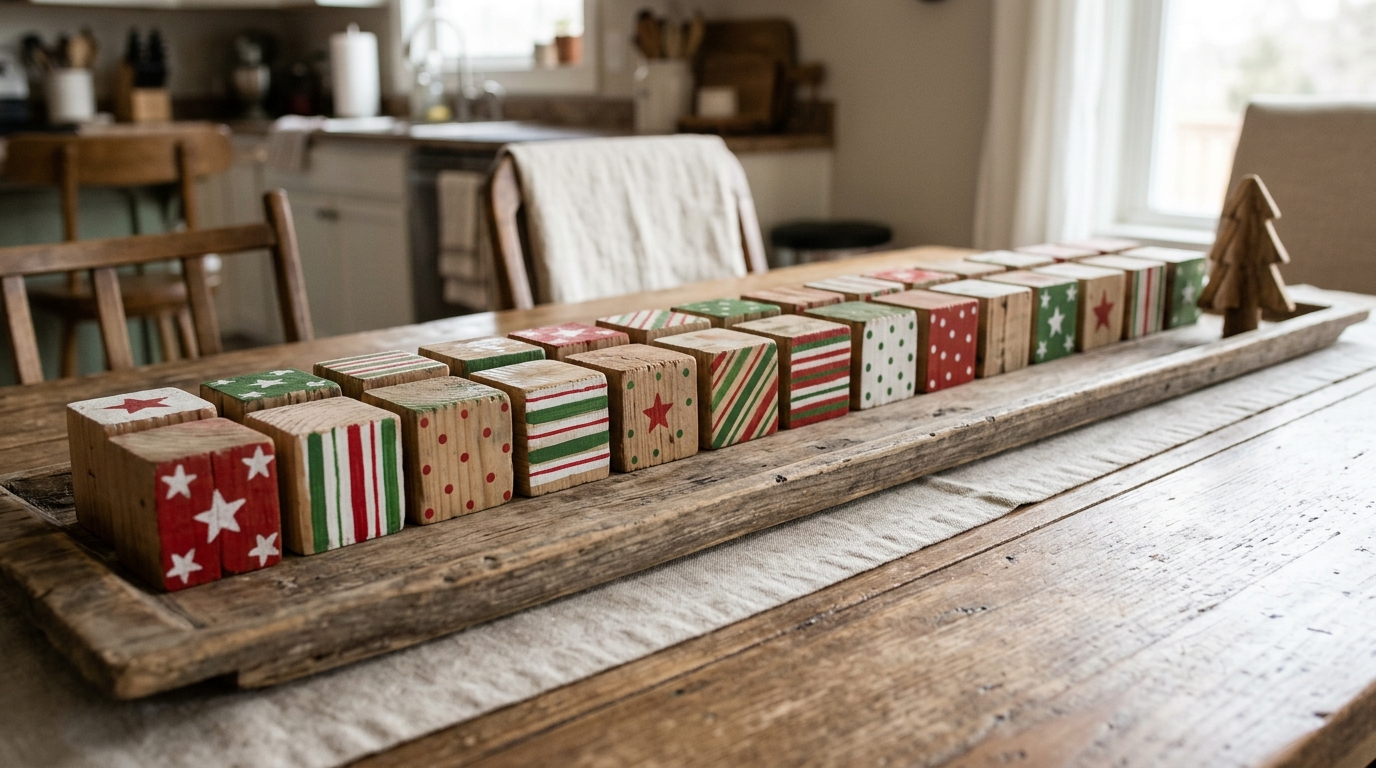
A row of painted blocks makes a simple countdown that kids can enjoy every morning. Cut 24 small squares, paint each one with its own pattern, and line them up on a long tray. Each day, a child flips one block or moves it to the other side. You can hide a tiny note under each one with a fun job, like baking cookies or reading a holiday book together. It turns waiting for Christmas into a little game. What would your first daily activity be?
You will need: one 2×4 board, a saw (adult use only), sandpaper, red, white and green paint, a long wooden tray, small paper notes.
How to make it: 1. Have an adult cut the board into 24 small cubes and sand them smooth. 2. Paint each one with stars, dots, stripes or plaid. 3. Line them up on a tray and tuck a small activity note under each block.
10. 2×4 Penguins
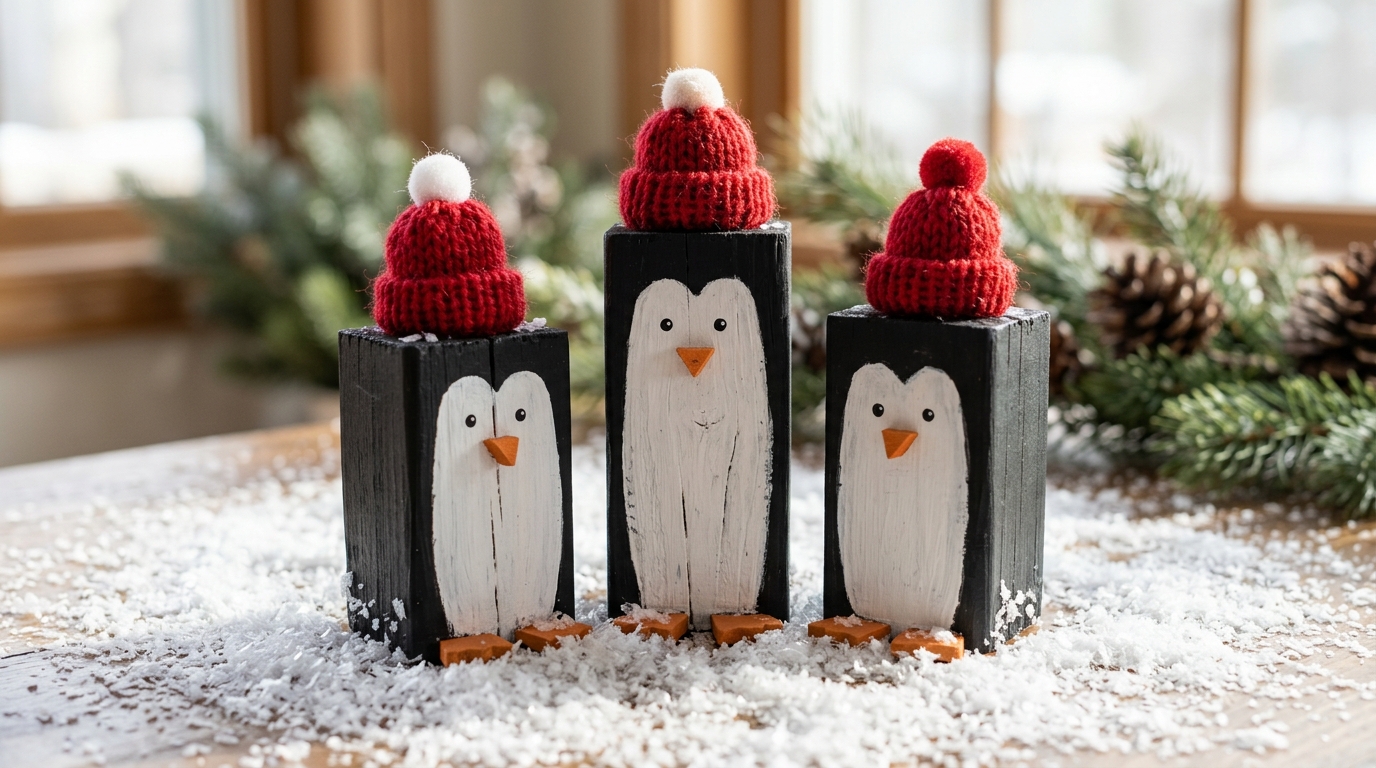
Penguins are a cute change from the usual snowmen, and kids adore them. Paint a short block black, add a white oval belly, then an orange beak and little feet. A tiny knit hat or a pompom on top gives each one a personality. Set them on a bed of faux snow and they look like they are waddling across the ice. These 2×4 Christmas crafts are great for a kids’ craft day because the shapes are simple and the paint does all the work. Will your penguins wear matching hats or each their own color?
You will need: short 2×4 blocks, black, white and orange paint, small pompoms or tiny knit hats, a black paint pen, faux snow.
How to make it: 1. Have an adult cut blocks about 5 to 7 inches tall. 2. Paint them black, then paint a white oval belly on the front. 3. Add an orange beak and feet, dot on eyes and glue a hat or pompom on top.
11. 2×4 Lantern Post With an LED Light
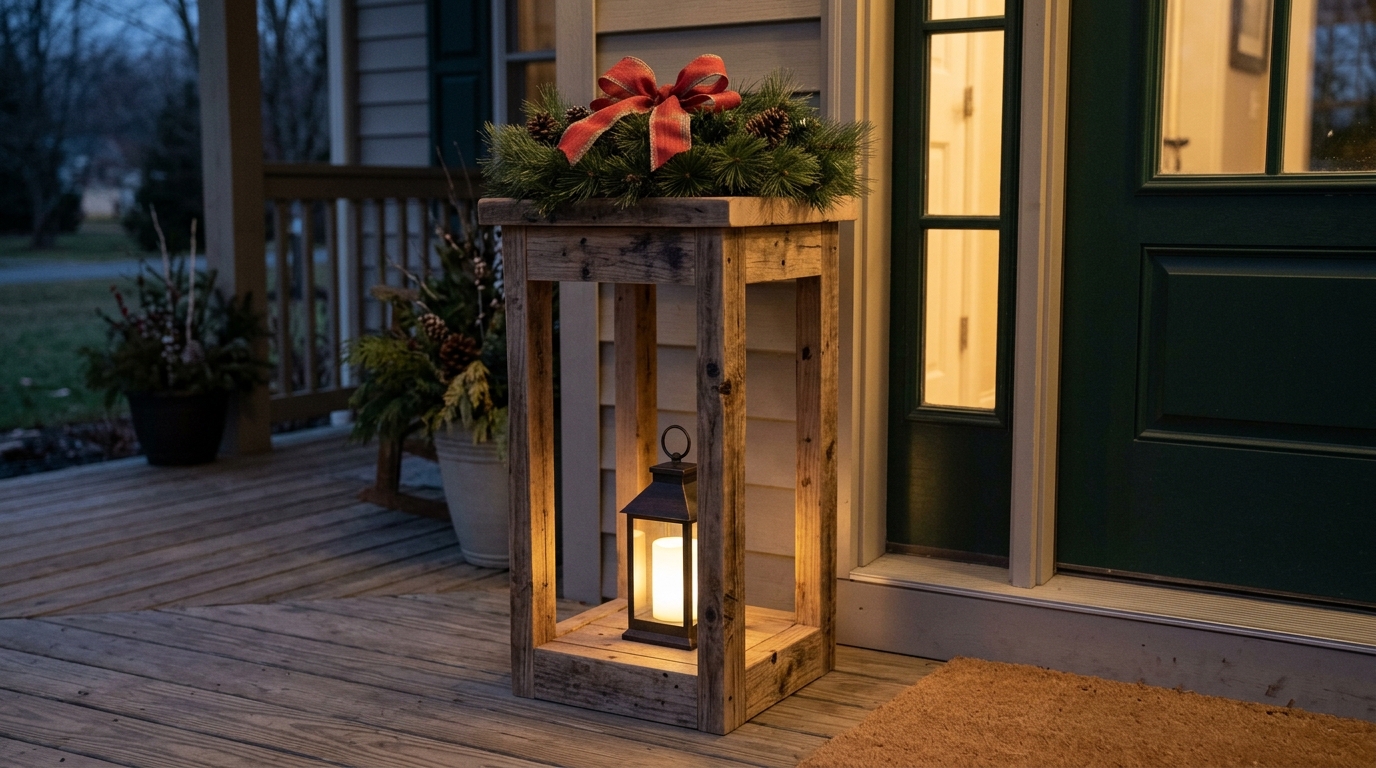
Of all the 2×4 Christmas crafts here, this lantern post adds the warmest glow to the porch without any flame at all. Four corner posts and a top and bottom frame make an open tower, and a battery LED lantern sits inside. Many battery lights come with a timer, so it turns on by itself every evening. Add a bit of pine garland and a bow on top, and guests will feel welcome as soon as they walk up. Would you put one on each side of the door?
You will need: 2×4 boards cut into four posts and frame pieces, a saw and drill (adult use only), wood screws, outdoor stain, a battery LED lantern with a timer, pine garland, a bow.
How to make it: 1. Have an adult cut four posts and eight short frame pieces. 2. Screw a square frame at the top and bottom of the posts, then stain the whole tower. 3. Set the battery LED lantern inside and tie garland and a bow on top.
12. 2×4 Christmas Crafts Tree Farm Sign
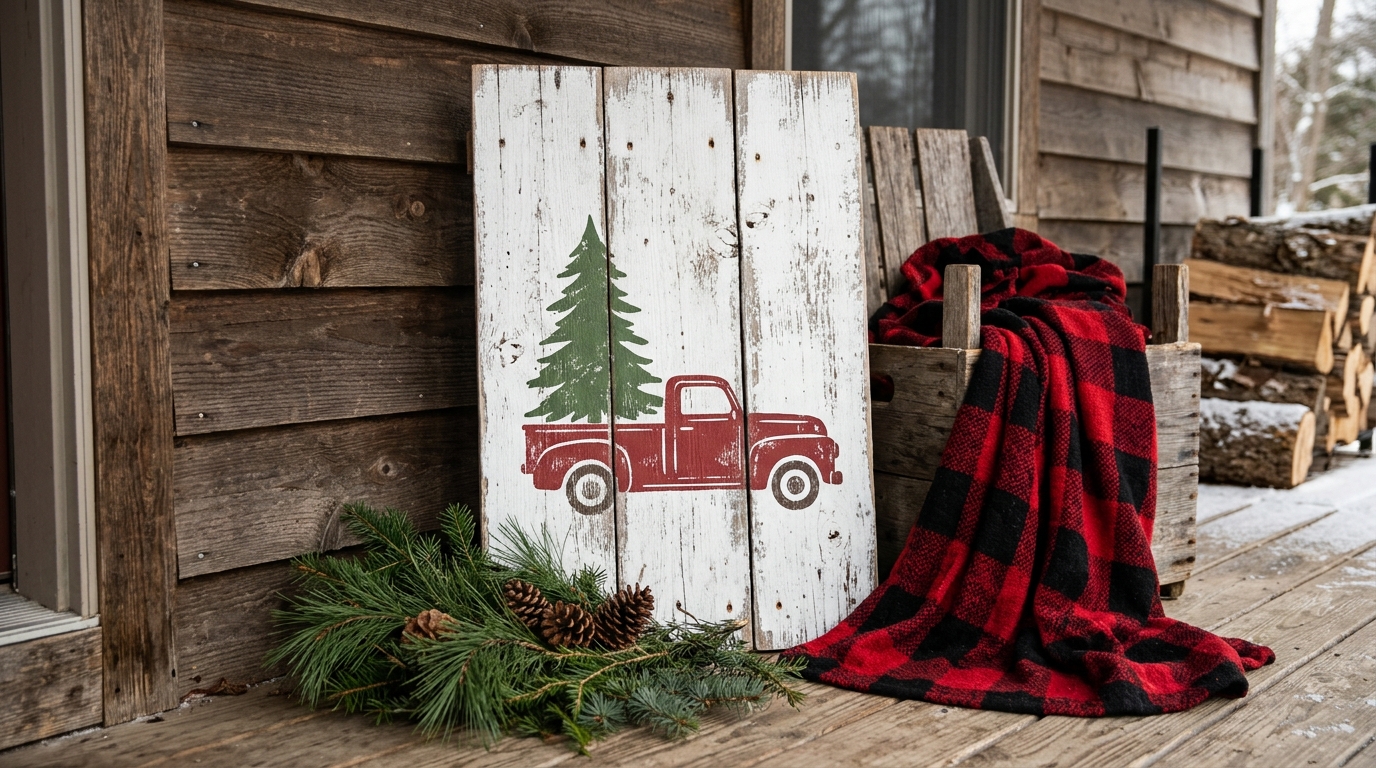
A tree farm sign brings that cozy country feeling to a porch or entryway. Three boards joined together side by side make a perfect painting surface. Paint it white, then add a simple pine tree and a little red truck. If you are not confident painting freehand, print a shape, trace it with pencil and fill it in. Lean it against the wall with a plaid blanket and some pine branches. For more ideas that start with plain boards, see our fence picket Christmas crafts. Where would yours look best?
You will need: three 2×4 boards about 2 feet long, two flat strips of wood to join them, wood screws, a drill (adult use only), white, green and red paint, a pencil.
How to make it: 1. Lay the boards side by side and have an adult screw the strips across the back. 2. Paint the front white and let it dry. 3. Trace a pine tree and a truck shape, then fill them in with green and red paint.
13. Stained Tree Trio, the Classy 2×4 Christmas Crafts Pick
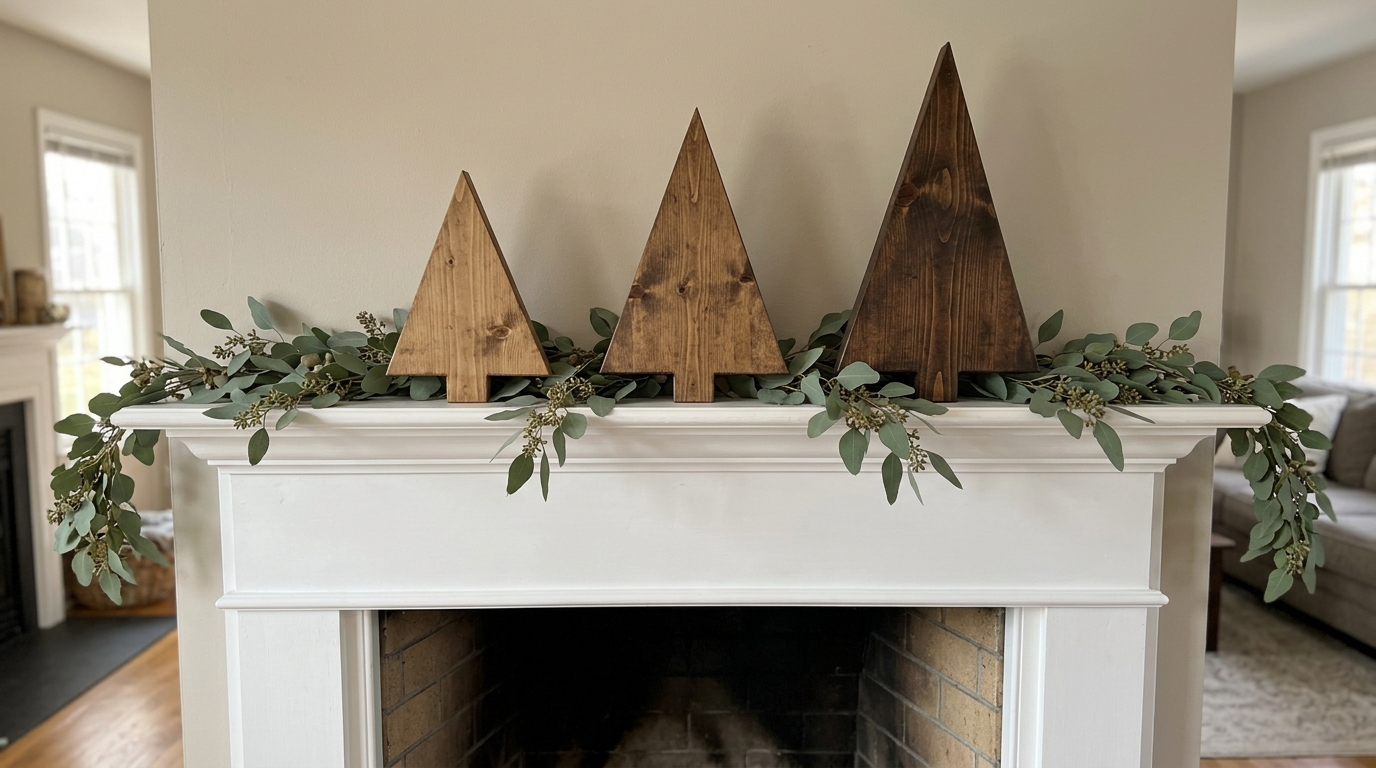
If bright paint is not your style, this trio is the answer. Three simple triangle trees, each finished in a different stain, show off the natural wood grain beautifully. Light, medium and dark tones side by side look calm and grown up. Set them on a mantel with some eucalyptus or pine and you have a display that works from Thanksgiving through New Year. They are also a quick gift for anyone who loves a natural, cozy home. Which stain color would you start with?
You will need: one 2×4 board, a saw (adult use only), sandpaper, three wood stains in light, medium and dark, a rag, gloves.
How to make it: 1. Have an adult cut three triangle trees in short, medium and tall heights. 2. Sand well so the stain soaks in evenly. 3. Wear gloves and wipe a different stain on each tree with a rag, then let them dry overnight.
14. 2×4 Christmas Presents Stack
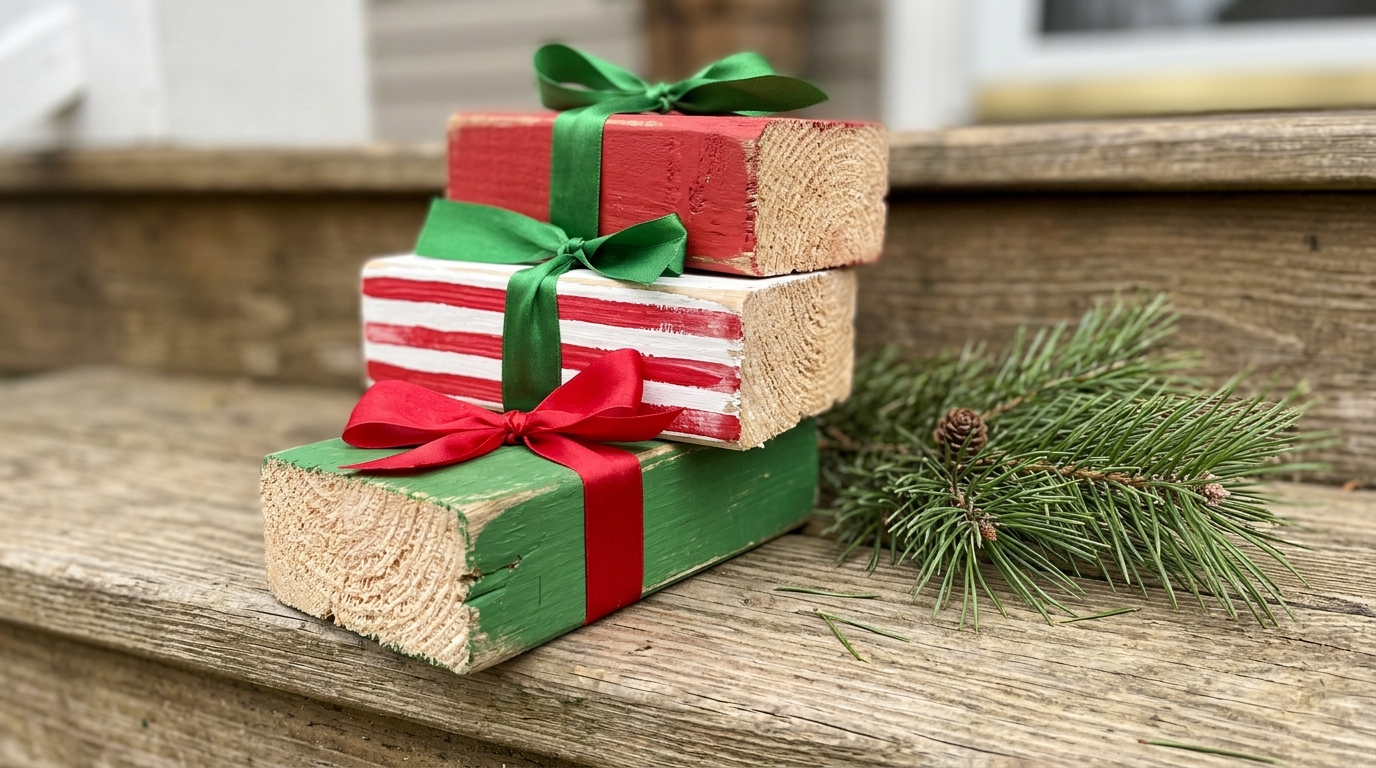
These 2×4 Christmas crafts are the only presents nobody will try to shake. Cut blocks in different lengths, paint them like wrapping paper, then tie real satin ribbon around each one. Stack them on a porch step, under the tree or on a shelf, and they look wrapped and ready all season long. You can paint plaid, stripes or polka dots, so it is a great way to use up leftover paint. Kids can help with the patterns and choose the bow colors. Which pattern will be on top of your pile?
You will need: 2×4 blocks in a few lengths, a saw (adult use only), red, green and white paint, satin ribbon, wood glue.
How to make it: 1. Have an adult cut blocks 4, 6 and 8 inches long. 2. Paint each block a solid color and add stripes, dots or plaid. 3. Tie a ribbon around each one with a bow on top and glue them into a stack.
15. 2×4 Wood Stars on a Dowel
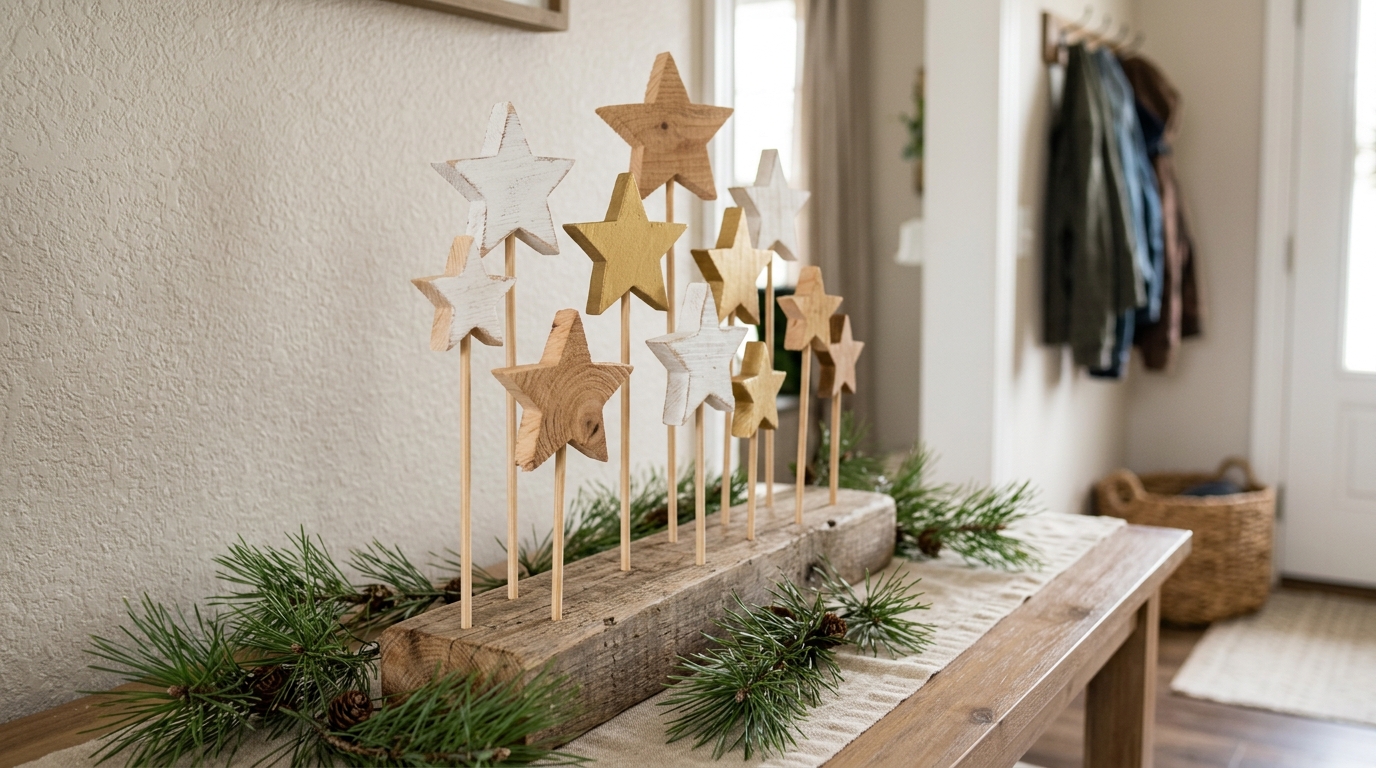
Let’s finish with a star, the classic sign of Christmas. Thin slices cut from a board become wooden stars, and each one sits on a dowel of a different height. Put them in a base block and they look like a little shining sky on your entry table. Paint them white and gold, or keep them natural for a farmhouse touch. Since they are small, these 2×4 Christmas crafts make a quick last minute gift too. Now you have 15 builds from one cheap board, so which one will you make first?
You will need: a 2×4 board, a scroll saw (adult use only), sandpaper, thin wooden dowels, a drill (adult use only), white and gold paint, a scrap block for the base.
How to make it: 1. Have an adult cut thin slices and shape each one into a star. 2. Sand, paint and drill a small hole in the bottom of each star. 3. Glue each star on a dowel and push the dowels into holes drilled in a base block.