DIY Cat Walkways: 14 Wall Shelves, Bridges and Hideouts That Keep Indoor Cats Happy All Winter
DIY Cat Walkways turn a plain wall into a playground, and once you see a cat strolling across a little rope bridge above the sofa, you will want one too. When the weather turns cold and indoor cats get restless, climbing up high gives them exercise, safety and a place to watch the whole house. The good news is that most of these projects need only boards, brackets, rope and an afternoon. Some take an hour, some take a weekend, and all of them can grow piece by piece as your cat shows you where it likes to go. Always screw shelves into studs or strong wall anchors, test every step with your own hand pressing hard, and ask an adult helper to handle drills and saws. Here are 14 ideas to get your home cat highway started..
DIY Cat Walkways Start With Floating Step Shelves
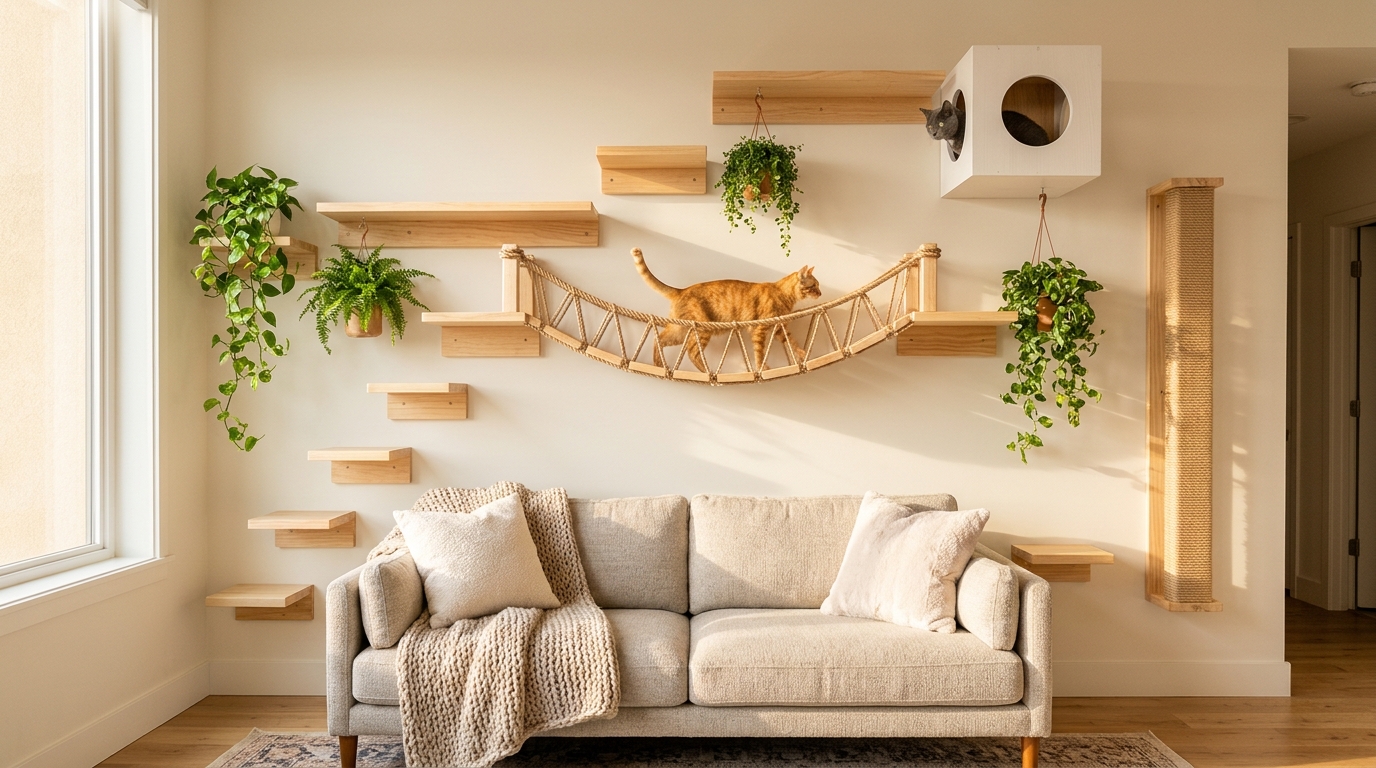
Every great cat highway begins with a few sturdy steps. Floating shelves set in a gentle zigzag let your cat hop from the sofa back up toward the ceiling without one big leap. Space them about 12 to 16 inches apart so older cats can climb with ease, and keep the first step low. Light oak or pine looks warm against a white wall and blends with almost any room. Once the steps are up, you can link them to a bridge or a hideout later. Start with three steps and watch where your cat wants to go next..
You will need: 4 to 6 pine boards about 8 by 16 inches, heavy duty shelf brackets, stud screws or strong wall anchors, a level, sandpaper, cork or carpet pads for grip, and a drill (adult help).
How to make it: 1. Find the studs and mark a zigzag path with painter’s tape. 2. Sand the boards and glue a grippy pad on top of each one. 3. Fix the brackets with stud screws, check them with a level, then screw the boards on. 4. Press down hard on every step before your cat tries it.
Rope Wrapped Wall Scratching Post
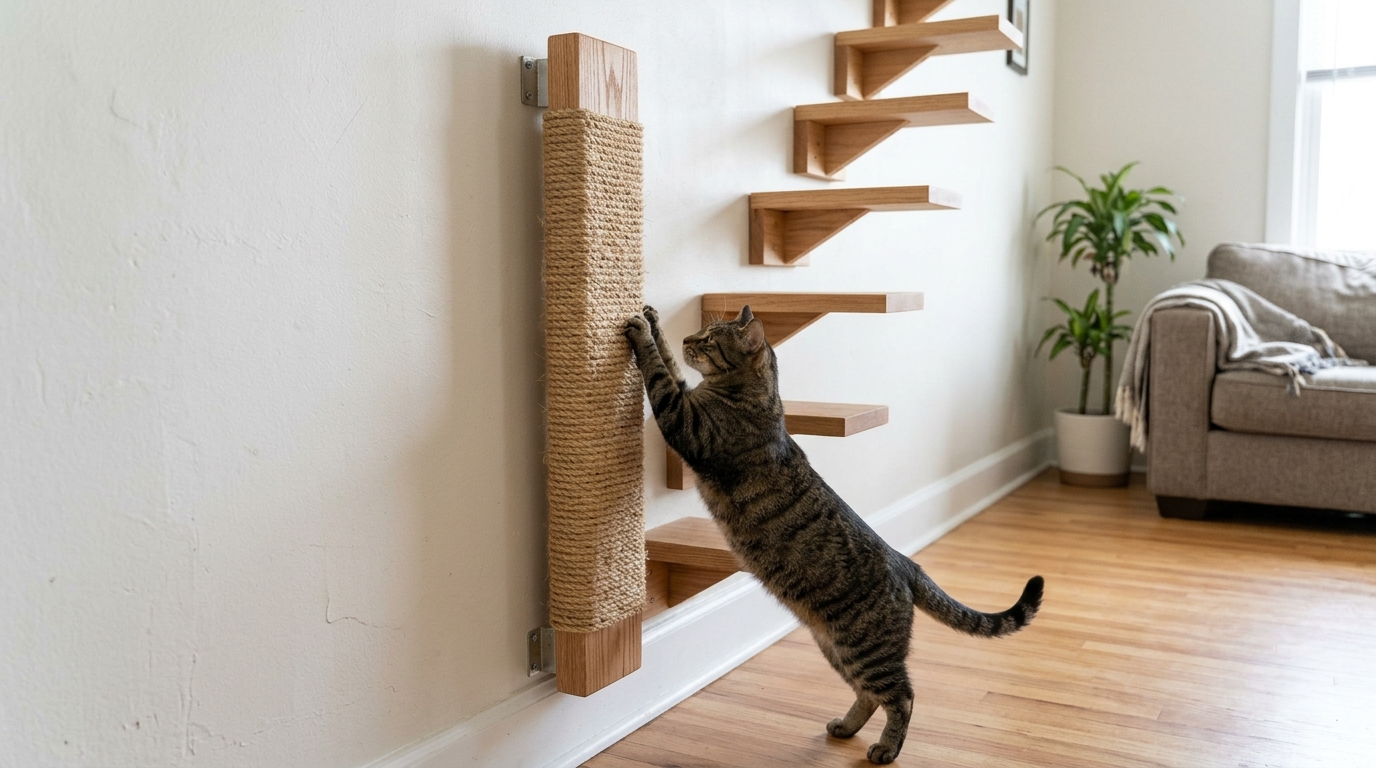
A scratching post fixed to the wall never wobbles, which is exactly why cats love it. Wrap a long board in natural sisal rope and mount it right next to your DIY cat walkways so your cat can stretch, scratch and climb in one smooth move. It also saves your sofa arms from those long winter claw sessions. Mount it tall enough for a full stretch, about 30 inches or more. Would your cat pick this over the couch?
You will need: A 1 by 6 pine board about 32 inches long, 50 feet of 3/8 inch sisal rope, wood glue, a staple gun, two wall brackets and wall anchors.
How to make it: 1. Staple the rope end at the top of the board. 2. Wrap the rope tightly downward, adding glue every few turns. 3. Staple the end on the back. 4. Screw the board to the wall with brackets at the top and bottom.
A Rope Bridge Makes DIY Cat Walkways Feel Like an Adventure
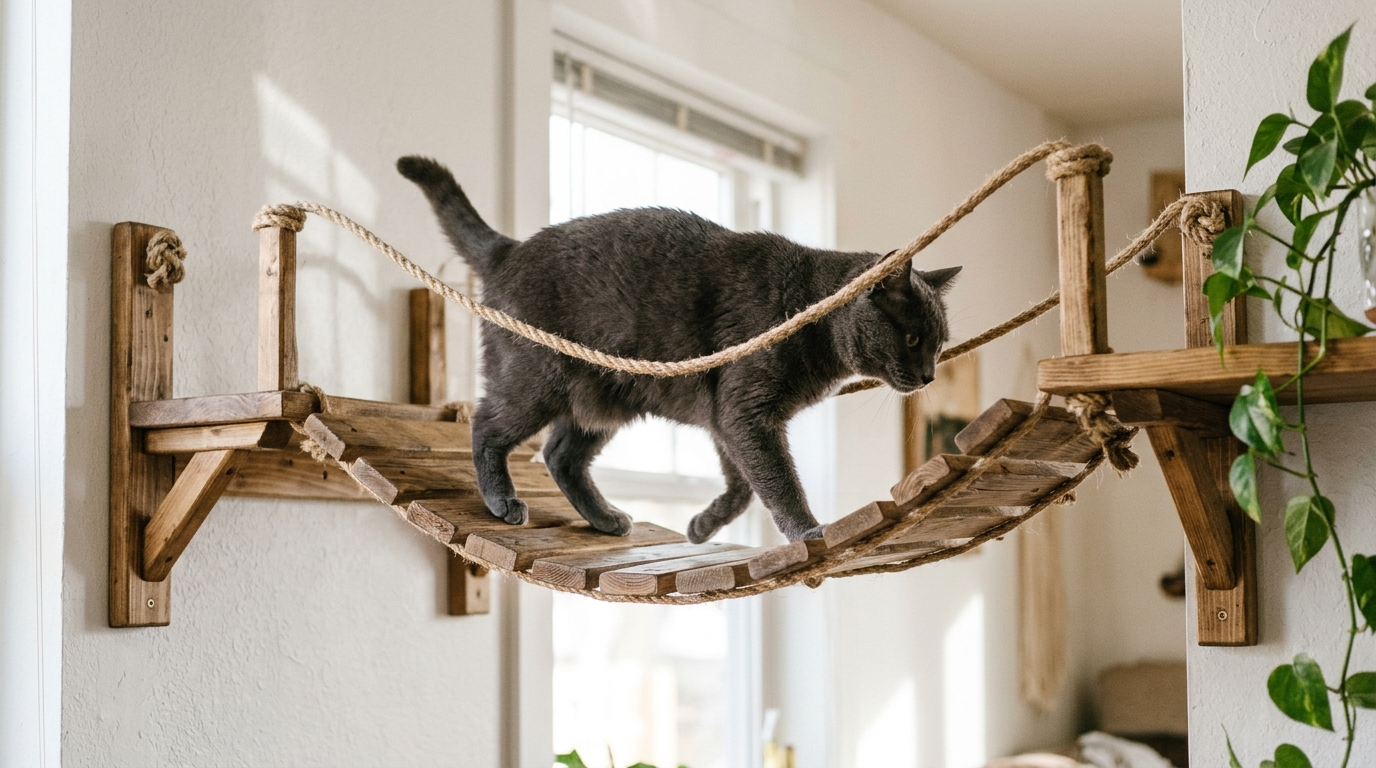
The rope bridge is the star of most DIY cat walkways, and it is the part that helped the maker Half-Asleep Chris pull millions of views when he built cat walkways all around his house. Wooden slats tied between two thick ropes make a gentle sway that cats find thrilling but safe. Keep it short, about 2 to 3 feet, and tie the ropes tight so the dip stays small. Ready to watch your cat strut across it like a tightrope star?
You will need: 10 to 12 wooden slats about 2 by 10 inches, two lengths of 1/2 inch cotton or jute rope, a drill with a 1/2 inch bit (adult help), two mounted wall shelves and four eye bolts.
How to make it: 1. Drill two holes in each end of every slat. 2. Thread the slats onto both ropes, tying a knot under each slat to space them 1 inch apart. 3. Tie the rope ends to eye bolts on the two shelves. 4. Tighten until the bridge sags only a few inches.
Wall Cube Hideaway Box
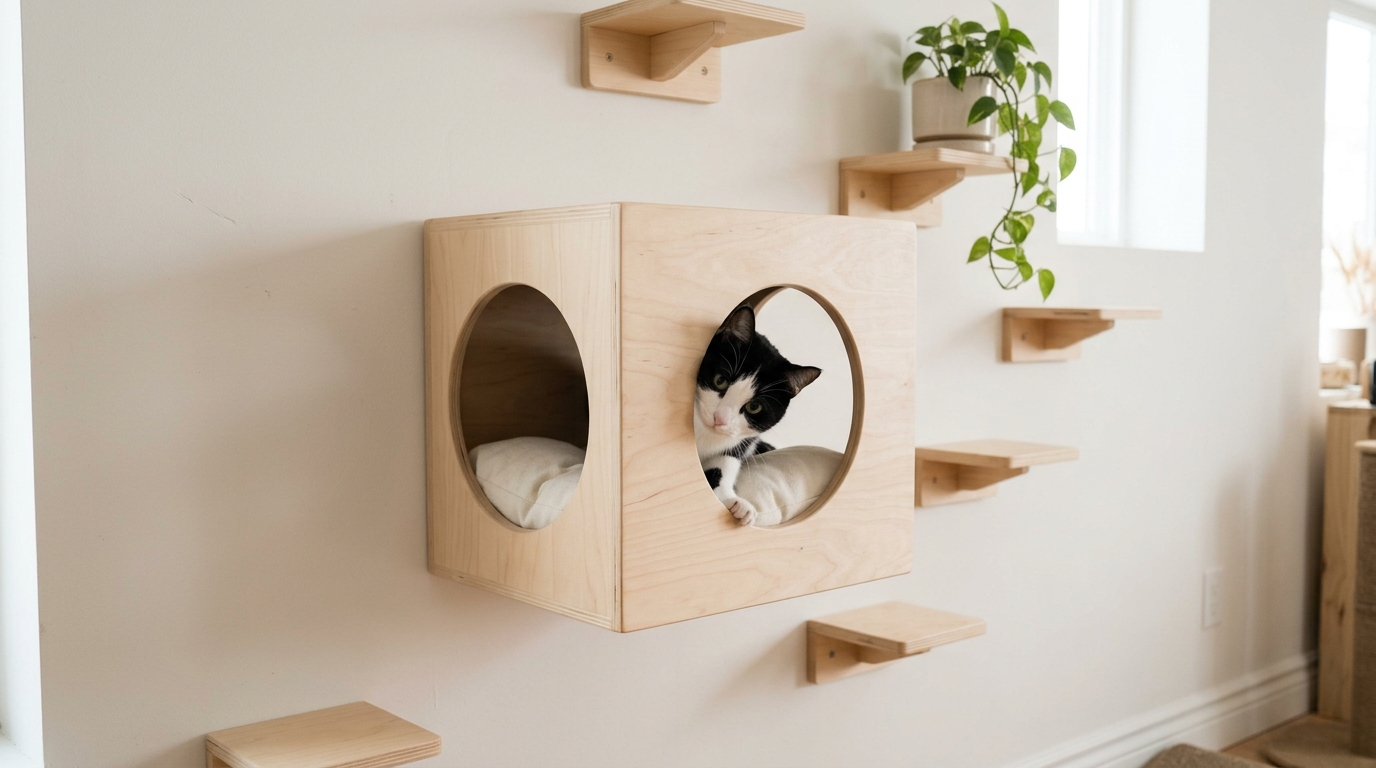
Cats love to see without being seen, and a cube hideaway on the wall gives them a private den high above the busy floor. Build a simple plywood box, cut a round door, and drop a soft cushion inside. Mounted between your step shelves, it becomes the rest stop on the cat highway. Painting it white makes it look like modern wall decor rather than pet gear. Which of your cats will claim the cube first?
You will need: Five 14 inch squares of 1/2 inch plywood, wood glue, finishing nails, a jigsaw (adult help), sandpaper, white paint, a small cushion and two heavy duty brackets.
How to make it: 1. Trace a 7 inch circle on the front panel and cut it out. 2. Glue and nail the box together. 3. Sand, paint and let it dry. 4. Screw the box into studs with brackets under it and add the cushion.
DIY Cat Walkways Window Perch From a Shelf Bracket
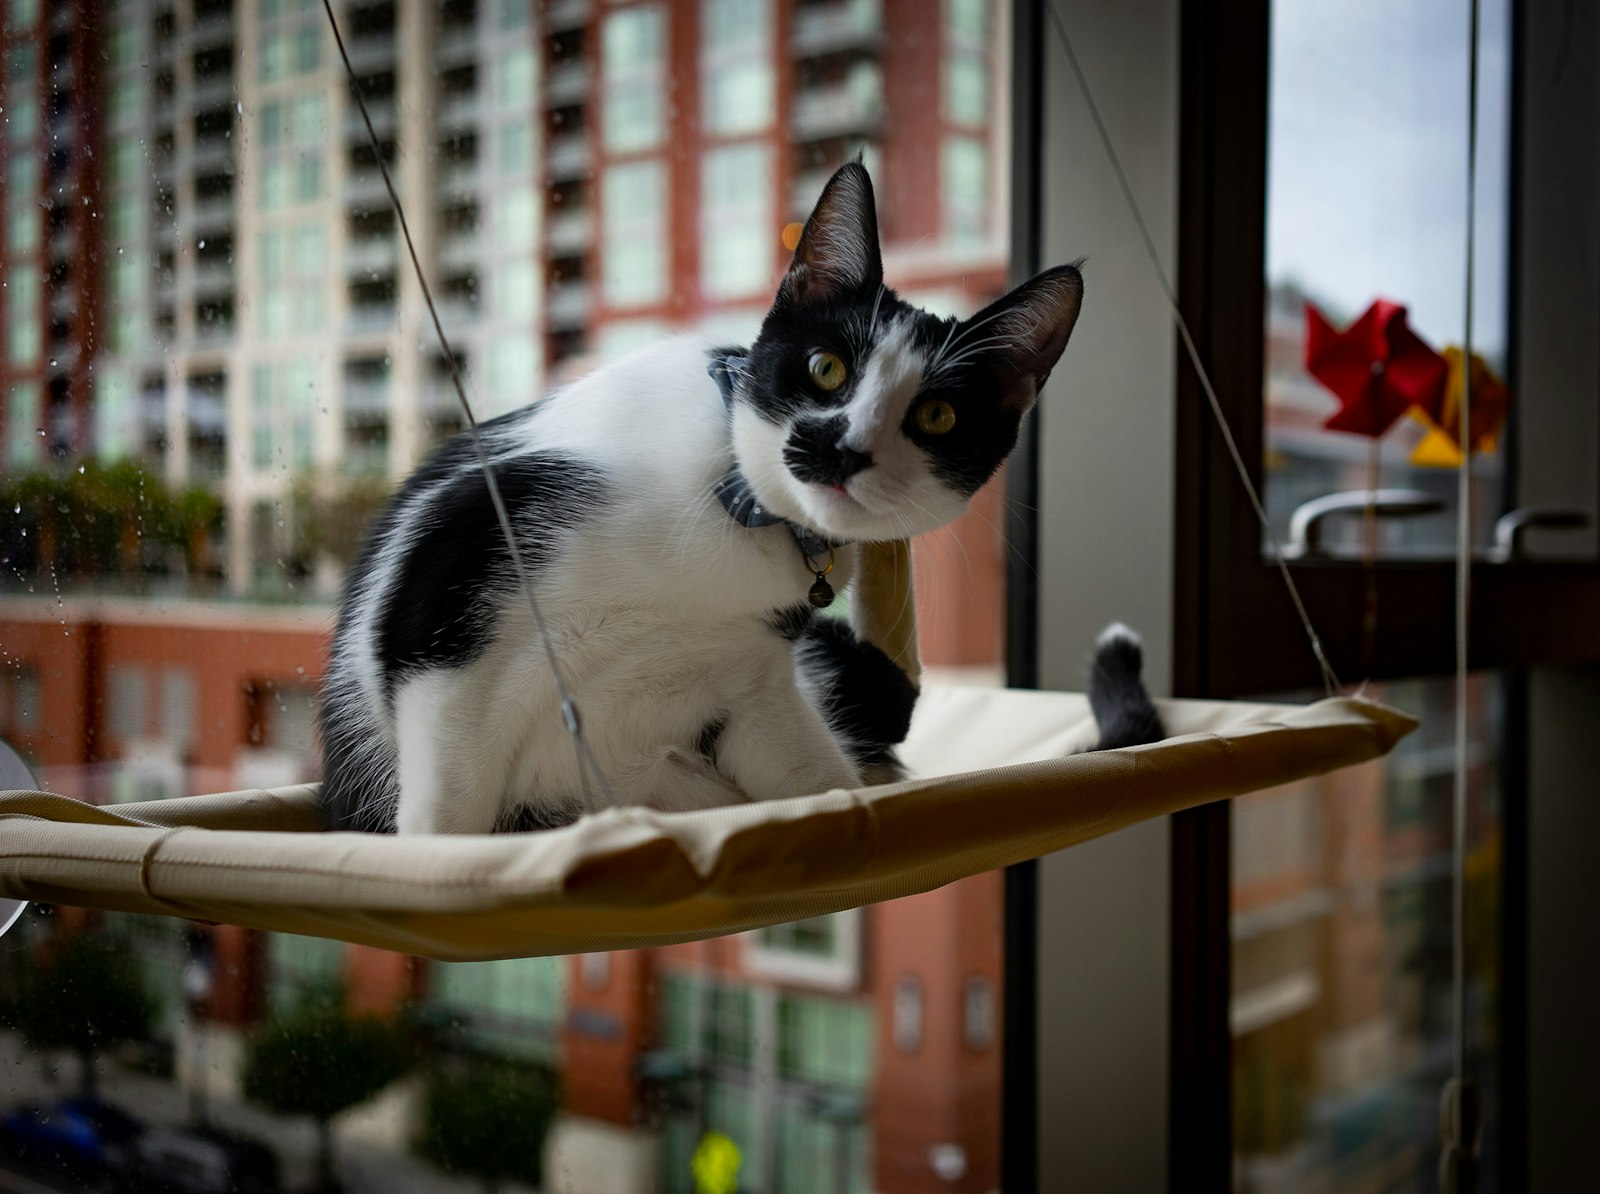
Every cat walkway needs a window seat with a view of birds and falling snow. A single wide board on two sturdy shelf brackets, padded with a folded blanket, turns any sunny sill into the best seat in the house. Place it so it links to your other shelves and your cat can stroll right over to it. It costs only a few dollars and takes under an hour. Is there a window your cat already stares out of every morning?
You will need: One pine board about 10 by 24 inches, two heavy duty shelf brackets, wall anchors, a folded fleece blanket or cushion, and a level.
How to make it: 1. Mark the bracket spots just under the window sill. 2. Screw the brackets into studs or strong anchors. 3. Fix the board on top and check it is level. 4. Lay the blanket on and add a treat to invite your cat up.
Bookshelf Highway for DIY Cat Walkways

If you already have tall bookshelves, you are halfway to a cat highway. Short plank bridges between the tops of the shelves let your cat travel along a whole wall without touching the floor. Clear a strip on top so there is nothing to knock off, and anchor every bookcase to the wall so it cannot tip. It is a smart way to use furniture you already own. Which room in your home has the tallest shelves?
You will need: Wall straps or anti tip kits for each bookcase, 2 or 3 pine planks about 8 inches wide, small L brackets, wood screws and a grippy shelf liner.
How to make it: 1. Strap every bookcase securely to the wall. 2. Measure the gaps between the tops. 3. Cut planks to span each gap and screw them down with L brackets. 4. Add shelf liner on top for grip.
Ceiling Corner Lookout
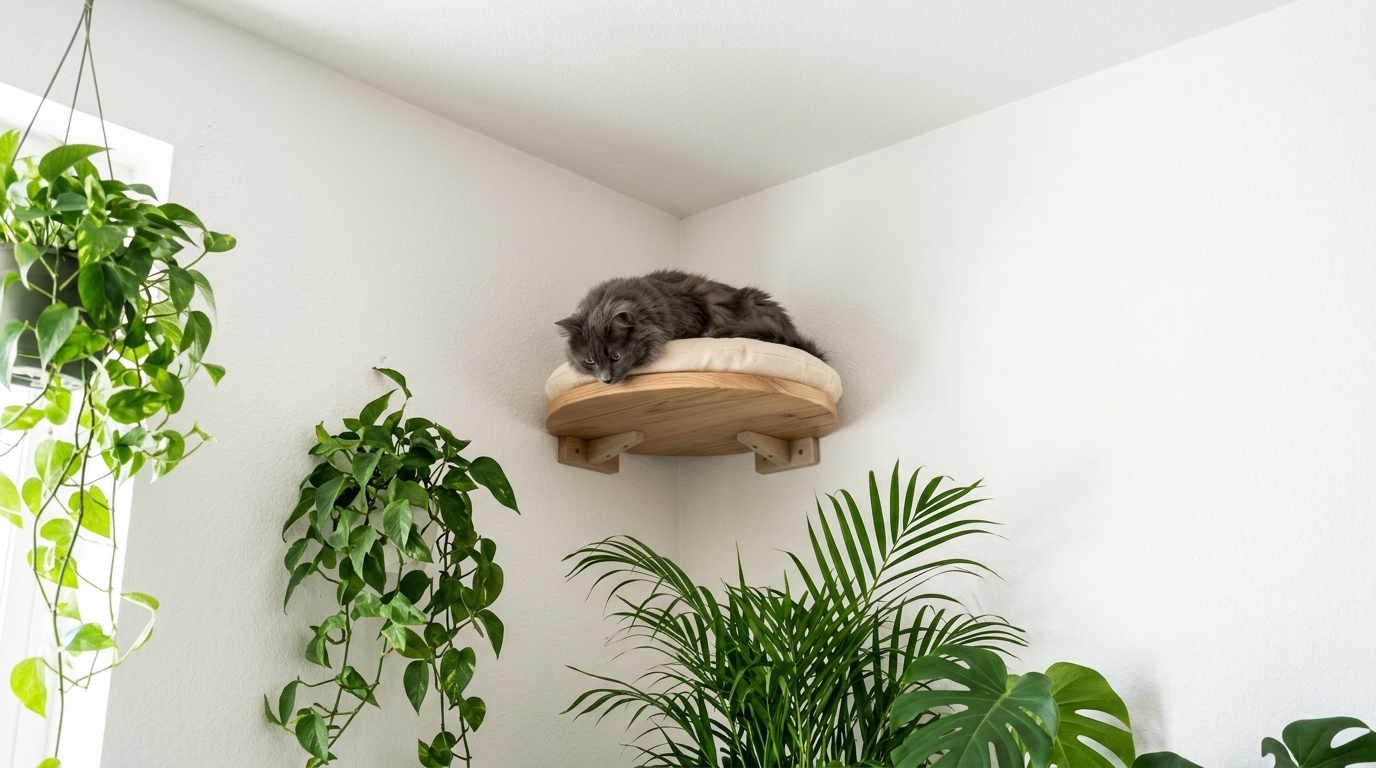
Some cats want to be the king of the room, and a round lookout platform up in a corner gives them that throne. A corner spot is strong because it uses two walls, and it keeps the platform out of everyone’s way. Add a cushion so it doubles as a nap spot, and connect it to your DIY cat walkways with one last step. From up there your cat can watch the whole family all evening. Would your cat ever come down?
You will need: A 16 inch round wood panel or a quarter circle cut from plywood, two corner brackets, stud screws, a round cushion and sandpaper.
How to make it: 1. Cut or buy the round panel and sand the edges smooth. 2. Mark a spot about 12 inches below the ceiling. 3. Screw a bracket into a stud on each wall. 4. Fix the platform on top and add the cushion.
Cardboard Castle for Kittens
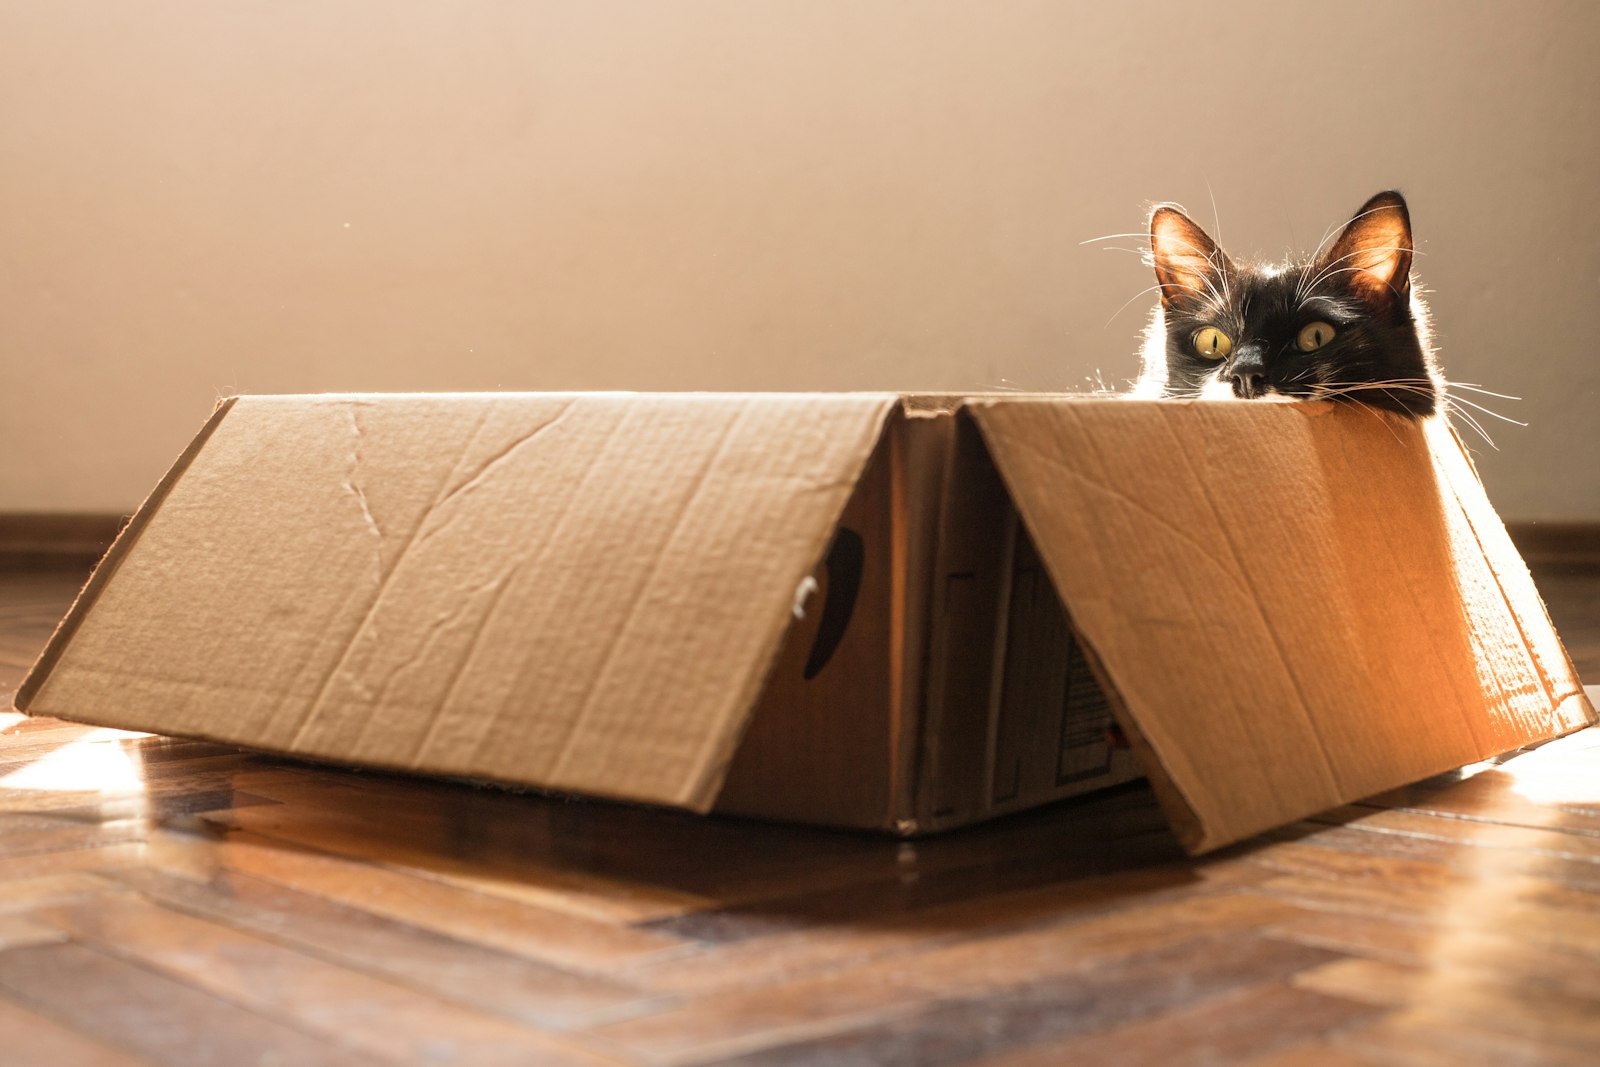
Before you drill a single hole, try a cardboard castle. Half-Asleep Chris also built a castle for his kitten and it pulled about 5 million views, which proves cats adore anything with doors and towers. Stack sturdy boxes, cut round doors and windows, and tape them together into a castle that kittens can climb, hide and nap in. It costs nothing and you can rebuild it whenever it gets worn out. Have you saved any big boxes lately?
You will need: 3 to 5 sturdy cardboard boxes, a box cutter (adult help), packing tape, a paper towel tube for a tower, and an old towel.
How to make it: 1. Cut round doors and windows in each box. 2. Stack the boxes and tape them firmly together. 3. Add a tube tower on top. 4. Put a towel in the bottom box for napping.
Sisal Stairs Turn a Cabinet Into DIY Cat Walkways
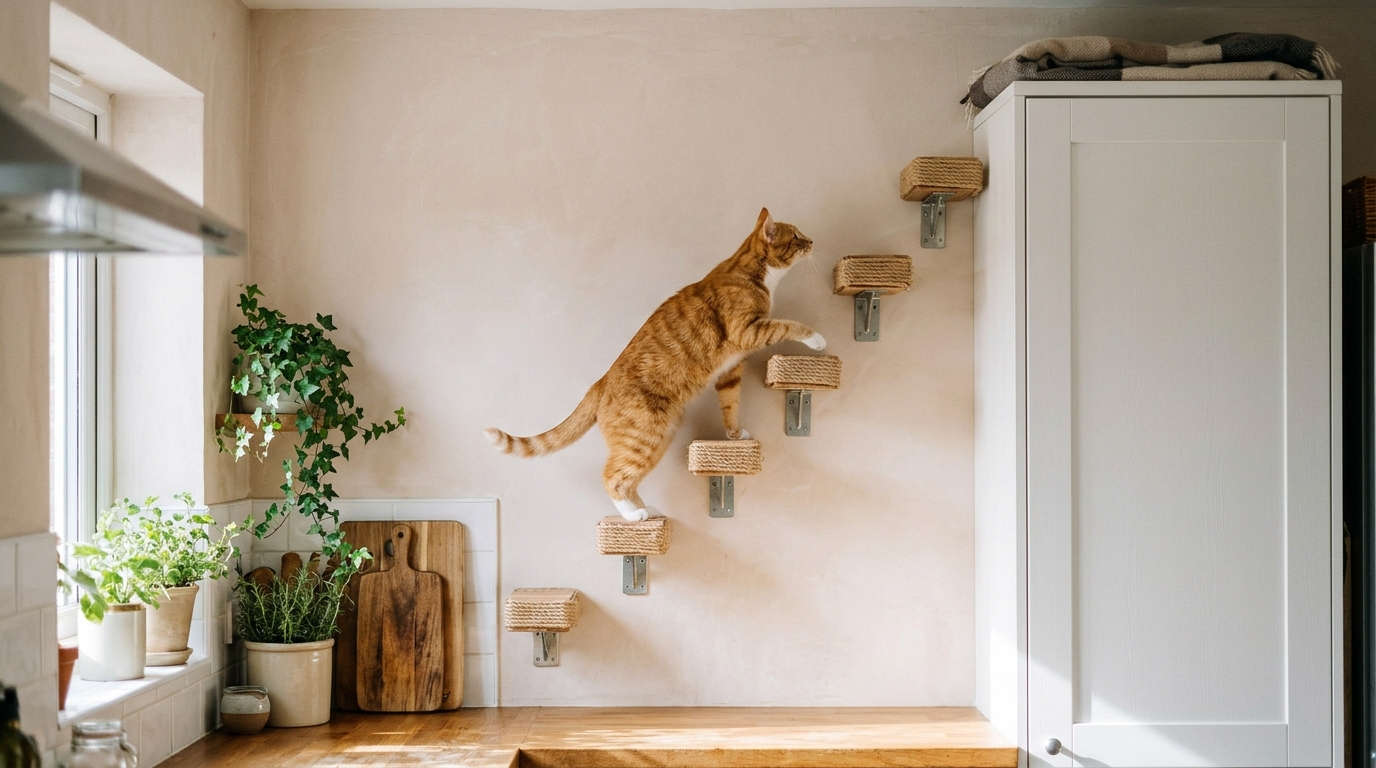
The top of a tall cabinet is wasted space that cats adore. A few small wall steps wrapped in sisal rope give your cat a safe way up, with extra grip and a scratching bonus on every step. Keep the steps close together so the climb feels easy, and clear the cabinet top so nothing gets pushed off. Keep the steps well away from the stove and the counters where you cook. What could you move off that cabinet top today?
You will need: 4 or 5 small pine blocks about 6 by 10 inches, sisal rope, wood glue, a staple gun, L brackets and stud screws.
How to make it: 1. Wrap each block with sisal rope, gluing as you go. 2. Mark a short staircase up the wall beside the cabinet. 3. Screw the L brackets into studs and fix each step on. 4. Lay a soft mat on the cabinet top.
Wooden Hammock Nap Spot
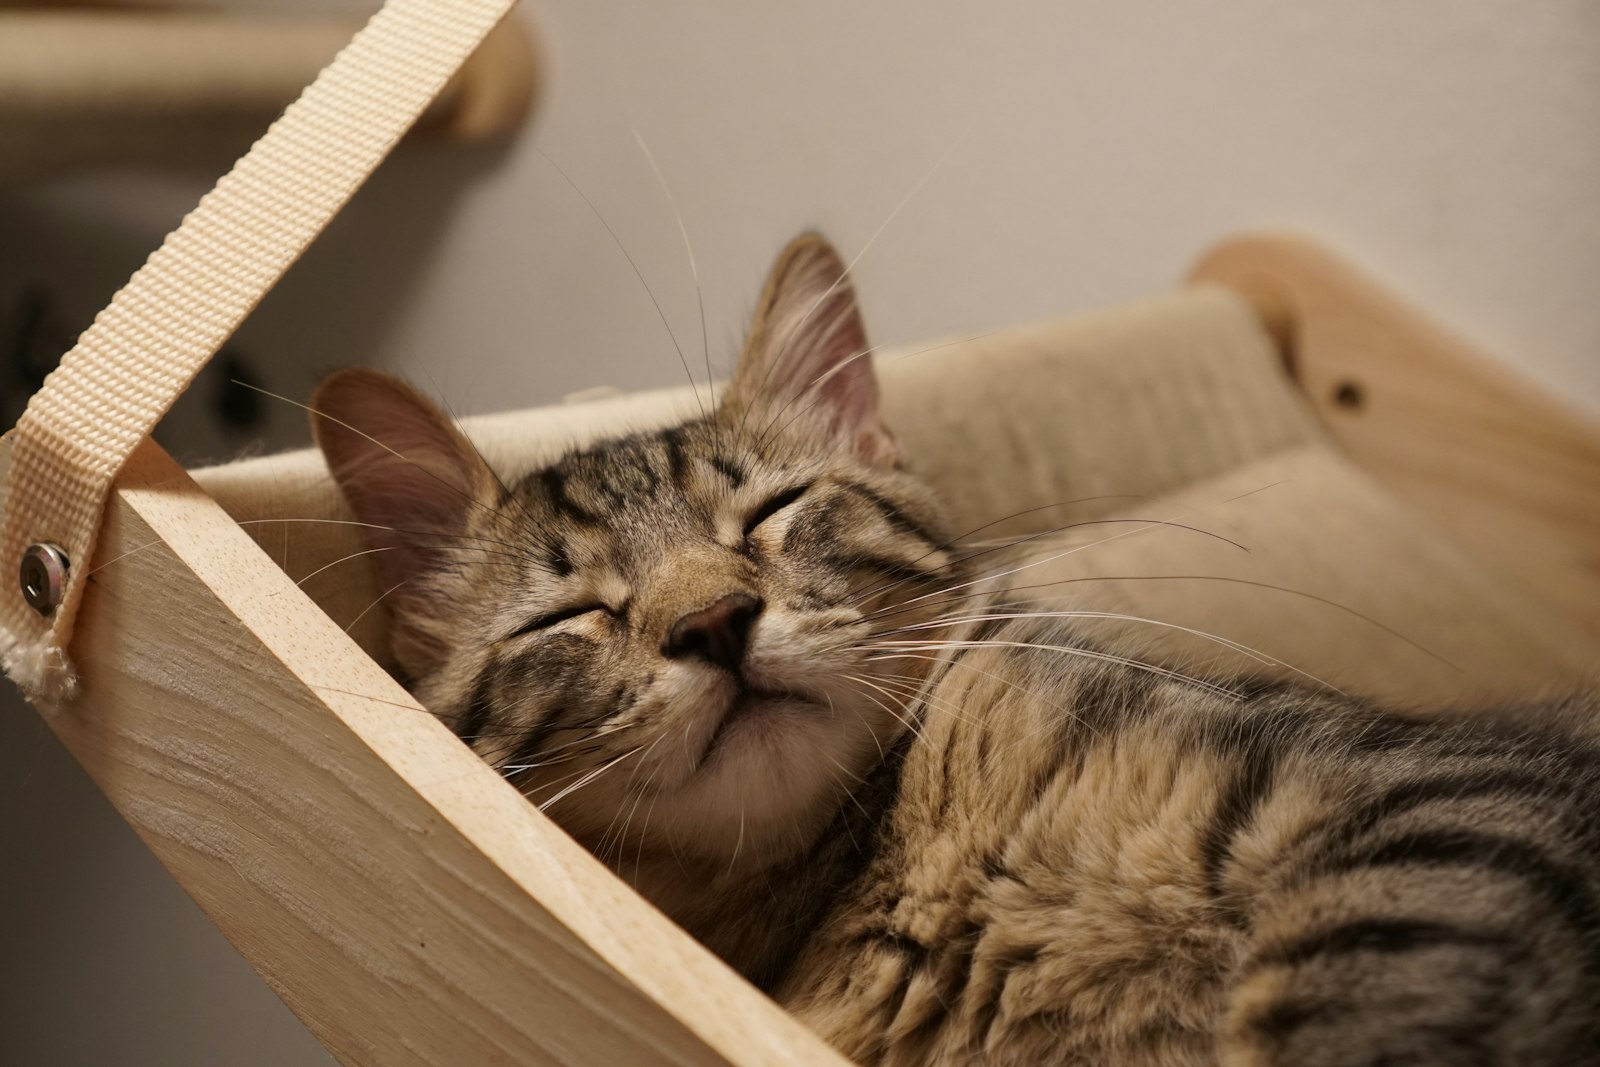
After all that climbing, every cat needs a hammock. A simple wooden frame with a fabric sling makes a cozy bed that gently cradles your cat. Hang a small version under a side table or fix the frame to a low shelf so it becomes the last stop on the cat highway. Use a fleece sling in winter and swap to cotton when it warms up. Doesn’t that tabby look like it never wants to get up?
You will need: Four pine boards for a frame, wood screws, a fleece rectangle about 16 by 20 inches, a heavy duty staple gun and sandpaper.
How to make it: 1. Screw the boards into a square frame. 2. Sand all the edges smooth. 3. Staple the fleece across the frame, leaving a gentle dip. 4. Set it under a side table or screw it to a low shelf.
Planter Basket Tunnel for DIY Cat Walkways
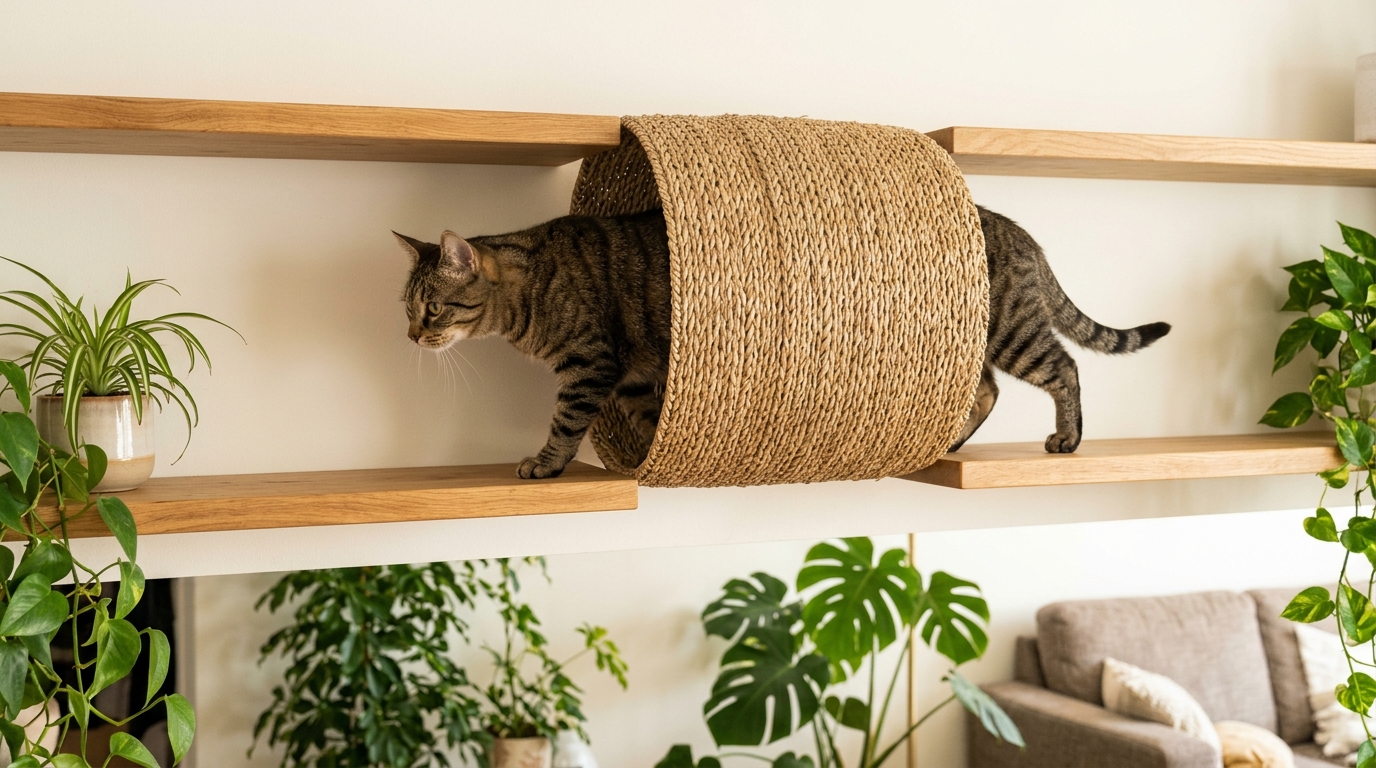
Here is a clever thrift store trick: a big woven planter basket turned on its side becomes a wall tunnel. Fix it between two shelves and your cat gets a cozy pass through in the middle of the walkway. Seagrass and rattan look stylish, so guests will think it is boho decor. Check the basket is thick and firm before you buy it. Could a basket you already own get a second life here?
You will need: A large sturdy seagrass or rattan basket about 12 inches wide, two wall shelves, small screws with washers or strong zip ties, and a soft liner.
How to make it: 1. Mount two shelves level with each other. 2. Lay the basket on its side so it bridges the shelves. 3. Fix it with screws and washers through the base or with strong zip ties. 4. Add a liner inside.
Cubby Shelf Nap Spots for Multi Cat Homes
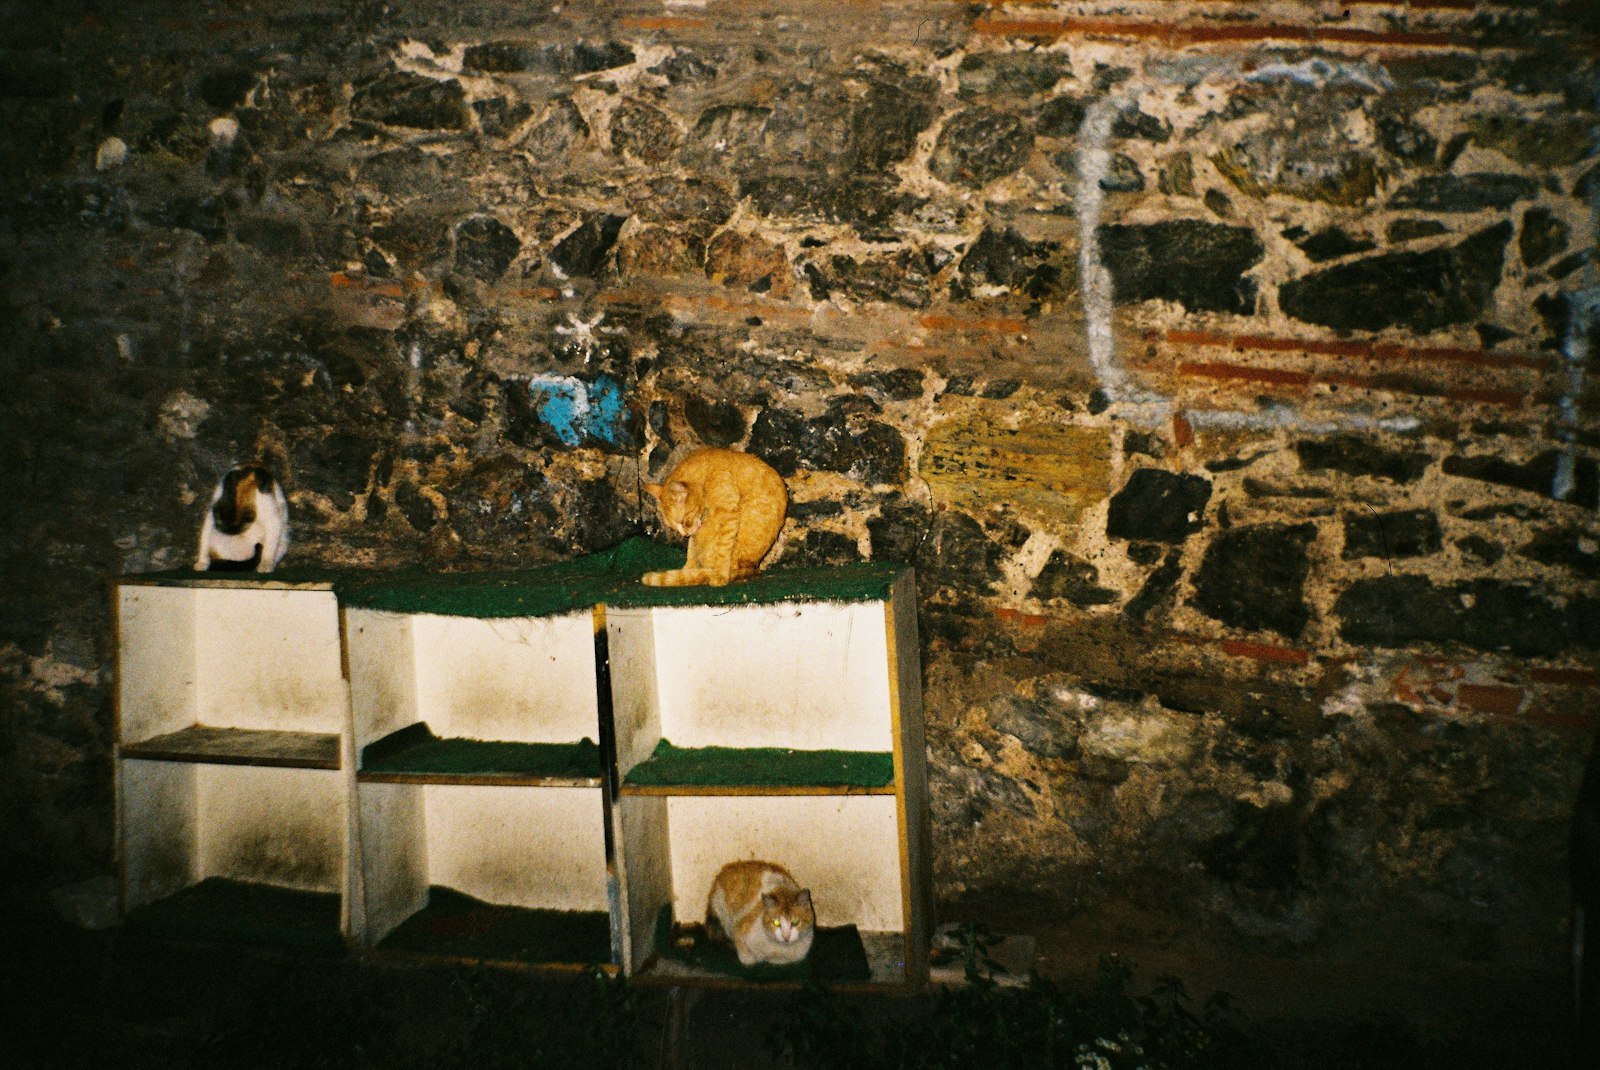
If you share your home with several cats, give each one its own spot. Small open cubbies hung along a wall let everyone nap up high without squabbling over the best seat. This rustic stone wall setup shows how a row of simple boxes becomes a whole cat apartment block. Tuck a little cushion inside each cubby and watch them pick favorites. How many cubbies would your crew need?
You will need: Wooden crates or small cubby boxes, heavy duty brackets, stud screws, small cushions and a level.
How to make it: 1. Plan a staggered row so cats can hop between cubbies. 2. Screw the brackets into studs. 3. Fix each cubby on its brackets and check it is level. 4. Add cushions and press hard on each one before cats move in.
DIY Cat Walkways Over the Doorway
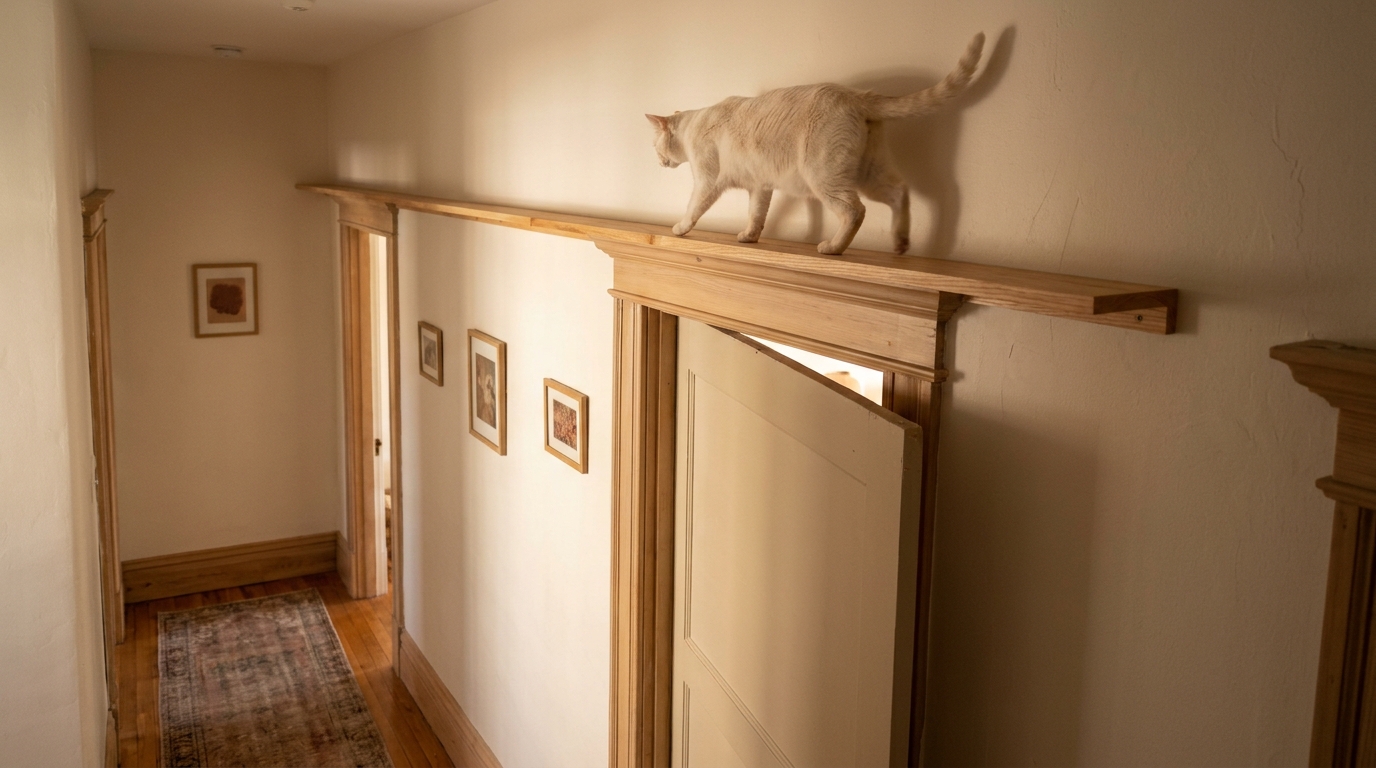
The space above a doorway is perfect for a long walkway shelf because nobody uses it. A narrow board running along the top of the door frame links one room to the next, so your cat can patrol the whole hallway from up high. Round the corners and add a small lip on the open side if your cat is a bit clumsy. It looks like simple trim, so guests barely notice it. Where would your cat’s highway lead next?
You will need: A 1 by 8 pine board the width of the doorway plus 12 inches, three heavy duty brackets, stud screws, sandpaper and grip strips.
How to make it: 1. Find the studs above the door frame. 2. Fix the brackets well above the frame so nobody bumps their head. 3. Screw the board on and sand the edges round. 4. Add grip strips on top.
Branch Cat Climbing Tree
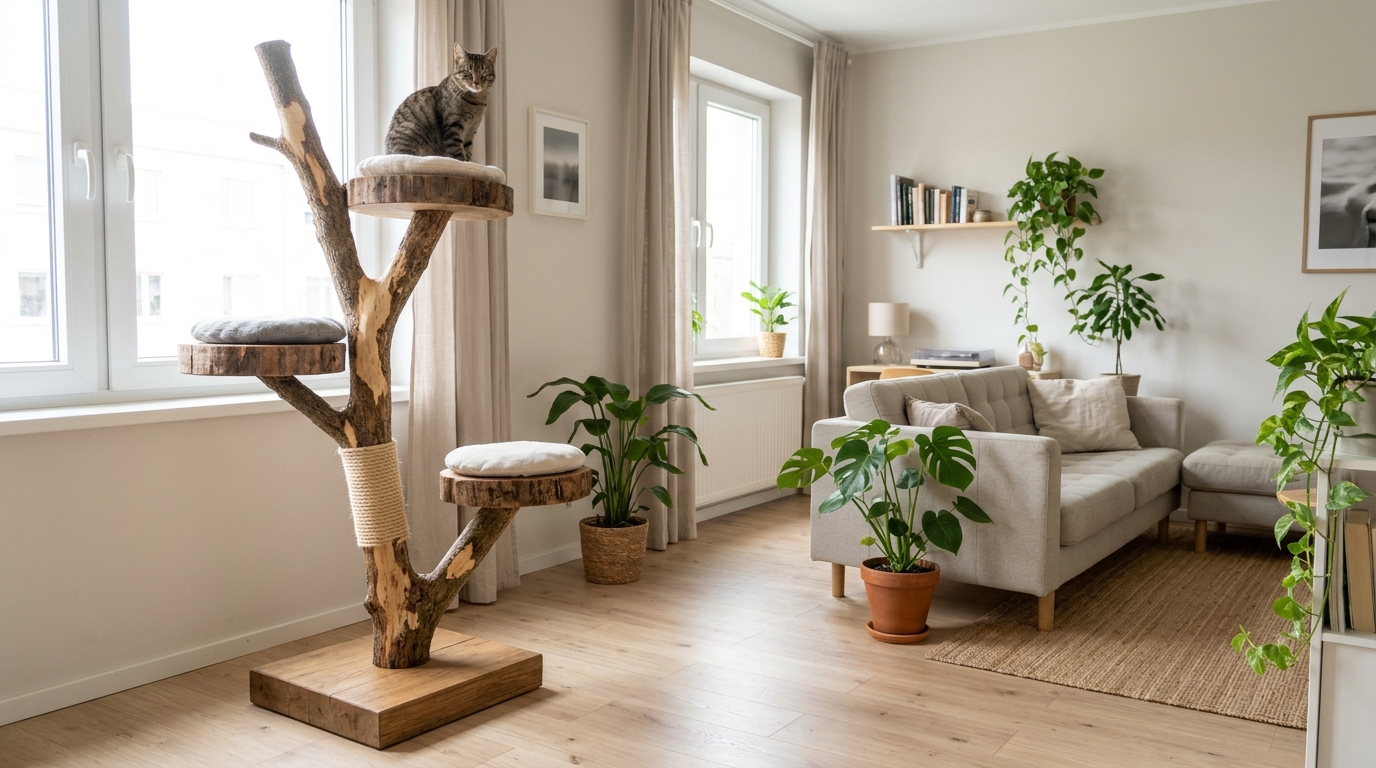
Finish your project with a cat tree that looks like art. A real sanded branch fixed into a heavy wooden base, with round platforms at different heights, feels natural to climb and looks gorgeous in a modern room. Choose a dry hardwood branch, remove loose bark and check it for sharp bits. Place it near your wall shelves so your cat can jump from the tree onto your DIY cat walkways. For more cozy projects, see these DIY cat beds made from things you already own. Which spot in your living room is waiting for a tree?
You will need: A dry hardwood branch about 5 feet tall, a heavy plywood base, long screws, 3 round wood platforms, sandpaper and small cushions.
How to make it: 1. Sand the branch smooth and let it dry fully. 2. Screw it firmly into the heavy base from below (adult help). 3. Screw the platforms onto strong limbs at different heights. 4. Strap the top to the wall for extra safety.