Chester Greenwood Earmuffs: 16 Cozy DIY Winter Accessories Inspired by a 15 Year Old Inventor
Chester Greenwood earmuffs began with a cold winter day in Farmington, Maine, back in 1873. Chester was just 15 years old and wanted to test a new pair of ice skates, but his ears kept freezing. Wool scarves made him itch, so he bent two loops of wire and asked his grandmother to sew fur onto them. That simple homemade fix became the earmuffs we still wear today, and he went on to make ear protectors in his hometown for nearly 60 years. In 1977 the state of Maine even named December 21 Chester Greenwood Day. We gathered 16 cozy winter accessories you can make yourself, from faux fur earmuffs to hand warmers and gift boxes, all on a budget. Grab your scissors and a warm drink and let us start..
Chester Greenwood Earmuffs Start With a Faux Fur Headband

Chester Greenwood earmuffs were all about soft fur over cold ears, and a faux fur headband version is the easiest place to start. Buy a plain plastic headband, glue two padded circles of faux fur to the ends and wrap the band in matching ribbon. Make a few in cream, red knit and plaid and you have a whole row ready for skating season. Read the full story of the young inventor on the Chester Greenwood page. Which color would you make first..
You will need: a plain plastic headband, faux fur fabric, thin batting, cardboard circles about 3 inches wide, ribbon, fabric glue, scissors.
How to make it: 1. Cover two cardboard circles with batting and faux fur, gluing the edges at the back. 2. Wrap the headband in ribbon and glue the ends. 3. Glue a fur circle to each end of the band and let it dry overnight.
Chester Greenwood Earmuffs, Grandma Style With Wire Loops
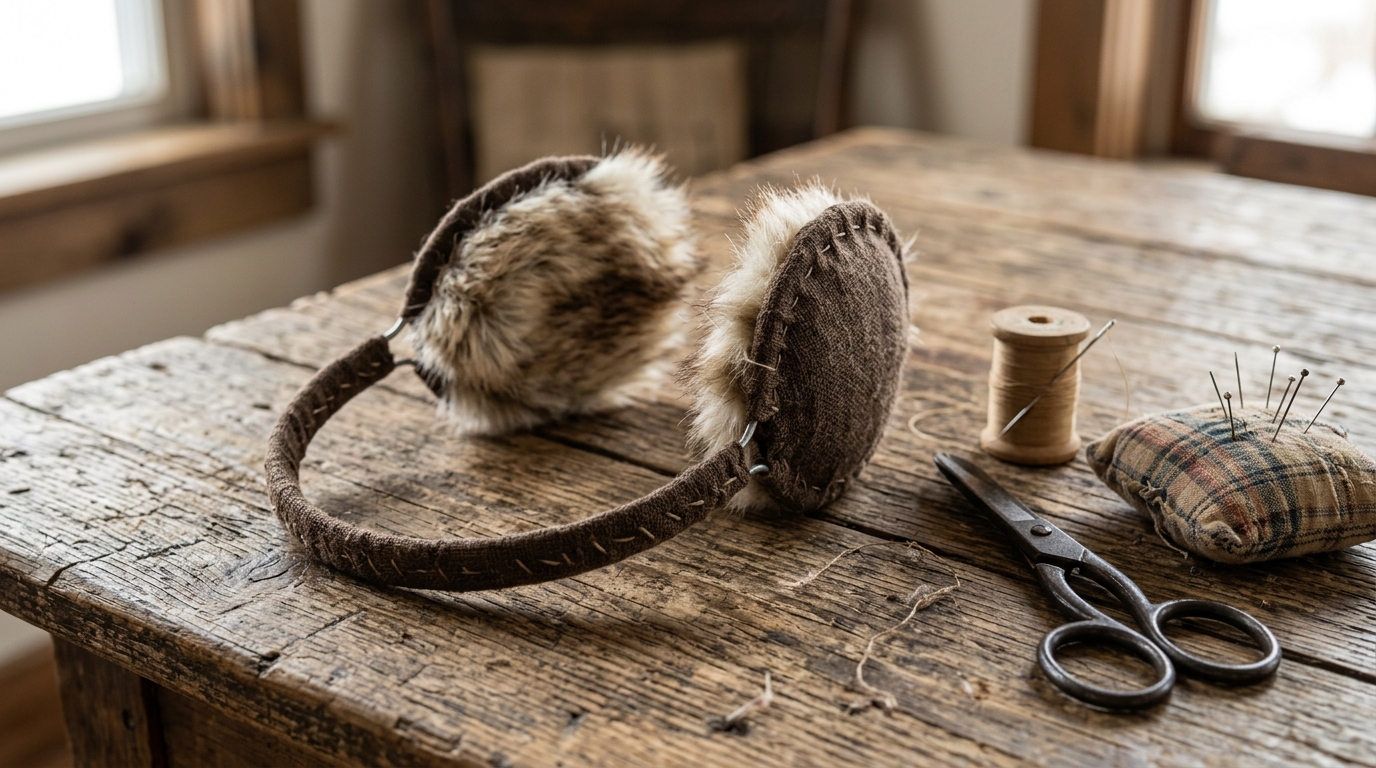
This is the closest you can get to the very first Chester Greenwood earmuffs. Chester bent wire into two ear shaped loops and his grandmother sewed fur onto them. You can do the same with a soft craft wire, fabric strips and a little faux fur. Bend the ends of the wire carefully and wrap them so nothing pokes. It is a lovely history craft for older kids and grandparents to make together on a snowy afternoon. Who in your family loves a good sewing project?
You will need: soft aluminum craft wire, pliers, brown cotton fabric strips, faux fur scraps, a needle and strong thread, fabric glue.
How to make it: 1. Bend the wire into a headband with an oval loop at each end, and have an adult tuck in the sharp ends. 2. Wrap the whole frame tightly in fabric strips, gluing as you go. 3. Sew faux fur tufts over each loop until the ears are fully covered.
Chester Greenwood Earmuffs Made From Yarn Pom Poms
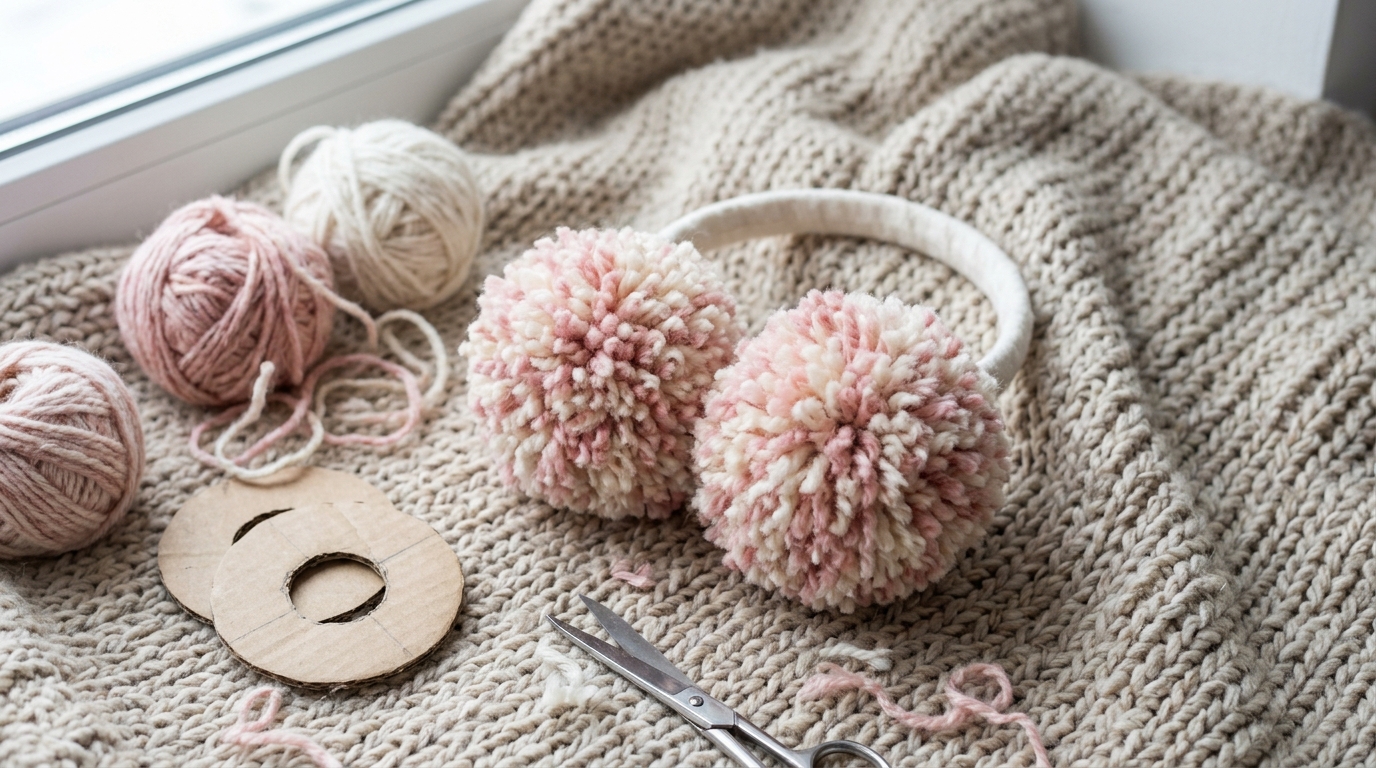
Two big fluffy pom poms on a headband make the cutest Chester Greenwood earmuffs for teens and kids. Mixing two yarn colors, like blush pink and cream, gives each pom pom a soft speckled look. A cardboard ring or a cheap pom pom maker does all the work, and you can finish a pair while watching a movie. Trim them nice and round for a neat finish. These make sweet stocking stuffers too. What two colors would you mix together?
You will need: chunky yarn in two colors, a pom pom maker or two cardboard rings, sharp scissors, a padded headband, a hot glue gun used by an adult.
How to make it: 1. Wrap both yarn colors around the pom pom maker until it is very full. 2. Cut around the edge, tie the middle tightly and trim into a ball. 3. Have an adult hot glue one pom pom to each end of the headband.
Upcycled Sweater Earmuffs
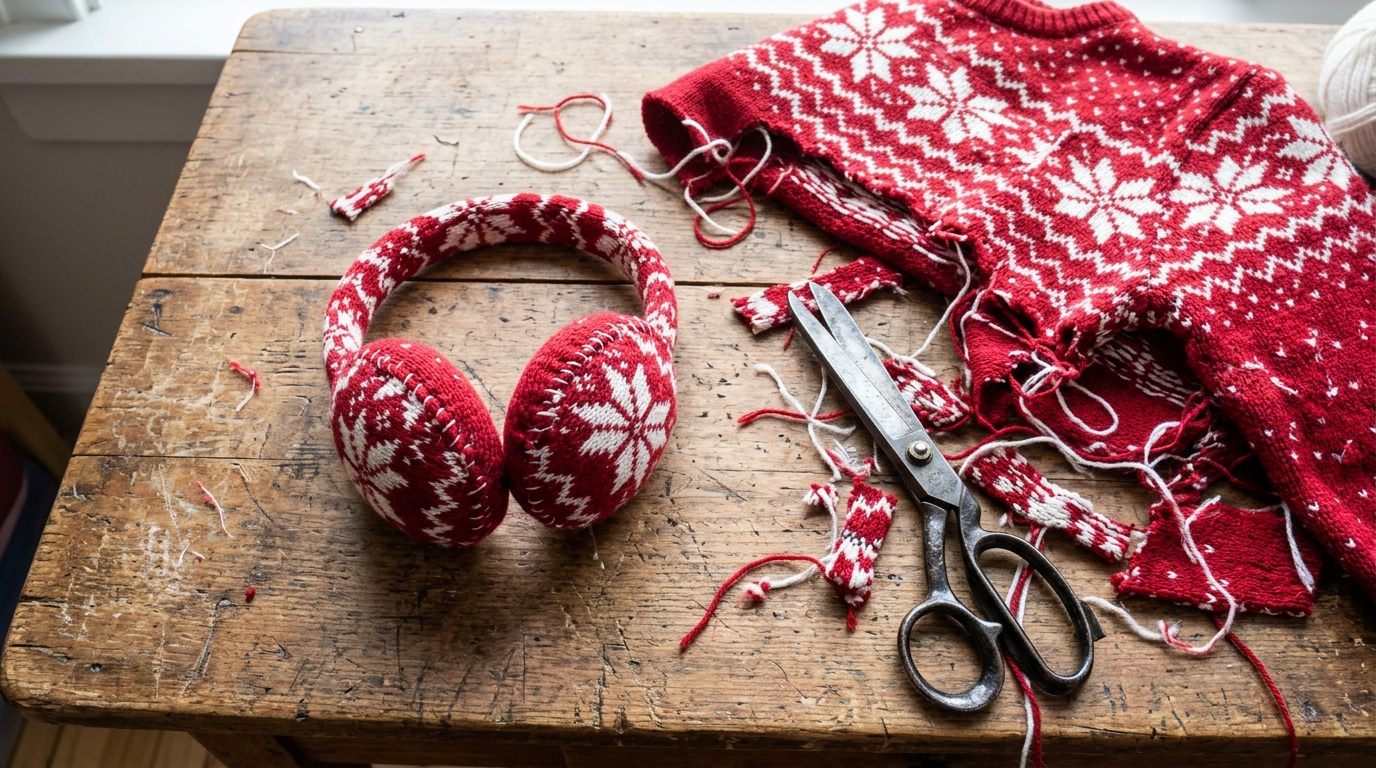
Got an old Fair Isle sweater with a hole in the elbow? Cut out two circles from the best part of the pattern and turn them into a snug pair of earmuffs. The knit is already warm and stretchy, so it hugs the padding nicely. Wrap the headband in a strip cut from the sleeve so everything matches. It is a thrifty way to keep a favorite sweater in your life a little longer. Do you have a sweater that deserves a second winter?
You will need: an old patterned sweater, two padded foam circles or batting, a plain headband, a needle and thread, fabric glue, scissors.
How to make it: 1. Cut two knit circles about an inch wider than your padding. 2. Gather each circle around the padding with a running stitch and pull it tight. 3. Wrap the headband in a sleeve strip and glue the padded ears to the ends.
No Sew Fleece Ear Warmer Headband
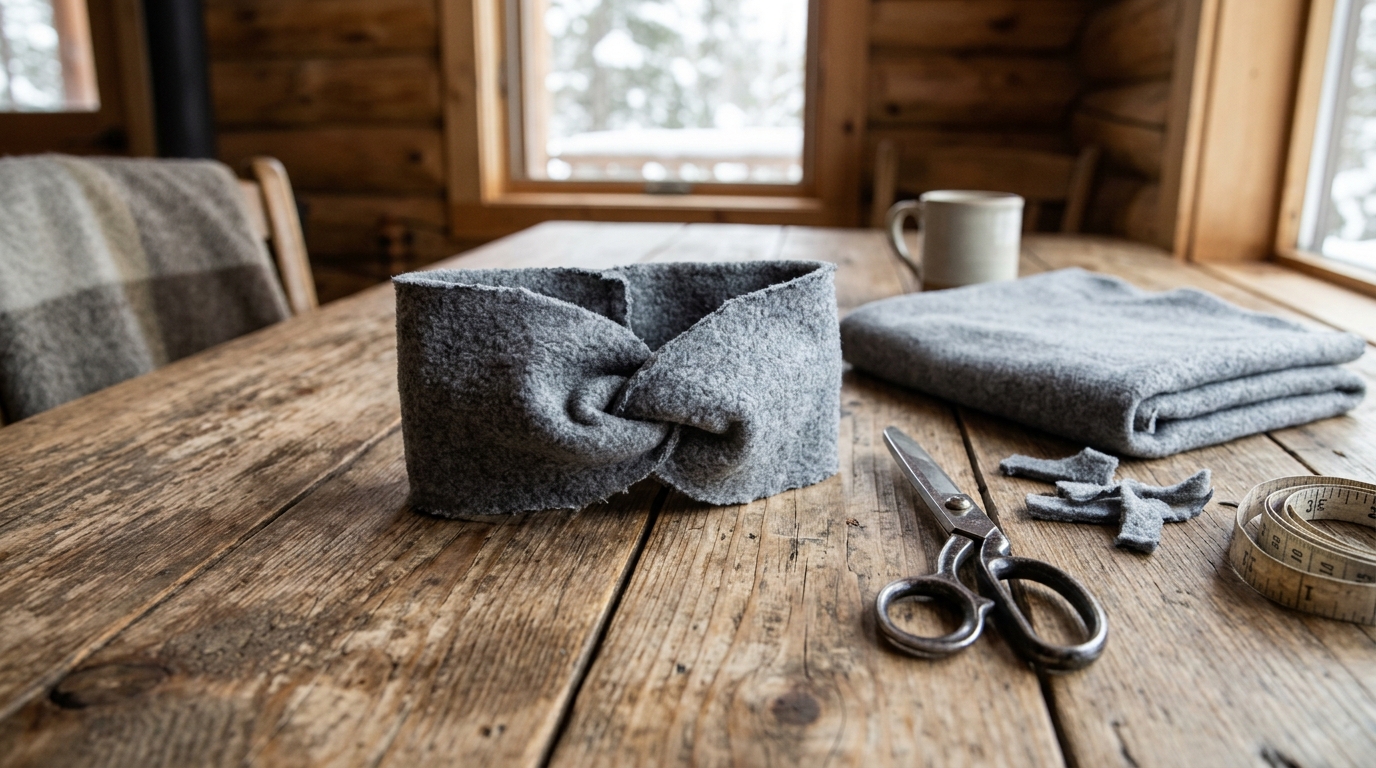
If earmuffs feel too bulky under a hood, a fleece ear warmer is the answer. This one needs no sewing at all. Cut a wide strip of fleece, twist it once at the front for a pretty knot look and close the back with fabric glue or a few stitches. Fleece does not fray, so the edges stay neat. It takes about ten minutes, which makes it perfect for a batch of last minute gifts. How many could you make in one evening?
You will need: a fleece remnant, fabric scissors, a measuring tape, fabric glue or a needle and thread, clothespins.
How to make it: 1. Cut a fleece strip about 5 inches wide and as long as your head measurement plus 1 inch. 2. Fold it in half lengthwise, then twist the two ends around each other at the front. 3. Overlap the back ends, glue or stitch them and hold with clothespins until dry.
Chester Greenwood Earmuffs With Felt Snowflakes
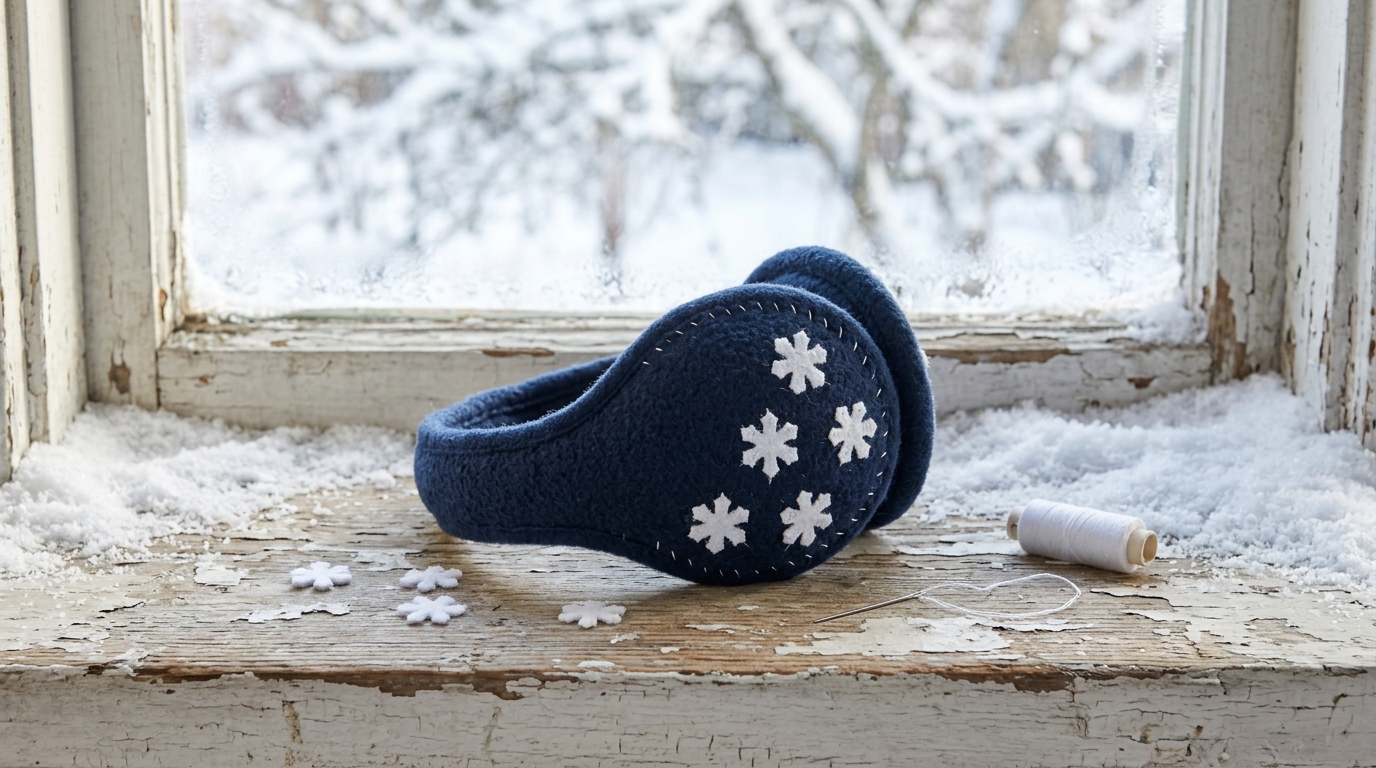
A plain pair of store bought earmuffs becomes a one of a kind gift with a few tiny felt snowflakes. This is a fun way to dress up Chester Greenwood earmuffs for the holidays. Cut little snowflakes from white felt using a paper punch or small scissors and stitch them on with white thread. Navy blue and white looks crisp and wintery, but red with white is just as cheerful. Add a few sequins if you want a little sparkle. Who on your list would love a pair?
You will need: plain fabric earmuffs, white felt, a snowflake paper punch or small sharp scissors, a needle, white thread, optional sequins.
How to make it: 1. Punch or cut 8 to 10 small snowflakes from white felt. 2. Arrange them on the ear pieces until you like the layout. 3. Stitch each one on with a few small stitches through the center.
No Sew Fringe Fleece Scarf
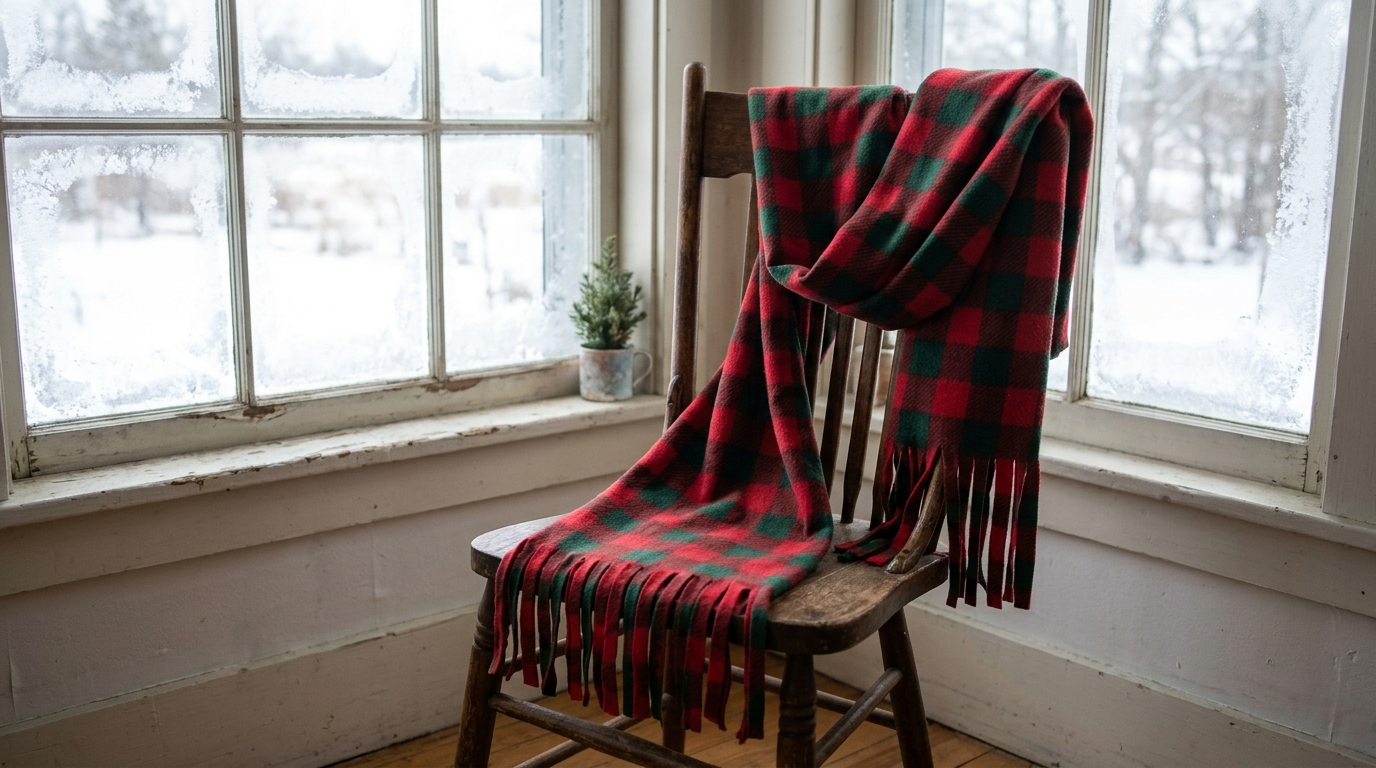
Chester skipped scarves because wool made him itch, but a soft fleece scarf would have suited him fine. Buffalo check fleece looks classic and cozy, and you only need to cut it. Snip the ends into neat fringe and you are done. Make it extra long so it wraps twice around the neck. If you love easy fleece crafts, try our fleece tie blankets next. They use the same no sew trick. Would you go red check or green check?
You will need: buffalo check fleece about 10 inches by 70 inches, sharp fabric scissors, a ruler, a fabric marker.
How to make it: 1. Trim the fleece into a long, even strip. 2. Mark a line 5 inches from each end. 3. Cut fringe strips about half an inch wide up to the line on both ends.
Felt Heart Hand Warmer Pouches
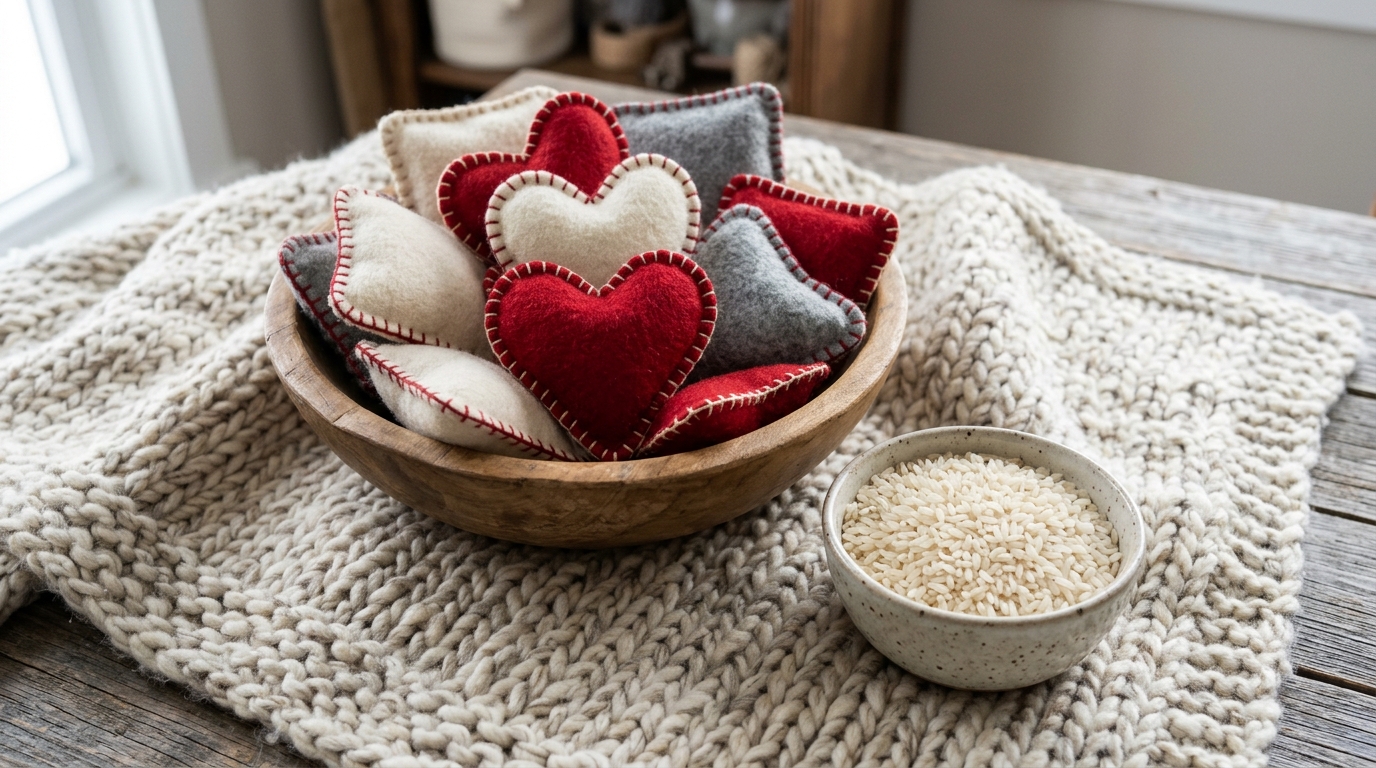
Little felt pouches filled with rice are a sweet companion to a pair of earmuffs on a cold walk. Cut hearts and squares from wool blend felt, stitch around the edges with blanket stitch and fill them with dry rice before closing. Warm them in the microwave in short bursts of about 15 seconds and check the heat with your hand before giving them to anyone. Tuck them in pockets or mittens. Which shape will you make first?
You will need: wool blend felt in red, cream and gray, embroidery floss, a needle, dry rice, a small funnel, pins, scissors.
How to make it: 1. Cut two matching hearts or squares for each pouch. 2. Blanket stitch around the edges, leaving a small gap. 3. Fill with rice using a funnel, then stitch the gap closed.
Cozy Fleece Neck Gaiter
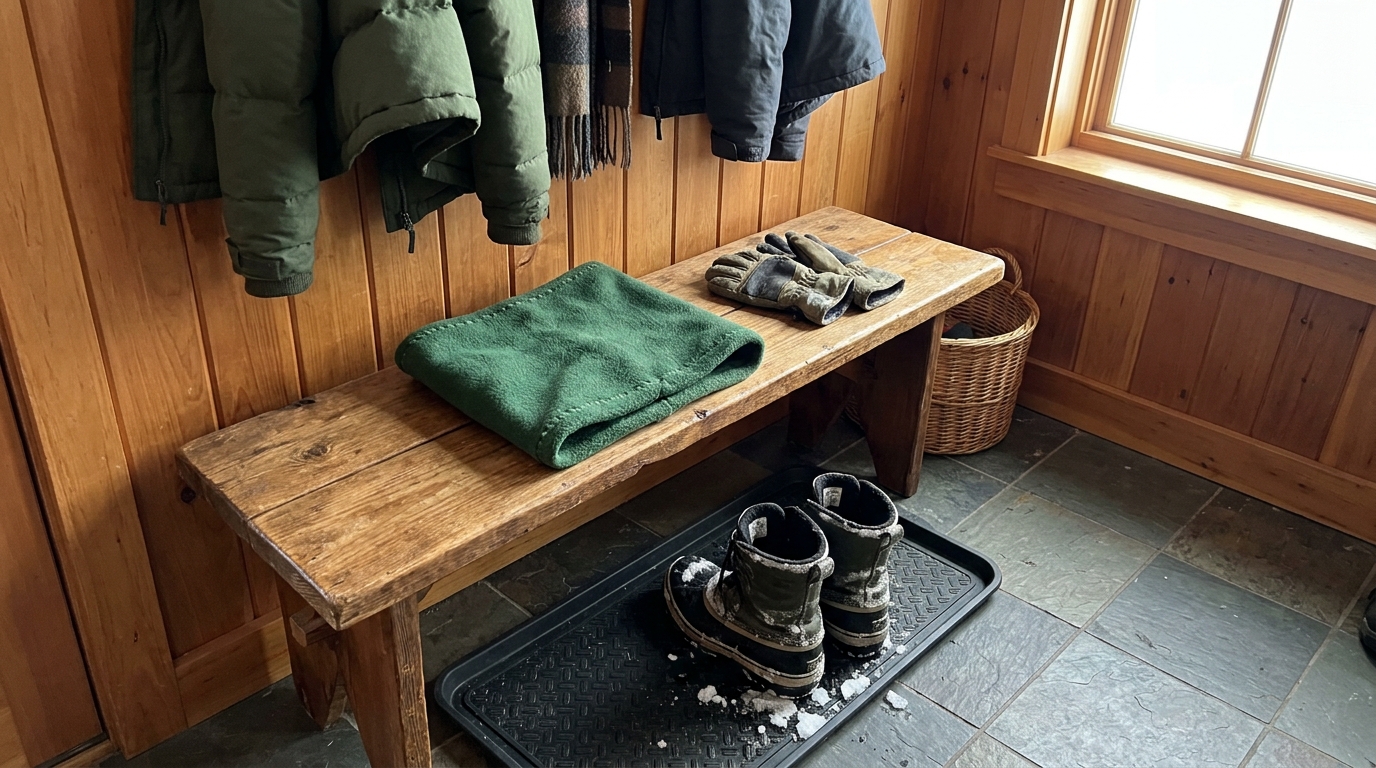
A neck gaiter is like a short scarf that cannot come loose, which makes it great for skating, sledding and shoveling snow. Sew a simple tube of fleece, fold it in half so it is double thick, and it will keep your neck toasty all day. Forest green looks great with boots and a wool coat, but any color works. It is a perfect first sewing machine project. Keep one by the door for quick trips outside. Who in your house is always cold first?
You will need: fleece about 12 by 22 inches, a sewing machine or needle and thread, pins, fabric scissors.
How to make it: 1. Fold the fleece right sides together and sew the long edge into a tube. 2. Turn it right side out. 3. Fold the tube in half so the seam is hidden inside and stitch the raw edges together.
Faux Fur Pom Pom Beanie Upgrade
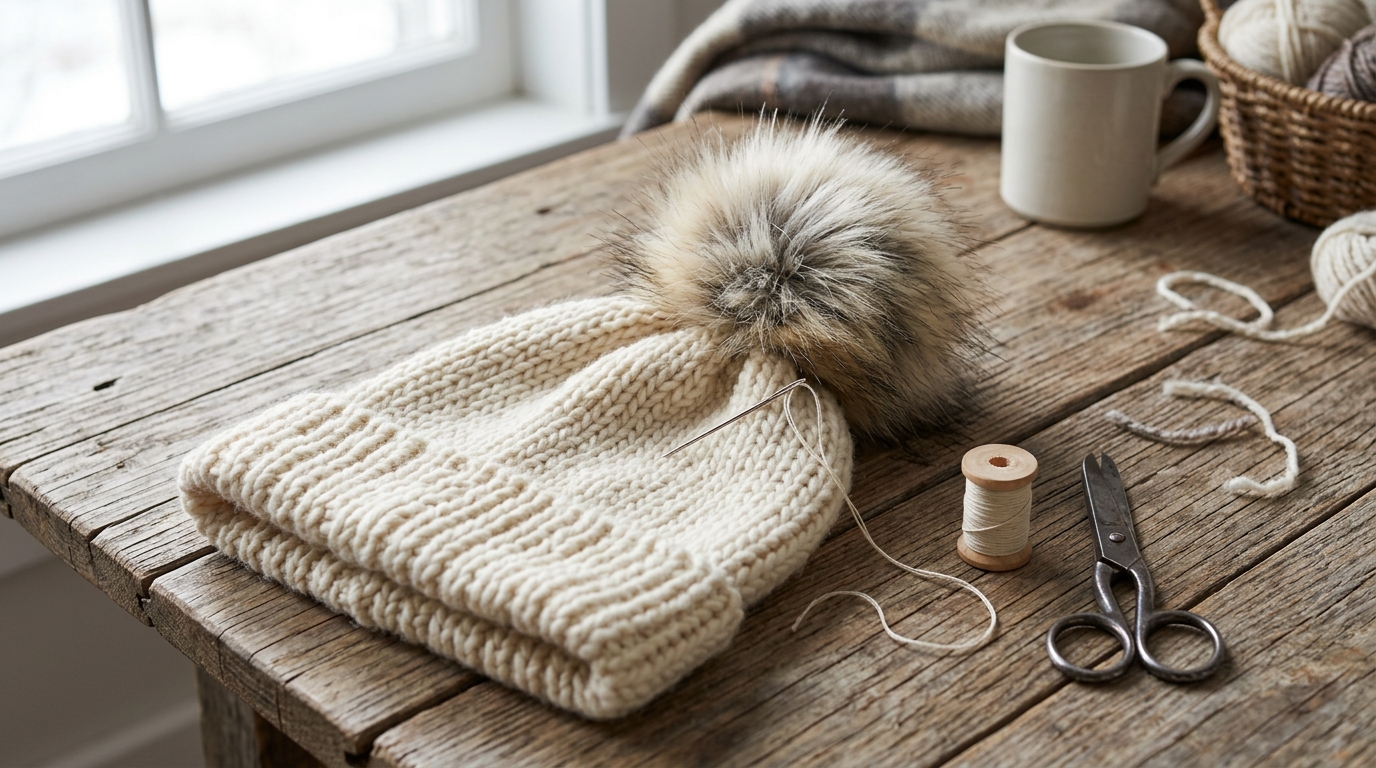
A plain knit beanie looks a little more special with a big faux fur pom pom on top. Many faux fur pom poms come with a snap or a loop, so you can move one from hat to hat. Simply stitch it on with strong thread through the crown of the hat. Cream on cream looks soft and elegant, or try a gray pom pom on a red hat. It is a quick upgrade that makes a budget hat look boutique. What color beanie would you dress up?
You will need: a plain knit beanie, a faux fur pom pom, a large needle, strong matching thread.
How to make it: 1. Find the center of the hat crown. 2. Push the pom pom loop or thread through to the inside. 3. Stitch it firmly in place with several passes and tie a knot inside.
Snap On Faux Fur Hood Trim
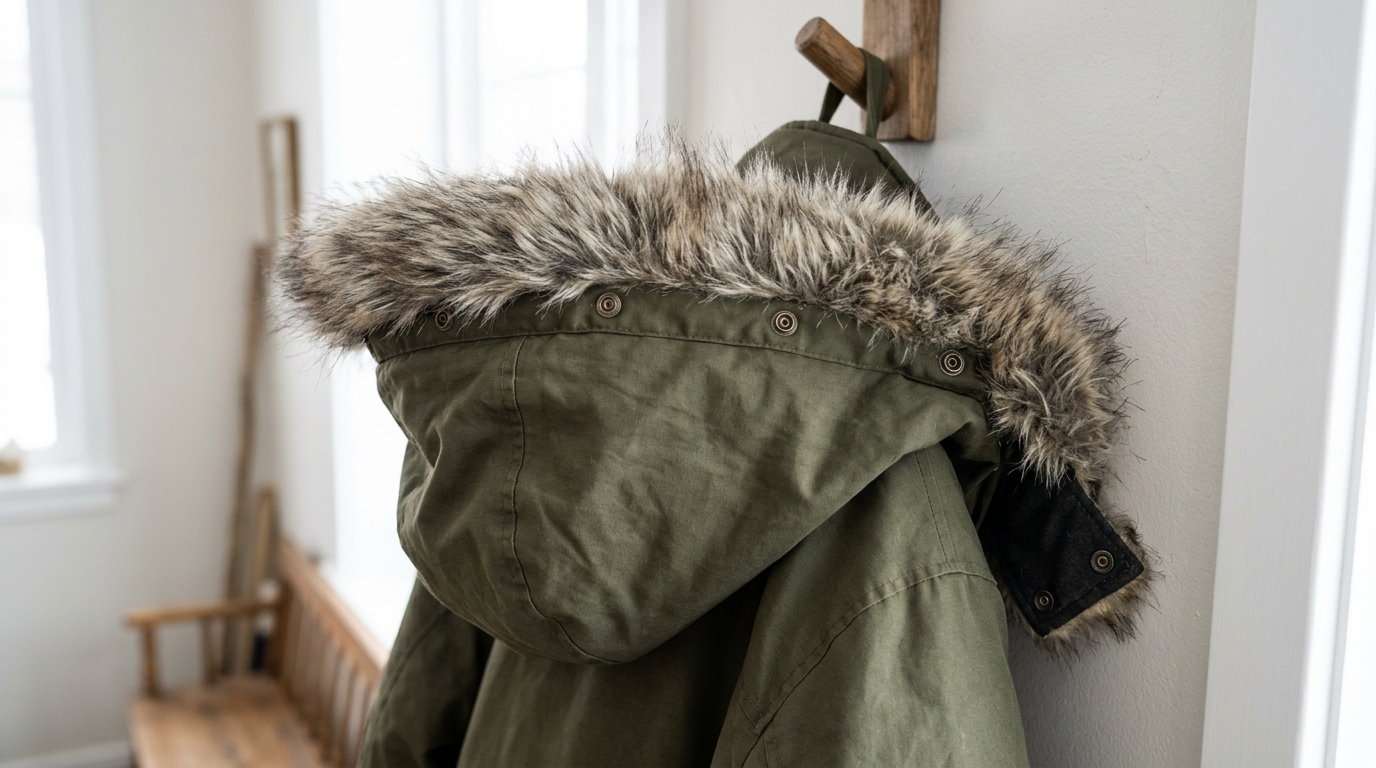
Faux fur around a hood blocks the wind from your face, and a removable trim means you can wash your coat easily. Cut a strip of faux fur to match the edge of your hood and sew small snaps along both the trim and the hood. Snap it on for snowy days and off for rainy ones. It gives an everyday parka a warm, cozy look for very little money. Is there a coat in your closet that needs a winter upgrade?
You will need: faux fur fabric, sew on snaps, a needle and strong thread, a measuring tape, small sharp scissors.
How to make it: 1. Measure around the hood edge and cut a fur strip about 3 inches wide. 2. Cut the fur from the back only, so the long hairs stay whole. 3. Sew snaps every 4 inches along the trim and the hood and snap it on.
Ribbon Mitten Clips
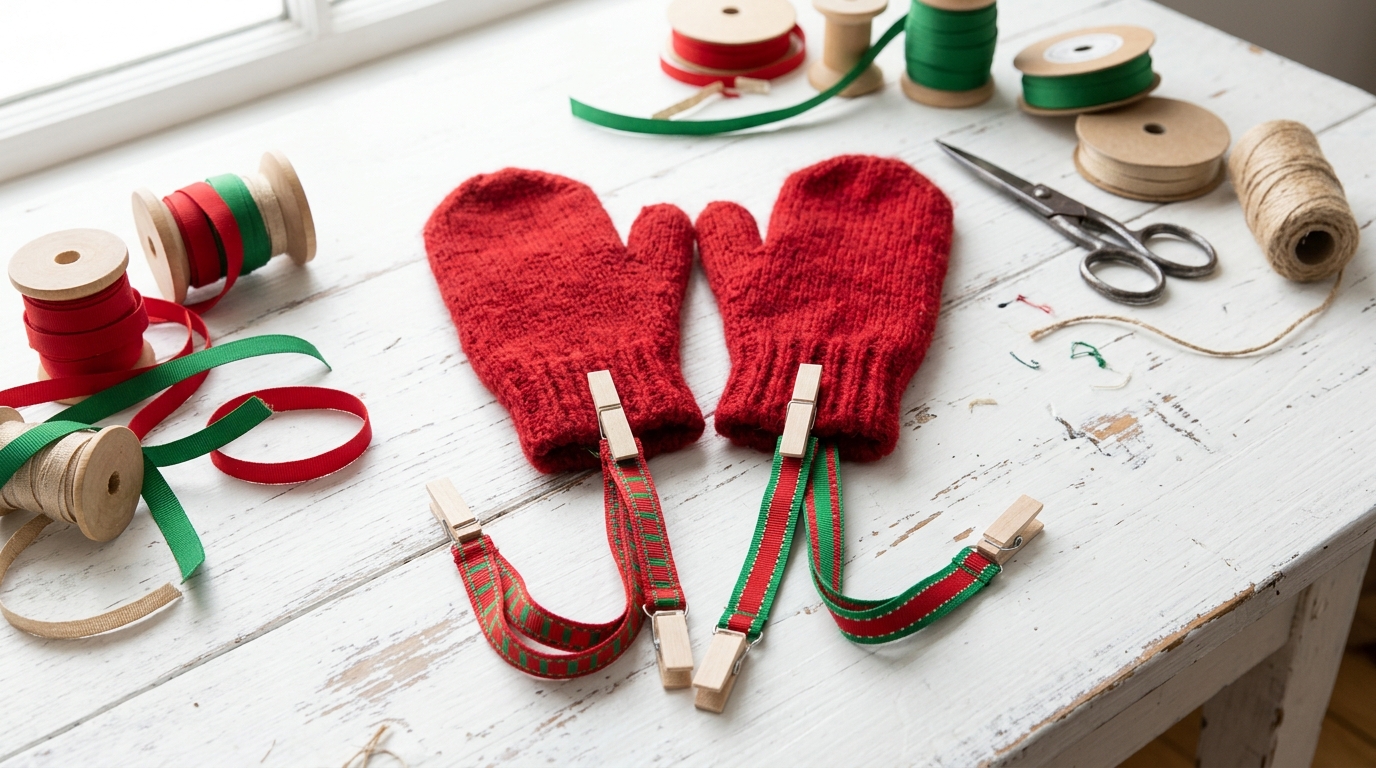
Lost mittens are a winter tradition in every house with kids. Mitten clips made from grosgrain ribbon and small wooden clips keep each pair attached to a coat sleeve. Choose holiday colors and they look festive too. Fold the ribbon ends and glue them to the clips so nothing frays. Make a few sets and tuck them into Christmas stockings. They are cheap, useful and fun to make together. How many mittens has your family lost this year?
You will need: grosgrain ribbon in red and green, small wooden clips, strong craft glue, scissors, fray check liquid.
How to make it: 1. Cut the ribbon about 10 inches long and seal the ends with fray check. 2. Fold each end over a wooden clip and glue it in place. 3. Let it dry, then clip one end to the mitten and one to the coat cuff.
Felt Mini Ice Skate Ornaments

Chester came up with his big idea while testing new ice skates, so tiny felt skates make a sweet tribute on the tree. Cut boot shapes from white and red felt, stitch them together and add a blade made from silver glitter felt. A little loop of twine ties a pair together. Hang them on a branch near the top so everyone sees them. They also make great gift toppers. Will your tree get a pair of tiny skates this year?
You will need: white and red felt, silver glitter felt, embroidery floss, a needle, a little stuffing, twine, scissors.
How to make it: 1. Cut two boot shapes for each skate and one thin blade from glitter felt. 2. Blanket stitch the boot pieces together, adding a little stuffing. 3. Stitch the blade to the bottom, sew on tiny laces and tie a pair together with twine.
Chester Greenwood Earmuffs Snowman Wreath
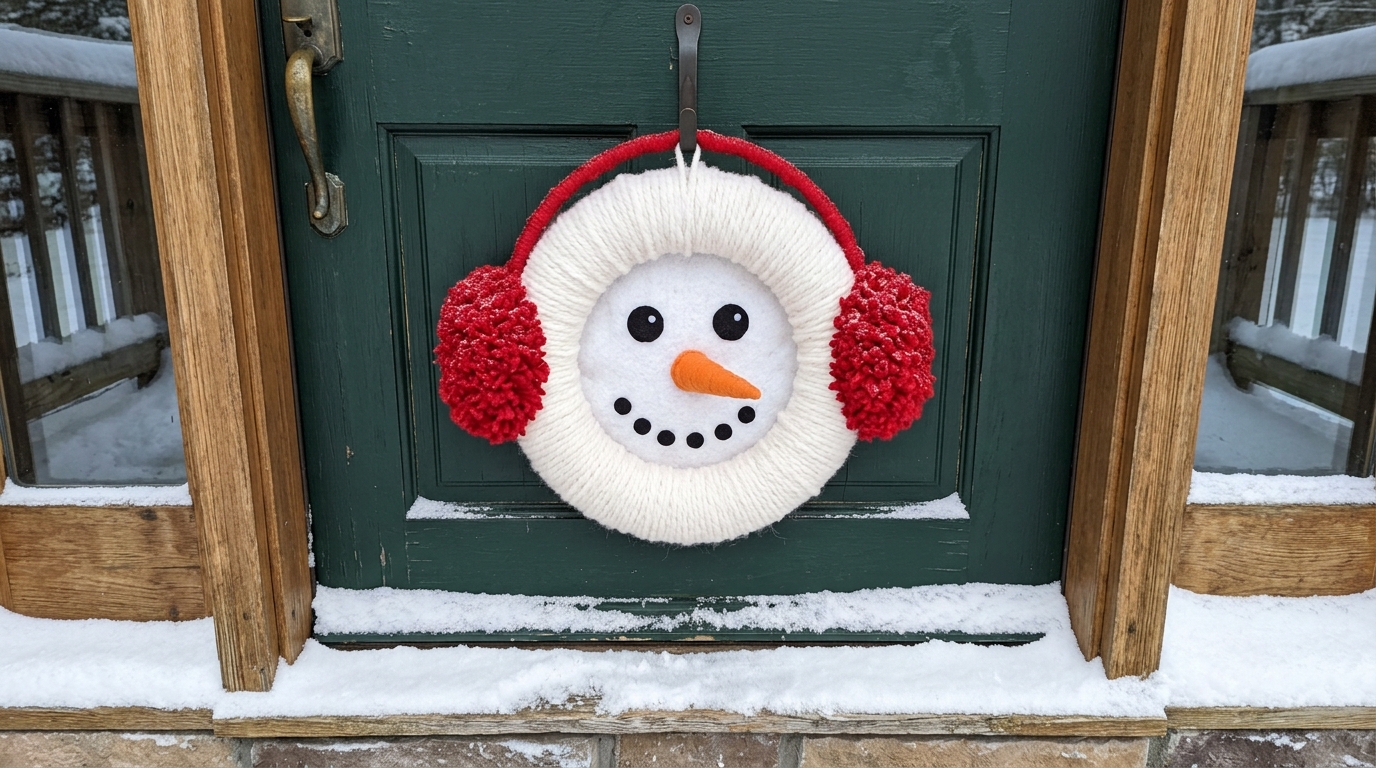
Here is a cheerful front door idea that gives a nod to Chester Greenwood earmuffs: a snowman face wreath wearing big red earmuffs. Wrap a foam wreath form in white yarn, glue on black felt dots for eyes and a mouth, add an orange felt carrot nose, then top it with two red pom pom earmuffs on a covered pipe cleaner band. It makes everyone smile on the way in and lasts all winter long. Who will notice it first?
You will need: a foam wreath form, white chunky yarn, black and orange felt, red yarn for pom poms, a pom pom maker, a red pipe cleaner, craft glue, ribbon for hanging.
How to make it: 1. Wrap the wreath form tightly in white yarn until it is fully covered. 2. Glue on felt eyes, mouth and a carrot nose. 3. Make two red pom poms, join them with a red pipe cleaner arch and glue them to the sides.
Winter Entryway Rack for Hats and Earmuffs
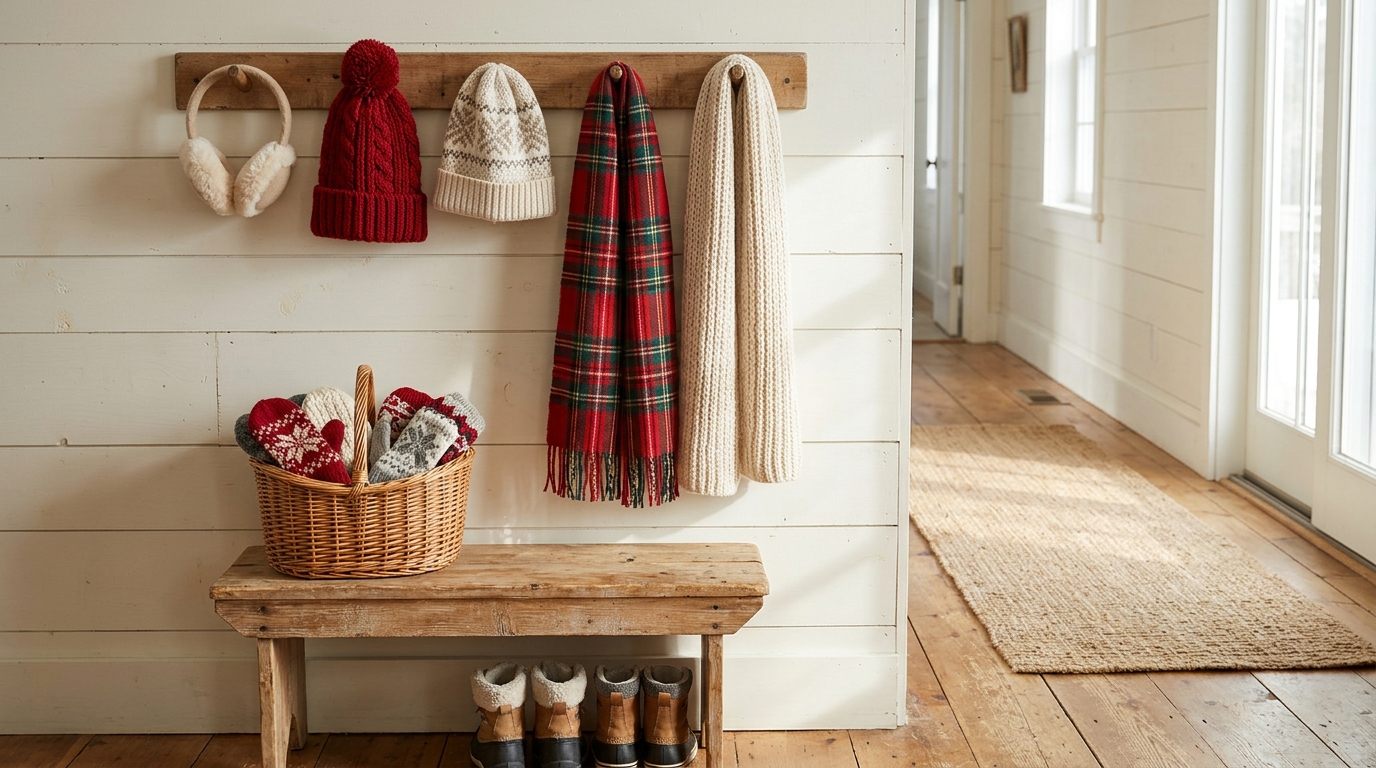
When everyone comes in from the snow, hats and earmuffs end up everywhere. A simple wall rack with wooden pegs gives each piece a home where it can dry. Paint a board white, screw in a row of Shaker pegs and hang it at a height kids can reach. Add a bench below with a basket for mittens and the whole entry looks tidy and welcoming. It is one of those small projects that makes winter mornings easier. Where would you hang yours?
You will need: a pine board, wooden Shaker pegs, wood glue, white paint, a drill used by an adult, wall anchors and screws, a level.
How to make it: 1. Paint the board and let it dry. 2. Have an adult drill holes every 6 inches and glue in the pegs. 3. Screw the rack to the wall with anchors, checking it with a level.
Chester Greenwood Earmuffs Gift Box

End the season with a cozy gift box built around a pair of Chester Greenwood earmuffs. Line a kraft box with tissue or crinkle paper, then add the earmuffs, a red knit scarf and a couple of felt hand warmers. Tie on a blank tag and write the story of the 15 year old inventor inside the card, so the gift comes with a smile. It is warm, useful and looks far more expensive than it costs. Who on your list always complains about cold ears?
You will need: a kraft gift box, crinkle paper, a pair of handmade or plain earmuffs, a knit scarf, felt hand warmers, a kraft tag, twine, a small card.
How to make it: 1. Fill the box with crinkle paper. 2. Arrange the earmuffs, scarf and hand warmers so each piece shows. 3. Close the lid, tie it with twine and add the tag and card.