DIY Wooden Christmas Gifts: 15 Easy Handmade Pieces They Will Keep for Years
DIY Wooden Christmas Gifts have a warmth that store bought presents just cannot copy. Wood feels solid in your hand, it smells good, and it gets better with age instead of ending up in a drawer. Maybe that is why searches for handmade wooden gifts are shooting up this season. The best part is that you do not need a workshop or a garage full of tools. Most of these ideas start with plain wooden pieces from a craft store, like blocks, spoons, slices and boxes, plus paint, twine and a little sandpaper. Anything that needs a saw or a drill is marked for adult help, and nothing here uses burning or flames. Clear a corner of the kitchen table, put on some Christmas music and let’s make something they will keep for years..
DIY Wooden Christmas Gifts Ready Under the Tree
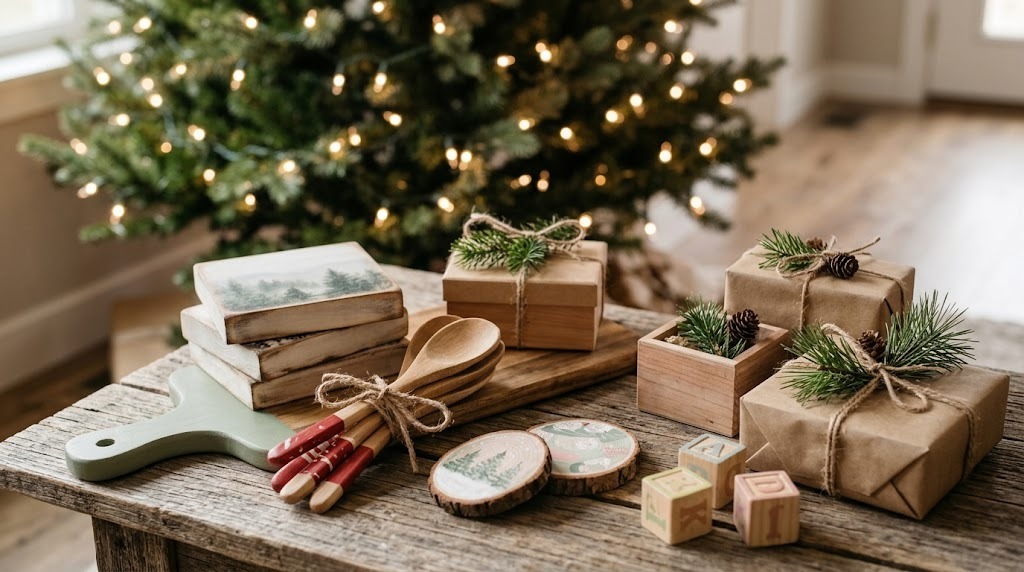
Picture this under the tree: a stack of little wooden treasures tied with twine, each one made by you. A photo block for grandma, a set of dipped spoons for the cook, painted blocks for the new baby. None of them cost much, and every one of them says you thought about that person. Start with the easiest project on this list and work your way up, and you will be amazed how fast your gift pile grows. Which person on your list are you making something for first..
You will need: Plain wooden pieces from the craft store, fine sandpaper, acrylic paint, a clear water based sealer, jute twine, brown kraft paper.
How to make it: 1. Choose one project per person on your list. 2. Sand every piece lightly before you paint so the finish looks smooth. 3. Wrap finished gifts in kraft paper and tie them with twine and a sprig of pine.
Photo Transfer Blocks, Sweet DIY Wooden Christmas Gifts for Grandma
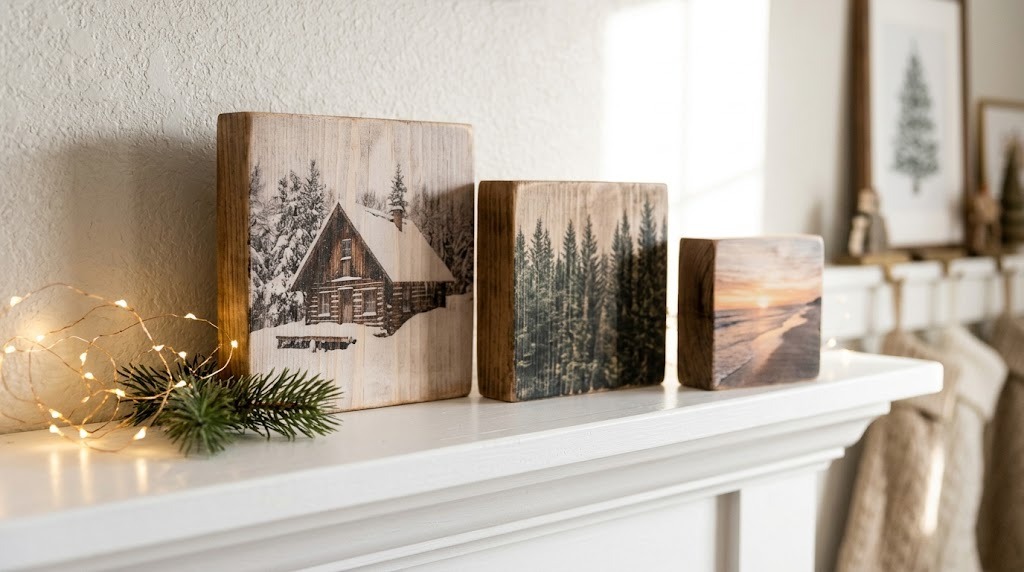
A favorite family photo printed onto a chunky wood block feels like a little piece of art. The wood grain shows through the picture and gives it a soft, vintage look that grandparents love. You use a laser print, a photo transfer gel and some patience, and when you rub the paper away the image is left on the wood. Make a set of three in different sizes for a mantel or bookshelf. Which photo would make your grandma smile the most?
You will need: Square wood blocks, laser printed photos (not inkjet) printed in reverse, photo transfer gel or medium, a foam brush, a damp sponge, clear sealer.
How to make it: 1. Brush a thick layer of transfer gel on the block and press the photo face down, smoothing out bubbles. 2. Let it dry overnight. 3. Wet the paper and gently rub it away with your fingers, then seal the block.
A Plain Cutting Board Finished With Oil and a Painted Handle
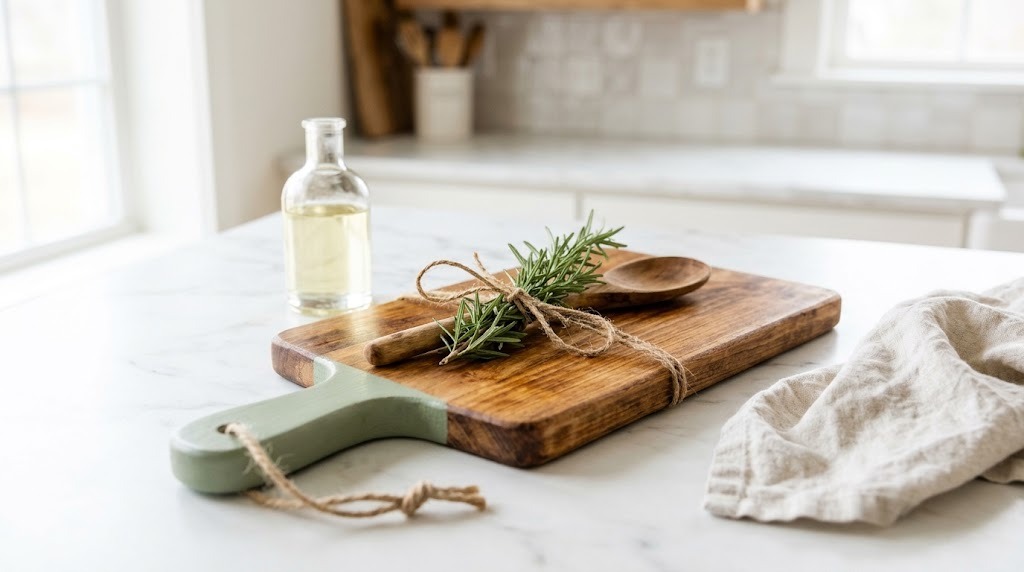
A simple wooden cutting board from a home store becomes a gift when you finish it yourself. Rub it with food safe board oil until the grain glows, then paint just the handle in a soft color like sage or red. Tie a small bundle of rosemary or a wooden spoon to the handle with twine and it looks like something from a farm shop. Keep the paint on the handle only, never on the cutting surface. Who in your family is always in the kitchen?
You will need: A plain hardwood cutting board, fine sandpaper, food safe mineral oil or board butter, painter’s tape, acrylic paint and sealer for the handle only, a soft cloth.
How to make it: 1. Sand the board smooth and wipe off the dust. 2. Tape off the handle, paint it and seal it, then remove the tape. 3. Rub oil into the whole wood surface, let it soak in overnight and buff with a cloth.
Dipped Wooden Spoons Tied With Twine
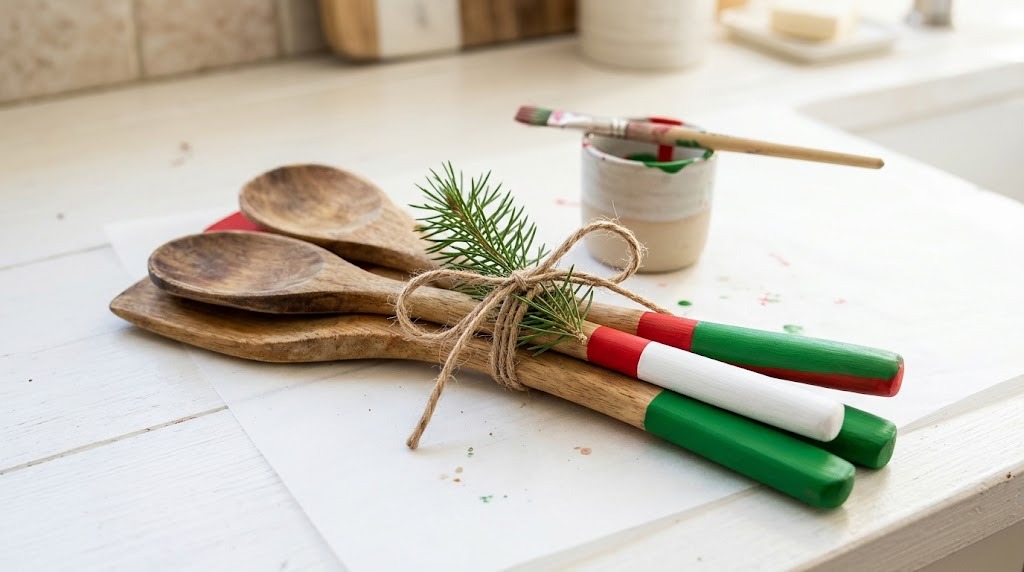
Painted handle spoons are one of the cheapest and prettiest DIY Wooden Christmas Gifts you can make. Just tape off the bottom of each handle and paint it in bright colors, or dip it in a cup of paint for a clean straight line. A bundle of four in red, white and green looks so festive tied with twine and a little tag. Only paint the handle ends that never touch food. They also make a sweet hostess gift. Which colors match your friend’s kitchen?
You will need: Plain wooden spoons and spatulas, painter’s tape, acrylic paint, a clear water based sealer, a cup for dipping, twine.
How to make it: 1. Wrap tape around each handle where you want the color to stop. 2. Paint or dip the handle end and let it dry, then add a second coat. 3. Seal the painted part, peel off the tape and bundle with twine.
A Wood Slice Tic Tac Toe Set in a Cloth Bag
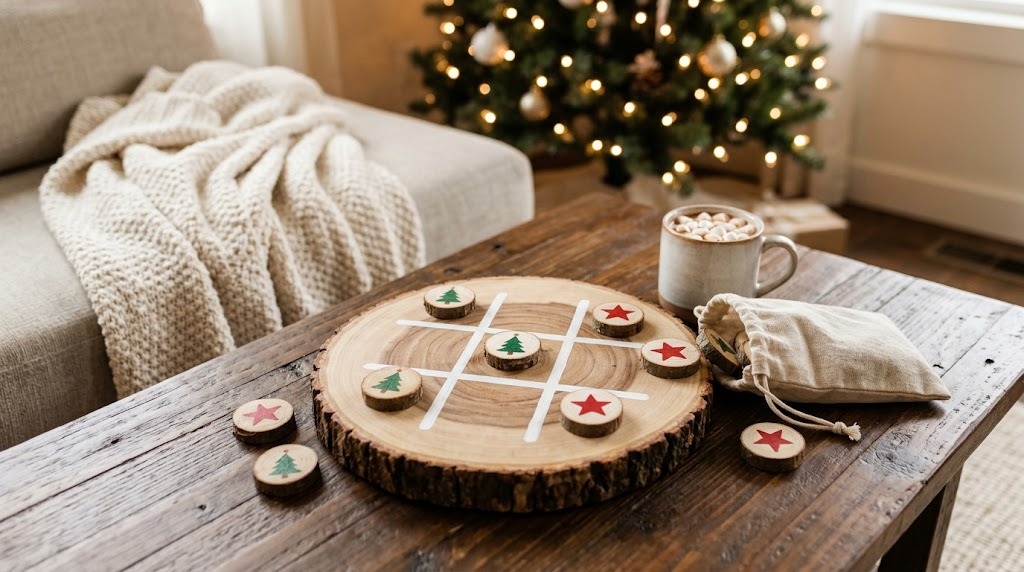
This little game is perfect for kids, grandparents and anyone who loves a car ride activity. Paint a grid on a big wood slice, then paint five small slices with X shapes and five with O shapes. Or skip the letters and use little trees and stars for a Christmas version. Everything packs into a small drawstring bag, so it is easy to take to restaurants and family visits. It looks charming on a coffee table too. Who would you challenge to the first game?
You will need: One large wood slice, ten small wood slices, acrylic paint or paint pens, a ruler, clear sealer, a small drawstring bag.
How to make it: 1. Draw a tic tac toe grid on the big slice with a ruler and paint it. 2. Paint five small slices with one symbol and five with another. 3. Seal everything and pack it in the bag.
Clothespin Recipe Card Holders on Wood Blocks
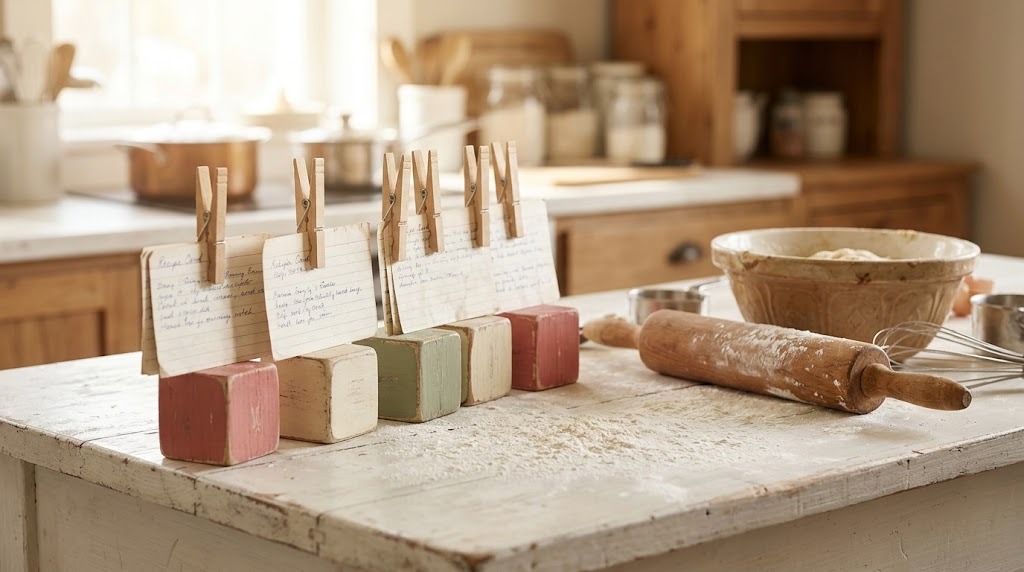
Every home cook needs a place to hold a recipe card while they work. Glue a wooden clothespin on top of a small painted block and you have a sturdy holder that keeps the card out of the flour. Paint the block in a fun color and add a tiny painted heart. Pair it with a handwritten family recipe card and it becomes one of those DIY Wooden Christmas Gifts people treasure. It also works for holding photos and place cards. What family recipe would you write on the card?
You will need: Small wooden blocks, wooden clothespins, acrylic paint, strong wood glue, sandpaper, a blank recipe card.
How to make it: 1. Sand and paint the block and the clothespin. 2. Glue the clothespin upright on top of the block and let it dry fully. 3. Clip in a handwritten recipe card before wrapping.
A Wood Round Ring Dish With a Painted Edge
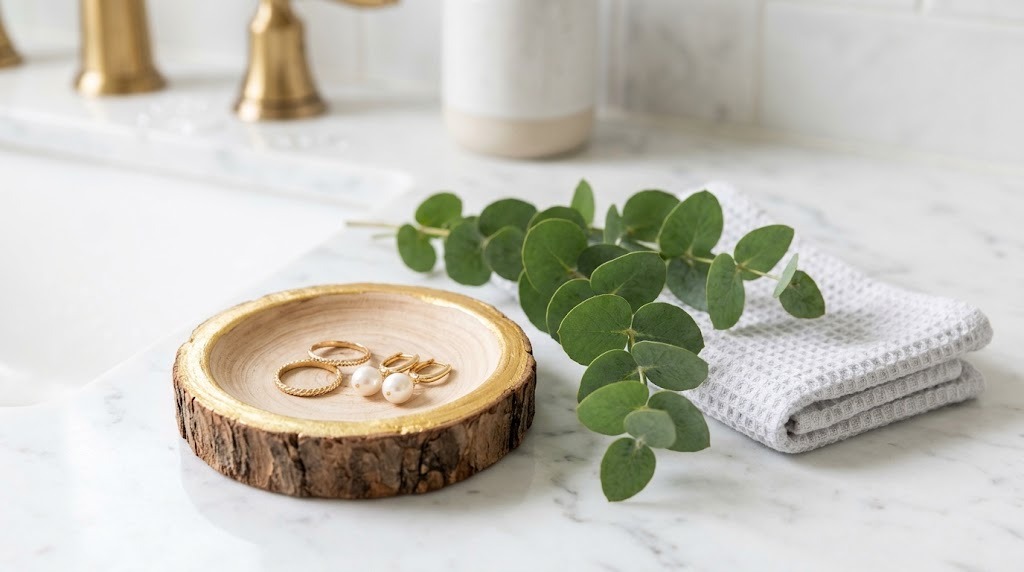
A small, shallow wood dish by the sink or on the dresser is the perfect spot for rings, earrings and keys. Buy an unfinished wood bowl or round tray from the craft store and paint just the rim in gold or a soft pastel. Seal the whole dish so it can handle a little water. It takes about 20 minutes plus drying time, and it looks like something from a boutique. Make a few for friends in their favorite colors. Where do you always lose your rings?
You will need: An unfinished small wood bowl or round tray, painter’s tape, gold or pastel acrylic paint, a small brush, clear water based sealer.
How to make it: 1. Sand the dish lightly and wipe off the dust. 2. Tape a line below the rim and paint the edge, then peel off the tape. 3. Seal the whole dish with two coats.
Tiny Painted Wood Slice Magnets
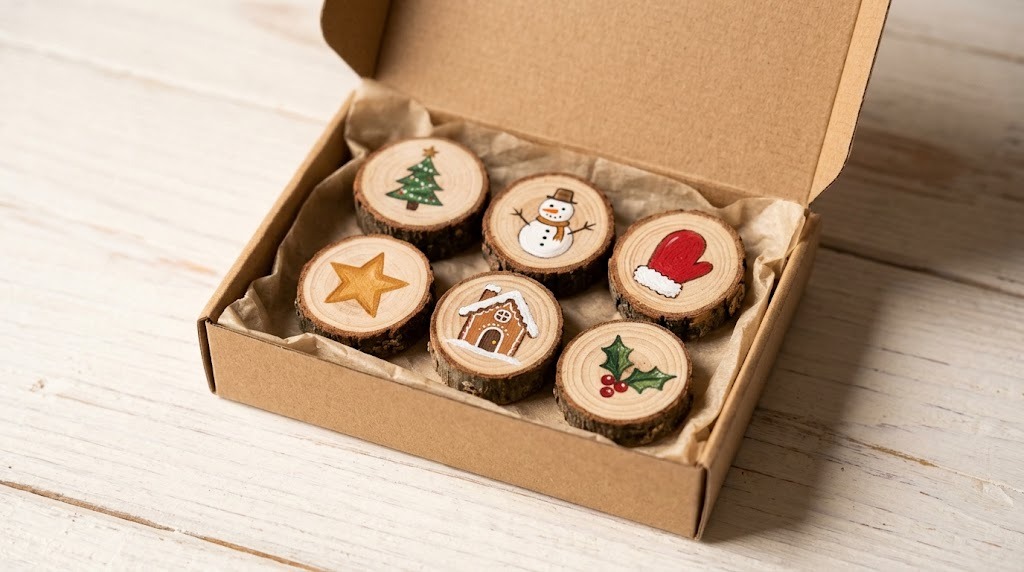
Little wood slices turn into the cutest fridge magnets with a few dabs of paint. Paint tiny Christmas trees, snowmen, mittens or a family pet, and glue a strong magnet on the back. A set of six in a small box is one of the cheapest DIY Wooden Christmas Gifts for neighbors, teachers or coworkers. Even simple shapes look adorable because the bark edge frames each one. Kids can help with the painting part. What tiny picture would you paint first?
You will need: Small wood slices with bark, acrylic paint, fine brushes or paint pens, strong round magnets, strong glue (hot glue with adult help), clear sealer.
How to make it: 1. Paint a simple picture on each slice and let it dry. 2. Seal the front. 3. Glue a magnet to the back and let it cure overnight before packing them in a small box.
Stamped Wooden Keychains for Everyone on Your List
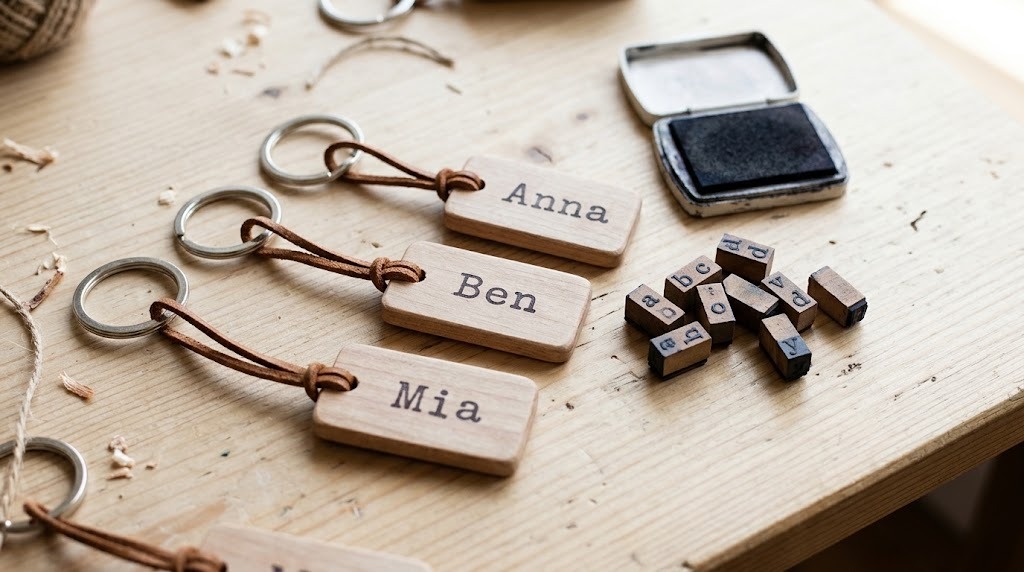
Small wooden tags with a name or initial make easy stocking stuffers. Use rubber alphabet stamps and dark ink, or a fine paint pen, to add a name, a date or a short word like home. Then seal the tag and add a key ring and a loop of leather cord. These DIY Wooden Christmas Gifts are light, quick to make, and you can make one for every family member in one evening. New drivers and new homeowners love them most. Who just got a new set of keys this year?
You will need: Small wooden tags with a hole (precut), rubber alphabet stamps and permanent ink or a paint pen, clear sealer, key rings, leather cord.
How to make it: 1. Stamp or write the name on each tag and let the ink dry. 2. Brush on two coats of sealer. 3. Thread the leather cord through the hole and attach the key ring.
Painted Alphabet Blocks, DIY Wooden Christmas Gifts for a New Baby
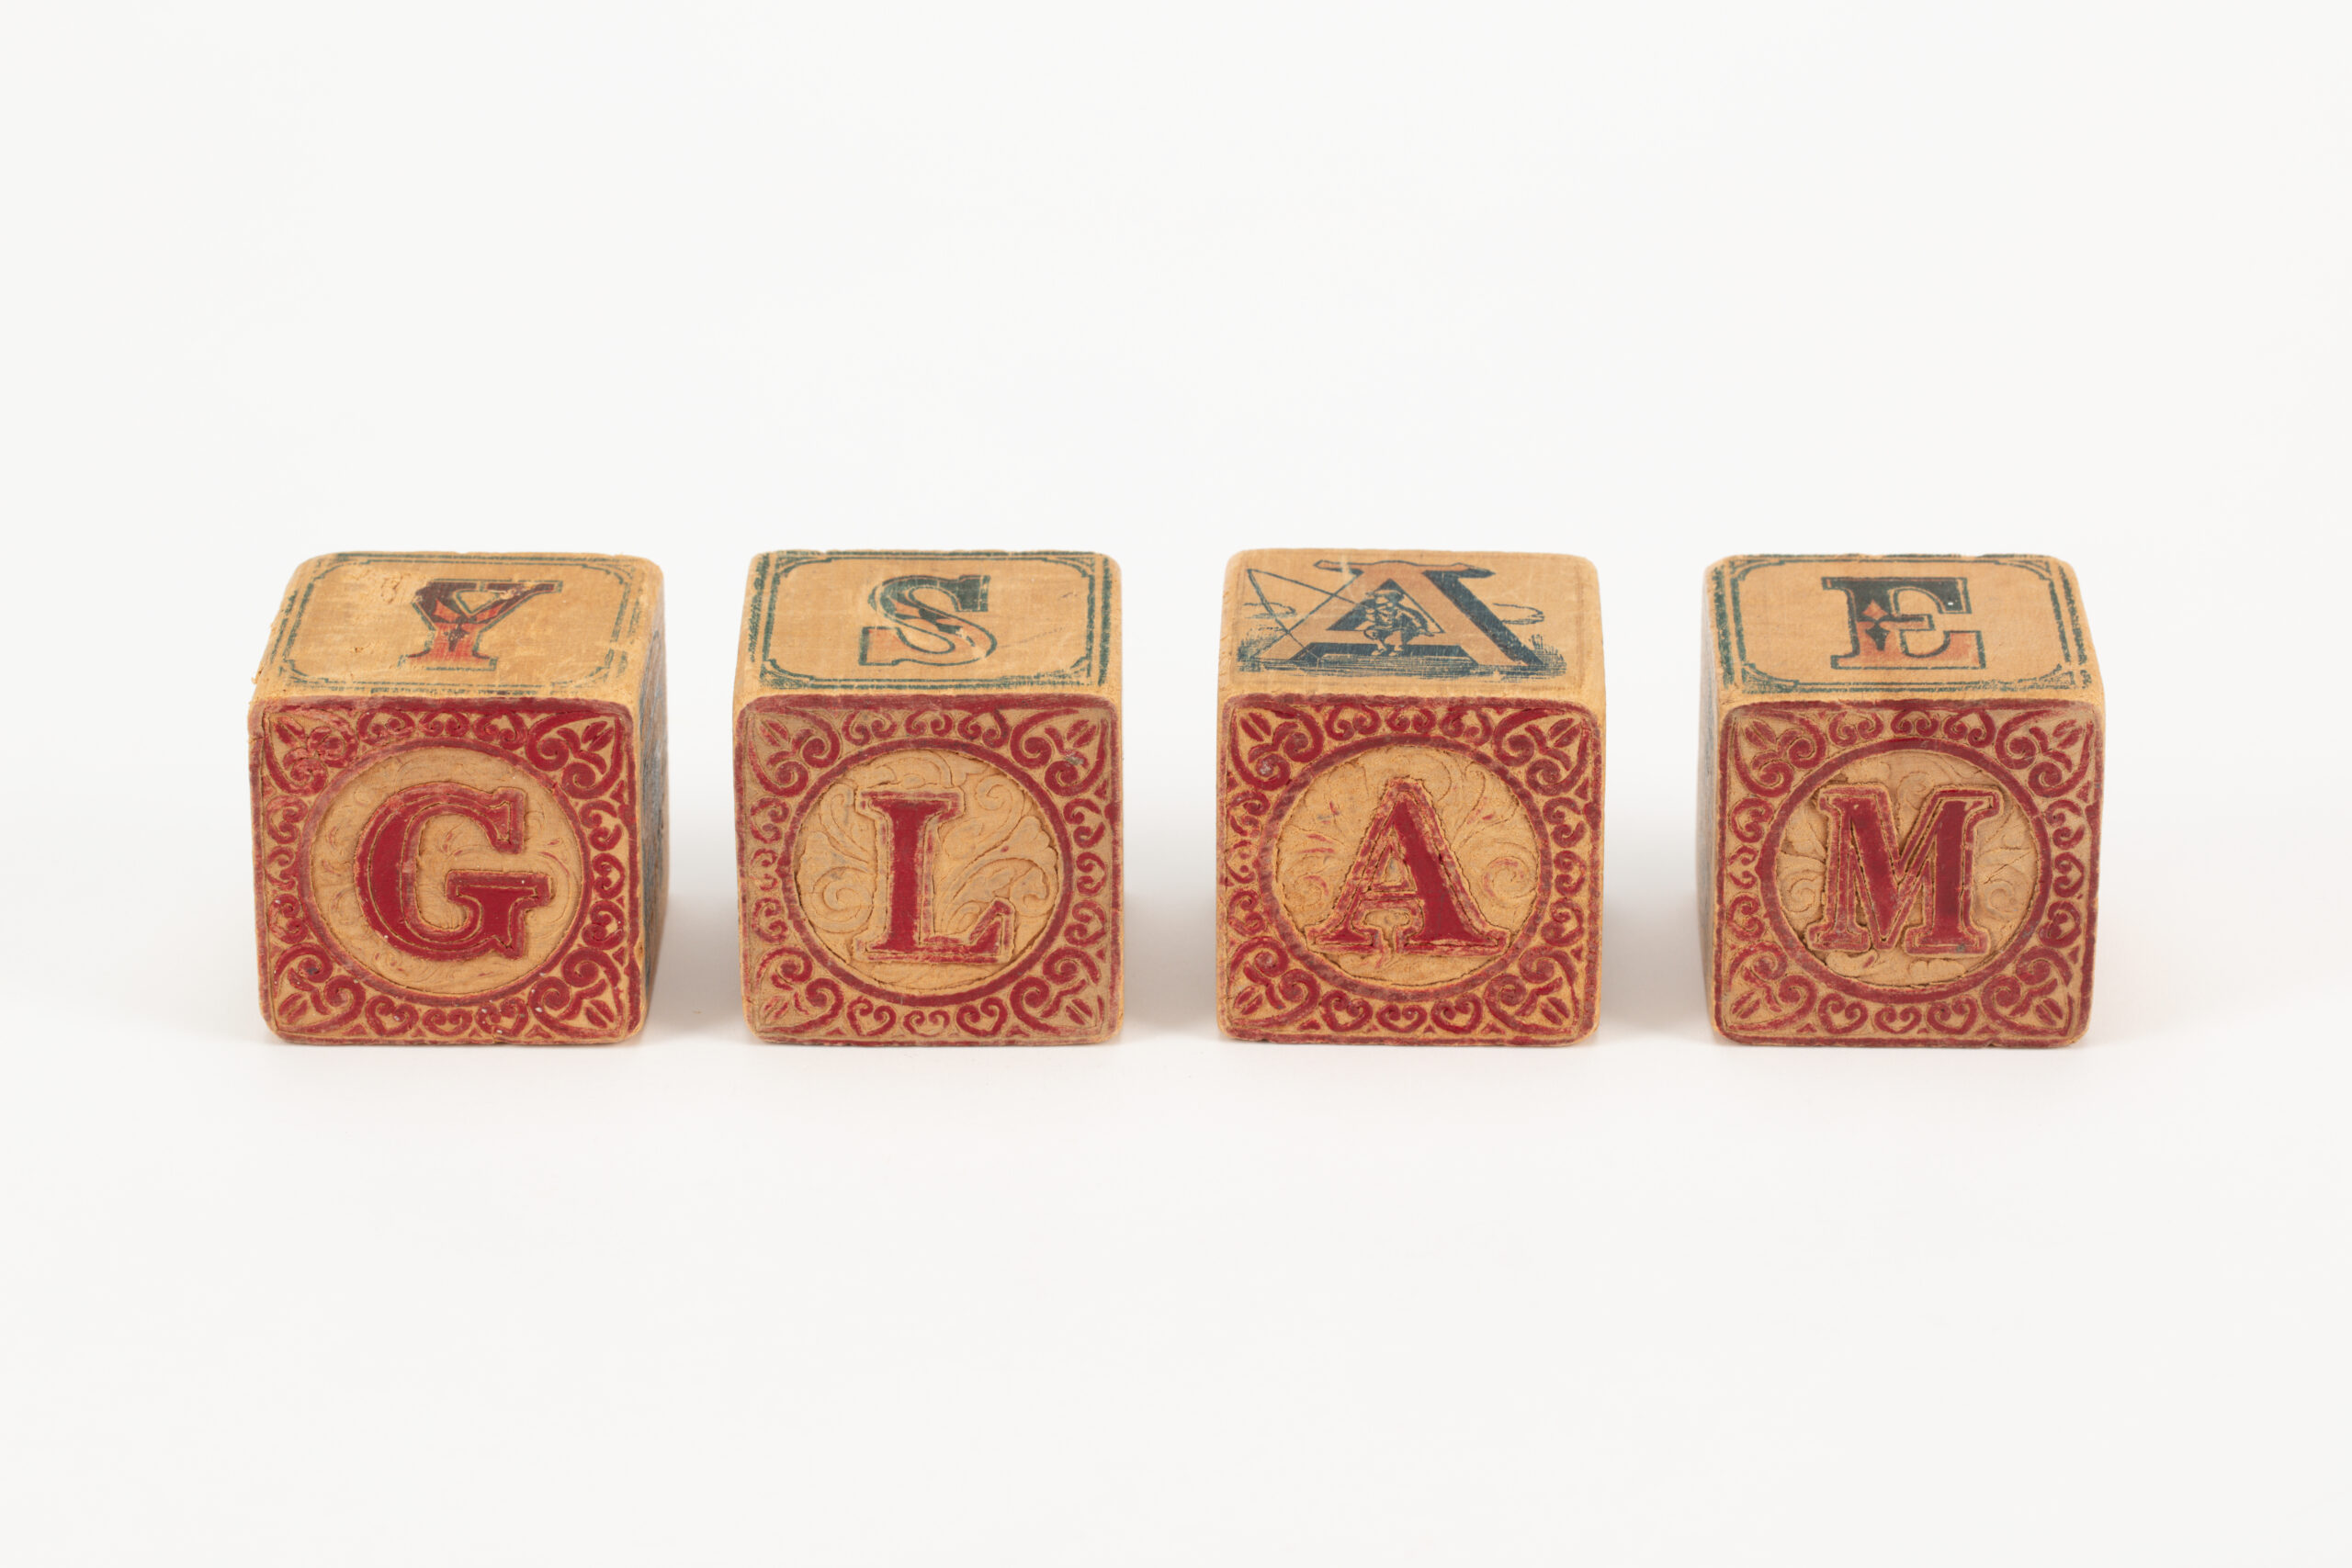
Big wooden blocks with a baby’s name painted on them make a sweet nursery shelf decoration and a keepsake parents keep for years. Paint each block a soft color and add one letter per block with a stencil. Choose large blocks that are too big to fit in a small mouth, and use paint and sealer labeled safe for toys. Many parents keep them on a shelf for photos on each birthday. Whose new baby are you celebrating this year?
You will need: Large unfinished wood blocks (at least 2 inches), letter stencils, non toxic paint and sealer labeled safe for toys, a stencil brush, sandpaper.
How to make it: 1. Sand the blocks and round the corners a little with sandpaper. 2. Paint each block and let it dry. 3. Stencil one letter per block, then seal with a toy safe finish and let it cure fully.
DIY Wooden Christmas Gifts for the Gardener: Plant Markers
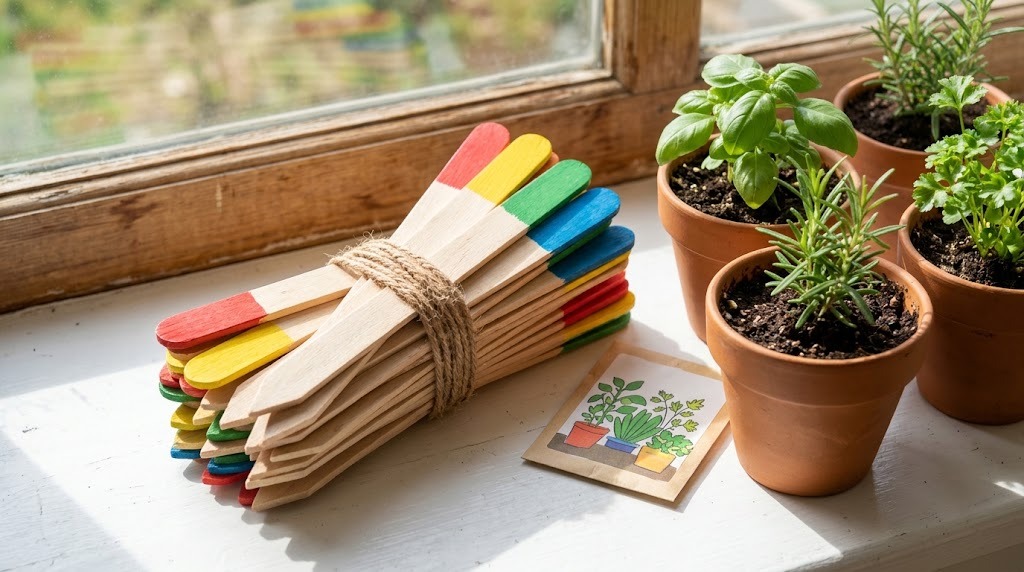
Any gardener on your list will love a set of painted wooden plant markers. Use flat wooden stakes or even old wooden spoons, paint the top in bright colors and write herb names like basil, mint and thyme. Seal them well so they last through rain and watering. Tie a bundle together and add a packet of seeds for a gift that keeps going all spring. They look cheerful in a kitchen windowsill pot too. Do you know someone who already plans next year’s garden?
You will need: Flat wooden stakes or old wooden spoons, outdoor acrylic paint, a paint pen, outdoor clear sealer, twine, a packet of seeds.
How to make it: 1. Paint the top third of each marker and let it dry. 2. Write a plant name on each one with a paint pen. 3. Seal with two coats of outdoor sealer and bundle with twine and seeds.
Thin Wood Veneer Bookmarks With Tassels

For the reader in your life, thin wooden bookmarks feel special every time they open a book. Craft stores sell thin wood veneer sheets that you can cut with sharp scissors or a craft knife with adult help. Paint a simple pine branch or a quote you love, punch a hole at the top and add a small yarn tassel. Tuck one inside a used book you found at the thrift store for a sweet two part gift. What book would you pair it with?
You will need: Thin wood veneer sheet or wooden bookmark blanks, a ruler, sharp scissors or a craft knife (adult help), paint or paint pens, a hole punch, embroidery thread for tassels, clear sealer.
How to make it: 1. Cut strips about 2 inches by 6 inches and sand the edges. 2. Paint a design and seal it. 3. Punch a hole at the top and loop on a small tassel.
Hand Lettered Wooden Hangers for a Special Outfit
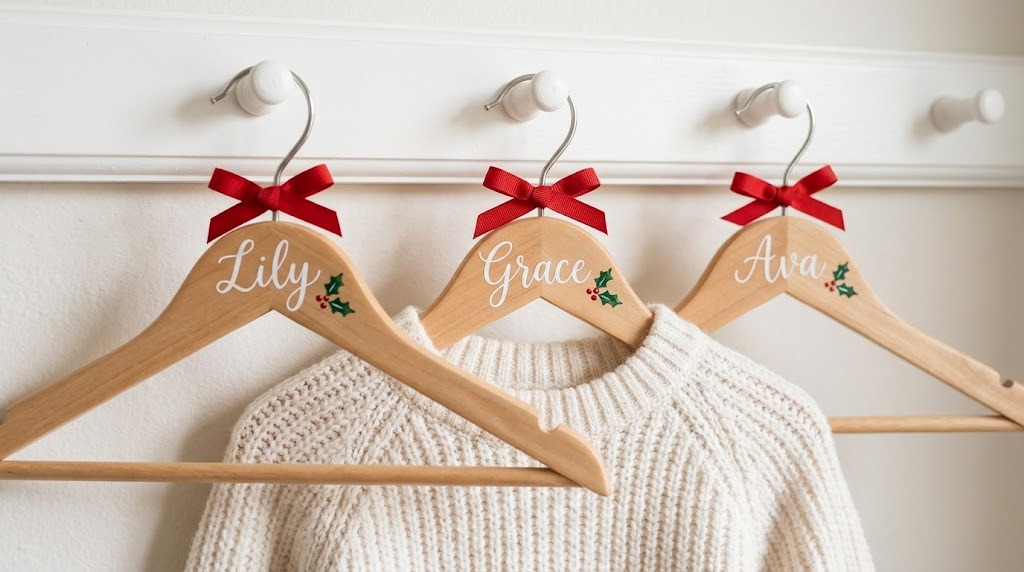
Plain wooden hangers with a name painted on them make a lovely gift for a little girl’s first Christmas dress, a bride or a guest room. Write the name in a pretty script with a paint pen, then add a tiny painted holly sprig or a bow. A set of family hangers for the Christmas outfits is a sweet new tradition. They take only minutes each, they cost less than most DIY Wooden Christmas Gifts on this list, and they look so thoughtful hanging in the closet. Whose name would you write first?
You will need: Plain wooden hangers, a white or gold paint pen, a pencil, acrylic paint for small details, clear sealer, ribbon.
How to make it: 1. Sketch the name lightly in pencil along the hanger. 2. Trace it with the paint pen and add small details. 3. Seal it and tie a ribbon bow at the hook.
A Decoupaged Wooden Keepsake Box
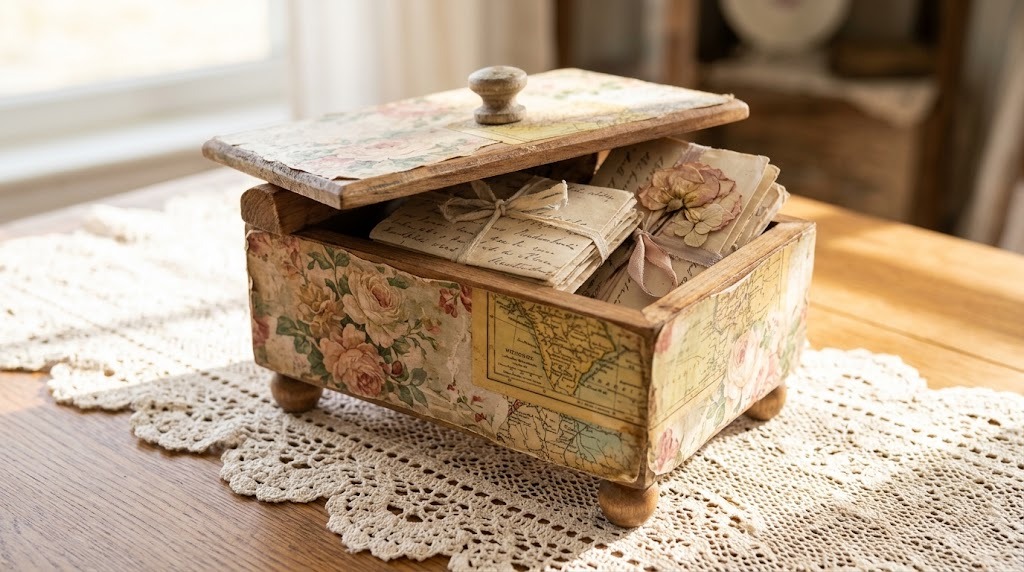
A small wooden box covered in pretty paper becomes the place where someone keeps letters, ticket stubs and little treasures. Decoupage is the easiest way to do it: brush on decoupage glue, smooth on napkins, maps or old sheet music, and brush another coat on top. Add small wooden feet or a knob for a finished look. It is one of the most personal DIY Wooden Christmas Gifts because you can choose paper that fits the person. Fill it with a note before you wrap it. What would you tuck inside?
You will need: A small unfinished wooden box, decoupage glue, patterned paper napkins or printed paper, a foam brush, scissors, small wooden knob or feet, wood glue.
How to make it: 1. Paint the inside and edges of the box and let it dry. 2. Brush glue on the outside, lay the paper on and smooth it, then trim the edges. 3. Add a top coat of glue and glue on the knob or feet.
A Painted Wooden Crate Full of DIY Wooden Christmas Gifts
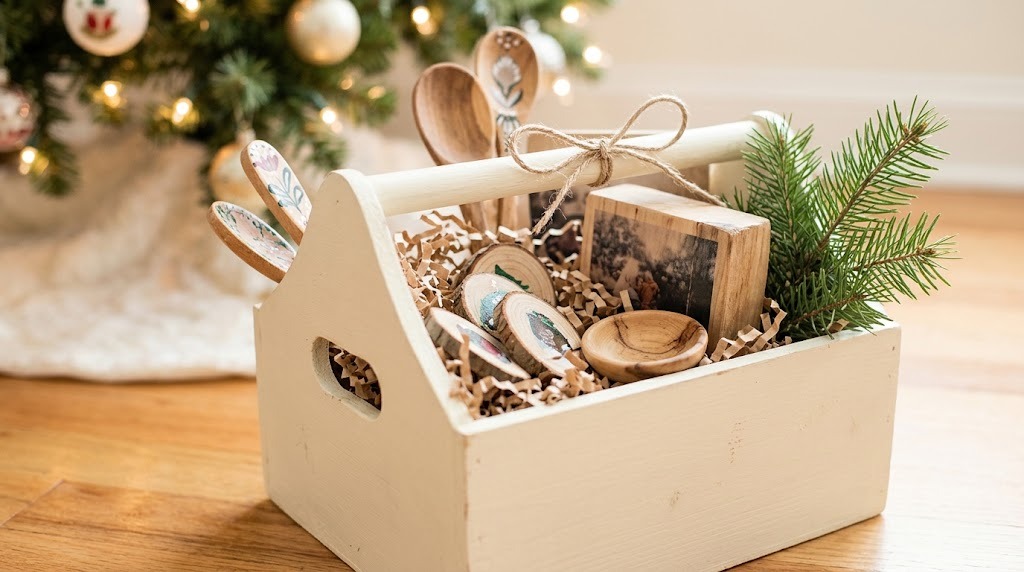
Here is a fun way to give several small gifts at once. Paint a small wooden crate from the craft store, stencil the family name on the side, and fill it with spoons, magnets and a photo block. The crate becomes part of the gift and can hold blankets, mail or plants afterward. If you get hooked on working with wood, our list of wood crafts to sell has more ideas for craft fairs. Learn more about how oils, waxes and sealers protect wood in this guide to wood finishing. Who on your list would love a whole crate of handmade surprises?
You will need: A small unfinished wooden crate, acrylic paint, letter stencils, a stencil brush, clear sealer, shredded paper filler, your handmade gifts.
How to make it: 1. Sand and paint the crate and let it dry. 2. Stencil a name or a word like Merry on one side and seal it. 3. Fill it with paper shreds and arrange the gifts inside.