Decoupage Christmas Plates: 15 Thrift Store Glass Plates Turned Into Holiday Treasures
Decoupage Christmas plates are the thrift store flip everyone is talking about this season, and once you see one you will want a whole stack. You pick up a plain clear glass plate for a dollar or two, glue a pretty holiday napkin to the back, and suddenly it looks like fancy china from a boutique. A thrifted glass plate makeover on Instagram passed 331,000 likes and 2,600 shares in just two days this week, and the comments are full of people asking for a Christmas version. So here it is. Below are 15 ideas, from vintage Santa prints to gold leaf rims, a sparkly snowflake plate and a sweet gift stack for the neighbors. They are meant for display, not for eating from, and they look wonderful on walls, tables and shelves. Grab a napkin you love and let’s get started..
Decoupage Christmas Plates Start With a Holly Napkin
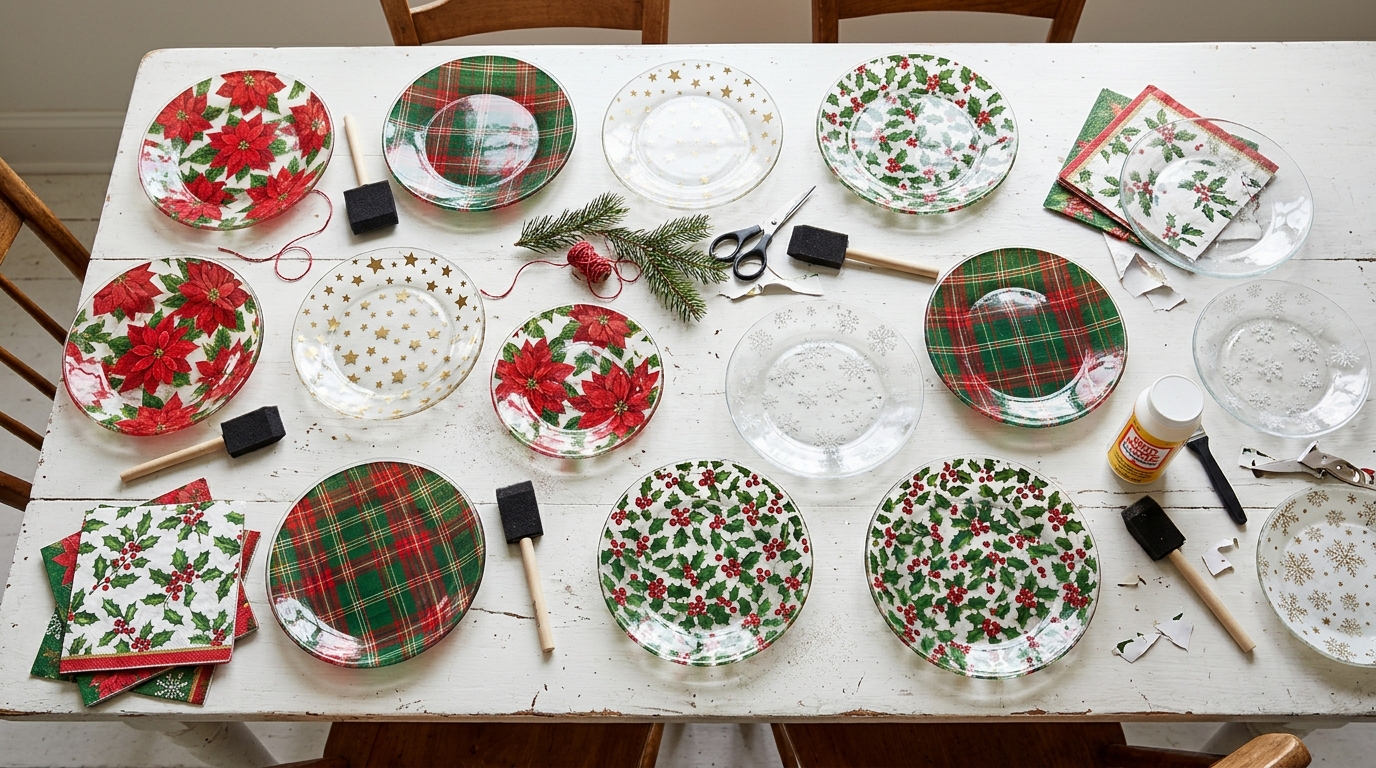
Every one of these plates begins the same simple way, and the classic holly napkin is the best place to start. Clear glass plates are easy to find at thrift stores, often for a dollar or two. The trick is that the napkin goes on the back, printed side facing the glass, so the pattern shows through the front with a glossy shine. Napkins are thin, so they melt into the glue and look almost painted on. Once you have made one, decoupage Christmas plates become hard to stop making, so let’s start with the basics..
You will need: A clear glass plate, a festive paper napkin, rubbing alcohol and a cloth, decoupage glue, a soft foam brush, fine sandpaper, white or cream acrylic paint and a clear spray sealer.
How to make it: 1. Clean the back of the plate with rubbing alcohol, then peel off the plain bottom layers of the napkin so only the printed layer is left. 2. Brush glue on the back of the plate, lay the napkin print side down and smooth it from the center out with your fingers. 3. Once dry, sand away the extra napkin at the edge, paint a backing coat of white or cream and seal it outdoors or in a well aired room.
Vintage Santa Print Plate
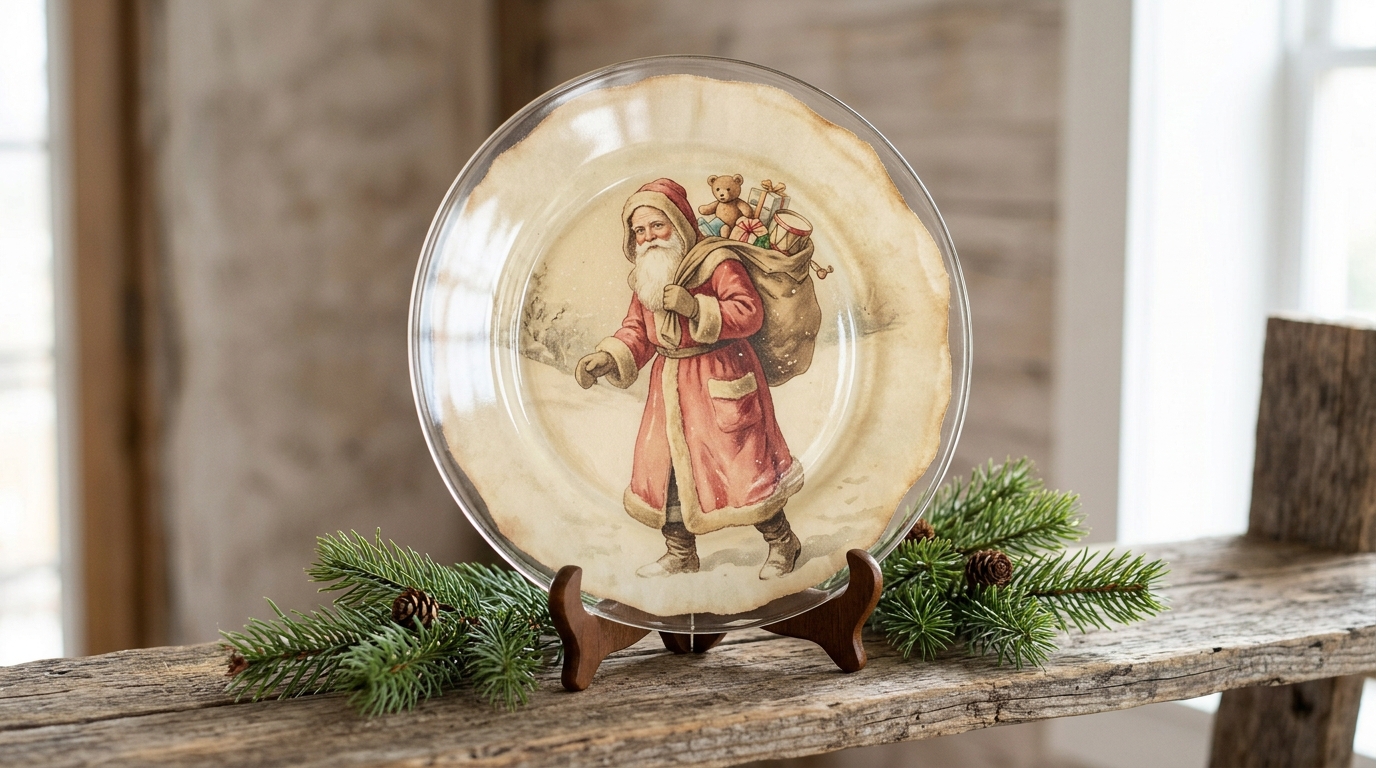
An old fashioned Santa with rosy cheeks and a sack of toys gives a plain plate instant storybook charm. Look for napkins with soft vintage colors, like faded red, cream and sage, because they look the most like antique china. A cream backing paint behind the napkin makes the colors feel warm and old, while bright white makes them pop. Stand the plate on a little wooden plate stand on a shelf or a kitchen windowsill. It is the kind of piece people pick up and ask where you found it. Will you tell them it cost two dollars?
You will need: A clear glass plate, a vintage style Santa napkin, decoupage glue, a foam brush, cream acrylic paint, clear sealer and a small plate stand.
How to make it: 1. Center the Santa picture on the back of the plate before you add any glue. 2. Glue it down and smooth out bubbles gently with your fingertips. 3. Paint the back cream, let it dry, seal it and set it on the stand.
Decoupage Christmas Plates as Poinsettia Chargers
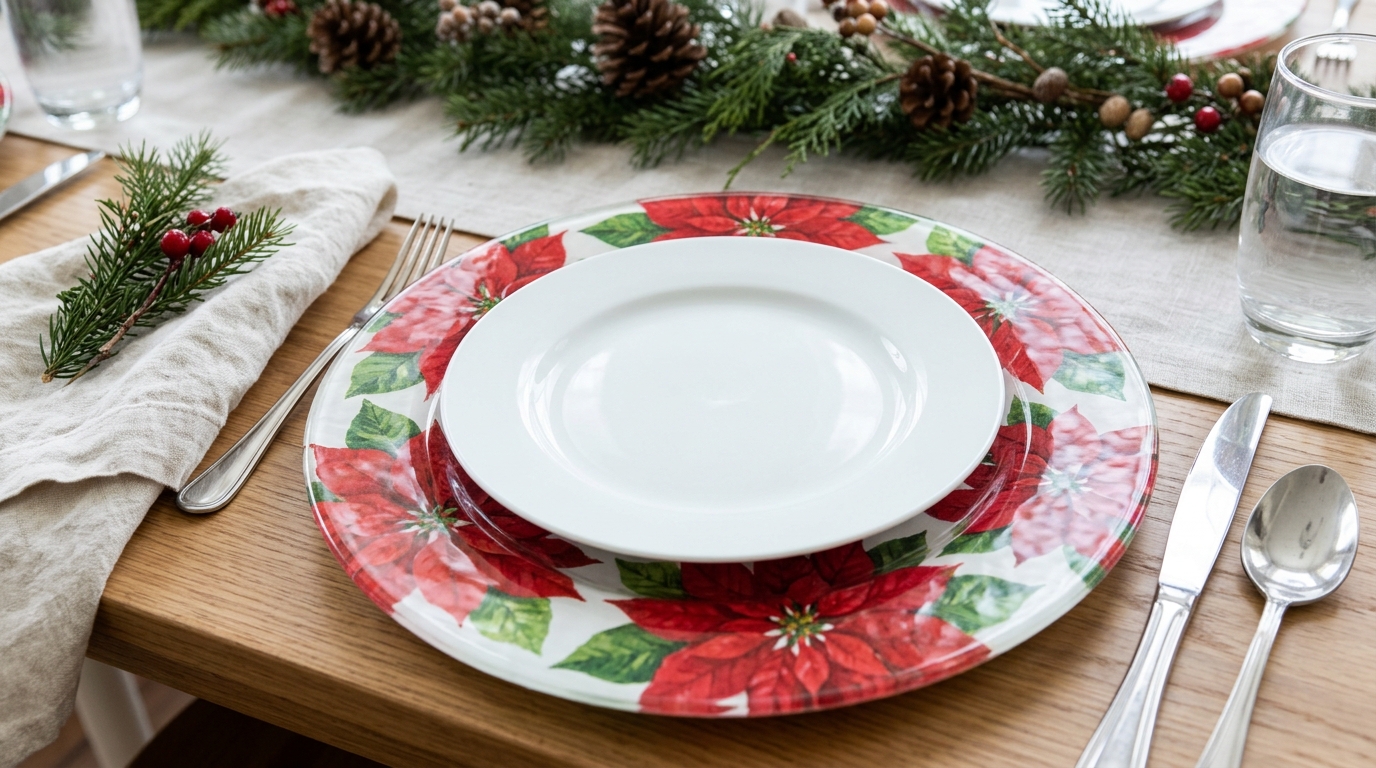
Big glass chargers are some of the cheapest finds at thrift stores, and they make the most dramatic decoupage Christmas plates of all. Use a napkin with large red poinsettias and the whole table suddenly looks dressed for a party. Set a plain white dinner plate on top so the flowers frame it like a wreath. Because the decoupage is only a decoration, the charger should stay under the real plate and never go in the dishwasher. Just wipe the top gently with a soft damp cloth. How many places will you set this year?
You will need: Large clear glass charger plates, poinsettia napkins, decoupage glue, a wide foam brush, white acrylic paint and clear sealer.
How to make it: 1. Since chargers are big, glue down two napkins and overlap them slightly where they meet. 2. Smooth each piece well, let it dry and sand the rim clean. 3. Paint the back white, seal it and pair it with a white dinner plate on top.
Gold Leaf Rim Plate for Extra Shine
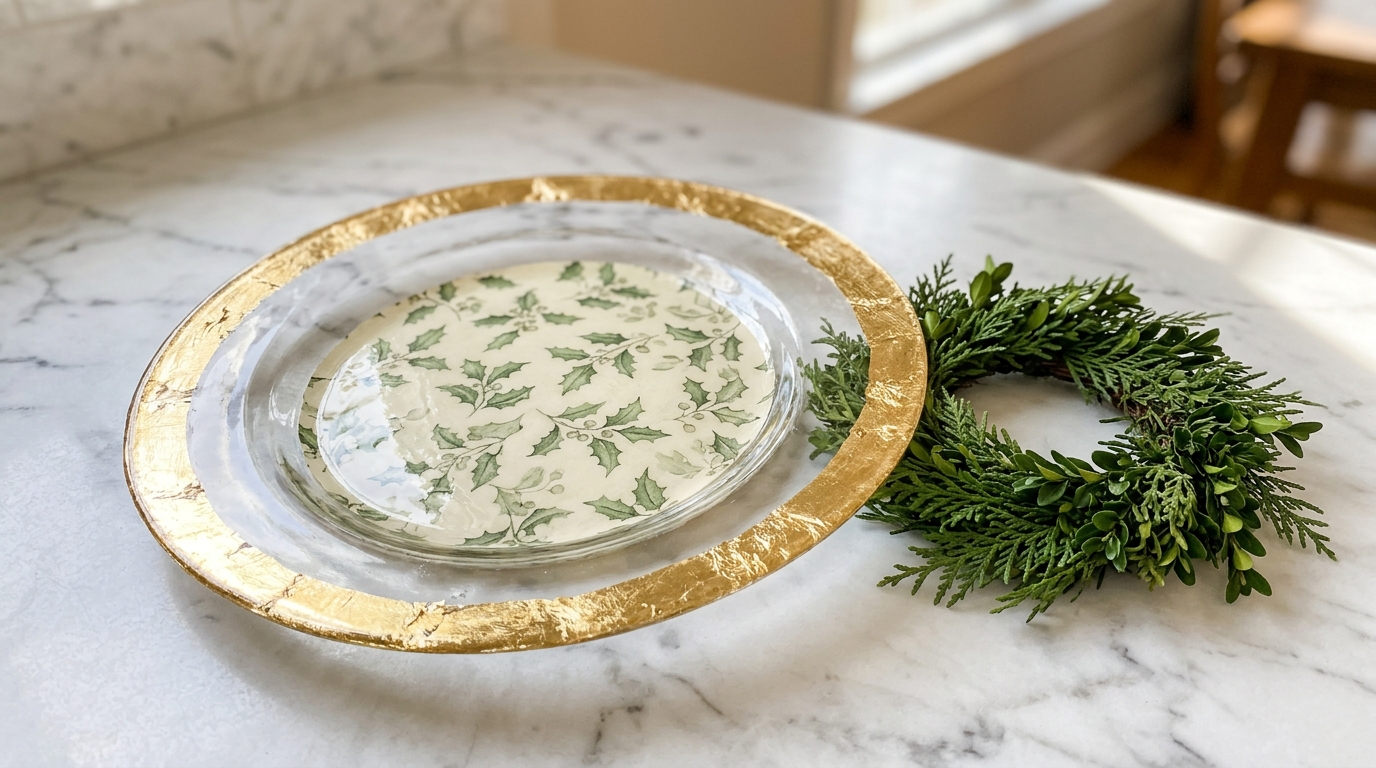
A little gold makes everything feel more special. On this plate, the holly napkin covers the center, and crinkled gold leaf runs all the way around the rim. Gold leaf sheets are very thin and a bit fussy, but that is part of the fun, because the little cracks and wrinkles look lovely through the glass. You do not need to be neat. A messy, broken gold edge actually looks more like an old heirloom. Set it on a marble counter or a white shelf and watch it catch the light. Gold or silver for yours?
You will need: A clear glass plate, a holly napkin circle cut smaller than the center, decoupage glue, gold leaf sheets, gilding adhesive, a soft dry brush, paint and sealer.
How to make it: 1. Glue the napkin circle to the center of the back and let it dry. 2. Brush gilding adhesive around the rim, wait until it is tacky and press on the gold leaf. 3. Brush away the loose flakes, paint the back and seal the whole thing.
Red and Green Plaid Plates for a Cozy Table
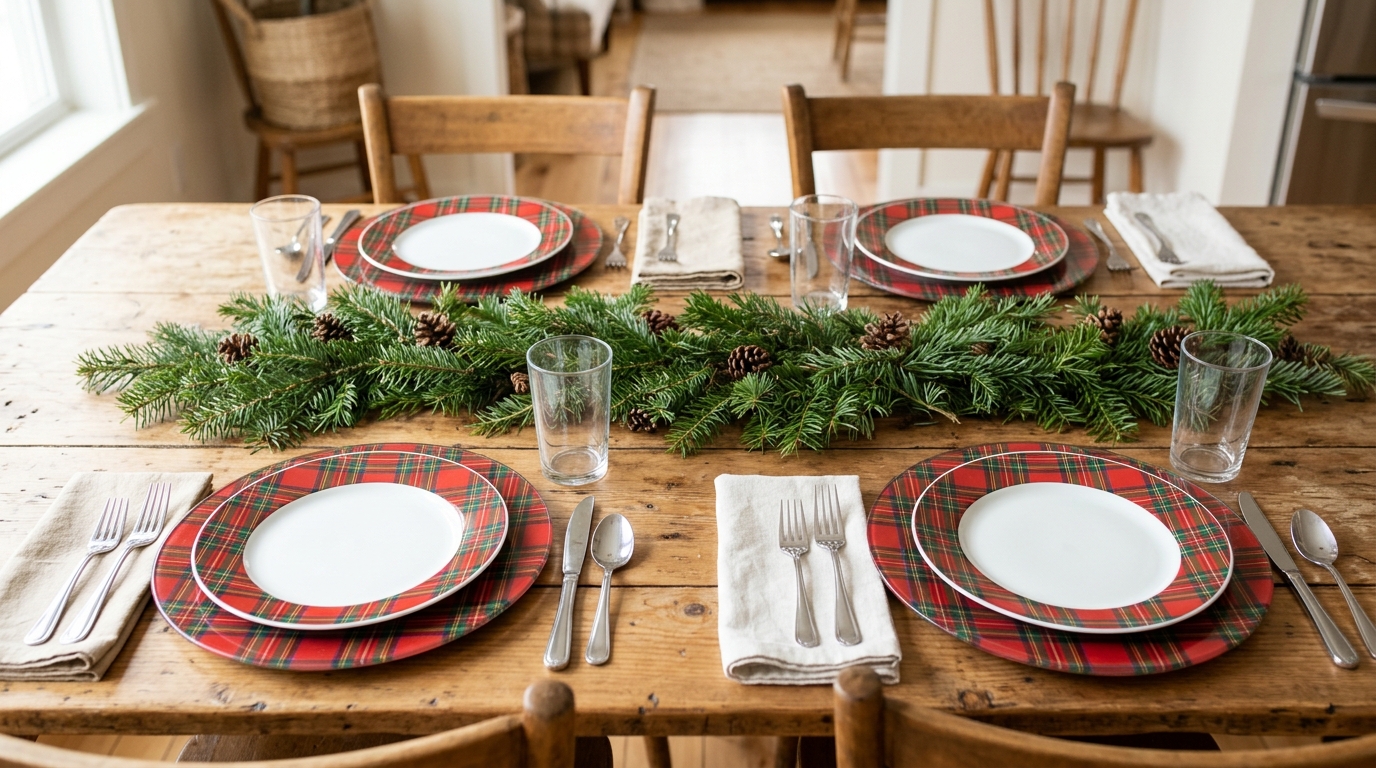
Tartan plaid is one of the most loved holiday patterns, and it is everywhere in napkin aisles right now. On glass, the red and green lines look crisp and clean, like a fancy cabin dinner set. Make four or six to match and use them as chargers under white plates, with a pine runner down the middle of the table. Plaid also hides small wrinkles really well, which makes it a great choice for your very first plates. If you love that rustic feeling, which other holiday color would you pair with it?
You will need: Matching clear glass plates, red and green plaid napkins, decoupage glue, a foam brush, fine sandpaper, cream paint and clear sealer.
How to make it: 1. Line up the plaid stripes on the back of each plate so they all face the same way. 2. Glue, smooth and let each plate dry fully. 3. Sand the edges, paint a cream backing and seal them before you set the table.
Snowy Winter Village Scene Plate
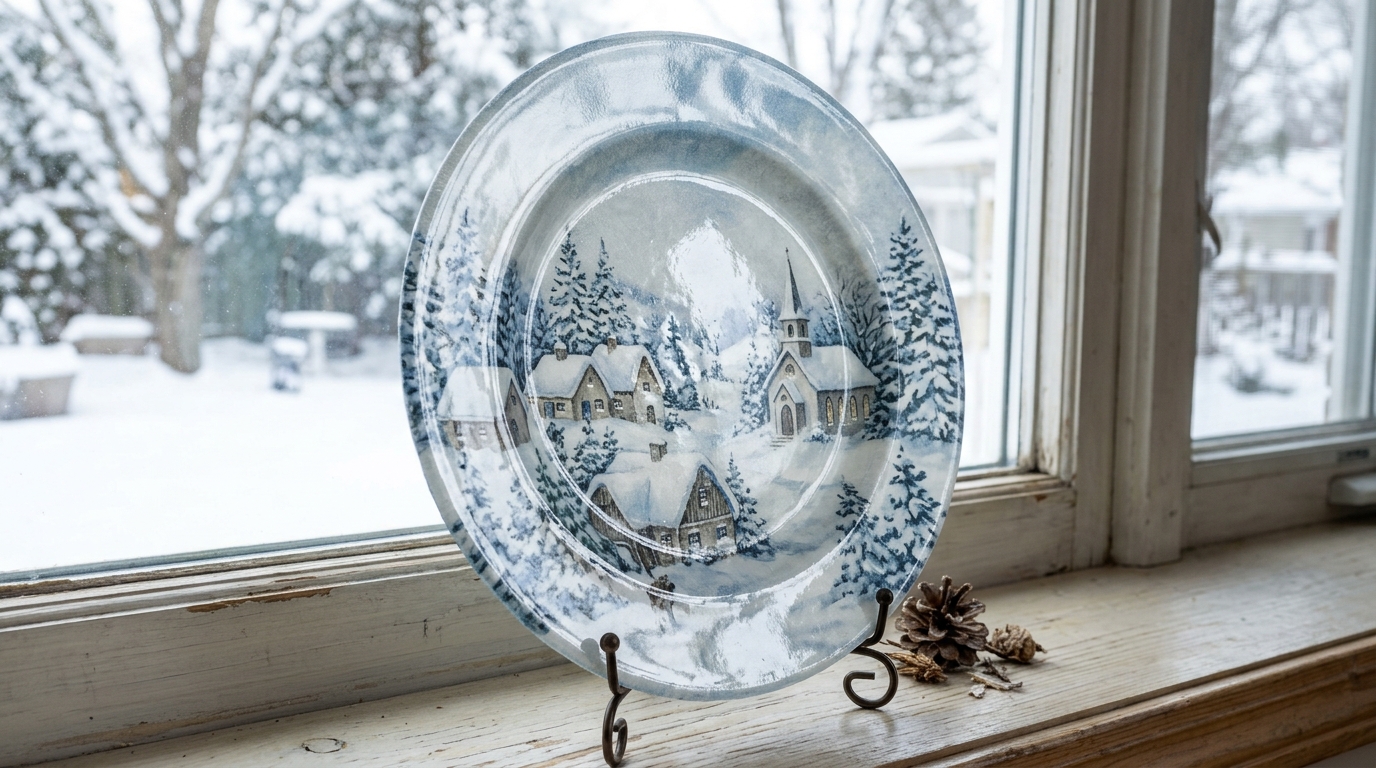
Some napkins have little winter scenes on them, with snowy rooftops, pine trees and a church steeple. Put one on a glass plate and it looks just like old blue and white china that a grandmother might have kept in her cabinet. These calm blue tones work long after Christmas, so you can leave this plate out all through January. Stand it on a windowsill with snow outside, or mix it with real blue and white dishes on a shelf. It is gentle, peaceful and very pretty. Which winter scene would you pick?
You will need: A clear glass plate, a blue and white winter village napkin, decoupage glue, a foam brush, white acrylic paint, sealer and a plate stand.
How to make it: 1. Trim the napkin so the village scene sits in the middle of the plate. 2. Glue it on the back, smoothing slowly so the little houses do not stretch. 3. Paint the back white, seal it and stand it in a bright window.
A Display Plate for Santa’s Cookies
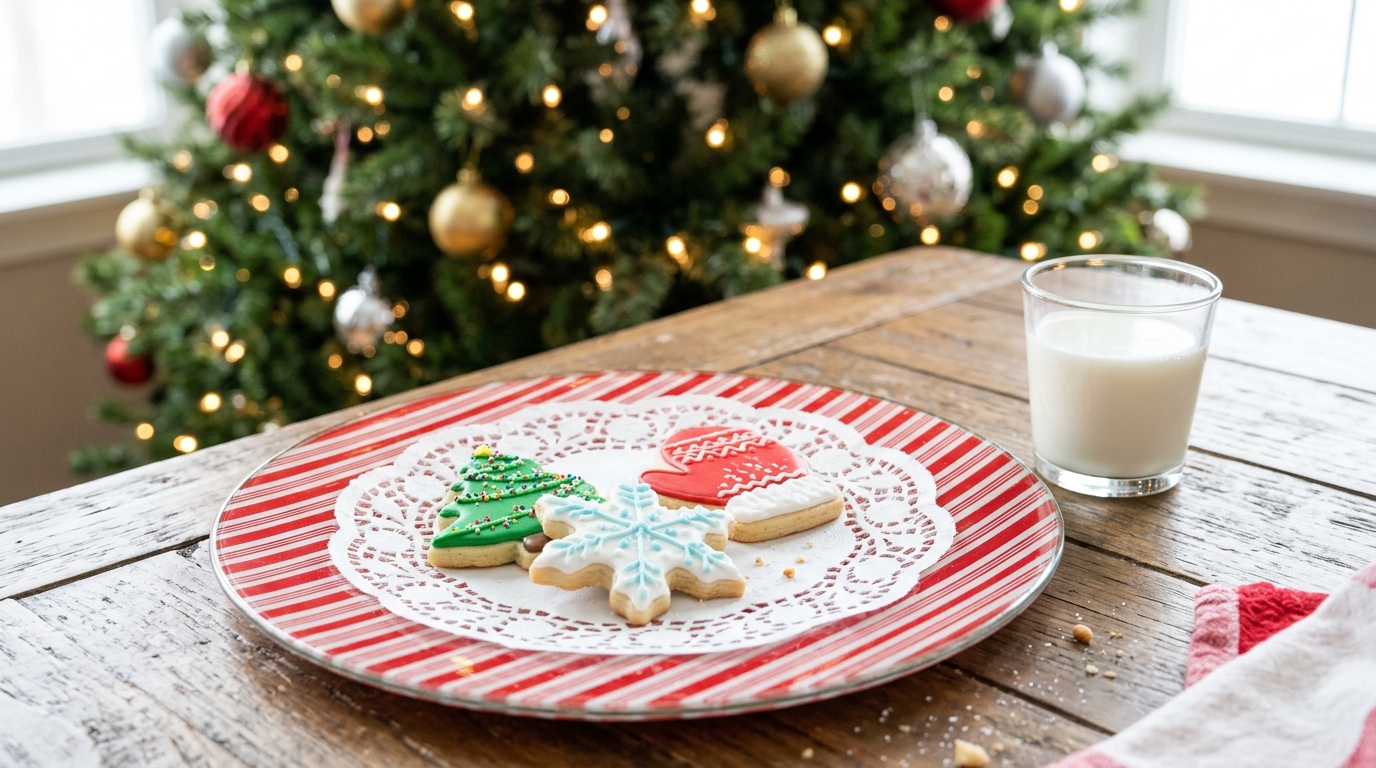
Christmas Eve deserves a special plate, and this candy cane one is made just for the cookies left out for Santa. Since decoupaged plates are for decoration only, place a paper doily on top so the cookies sit on the doily and never on the plate. It makes a cute photo next to the tree, and the kids will look forward to bringing it out every year. Afterward, wipe it gently and pack it away with the ornaments. It could easily become a family tradition. What cookies will Santa find on yours?
You will need: A clear glass plate, a red and white candy cane napkin, decoupage glue, a foam brush, white paint, clear sealer and paper doilies.
How to make it: 1. Glue the candy cane napkin to the back of the plate and smooth it flat. 2. Paint the back white and seal it once it is dry. 3. On Christmas Eve, lay a doily on top and set out the cookies and a glass of milk.
Decoupage Christmas Plates That Sparkle Like Snow
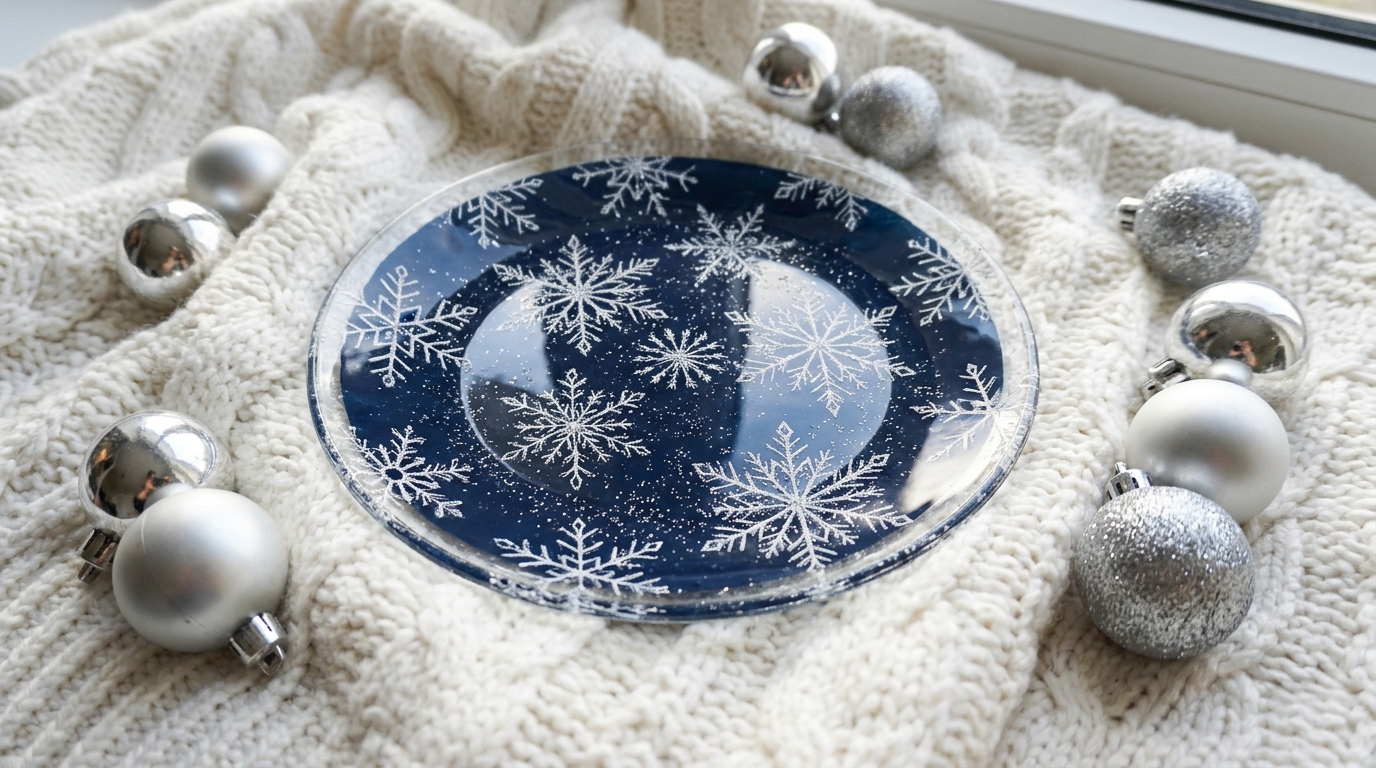
This one is all about the frosty sparkle. A navy napkin with white snowflakes goes on first, then a light dusting of fine silver glitter on the back before the paint. When you turn the plate over, the glitter twinkles through the glass like fresh snow under a streetlight. It looks gorgeous next to silver ornaments or on a white winter mantel. Decoupage Christmas plates like this one are also lovely for anyone who prefers cool blue tones over red and green. Would you add more glitter or keep it subtle?
You will need: A clear glass plate, a navy snowflake napkin, decoupage glue, fine silver glitter, a foam brush, navy or white acrylic paint and clear sealer.
How to make it: 1. Glue the snowflake napkin to the back of the plate and let it dry. 2. Brush on a thin layer of glue and sprinkle the silver glitter over it, tapping off the extra. 3. Once dry, paint the back and seal it well so the glitter stays put.
Little Green Trees on a Cream Plate
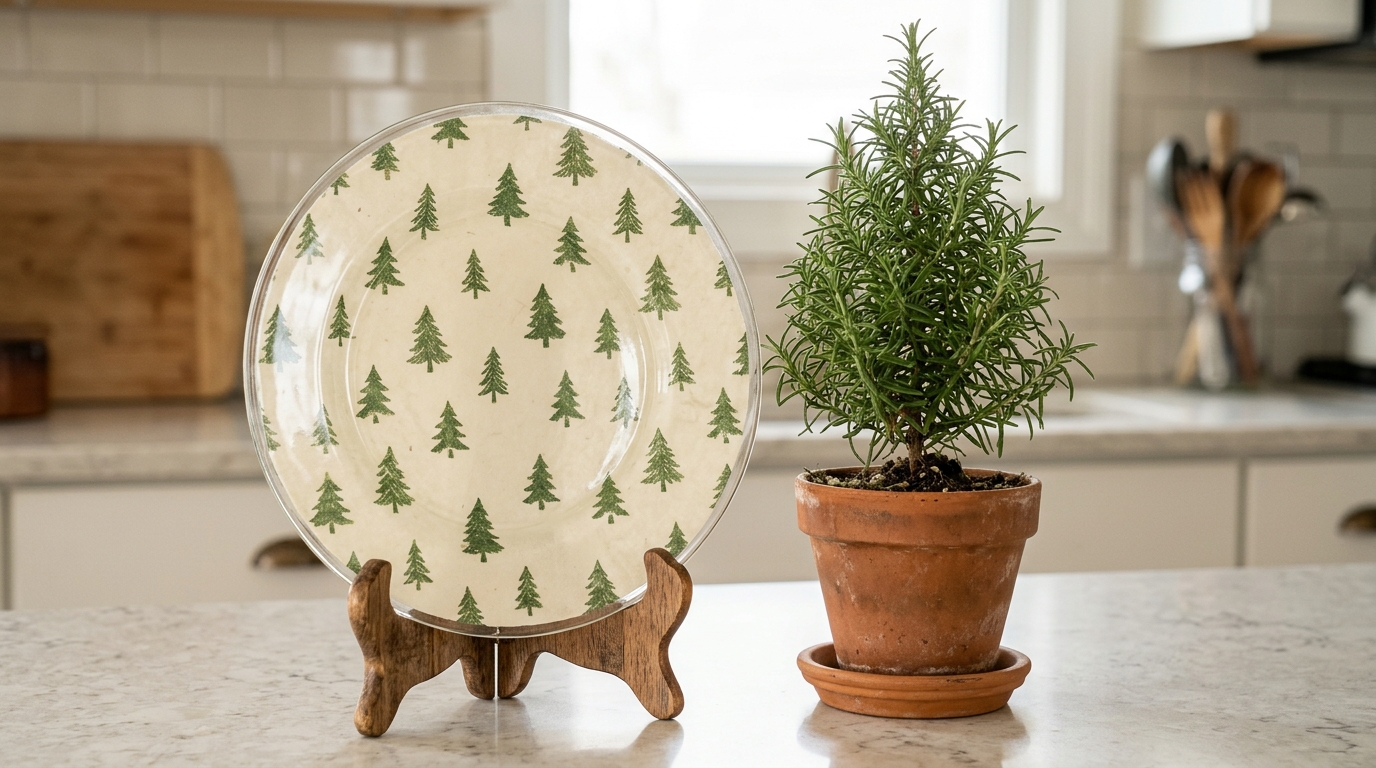
Not every holiday plate needs to shout Christmas. A cream napkin with rows of tiny green trees feels soft and simple, almost like a winter forest. It sits nicely on a kitchen counter with a little potted rosemary tree, and it fits in with almost any style of home, from farmhouse to modern. This is also a smart pick if you want to keep a plate out from December through February. Small patterns are very easy to line up, so this is a great beginner project. Where would yours look best?
You will need: A clear glass plate, a small tree pattern napkin, decoupage glue, a foam brush, cream acrylic paint, sandpaper and clear sealer.
How to make it: 1. Cut the napkin a little larger than the plate and remove the plain layers. 2. Glue it to the back and smooth it out with your fingers. 3. Sand the extra napkin off the edge, paint the back cream and seal it.
Tiny Holly Trinket Dish for Rings
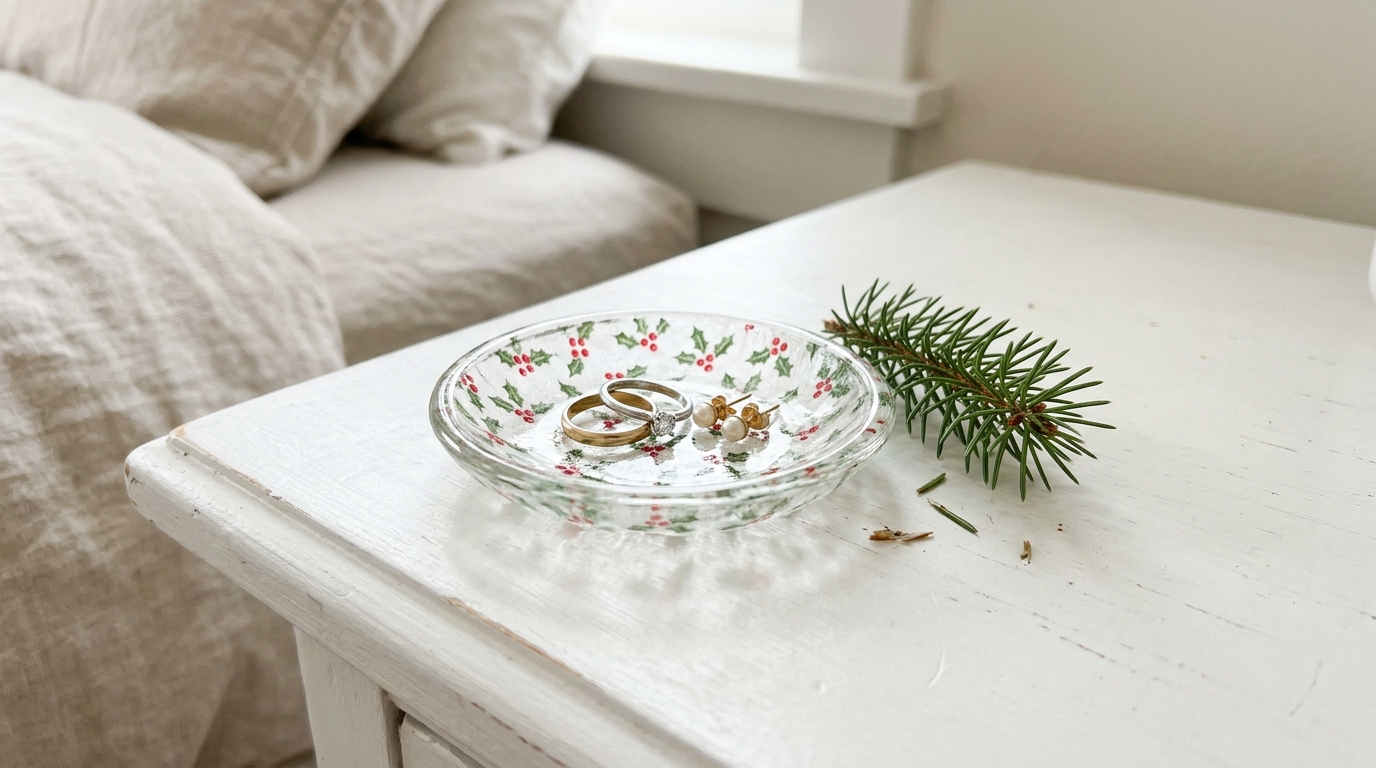
Small glass dishes from the thrift store make perfect little trinket trays. A tiny holly pattern on the back turns one into a spot for rings, earrings and hair clips by the bed or the sink. It only takes a scrap of napkin, so you can use up the pieces left over from bigger plates. Make a few and you have quick little gifts for friends, teachers and coworkers. If you like small handmade presents, you will find more ideas in our list of thrift store Christmas gifts. Who would you make one for first?
You will need: A small clear glass dish, napkin scraps with a small holly print, decoupage glue, a small brush, white paint and clear sealer.
How to make it: 1. Cut a napkin circle a little bigger than the dish and remove the plain layers. 2. Glue it to the underside, pressing it gently into the curve. 3. Trim the edge, paint the underside white and seal it.
Two Tier Stand for Ornaments
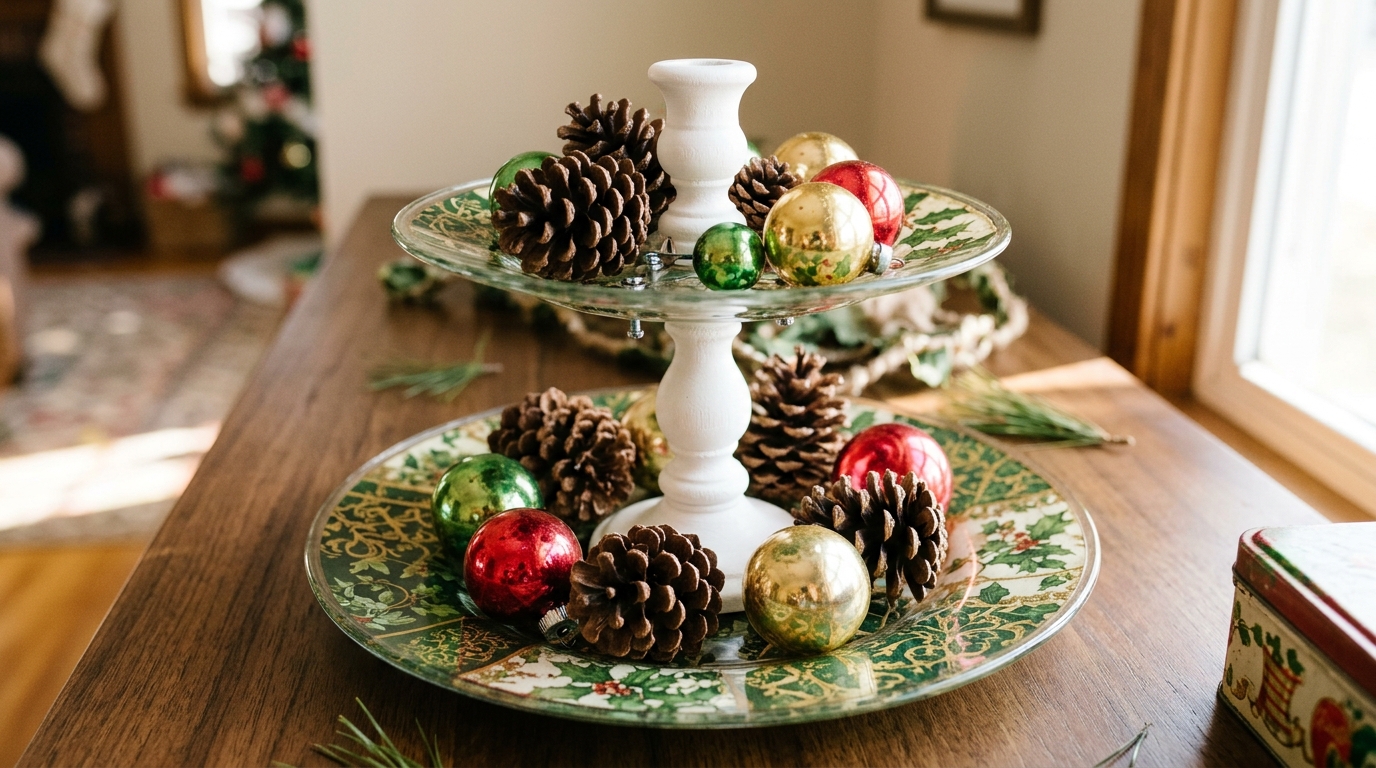
Join two decoupaged plates with a short post and you have a pretty tiered stand. Fill it with shiny glass ornaments, pine cones and little sprigs of greenery for a centerpiece that costs almost nothing. A large plate on the bottom and a smaller one on top gives the best shape. Use strong glass glue and let a grown up handle the drilling or gluing, then give it a full day to set. Because it is a display piece, it is made for ornaments and decor, not for serving food. What would you pile on yours?
You will need: One large and one small decoupaged glass plate, a short glass candlestick or wooden post, strong glass and ceramic glue (adult help), ornaments and pine cones.
How to make it: 1. Finish and seal both plates first. 2. With adult help, glue the post to the center of the large plate, then glue the small plate on top, using the glue’s own safety directions. 3. Let it cure for a full day before you fill it with ornaments.
Decoupage Christmas Plates on a Kitchen Wall
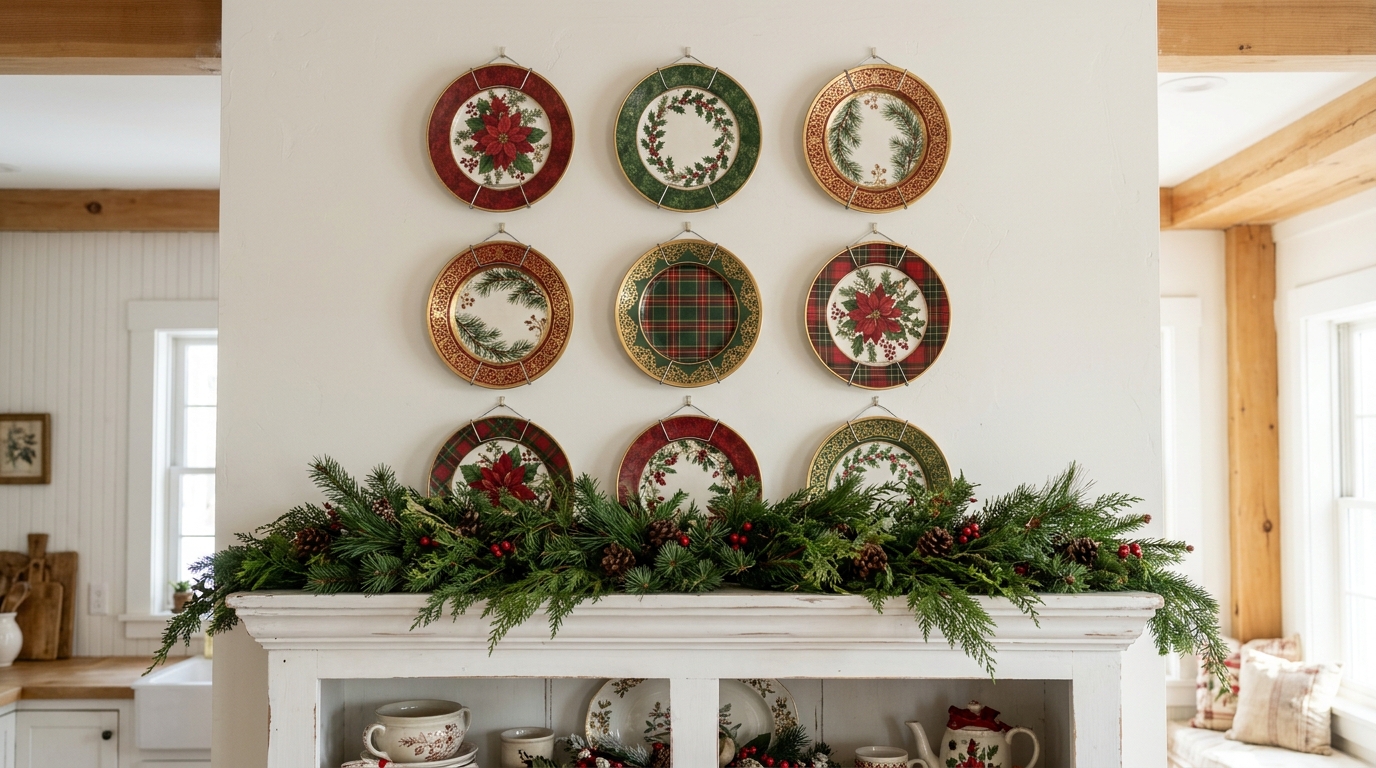
Once you have a few plates, it is hard to keep them in a cupboard. A plate wall above a hutch or a sideboard is a classic farmhouse look, and decoupage Christmas plates make it festive in one afternoon. Mix red, green and gold patterns, keep the spacing even and lay everything out on the floor first so you can move things around. Use proper plate hangers or adhesive plate discs made for the weight. Add a strand of greenery along the top of the hutch to tie it all together. How many plates will fit on your wall?
You will need: Six to nine finished plates, plate hangers or adhesive plate discs, a pencil, a tape measure, a level and some greenery for the hutch.
How to make it: 1. Lay the plates on the floor in a grid and trace each one on paper. 2. Tape the paper shapes to the wall so you can check spacing with a level. 3. Fit each plate with a hanger, hang it where its paper shape was and remove the paper.
A Fun Project to Make With the Kids

Kids love this craft because the magic happens right in their hands. They can choose the napkin, brush on the glue and smooth the pattern down with their fingers, then flip the plate over to see it shine through the glass. A grown up should handle the sanding of the edges and any spray sealer, which belongs outdoors or in a room with open windows. Let little ones pick a favorite pattern, and the finished plate becomes a keepsake that comes out every December. What napkin would your kids choose?
You will need: Clear glass plates with smooth edges, holiday napkins, decoupage glue, foam brushes, a plastic tablecloth and acrylic paint for the backing.
How to make it: 1. Cover the table and help the kids separate the printed napkin layer. 2. Let them brush glue on the back of the plate and smooth the napkin down from the middle. 3. An adult sands the edge and seals the plate once the paint is dry.
Decoupage Christmas Plates as a Neighbor Gift
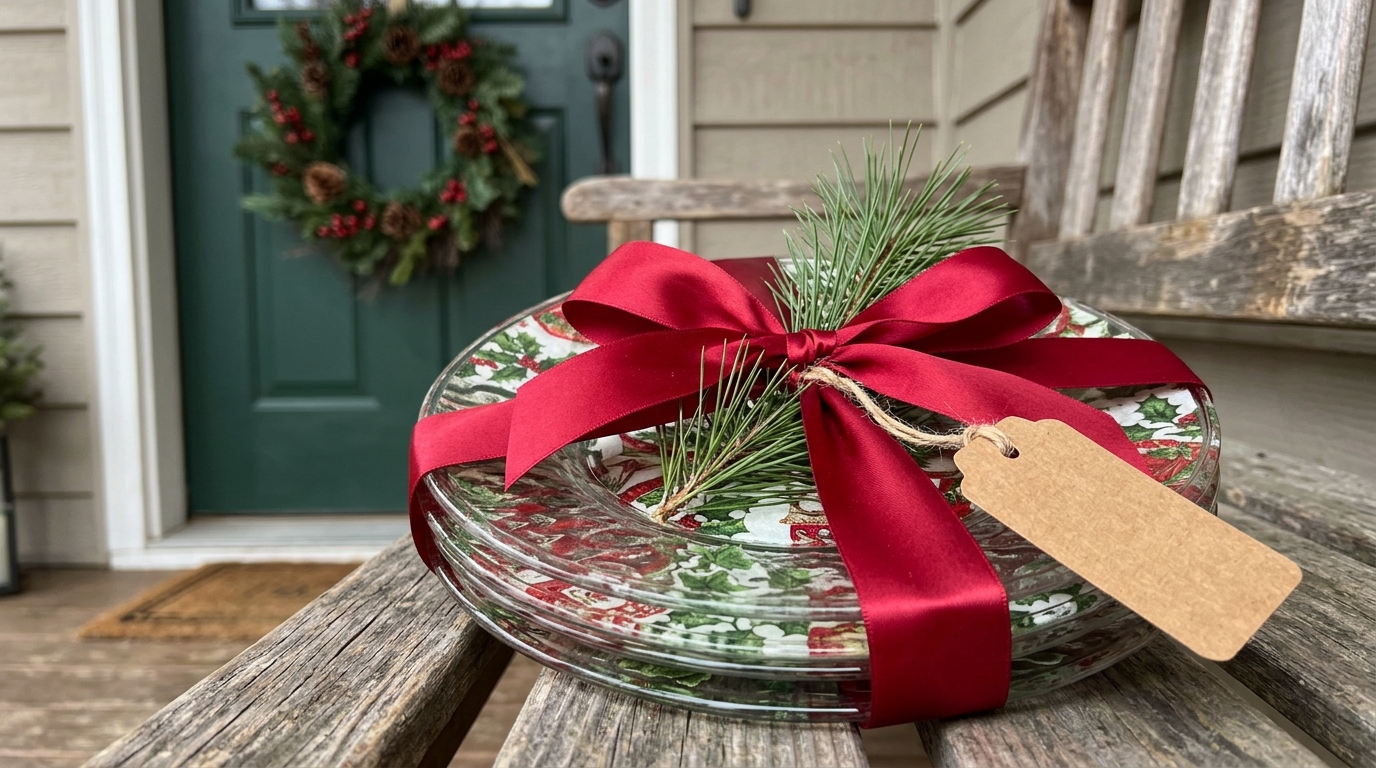
A stack of three handmade plates tied with a wide red ribbon is a gift people truly remember. Mix a few patterns, slip a sprig of pine under the bow and add a kraft paper tag with a short care note. Write that the plates are for decoration only, and that they should be wiped gently and kept out of the dishwasher. It is a thoughtful, budget friendly present for neighbors, hosts or a favorite aunt who loves pretty dishes. Making decoupage Christmas plates in a batch also saves time. Who is on your gift list?
You will need: Three finished plates, a wide satin ribbon, a sprig of pine or faux greenery, a kraft paper tag and a pen.
How to make it: 1. Stack the plates with a sheet of tissue paper between each one. 2. Tie the ribbon around the stack both ways and finish with a big bow. 3. Tuck in the greenery and write a short care note on the tag.
Decoupage Christmas Plates Finale: Before and After
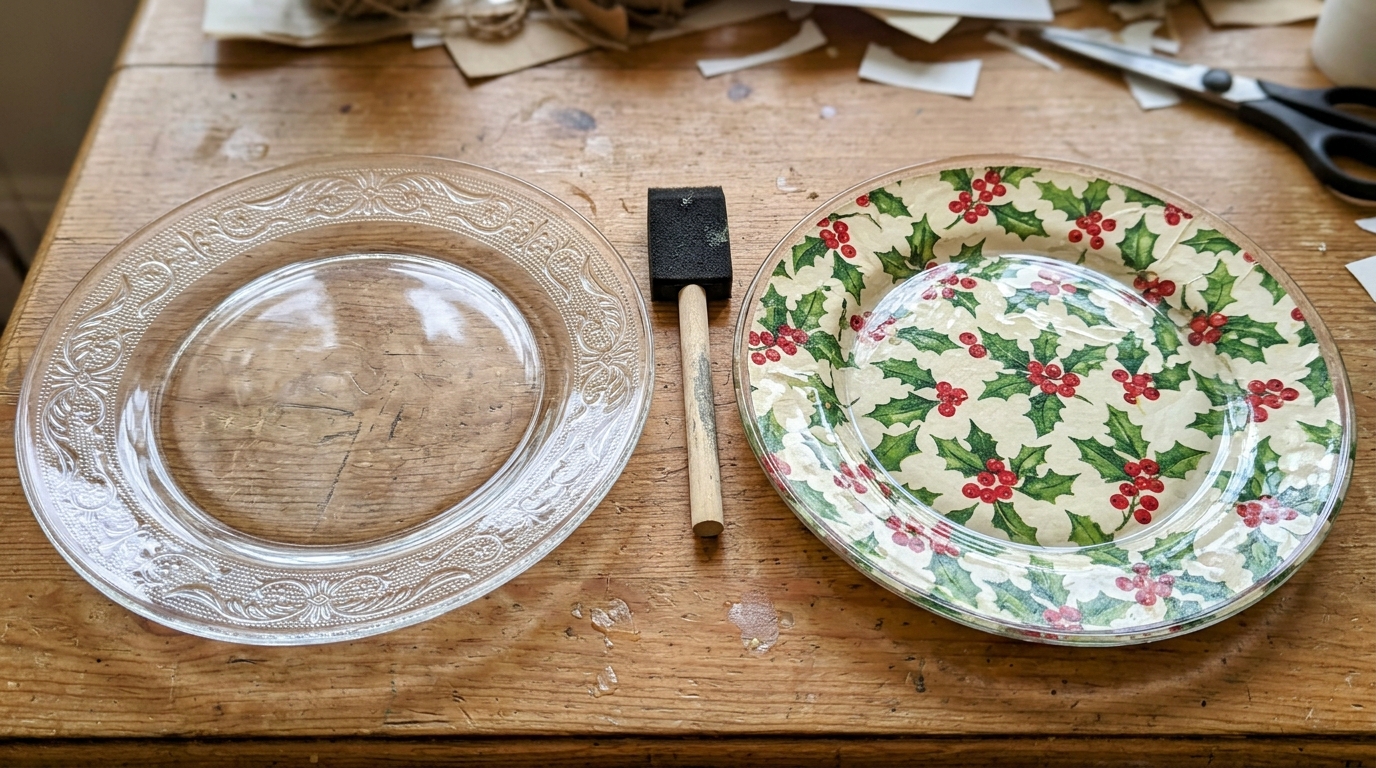
Here is the moment that makes this craft so popular. On the left is a plain glass plate straight from the thrift store shelf. On the right is the very same style plate after one napkin, a little glue and a coat of paint. That simple change is why a thrifted glass plate makeover on Instagram gathered more than 331,000 likes in two days. Decoupage Christmas plates prove that you do not need a big budget to make something lovely for the holidays. Your next thrift store trip could start a whole new tradition. Which plate will you make first?
You will need: A plain clear glass plate, your favorite holiday napkin, decoupage glue, a foam brush, sandpaper, acrylic paint and clear sealer.
How to make it: 1. Take a before photo of your thrift store plate. 2. Clean it, glue the napkin to the back, sand the edge and paint the backing. 3. Seal it, let it cure and take your after photo to compare.