Vintage Christmas Ornaments: 15 Grandma Style Ideas That Bring Back the Old Magic
Vintage Christmas ornaments have a way of bringing back the whole feeling of childhood in one glance. That faded pink glass ball, the silver one with the worn spot, the little bird with the clip on its feet. They hung on Grandma’s tree for years, and now many of them sit in a dusty box because nobody knows what to do with them. The good news is that old ornaments look stunning when you give them a new place to shine. People have been making glass Christmas ornaments for more than 150 years, and the old ones have a soft, warm glow new ones cannot copy. You can also find them for a few dollars at yard sales and thrift stores. Here are our favorite ways to show them off..
Vintage Christmas Ornaments All Around the Room
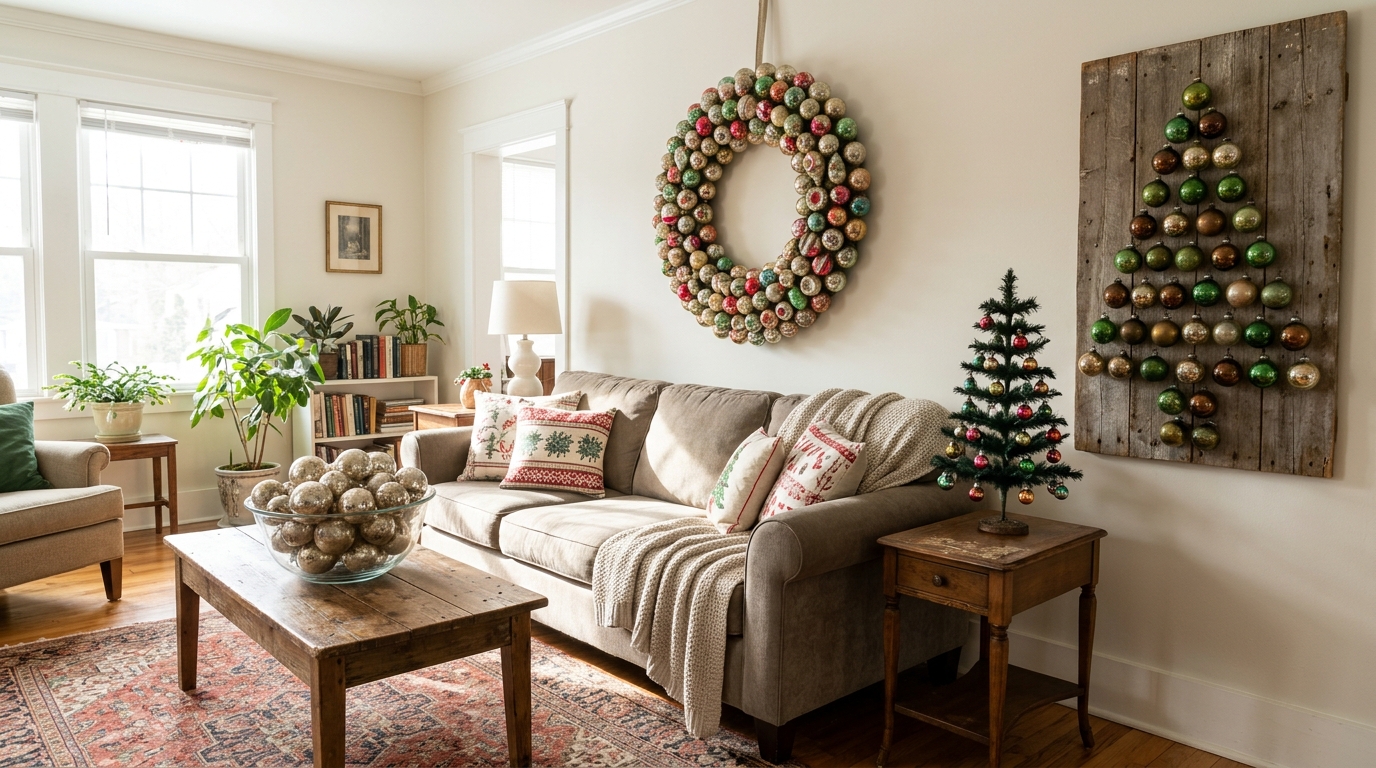
This cozy room shows how far one box of old ornaments can go. A tree shape made of glass balls hangs on the wall, a bowl of mercury glass sits on the coffee table, a wreath of pastel ornaments glows over the sofa, and a little feather tree holds the tiniest pieces. Nothing here is expensive, and much of it came from family boxes and thrift stores. Spreading ornaments around the room makes the whole house feel like Christmas, not just the tree. Which display would you try first..
You will need: a box of old glass ornaments, bowls and jars, a wooden board, a wreath form, a small feather tree, ribbon.
How to make it: 1. Sort your ornaments by color and size. 2. Pick two or three displays from this list. 3. Save the most fragile ones for spots where nobody will bump them.
Ornament Wall Tree on a Wooden Board
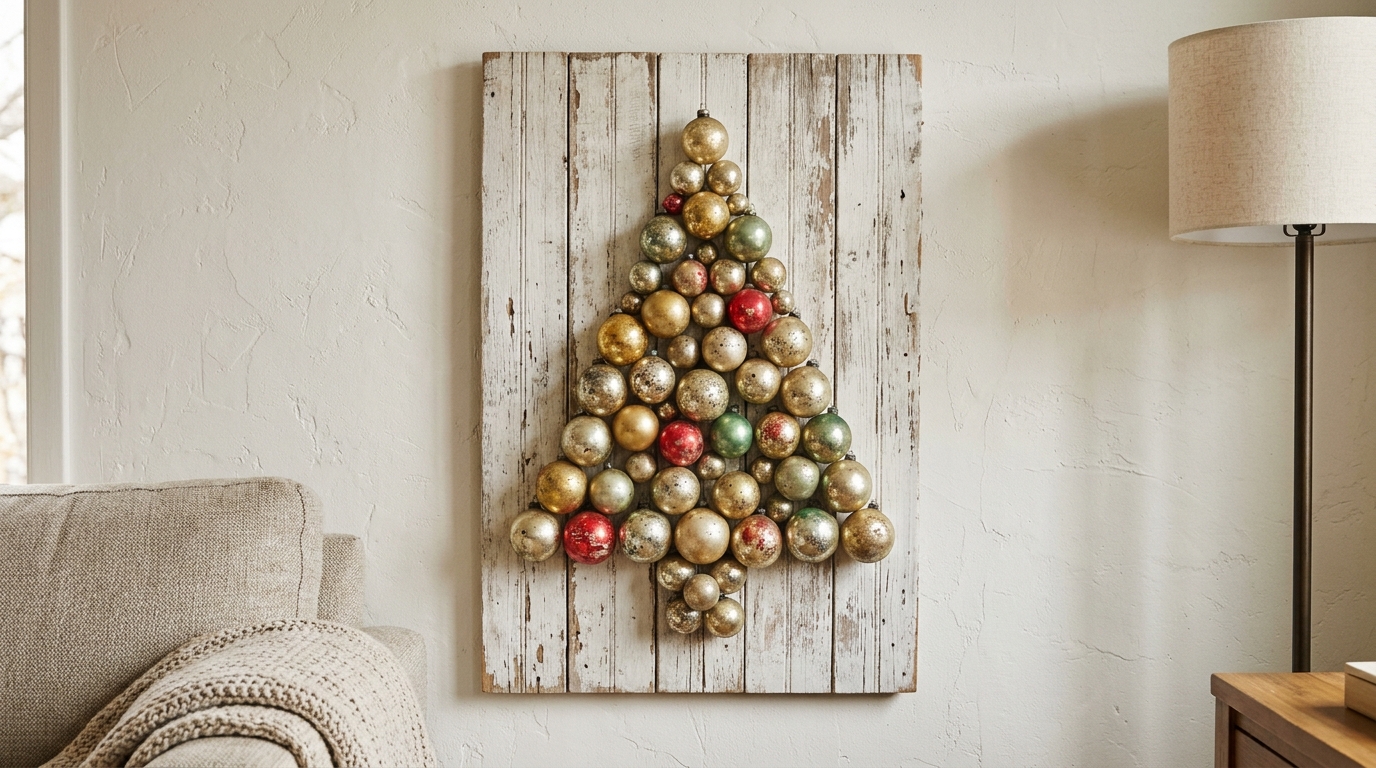
If you have more ornaments than tree space, this is the answer. Lay a whitewashed board flat, sketch a triangle with chalk and fill it with glass balls, starting with the biggest ones at the bottom. Glue them in place with a low temp glue gun, with adult help, or wire them through small screw eyes so you can take them off later. Lean it on a mantel or hang it in the entry. Your vintage Christmas ornaments become a piece of art that tells your family story. How many ornaments would yours need?
You will need: a wooden board or pallet plank, white paint, chalk, a low temp glue gun (adult help) or floral wire and small screw eyes, lots of glass ball ornaments.
How to make it: 1. Whitewash the board and let it dry. 2. Draw a tree shape with chalk. 3. Attach the ornaments from the bottom up, filling every gap.
Vintage Christmas Ornaments in a Mercury Glass Bowl
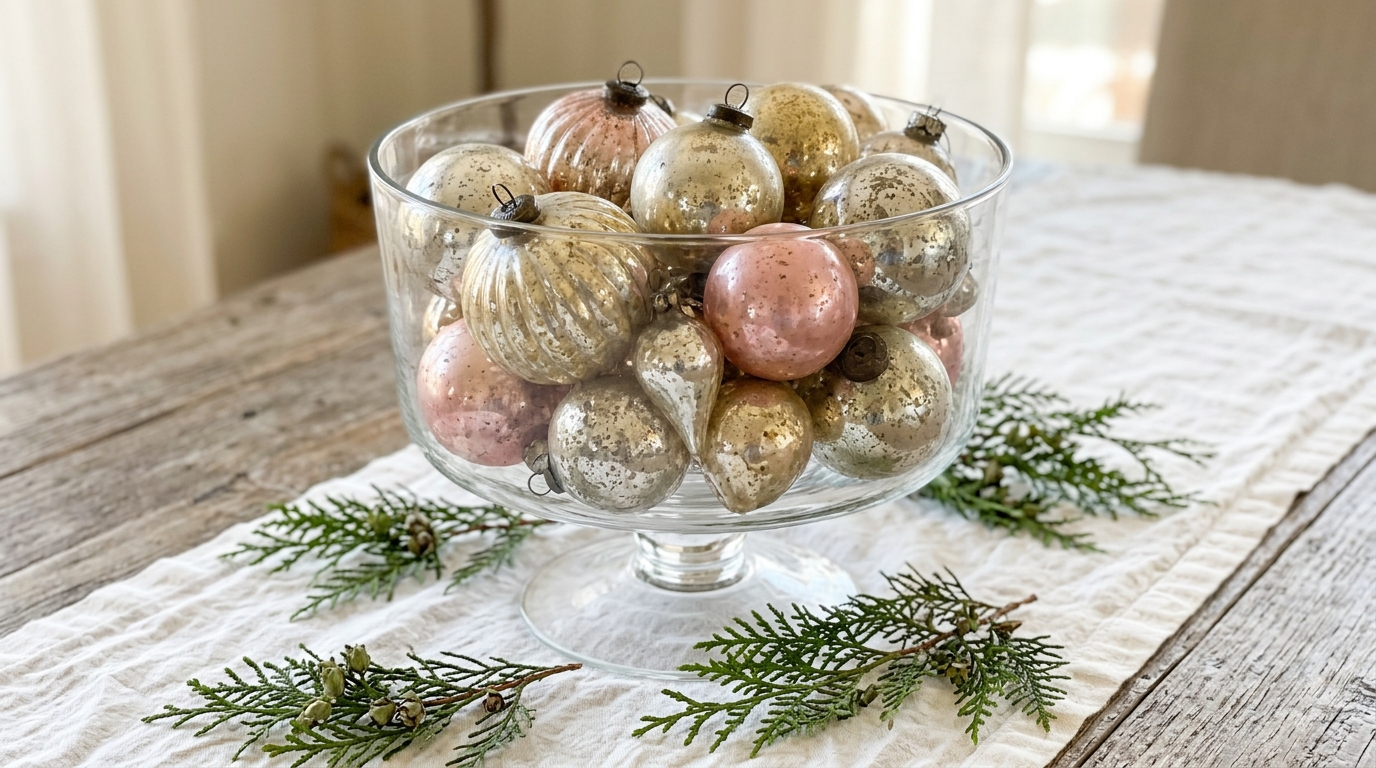
The easiest display of all is also one of the prettiest. Pile old mercury glass ornaments into a wide clear bowl and set it in the middle of the table. The worn silver and soft gold catch the light from the window and look like treasure. Tuck in a few sprigs of cedar for color. This is a smart way to use vintage Christmas ornaments that are too fragile or missing their caps to hang. Swap the colors each year to keep it fresh. What bowl would you fill?
You will need: a wide clear glass bowl or trifle dish, old mercury glass ornaments, cedar or pine sprigs, a table runner.
How to make it: 1. Place the largest ornaments in the bowl first. 2. Fill the gaps with smaller ones. 3. Tuck in greenery around the edges.
Grandma’s Ornaments in a Glass Lamp Base
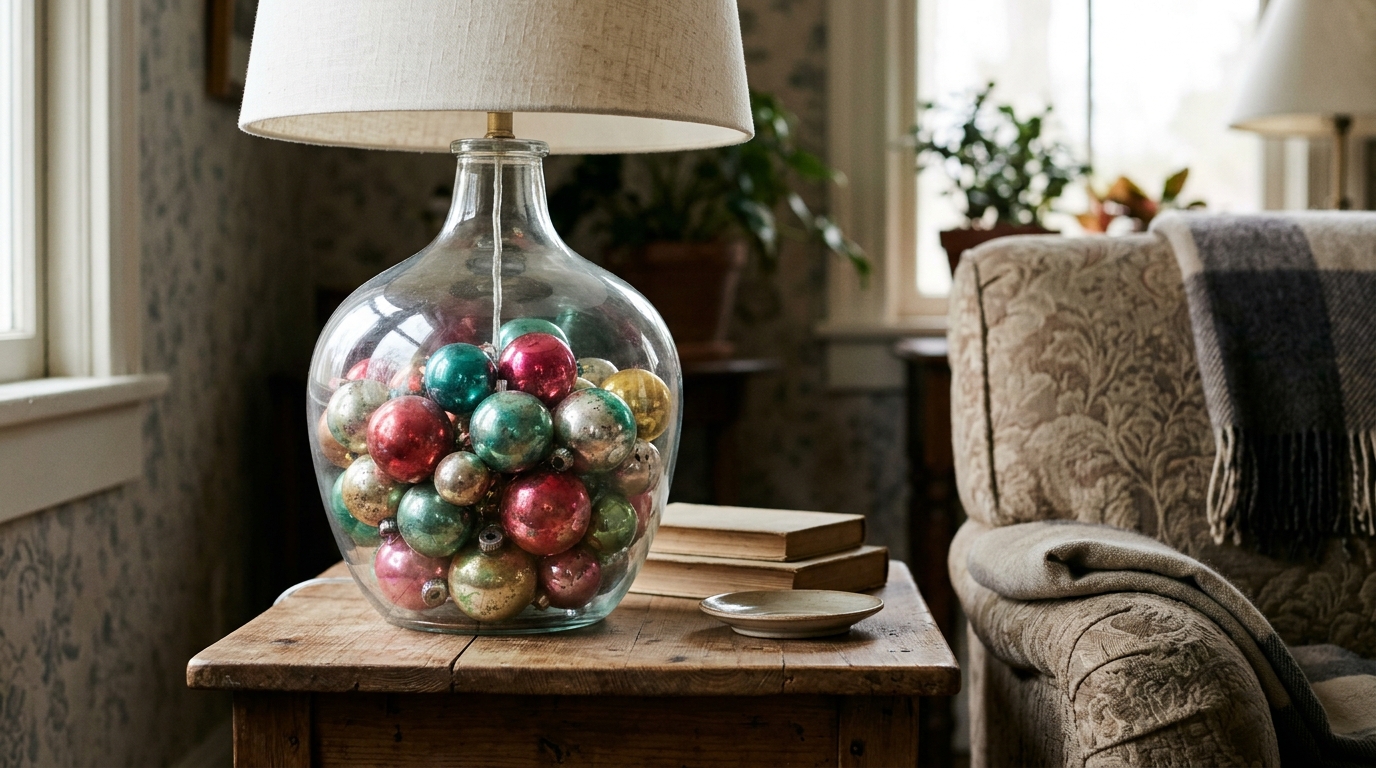
Fillable glass lamps are made to show off whatever you put inside, and old ornaments are perfect for it. Fill the base with colorful glass balls and you have a lamp that brings back memories every time you switch it on. Buy a lamp made to be filled, so the wiring stays safe inside its own tube, and use an LED bulb that stays cool. Pick a simple linen shade so the ornaments are the star. It is a lovely way to keep Grandma’s ornaments out all season. Which room would this lamp brighten?
You will need: a fillable glass lamp base made for this use, an LED bulb, a linen lampshade, small glass ornaments.
How to make it: 1. Remove the lamp top as the instructions show. 2. Gently fill the base with ornaments. 3. Replace the top, add the shade and the LED bulb.
Vintage Ornament Wreath
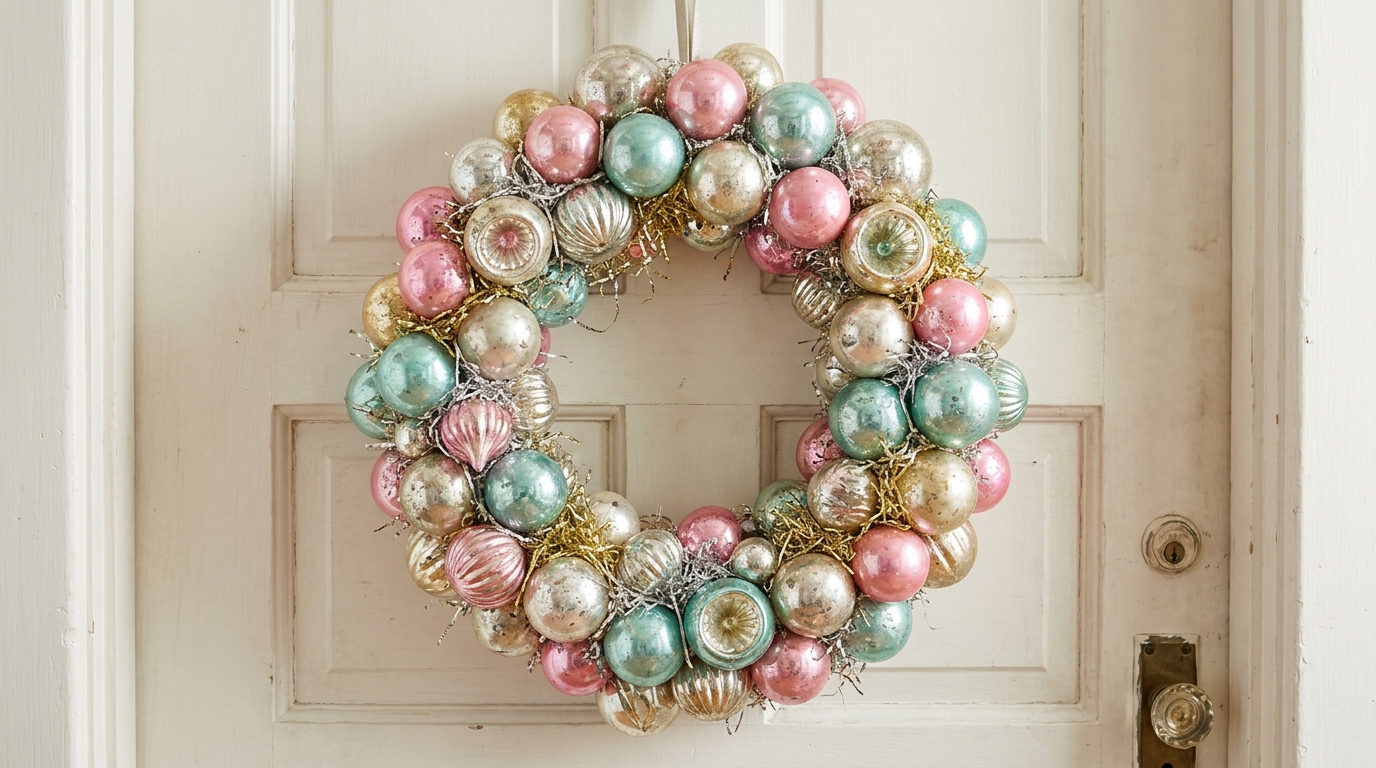
An ornament wreath packed with old pastel glass looks like it came straight from the 1950s. Start with a wire or foam wreath form and attach the biggest ornaments first, then fill in with small ones until no form shows through. Wire works best for glass. A few strands of old tinsel woven through add sparkle. Hang it indoors, out of the wind, so the glass stays safe. It is the perfect use for mismatched vintage Christmas ornaments that do not suit your tree. Where would you hang it?
You will need: a wire or foam wreath form, floral wire, glass ornaments in different sizes, old tinsel, a ribbon hanger.
How to make it: 1. Glue each cap in place so it cannot slip off. 2. Wire the large ornaments to the form. 3. Fill gaps with small ones and add tinsel.
Tinsel and Glass Ball Window Swag
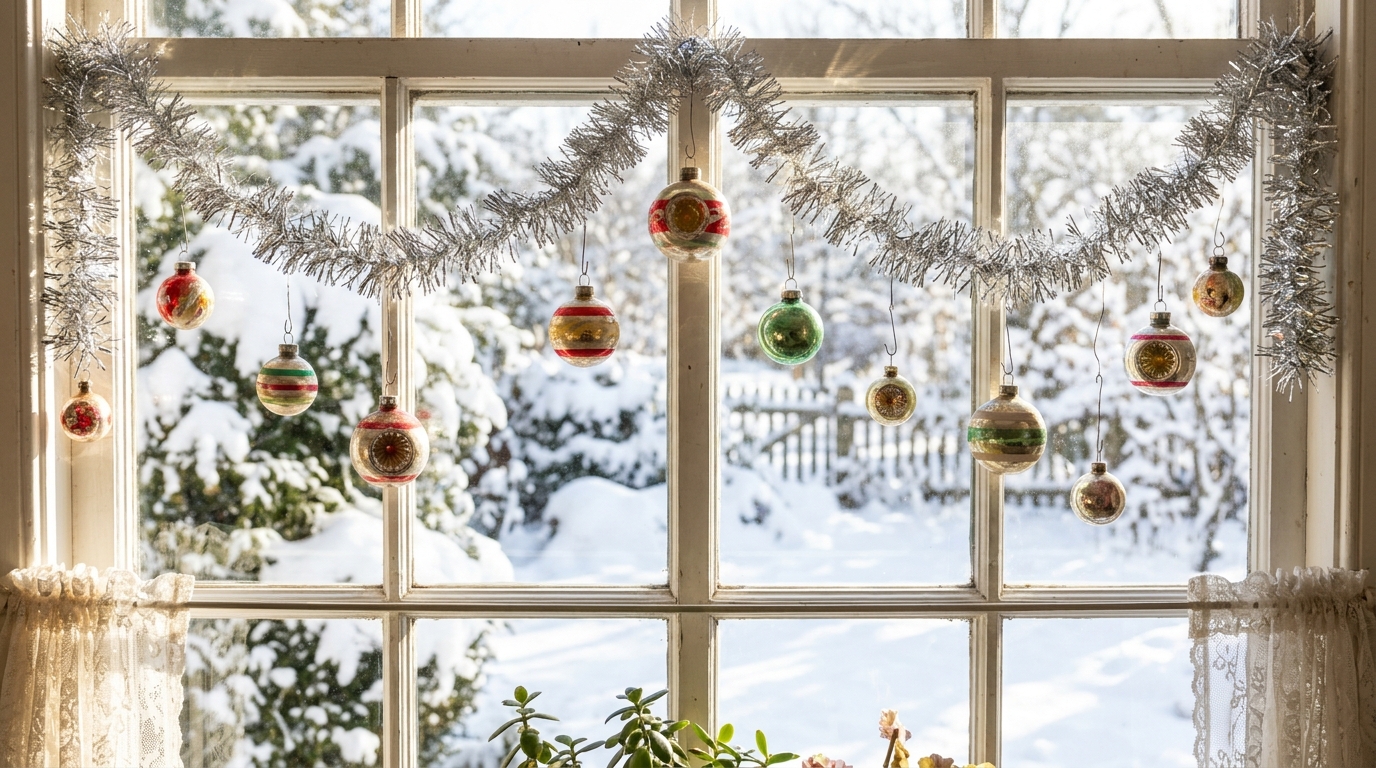
Before big light displays, many families decorated with tinsel garland draped across windows. Bring that look back by looping silver tinsel across the top of a window and hanging glass balls at different lengths from the dips. When the sun comes in, the whole window sparkles. Use clear command hooks so you do not have to put holes in the frame. This is a quick way to add charm to a room without buying a thing. Which window gets the best sun in your house?
You will need: silver tinsel garland, glass ball ornaments, ornament hooks or thin ribbon, clear adhesive hooks.
How to make it: 1. Stick hooks in the top corners and middle of the window frame. 2. Drape the tinsel in loose swoops. 3. Hang ornaments from the low points at different lengths.
Vintage Christmas Ornaments Woven Into a Mantel Garland
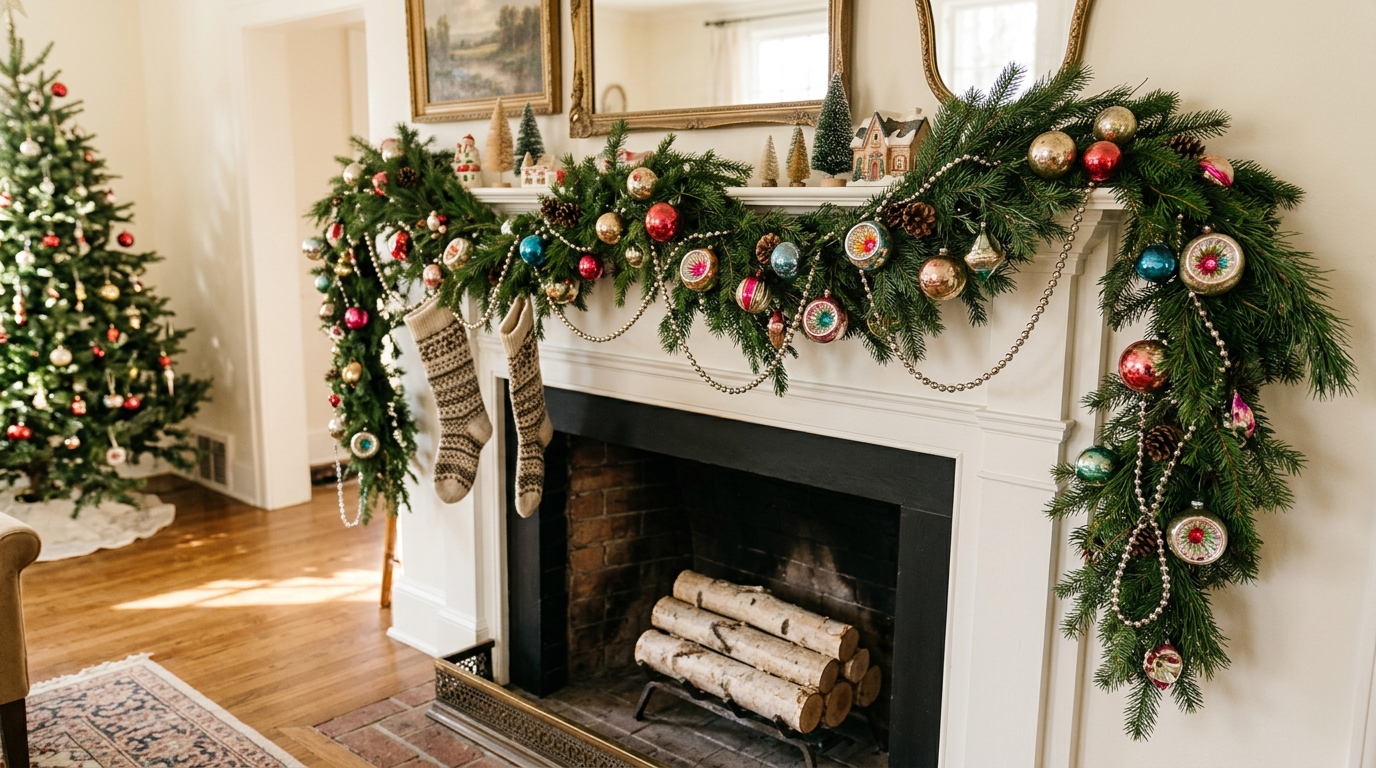
A plain evergreen garland gets instant charm when you tuck old ornaments into it. Use indent reflector ornaments, the ones with the dimpled centers, along with simple glass balls and a strand of silver bead garland. Wire them in so they cannot roll off. The mix of shapes makes vintage Christmas ornaments look rich and layered, even if you only have a dozen. Keep the fireplace unlit or use a faux fire screen when glass is on the mantel. Do you have any reflector ornaments in your old boxes?
You will need: a faux or fresh evergreen garland, floral wire, indent reflector ornaments, glass balls, silver bead garland.
How to make it: 1. Lay the garland along the mantel and secure it. 2. Wire the ornaments in groups of three. 3. Weave the bead garland through in loose loops.
Old Ornaments on a Cake Stand
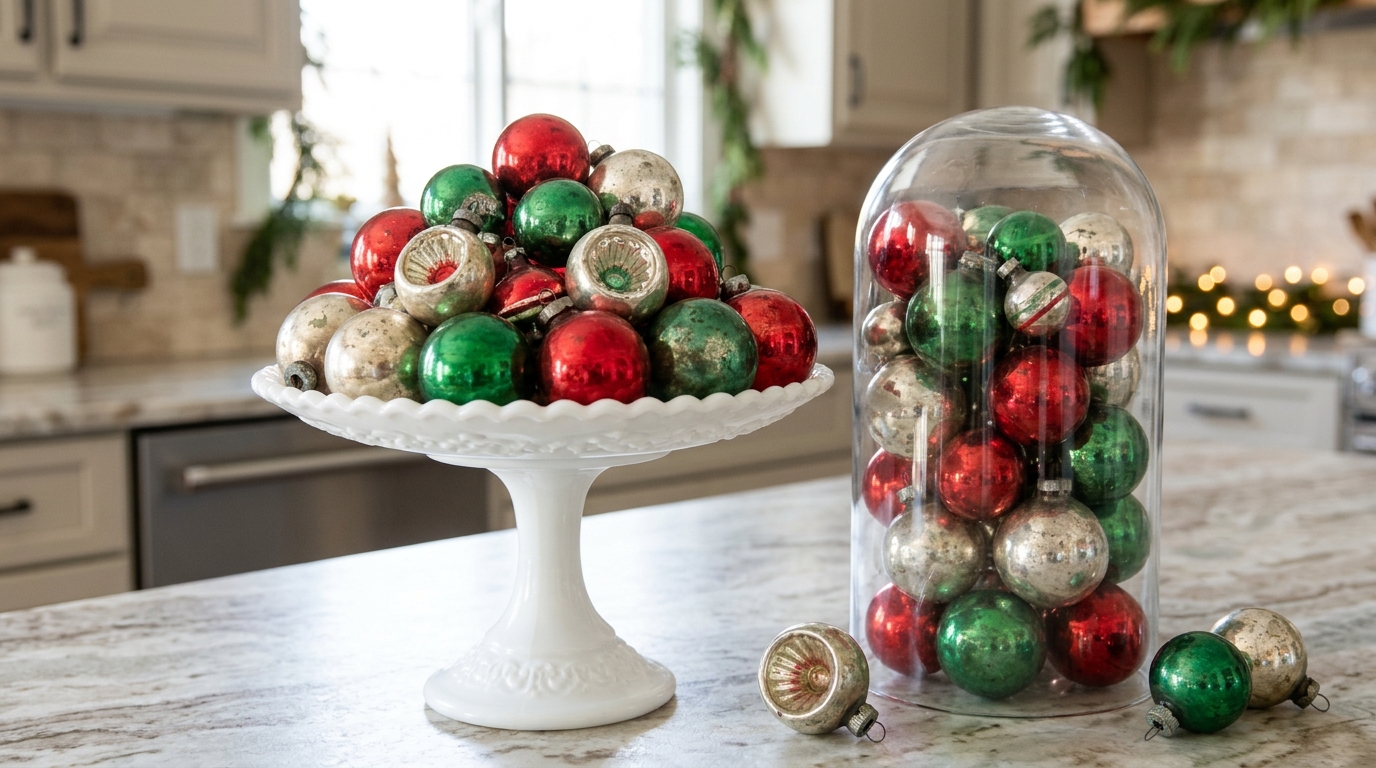
Cake stands are not just for cake in December. Pile old ornaments in a little mountain on a milk glass stand and set it on the kitchen counter or buffet. A glass cloche beside it holds the most delicate pieces and keeps dust away. This display takes two minutes and looks like something from a farmhouse magazine. It works well on a coffee bar or a sideboard where people gather. If you have two stands of different heights, group them together. What would you put under the cloche?
You will need: a cake stand, a glass cloche, a mix of old glass ornaments, a few greenery sprigs.
How to make it: 1. Place the largest ornaments in the middle of the stand. 2. Build up with smaller ones around them. 3. Put the most fragile pieces under the cloche.
Shadow Box of Family Heirloom Ornaments
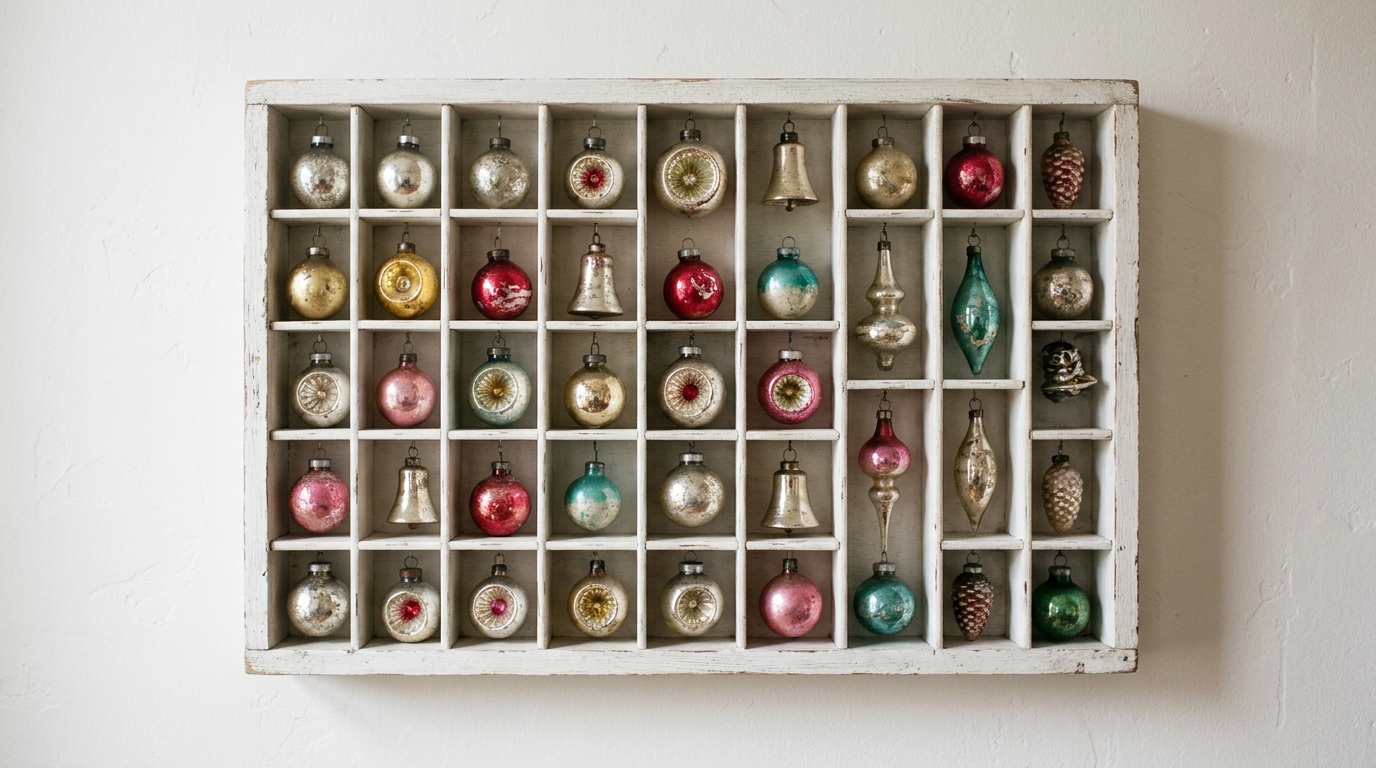
Some ornaments are too precious to risk on a tree. A shadow box with small compartments keeps each one safe while letting everyone see it. Look for a printer’s tray or cubby shelf at a thrift store and paint it white. Set one heirloom ornament in each space, with a little tag on the back noting whose it was and when. It can stay up all year as a family memory wall. Ask older relatives to tell you the story behind each piece. Which ornament in your family has the best story?
You will need: a shadow box or printer’s tray with cubbies, white paint, museum putty, small tags, a pen.
How to make it: 1. Paint the box and let it dry. 2. Use museum putty to hold each ornament in its cubby. 3. Write the history on a tag and tuck it behind.
Hand Painted Retro Stripe Ornaments
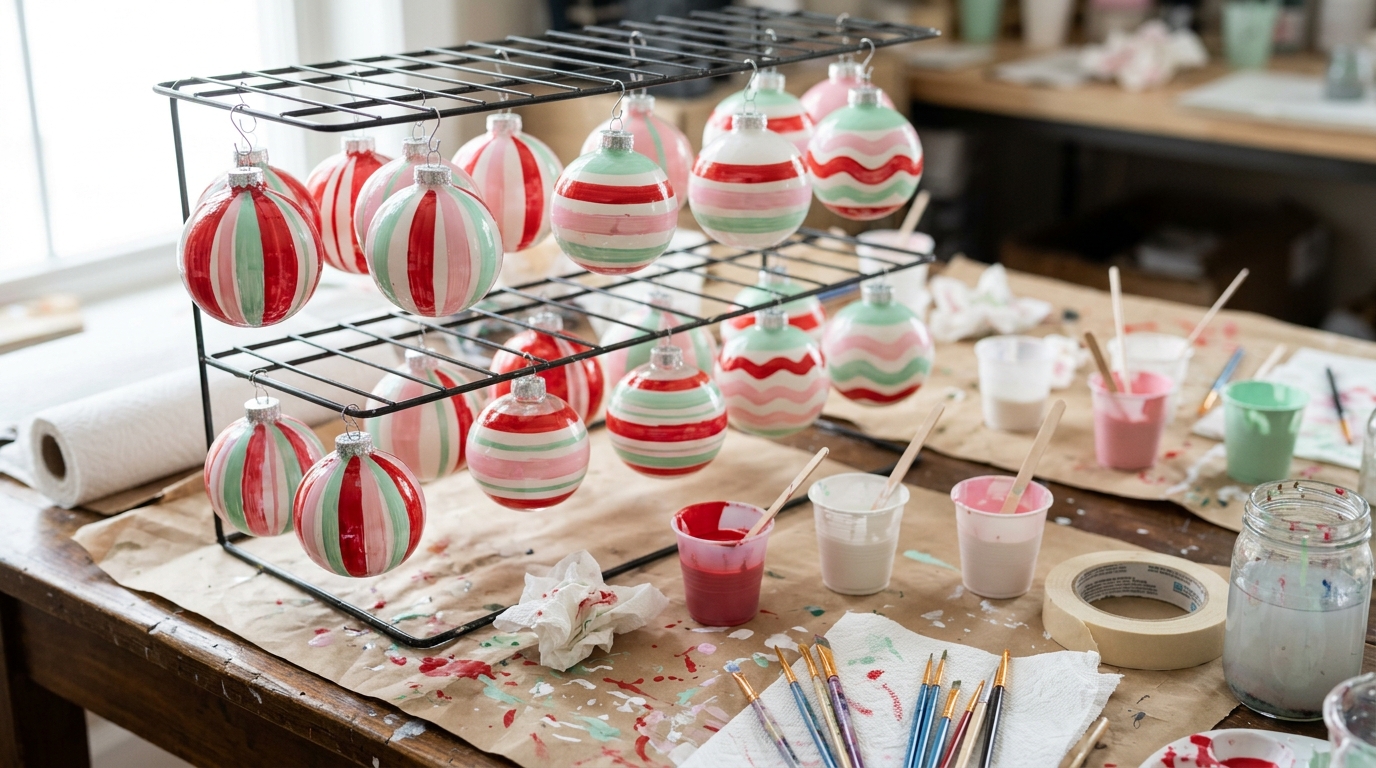
If you cannot find the old striped ornaments you remember, paint your own. Plain glass balls from the craft store become retro beauties with a few bands of paint in red, pink, mint and white. Paint pens are the easiest way to get neat lines. Turn the ornament slowly while you hold the pen still. Let each color dry before adding the next. They look just like vintage Christmas ornaments from the 1950s, and kids can help with simple stripes too. Which colors did your grandma’s tree have?
You will need: plain glass or shatterproof ornaments, acrylic paint pens in retro colors, a wire rack or egg carton for drying.
How to make it: 1. Remove the caps and clean the ornaments. 2. Paint stripes while turning the ornament slowly. 3. Let them dry on a rack, then replace the caps.
Kugel Style Ornaments You Can Make at Home
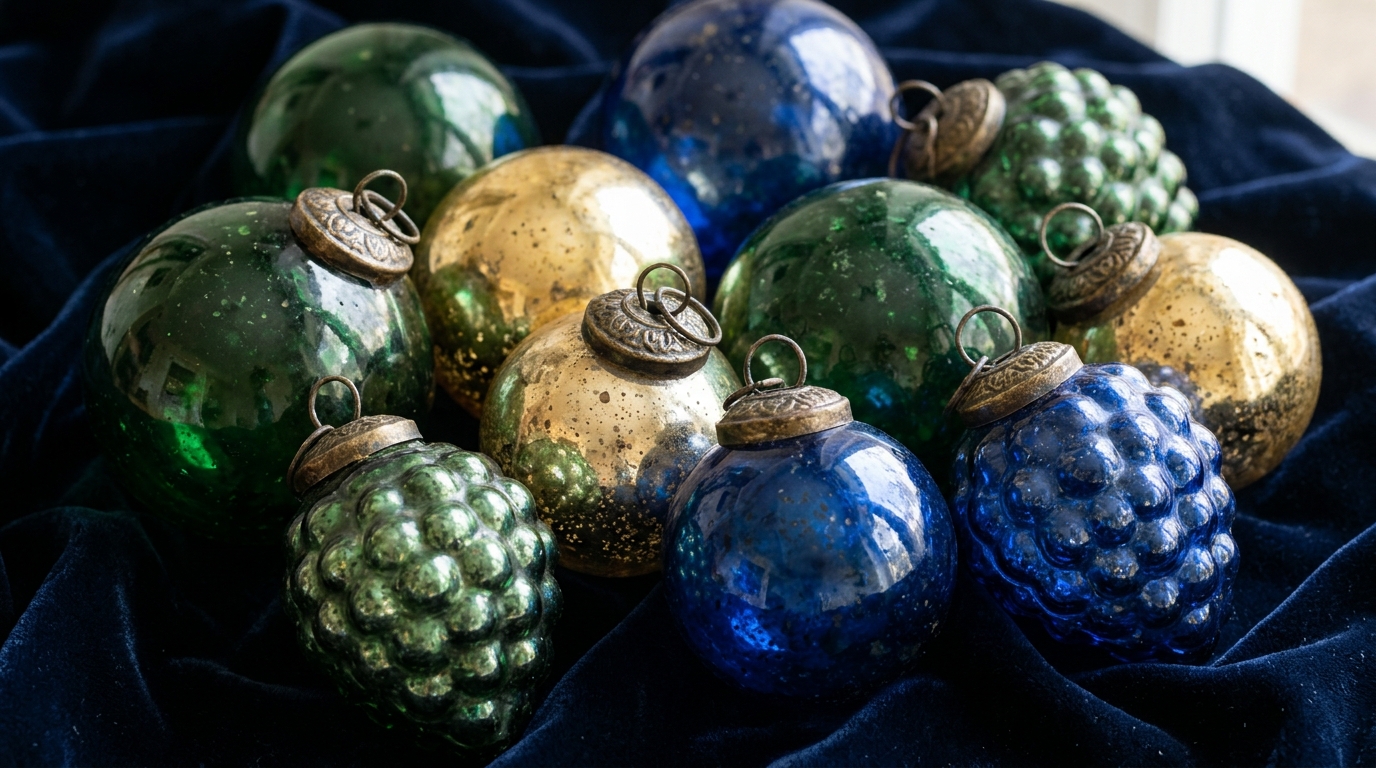
Kugels are the heavy, thick glass ornaments first made in Germany long ago, known for deep jewel colors and fancy brass caps. Real antique ones cost a lot, but you can make a similar look. Buy plain clear glass balls and swirl a little glass paint inside in deep green, gold or cobalt blue, then turn them until fully coated. Top them with fancy gold caps from the craft store. Grape cluster shapes look especially charming. Would you mix them with your real vintage Christmas ornaments?
You will need: clear glass ball ornaments, glass paint in jewel tones, ornate gold ornament caps, a small funnel, paper towels.
How to make it: 1. Remove the cap and pour a little paint inside. 2. Turn the ball slowly until the inside is coated, then drain extra paint. 3. Let dry upside down and add the fancy cap.
Vintage Christmas Ornaments as Gift Toppers

Instead of a bow, tie an old ornament onto each present. Simple kraft paper and velvet ribbon let the ornament shine, and your friend gets a small keepsake to hang on their own tree. Thrift stores often sell bags of old glass ornaments for a few dollars, which makes this cheaper than buying fancy bows. Match the ornament to the person, like a bird for a nature lover. It is a sweet way to pass vintage Christmas ornaments on to the people you love. Who would get the prettiest one?
You will need: kraft paper, velvet ribbon, old glass ornaments, scissors, tape, gift tags.
How to make it: 1. Wrap the gift in kraft paper. 2. Tie the ribbon around it with a knot on top. 3. Thread the ribbon through the ornament hanger and tie a bow.
Feather Tree With Tiny Vintage Christmas Ornaments
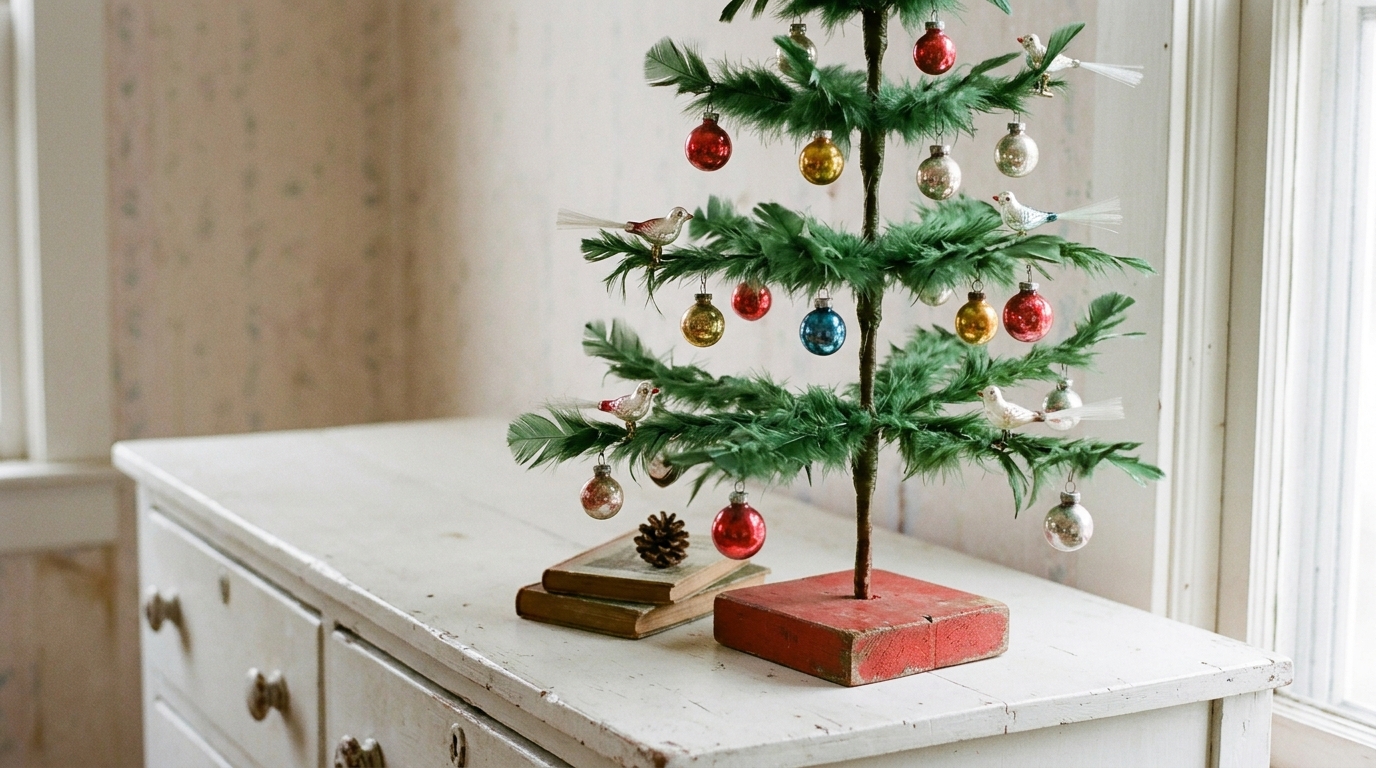
Feather trees were first made in Germany from dyed goose feathers, and they have a sweet, sparse look that shows off every ornament. Today you can buy new ones made to look old, in many sizes. Because the branches are spaced out, they are perfect for your tiniest glass balls and little clip on birds. Set one on a dresser, a desk or a kitchen shelf and fill it with your smallest vintage Christmas ornaments. It is a lovely spot for the small ornaments that get lost on a big tree. Where would a little feather tree fit in your home?
You will need: a small feather tree, tiny glass ball ornaments, clip on glass birds, ornament hooks.
How to make it: 1. Fluff the branches so they spread out evenly. 2. Hang one small ornament near the tip of each branch. 3. Clip the birds near the top.
Ornament Filled Apothecary Jars
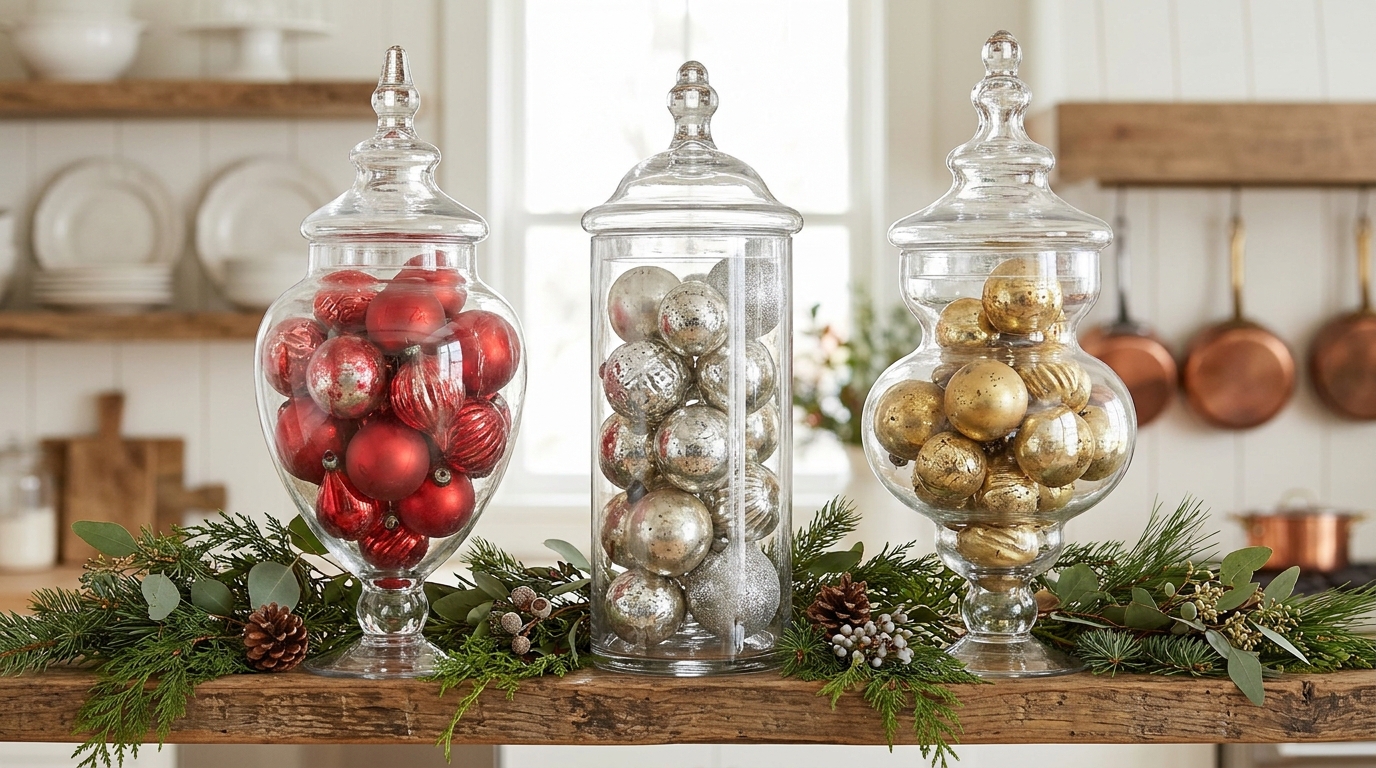
Sorting old ornaments by color and filling tall glass jars turns a jumble into a display. One jar of red, one of silver, one of gold, all lined up on a shelf, looks clean and bright. It is also a smart way to store ornaments you love but do not hang. If you like this idea, our Christmas ornament hacks have more clever ways to use and store your collection. Add a sprig of greenery on top of each lid. Which colors would you sort into your jars?
You will need: tall glass jars with lids, ornaments sorted by color, small greenery sprigs, ribbon.
How to make it: 1. Sort the ornaments into color groups. 2. Fill each jar, placing the larger ones at the bottom. 3. Close the lids and tie a ribbon or add greenery on top.
Storing Heirloom Ornaments in Egg Cartons
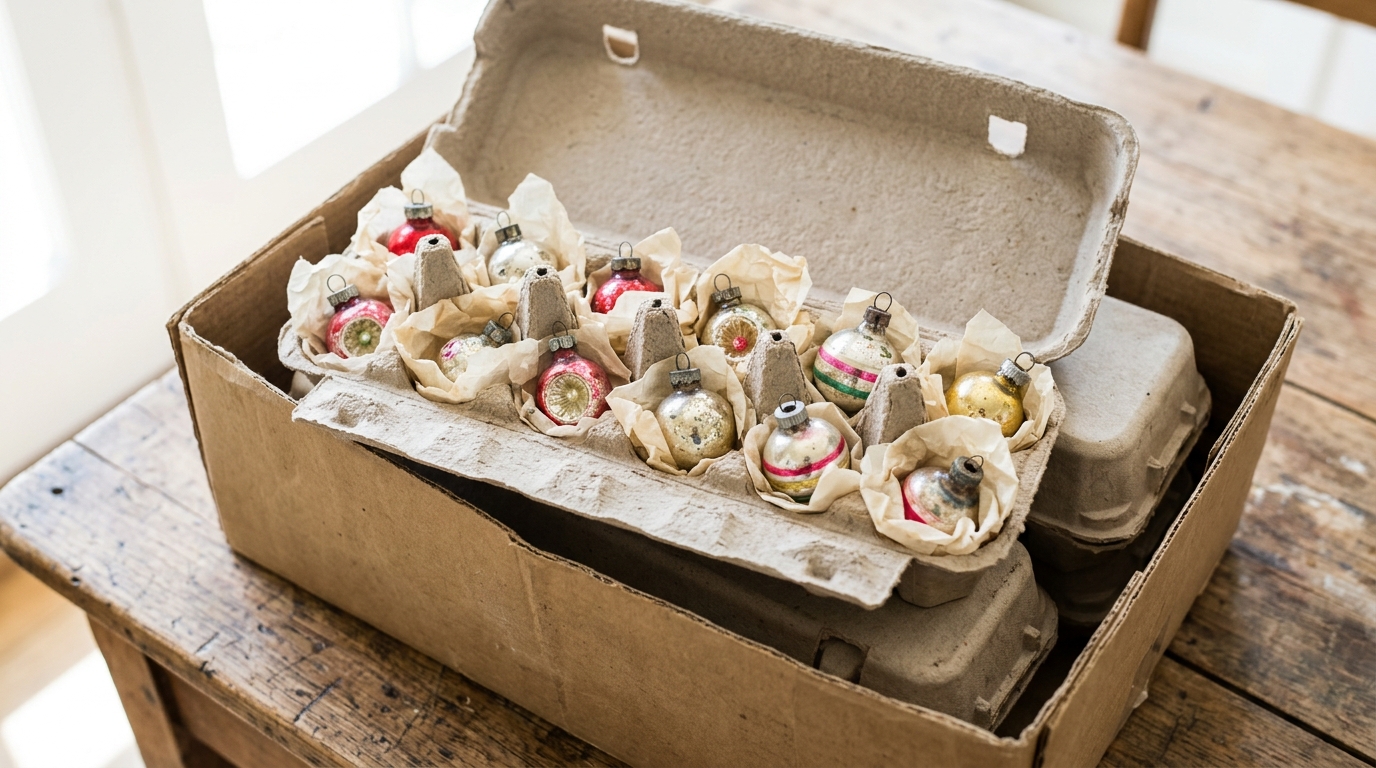
When the season ends, the best way to protect old glass is also free. Clean egg cartons hold small ornaments one per cup so they never knock into each other. Wrap the most fragile ones in tissue first. Stack the cartons in a box and label it so next year is easy. Wear thin gloves when handling any ornament that is chipped or cracked. Taking care of them this way means your grandchildren can enjoy the same ornaments one day. Have you started saving egg cartons yet?
You will need: clean egg cartons, acid free tissue paper, a sturdy storage box, a marker, thin gloves for chipped pieces.
How to make it: 1. Wrap fragile ornaments in tissue. 2. Set one ornament in each egg cup. 3. Stack the cartons in a labeled box and store it somewhere dry.