Napkin Decoupage Ideas: 13 Thrift Store Makeovers That Look Expensive
Napkin decoupage ideas are the best kept secret in thrift store crafting, because a single printed paper napkin can make a one dollar dish look like it came from a boutique. The trick is simple: the top layer of a napkin is so thin that, once you brush it down with decoupage glue, the pattern melts into the surface and looks painted on. No drawing skills, no expensive tools and no special paper needed. Crafters have been sharing seashell dishes, jar vases and little wooden trays that get tens of thousands of reactions, and every one of them started with a pretty napkin and a brush. Below are thirteen easy projects to try this weekend, from a glass plate with flowers under the surface to soaps, trays and keepsake ornaments. Pick a napkin you love and let us get gluing..
Napkin Decoupage Ideas: A Glass Plate With Flowers Underneath
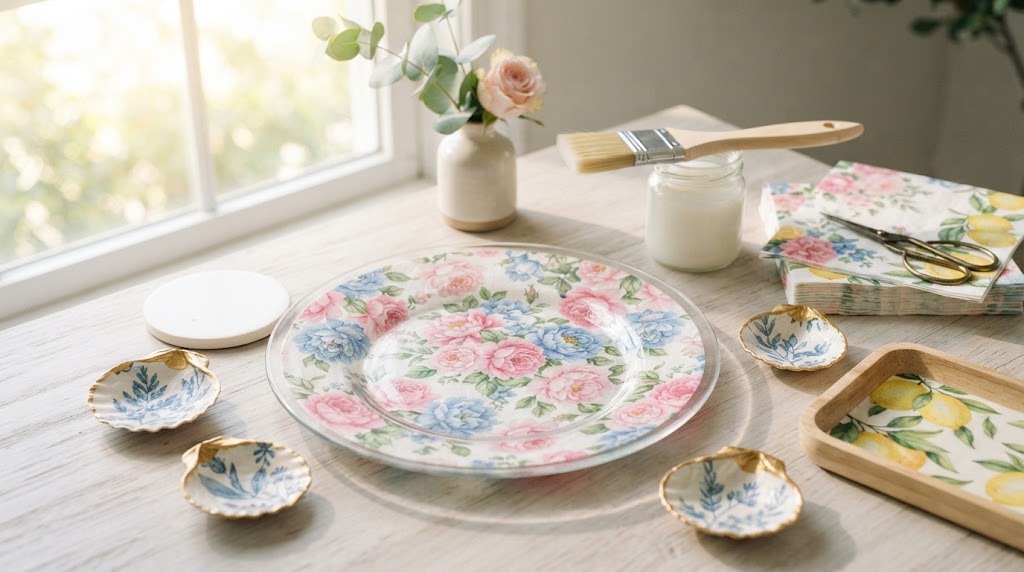
A clear glass plate is the perfect first project, because the napkin goes on the underside and the flowers show through the glass like fine china. Thrift stores sell plain glass plates for a dollar or less, and a pack of floral napkins makes a whole set. Keep these plates decorative, or use them only for dry treats like cookies, since the napkin side should never touch food or soak in water. They look gorgeous on a plate stand or hung on a wall. This is where many people fall in love with decoupage..
You will need: a clear glass plate, a printed paper napkin, decoupage glue, a soft flat brush, a white acrylic paint and a clear waterproof sealer.
How to make it: 1. Peel the napkin layers apart and keep only the thin printed top layer. 2. Brush glue on the underside of the plate, lay the napkin face down onto it and gently brush more glue over the top from the center out. 3. Once dry, paint the back white so the pattern pops, then seal it with two coats of clear sealer.
Seashell Trinket Dishes
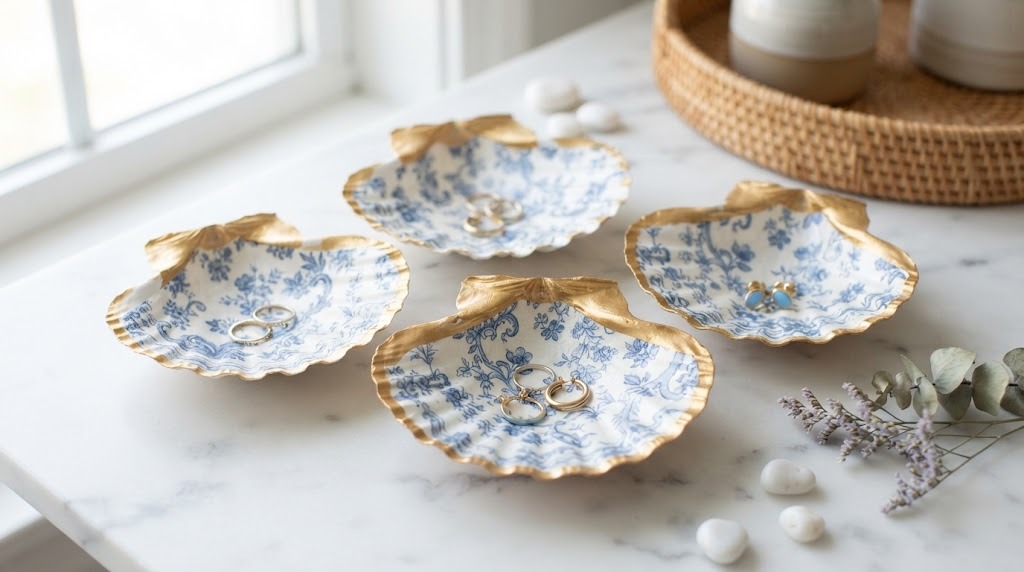
Seashell dishes are among the napkin decoupage ideas that went viral this year. One seashell trinket dish video passed 61,600 reactions on Facebook, and it is easy to see why. Big shells from the beach or a craft store become little jewelry dishes once you line them with a delicate print and paint the edge gold. They make thoughtful gifts for bridesmaids, teachers and grandmas. Do you still have a bag of shells from your last beach trip?
You will need: large flat shells, printed napkins, decoupage glue, a small brush, gold acrylic paint and a gloss sealer.
How to make it: 1. Wash and dry the shells and tear the napkin print into small pieces. 2. Brush glue inside the shell, press the napkin pieces in place and dab more glue over them to smooth the wrinkles. 3. Paint the rim gold, let everything dry and finish with a glossy sealer.
Thrift Store Platter Makeover
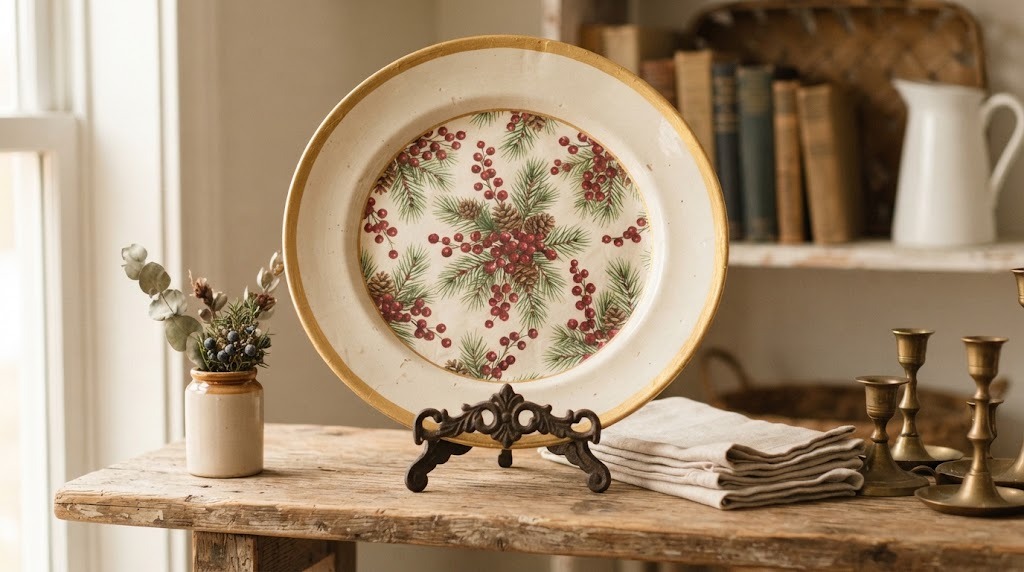
Those dated platters stacked on thrift store shelves are a treasure if you look at them as blank canvases. A napkin with winter berries or pine boughs turns one into seasonal art you can display on a plate stand all winter. For napkin decoupage ideas like this one, choose a platter with a flat center so the napkin lies smooth. Like the glass plate, keep it decorative or decoupage only the underside of a clear one. Which old dish in your cabinet is ready for a second life?
You will need: a thrift store platter, a seasonal napkin, decoupage glue, a flat brush, gold paint pen and a clear sealer.
How to make it: 1. Clean the platter well and let it dry. 2. Brush glue on the center, lay down the printed napkin layer and smooth it with more glue. 3. Add a gold rim with the paint pen and seal the whole front with two coats.
Napkin Decoupage Ideas for a Fall Jar Vase
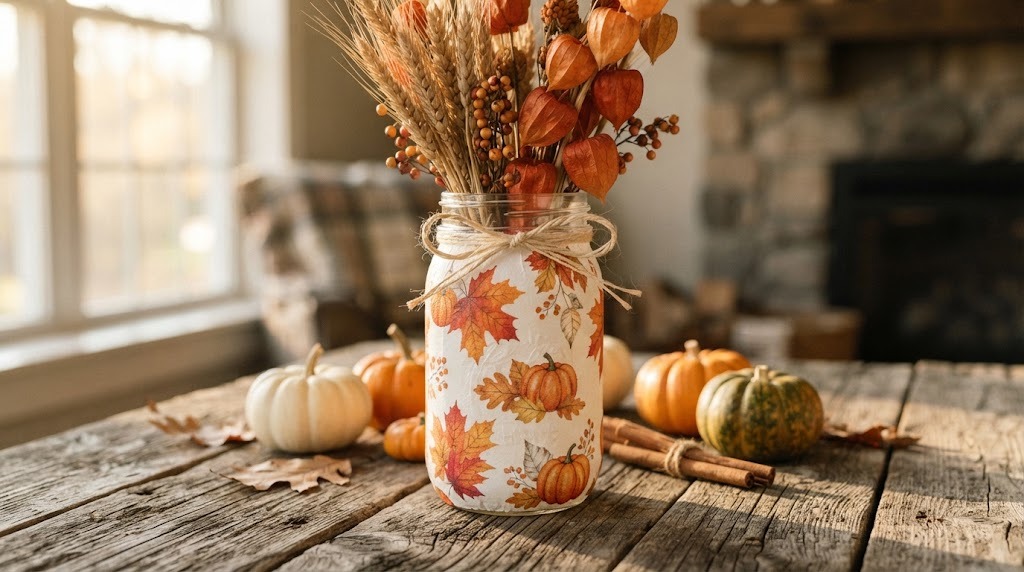
An empty jar from the recycling bin can become a fall vase in about twenty minutes. Wrap it in a napkin printed with autumn leaves or pumpkins, seal it, and fill it with dried wheat or faux flowers. Crafters on Instagram have shared versions of this old jar to cozy fall decor makeover with more than 45,000 likes. It looks lovely on a mantel or as a table centerpiece. What would you put in yours, wheat, eucalyptus or bright faux flowers?
You will need: a clean glass jar, a fall printed napkin, decoupage glue, a soft brush, twine and dried stems.
How to make it: 1. Cut the napkin to fit around the jar and separate the printed layer. 2. Brush glue on the jar, wrap the napkin around it and smooth it gently with more glue. 3. Let it dry, add a coat of sealer, tie twine around the rim and fill it with dried stems.
Wood Scrap Mini Trays
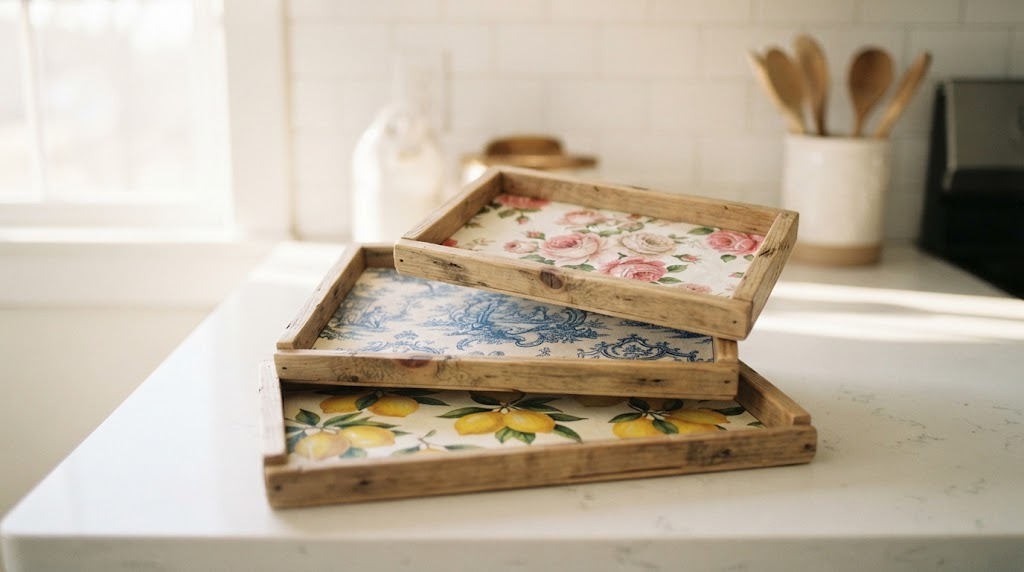
If you have scrap wood in the garage, you have the start of one of the most useful napkin decoupage ideas: a set of mini trays. Glue thin strips around a flat square for the sides, paint the edges and decoupage a napkin print in the middle. Lemons, blue toile and pink roses all look fresh and expensive. These trays are great for holding keys, rings or a small plant. A version showing scrap trays decorated three ways passed 51,000 likes on Instagram. Which print would you choose for your kitchen?
You will need: flat wood scraps, thin wood strips, wood glue, acrylic paint, printed napkins, decoupage glue and a sealer.
How to make it: 1. Glue thin strips around the edges of a flat wood square and let it dry, with adult help for any cutting. 2. Paint the edges, then decoupage the napkin print onto the center. 3. Seal with two or three coats so the tray can be wiped clean.
Decorated Bar Soaps
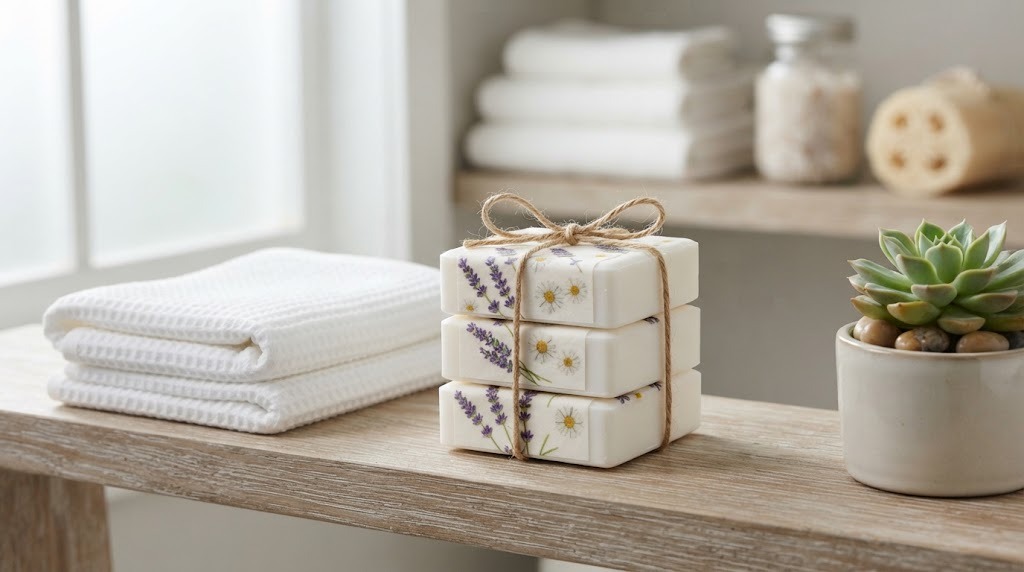
Of all the napkin decoupage ideas here, decorated soaps make the sweetest little gifts and they cost almost nothing. Plain white bars take a napkin print beautifully, and the design stays put through several uses. Tie a stack with twine and you have a hostess gift, a teacher present or a stocking stuffer. Lavender, daisies and tiny roses look especially fresh on white soap. Who on your list would love a pretty stack of soaps?
You will need: plain white bar soaps, small floral napkin prints, a little water, a soft brush and twine.
How to make it: 1. Cut a small napkin motif and separate the thin printed layer. 2. Lightly wet the top of the soap, lay the napkin on it and gently brush with a damp brush until it melts into the surface. 3. Let the soap dry overnight, then stack and tie with twine.
Flameless LED Pillar Candles
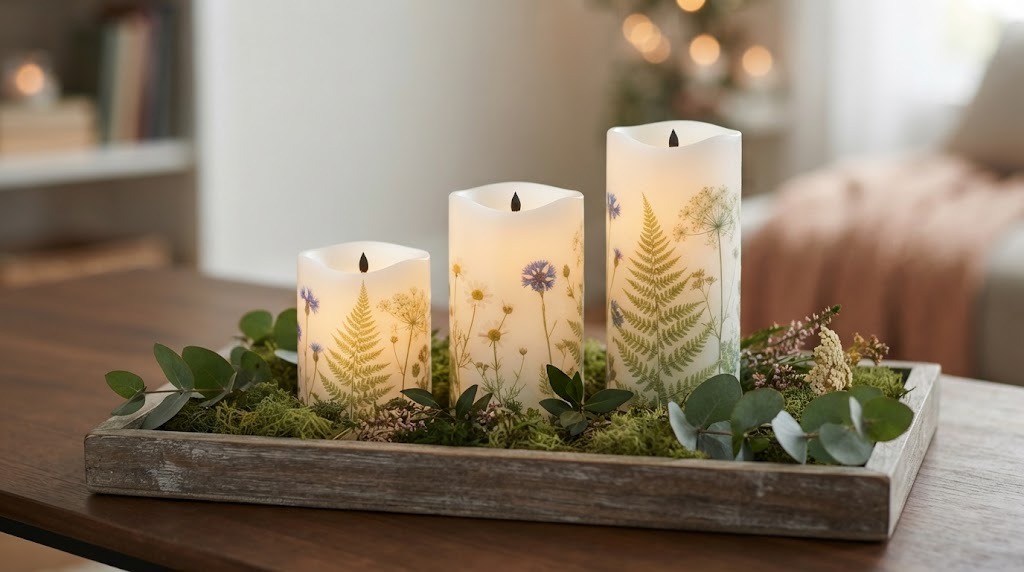
Napkin prints on pillar candles look stunning, but candles you plan to light can be a fire risk once they are covered in paper and glue. The safe answer for napkin decoupage ideas like this is flameless LED pillar candles. They have a real wax look, glow softly and can be decorated with ferns, wildflowers or holiday prints without any worry. Group three on a tray with greenery for a cozy centerpiece. Where would you put a glowing trio like this?
You will need: flameless LED pillar candles with a wax finish, printed napkins, decoupage glue, a soft brush and a little greenery.
How to make it: 1. Cut the napkin motif to fit the side of the candle and separate the printed layer. 2. Brush a thin layer of glue on the candle, lay the napkin on it and smooth it gently from the center outward. 3. Let it dry and add a thin top coat of glue to protect it.
Napkin Decoupage Ideas Start With the Right Napkins
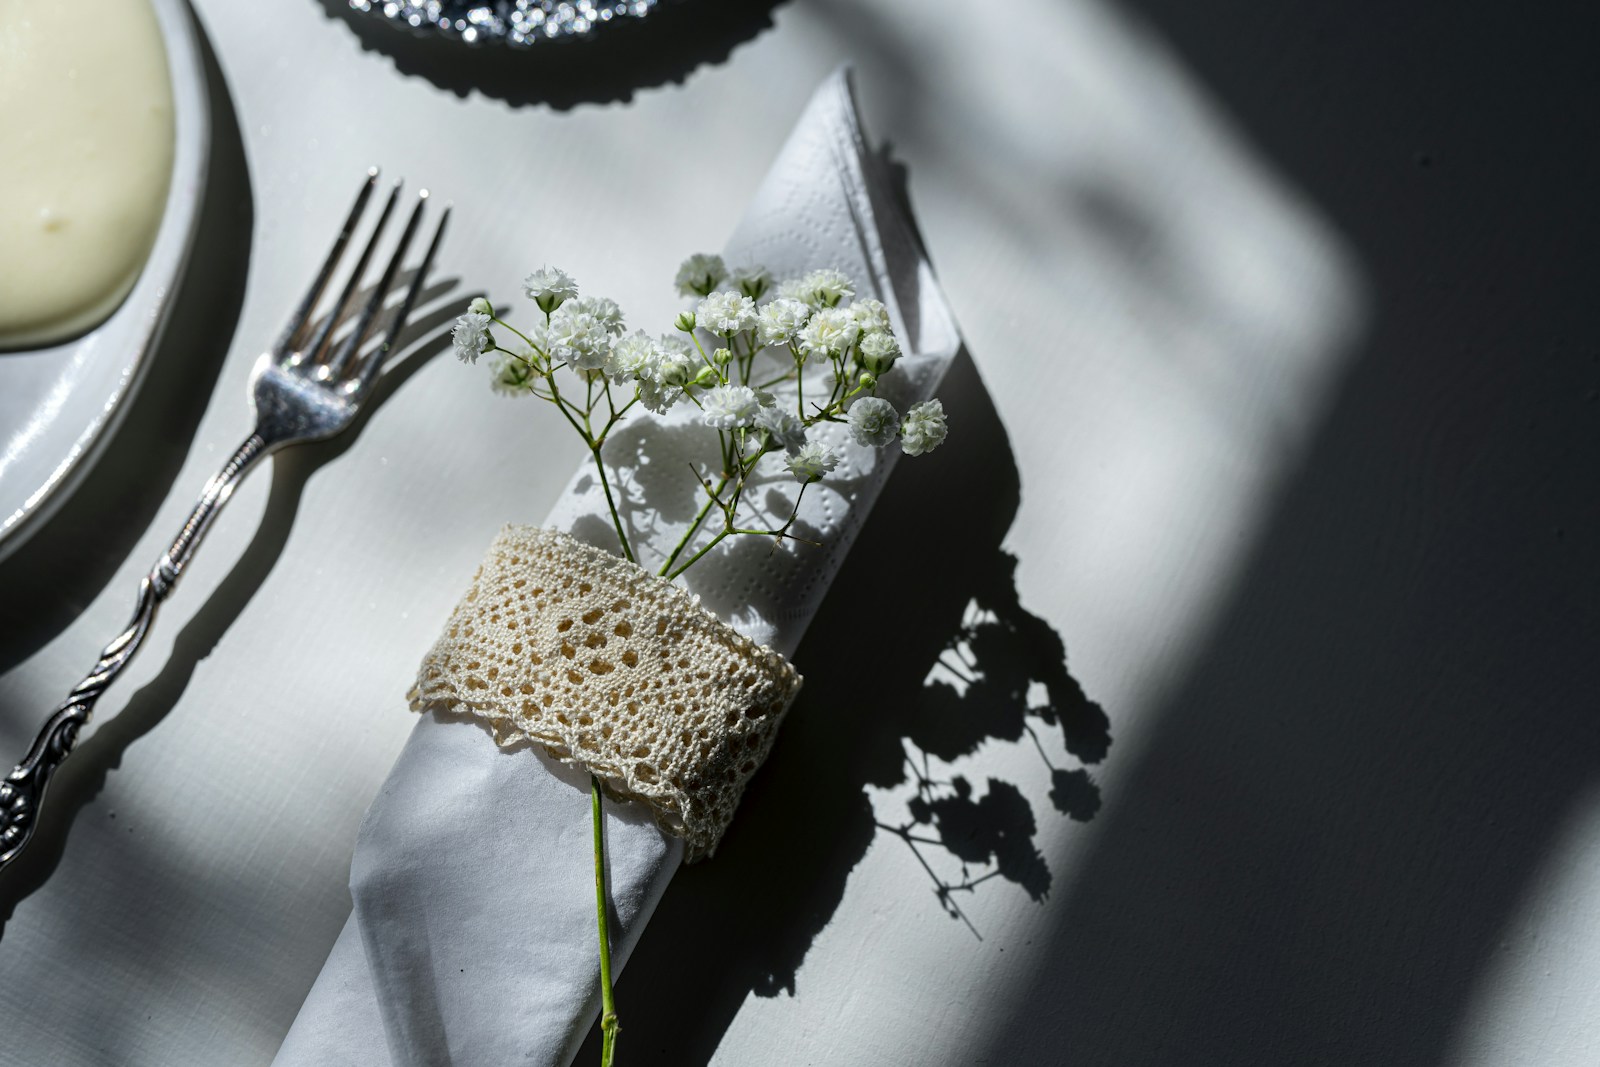
Not every napkin works for decoupage, so it pays to choose well. Look for three ply paper napkins with a crisp, bright print, since the thin top layer is what you will use. Light backgrounds work best on light surfaces, and busy patterns hide small wrinkles nicely. Party stores, dollar stores and the seasonal aisle all carry great options, and one pack can cover a dozen projects. What is the prettiest napkin you have spotted lately?
You will need: three ply printed napkins, small sharp scissors, a pair of tweezers and a flat dry surface.
How to make it: 1. Cut out the part of the design you want before separating the layers. 2. Peel away the white backing layers so only the printed tissue remains. 3. Store the cut pieces flat between sheets of paper until you are ready to glue.
Terracotta Pot Makeover
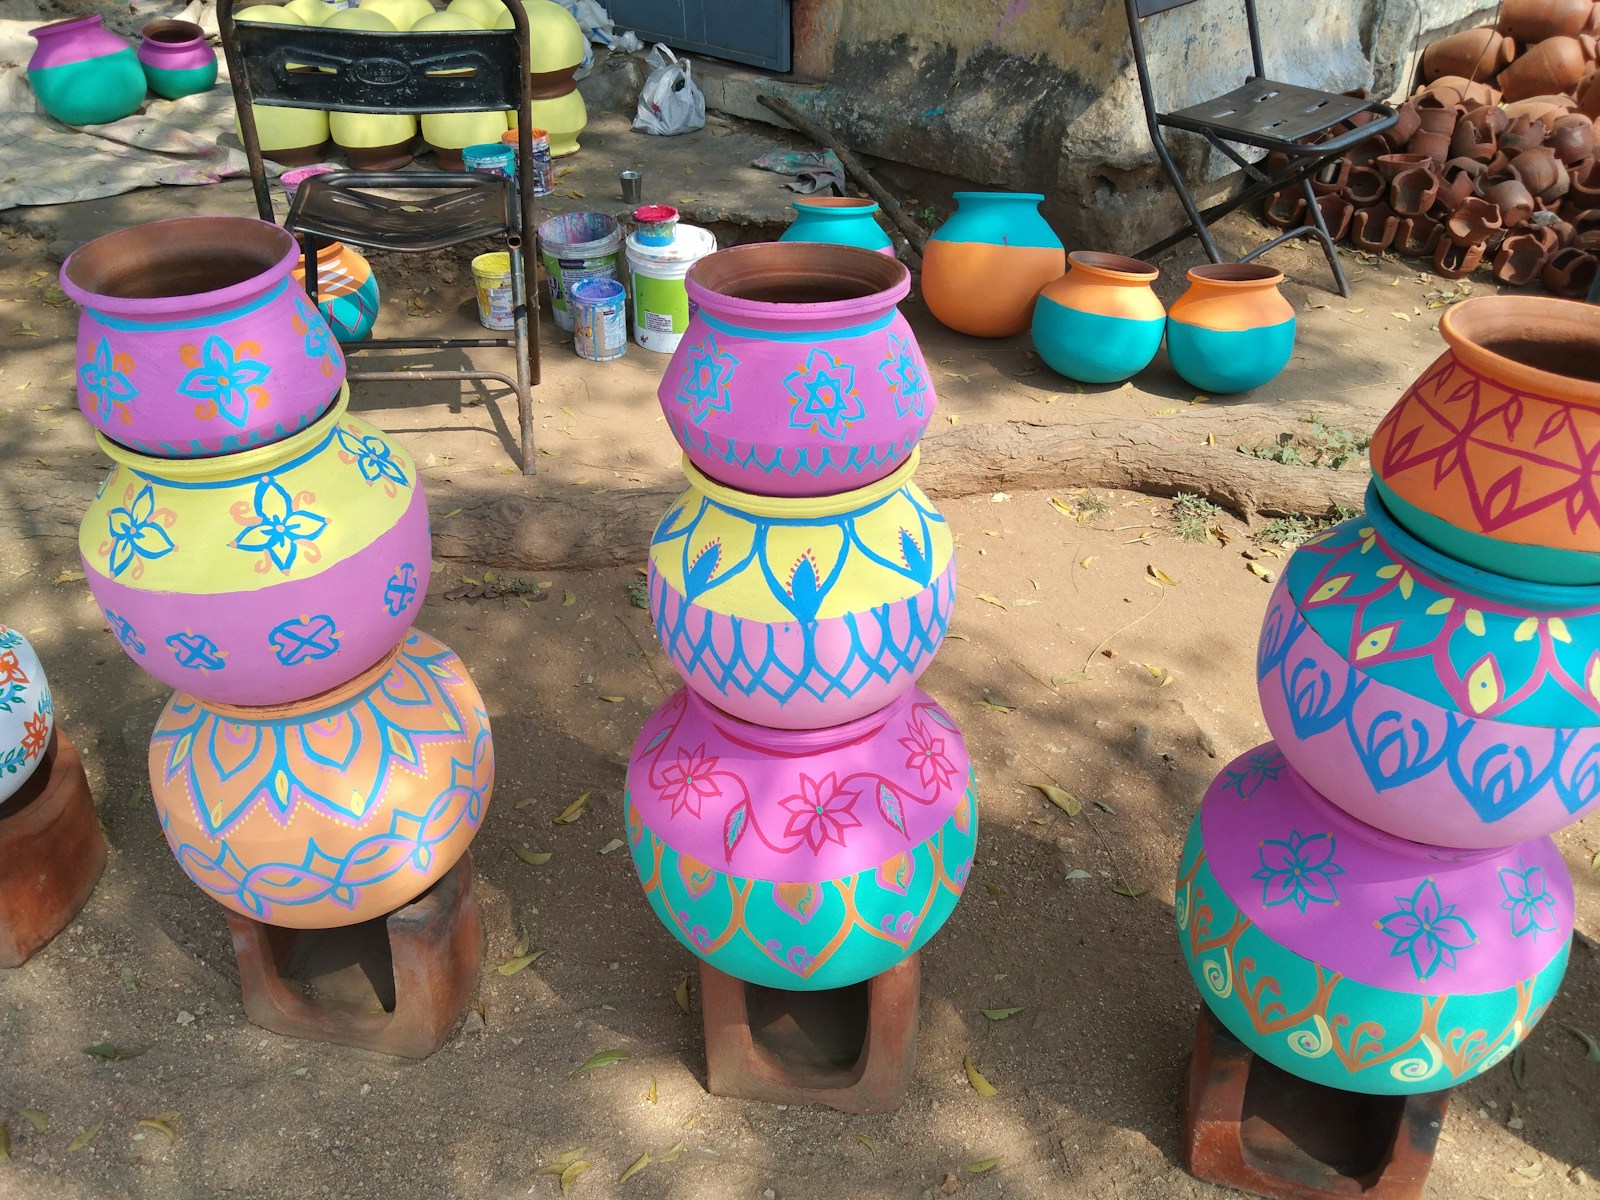
Plain terracotta pots are cheap and porous, which makes them perfect for paint and napkin decoupage ideas. Give each pot a base coat in a bright color, then add a band of napkin flowers, lemons or birds around the middle. Grouped on a porch or windowsill, they look like a matching set from a garden boutique. Seal them well so they can handle watering. For more fresh starts with old pieces, see our furniture flips. Which color would you paint first?
You will need: terracotta pots, acrylic paint, printed napkins, decoupage glue, a flat brush and an outdoor waterproof sealer.
How to make it: 1. Paint the pots with two coats of acrylic paint and let them dry. 2. Glue a strip of napkin print around the pot and smooth it gently with more glue. 3. Seal inside and out with outdoor sealer before adding soil and plants.
Painted Ornaments With Napkin Motifs
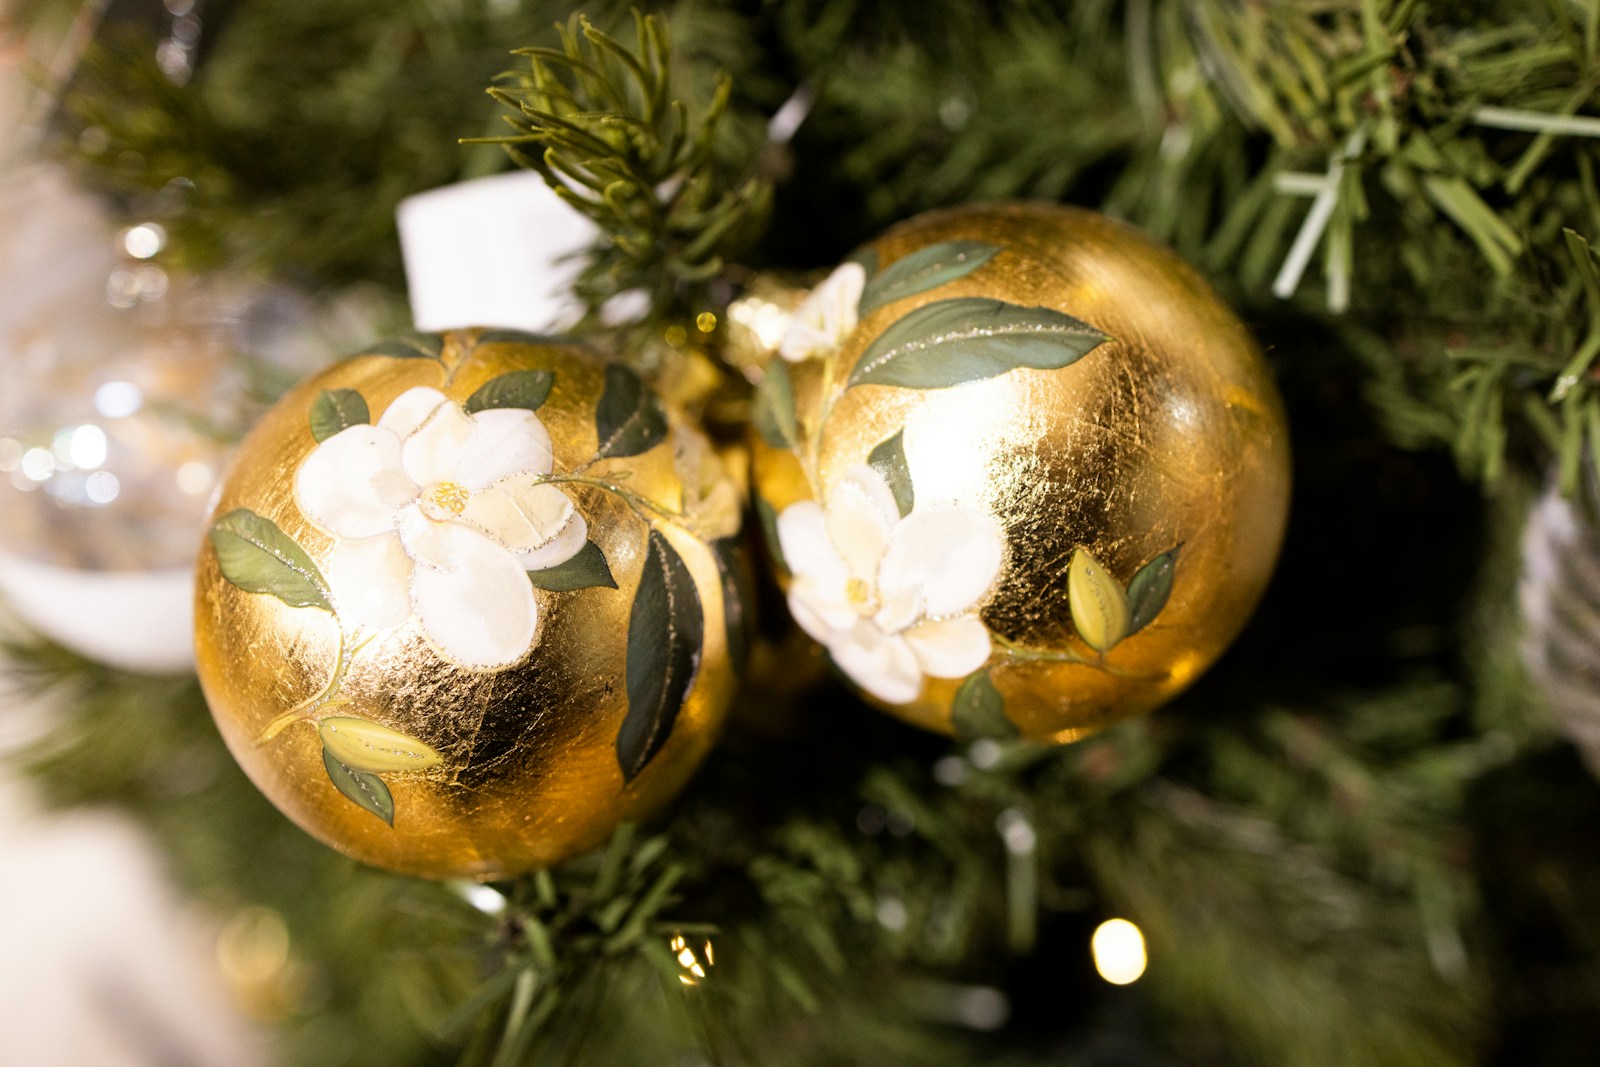
Shatterproof ornaments painted a solid color are the perfect base for small napkin motifs. Flowers, birds or tiny snowflakes from holiday napkins make each ornament look hand painted. Make a set to match your tree or use them as gift toppers that turn into keepsakes. Small motifs work best on round surfaces because they lie flat without too many wrinkles. Which holiday napkin is sitting in your drawer right now, just waiting to be used?
You will need: shatterproof ornaments, acrylic paint, holiday napkins, decoupage glue, a small soft brush and gold paint for accents.
How to make it: 1. Paint the ornaments and let them dry completely. 2. Cut small motifs, separate the printed layer and glue them on one at a time, smoothing gently with a brush. 3. Add gold dots or a rim and finish with a coat of sealer.
Wooden Spoon Wall Art
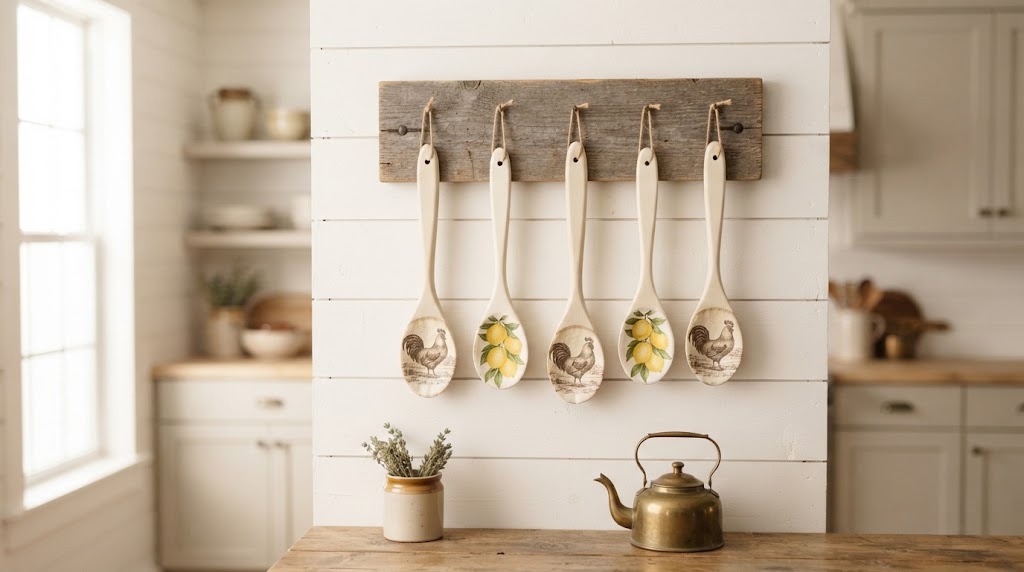
Among the most budget friendly napkin decoupage ideas, dollar store wooden spoons turn into charming farmhouse wall art with a coat of paint and a napkin print on each bowl. Roosters, lemons and herbs fit a kitchen perfectly. Hang them from a rustic board with twine loops, and you have a statement piece that costs less than a takeout lunch. These are for display only, not for stirring soup. Which wall in your kitchen needs a little personality?
You will need: 5 wooden spoons, cream acrylic paint, printed napkins, decoupage glue, a soft brush, a wooden board, small hooks and twine.
How to make it: 1. Paint the spoons cream and let them dry. 2. Decoupage a napkin motif onto each spoon bowl and seal it. 3. Screw small hooks into the board, tie twine loops on the spoon handles and hang them in a row.
Dollar Store Canvas Art
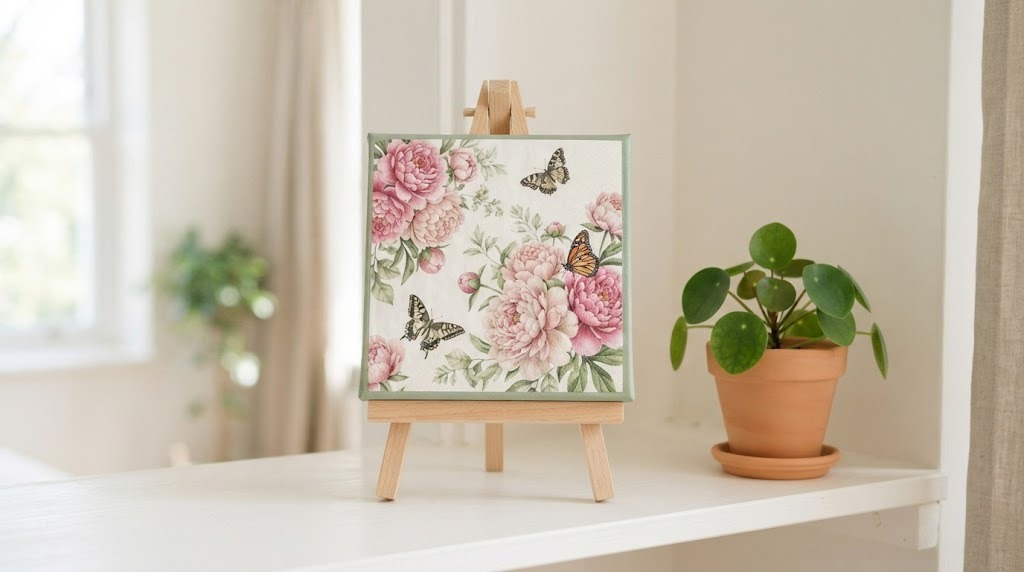
A small canvas from the dollar store becomes framed looking art with one oversized napkin print. Peonies, butterflies and botanical designs look especially elegant. Paint the edges a soft color that matches your room, and it looks like a custom piece. Make a set of three for a gallery wall that costs less than one store bought print. This dollar store canvas technique has thousands of reactions on Facebook. Which room would your mini gallery go in?
You will need: small canvases, a large printed napkin, decoupage glue, a wide soft brush and acrylic paint for the edges.
How to make it: 1. Paint the canvas edges and let them dry. 2. Brush glue over the front, lay the napkin print down and smooth it from the center out with more glue. 3. Let it dry and add one more thin coat for a soft sheen.
Napkin Decoupage Ideas for a Serving Tray
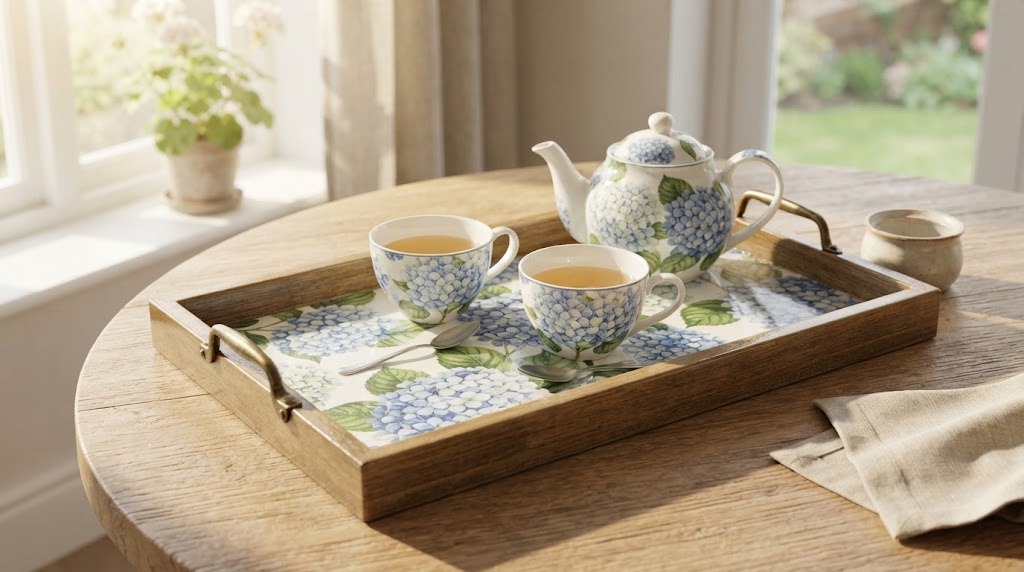
Finish with a project you will use every day. A plain wooden serving tray with handles becomes a showpiece with a hydrangea or toile napkin in the center and a few coats of glossy sealer. It is perfect for coffee mugs, a tea set or breakfast in bed. Keep food on plates rather than directly on the decoupaged surface, and wipe it clean instead of soaking it. Would you keep it for yourself or wrap it up as a gift?
You will need: a wooden tray with handles, light paint, large printed napkins, decoupage glue, a wide brush and a waterproof gloss sealer.
How to make it: 1. Paint the tray a light color and let it dry. 2. Lay napkin sections across the base, overlapping slightly, and brush glue over them from the center out. 3. Seal with three coats of waterproof gloss sealer, letting each coat dry.