Fall Leaf Crafts: 14 Gorgeous Ideas That Turn Backyard Leaves Into Free Decor
Fall leaf crafts are the sweetest kind of free magic, because the supplies are falling from the trees right now. One Instagram reel showing how to preserve real autumn leaves with a glossy coat has collected more than 115,000 likes, and a simple leaf bowl video passed 103,000 more. People clearly want cozy projects that feel like a walk in the woods. The best part is that most of these ideas cost almost nothing: a bag of leaves, some glue, a bit of twine and a free afternoon. Kids can gather and sort while grown ups handle the trickier steps. Grab a basket, head outside before the rain turns everything brown, and let us bring the colors of the season inside..
Fall Leaf Crafts Start With a Glossy Leaf Bowl
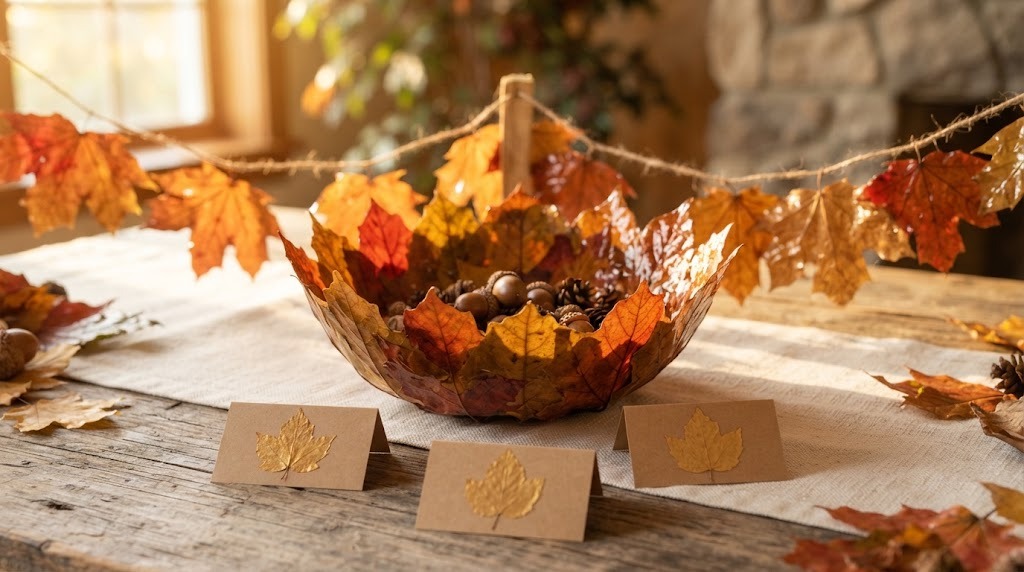
This bowl looks like something from a fancy shop, but it starts with a party balloon. Blow one up, cover the top half with plastic wrap, then layer real leaves over it with decoupage glue, overlapping the edges so there are no gaps. Three or four layers make it sturdy. Once it dries overnight, pop the balloon and peel it away, and the leaves hold their shape like magic. Fill it with acorns, pinecones or wrapped candies for the coffee table. It is the project everyone asks about first, so start here..
You will need: A round balloon, plastic wrap, 30 to 40 flat dry leaves, gloss decoupage glue, a foam brush, a small bowl to rest the balloon in.
How to make it: 1. Blow up the balloon and set it knot down in a bowl. 2. Cover the top with plastic wrap. 3. Brush on glue and layer leaves, overlapping the edges. 4. Add two more layers and let it dry overnight. 5. Pop the balloon and trim any loose tips.
A Shiny Preserved Leaf Garland
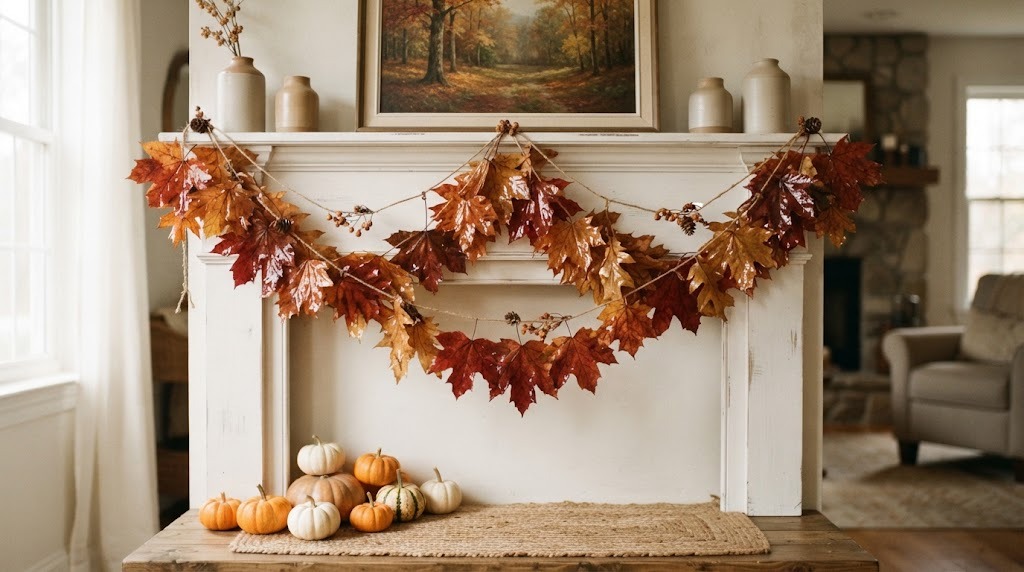
Preserving leaves is the trick that made one Instagram reel take off, with more than 115,000 likes for a simple gloss coat on real fall leaves. Brush a thin layer of decoupage glue on both sides of each fresh leaf, let them dry flat, and the colors stay bright for weeks instead of curling up in a day. Punch a tiny hole near the stem and string them on jute twine. Drape it over the mantel, a doorway or a stair rail. Which color leaves will you pick first?
You will need: Fresh, flat fall leaves, gloss decoupage glue, a foam brush, wax paper, a hole punch or large needle, jute twine.
How to make it: 1. Wipe the leaves clean and pat them dry. 2. Brush glue on the front and let it dry on wax paper. 3. Flip and coat the back. 4. Make a small hole near each stem. 5. String the leaves on twine a few inches apart.
Leaf Roses That Last for Weeks

Leaf roses are one of the prettiest fall leaf crafts, and they look like they came from a florist. Once you get the hang of it, each one takes about two minutes. Fold one maple leaf in half, roll it tightly to make the center bud, then wrap more folded leaves around it like petals. Tie the base with thread and add a twig for a stem. Make a dozen in mixed reds and golds and set them in a jar on the kitchen table. How many can you roll before dinner?
You will need: 5 to 7 large soft maple leaves per rose, sewing thread or thin floral wire, twigs or bamboo skewers for stems, a small jar or bottle.
How to make it: 1. Fold a leaf in half lengthwise. 2. Roll it into a tight bud. 3. Wrap more folded leaves around the bud, one at a time. 4. Tie the base with thread. 5. Push in a twig stem and arrange the roses in a jar.
Fall Leaf Crafts for Artists: A Leaf Mosaic Landscape
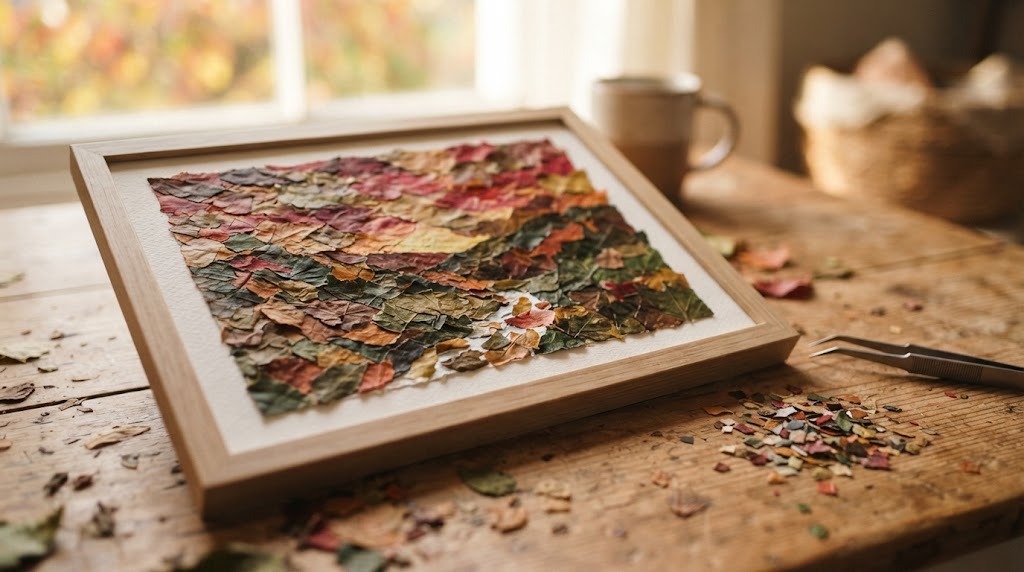
Leaf mosaic art is like painting with nature’s own colors, and a leaf landscape reel on Facebook picked up nearly 12,000 reactions. Tear dried leaves into small pieces and sort them into piles by shade: yellows for the sky, oranges for the sun, browns and reds for the hills. Lightly sketch a simple scene on thick card, then glue the pieces down one section at a time. Tweezers make tiny bits easier to place. Frame it and you have art that cost nothing. What scene would you make?
You will need: Dry pressed leaves in many colors, thick card or watercolor paper, a pencil, white craft glue, a small brush, tweezers, a frame.
How to make it: 1. Sketch a simple landscape with three or four big shapes. 2. Tear the leaves into small bits and sort them by color. 3. Brush glue onto one area at a time. 4. Press the leaf pieces in place, overlapping slightly. 5. Dry it under a heavy book, then frame it.
Glowing Pressed Leaf Jar Lanterns
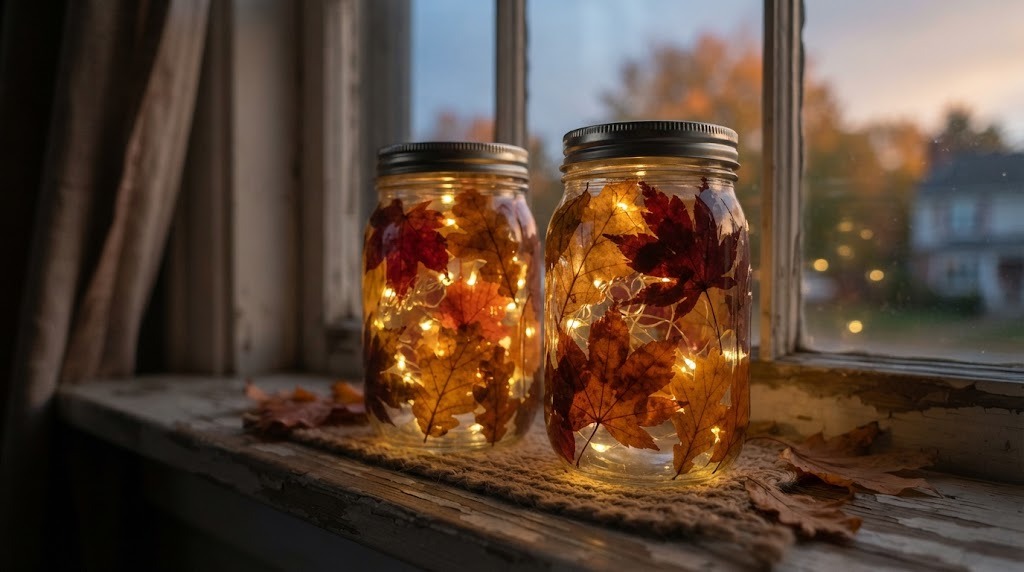
An empty jar turns into a glowing lantern with a few pressed leaves and some glue. Brush decoupage glue onto the outside of a clean jar, press the leaves on flat, then add a coat over the top to seal them. When it dries clear, drop in a string of battery LED fairy lights and watch the leaf veins glow like stained glass. LED lights are the safe choice here, since dry leaves and real flames never mix. Line a few up on the windowsill or porch steps. Where would yours shine brightest?
You will need: Clean glass jars, pressed fall leaves, decoupage glue, a foam brush, jute twine, battery LED fairy lights or LED tea lights.
How to make it: 1. Brush glue on a small area of the jar. 2. Press a leaf on and smooth out any bubbles. 3. Repeat all the way around. 4. Coat everything with glue and let it dry. 5. Tie twine around the rim and add the LED lights.
Painted Leaf Art With Bold Patterns
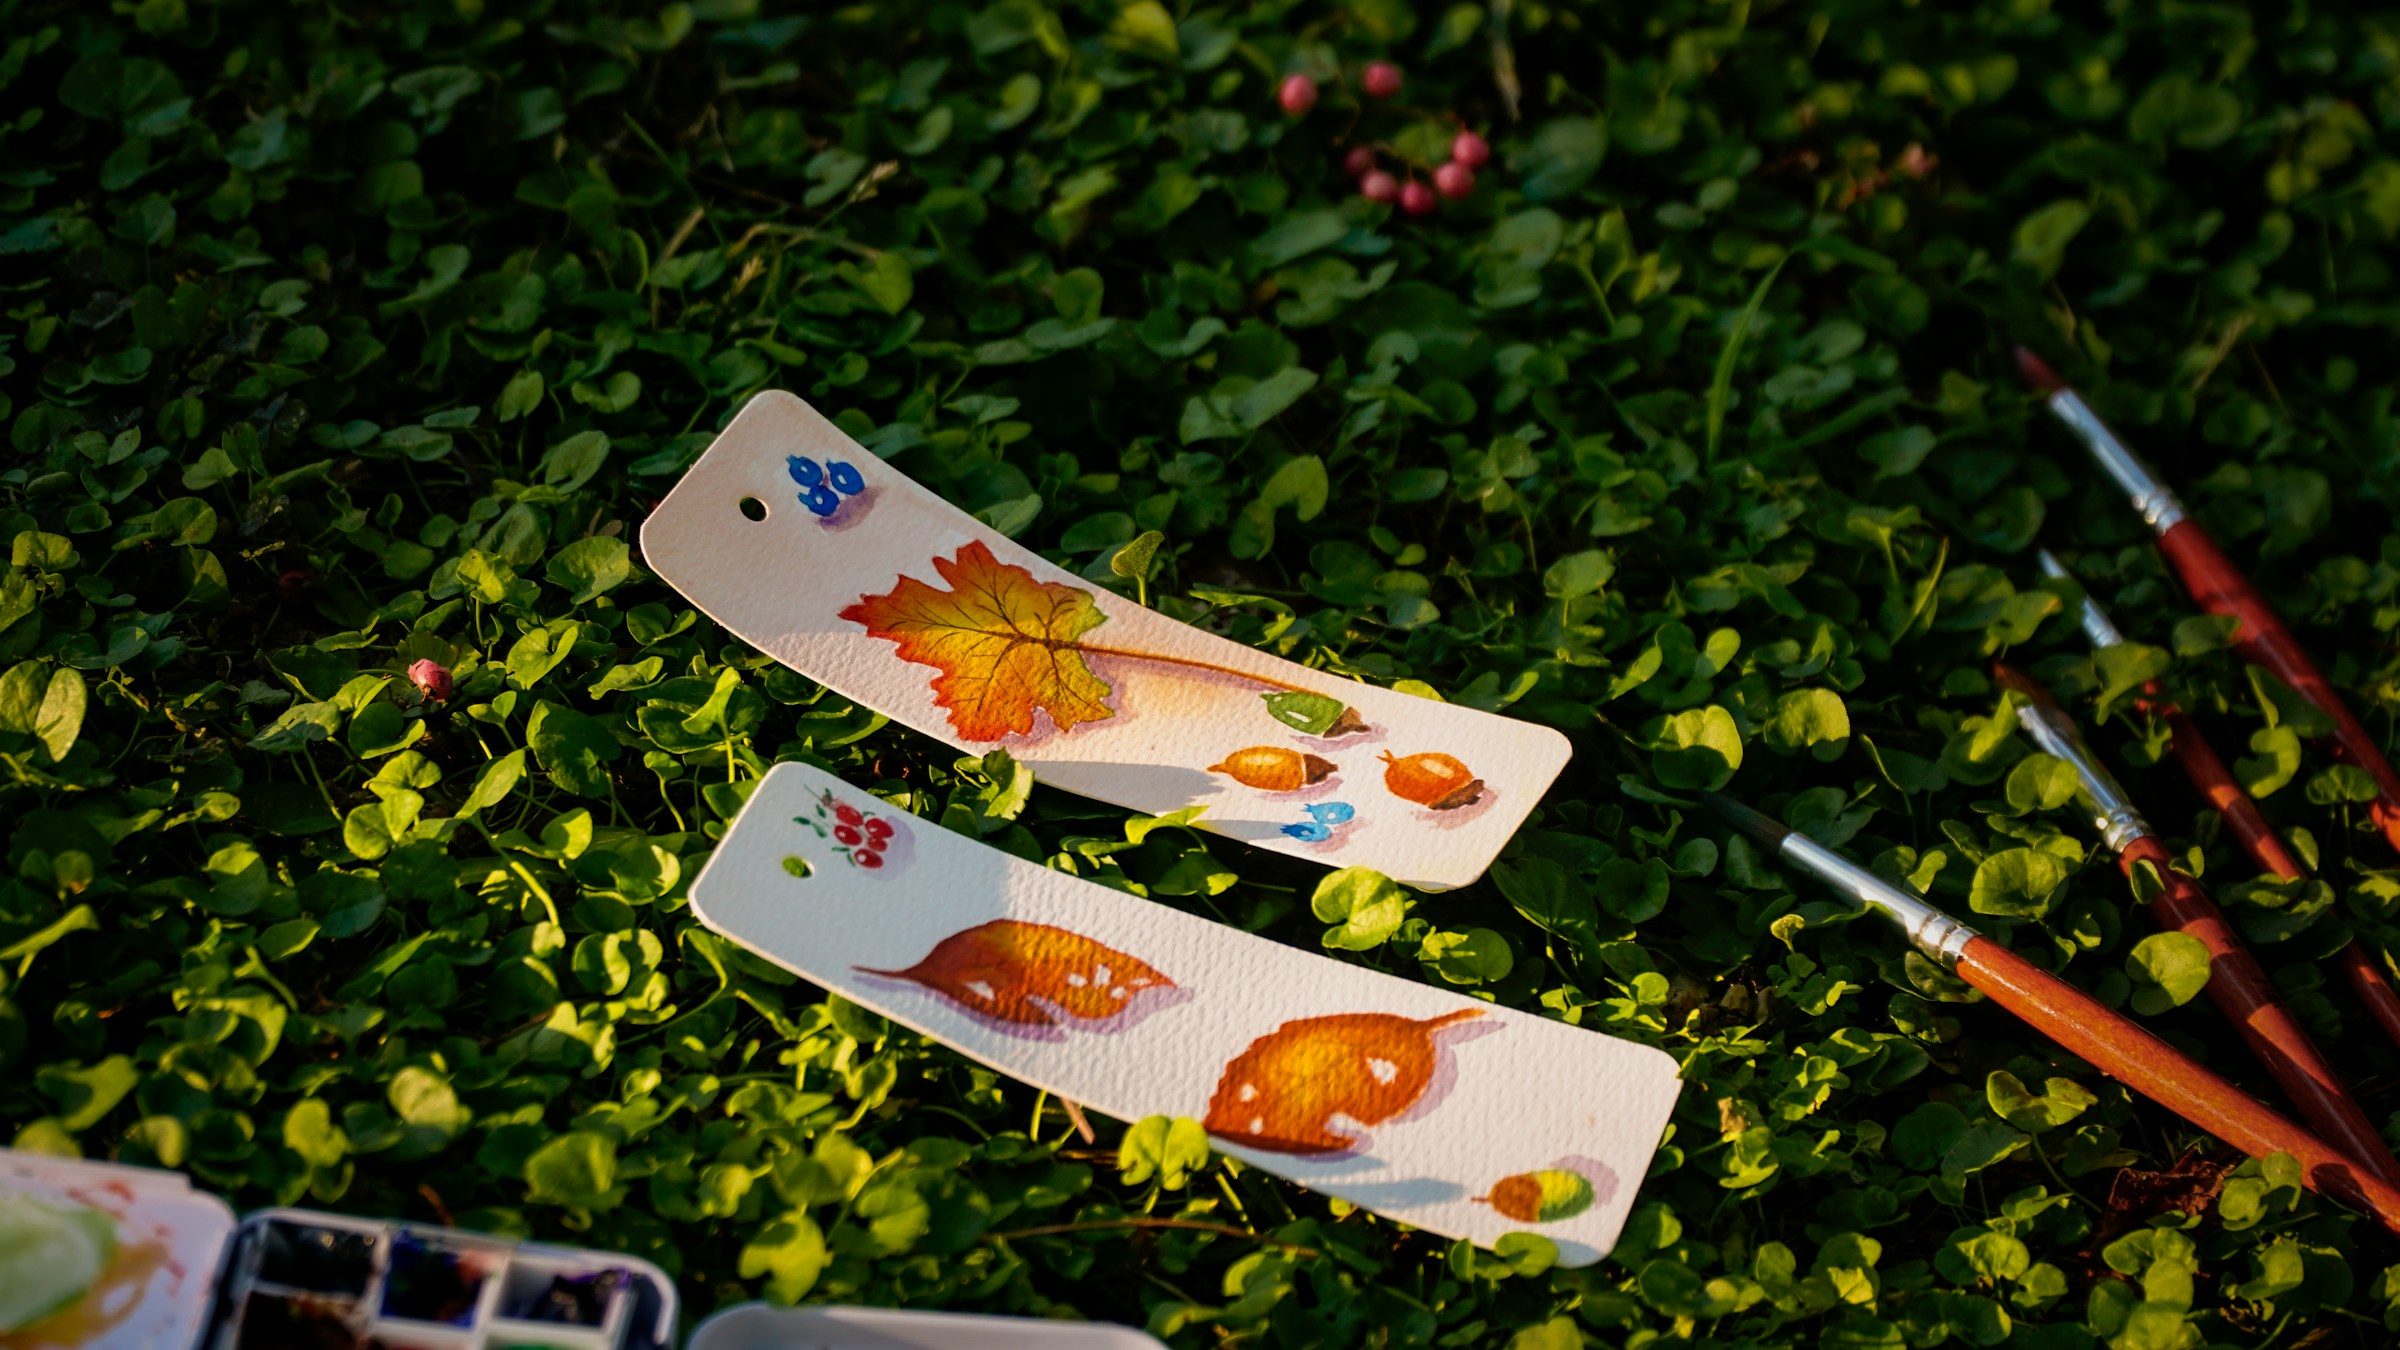
Painted leaves are fall leaf crafts that turn a pile of plain finds into little works of art. Use acrylic paint and a fine brush to add dots, stripes, swirls or tiny patterns along the veins, or paint the whole leaf a bright color and add gold edges. Dried leaves are delicate, so press them for a few days first to keep them flat. Scatter them on the table, glue them to greeting cards or string them into a mobile. This one is lovely for a quiet evening with a cup of tea. Would you go bold or keep it simple?
You will need: Pressed dry leaves, acrylic paints, fine and medium brushes, a paint palette, clear sealer (optional, adult use).
How to make it: 1. Press the leaves under heavy books for 3 to 5 days. 2. Paint a base color or leave them natural. 3. Add dots, lines or patterns with a fine brush. 4. Let them dry, then seal them if you want extra shine.
A Leaf Crown for Little Royals

Every child should get to wear a crown made of autumn at least once. Cut a strip of cardstock that fits around their head, staple it into a ring, then let them glue or tape on the biggest, brightest leaves they can find. Tall maple leaves standing upright look especially royal. Add acorns or a feather for extra flair. It is a perfect activity for a fall birthday party or the kids table at Thanksgiving. Snap a photo, because they grow out of these moments fast. Who is the king or queen of fall at your house?
You will need: A strip of brown or gold cardstock, a stapler, tape or white glue, large fall leaves, acorns or feathers (optional).
How to make it: 1. Measure the strip around the head and staple it closed. 2. Lay out the leaves to plan the design. 3. Glue or tape the leaves standing up around the band. 4. Let it dry flat before wearing.
Fall Leaf Crafts Kids Love: Silly Leaf Critters
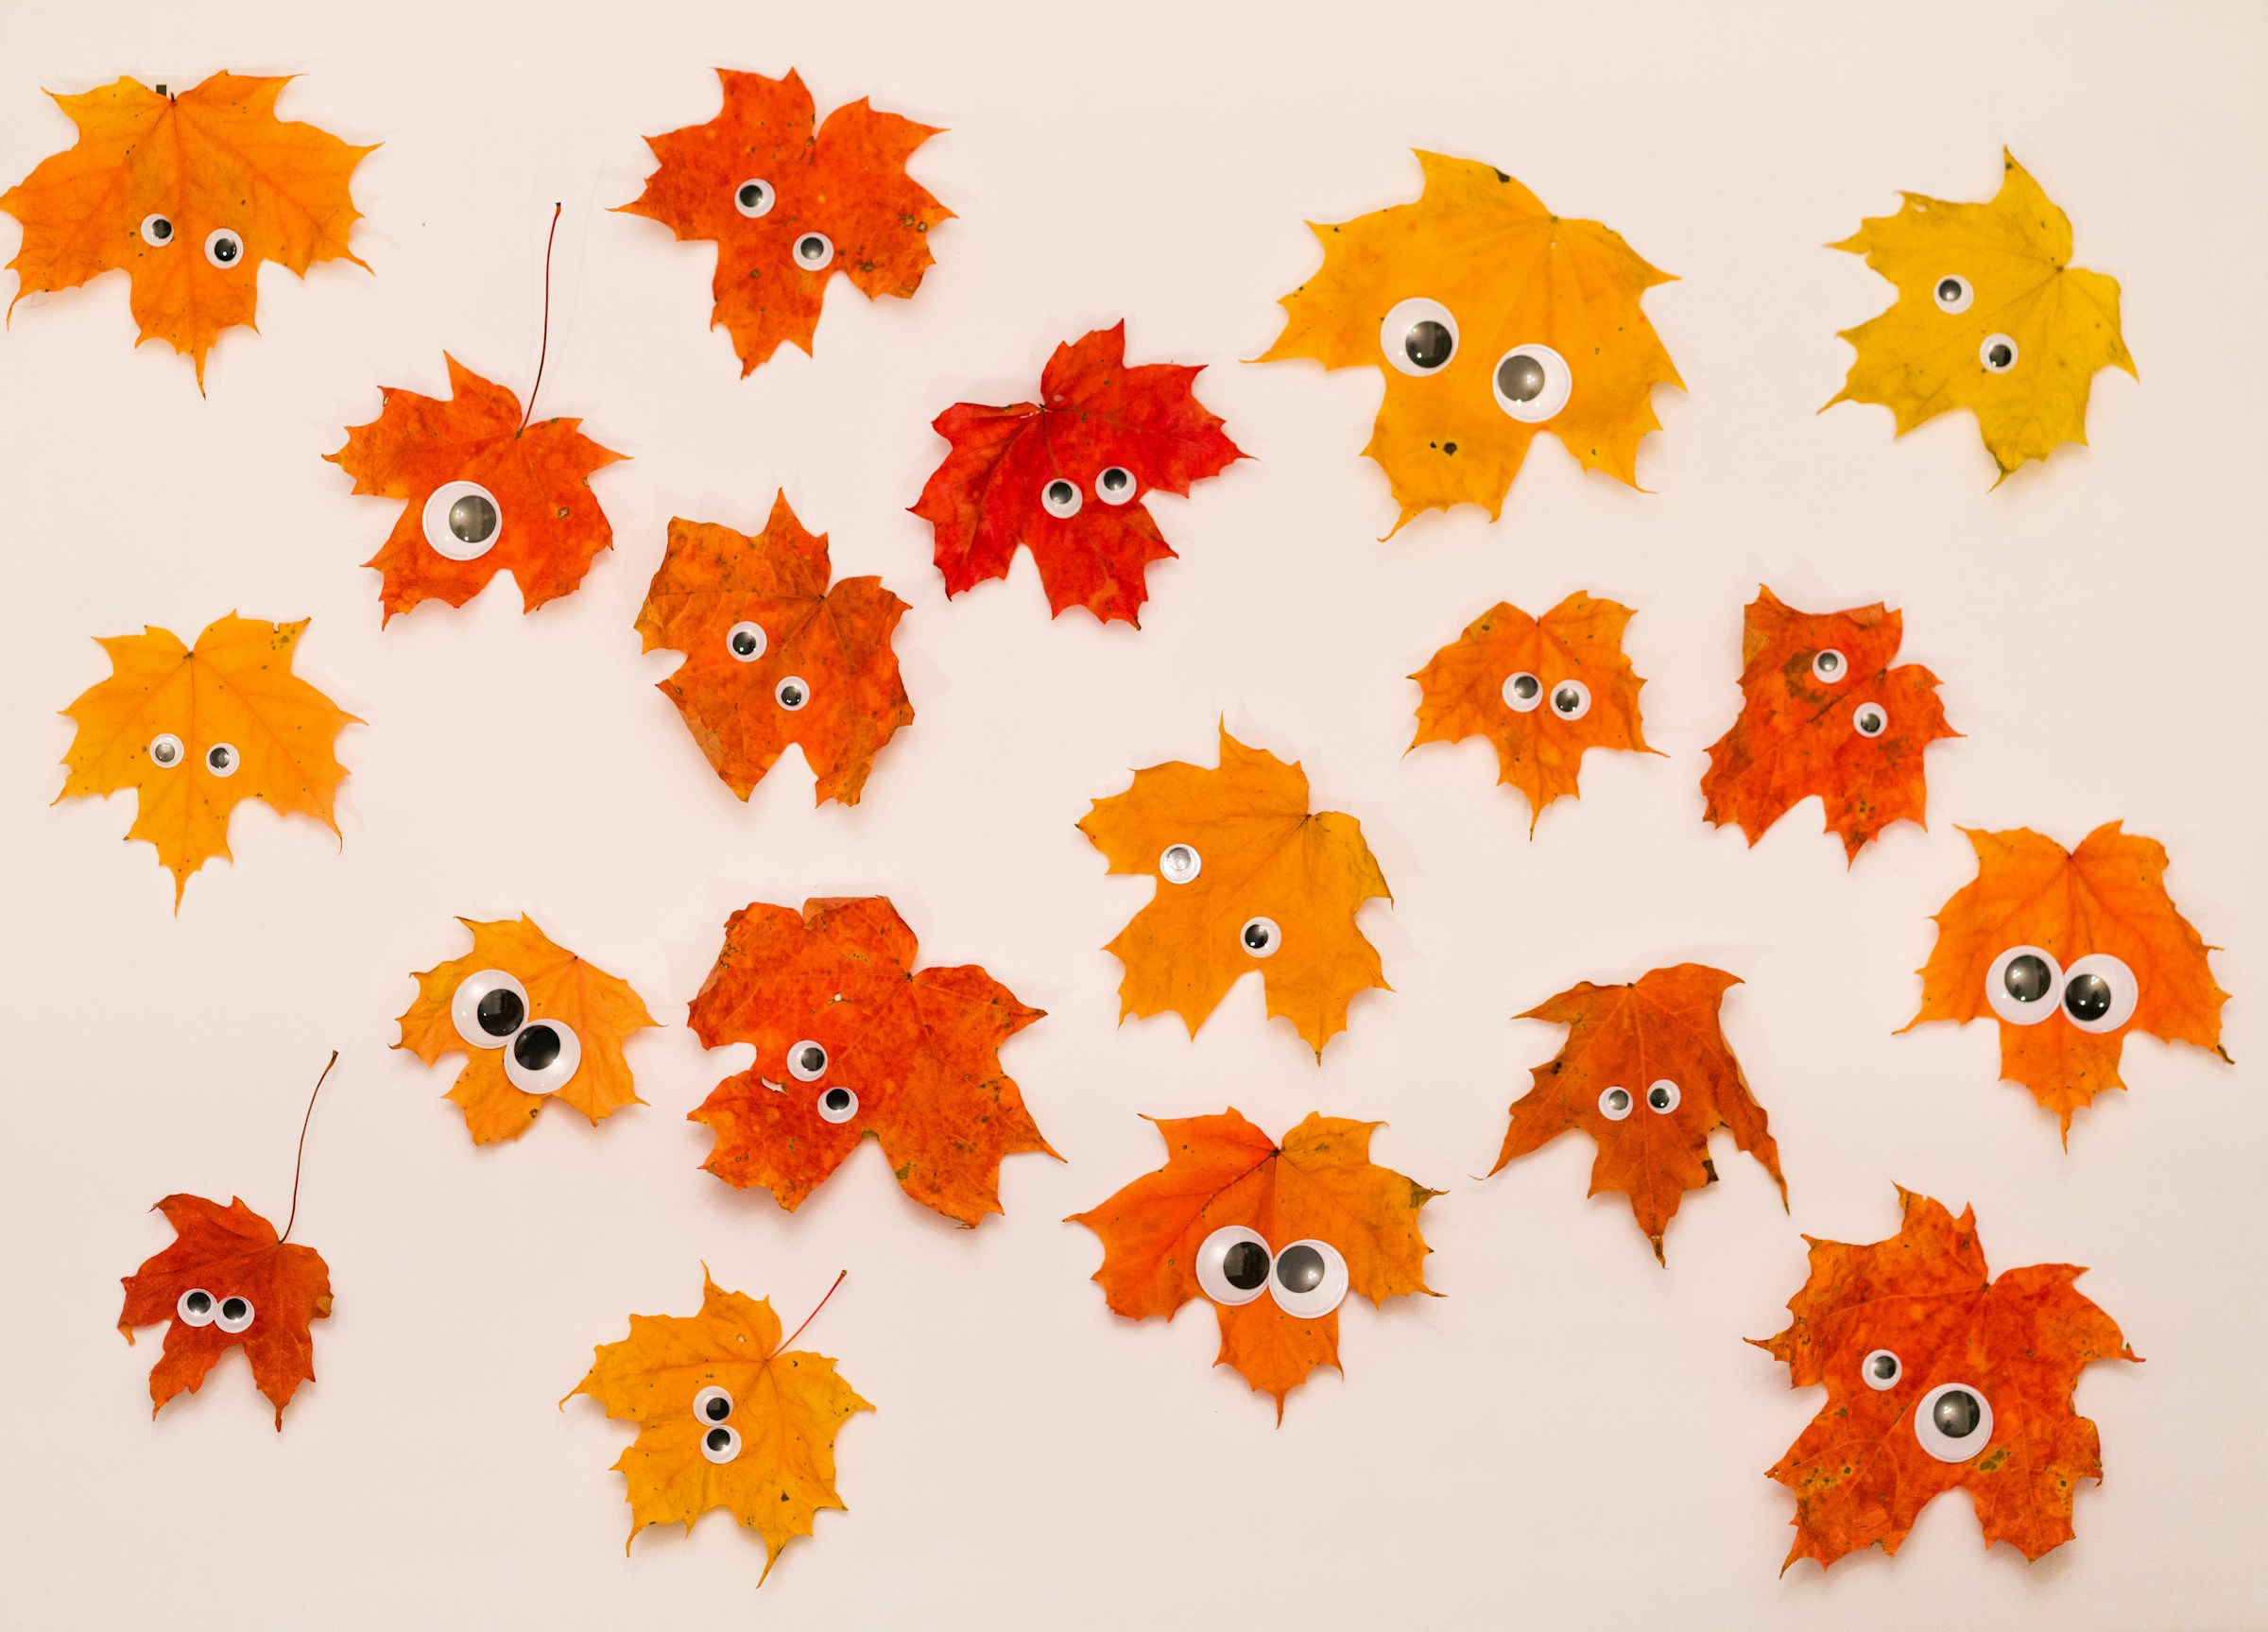
Fall leaf crafts for kids do not get sillier than this. Add a pair of googly eyes to a leaf and suddenly it has a personality. A long yellow leaf becomes a fish, a round red one becomes an owl, and a pair of maple leaves can turn into a fox with a little paper nose. Glue them onto paper and draw legs, tails and backgrounds with markers. Kids will happily spend an hour inventing a whole leafy zoo. Hang the best ones on the fridge. Which animal will your kids create first?
You will need: Assorted dry leaves, googly eyes, white glue, colored paper, markers, child safe scissors.
How to make it: 1. Spread the leaves out and look for shapes that remind you of animals. 2. Glue the leaves onto paper. 3. Add googly eyes. 4. Draw the details with markers.
Leaf Rubbings That Feel Like Magic
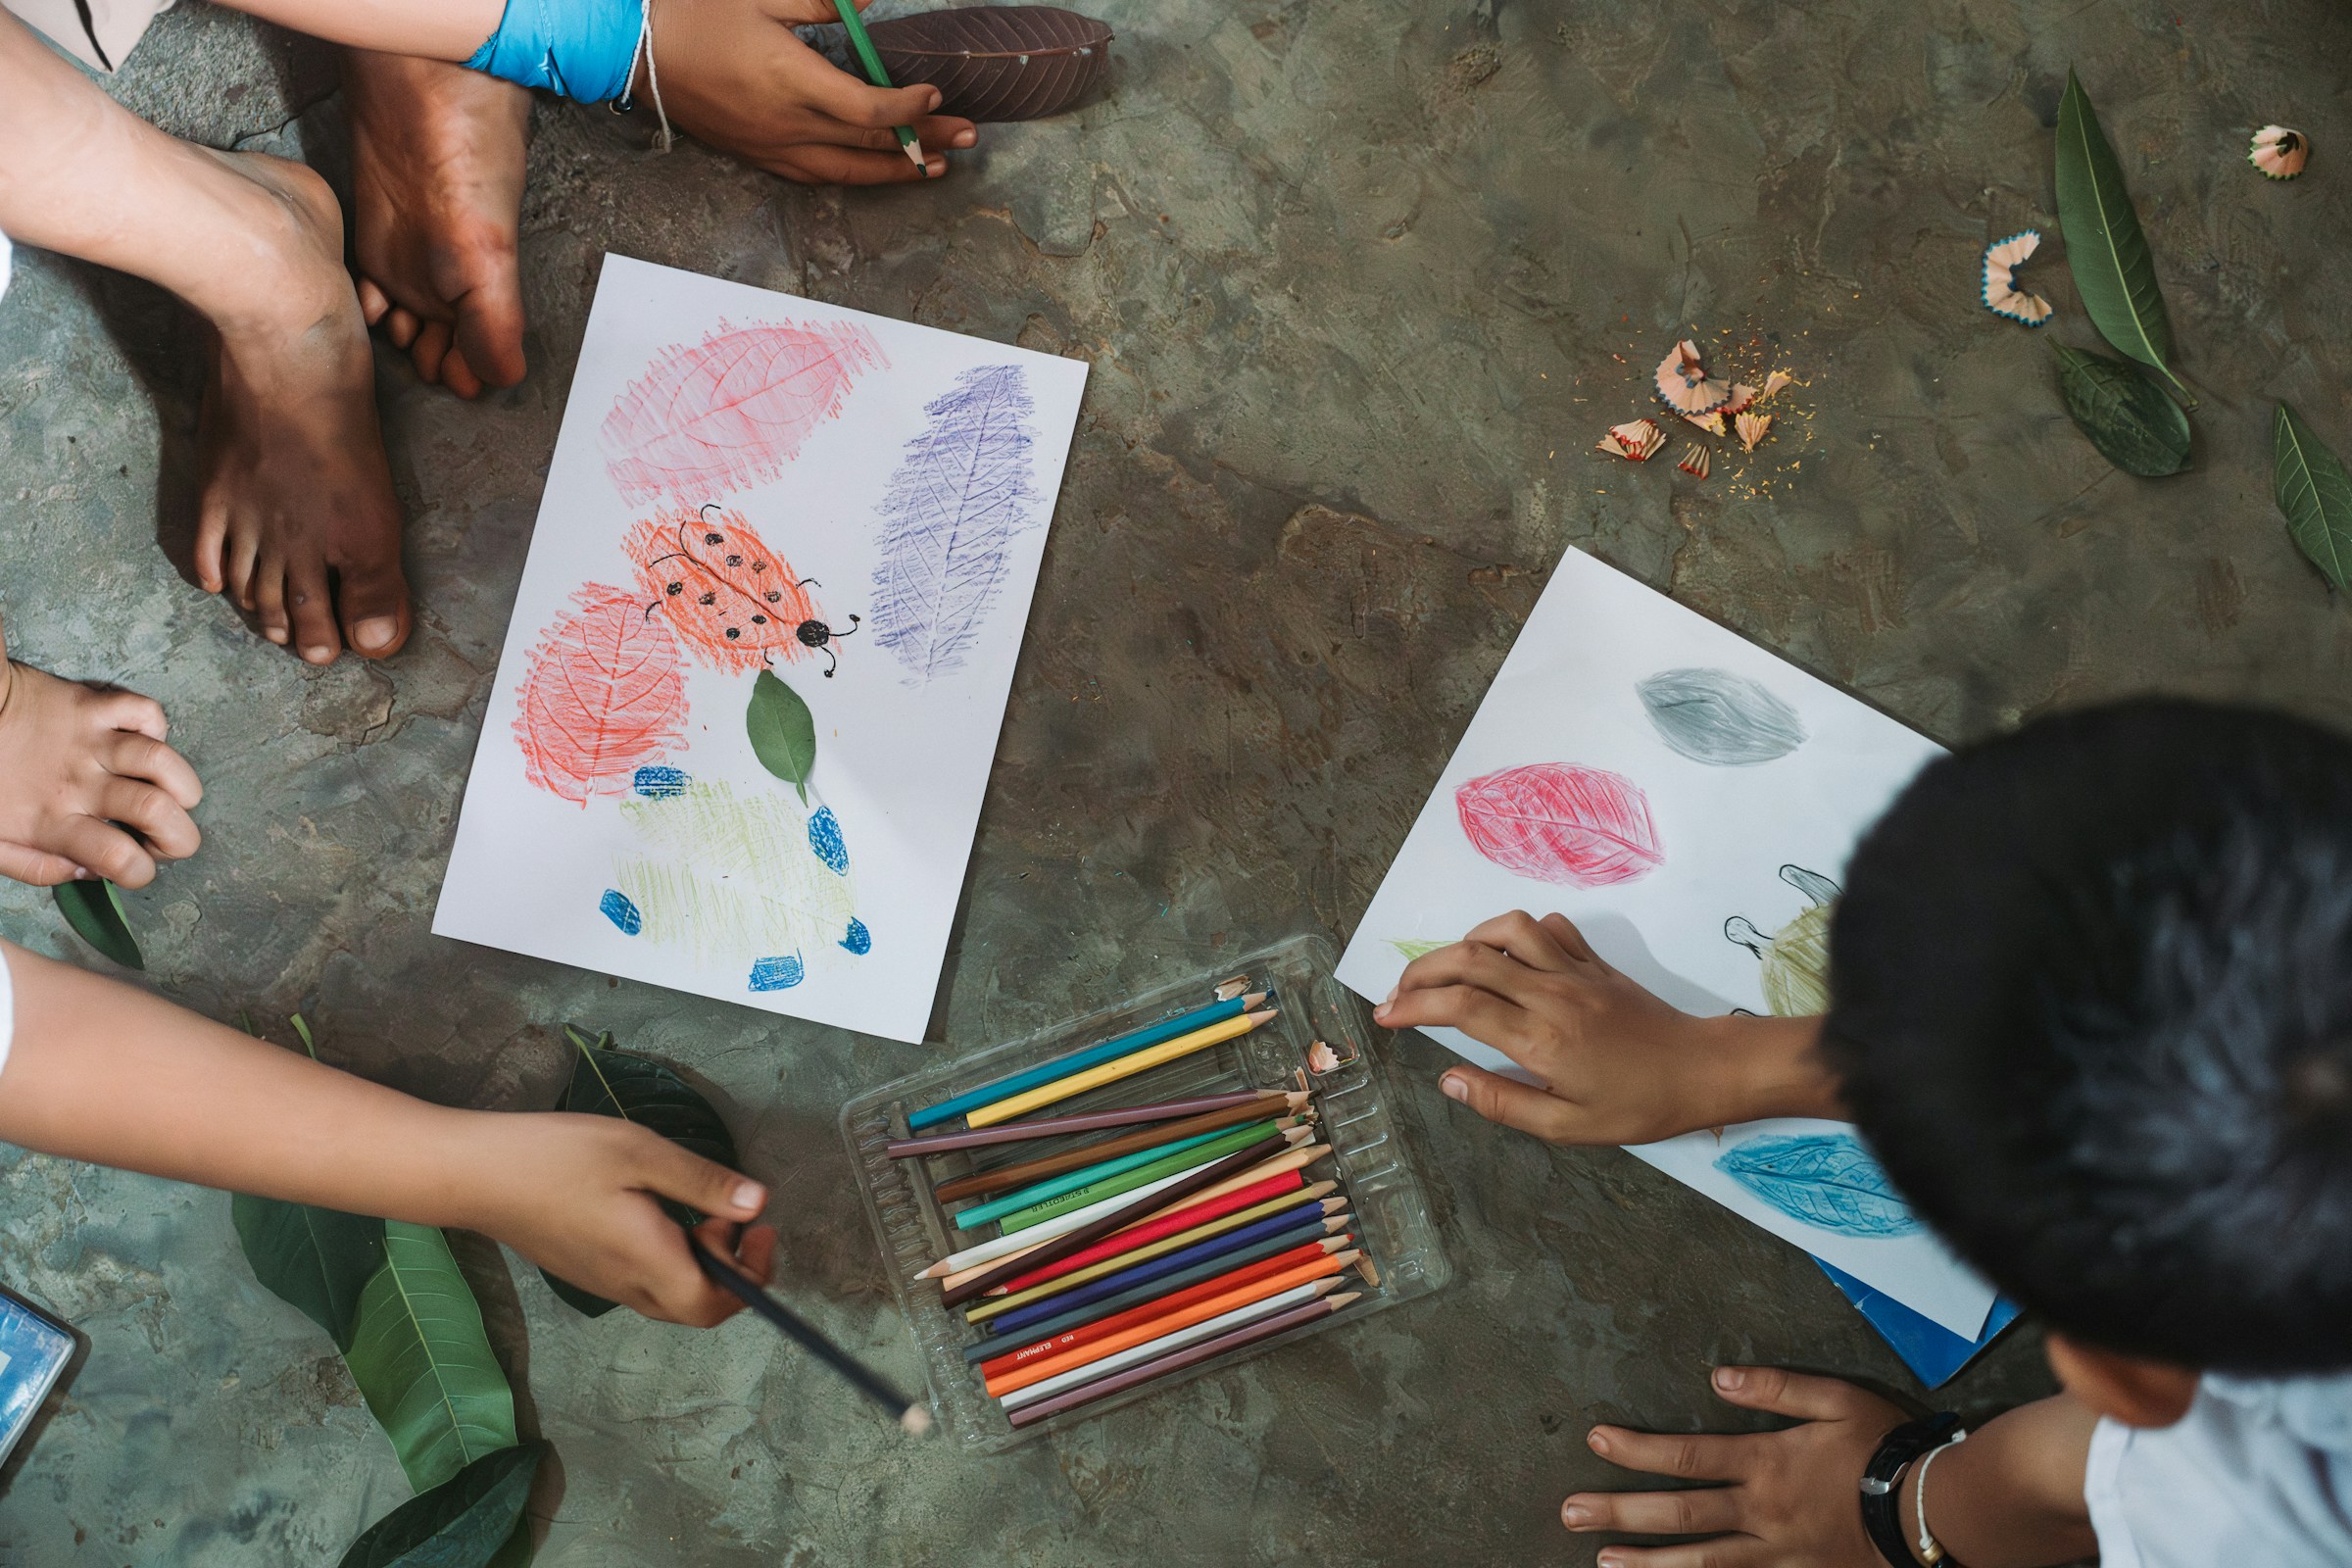
Leaf rubbings are the classic fall leaf crafts for a reason: they feel like magic every single time. Place a leaf vein side up under thin paper, then rub the side of a peeled crayon over it, and the whole leaf appears with every tiny line. Try different colors on the same page for a rainbow effect. Older kids can cut the rubbings out and glue them into a collage or a framed set. It is a great rainy day activity using leaves you gathered earlier in the week. Have you tried this since you were little?
You will need: Fresh leaves, thin white paper, peeled crayons in fall colors, tape, frames (optional).
How to make it: 1. Tape a leaf vein side up to the table. 2. Lay the paper over it. 3. Rub the side of a crayon gently across the paper. 4. Repeat with more leaves and colors.
An Embroidery Hoop Leaf Wreath
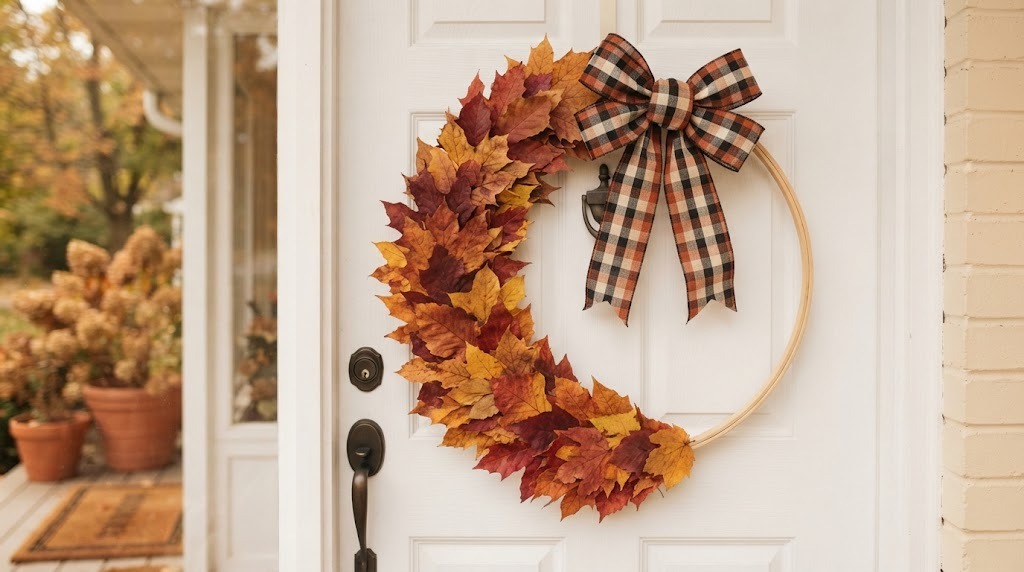
An embroidery hoop makes the easiest modern wreath base you will ever use. Glue a cluster of preserved leaves along one side of the ring and leave the rest of the wood bare, which looks fresh and simple. Add a plaid ribbon bow or a few faux berries where the leaves meet. It weighs almost nothing, so it hangs on a door with a small removable hook. For more cozy natural ideas, try these pine cone Christmas crafts next. What colors would you choose?
You will need: A wooden embroidery hoop (inner ring), preserved fall leaves, a hot glue gun (adult help), plaid ribbon, a removable hook.
How to make it: 1. Separate the hoop and use the inner ring. 2. Plan the leaf cluster on one side. 3. Glue the leaves on, layering from the edges in. 4. Tie a bow over the stems and hang it.
Pressed Leaf Botanical Wall Art
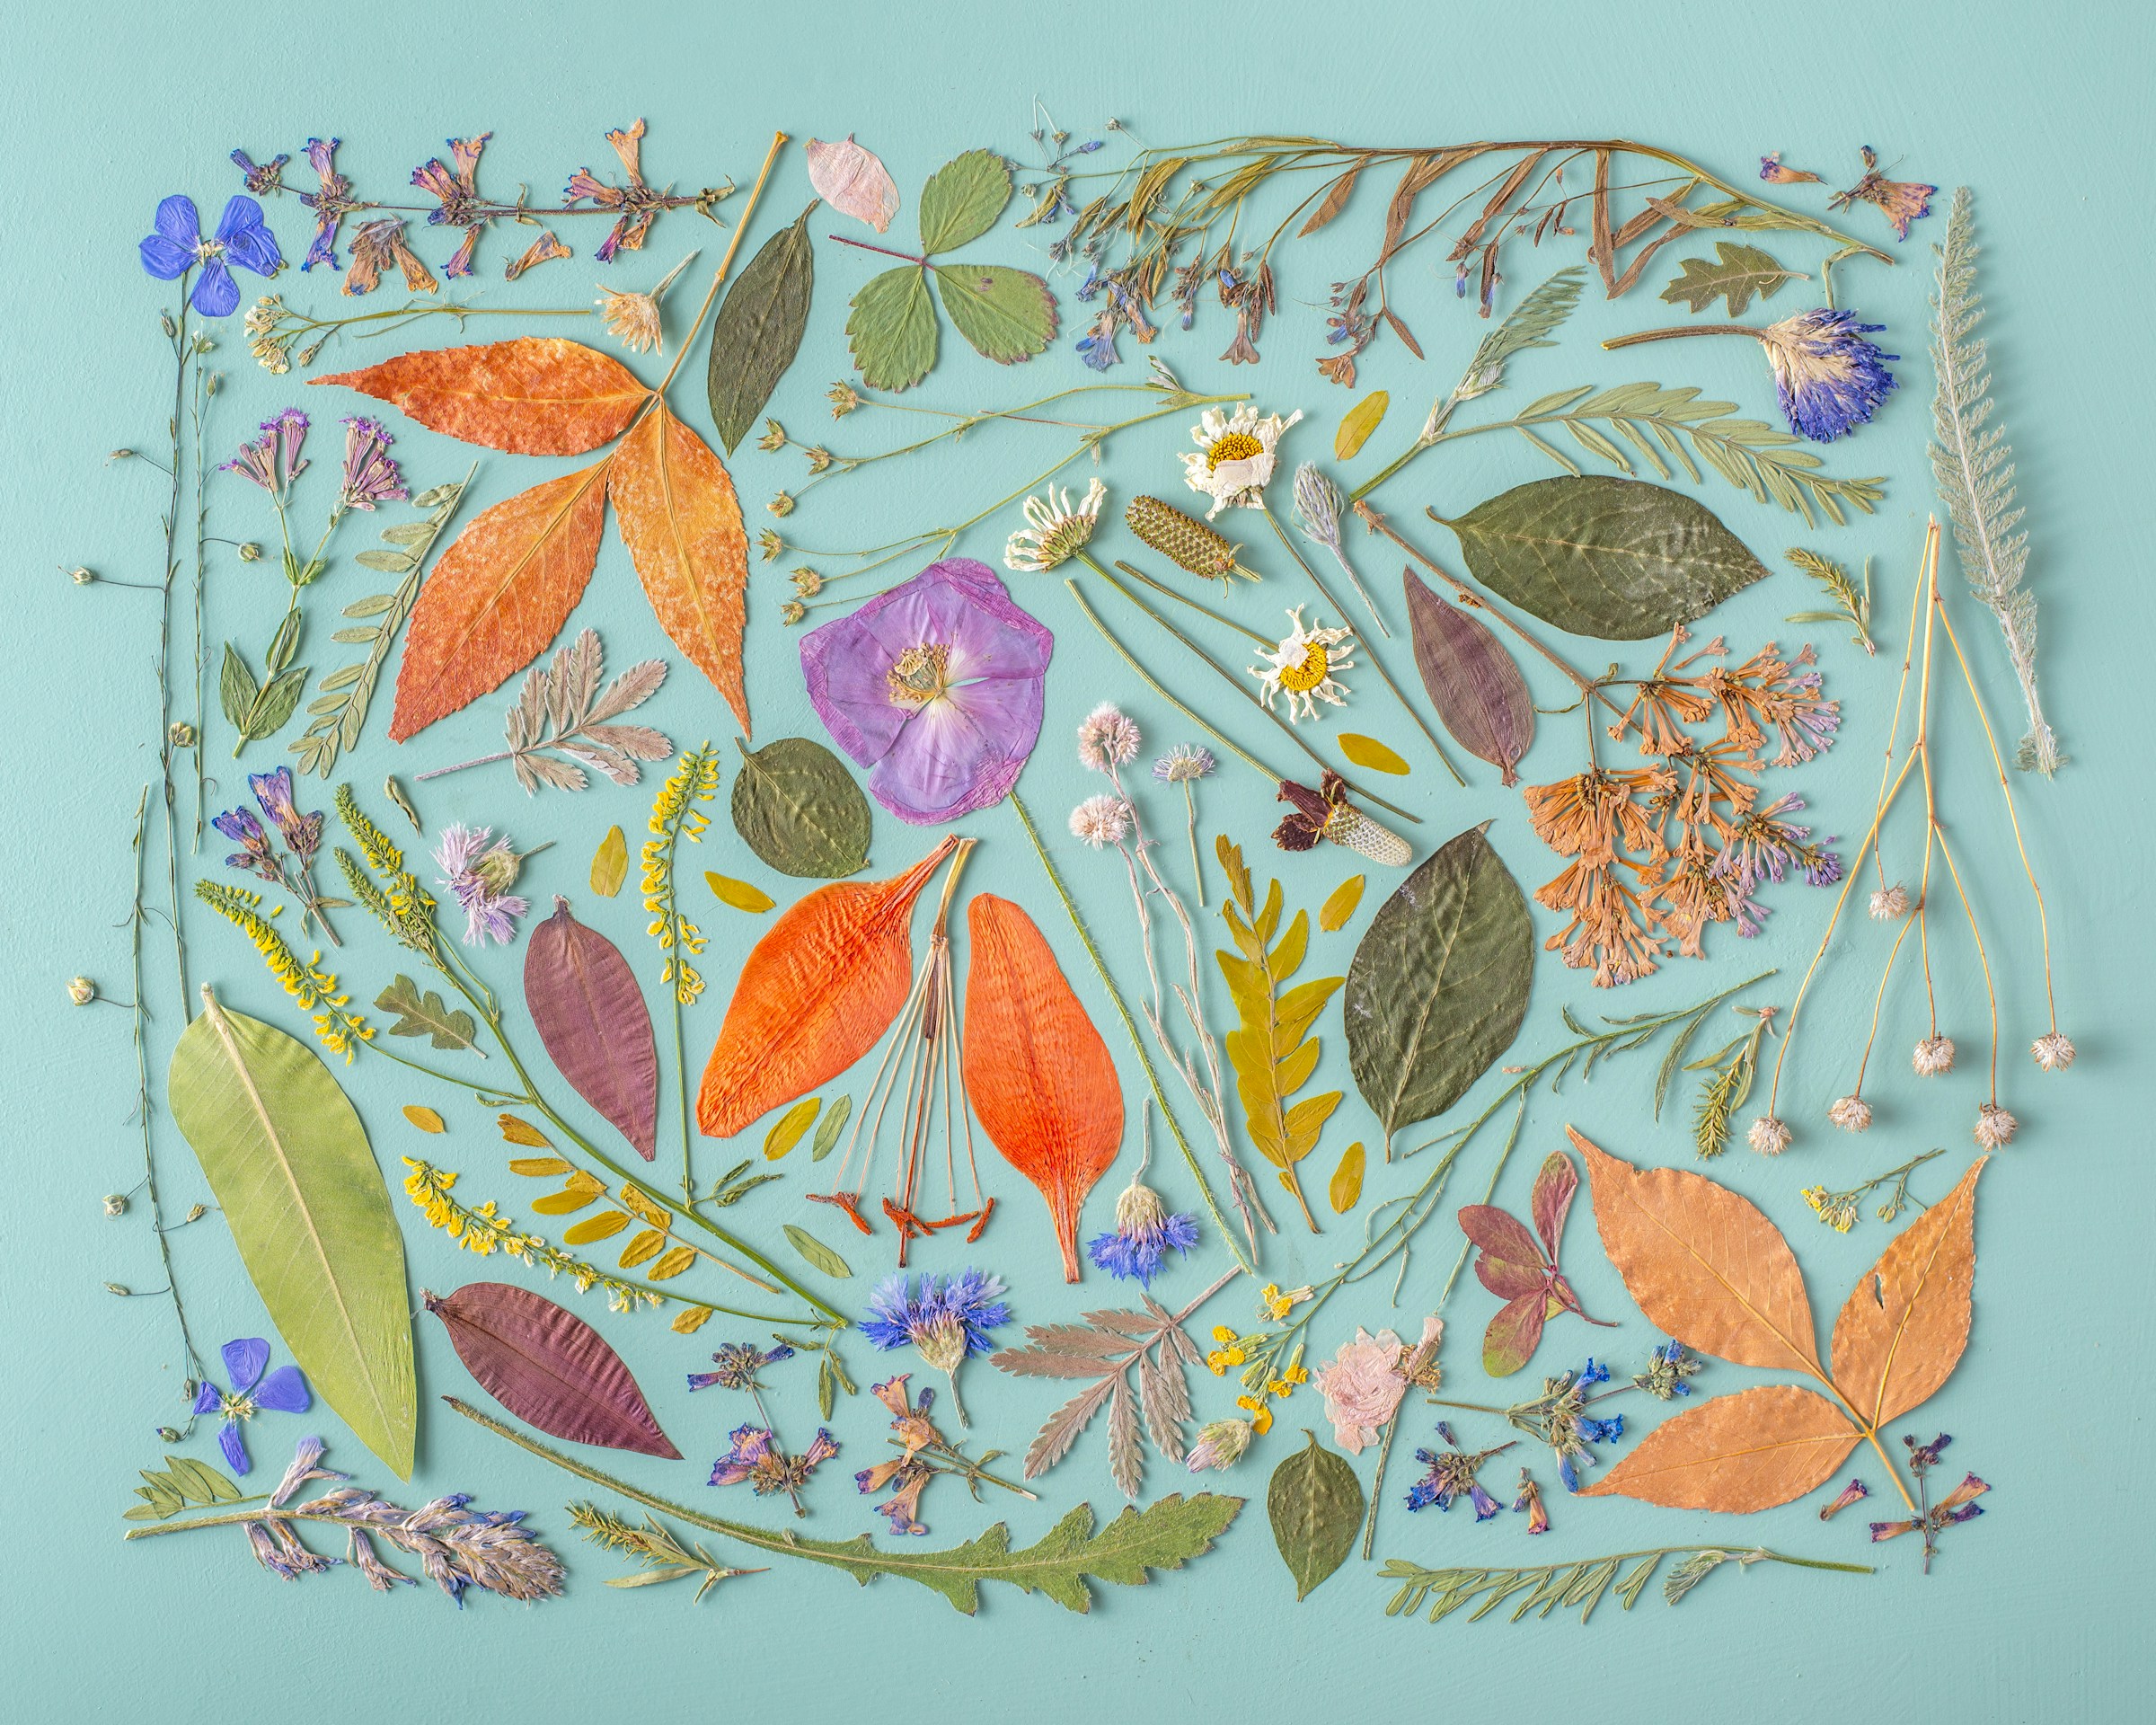
Pressed leaf art is one of the calmest fall leaf crafts, and it brings a quiet gallery look to any wall. Collect leaves in different shapes and sizes, press them flat in an old book for about a week, then arrange them on colored card in rows, a circle or a loose scatter. A bold background like deep blue makes the warm leaf colors glow. Glue them down with tiny dots of glue and slip the card into a frame. Make a set of three for a hallway. It is a lovely way to save the colors of one special walk. Where would you hang yours?
You will need: Leaves in mixed shapes, heavy books and paper towels for pressing, colored cardstock, white glue, a frame.
How to make it: 1. Press the leaves between paper towels in a heavy book for 7 days. 2. Arrange them on the card. 3. Glue each one down with small dots. 4. Frame it behind glass.
Fall Leaf Crafts for the Table: A Gold Tipped Centerpiece
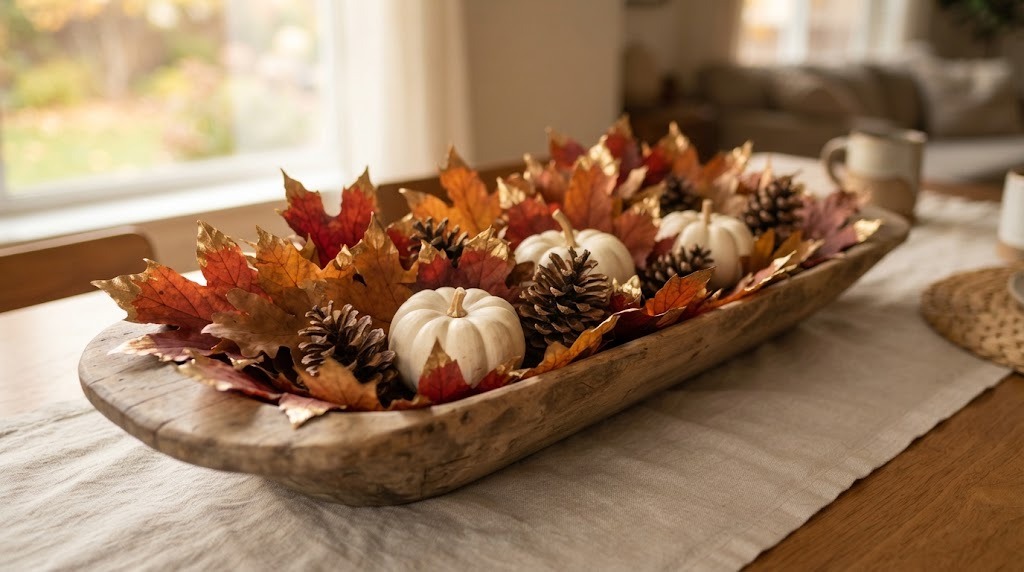
Fall leaf crafts can look elegant too, and a little gold paint is the secret. Dip just the tips of dried leaves in metallic gold paint, or brush it on, and let them dry on wax paper. Arrange them in a long wooden bowl with small white pumpkins, pinecones and a few cinnamon sticks. The gold catches the light during dinner and makes the table feel dressed up for almost nothing. It looks wonderful on a Thanksgiving table or a sideboard. Would you go gold, copper or silver?
You will need: Pressed dry leaves, metallic gold acrylic paint, a small brush, wax paper, a long bowl or tray, mini pumpkins, pinecones.
How to make it: 1. Paint the tips or edges of each leaf. 2. Let them dry on wax paper. 3. Fill the bowl with pumpkins and pinecones. 4. Tuck the gold leaves in between.
Glossy Leaf Place Settings for Thanksgiving
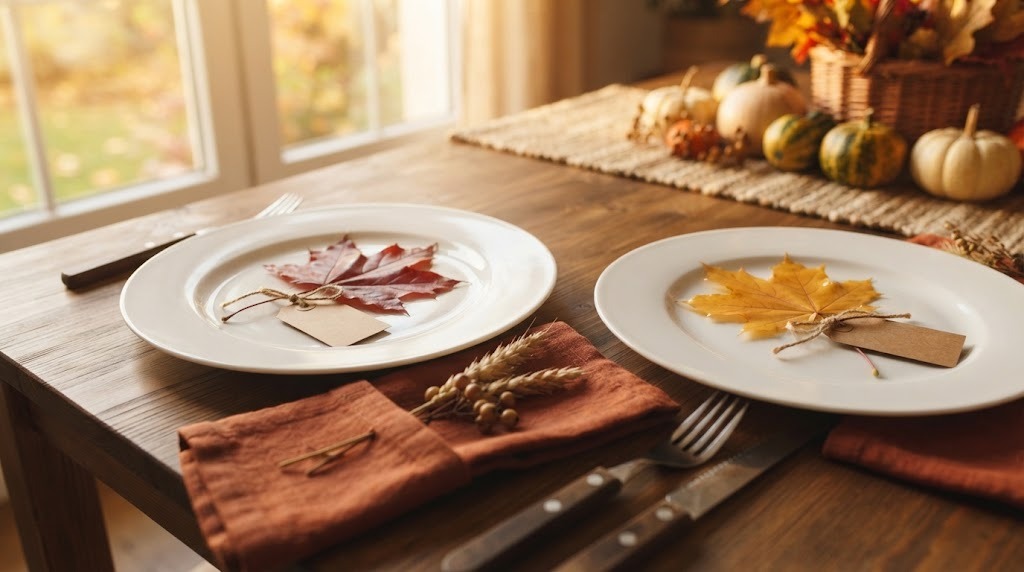
Set a Thanksgiving table that feels thoughtful without spending a thing. Coat bright leaves with gloss decoupage glue so they stay vivid, then lay one on each plate with a small kraft tag tied on with twine. Write each guest name on the tag in your neatest handwriting. Kids can help choose the perfect leaf for every person at the table, which makes a sweet job on a busy cooking day. Guests often take them home as a keepsake. Which leaf would you choose for grandma?
You will need: Large bright leaves, gloss decoupage glue, a foam brush, kraft paper tags, twine, a pen.
How to make it: 1. Coat both sides of each leaf with glue and dry them flat. 2. Write the names on the tags. 3. Tie a tag to each leaf stem. 4. Place one on each plate.
Fall Leaf Crafts to Hang: Leaf Flower Ornaments
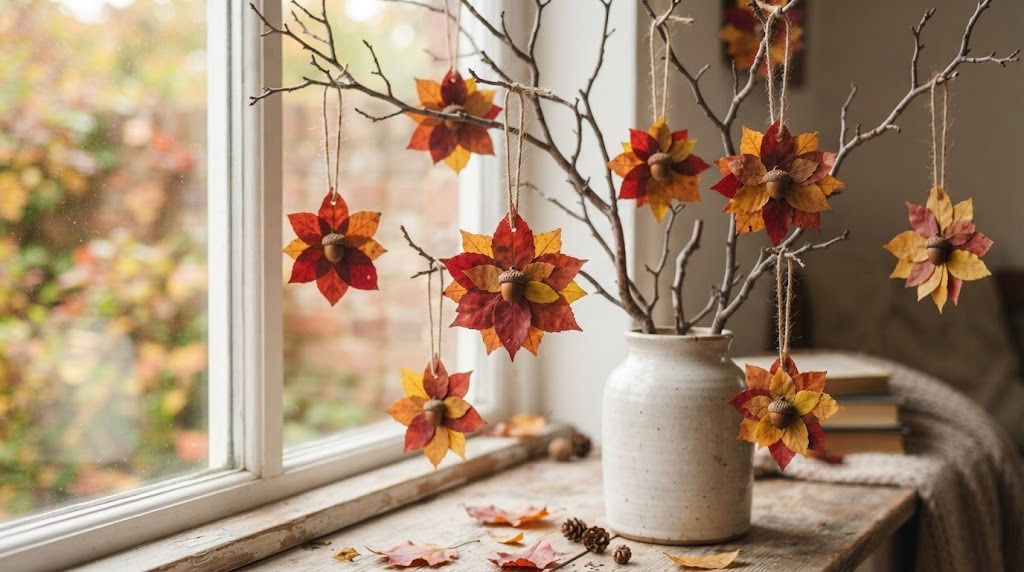
Fall leaf crafts you can hang make a home feel cozy all the way to Christmas. Cut small leaves into petal shapes or use tiny whole leaves, then glue them in a circle around an acorn cap to make a flower. Glue a twine loop on the back and hang them from a branch in a vase, a window or the tree. A similar leaf flower ornament reel picked up more than 23,000 reactions on Facebook, and it is easy to see why. Will you make a whole branch full?
You will need: Small dry leaves, acorn caps, white glue or a hot glue gun (adult help), twine, a small cardboard circle for each backing, a branch in a vase.
How to make it: 1. Cut a small cardboard circle. 2. Glue leaves around the edge like petals. 3. Glue an acorn cap in the center. 4. Add a twine loop to the back and hang it.