DIY Squishies: 16 Soft and Satisfying Paper Squishies Kids Will Beg to Make Again
DIY squishies are the craft that kids cannot stop talking about, and once you make one you will understand why. A sheet of paper, some markers, clear tape and a handful of stuffing turn into a puffy little toy that is so satisfying to squeeze. There is no oven, no glue gun and no mess to scrub off the table. Kids love drawing their own faces and colors, and grown ups secretly love squishing the finished ones just as much. These 16 cute ideas go from breakfast foods to sweet holiday shapes, and every one uses the same simple method. Clear the table, grab the tape and get ready for a happy, quiet afternoon..
The Paper Butter Block That Started the DIY Squishies Craze
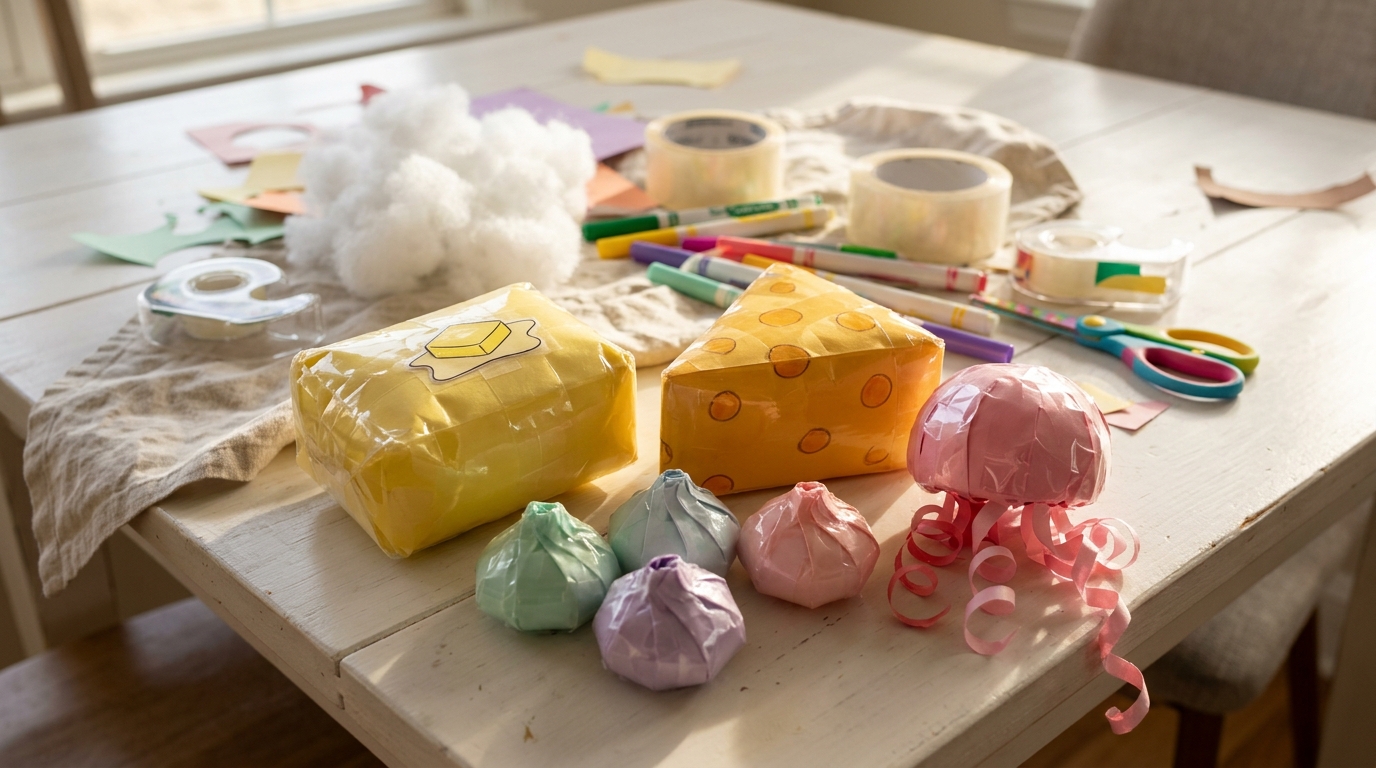
If you have spent any time on short videos lately, you have seen the paper butter block. It is a simple yellow rectangle with a little pat of butter drawn on top, and it squishes like a soft pillow. It is the perfect first project because the shape is so easy, and it teaches the method you will use for every other design. Make one and you will be hooked, so keep the tape close by and let the squishing begin..
You will need: Printer paper, markers or colored pencils, wide clear packing tape, scissors, plastic grocery bags or polyester stuffing
How to make it: 1. Draw the top and sides of a butter block on paper and color it yellow. 2. Cover the whole drawing in clear tape on both sides. 3. Cut out two matching pieces and tape the edges together, leaving a small gap. 4. Stuff it softly through the gap, then tape it closed.
Giant Cheese Wedge
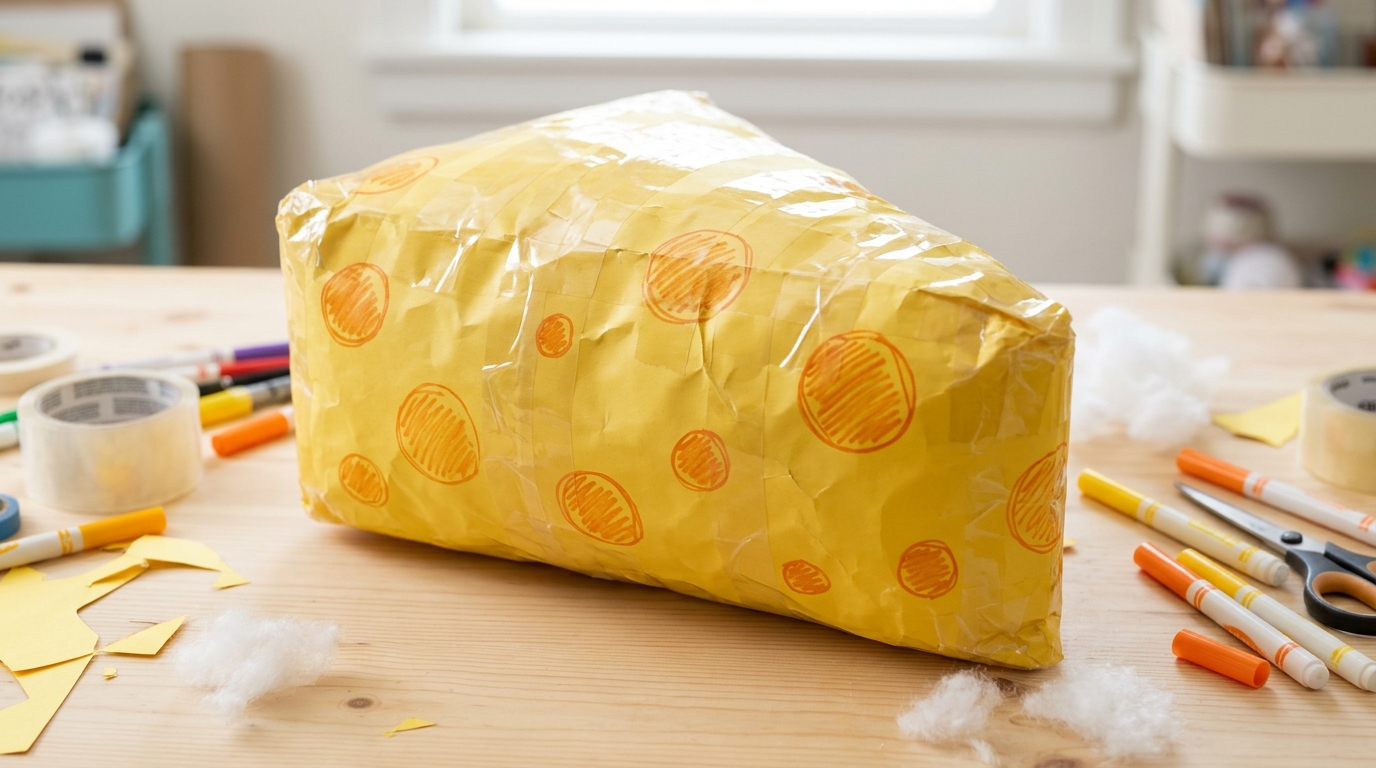
This one is a crowd favorite because it is big, bright and silly. A giant cheese squishy video from a craft channel has been watched more than 40 million times, and it is easy to see why. Draw a triangle wedge with round holes in orange marker, tape it well and stuff it extra full so it feels chunky. Kids love squeezing it like a stress ball. Would your kids want to make it even bigger?
You will need: Printer paper, markers or colored pencils, wide clear packing tape, scissors, extra stuffing, a ruler
How to make it: 1. Draw two big triangles and three rectangles for the sides. 2. Color them yellow and add round holes with orange marker. 3. Tape every piece on both sides and cut them out. 4. Tape the shape together, stuff it full and seal it.
Rainbow Dumplings
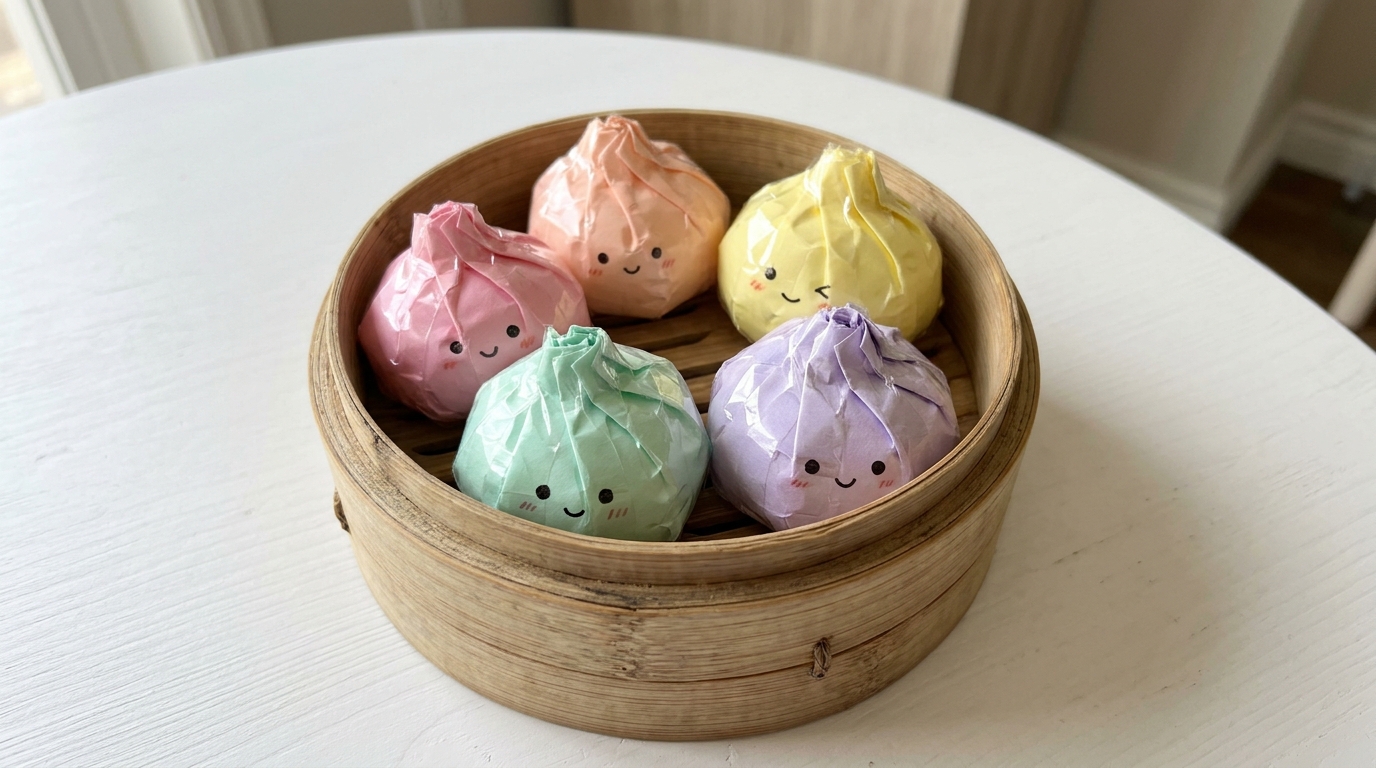
These little dumplings are almost too cute to squeeze. Make them in pastel rainbow colors and draw tiny sleepy faces on the front. The pleated top is made by pinching and taping the paper into small folds, which gives them a real dumpling look. Set them in a small steamer basket or a bowl for a darling display on a desk. Which color would your child pick first?
You will need: Printer paper, markers or colored pencils, wide clear packing tape, scissors, stuffing, a small bowl or basket for display
How to make it: 1. Draw two circles about 4 inches wide in pastel colors. 2. Add a face and tape both sides of each circle. 3. Tape the circles together around the bottom edge and stuff. 4. Pinch the top into small pleats and tape them closed.
Baby Jellyfish DIY Squishies
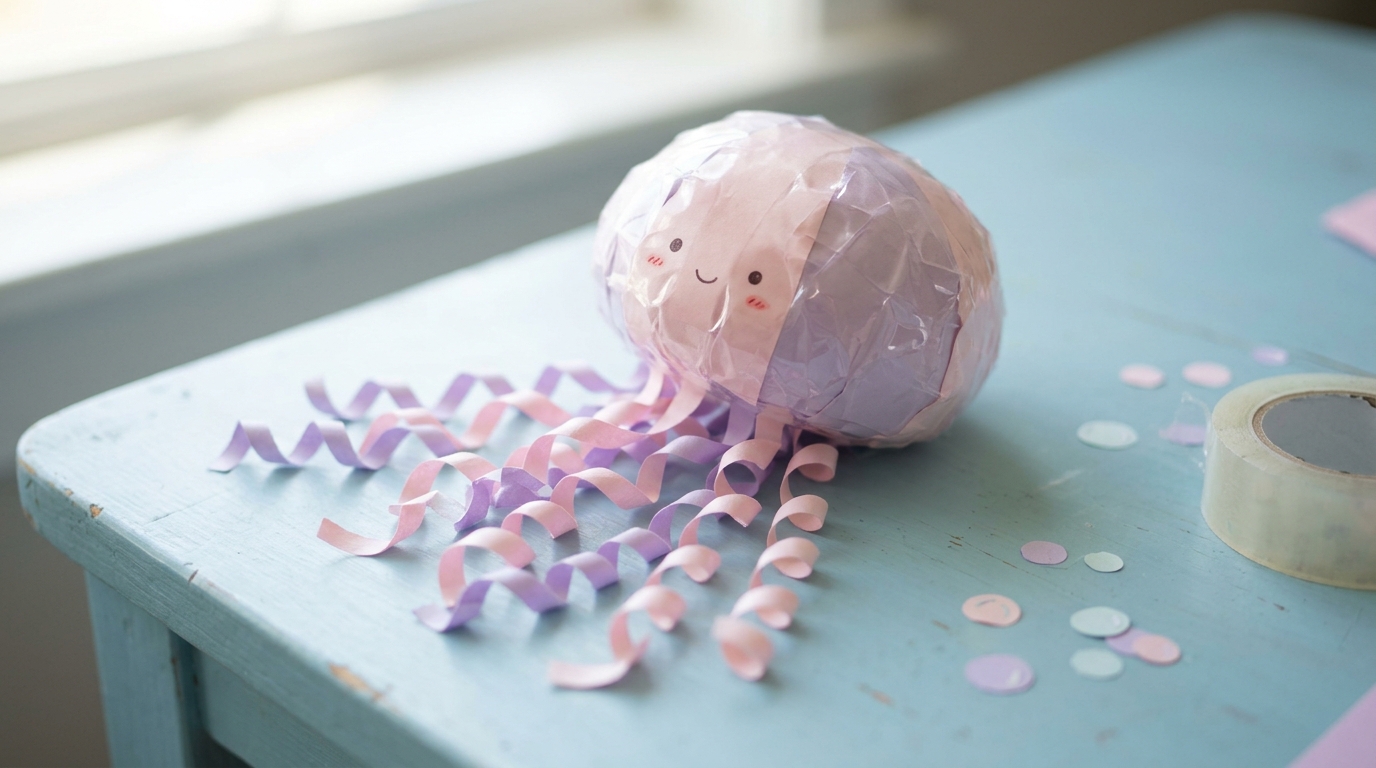
This dreamy jellyfish is one of the most popular DIY squishies online, with millions of views on short videos. The puffy dome head squishes softly, and long curly ribbon tentacles swing when you hold it up. Use pale pink, lilac or baby blue paper for a soft ocean look. It makes a sweet bedroom decoration when kids are done playing. Would you add glitter tape for a little sparkle?
You will need: Printer paper, markers or colored pencils, wide clear packing tape, scissors, stuffing, curling ribbon, tape
How to make it: 1. Draw two matching half circles with a cute face. 2. Tape both sides and cut them out. 3. Tape curled ribbon strips along the flat bottom edge. 4. Tape the halves together, stuff the dome and seal it.
Avocado Half
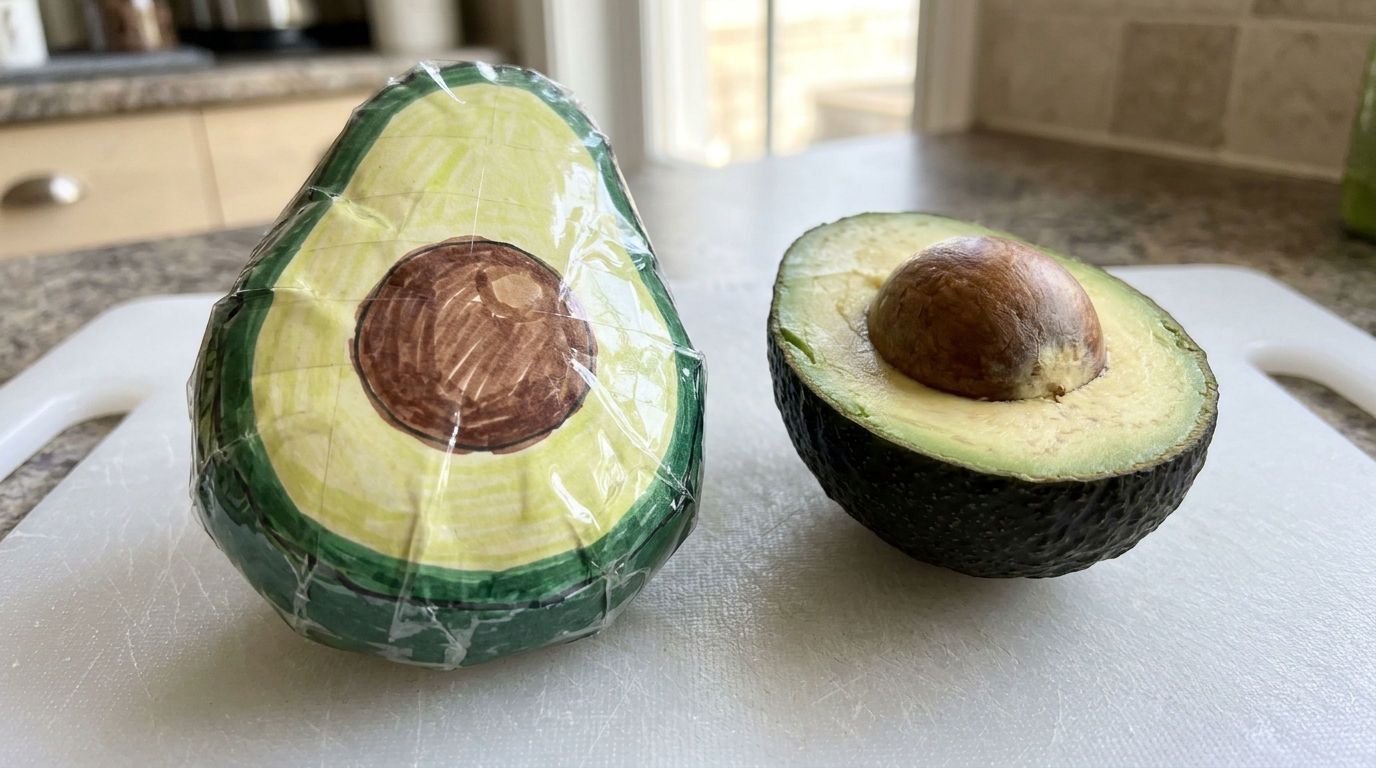
An avocado squishy is a fun way to practice coloring in layers. Start with dark green for the skin, light green for the flesh and a big brown circle for the pit. For an extra fun touch, make the pit a separate little squishy that pops in and out. Place it next to a real avocado and see who can tell the difference from across the room. Will your family be fooled?
You will need: Printer paper, markers or colored pencils, wide clear packing tape, scissors, stuffing, green and brown markers
How to make it: 1. Draw an avocado shape and color the skin, flesh and pit. 2. Tape the front and a plain green back on both sides. 3. Cut them out and tape the edges together. 4. Stuff softly and seal the last gap.
Strawberry Milk Carton
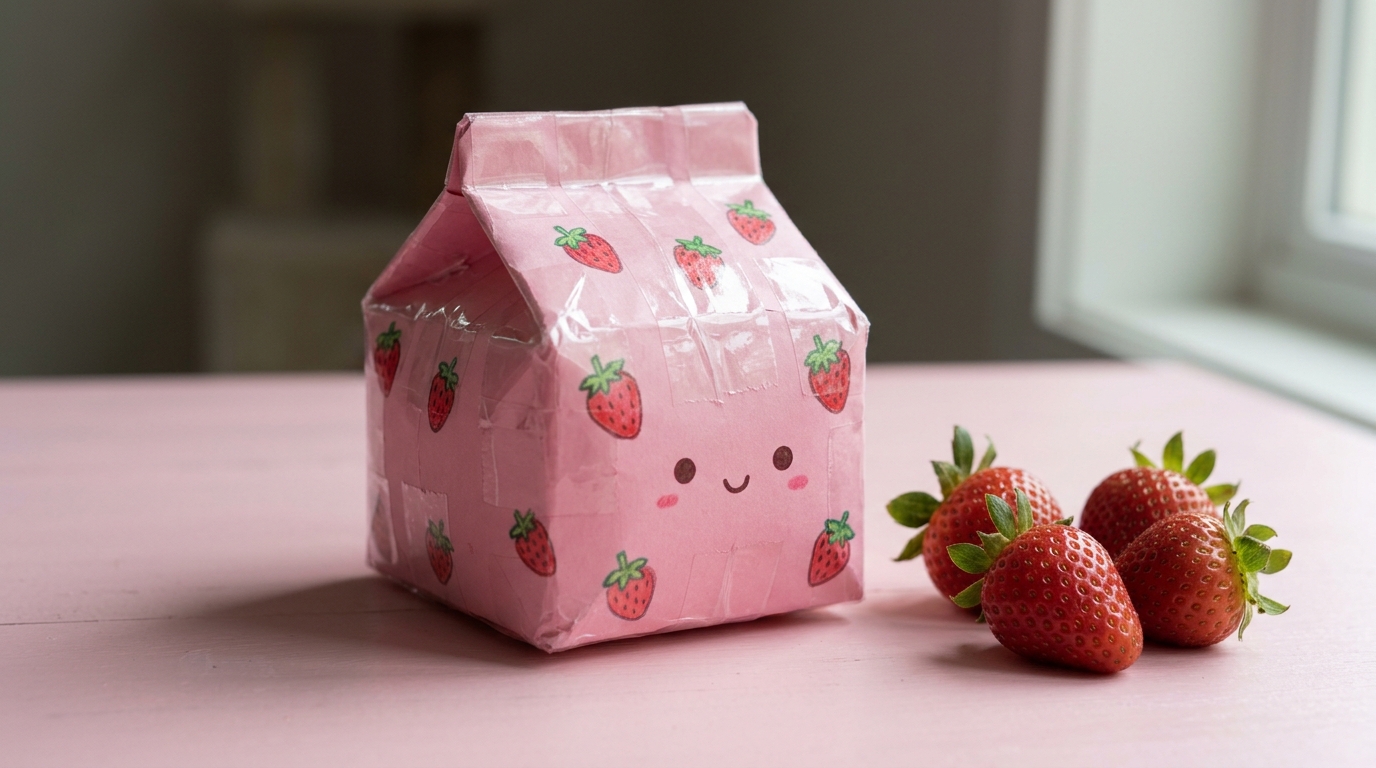
A little milk carton squishy feels like a toy from a play kitchen. Draw a pink carton with a pointed top, add strawberries and a happy face, and skip any words so it looks clean and cute. Kids can make a whole set of flavors, like chocolate, banana and blueberry. It also makes a sweet gift for a friend who loves pink. What other flavors would your kids invent?
You will need: Printer paper, markers or colored pencils, wide clear packing tape, scissors, stuffing, a ruler, pink and red markers
How to make it: 1. Draw a carton pattern with four sides, a bottom and a pointed top. 2. Color it pink and add strawberries and a face. 3. Tape the whole sheet, cut it out and fold along the lines. 4. Tape the sides, stuff it and close the top.
Toast Slice DIY Squishies
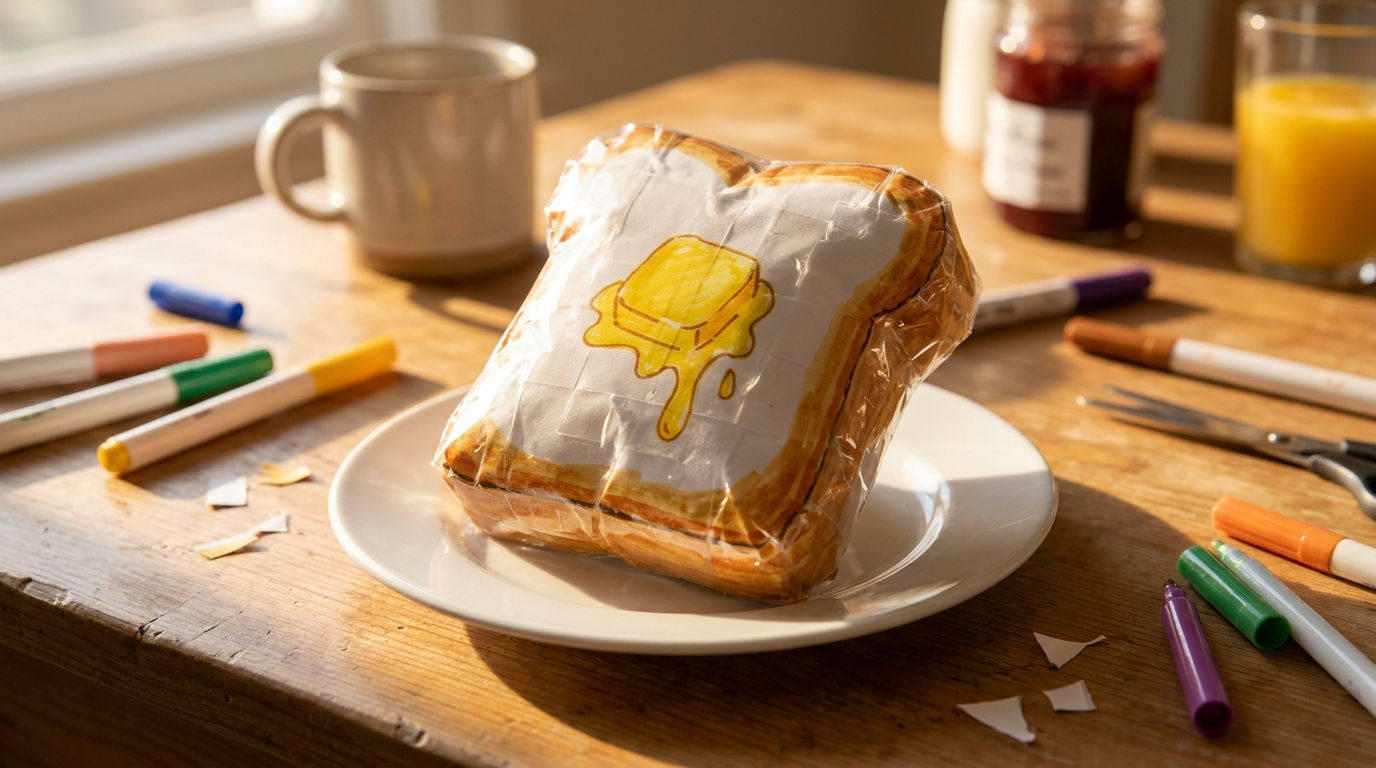
Breakfast foods make some of the cutest DIY squishies, and a slice of toast is one of the easiest. Color a golden crust around the edge, add a melting pat of butter or a smear of jam and draw a happy face if you like. It squishes flat and puffs right back up. Make a stack of slices for a pretend breakfast party. Butter or jam on yours?
You will need: Printer paper, markers or colored pencils, wide clear packing tape, scissors, stuffing, brown, tan and yellow markers
How to make it: 1. Draw two toast shapes and color the crust brown and the middle light tan. 2. Add butter or jam on the front piece. 3. Tape both sides and cut out the pieces. 4. Tape them together, stuff lightly and seal.
Sleepy Cloud
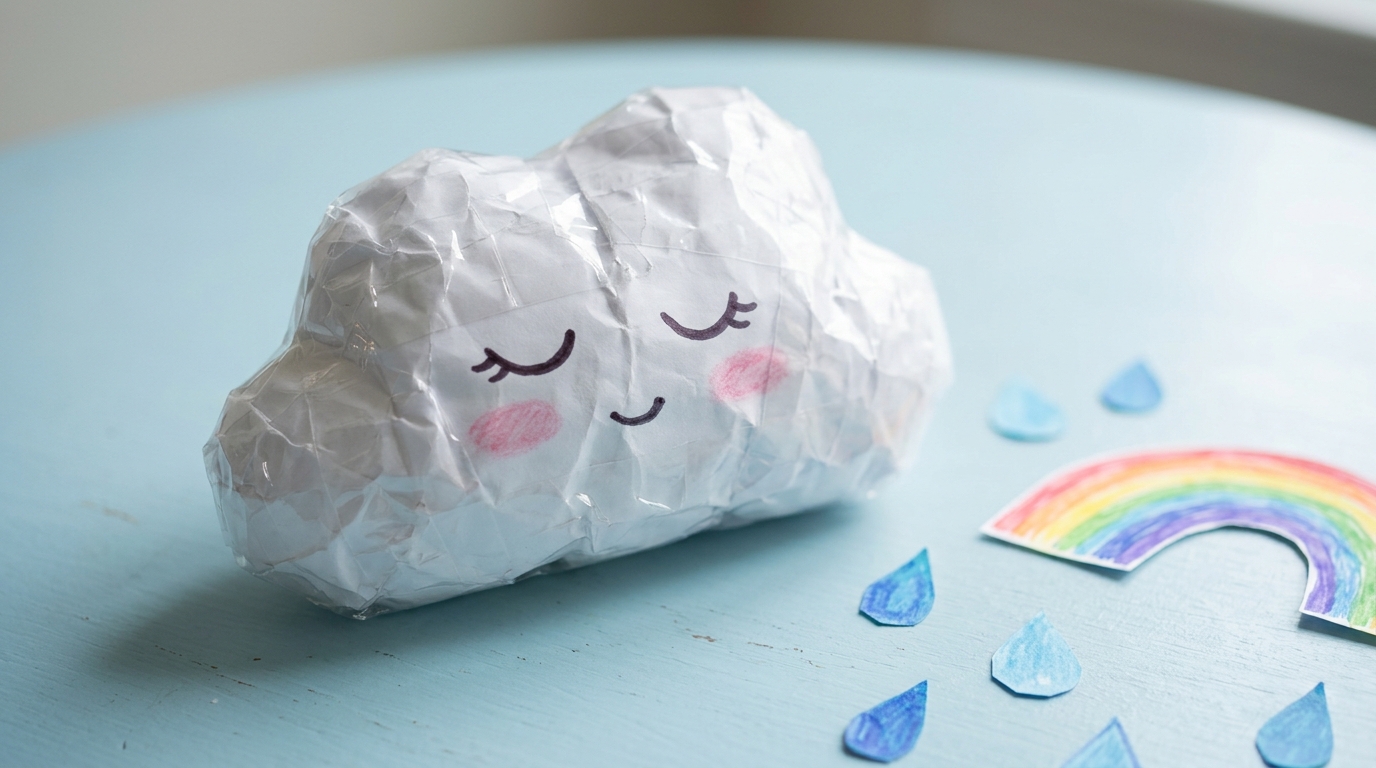
A soft white cloud with a sleepy face is perfect for a bedtime squeeze. Add rosy cheeks, little closed eyes and maybe a few paper raindrops or a rainbow to go with it. Because it is white, it is a great one for younger kids who are still learning to color inside the lines. Hang it from a ribbon over a bed for a calm little decoration. Who would love this one at your house?
You will need: Printer paper, markers or colored pencils, wide clear packing tape, scissors, stuffing, pink marker, optional ribbon
How to make it: 1. Draw two puffy cloud shapes with bumpy edges. 2. Add a sleepy face and pink cheeks on the front. 3. Tape both sides and cut them out. 4. Tape the edges together, stuff and seal.
Mini Donuts
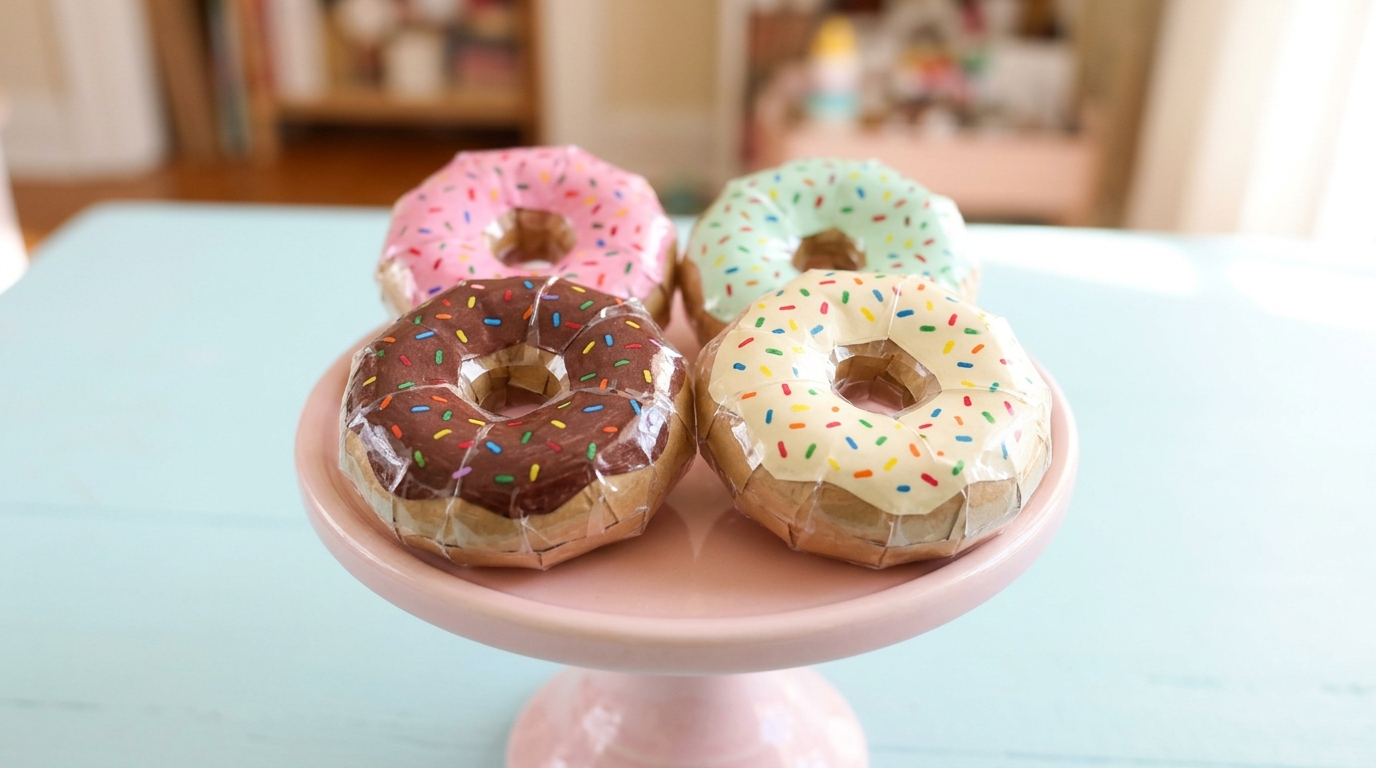
A plate of mini donut squishies looks good enough to eat. Draw pink, chocolate, mint and vanilla frosting and go wild with tiny sprinkles. The hole in the middle is the only tricky part, so cut a small circle out of both layers before you tape the edges together. Kids love setting up a pretend bakery with a whole box of them. Which flavor would you grab first?
You will need: Printer paper, markers or colored pencils, wide clear packing tape, scissors, stuffing, colored markers, a small round lid to trace
How to make it: 1. Trace two circles and a small center hole on each. 2. Color the frosting and add sprinkles on the front. 3. Tape both sides and cut out the rings. 4. Tape around the outer and inner edges, stuffing as you go.
Smiling Pumpkin
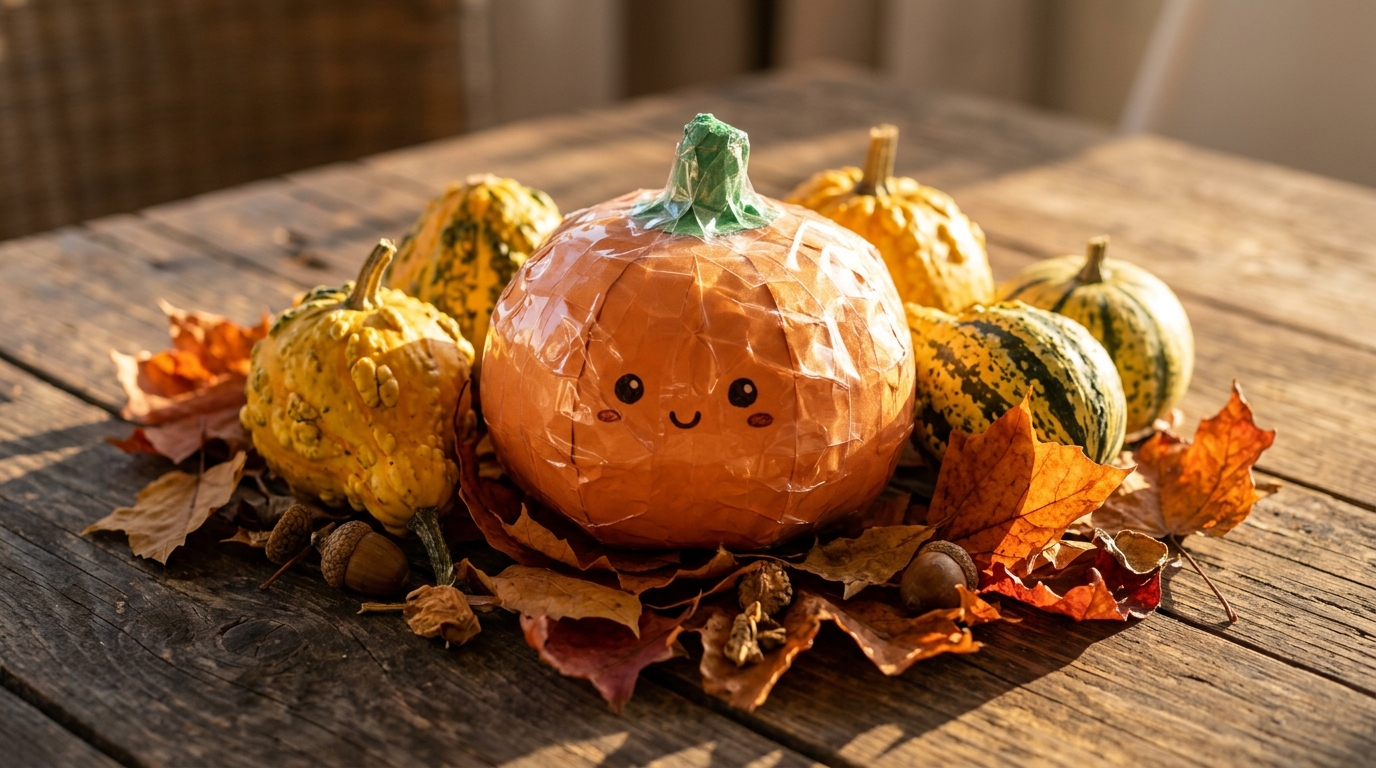
A round orange pumpkin squishy is a sweet fall project that kids can keep out all season. Draw curved lines for the ridges, a green stem and a happy face instead of a scary one. It looks adorable tucked among real gourds on a table. You can also make a whole pumpkin patch in different sizes. How many pumpkins will your patch need?
You will need: Printer paper, markers or colored pencils, wide clear packing tape, scissors, stuffing, orange and green markers
How to make it: 1. Draw two round pumpkin shapes with ridges and a stem. 2. Color them orange with a green stem and add a face. 3. Tape both sides and cut them out. 4. Tape them together, stuff and seal.
Cute Little Ghost DIY Squishies
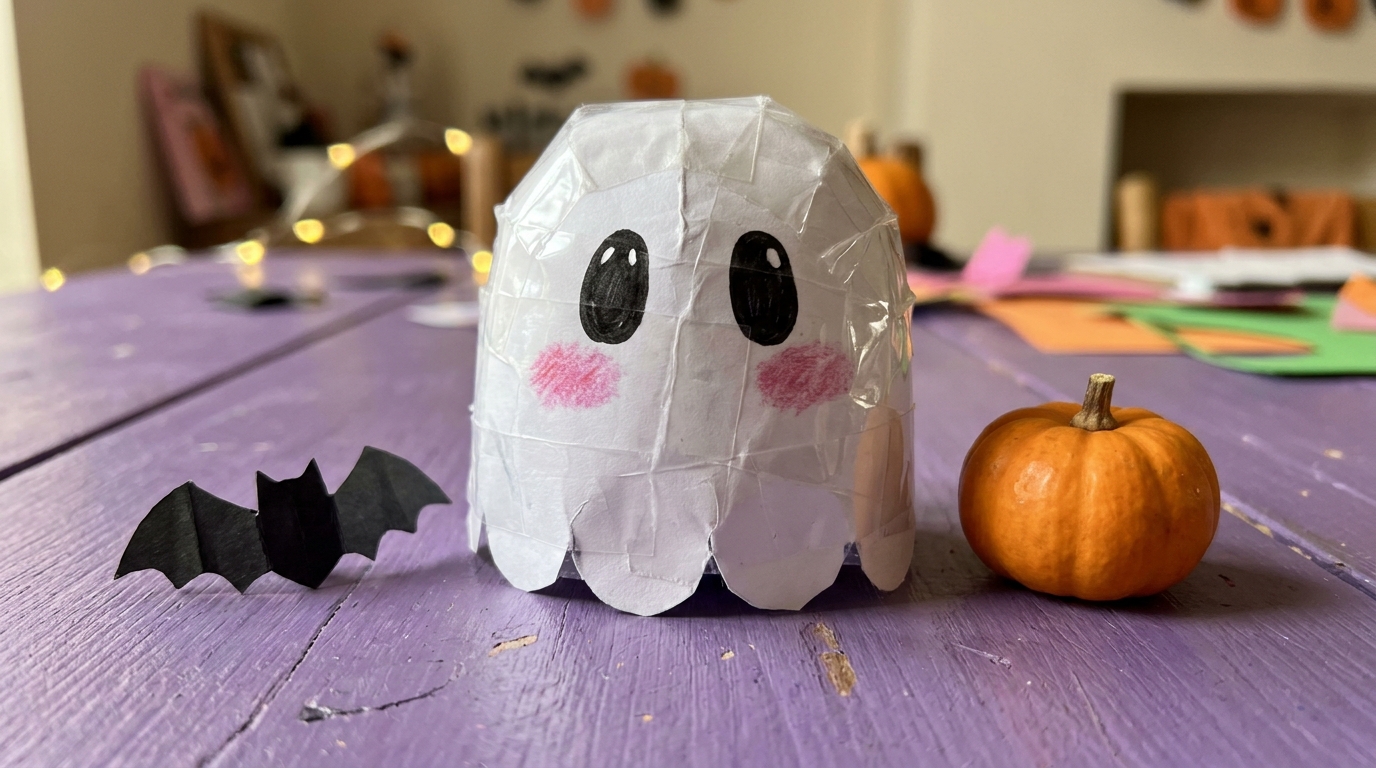
Not every Halloween craft has to be spooky. This little white ghost has big eyes and pink cheeks, and it is one of the easiest DIY squishies for small hands. The wavy bottom edge gives it a floating look. Pair it with a paper bat and a mini pumpkin for a sweet desk display. Looking for more seasonal fun? Our Halloween crafts for kids are full of easy ideas. Will your ghost be silly or sweet?
You will need: Printer paper, markers or colored pencils, wide clear packing tape, scissors, stuffing, a black marker, pink colored pencil
How to make it: 1. Draw two ghost shapes with a wavy bottom. 2. Add eyes and cheeks on the front piece. 3. Tape both sides and cut them out. 4. Tape the edges together, stuff and seal.
Gingerbread Cookie
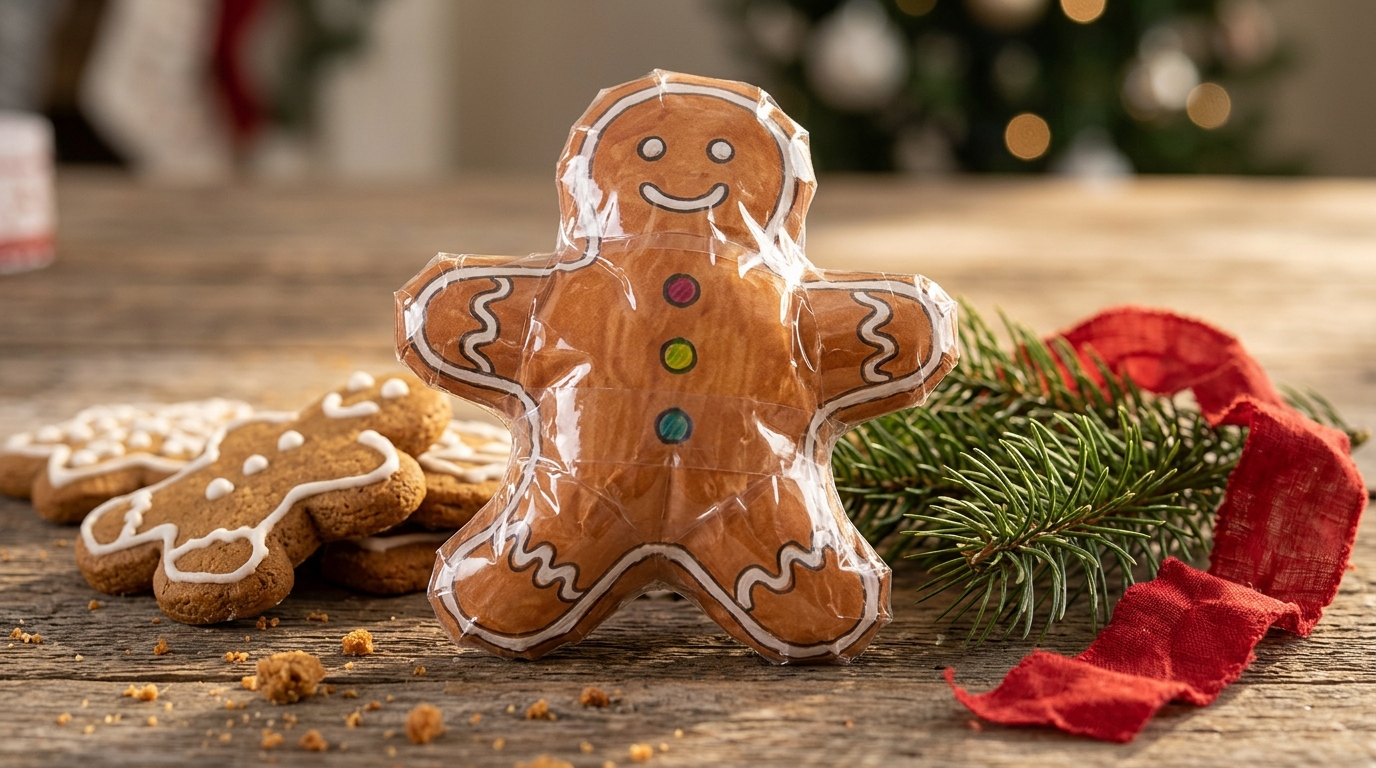
A gingerbread man squishy is a fun way to start the holiday season. Color him warm brown, draw white icing lines, round buttons and a big smile. Kids can make a whole gingerbread family with different outfits. They also make cute fillers for stockings or little gifts for classmates. Would your gingerbread wear a scarf or a bow tie?
You will need: Printer paper, markers or colored pencils, wide clear packing tape, scissors, stuffing, brown and white markers or a white gel pen
How to make it: 1. Trace a gingerbread man shape twice. 2. Color it brown and add icing details with a white pen. 3. Tape both sides and cut out the shapes. 4. Tape them together, stuffing the arms and legs as you go.
Bubble Tea Cup
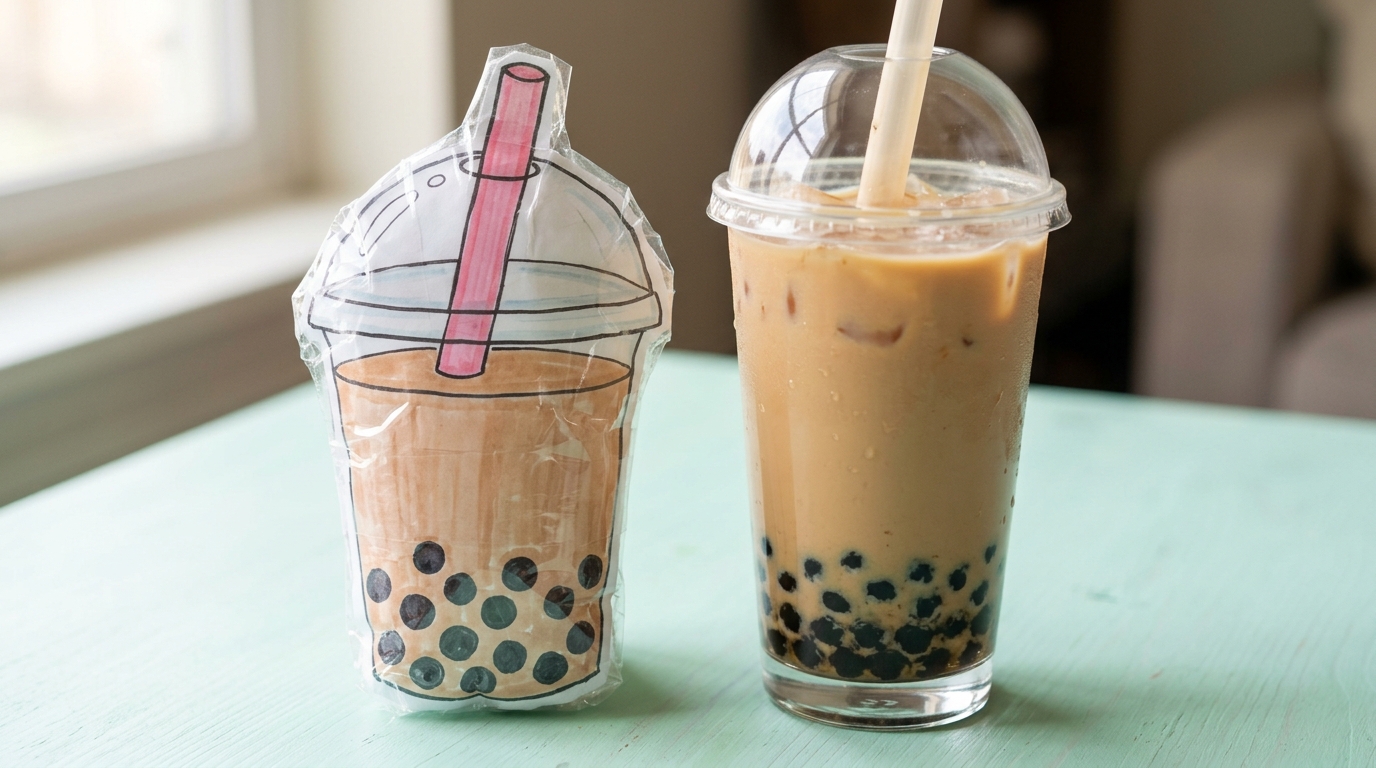
Bubble tea squishies are a big hit with older kids and teens. Draw a cup with a dome lid, a wide straw and round tapioca pearls at the bottom. Use light brown for milk tea, pink for strawberry or green for matcha. The straw can be a rolled paper tube taped on top for a real 3D look. What flavor would you draw?
You will need: Printer paper, markers or colored pencils, wide clear packing tape, scissors, stuffing, a paper straw or rolled paper, brown and black markers
How to make it: 1. Draw two cup shapes with a dome top. 2. Color the tea and add pearls at the bottom. 3. Tape both sides, cut them out and tape together with stuffing. 4. Tape a short paper straw on top.
Squishy Keychain Charms
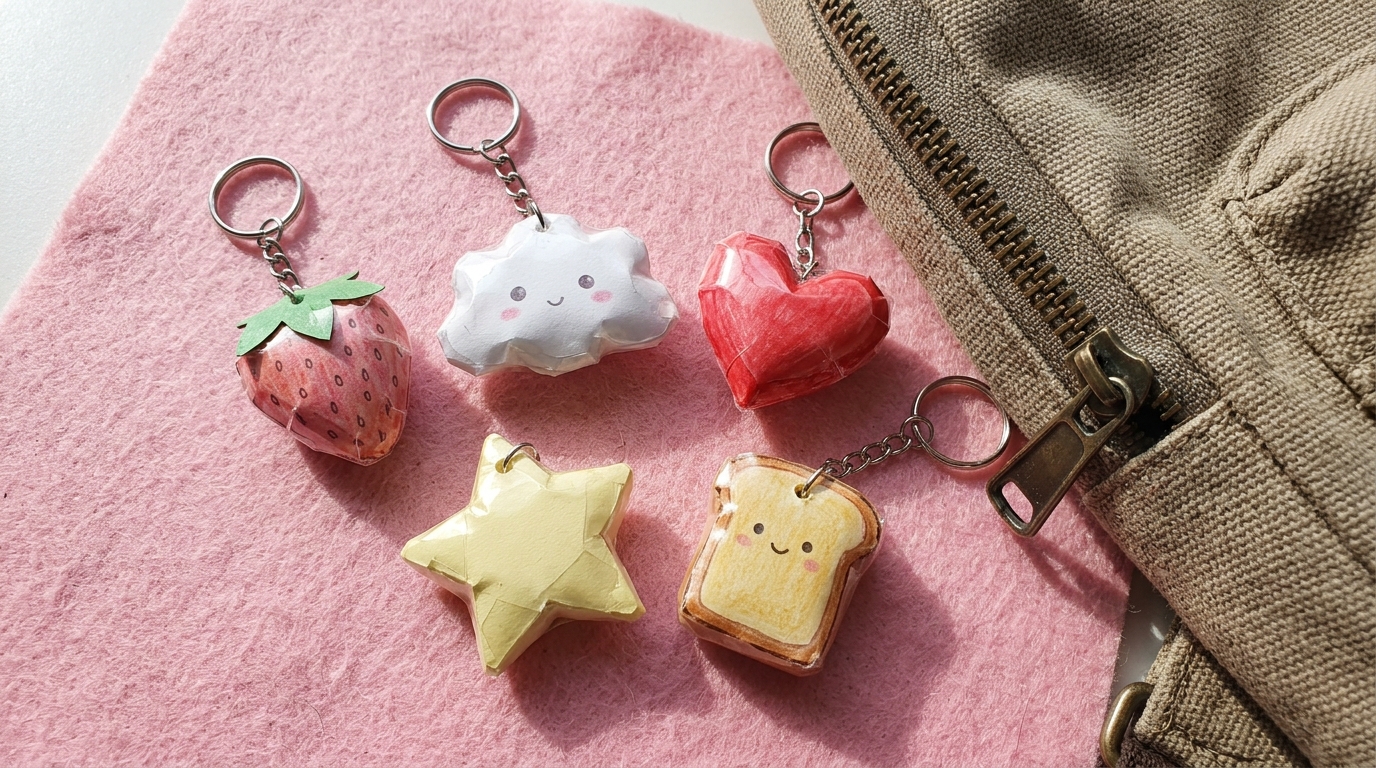
Tiny squishies make adorable charms for backpacks, pencil cases and zipper pulls. Pick simple shapes like a strawberry, a heart, a star or a mini slice of toast. Punch a hole near the top before stuffing and add a small keyring. These are best for older kids, because small parts are not safe for little ones under three. Which charm would you hang on your bag?
You will need: Printer paper, markers or colored pencils, wide clear packing tape, scissors, a little stuffing, a hole punch, small keyrings and chains
How to make it: 1. Draw tiny shapes about 2 inches wide. 2. Color, tape and cut them out. 3. Tape them together with a little stuffing. 4. Punch a hole through the taped edge and add a keyring.
Balloon Squishy Stress Balls
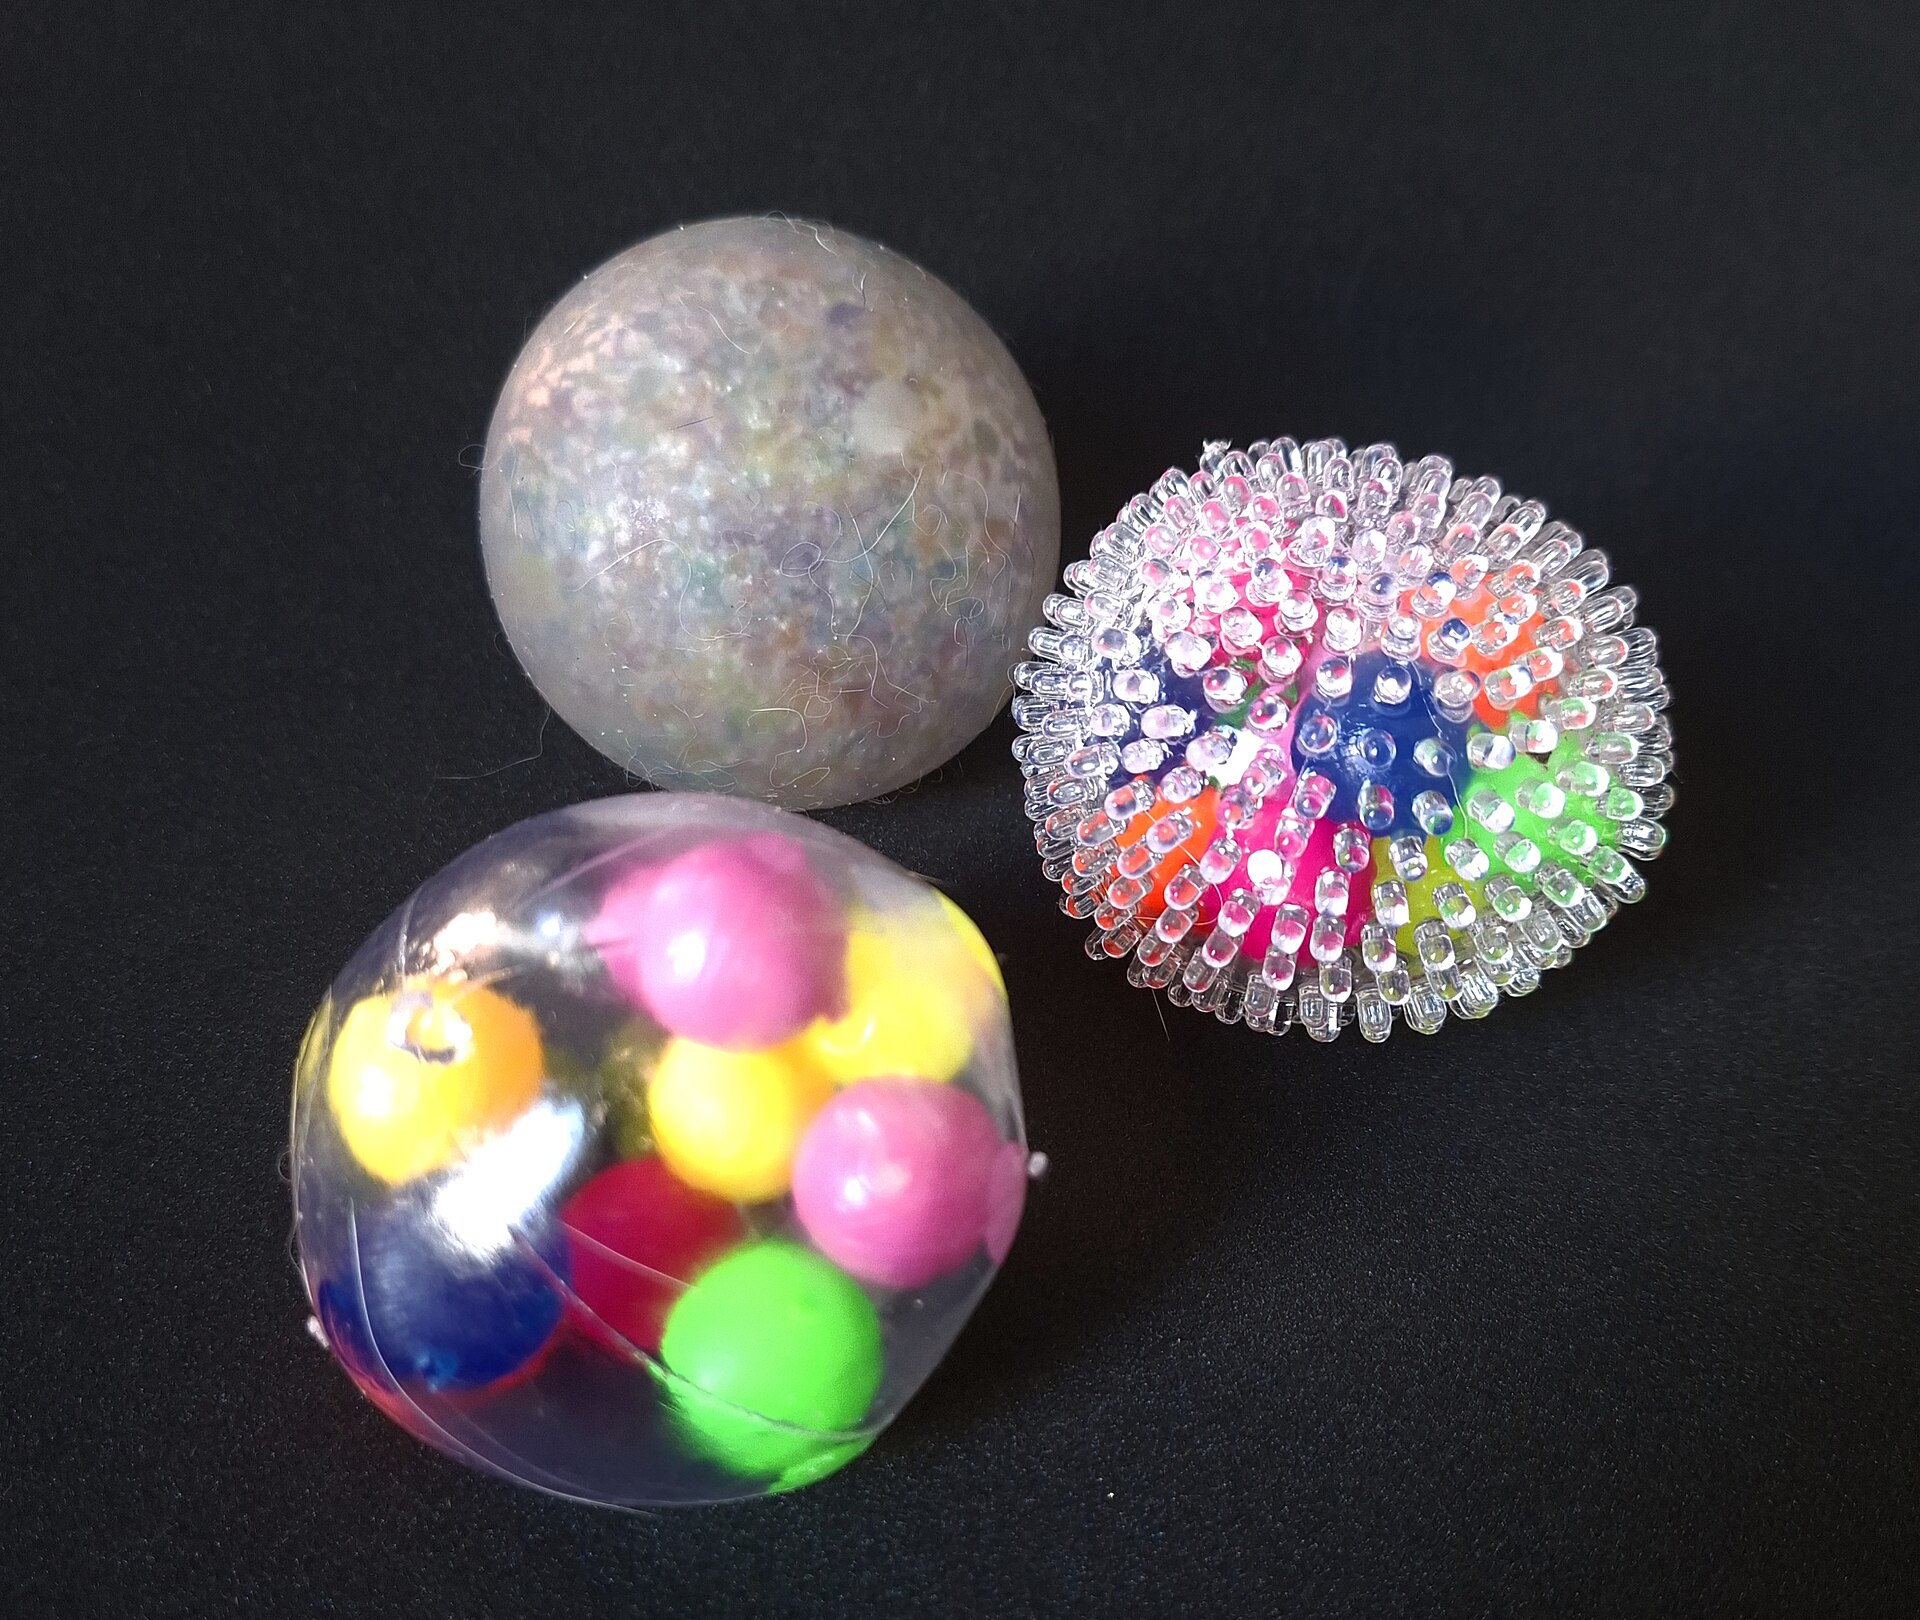
Not all squishies are made from paper. A balloon filled with flour or rice turns into a squishy stress ball that is great for busy hands during homework time. Double up the balloons so it is extra strong, and draw a face with a marker. Store-bought sensory balls like these are colorful, but the homemade ones are just as fun to squeeze. Always make these with an adult, and keep balloons away from little kids. Which filling feels best to you?
You will need: 2 round balloons, flour or dry rice, a funnel, scissors, a marker
How to make it: 1. Stretch a balloon and fit the neck over a funnel. 2. An adult helps fill it with flour or rice. 3. Tie it tightly and cut off the neck. 4. Cover it with a second balloon and draw a face.
Sponge Shape DIY Squishies
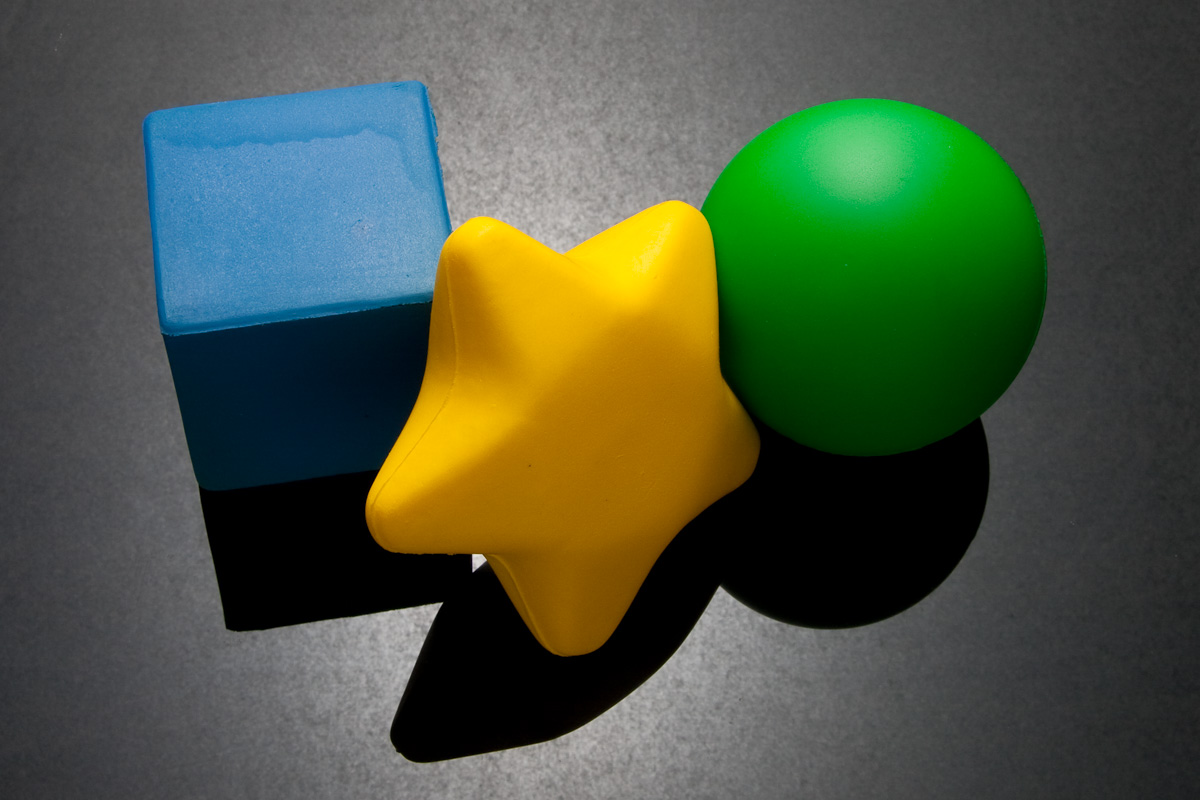
For the quickest DIY squishies of all, try soft foam shapes. A new, clean kitchen sponge or a scrap of soft craft foam can be cut into a star, a cube or a ball, just like the colorful foam toys in this photo. Older kids can color them with markers and give them faces. They squish down flat and slowly puff back up. It is a great project when you only have ten minutes. What shape would you cut first?
You will need: New soft sponges or soft craft foam, scissors (adult help for thick foam), markers
How to make it: 1. Draw a simple shape on the sponge with a marker. 2. An adult helps cut it out with sharp scissors. 3. Trim the edges to round them. 4. Add color and faces with markers and let it dry.