Clothespin Crafts: 16 Clever Ideas That Turn a Cheap Pack Into Holiday Magic
Clothespin crafts are suddenly everywhere, and we are not surprised. A pack of wooden clothespins costs about a dollar, and with a little glue and paint it turns into stars, wreaths, angels and tiny reindeer that look like they came from a fancy shop. This week a search for a glass jar clothespin craft jumped to breakout on Google Trends, a clothespin reindeer video passed 46,800 reactions and 10,000 shares, and a Christmas clothespin idea has 77,000 views in three weeks. These are the kind of crafts you can make at the kitchen table with kids, grandkids or friends on a cozy evening. We picked 16 of the sweetest ideas, from easy fridge magnets to a full door wreath. Grab a pack and let us start..
Clothespin Crafts Start Here: The Classic Star
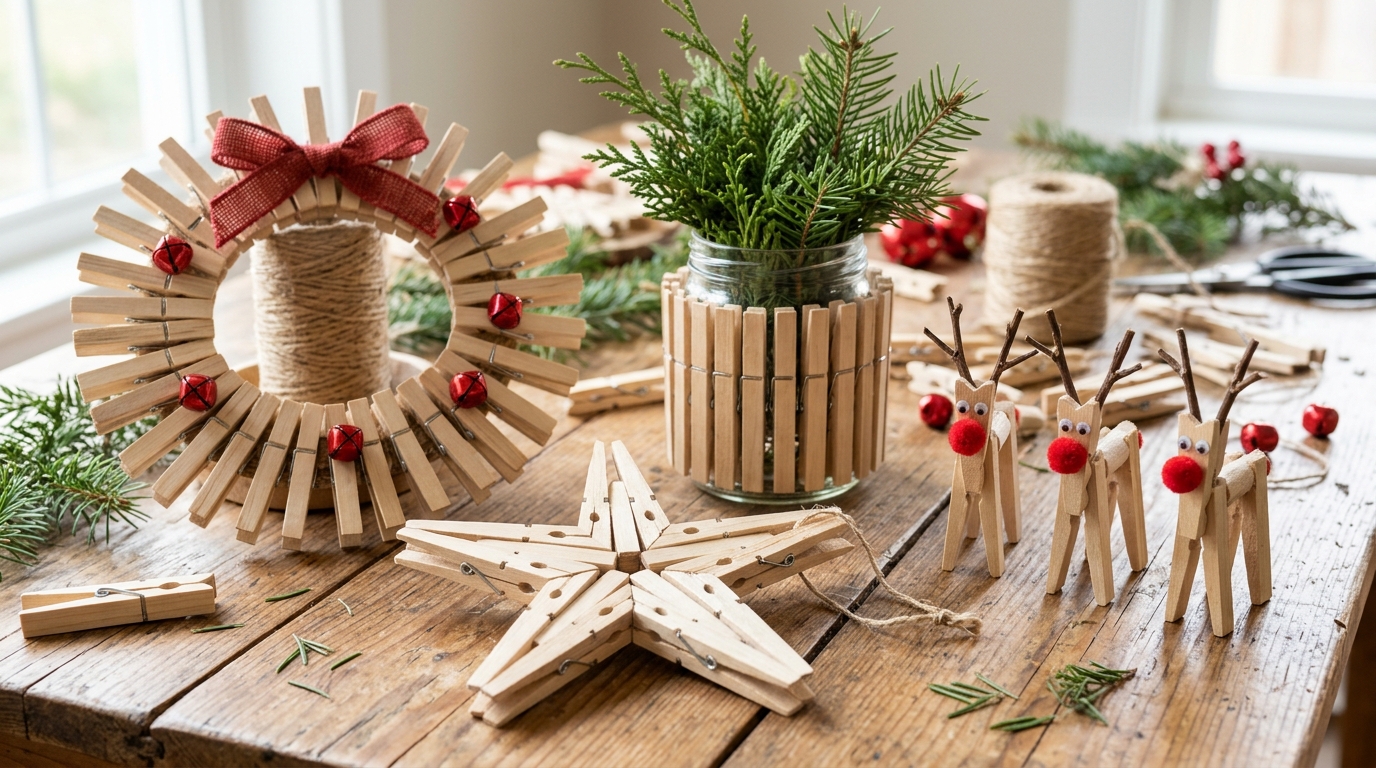
This is the one everyone wants to make first. Take the clothespins apart, flip the halves so the flat sides face out, and glue them into a big eight point star. It looks like a carved wooden ornament, but it costs pennies. Leave it natural for a farmhouse feel, or paint it white with a touch of glitter. It is the star of all clothespin crafts, and it looks lovely on a tree, a door or a window. How many will you make for your tree..
You will need: About 16 wooden clothespins, a hot glue gun with adult help, paint if you like and some twine.
How to make it: 1. Take the clothespins apart and remove the metal springs. 2. Glue the halves back to back so the flat sides face out, then arrange them in a star with points facing outward. 3. Glue the center, let it set and add a twine loop.
Clothespin Crafts for Kids: Little Reindeer

These tiny reindeer are going viral on Facebook right now, and one video passed 46,800 reactions and 10,000 shares. Two clothespins glued together make the body and legs, a small piece of brown pipe cleaner makes the antlers, and a red pom pom becomes the nose. They stand up on their own, so you can line them up on a mantel or a shelf. Kids love giving each one a name. What would you name yours?
You will need: Wooden clothespins, brown pipe cleaners, small red pom poms, googly eyes and craft glue.
How to make it: 1. Clip two clothespins together so one is the body and one makes the legs, then glue them. 2. Twist pipe cleaner antlers and glue them on top. 3. Add googly eyes and a red pom pom nose.
Sweet Clothespin Angels
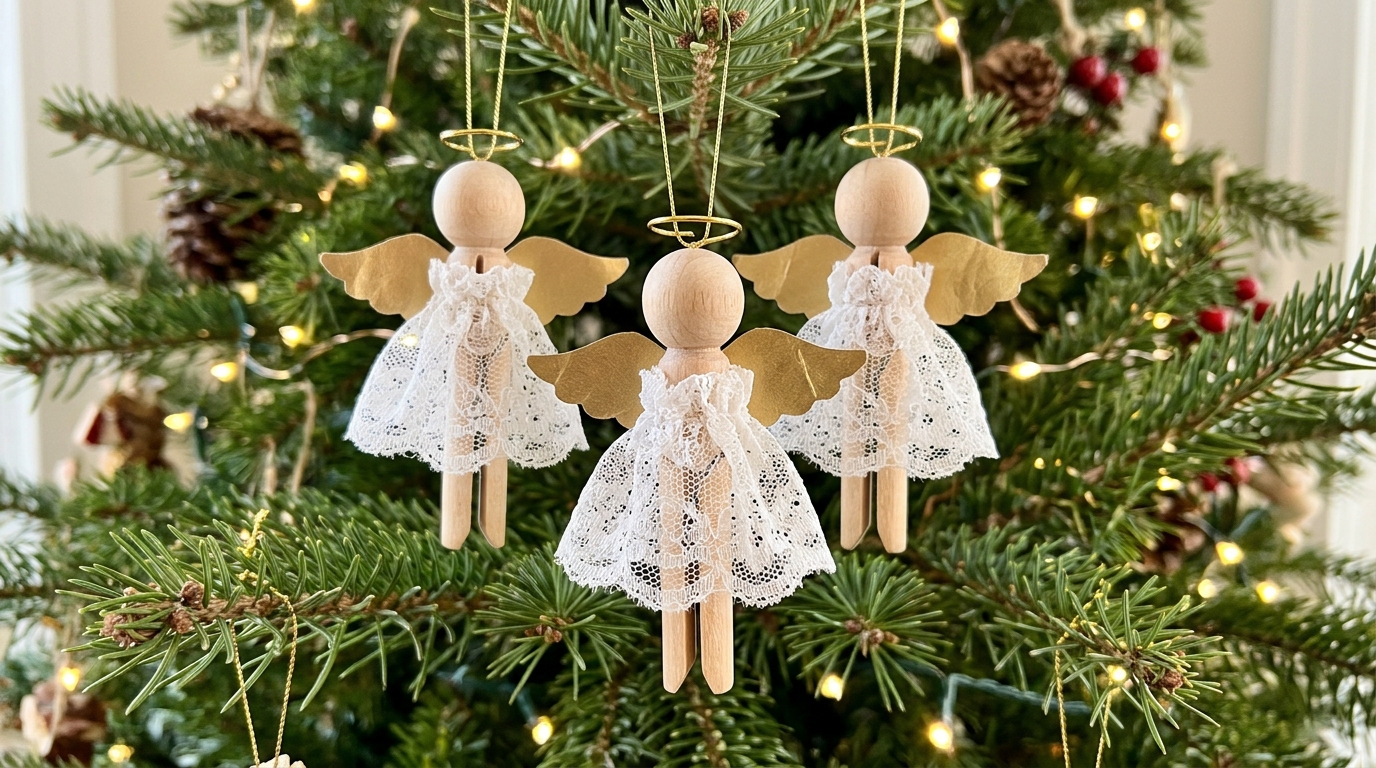
Old fashioned clothespins with round heads make the prettiest angel ornaments. A scrap of white lace becomes the dress, a little gold paper heart becomes the wings, and a loop of gold wire makes the halo. They look like something from a vintage tree. Make one for each family member or tuck one into a holiday card. They are gentle, simple and full of charm. Who in your life deserves a little angel this year?
You will need: Round head wooden clothespins, white lace scraps, gold paper, thin gold wire and craft glue.
How to make it: 1. Wrap the lace around the clothespin body and glue it in place. 2. Cut a small heart from gold paper and glue it on the back as wings. 3. Twist a gold wire circle and glue it above the head as a halo.
Clothespin Crafts Go Viral: The Glass Jar Vase

This is the idea behind the breakout search on Google Trends this week. Clip wooden clothespins all the way around the rim of a glass jar so they stand up like a little fence. Tie a red ribbon around the middle, fill it with evergreen and berries, and you have a rustic vase in five minutes. No glue is needed at all. It also works as a utensil holder for a holiday buffet. What would you put in yours?
You will need: A clean glass jar, about 20 wooden clothespins, a ribbon and some fresh or faux greenery.
How to make it: 1. Clip the clothespins side by side around the rim of the jar. 2. Tie a ribbon around the middle to hold them tight. 3. Fill it with faux greenery, or set a small cup of water inside for fresh stems.
A Clothespin Snowflake
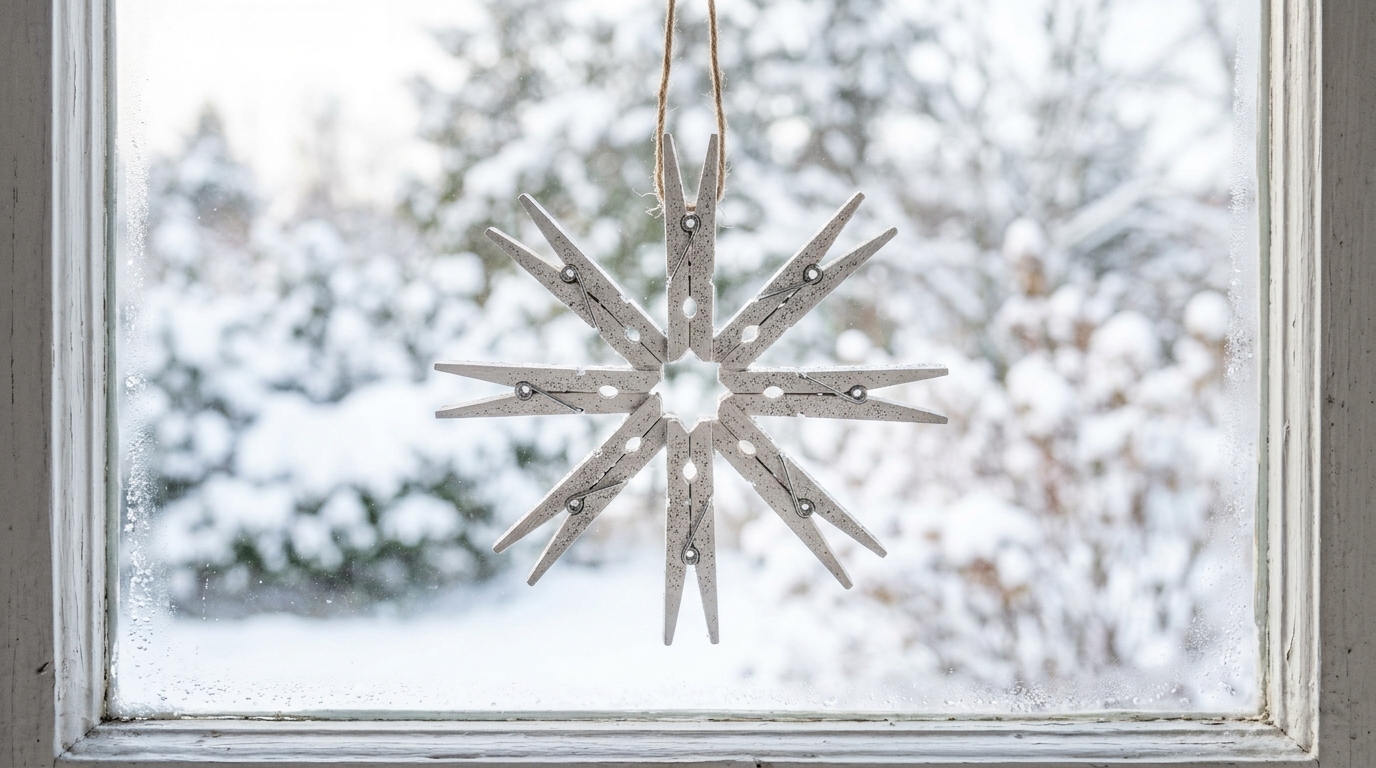
Eight clothespins glued in a circle make a striking snowflake that looks great in a window. Paint it white and sprinkle a little silver glitter while the paint is wet. It catches the winter light and looks like real frost. These are lovely as a set of three in different sizes. This is one of the clothespin crafts that grown ups enjoy as much as kids. Would you hang yours in a window or on the tree?
You will need: Eight wooden clothespins, white paint, silver glitter, a hot glue gun with adult help and a ribbon.
How to make it: 1. Take the clothespins apart and glue the halves back to back. 2. Glue the eight pieces in a circle with the points facing out. 3. Paint white, add glitter and tie on a ribbon.
Clothespin Crafts for the Door: A Jingle Bell Wreath
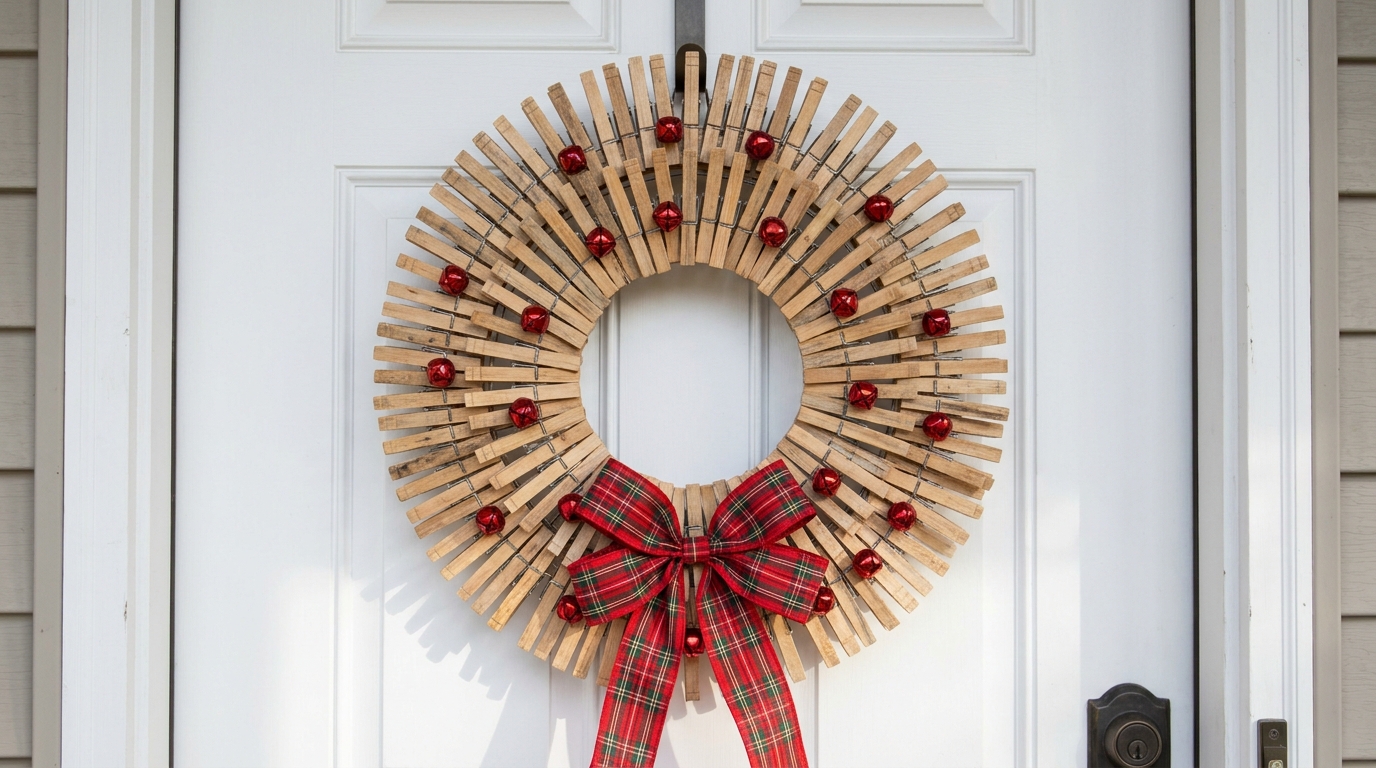
Clip natural wooden clothespins all the way around a wire wreath ring, and you get a full, textured wreath in under half an hour. Add a few red jingle bells and a plaid bow, and it is ready for the front door. It is sturdy, so it stands up to wind and weather on a covered porch. You can also paint the clothespins red and green for a brighter look. Would you keep it natural or paint it?
You will need: A wire wreath ring, about 50 wooden clothespins, small jingle bells and a plaid ribbon.
How to make it: 1. Clip the clothespins onto the wire ring, packing them close together. 2. Thread jingle bells onto thin ribbon and tie them between the pins. 3. Add a big bow at the bottom.
Clothespin Animals With Mouths That Open
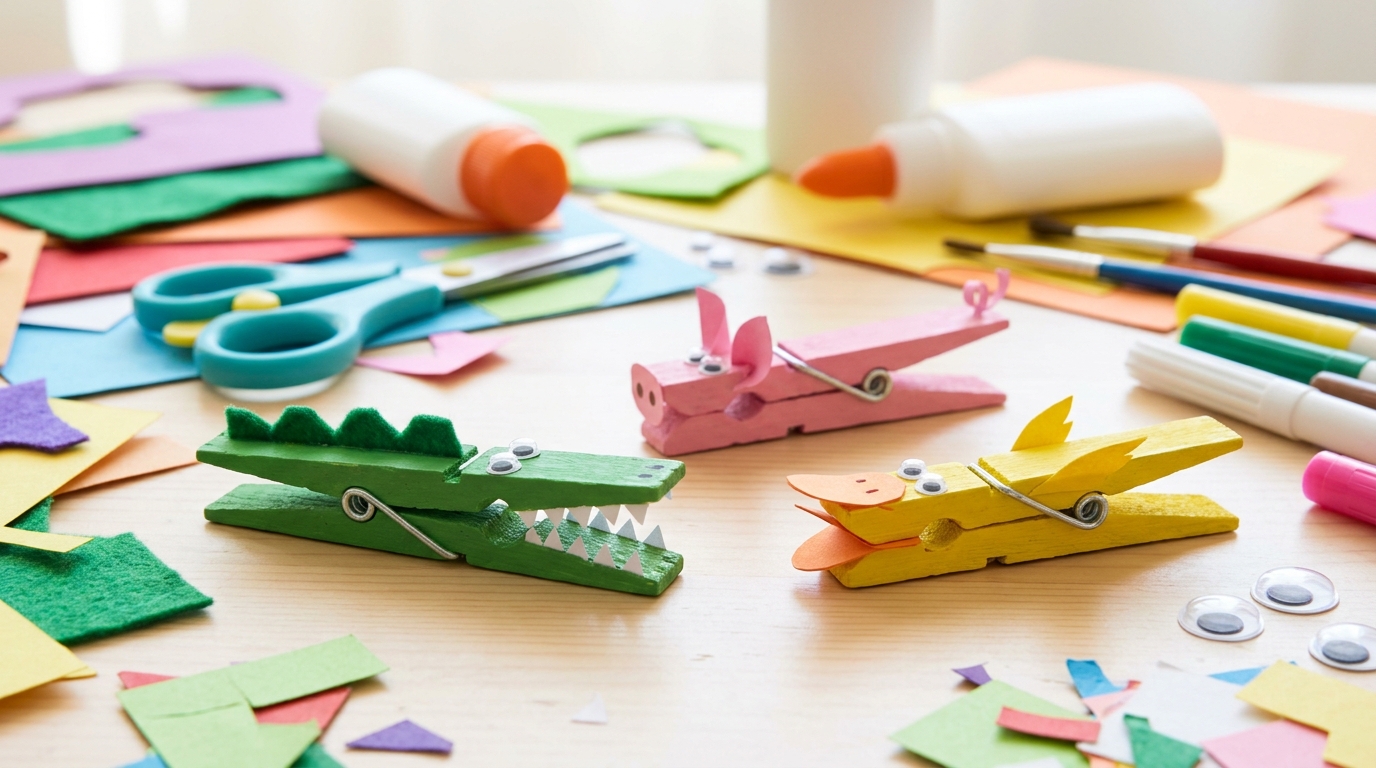
This is the most fun for little hands. Paint clothespins and add paper teeth, eyes and ears, and the spring makes the mouth open and close. A crocodile, a pig and a duck are easy first animals. A video of these clothespin animals with mouths that open passed 103,000 views in two weeks. Kids can use them as puppets, snack clips or bookmarks. Which animal would your kids make first?
You will need: Wooden clothespins, acrylic paint, colored paper, googly eyes and craft glue.
How to make it: 1. Paint each clothespin in the animal color and let it dry. 2. Glue on paper eyes, ears and teeth. 3. Squeeze the clothespin to make the mouth open and close.
A Clothespin Photo Display
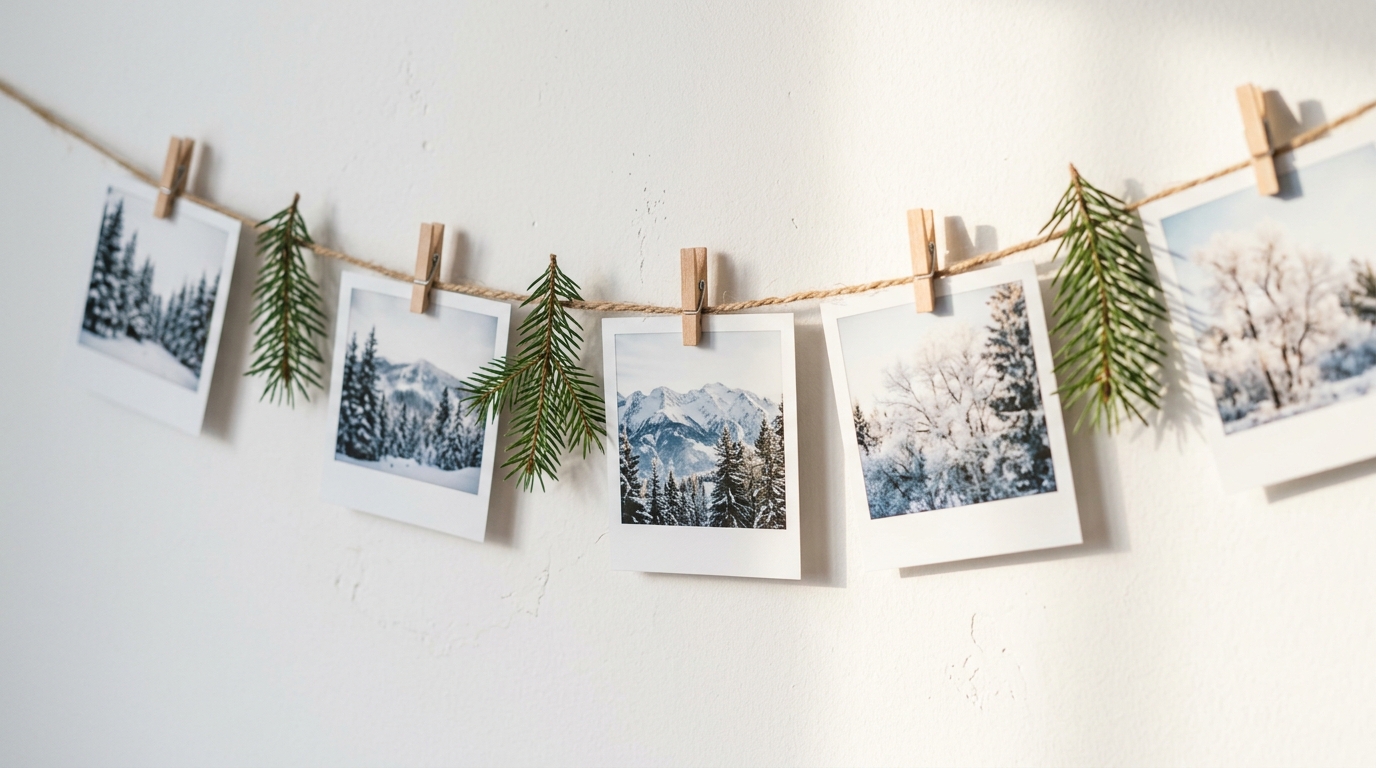
String a length of twine across a wall and use small clothespins to hang favorite photos, holiday cards or kids art. It is easy to change any time, and it makes a blank wall feel personal and warm. Add a few pine sprigs between the photos for a seasonal touch. This is a great spot to show off the year in pictures. What photos would you hang first?
You will need: Jute twine, small wooden clothespins, two small nails or hooks and printed photos.
How to make it: 1. Hang the twine between two hooks with a gentle dip in the middle. 2. Clip photos along the twine. 3. Tuck small sprigs of greenery between them.
A Sunburst Clothespin Trivet
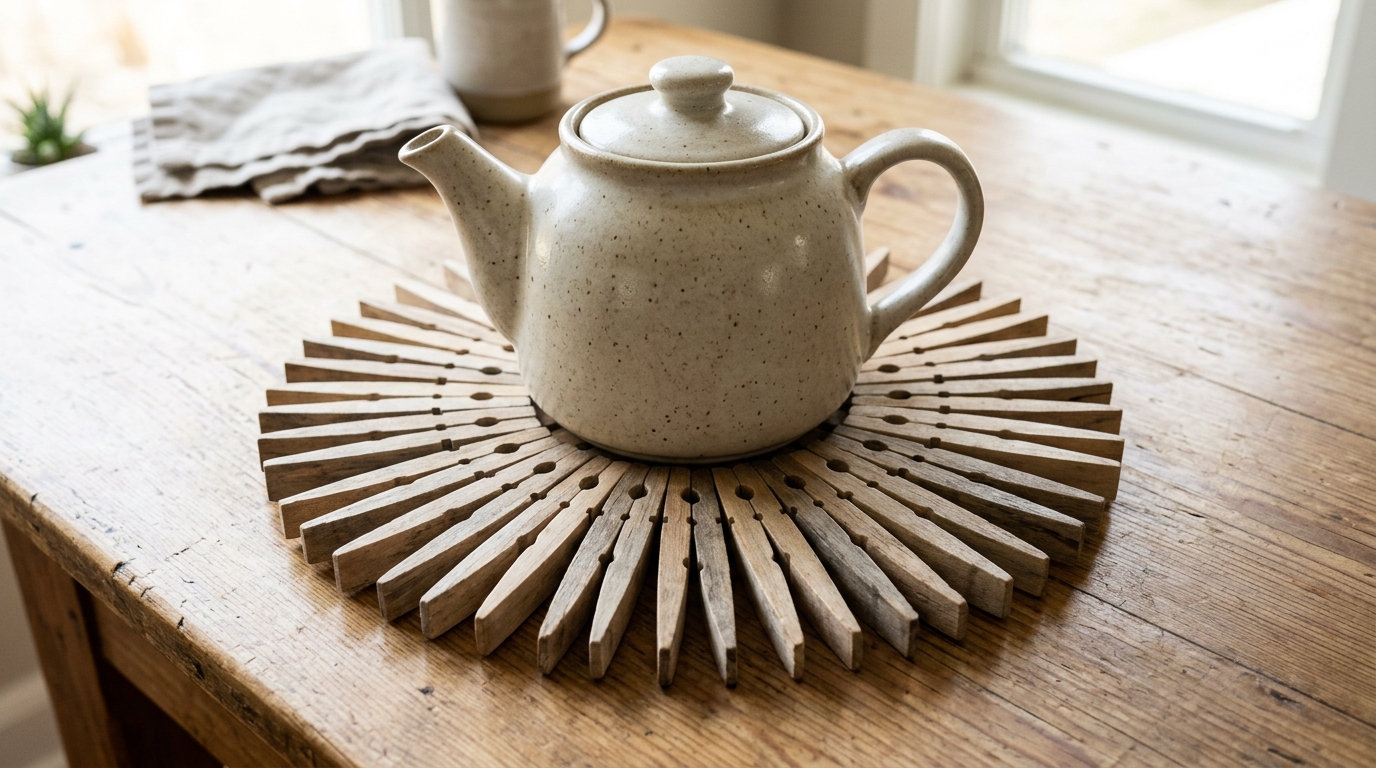
Clothespin halves glued in a ring make a sunburst trivet that looks like a store bought designer piece. It protects your table from warm teapots and serving dishes and adds a natural wood touch to the kitchen. It also makes a sweet hostess gift. This is one of those clothespin crafts that people never guess is made from laundry pins. Who would you make one for?
You will need: About 24 wooden clothespins, a cardboard circle, wood glue and a clear sealer.
How to make it: 1. Take the clothespins apart. 2. Glue the halves in a sunburst ring around the edge of the cardboard circle, then add a second ring inside. 3. Let it dry fully and seal it.
Pipe Cleaner Clothespin Trees
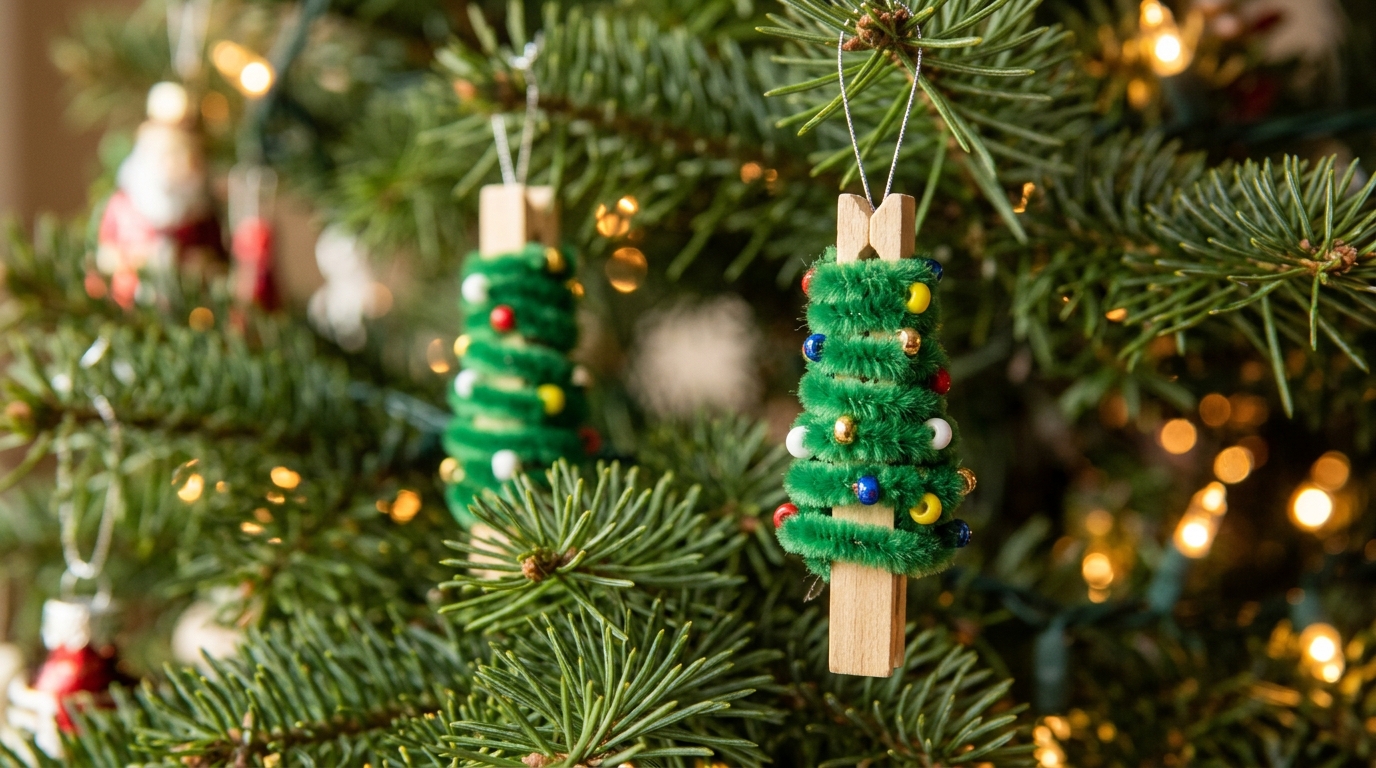
Wrap a clothespin in fuzzy green pipe cleaner and it turns into a tiny Christmas tree. Add a few small beads as ornaments and a little star on top. A video of this idea has 77,000 views in three weeks. They make cute tree ornaments, gift toppers or place card holders, since the clip can hold a name card. If your kids love fuzzy craft supplies, try our pipe cleaner crafts too. How many colors of beads would you use?
You will need: Wooden clothespins, green pipe cleaners, small beads, a tiny paper star and craft glue.
How to make it: 1. Wrap a pipe cleaner tightly around the clothespin from the top down. 2. Thread a few beads on as you wrap. 3. Glue a little star on top.
Clothespin Dollhouse Furniture
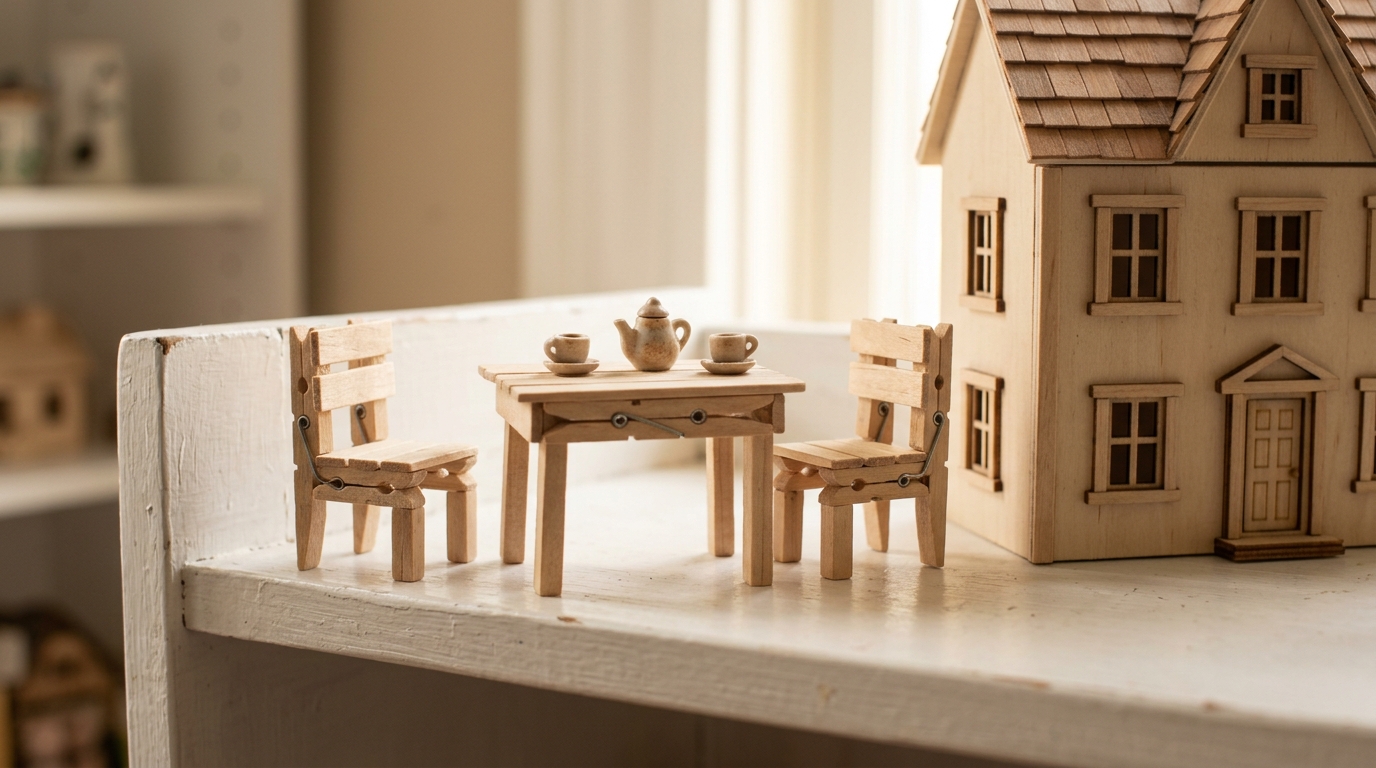
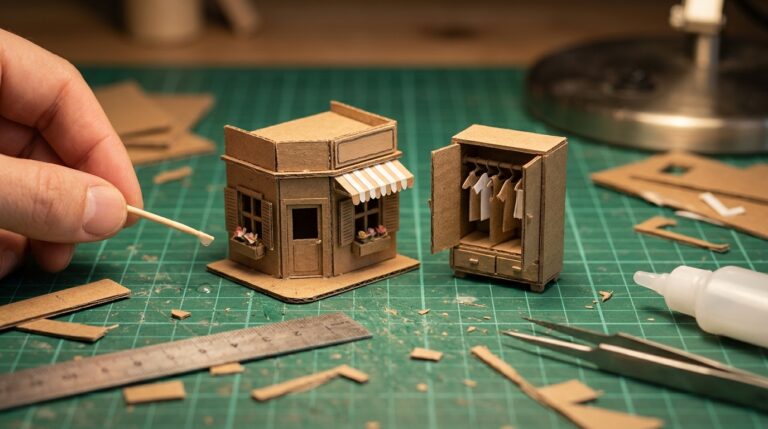
Clothespin halves are the perfect size for dollhouse chairs and tables. Glue them into little frames, and you can build a whole tiny dining set. Kids who love miniatures will spend hours on this. It is also a great way to use broken pieces left over from other clothespin crafts. Add tiny cups made from bottle caps and the scene is complete. Would your little one want a table set for a tea party?
You will need: Wooden clothespins taken apart, wood glue and small craft sticks.
How to make it: 1. Glue two halves upright for chair backs and legs. 2. Add a short piece of craft stick as the seat. 3. Make a table by gluing four halves under a flat craft stick top.
Painted Clothespin Fridge Magnets
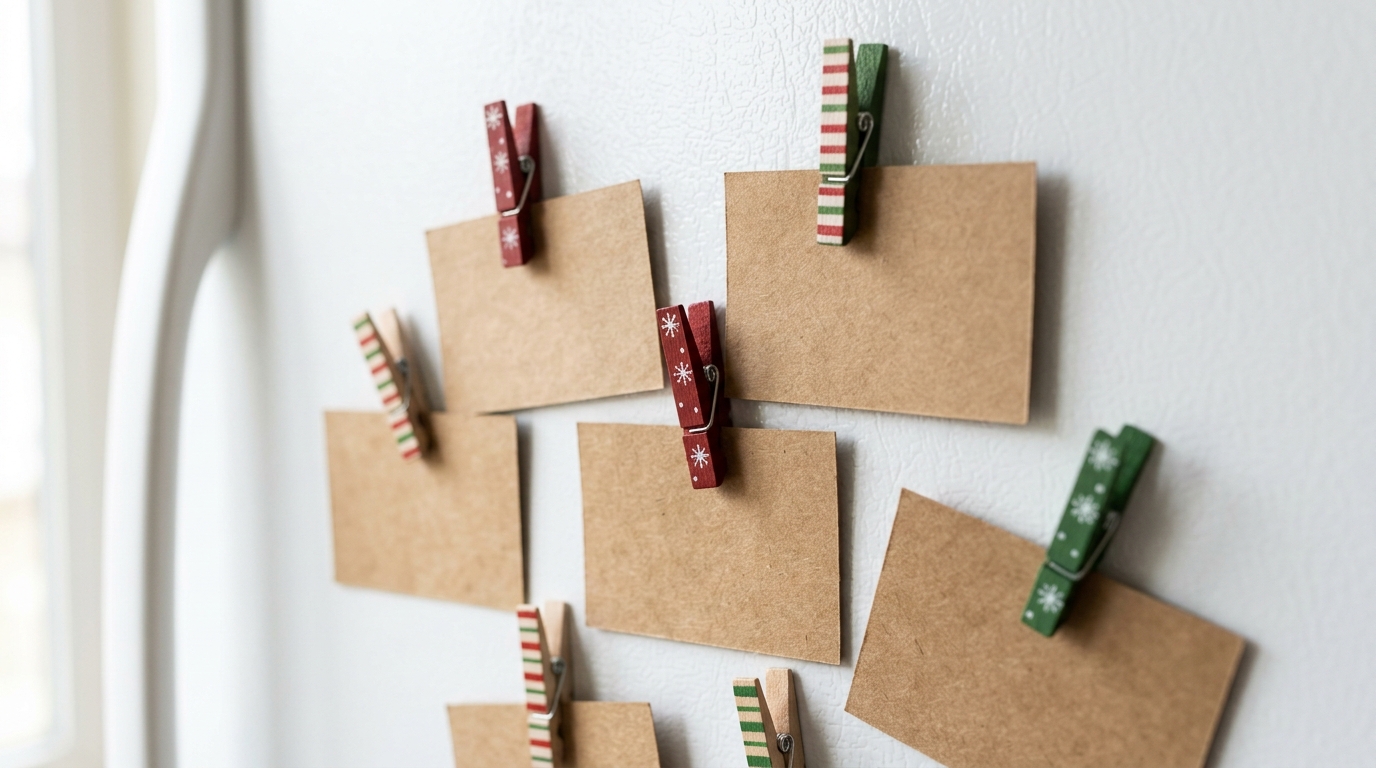
Paint clothespins in red, white and green with little snowflakes or stripes, glue a small magnet on the back and you have holiday fridge clips. They are perfect for holding school papers, lists and Christmas cards. They also make easy stocking stuffers when you tie a few together with ribbon. Easy clothespin crafts like this are great for kids to give as gifts. Which design would you paint?
You will need: Wooden clothespins, acrylic paints, small brushes, round craft magnets and strong glue.
How to make it: 1. Paint the clothespins and let them dry. 2. Add stripes or snowflakes with a fine brush. 3. Glue a magnet to the back of each one.
A Christmas Card Holder
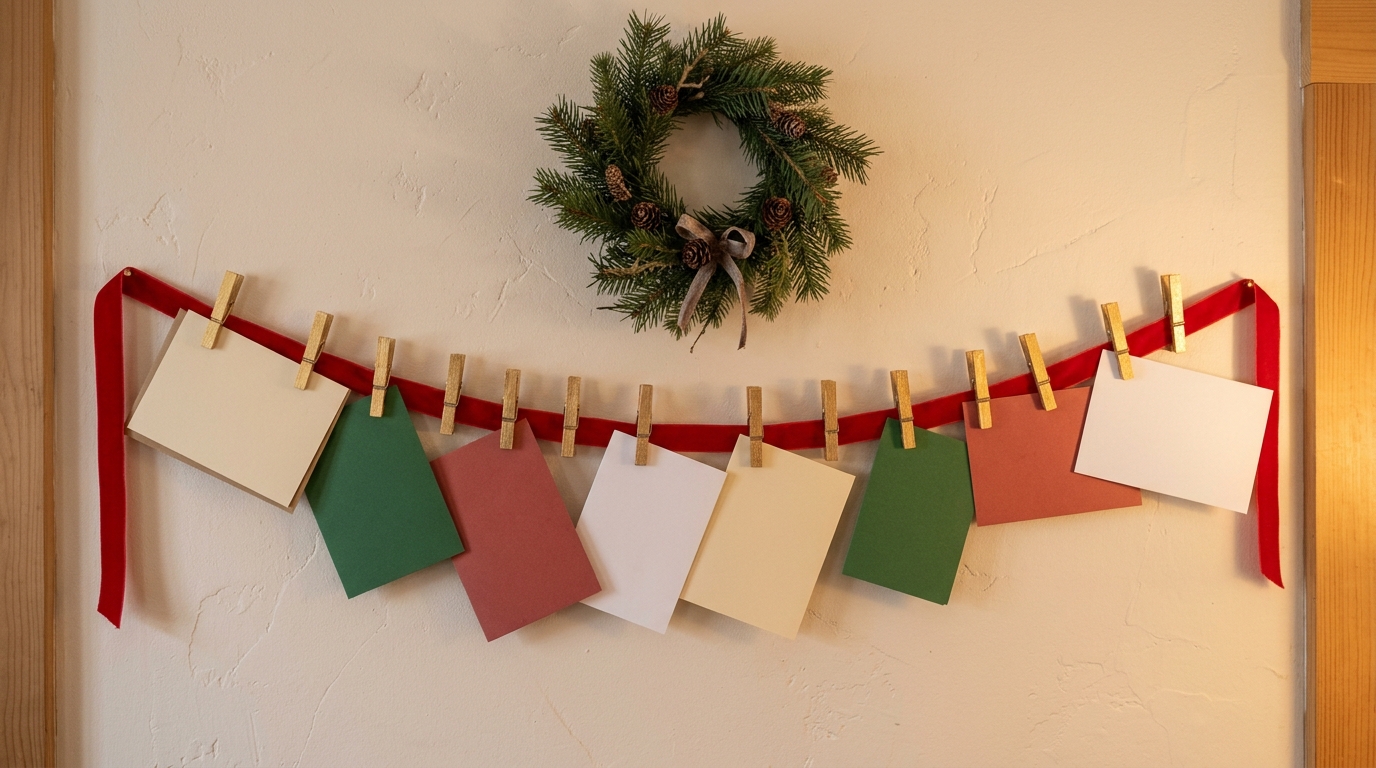
Every December the cards pile up on the counter. Hang a long red ribbon on a wall or door and clip each card with a gold painted clothespin. It turns the cards into a cheerful display that everyone can enjoy. Add a small wreath above it to finish the look. It is one of the most useful clothespin crafts of the season. Where would you hang yours?
You will need: Wide red ribbon, wooden clothespins, gold paint and two small hooks.
How to make it: 1. Paint the clothespins gold and let them dry. 2. Hang the ribbon between two hooks. 3. Clip the cards along the ribbon as they arrive.
Clothespin Gift Tag Clips

Skip the tape and clip your gift tags on with painted clothespins. Red and white stripes look like candy canes, and a tiny sprig of pine adds a fresh touch. The clothespin becomes part of the gift, and people often keep them to reuse. Plain kraft paper looks extra special this way. What colors would you paint your clips?
You will need: Wooden clothespins, red and white paint, kraft gift tags and small pine sprigs.
How to make it: 1. Paint red and white stripes on each clothespin. 2. Write the name on the tag. 3. Clip the tag and a pine sprig to the ribbon on the gift.
Clothespin Snowmen
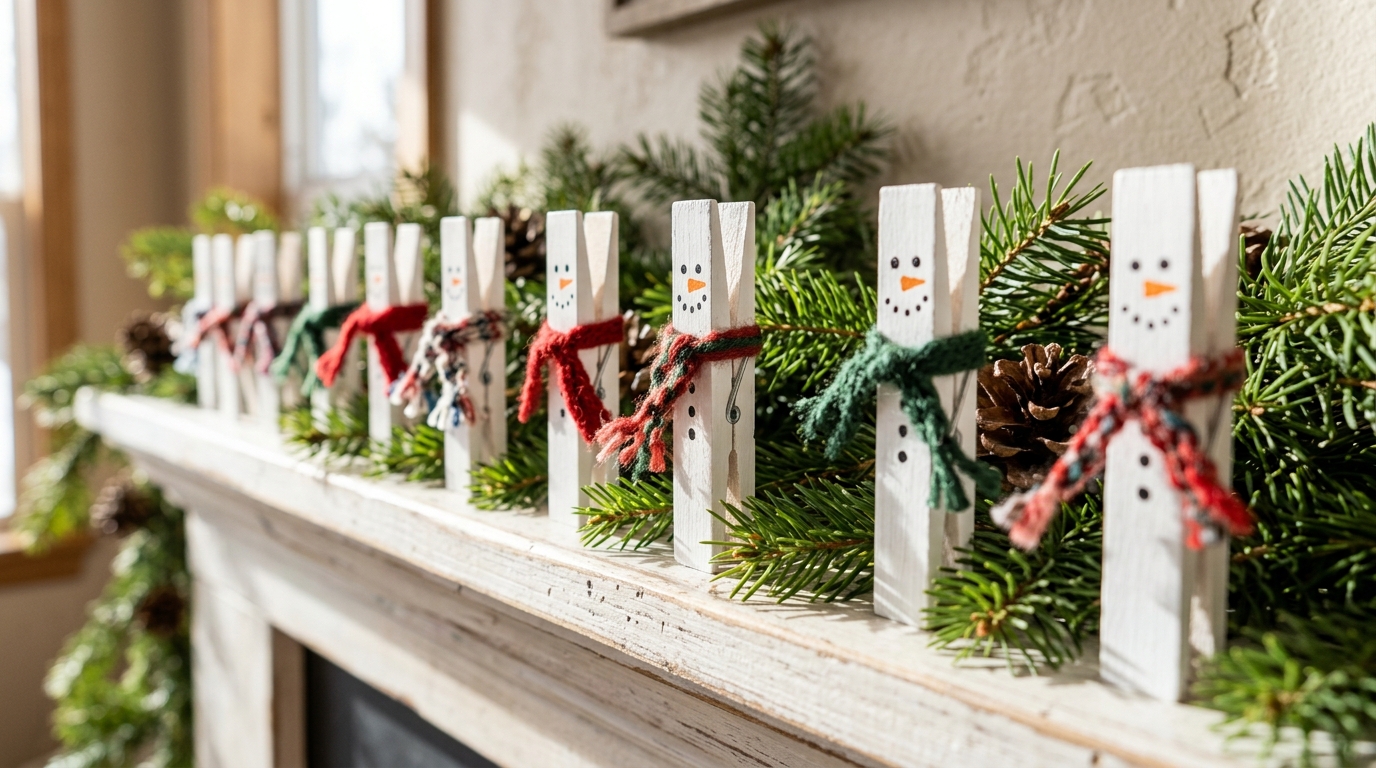
Paint a clothespin white, add two dot eyes, an orange carrot nose and a little yarn scarf, and you have a snowman. Line a row of them on a mantel or a shelf with some greenery. They are easy enough for preschoolers, with a grown up helping with the scarf. Each one turns out a little different, which makes them even cuter. What color scarves would your snowmen wear?
You will need: Wooden clothespins, white and orange paint, a black marker and yarn scraps.
How to make it: 1. Paint the clothespins white and let them dry. 2. Draw eyes and buttons with a marker and paint a small orange nose. 3. Tie a short piece of yarn around the neck as a scarf.
Clothespin Crafts Countdown: Advent Clips on a Ribbon
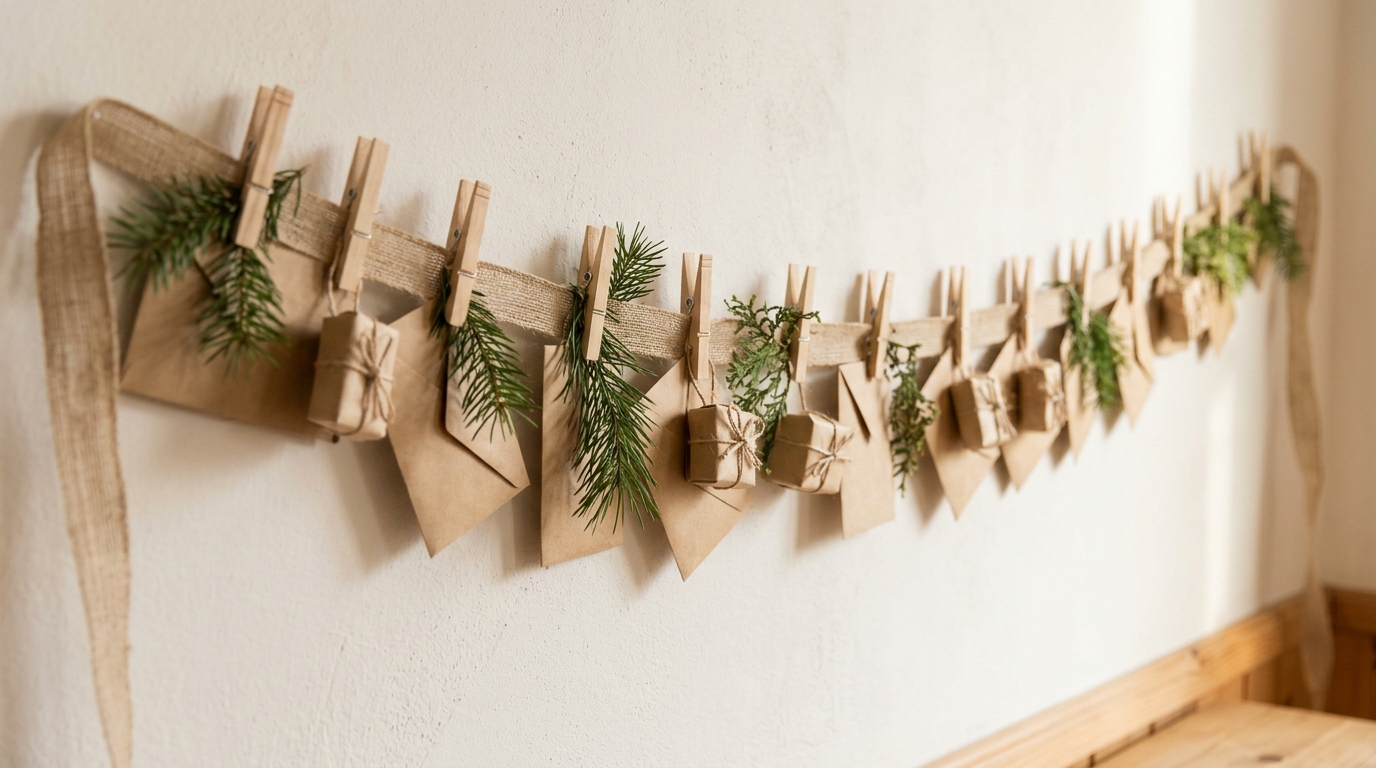
Clip small envelopes or tiny wrapped treats to a long ribbon with clothespins, one for each day in December. It is a simple countdown that kids can open each morning. Write a small kind task or a joke in each envelope. You can reuse the ribbon and clips every year. It is a sweet way to finish our list of clothespin crafts. Which of these 16 ideas will you try first?
You will need: A long ribbon, 24 wooden clothespins, small paper envelopes and tiny treats or notes.
How to make it: 1. Hang the ribbon along a wall or shelf. 2. Fill each envelope with a treat or a note. 3. Clip them along the ribbon in order.