Betty Ford Christmas: 15 Handmade Ornaments for Pennies Inspired by Her Cozy 1974 White House Tree
A Betty Ford Christmas proves the most famous tree in America can be dressed in scraps, husks and string. In 1974, the first lady chose a theme of handmade crafts, thrift and recycling for the official tree in the Blue Room. Instead of shiny store ornaments, the branches held pieces made by Appalachian women and senior citizens groups. That idea still feels fresh today. Most of these projects use things you already have, like fabric scraps, pine cones, yarn and old paper. They cost pennies, they are easy enough for a rainy afternoon, and they look sweet on any size tree. Grab a basket of odds and ends, pour a cup of coffee and swipe through all fifteen ideas. Each one comes with a simple supply list and three easy steps..
Betty Ford Christmas Starts With Calico Patchwork Balls
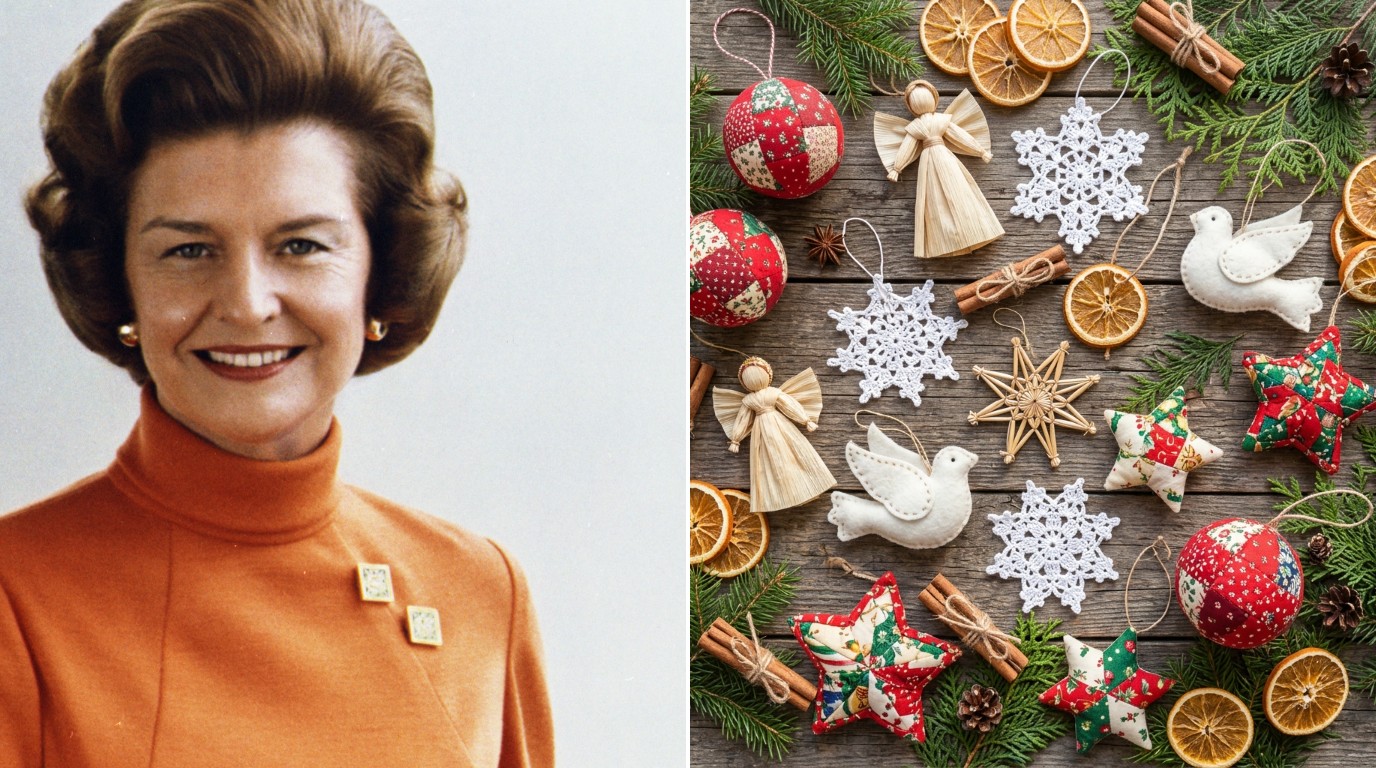
Here is the ornament that makes people stop and ask, “Did you make that?” A Betty Ford Christmas tree looked warm because every piece was handmade, and calico patchwork balls give you that same cozy look in one evening. You can read the full story of the 1974 tree in this White House Christmas tree history. Tiny squares of red and green print fabric get tucked into a foam ball until it looks quilted. If you love first lady style, peek at this Laura Bush holiday tree too. Save every small scrap from now on..
You will need: a 3 inch foam ball, red and green calico scraps cut in 1 inch squares, a butter knife, straight pins, ribbon.
How to make it: 1. Draw lines around the ball to make 8 sections. 2. Push the edges of each fabric square into the lines with a butter knife, overlapping slightly. 3. Cover the seams with ribbon and pin a loop on top.
Corn Husk Angels With Folded Wings
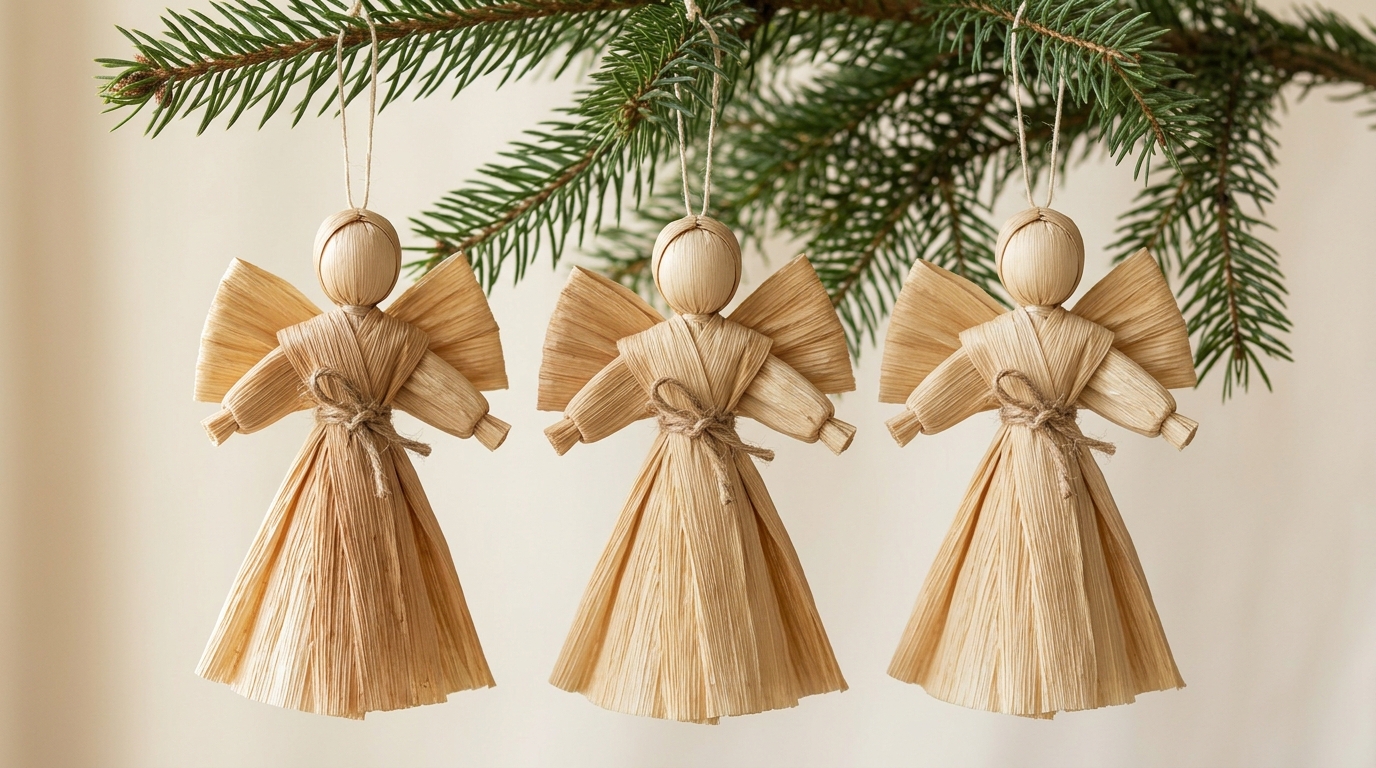
Corn husk angels are pure Appalachian craft, and they would have felt right at home on that 1974 tree. They cost almost nothing. A pack of dried husks from the grocery store makes a whole choir. Soak the husks so they bend without splitting, then tie, fold and trim. The natural tan color looks lovely against dark green branches. Add them to your box of easy handmade ornaments and make a few extra for gifts. Kids love helping with the wings.
You will need: dried corn husks, a bowl of warm water, natural twine, scissors, a wooden bead for the head.
How to make it: 1. Soak the husks 10 minutes until soft. 2. Fold a husk over the bead, tie under it for a head, then tie again for a waist. 3. Fold a second husk into wings, tie it at the back and let it dry.
Walnut Shell Cradle Ornaments
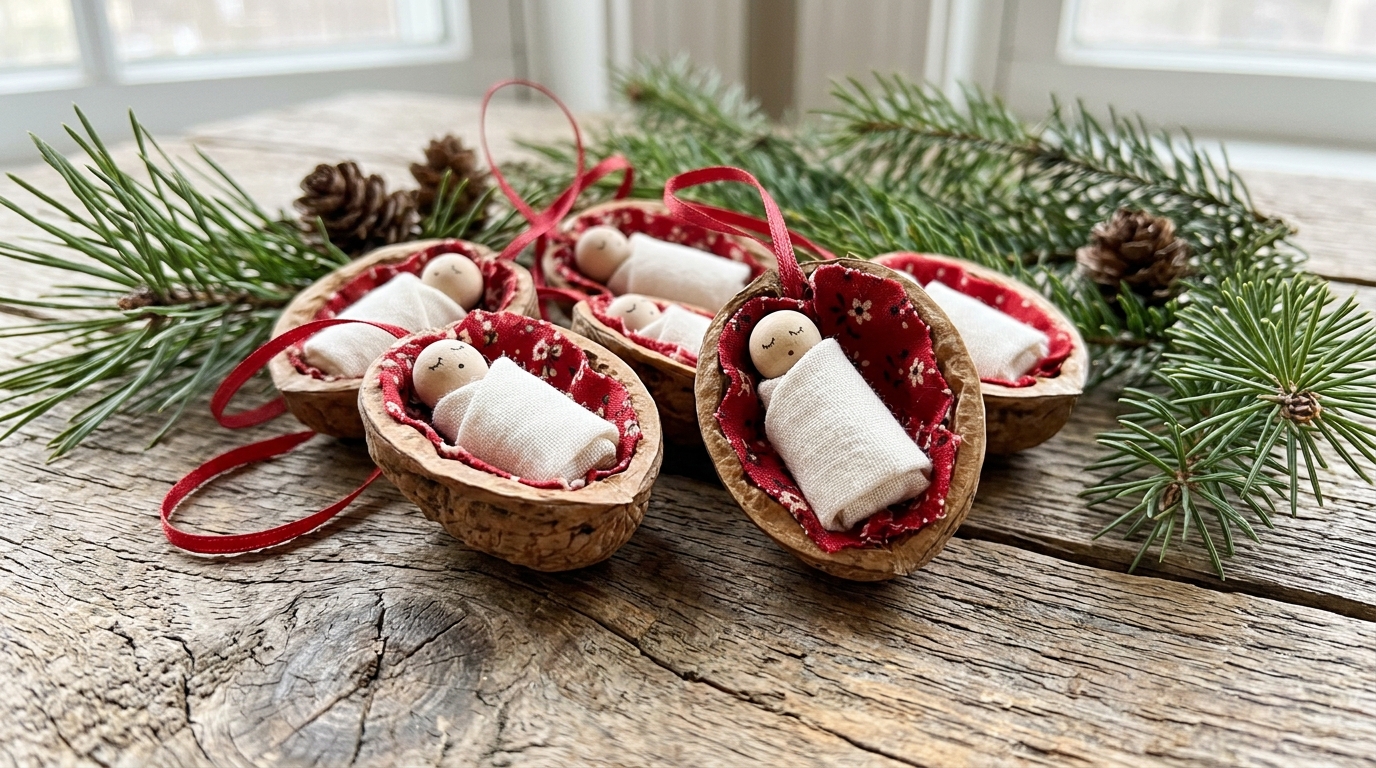
Grandmothers have made walnut shell cradles for generations, and they fit the thrift theme perfectly. Each empty half shell becomes a tiny bed lined with calico, holding a wooden bead baby wrapped in muslin. They are small, so they tuck deep into the branches where people find them like little surprises. If you collect old fashioned ornaments, these will look like they came from the same attic box. Buy walnuts already split in half to save time.
You will need: walnut shell halves, red calico scraps, white muslin, small wooden beads, thin red ribbon, tacky glue.
How to make it: 1. Glue a scrap of calico inside each shell. 2. Wrap a bead in a strip of muslin and glue it into the shell. 3. Glue a ribbon loop to the back and let it dry overnight.
Betty Ford Christmas Pine Cone Mini Trees
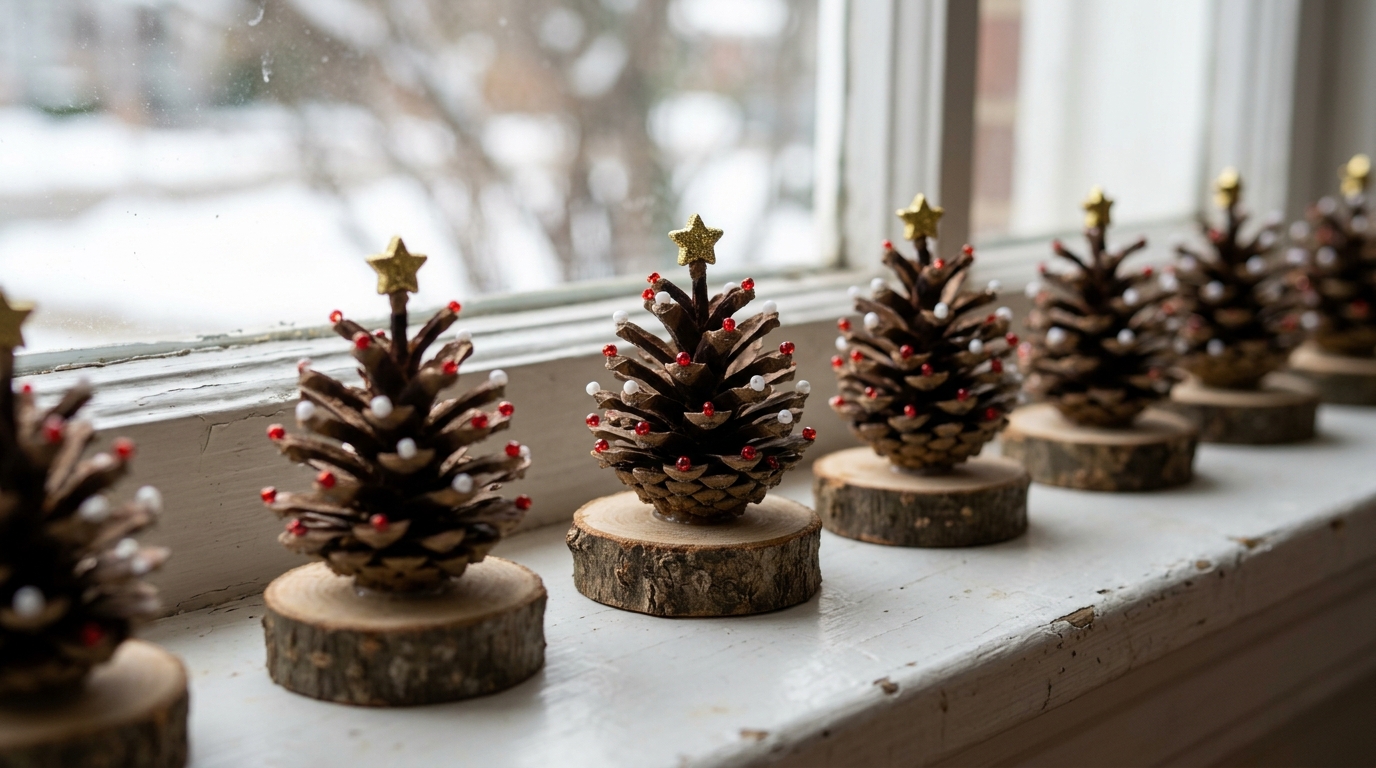
The 1975 tree added pine cones and other natural finds, and these little forests carry that idea onto a windowsill. A Betty Ford Christmas look is all about using what is free, and pine cones are free on any walk. Stand each one on a wood slice, dab the tips with seed beads and add a tiny star on top. Line them up in a row or group them with other woodland decor ideas. Bake the cones at low heat first to clean them, with adult help.
You will need: pine cones, wood slices, seed beads in red and white, a small gold star bead, tacky glue, hot glue (adult help).
How to make it: 1. Bake cones at 200 degrees F for 30 minutes to clean them. 2. Glue seed beads onto the scale tips. 3. Hot glue each cone to a wood slice and add the star on top.
Gingham Bow Garland for the Mantel
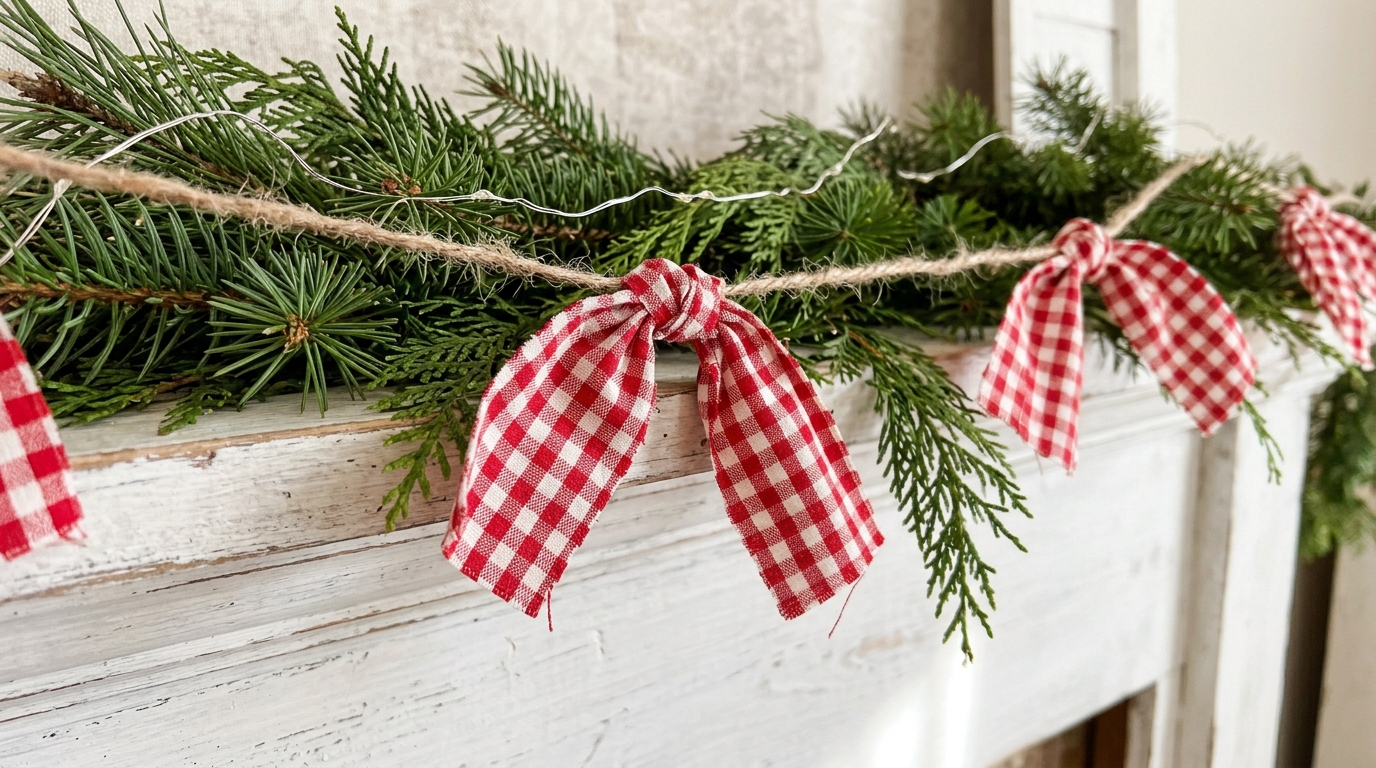
Gingham bows are the easiest way to make a room feel like a country kitchen at Christmas. Cut old shirts, tablecloths or leftover fabric into strips and tie them along a piece of jute twine. No sewing, no glue, and you can make it as long as you like. Drape it on the mantel, a stair rail or a doorway, or mix it into a full garland arch. Use battery lights tucked behind the greens if you want a soft glow.
You will need: red and white gingham fabric, pinking shears, jute twine, fresh or faux evergreen sprigs.
How to make it: 1. Cut fabric into strips 2 inches wide and 12 inches long. 2. Tie each strip into a bow around the twine every 8 inches. 3. Fluff the bows and drape with greenery.
Patchwork Star From Old Shirts
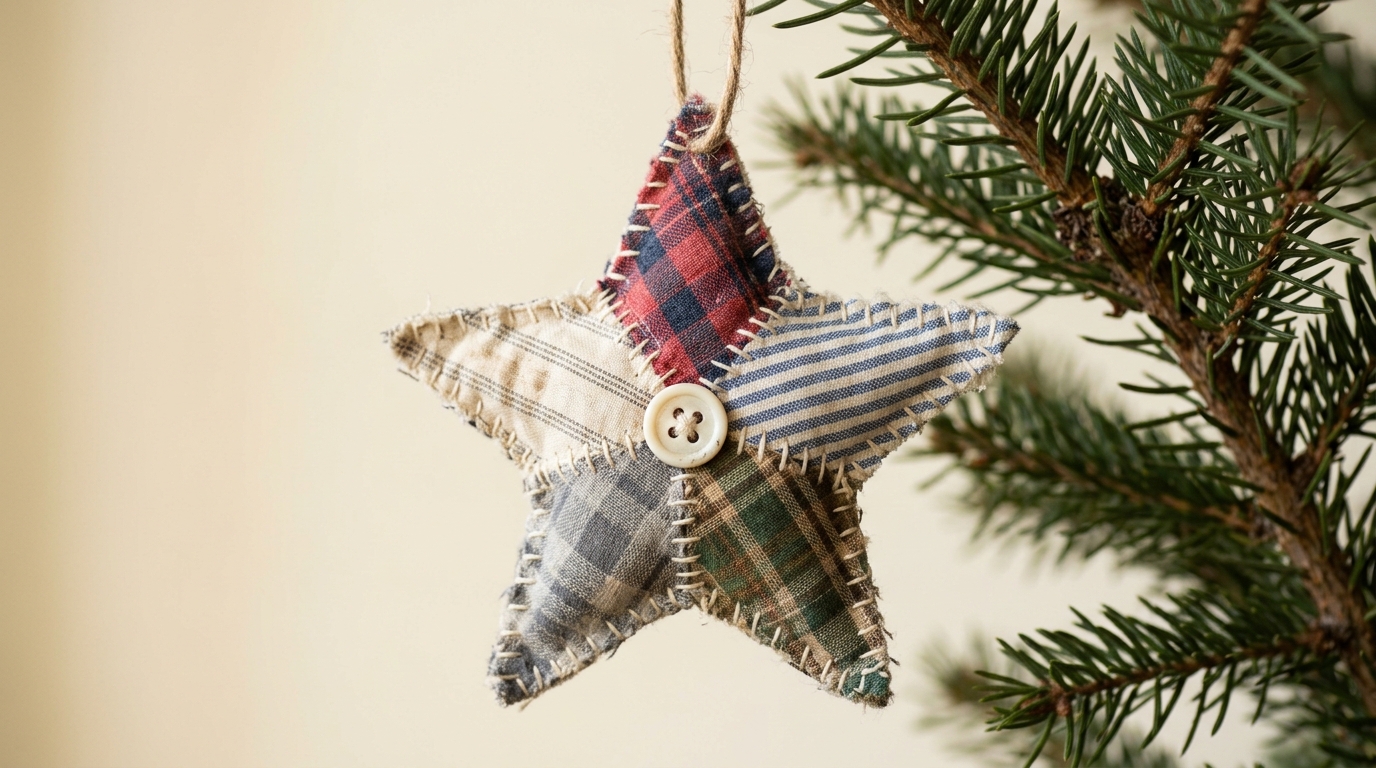
Recycling was part of the 1974 theme, and nothing says recycling like turning a worn out flannel shirt into a star. Plaids and stripes look charming side by side, and the soft stuffed shape is safe on low branches near pets and kids. Sew by hand or machine, whichever you prefer. More ways to use leftovers are in these fabric scrap crafts. A button in the middle adds a sweet finishing touch.
You will need: old shirt fabric, a paper star template, scissors, needle and thread, fiberfill, a button, twine.
How to make it: 1. Trace the star twice on fabric and cut out. 2. Sew the edges together, leaving a small gap, then stuff and close it. 3. Sew a button in the center and add a twine loop.
Betty Ford Christmas Quilt Block Ornaments
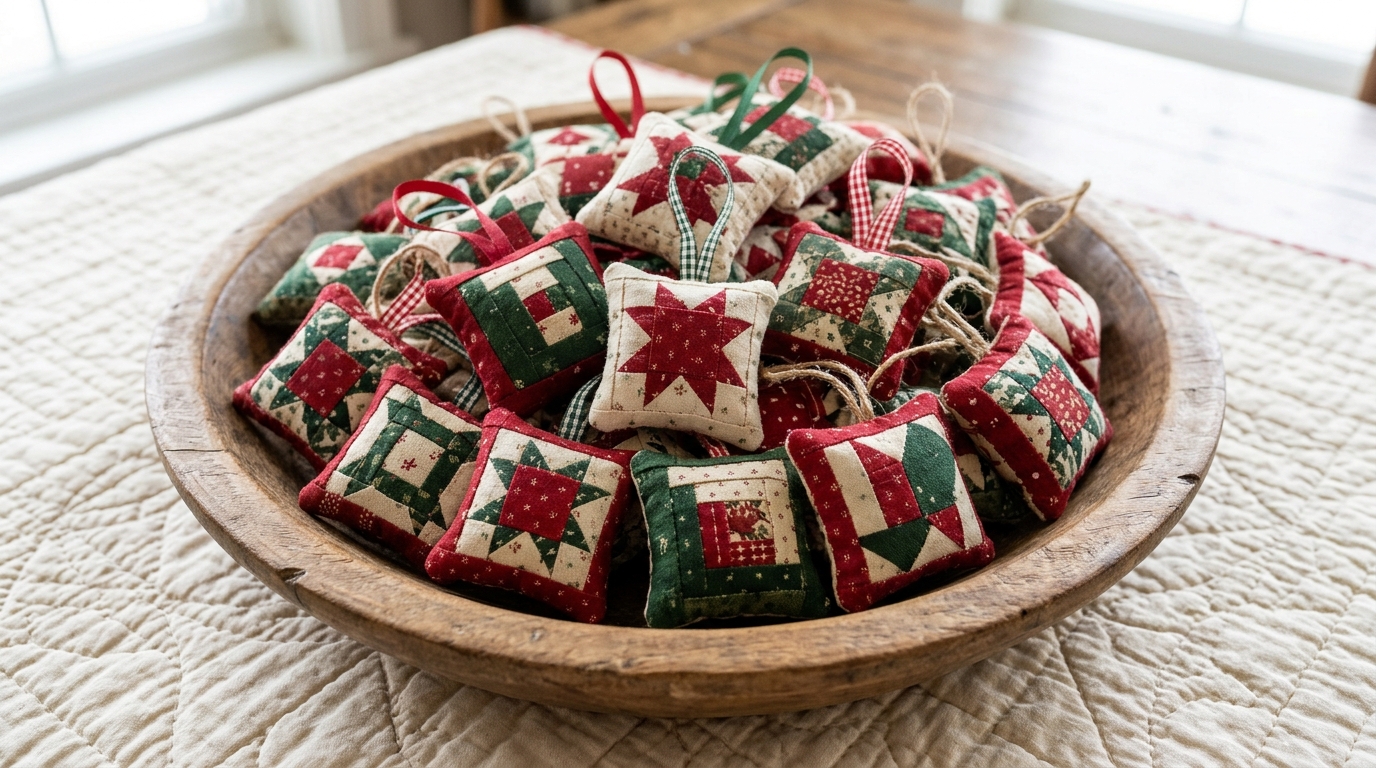
Quilting is a proud Appalachian tradition, so tiny quilt blocks are a natural fit for a Betty Ford Christmas tree. Each one is a little pillow about 3 inches square, pieced from red, green and cream fabric. Pile them in a wooden bowl for the table or hang them on ribbon loops. If you have a quilt lover in the house, these pair well with quilt decor ideas. Use quilting cotton so the points stay crisp.
You will need: quilting cotton scraps in 3 colors, a ruler, a rotary cutter or scissors, thread, fiberfill, thin ribbon.
How to make it: 1. Cut nine 1.5 inch squares and sew them into a small block. 2. Sew the block to a back square, right sides together, leaving a gap. 3. Turn, stuff, sew closed and add a ribbon loop.
Dried Apple Slice Ornaments
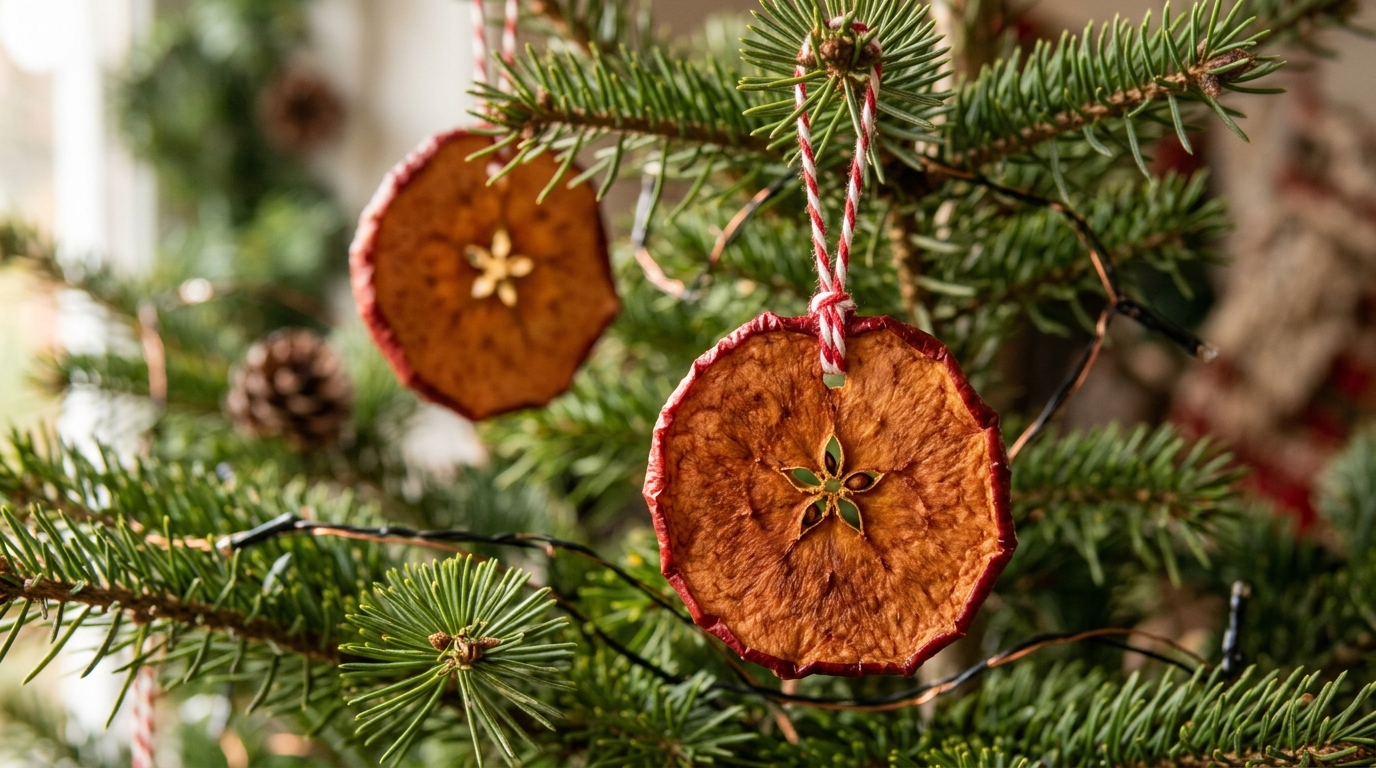
Dried fruit showed up on the White House tree in 1975, and apple slices are the prettiest version. When you cut an apple across the middle, a little star appears in the center. Bake the slices low and slow until they feel leathery, then tie them on with baker’s twine. They look great next to dried orange slices for a fruit garland. Ask an adult to handle the oven.
You will need: 2 red apples, a sharp knife, lemon juice, a baking sheet with parchment, baker’s twine, a skewer.
How to make it: 1. Slice apples crosswise about 1/4 inch thick and brush with lemon juice. 2. Bake at 200 degrees F for 2 to 3 hours, turning once. 3. Poke a small opening near the top with a skewer and add twine.
Mini Burlap Stockings
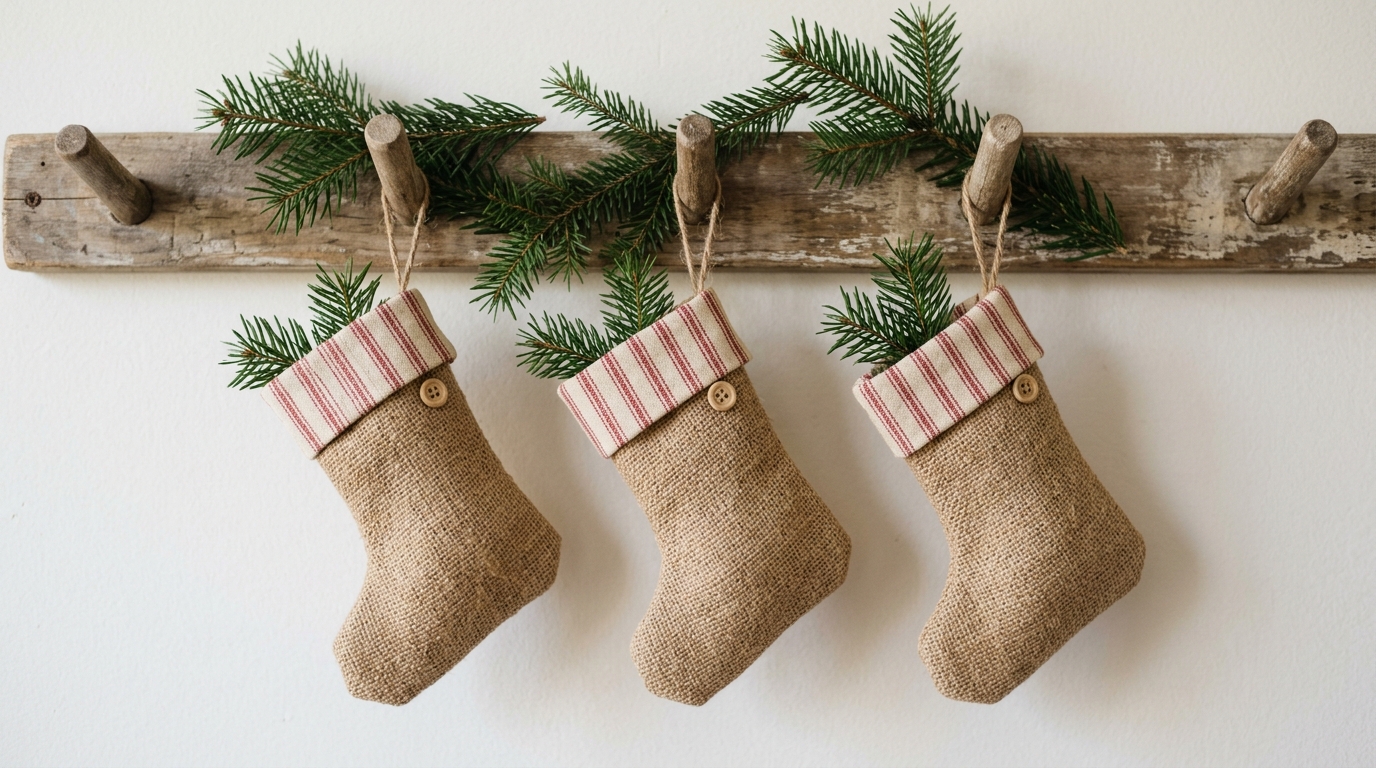
Small stockings make the sweetest ornaments, and burlap from an old coffee sack or feed bag costs next to nothing. A ticking stripe cuff and a wooden button turn a rough sack into something charming. Hang them on the tree, a peg rail or a doorknob, and slip a candy cane or a note inside. They fit right in with primitive country crafts. Seal the edges with a little glue so they do not fray.
You will need: burlap, ticking stripe fabric, a stocking template 6 inches tall, fabric glue or thread, small wooden buttons, twine.
How to make it: 1. Cut two stocking shapes from burlap. 2. Glue or stitch the edges, leaving the top open. 3. Fold a strip of ticking over the top for a cuff, add a button and a twine hanger.
Betty Ford Christmas Felt Doves
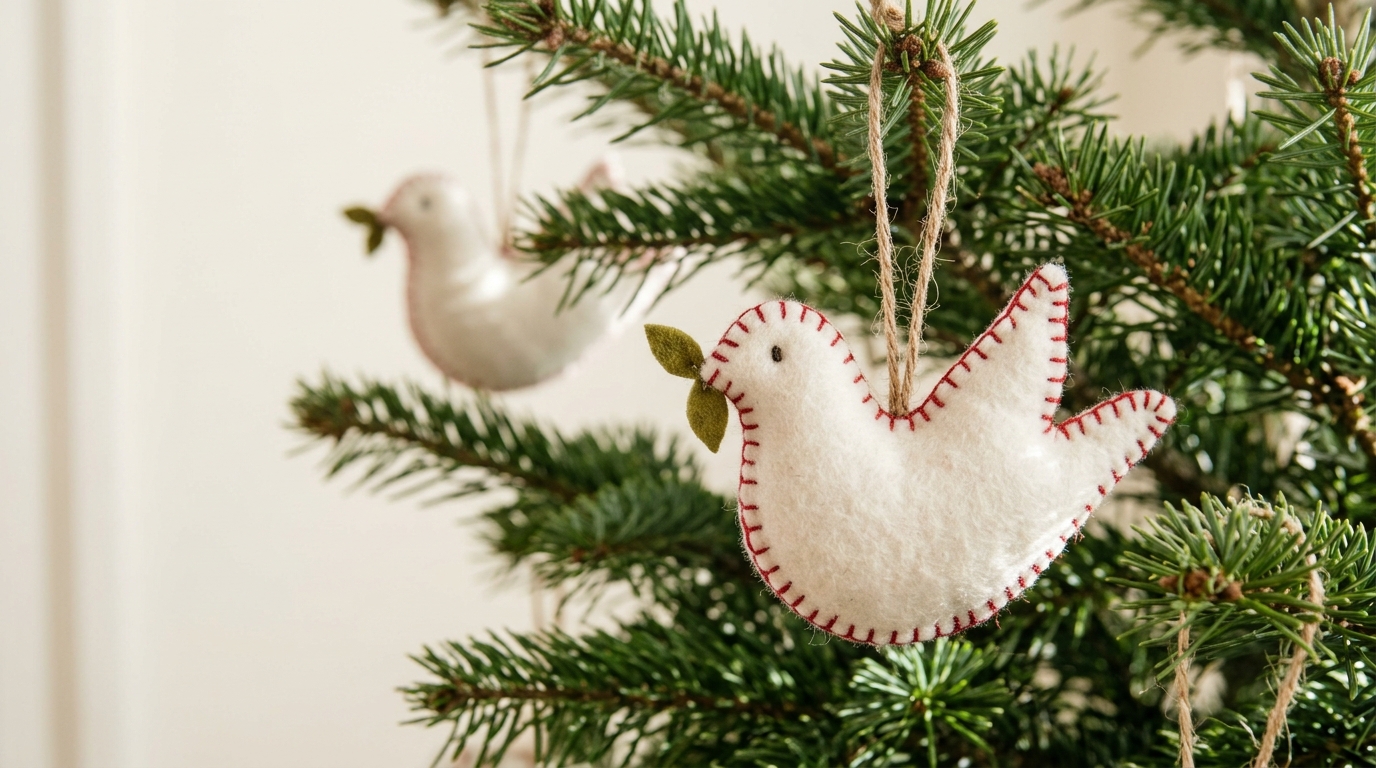
White felt doves bring a quiet, peaceful feeling to the tree. The blanket stitch around the edge is simple, and it is the kind of handwork senior groups loved to share, much like the makers of the Betty Ford Christmas ornaments. Felt does not fray, so even beginners get neat results. These are a lovely group project from our list of crafts for seniors. Add a tiny green leaf in the beak for color.
You will need: white felt, green felt, red embroidery floss, a needle, a dove template, a little fiberfill, ribbon.
How to make it: 1. Cut two dove shapes and one small leaf. 2. Blanket stitch around the edge in red, stuffing lightly before closing. 3. Glue the leaf to the beak and sew a ribbon loop on the back.
Woven Straw Stars
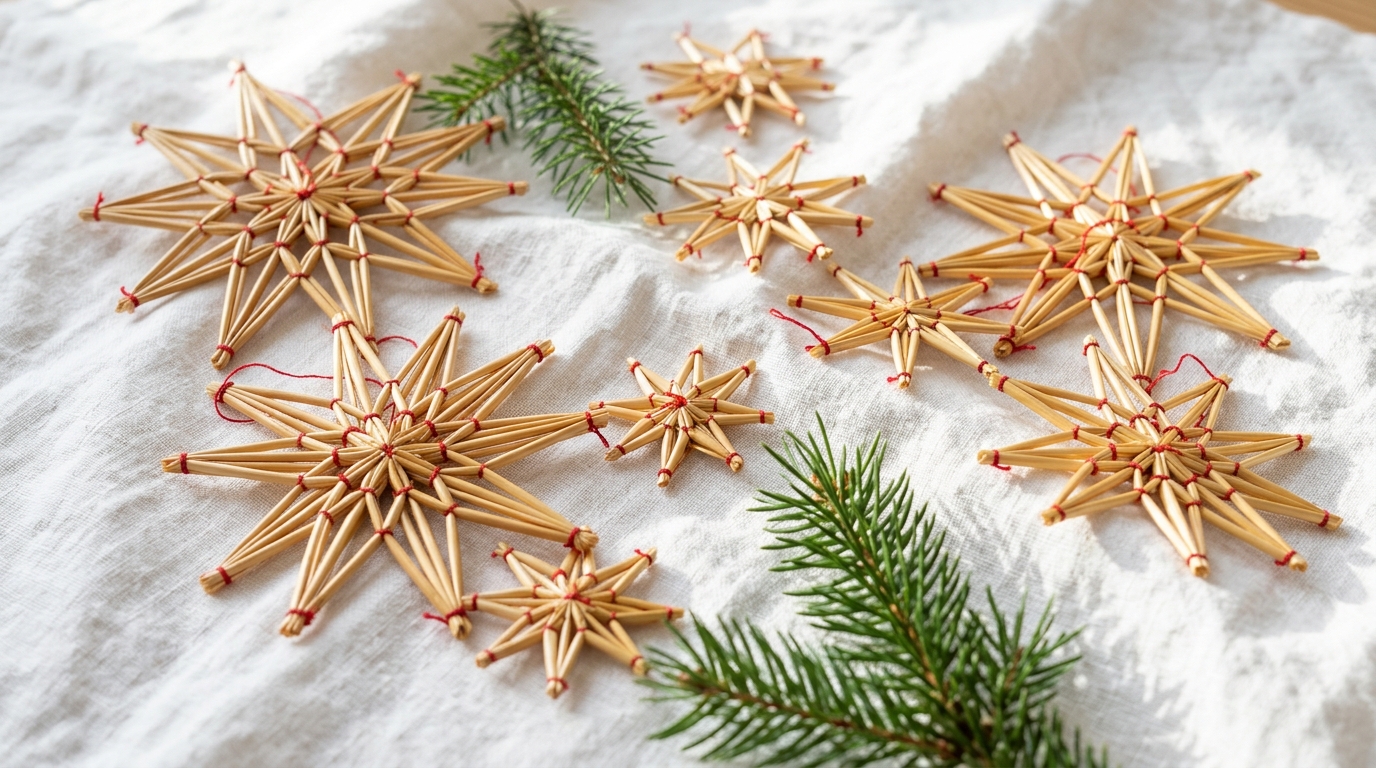
Straw was on the list when Colonial Williamsburg experts helped trim the 1975 tree, and straw stars still shine in soft gold. They are light, they never break, and they catch the light beautifully. Craft stores sell natural straw, or you can use paper straws in a pinch. For a Scandinavian twist, look at this Carl Larsson style tree. Soak the straw first so it flattens without splitting.
You will need: natural wheat straw or craft straw, a bowl of warm water, thin red thread, scissors, an iron (adult help).
How to make it: 1. Soak straw 20 minutes, split and flatten with a warm iron. 2. Cross 4 pieces into a star and tie the center with red thread, weaving over and under. 3. Trim the points at an angle.
Acorn Ornaments With Felt Ball Bodies
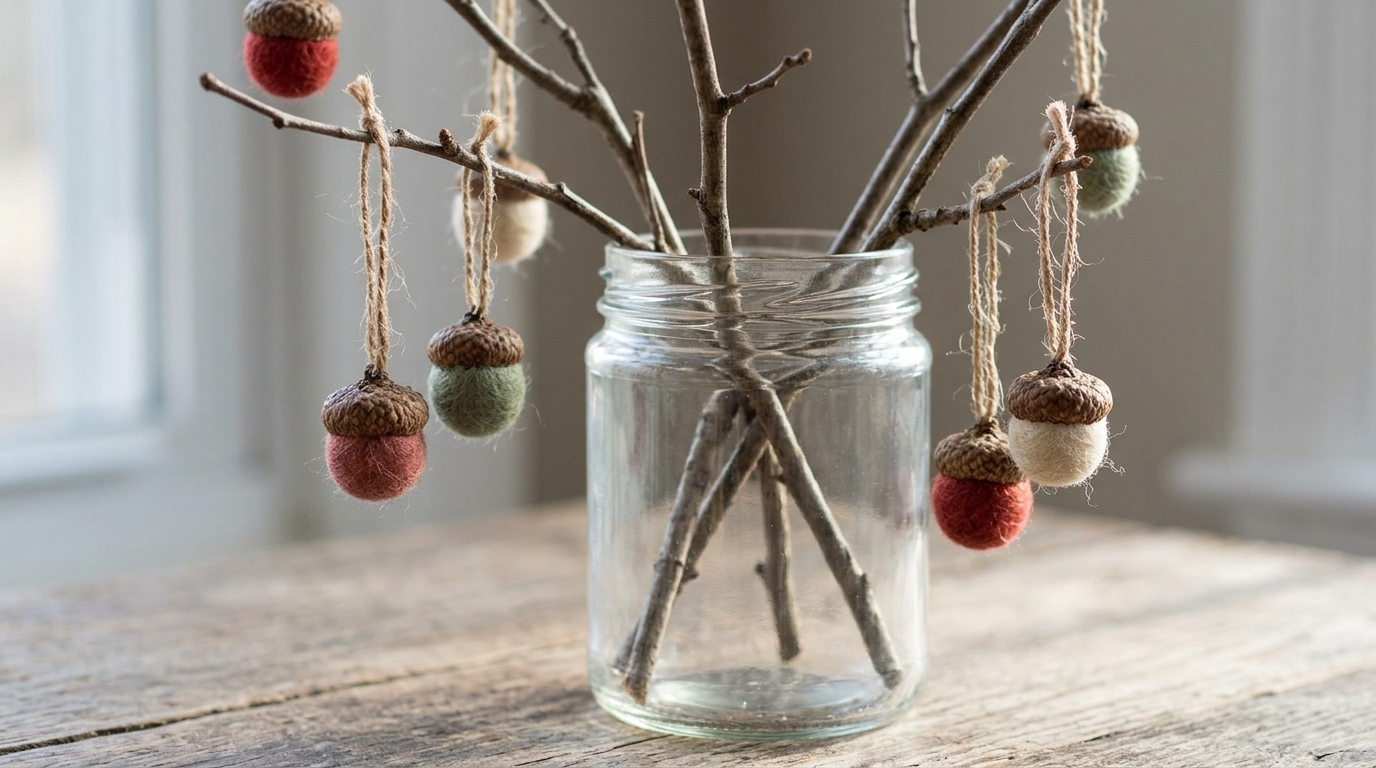
Acorns were another natural treasure on the 1975 tree, and this project gives them a cozy update. Pop off the cap, glue it onto a wool felt ball and you have a soft little acorn in any color you like. Hang them on a twig branch in a jar for a simple centerpiece. They feel straight out of a Laura Ingalls Wilder Christmas. Bake real acorn caps first to keep bugs out.
You will need: real acorn caps, wool felt balls about 1 inch, tacky glue, twine, a bare branch, a clear jar.
How to make it: 1. Bake acorn caps at 175 degrees F for 1 hour, with adult help. 2. Glue a twine loop inside each cap, then glue on a felt ball. 3. Hang them on branches set in a jar.
Betty Ford Christmas Paper Snowflakes
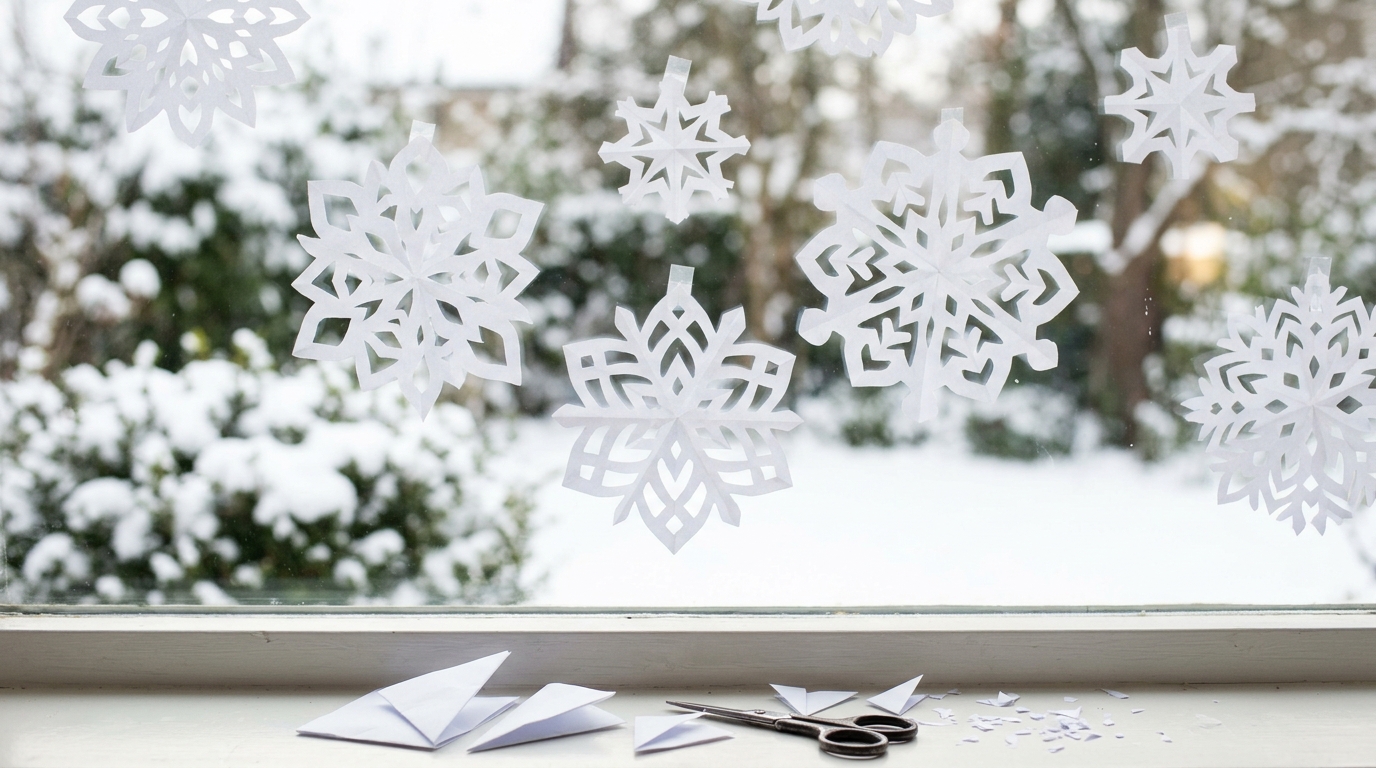
Paper snowflakes were part of the 1975 trim, and they are still the cheapest decoration in the house. Fold, snip and open, and every one is different. A window full of them feels like a Betty Ford Christmas afternoon at the kitchen table. Use printer paper, old book pages or coffee filters. Find more easy ideas in these no glue paper crafts. Tape them to the glass with small loops of tape.
You will need: white paper squares, scissors, a pencil, clear tape or thread.
How to make it: 1. Fold a square in half, then into thirds to make a cone. 2. Cut small shapes along the folded sides and trim the top in a curve. 3. Open gently, press flat under a book and hang.
Yarn Doll Ornaments
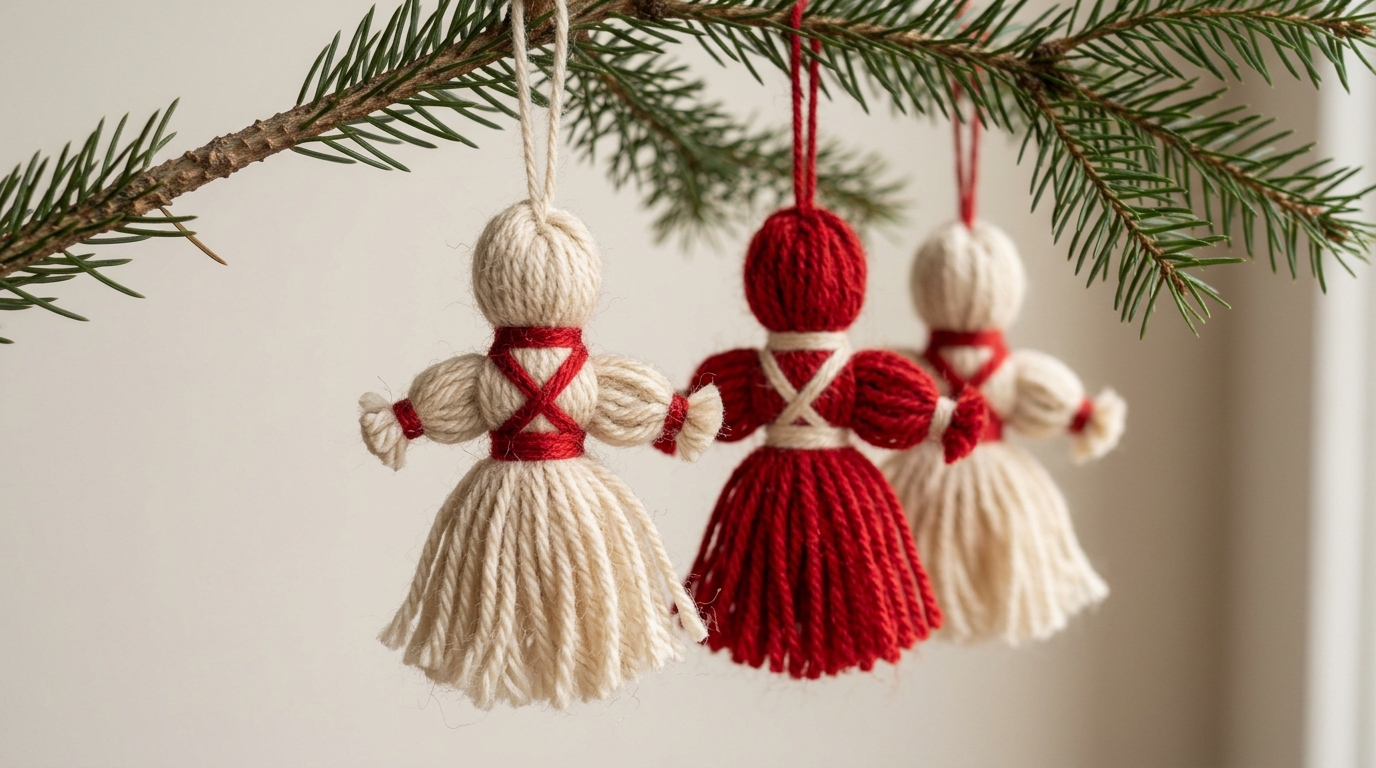
Yarn was also on the 1975 list, and yarn dolls are an old folk craft that takes about ten minutes. Wrap yarn around a book, tie a head, separate the arms and tie a waist. Red and cream look traditional, but any leftover skein works. They match the old fashioned charm of a Calvin Coolidge Christmas. Make a whole family in different sizes.
You will need: worsted yarn in red and cream, a paperback book about 5 inches tall, scissors, extra yarn for ties.
How to make it: 1. Wrap yarn around the book 40 times and slide it off. 2. Tie 1 inch from the top for a head, then cut the bottom loops. 3. Pull out a few strands each side for arms, tie the wrists and the waist.
Betty Ford Christmas Book Page Fan Ornaments
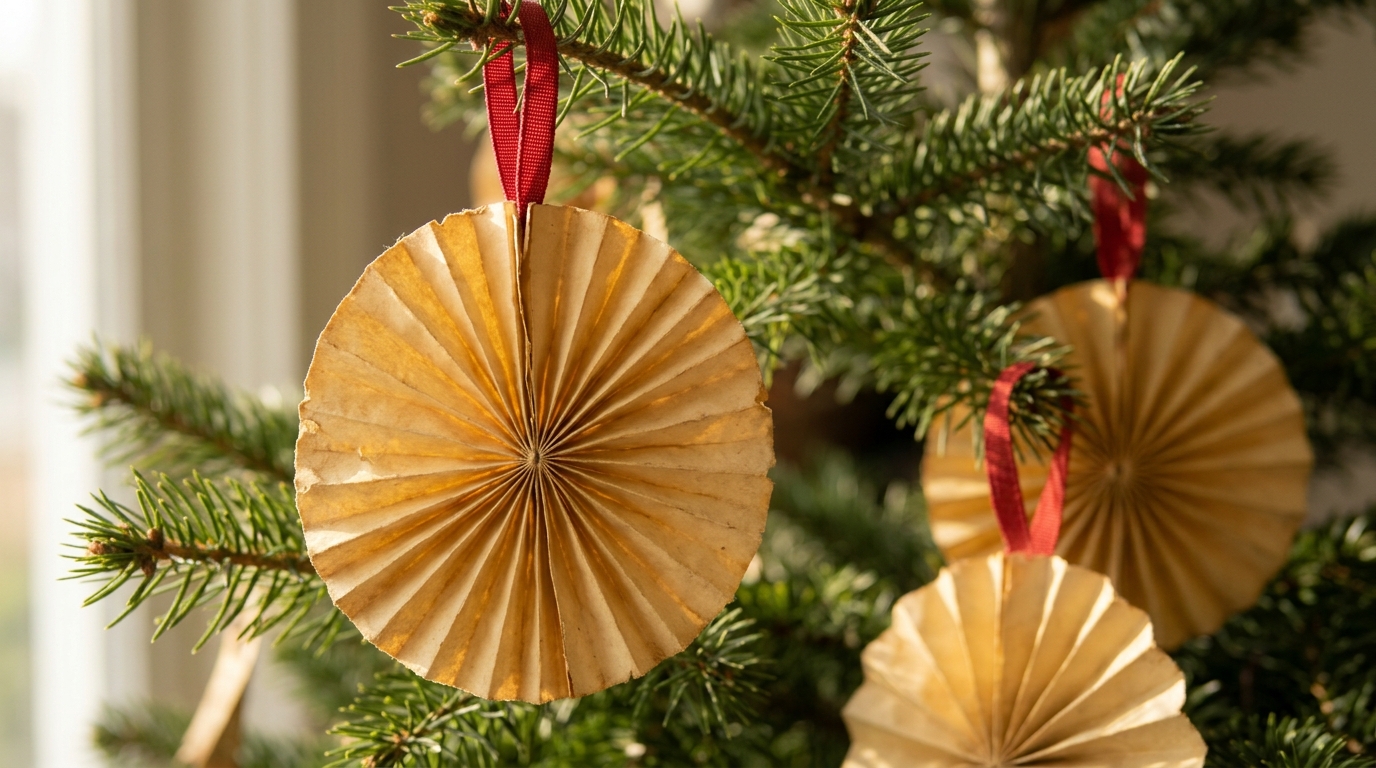
End the tree with paper fans that look like old gold coins hanging in the branches. A worn paperback from the thrift store becomes a dozen ornaments, which is exactly the kind of recycling the Betty Ford Christmas theme celebrated. Accordion fold each page, pinch it into a circle and glue the edges. There are plenty more ideas in these old book crafts. Tie on a red ribbon and you are done.
You will need: pages from a damaged old book, a ruler, glue stick, small paper circles, red ribbon.
How to make it: 1. Accordion fold two pages in half inch pleats. 2. Fold each in half and glue the ends together to make a round fan. 3. Glue a paper circle on each side of the center and add ribbon.