Christmas Crafts for Seniors: 14 Easy Projects That Feel Like Grandma’s Kitchen Table
Christmas Crafts for Seniors bring back something we all miss this time of year: an afternoon around the kitchen table, a pot of coffee, a pile of supplies and plenty of laughter. Whether you are planning an activity at a senior center, visiting a parent in assisted living or crafting with grandkids, the best projects use big pieces, simple steps and no hot glue. Every idea below was chosen for steady, happy work rather than fiddly frustration, and most use things you already have, from buttons and corks to old Christmas cards. You will find 14 easy projects, from a button tree canvas to a jar of family recipes, each with a short supply list and clear steps. Pull up a chair and let’s make something lovely together..
A Christmas Crafts for Seniors Table Full of Joy
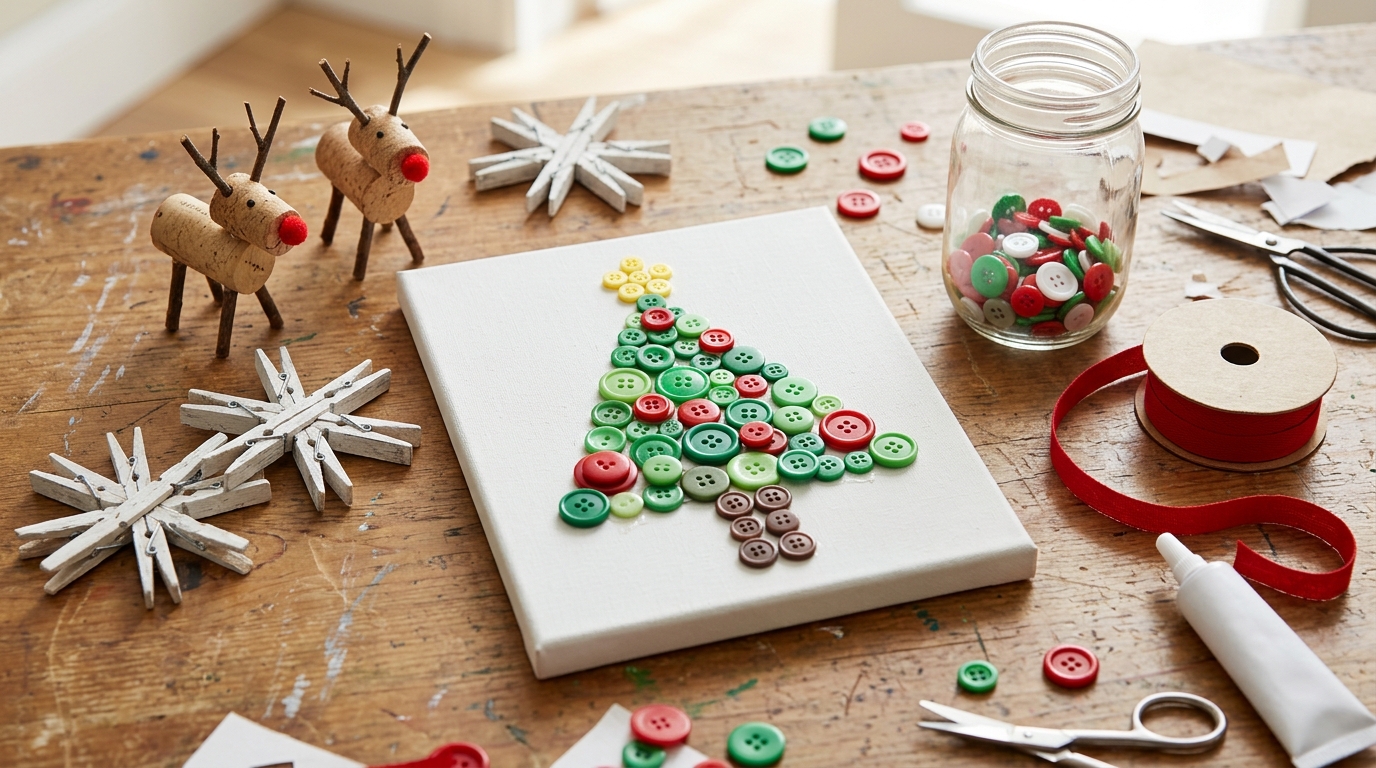
Start by setting up a table that invites everyone in. Lay out a few finished samples, like a button tree canvas, clothespin snowflakes and cork reindeer, so people can see what they are making before they begin. Searches for easy Christmas crafts for seniors are climbing fast this season, according to Google Trends, and a well set table is the secret to a great session. Good light, a cushioned chair and supplies in shallow trays make all the difference. Ready to set the table?..
You will need: A sturdy table, a washable tablecloth, shallow trays for supplies, tacky glue, safety scissors, finished samples, good lighting.
How to make it: 1. Cover the table with a washable cloth. 2. Sort supplies into shallow trays. 3. Place finished samples in the middle. 4. Give each person their own glue and scissors.
Christmas Crafts for Seniors: Clothespin Snowflakes
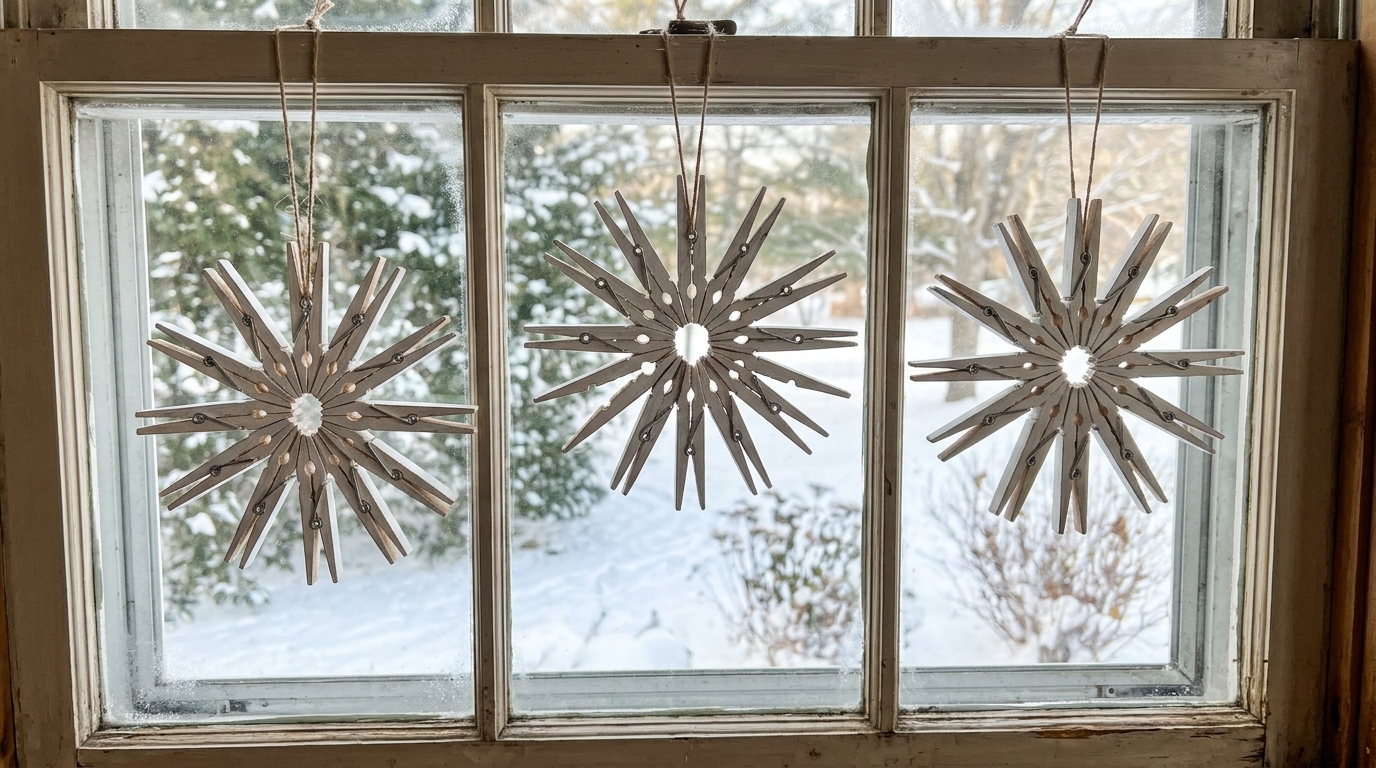
Wooden clothespins are easy to grip and make the most charming snowflakes. Glue eight clothespins in a circle with the clip ends pointing in, and you have a star burst that looks lovely in a window. Leave them natural for a rustic look or paint them white. Unclipping the pins first makes them flat and easy to handle. These make wonderful gifts for family members who visit. How many could your group make in an afternoon?
You will need: Wooden clothespins, tacky glue, a paper plate as a guide, white paint (optional), twine.
How to make it: 1. Take the clothespins apart. 2. Glue the halves back to back so they lie flat. 3. Glue eight in a circle on a paper plate guide. 4. Let dry overnight and add a twine loop.
Christmas Crafts for Seniors: Button Tree on Canvas
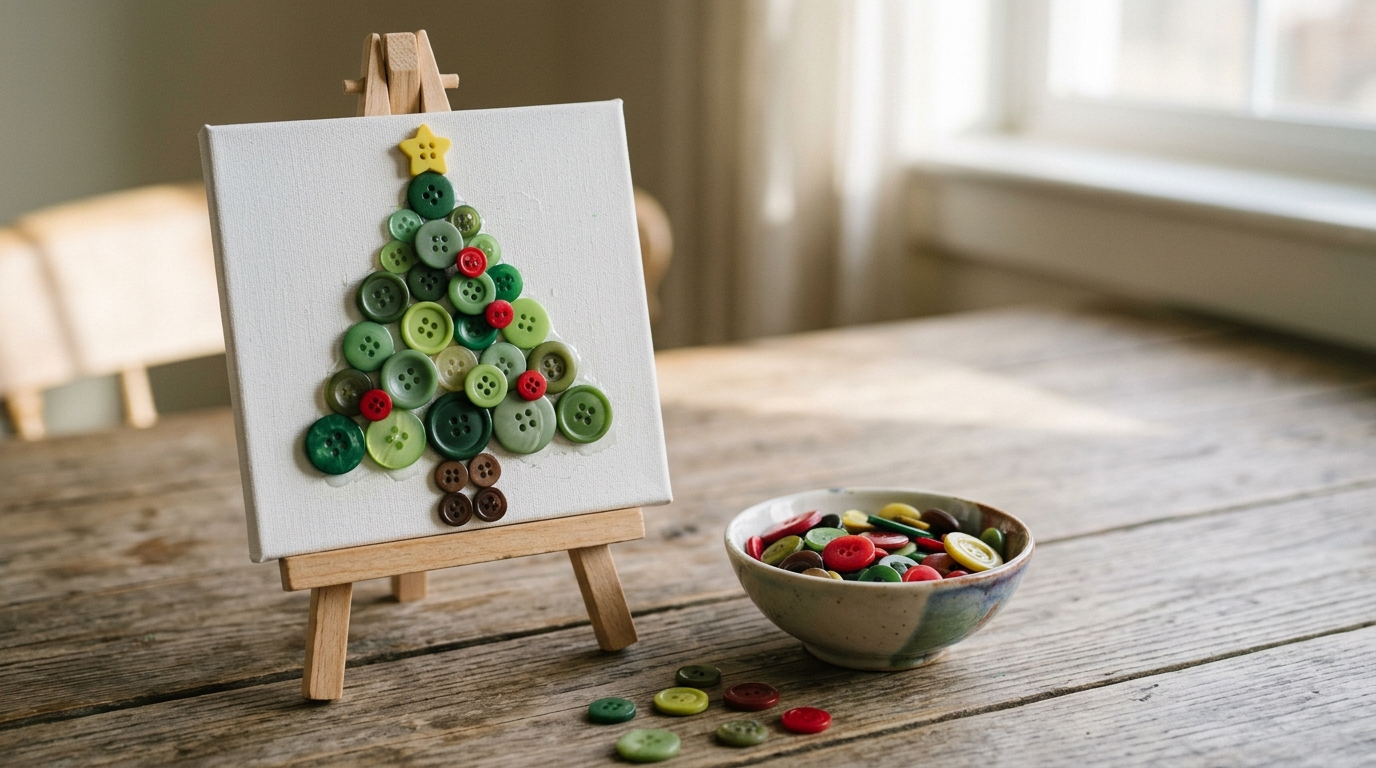
Almost everyone has a jar of buttons, and sorting through them is half the fun. Sketch a simple triangle tree on a small canvas, then glue on green buttons in rows, adding a few red ones as ornaments and a yellow one for the star. The big buttons are easy to pick up, and there is no wrong way to arrange them. Each canvas turns out different, which is part of the charm. Which buttons in your jar have a story to tell?
You will need: A small canvas, green, red and yellow buttons, tacky glue, a pencil, a small bowl for each person.
How to make it: 1. Draw a tall triangle on the canvas. 2. Squeeze glue in a small section. 3. Press buttons into the glue, filling the shape. 4. Add a brown trunk and a star button on top.
Candy Cane Reindeer
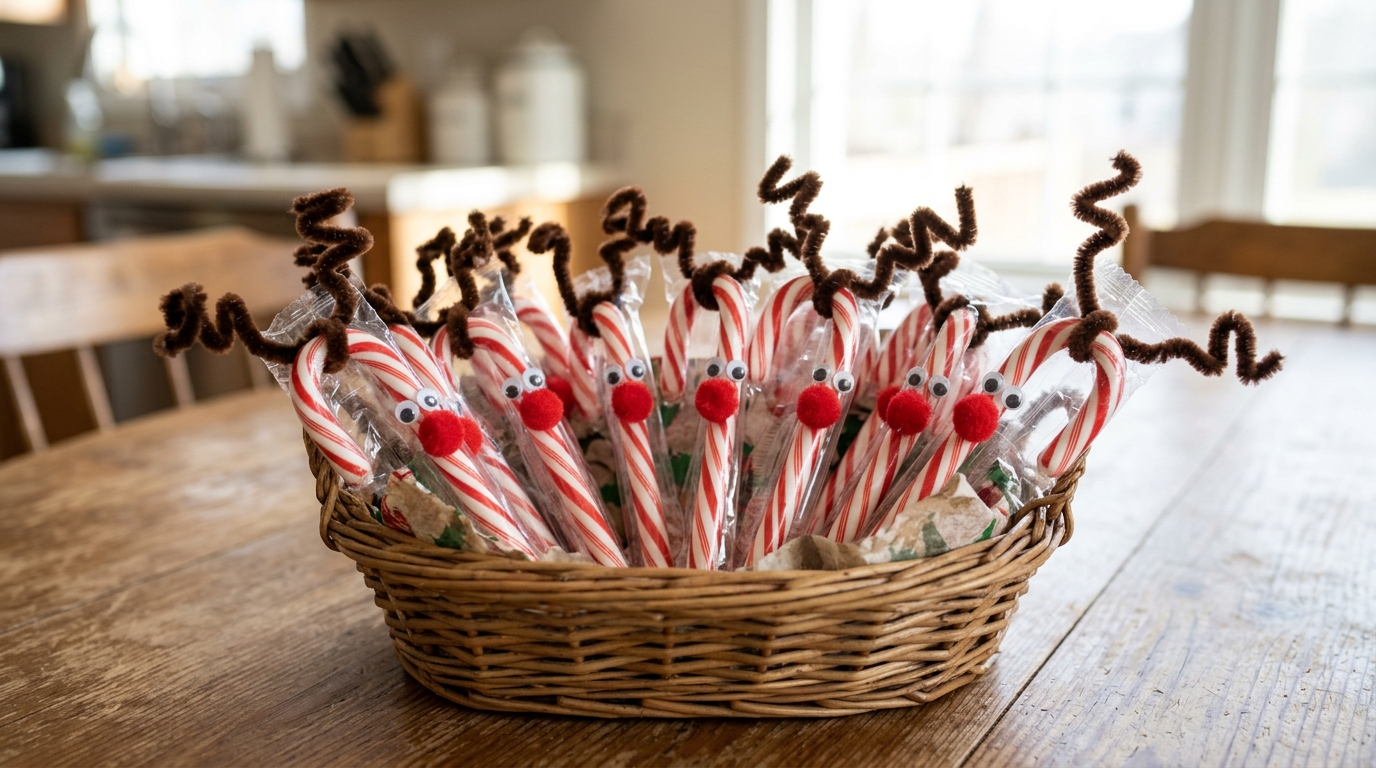
These little reindeer are a sweet treat and a craft in one. Twist a brown pipe cleaner around the hook of a wrapped candy cane for antlers, then glue on googly eyes and a red pom pom nose. They take about five minutes each and make perfect gifts for staff, visitors and grandchildren. Make a basketful and hand them out on a holiday visit. The candy stays wrapped, so they are clean and safe to share. Who would you give your first one to?
You will need: Wrapped candy canes, brown pipe cleaners, large googly eyes, red pom poms, tacky glue.
How to make it: 1. Wrap a pipe cleaner around the hook. 2. Bend the ends into antler shapes. 3. Glue on two eyes. 4. Glue the red pom pom at the bottom of the hook.
Paper Plate Wreath With Tissue Paper
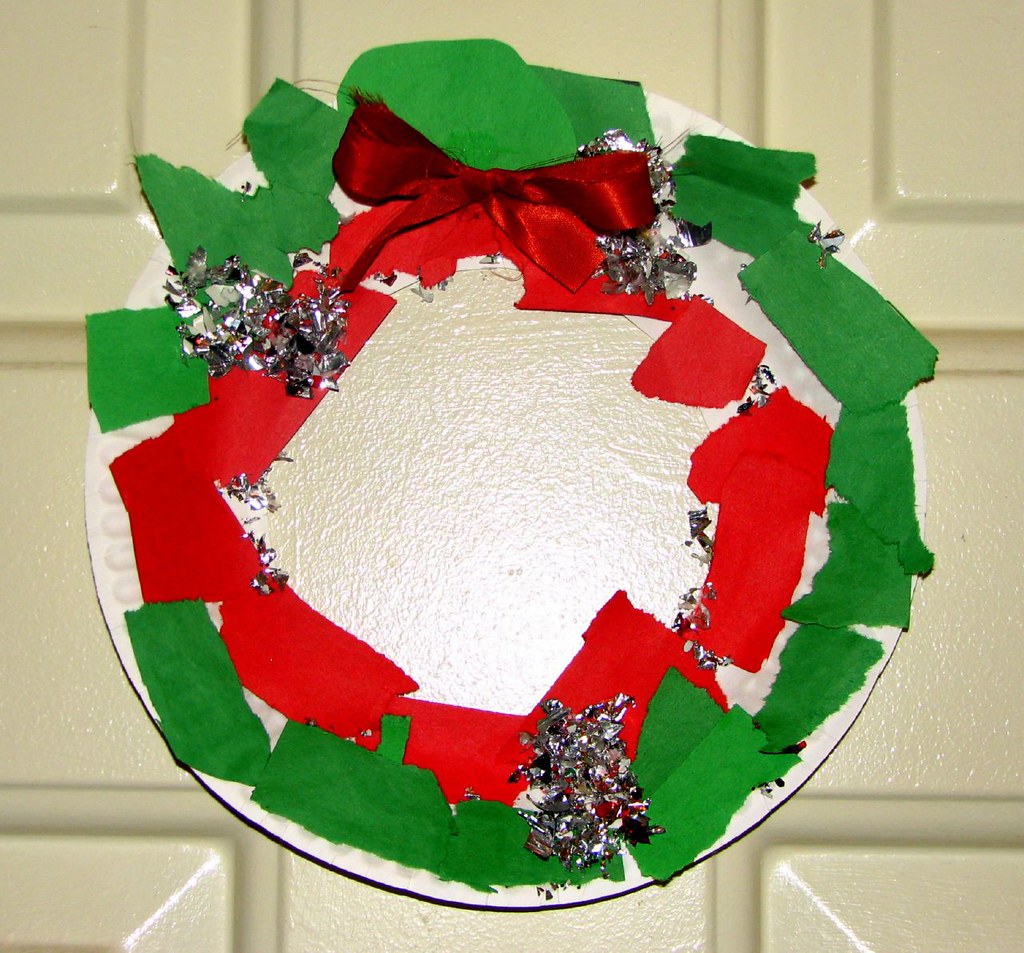
A paper plate wreath is the classic craft many of us made as children, and it still brings smiles. Cut out the center of a sturdy paper plate, then glue on squares of red and green tissue paper until the ring is covered, and finish with a big bow. Pre cut the plates and tissue so everyone can jump straight to the fun part. It is a lovely project to share with visiting grandkids. Do you remember making one of these in school?
You will need: Sturdy paper plates, red and green tissue paper squares, glue sticks, ribbon, pre cut centers.
How to make it: 1. Cut out the center of each plate in advance. 2. Rub glue on a section of the ring. 3. Press on scrunched tissue squares. 4. Add a ribbon bow at the bottom.
Sock Snowmen Filled With Rice
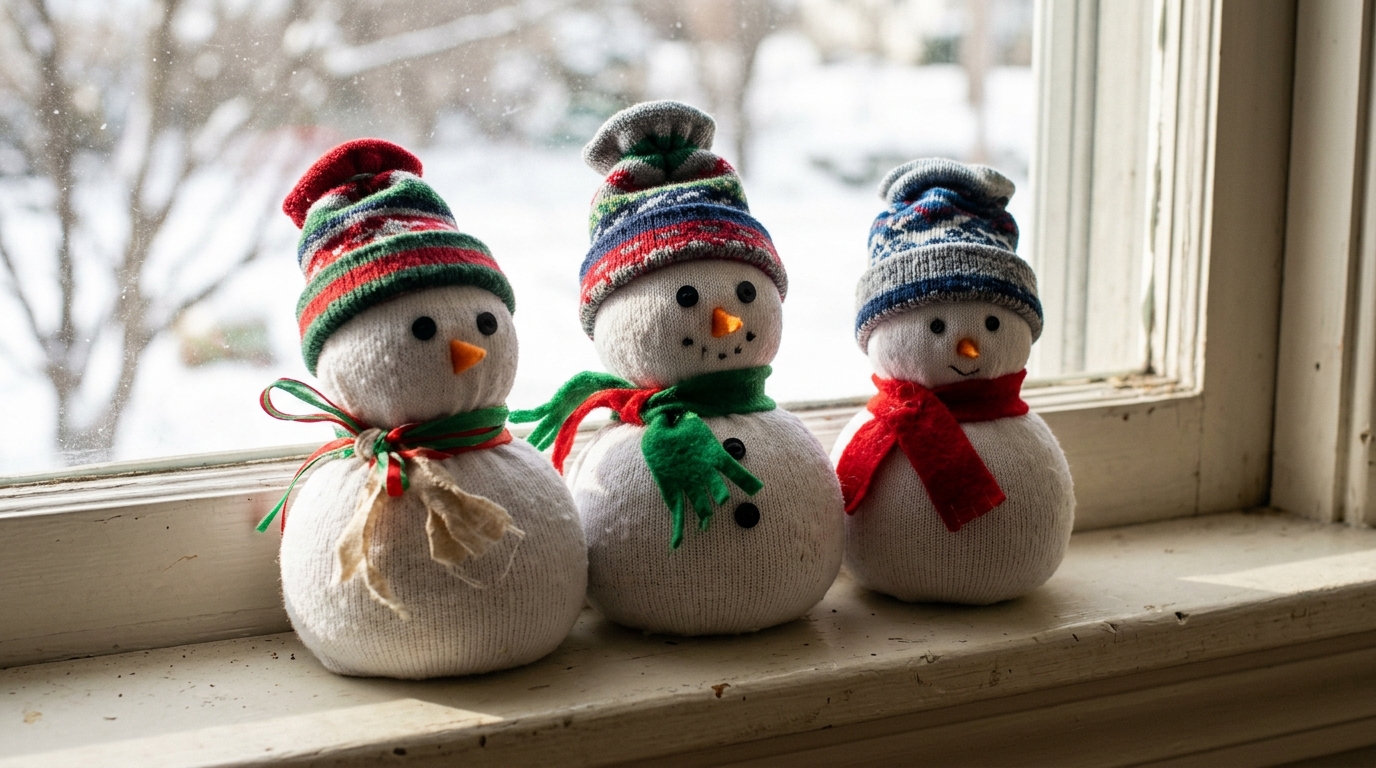
Sock snowmen are soft, squishy and hard to resist. Fill a white sock with rice, tie it with ribbon to make a head and body, and add a felt scarf, button eyes and a little hat made from a colorful sock cuff. There is no sewing at all, and the rice gives them a nice weight for sitting on a windowsill. They also make sweet little hand warmers when held. Use a funnel to make filling easy and tidy. What color scarf will yours wear?
You will need: White socks, rice, a funnel, rubber bands, ribbon, felt scraps, buttons, colorful socks for hats.
How to make it: 1. Fill a sock about two thirds with rice using a funnel. 2. Close with a rubber band and trim the top. 3. Tie ribbon to shape a head. 4. Add the scarf, eyes and a sock cuff hat.
Potato Stamped Wrapping Paper
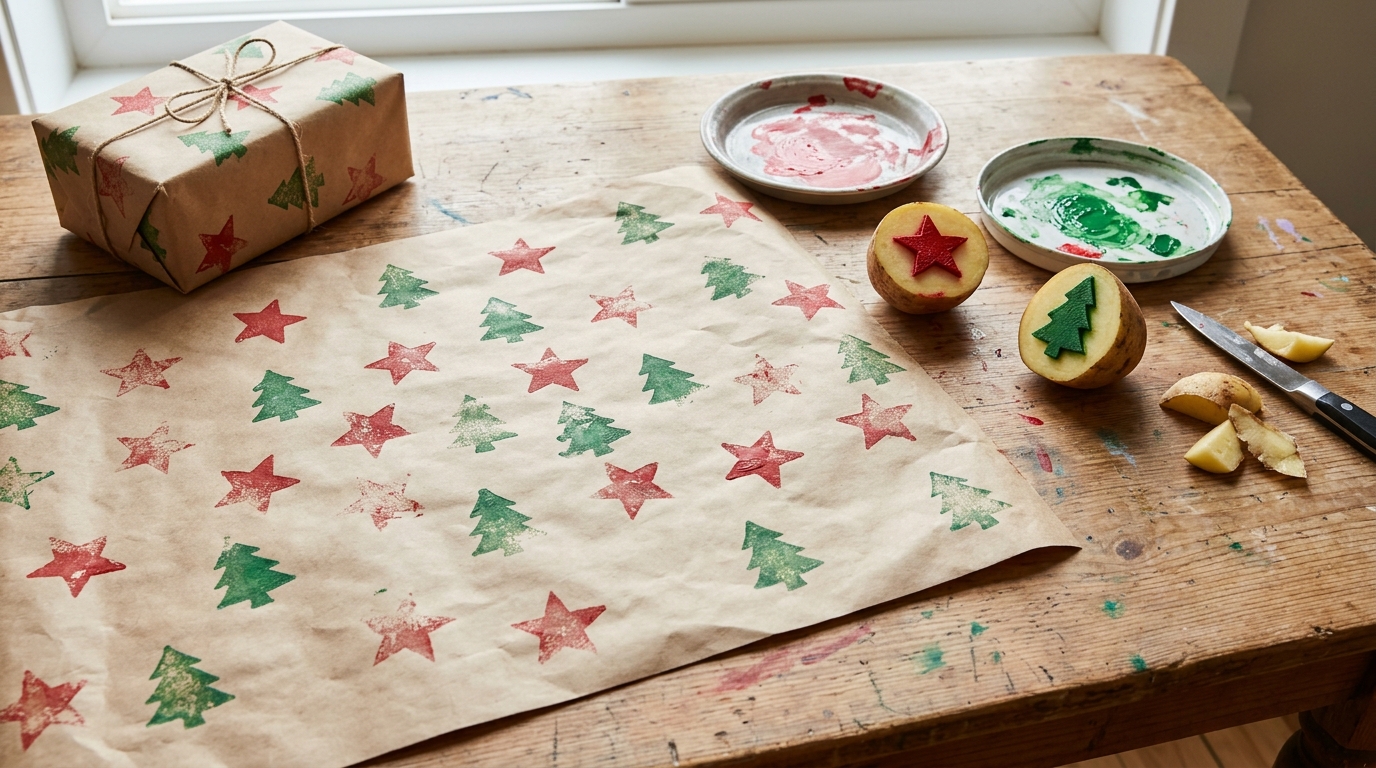
Potato stamps are an old fashioned craft that still makes beautiful gift wrap. An adult cuts potatoes in half and carves simple stars and trees ahead of time, and everyone else gets to stamp. Dip in paint, press on brown kraft paper and repeat. There is something very relaxing about it, and the results look like expensive designer wrap. Use the paper for gifts to family, and they will treasure it. Which shape will you stamp first?
You will need: Potatoes, a small knife (adult only), cookie cutters, red and green washable paint, plates, kraft paper.
How to make it: 1. An adult cuts potatoes in half and carves shapes. 2. Pour paint onto plates. 3. Dip the stamp and press firmly on the paper. 4. Let it dry flat before wrapping.
Felt Mitten Garland
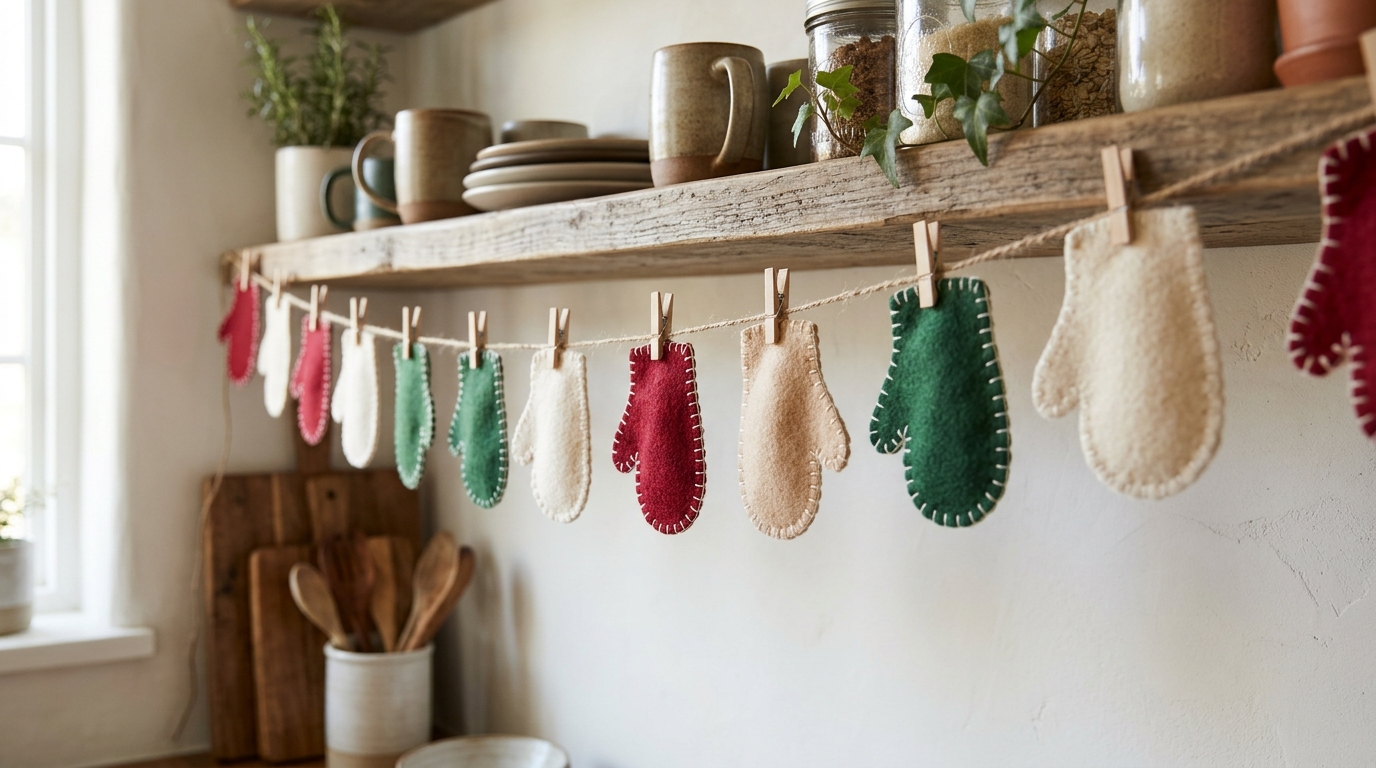
Little felt mittens clipped to twine look like a row of laundry drying by the fire in a storybook. Trace a mitten shape on felt, cut out pairs and decorate them with simple stitches, buttons or glued snowflakes. Larger mittens are easier to cut and decorate. Hang the garland across a shelf or a window in a common room. It is cheerful, cozy and suits every age. Would you make yours in classic red or mix the colors?
You will need: Felt in red, cream and green, a mitten template, scissors, buttons, tacky glue, twine, mini clothespins.
How to make it: 1. Trace and cut felt mittens. 2. Decorate with buttons or a simple stitch. 3. Clip each mitten onto twine. 4. Hang across a shelf or window.
Popsicle Stick Sled Ornaments
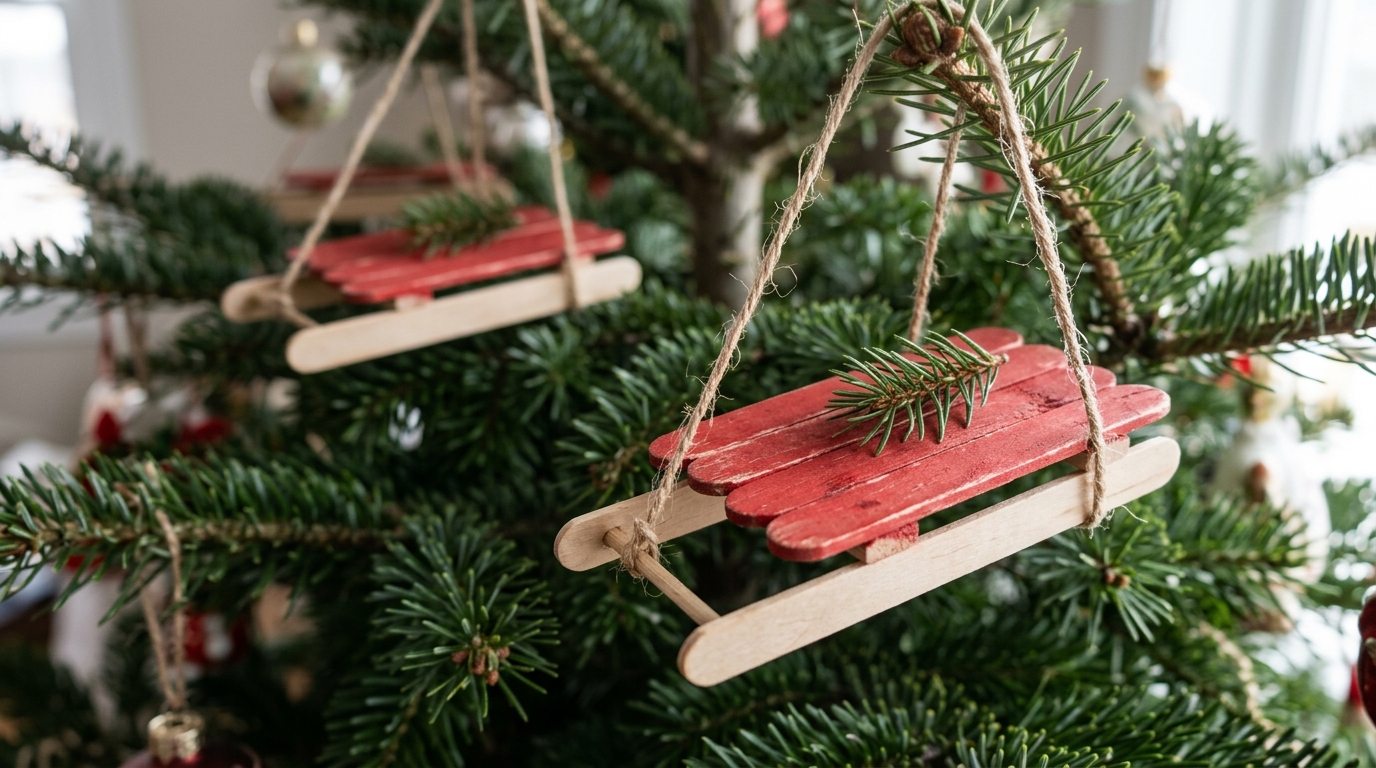
Tiny sleds made from craft sticks are quick, sturdy and bring back memories of snowy hills. Glue five painted sticks side by side, then glue two sticks underneath as runners. A piece of twine becomes the pull rope, and a sprig of pine on top makes it festive. Pre paint the sticks red the day before to keep things moving. These Christmas crafts for seniors look sweet on any tree. Did you have a favorite sledding hill growing up?
You will need: Craft sticks, jumbo craft sticks, red paint, tacky glue, twine, small pine sprigs.
How to make it: 1. Paint the sticks red and let dry. 2. Glue five sticks side by side. 3. Glue two jumbo sticks underneath as runners. 4. Add a twine rope and a pine sprig.
Cinnamon Stick Ornaments
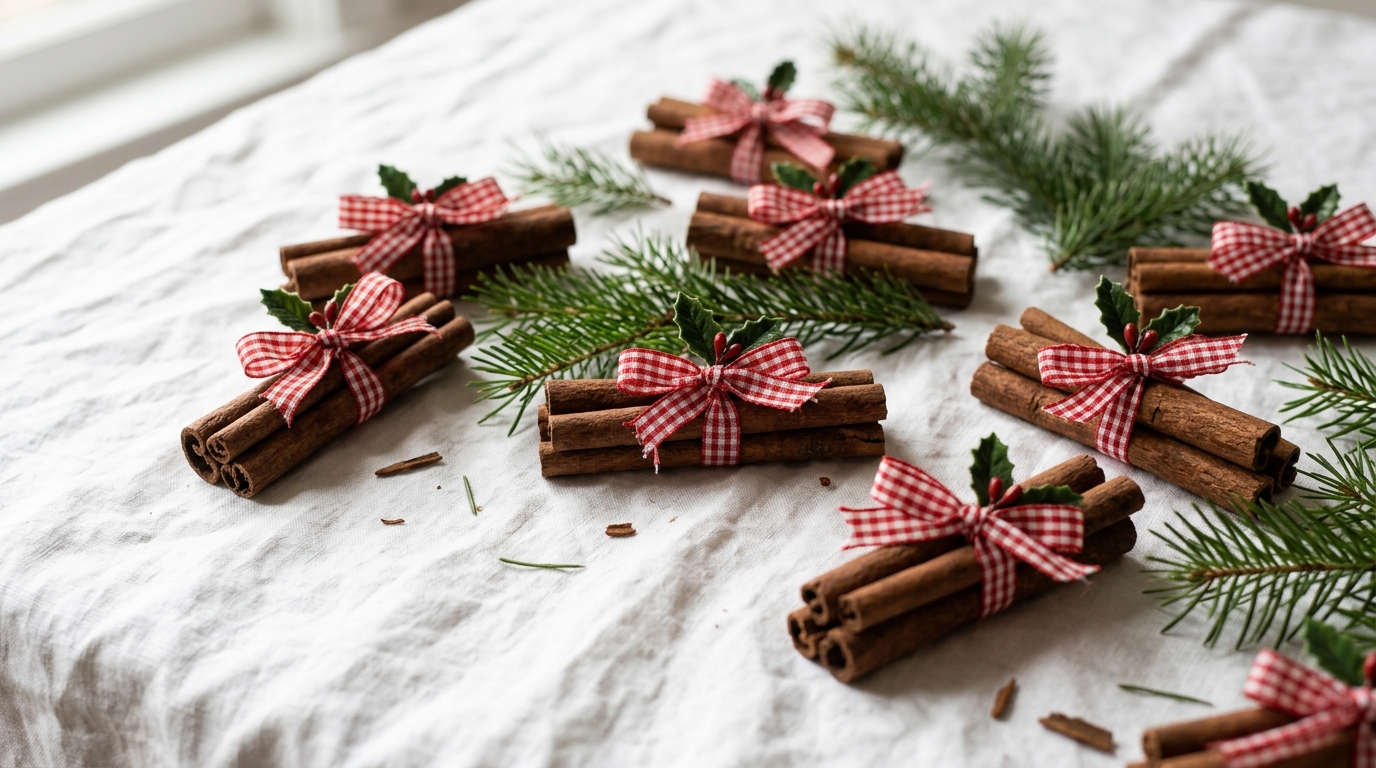
Cinnamon stick bundles smell like a warm kitchen and need no special skill at all. Stack three or four sticks, tie them with a gingham ribbon and tuck in a sprig of faux holly. The scent alone brings back memories of holiday baking. They hang beautifully on a tree or tie onto gift bags. Buy cinnamon sticks in bulk to keep costs low. This is one of the easiest Christmas crafts for seniors who have limited hand strength. What smells remind you most of Christmas?
You will need: Cinnamon sticks, gingham ribbon, faux holly sprigs, tacky glue, scissors.
How to make it: 1. Bundle three or four cinnamon sticks. 2. Tie them tightly with ribbon. 3. Tuck the holly under the bow and add a dot of glue. 4. Add a ribbon loop for hanging.
Christmas Crafts for Seniors: Holiday Recipe Memory Jar
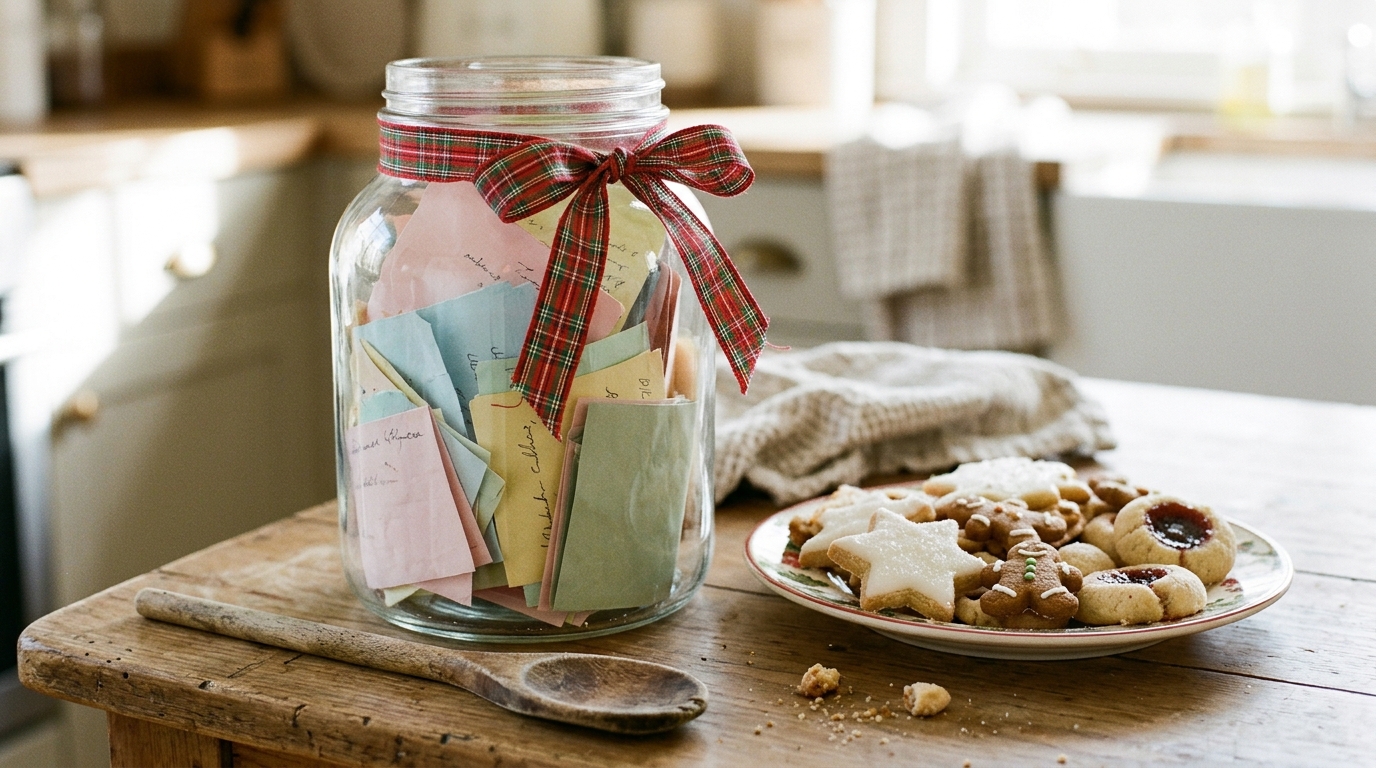
This might be the most meaningful project on the list. Ask everyone to write down a favorite holiday recipe or a food memory on colorful cards, fold them and fill a jar tied with a plaid ribbon. It sparks wonderful conversations about grandmothers, church suppers and burnt cookies. Large print cards help everyone join in. The jar becomes a family keepsake to pass down. It also pairs beautifully with any of our other Christmas crafts for adults. Whose recipe would go in first?
You will need: A large glass jar, colorful index cards, pens with thick tips, plaid ribbon, a gift tag.
How to make it: 1. Hand out cards and pens. 2. Write a recipe or a favorite holiday food memory. 3. Fold and drop the cards into the jar. 4. Tie on a ribbon and a tag.
Wine Cork Reindeer Family
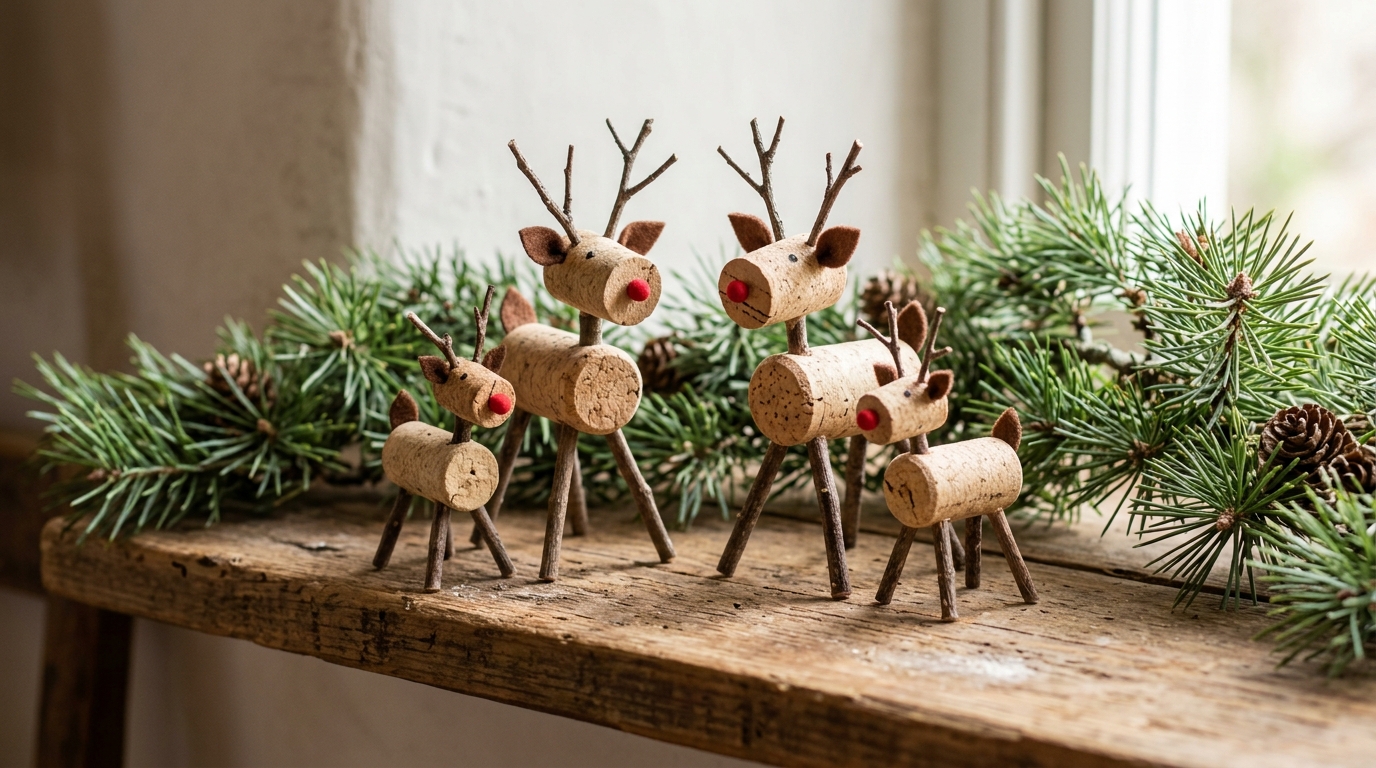
Saved wine corks turn into an adorable reindeer family with a few twigs and scraps of felt. Glue a cork on its side for the body, a smaller piece for the head, and four short twigs or cut corks for legs. Add twig antlers, felt ears and a red bead nose. Pre cut pieces make it easier, and the corks are light and easy to handle. Line them up on a mantel or shelf. These Christmas crafts for seniors are always a hit. What will you name the littlest one?
You will need: Wine corks, small twigs, brown felt, red beads, tacky glue, a craft knife (adult only for pre cutting).
How to make it: 1. An adult cuts some corks in half for heads. 2. Glue the head onto the body at an angle. 3. Glue on four twig legs and two twig antlers. 4. Add felt ears and a red bead nose.
Recycled Christmas Card Ornaments
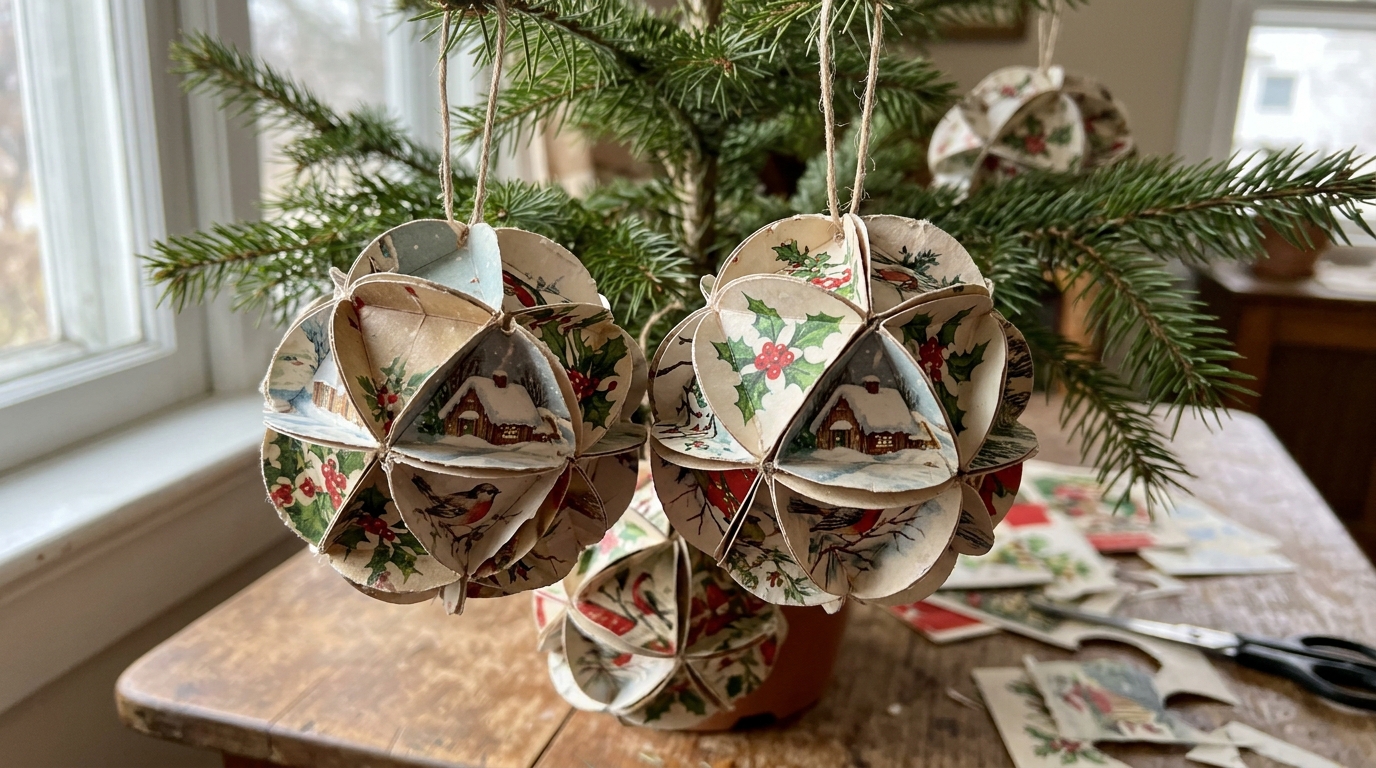
Old Christmas cards are too pretty to throw away, and this project gives them new life. Cut circles from the pictures, fold the edges in to form triangles and glue the flaps together into a ball. Each ornament shows bits of birds, holly and snowy cottages from cards sent by loved ones. It is a wonderful way to reminisce while you work. Use a cup to trace the circles for even sizes. Whose cards would you like to see on the tree?
You will need: Old Christmas cards, a cup to trace, scissors, a triangle template, tacky glue, ribbon.
How to make it: 1. Trace and cut 20 circles from the cards. 2. Fold the edges along a triangle template. 3. Glue flaps together into a ball. 4. Add a ribbon loop at the top.
Christmas Crafts for Seniors: Hand Painted Wooden Stars
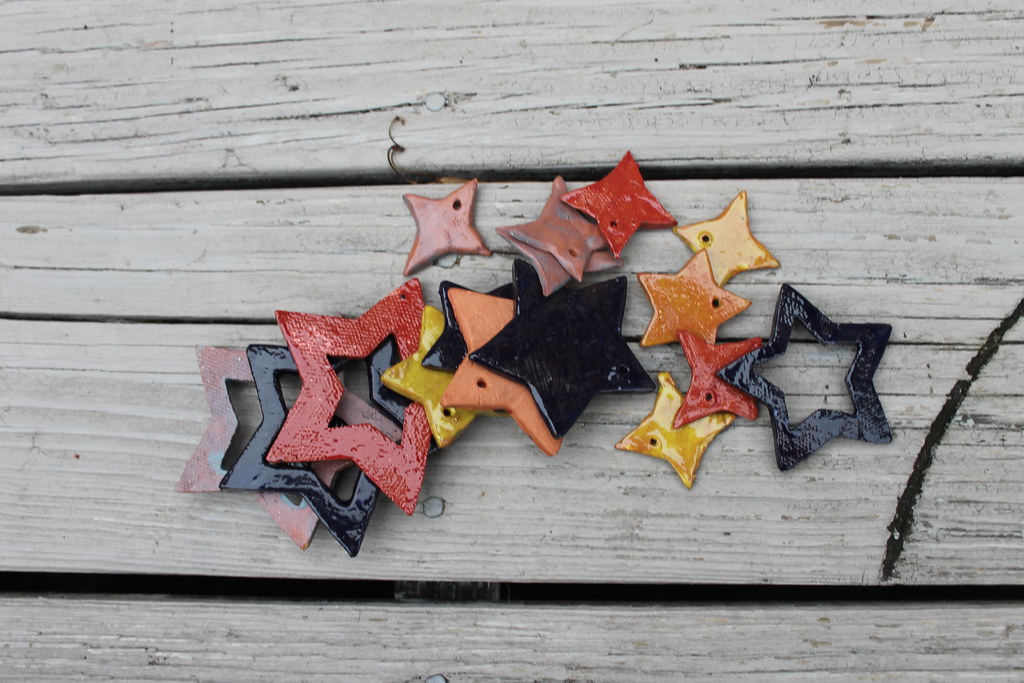
Plain wooden stars from the craft store are a perfect blank canvas for painting. Use bold colors, simple dots, stripes or a little snowflake, and finish with a ribbon loop. Larger stars are easier to hold and paint, and acrylic paint dries fast so they are ready to hang the same day. Write the year on the back and they become keepsakes. Christmas crafts for seniors like this one let everyone show off their own style. What colors will you choose?
You will need: Unfinished wooden stars, acrylic paint, brushes of different sizes, paint pens, ribbon, a cup of water.
How to make it: 1. Paint the base color and let it dry. 2. Add dots, stripes or snowflakes. 3. Write the year on the back with a paint pen. 4. Glue or tie on a ribbon loop.