Woodland Christmas Decor: 14 Forest Ideas Grandma Would Have Loved for Pennies
Woodland Christmas decor brings the quiet magic of a snowy forest right into your living room, and most of it is free for the picking. Grandma knew this trick well. She gathered pine, moss, twigs and acorns on a winter walk and turned them into decorations that felt cozy and timeless. Searches for woodland decorations have jumped this month, and it is easy to see why. Soft greens, warm browns, little felt animals and birch bark look calm and natural after a busy year. Below are 14 simple ideas that cost almost nothing, from moss letters to twig stars to tiny spool deer. Every glow comes from battery lights, so they are safe to leave out all season. Ready to bring the forest home..
Woodland Christmas Decor Tree With Felt Friends
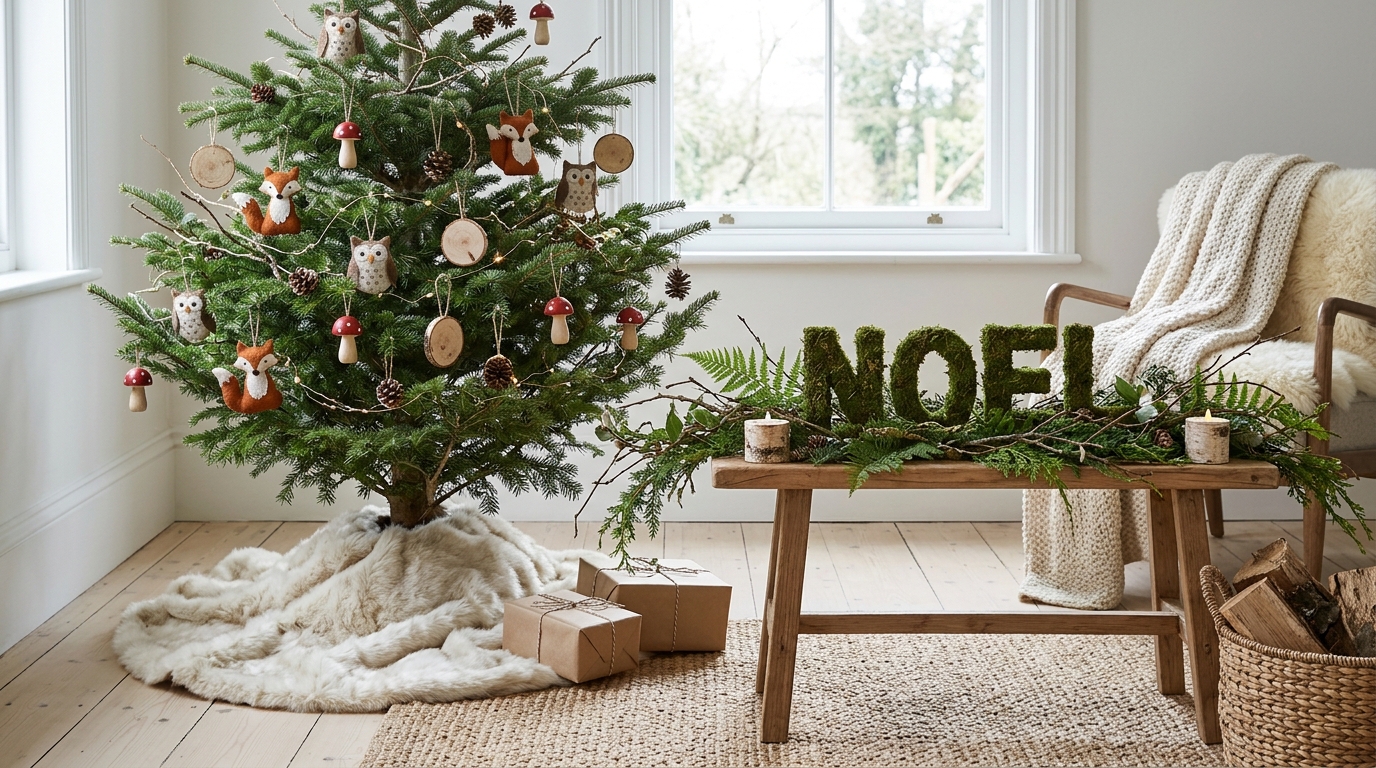
A woodland tree is all about mixing natural textures. Start with a green tree and add felt foxes and owls, red and white mushroom ornaments, wood slices and a few small pinecones. Skip the shiny glass this year and let soft, homemade pieces take the spotlight. A faux fur tree skirt looks like fresh snow on the forest floor. Next to the tree, set a little bench with a moss NOEL sign and a branch garland to pull the whole corner together. The look is calm, warm and full of character. Which forest friend would you hang first..
You will need: A Christmas tree, felt animal ornaments, mushroom ornaments, wood slice ornaments, small pinecones, a faux fur tree skirt.
How to make it: 1. Add warm white battery lights first. 2. Hang the largest ornaments evenly, then fill gaps with smaller ones. 3. Finish with the faux fur skirt and a few pinecones at the base.
Birch Log LED Tea Light Holders
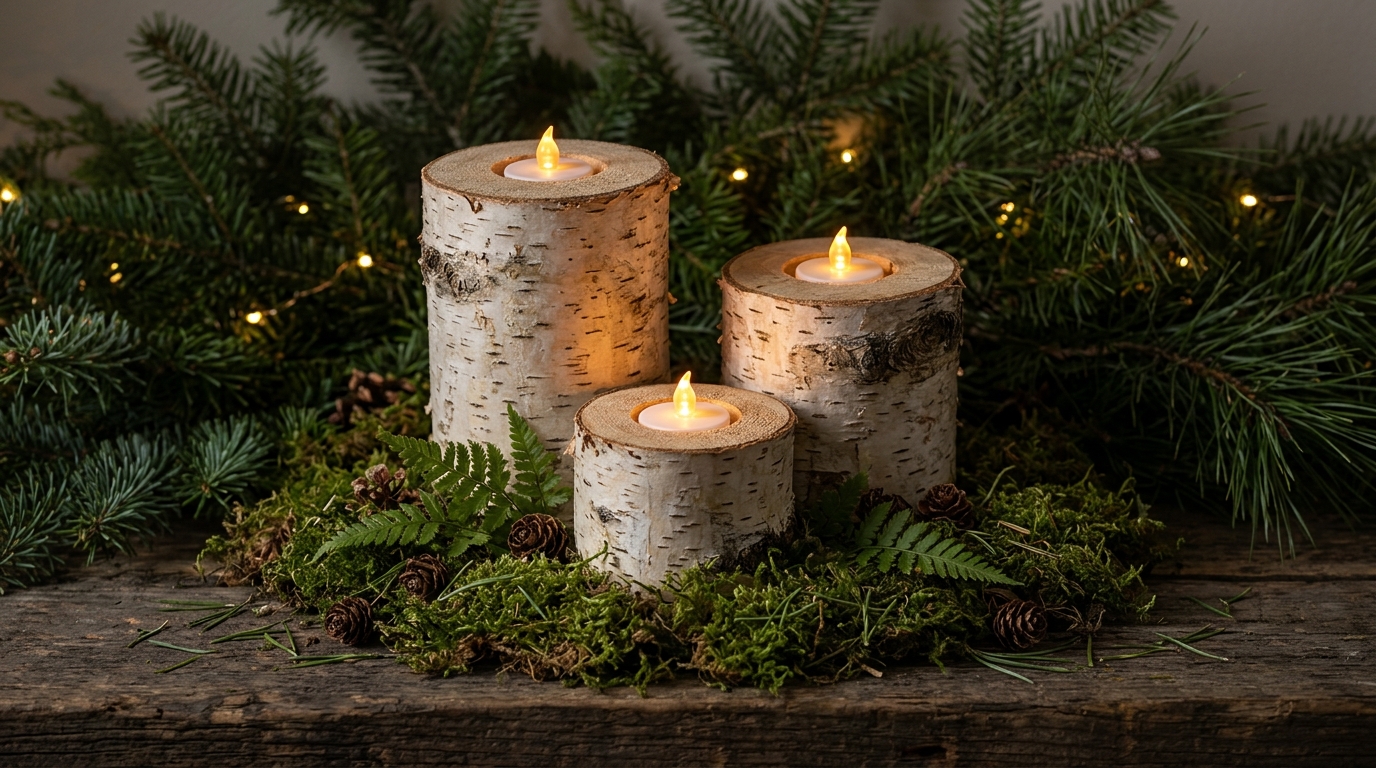
Birch logs have that soft white bark that looks like it came straight from a snowy forest. They are a classic piece of woodland Christmas decor. Cut short sections at different heights, then have an adult drill a shallow hole in the top of each one, just big enough for a battery LED tea light. Group three of them on a bed of moss with a few fern fronds and a little greenery behind. They give a warm flicker every evening without any open flame, so you can leave them on the mantel all night. Craft stores also sell birch logs if you do not have any nearby. Where would your log lights go?
You will need: Birch log sections, a drill with a spade bit (adult only), battery LED tea lights, moss, small fern fronds.
How to make it: 1. Cut the logs to three different heights. 2. Drill a shallow hole in the top of each (adult job). 3. Drop in the LED tea lights and set the logs on moss.
Moss Covered NOEL Letters
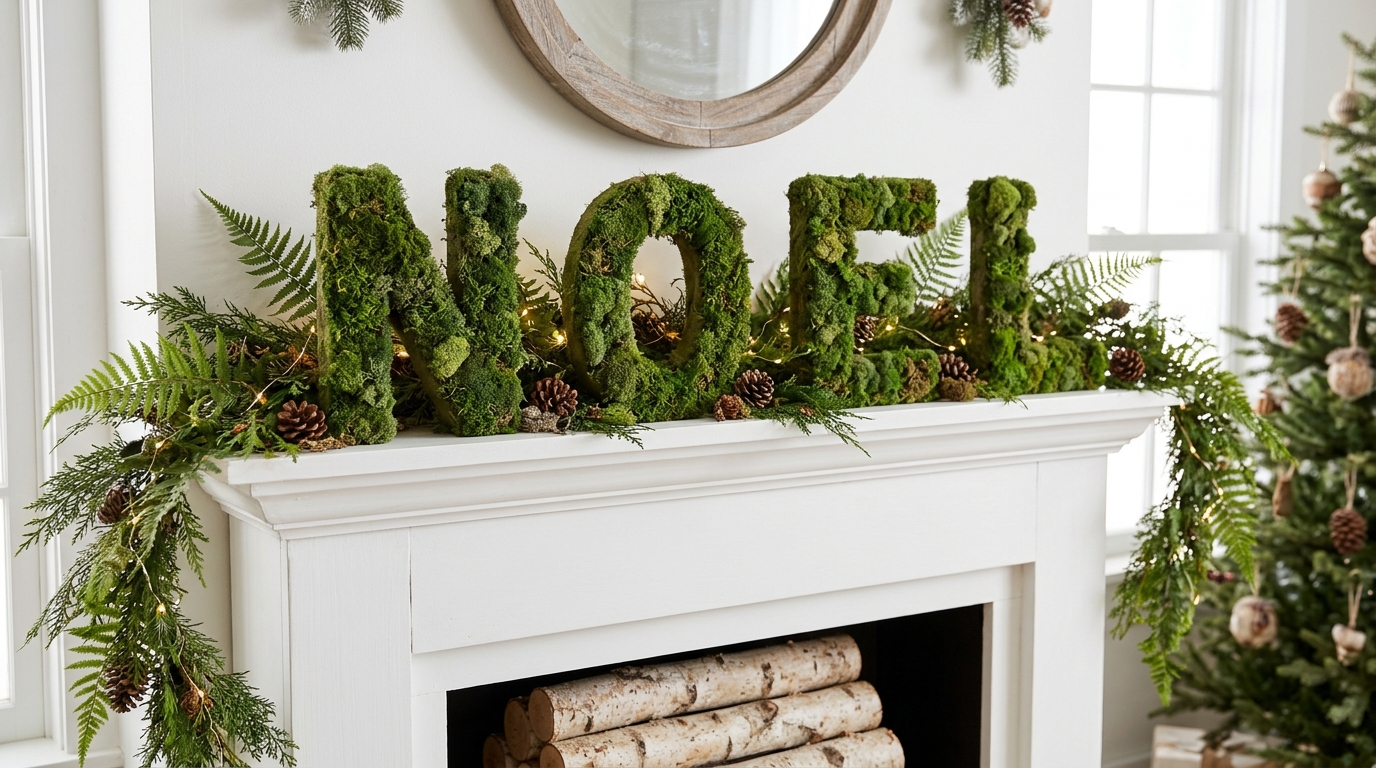
Moss letters look like something from a fancy garden shop, but they take just one afternoon. They are an easy way to start your woodland Christmas decor. Buy plain cardboard or papier mache letters at a craft store and cover every side with preserved sheet moss and craft glue. Stand them on the mantel, a bench or a sideboard with ferns and a little string of battery lights tucked behind. NOEL is a classic choice, but JOY or PEACE look lovely too. The moss stays green for years if you keep it out of direct sun. Which word would you spell out?
You will need: Cardboard or papier mache letters, preserved sheet moss, craft glue, scissors, a small brush.
How to make it: 1. Brush glue over one side of a letter at a time. 2. Press moss on firmly and trim the edges. 3. Let dry overnight and style with greenery.
Felt Fox and Owl Ornaments
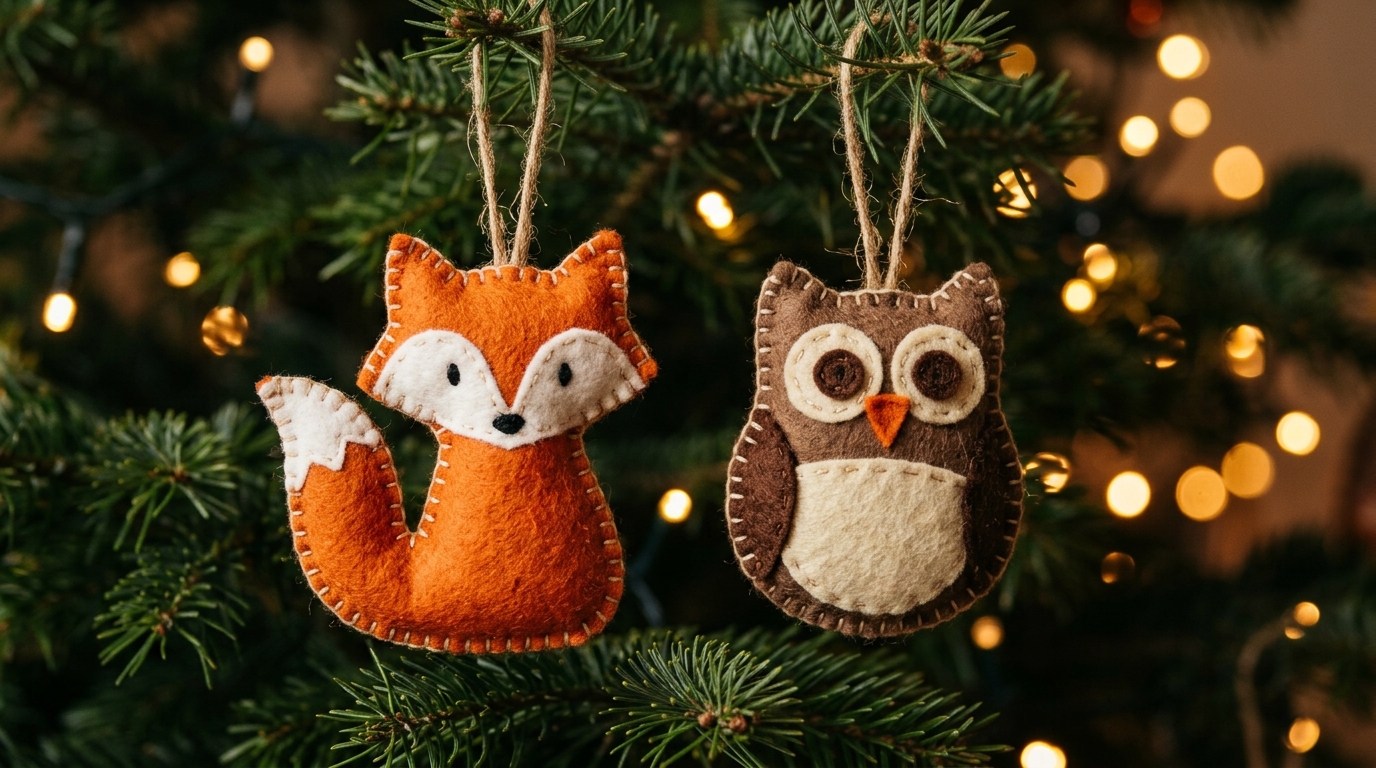
Felt animals are soft, sweet and perfect for woodland Christmas decor. Cut a simple fox and owl shape from orange, brown and cream felt, stitch the pieces together with a blanket stitch, and stuff them lightly with cotton fiberfill. A twine loop at the top is all you need for hanging. No sewing machine is required, and kids can help cut out the shapes. If you love felt, these layered felt trees on Hometalk are another sweet project. Would you make a whole forest of them?
You will need: Orange, brown, cream and white felt, embroidery floss, a needle, fiberfill, twine, a paper template.
How to make it: 1. Trace and cut two body pieces plus face details for each animal. 2. Stitch the details on, then blanket stitch the edges together. 3. Stuff lightly and add a twine loop.
Woodland Christmas Decor on Wood Slices: Painted Animal Ornaments
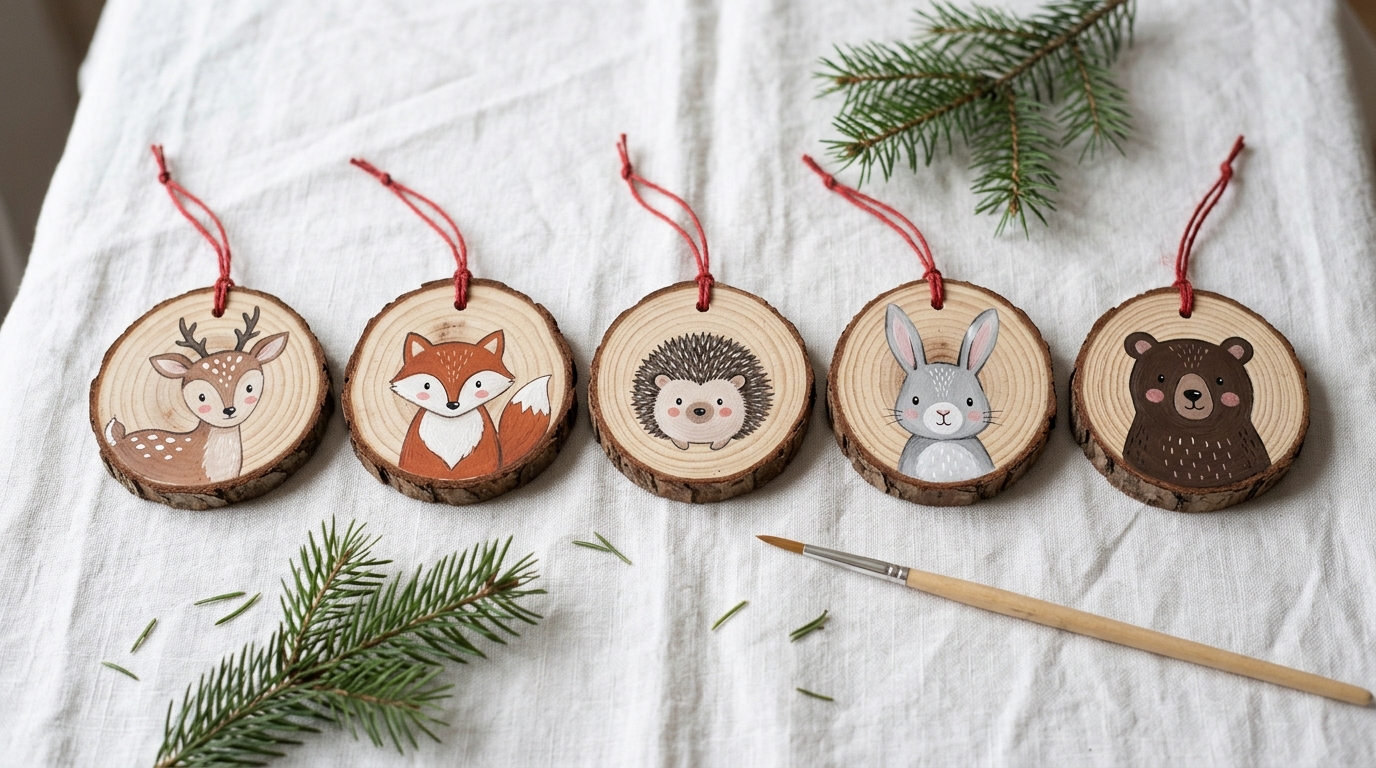
Wood slices are one of the cheapest craft supplies you can buy, and they look so sweet with a little painted animal on each one. Draw a deer, a fox, a hedgehog, a rabbit and a bear in pencil first, then fill them in with acrylic paint. Simple shapes and dot eyes look adorable, so there is no need to be an artist. Seal them, add a red twine loop, and they are ready for the tree. They also make lovely gift tags. Which animal would you paint first?
You will need: Wood slices with holes, a pencil, acrylic paint, small brushes, clear sealer, red twine.
How to make it: 1. Sketch the animal lightly in pencil. 2. Paint the main color, then add ears, noses and eyes. 3. Seal and tie on a twine loop.
Wooden Egg Mushroom Ornaments
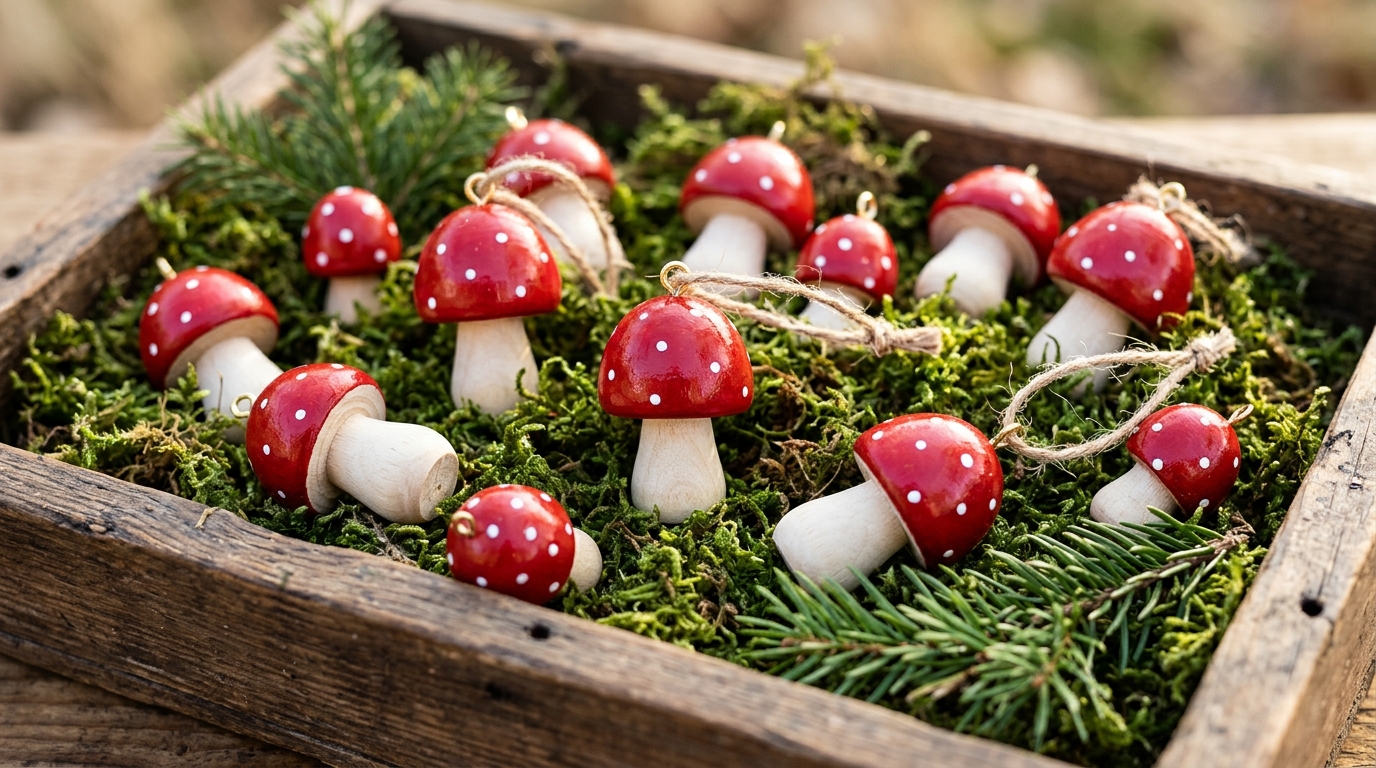
Little red mushrooms are everywhere in woodland decor, and you can make your own from wooden eggs and spools. Paint the top of each egg glossy red, then dot on white spots with the end of a paintbrush. Glue the egg onto a small wooden spool or peg for the stem. Add a tiny screw eye and a twine loop to hang them, or simply nestle them in a tray of moss on the coffee table. They look so cheerful and cost pennies each. Would you hang them on the tree or keep them in a tray?
You will need: Wooden eggs, small wooden spools or pegs, red and white acrylic paint, wood glue, screw eyes, twine, moss.
How to make it: 1. Paint the eggs red and let them dry. 2. Dot on white spots and glue each egg to a stem. 3. Twist in a screw eye and add a loop, or set them in moss.
Twig Star Wall Hanging
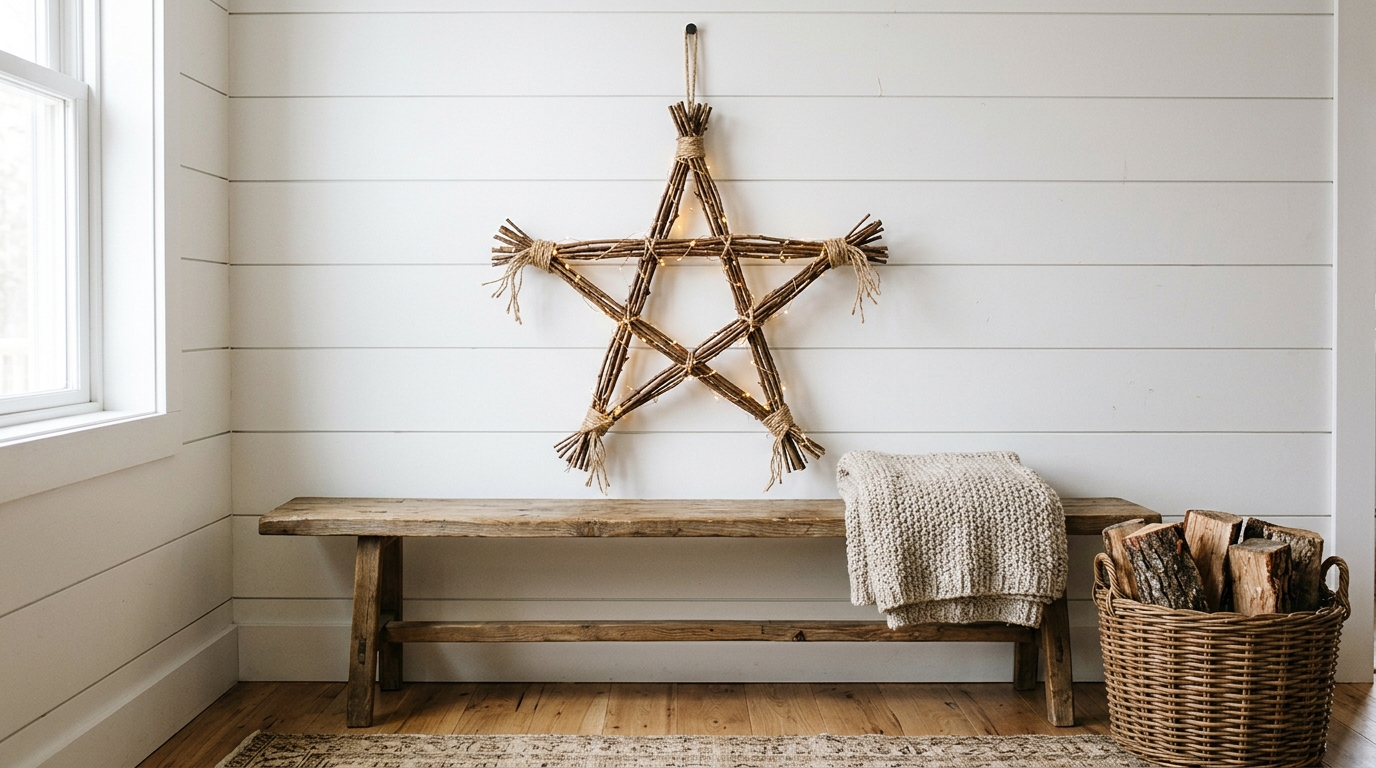
A big twig star is woodland Christmas decor at its simplest, and it makes a bare wall feel instantly cozy. Gather five straight sticks of the same length on your next walk, lay them in a star shape and tie each crossing point tightly with jute twine. Wrap a strand of battery fairy lights around the star for a gentle glow at night. Hang it over a bench, a bed or the entryway table. It costs nothing but a little twine, and it looks like something from a cabin in the woods. How big would you make yours?
You will need: Five straight sticks of equal length, jute twine, battery fairy lights, a picture hook.
How to make it: 1. Lay the sticks in a five point star shape. 2. Tie every crossing point tightly with twine. 3. Wrap with battery lights and hang on a hook.
Cedar Table Garland for Woodland Christmas Decor
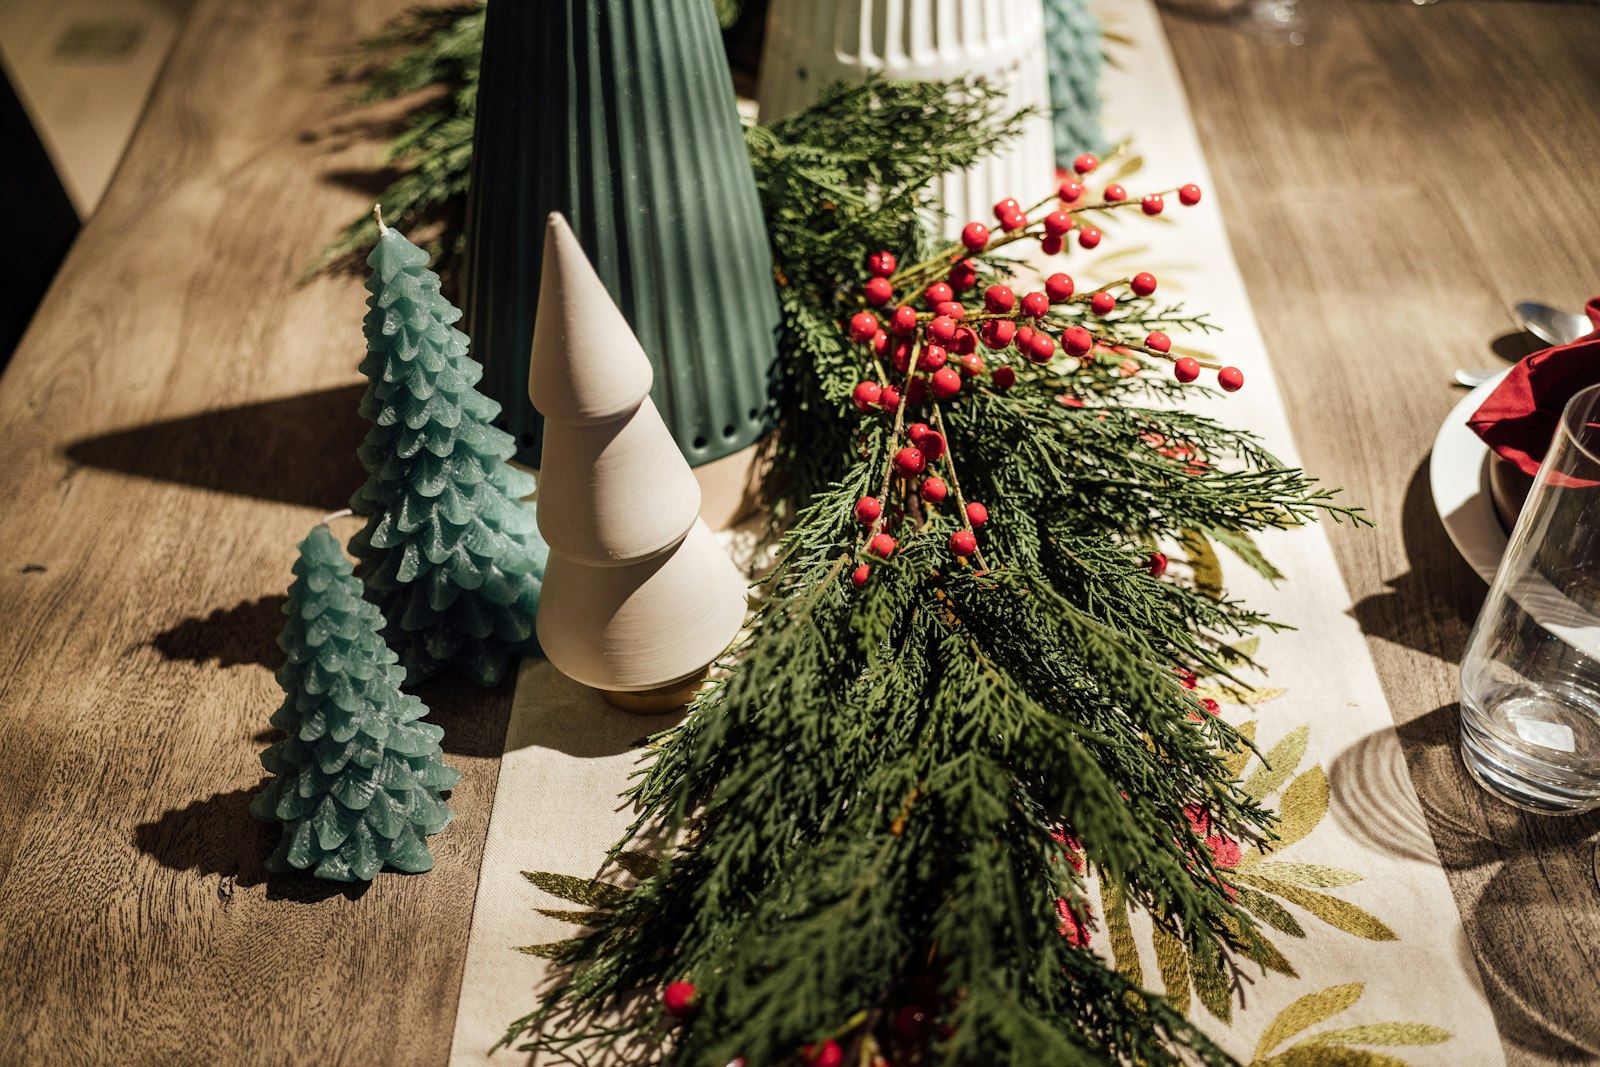
A fresh cedar garland down the middle of the table makes dinner feel like a meal in the forest. Lay long cedar and pine branches end to end, then tuck in red berries, small pinecones and a few little ceramic or wooden trees. The cedar smells wonderful and stays fresh for about two weeks if you mist it now and then. A faux garland works well too and can be used year after year. Keep it low so guests can still see each other across the table. Would you add berries or keep it all green?
You will need: Cedar and pine branches or a faux garland, red berry picks, small pinecones, small tabletop trees.
How to make it: 1. Lay the branches down the middle of the table, overlapping the stems. 2. Tuck in berries and pinecones. 3. Add a few small trees along the length.
Acorn Cap Garland
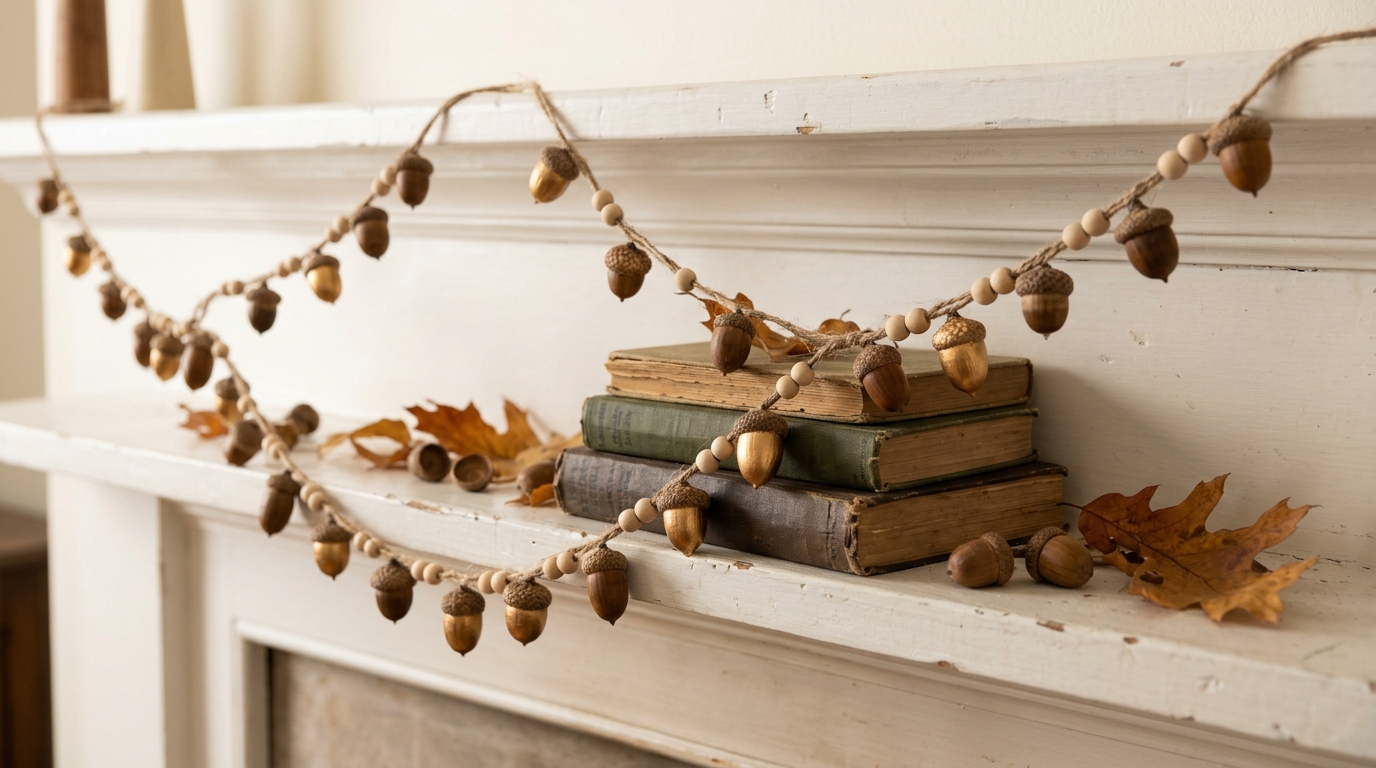
Fall acorns are a free decoration hiding in your backyard. This is woodland Christmas decor that costs nothing at all. Collect the little caps, rinse and dry them well, and string them on brown twine with a few wooden beads between them. Paint a few caps gold for a touch of shine. Drape the garland across the mantel, over a stack of old books or around a small tree. It has a soft, old fashioned look that Grandma would have loved. Kids enjoy helping with the gathering part. How many acorn caps can you find this weekend?
You will need: Acorn caps, wooden beads, brown twine, a large needle or small drill bit (adult help), gold paint.
How to make it: 1. Have an adult poke or drill a small hole in each cap. 2. Paint a few caps gold and let them dry. 3. String caps and beads on twine and tie off the ends.
Pinecone Owls on the Mantel
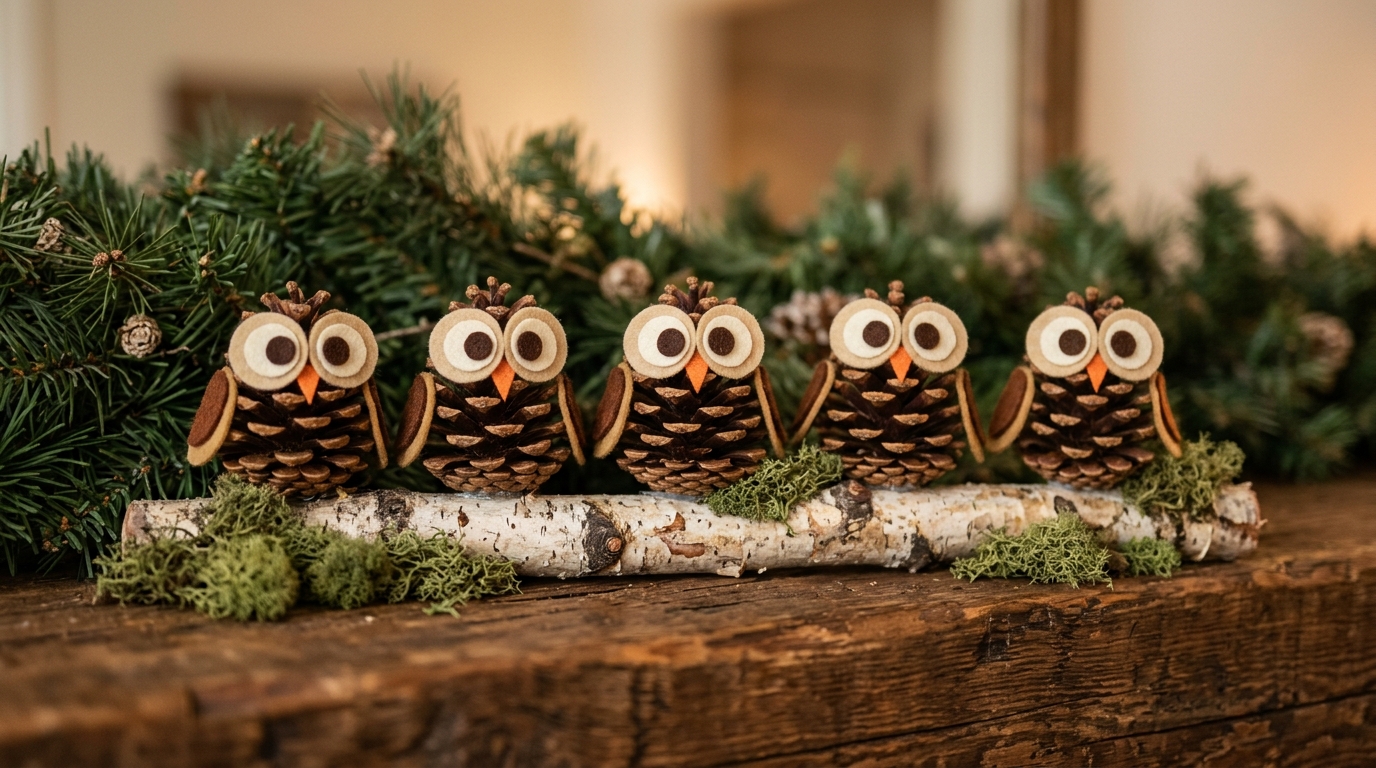
Here is the one pinecone project you need this year. Open pinecones make perfect owl bodies. Cut round felt eyes in cream and brown, a tiny orange beak and two little wings, then glue them on. Line up a whole family of owls on a birch branch along the mantel with some moss around their feet. They are so cute that guests always ask about them. For more ideas, see our pine cone Christmas crafts. How many owls would your family have?
You will need: Open pinecones, cream, brown and orange felt, craft glue, a birch branch, moss.
How to make it: 1. Cut felt eyes, a beak and wings for each owl. 2. Glue the pieces onto the pinecone. 3. Set the owls on a branch with moss around them.
Birch Bark Wrapped Jars
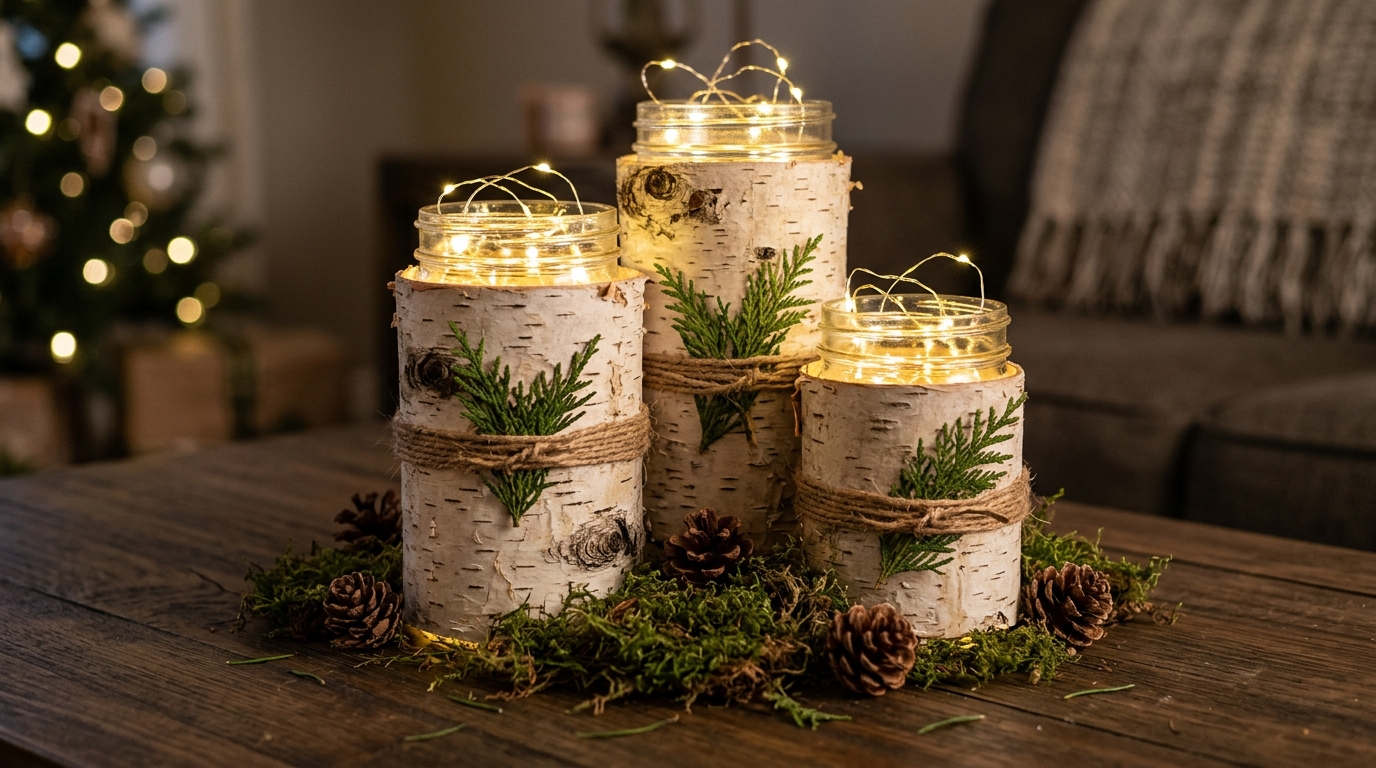
Plain glass jars turn into glowing forest lanterns with a wrap of birch bark. Use real bark from fallen branches or birch bark paper from the craft store. Wrap it around each jar, tie it with jute twine and tuck in a little sprig of cedar. Fill the jars with battery fairy lights for a soft, safe glow. Group three jars of different heights on the coffee table or along the stairs. This is woodland Christmas decor that looks beautiful from the moment the sun goes down. Do you have a few empty jars waiting to be used?
You will need: Glass jars, birch bark or birch bark paper, jute twine, cedar sprigs, battery fairy lights, craft glue.
How to make it: 1. Cut the bark to fit around each jar and glue the seam. 2. Tie twine around the middle and tuck in a cedar sprig. 3. Fill each jar with fairy lights.
A Woodland Christmas Decor Village of Moss and Twigs
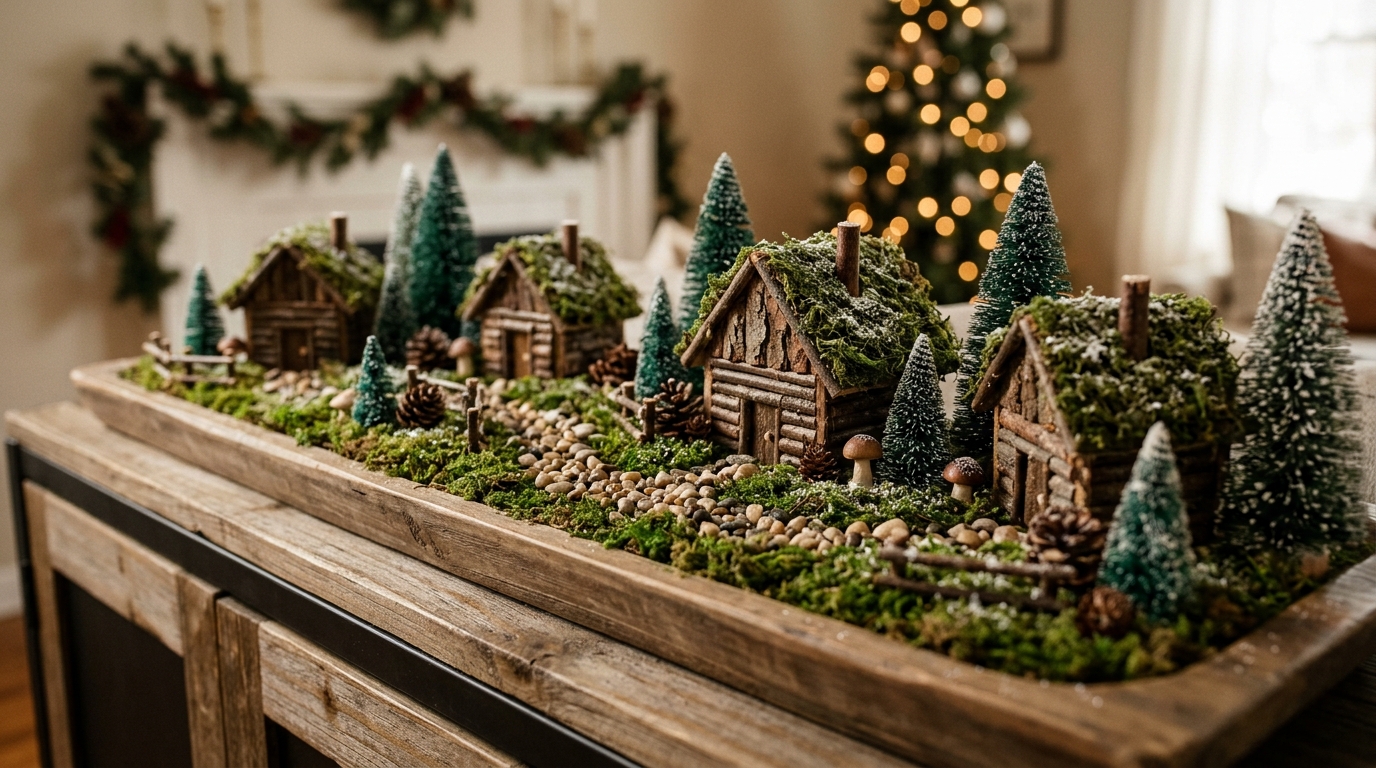
This tiny village is the kind of project the whole family can build together. Fill a long wooden tray with moss, then make little cabins from small blocks of wood or cardboard covered with twigs and bark. Moss makes a perfect roof. Add bottle brush trees, tiny mushrooms and a pebble path winding through the middle. A light dusting of faux snow finishes the scene. Set it on a sideboard or a console table where everyone can see it. Who in your house would love to help build it?
You will need: A long wooden tray, moss, small wood blocks or cardboard boxes, thin twigs, bark pieces, bottle brush trees, pebbles, faux snow, craft glue.
How to make it: 1. Cover the tray with a layer of moss. 2. Glue twigs and bark onto the blocks to make cabins with moss roofs. 3. Arrange the cabins, trees and path, then sprinkle with faux snow.
Forest Style Kraft Paper Gift Wrap

Plain kraft paper is the perfect match for woodland Christmas decor, and a big roll costs just a few dollars. Wrap each gift in brown paper, tie it with simple twine and tuck a sprig of cedar or pine under the knot. For a little extra charm, carve a simple deer or tree shape into a potato or an eraser and stamp it across the paper in white or dark green paint. The gifts look so pretty under the tree that you may not want to open them. Would you stamp deer, trees or snowflakes?
You will need: Kraft paper, twine, evergreen sprigs, a potato or eraser, a small knife (adult only), white or green paint.
How to make it: 1. Have an adult carve a simple shape into a potato half or eraser. 2. Stamp the shape across the paper and let dry. 3. Wrap the gifts, tie with twine and add a sprig.
Spool Deer: Woodland Christmas Decor From the Sewing Box
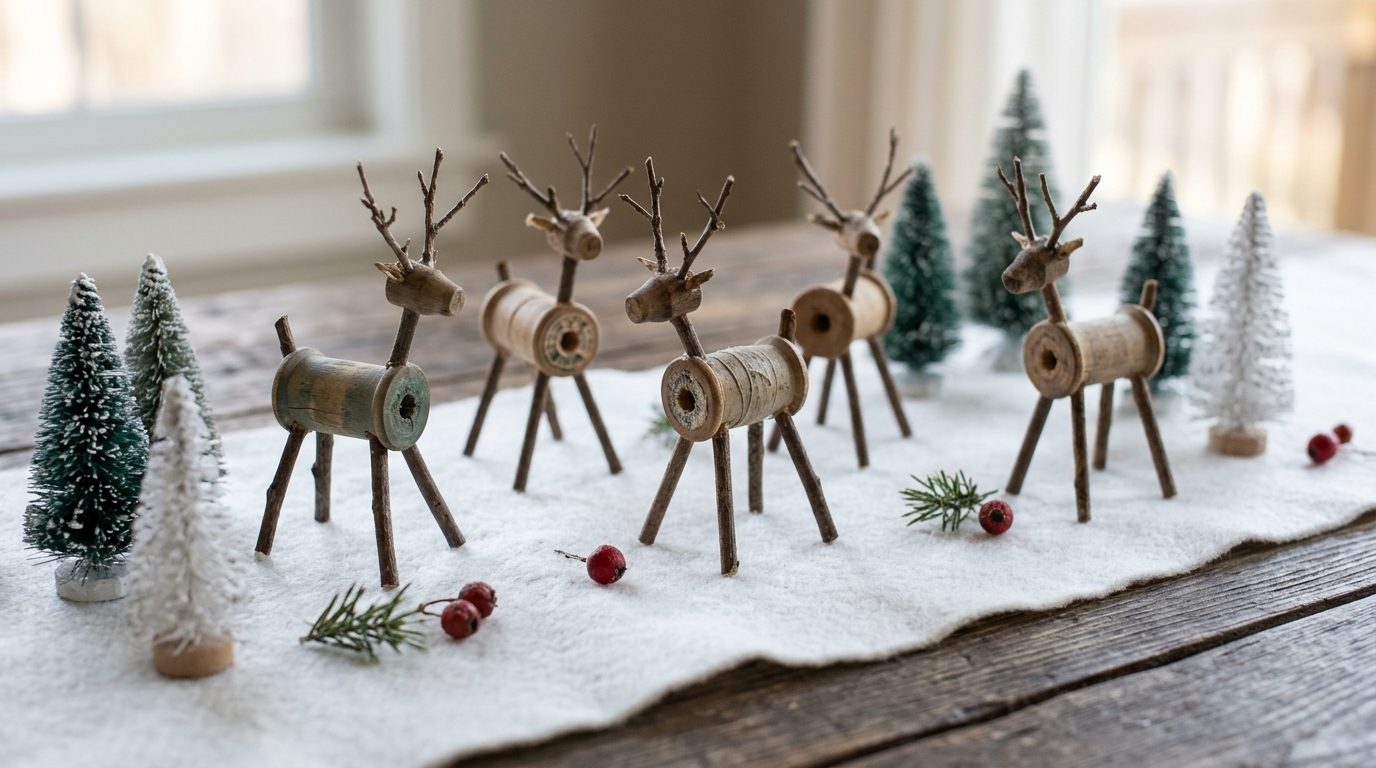
Old wooden thread spools make the cutest little deer. Use one spool for the body, glue on twig legs and a short twig neck, then add a small spool or wood bead for the head. Tiny branching twigs make perfect antlers. Make a whole herd in different sizes and set them on a white felt runner with bottle brush trees and red berries. They look like something from a vintage shop. Check thrift stores for bags of old spools. Which spot in your home needs a little herd of deer?
You will need: Wooden thread spools, small wood beads, thin twigs, small branching twigs, strong craft glue, a white felt runner.
How to make it: 1. Glue four twig legs into the bottom of a spool. 2. Add a twig neck and a bead head. 3. Glue on antlers and let dry before standing them up.