Button Christmas Crafts: 13 Ideas That Turn Grandma’s Button Jar Into Holiday Magic
Button Christmas crafts are having a real moment, and it makes sense: almost every family has a tin or jar of buttons tucked in a sewing drawer, often handed down from a mother or grandmother. Those little red, white and green circles are free craft supplies just waiting for a second life. With a glue gun, some wire and a quiet evening, they turn into wreaths, ornaments, cards and gift toppers that look sweet, nostalgic and surprisingly polished. These projects are perfect for adults who want a calm, cozy craft night, and many are easy enough to share with older kids. One safety note before you begin: buttons are small, so keep them away from little children and pets. Now pour out the button jar and let’s get sorting..
Button Christmas Crafts Starter: The Classic Button Wreath
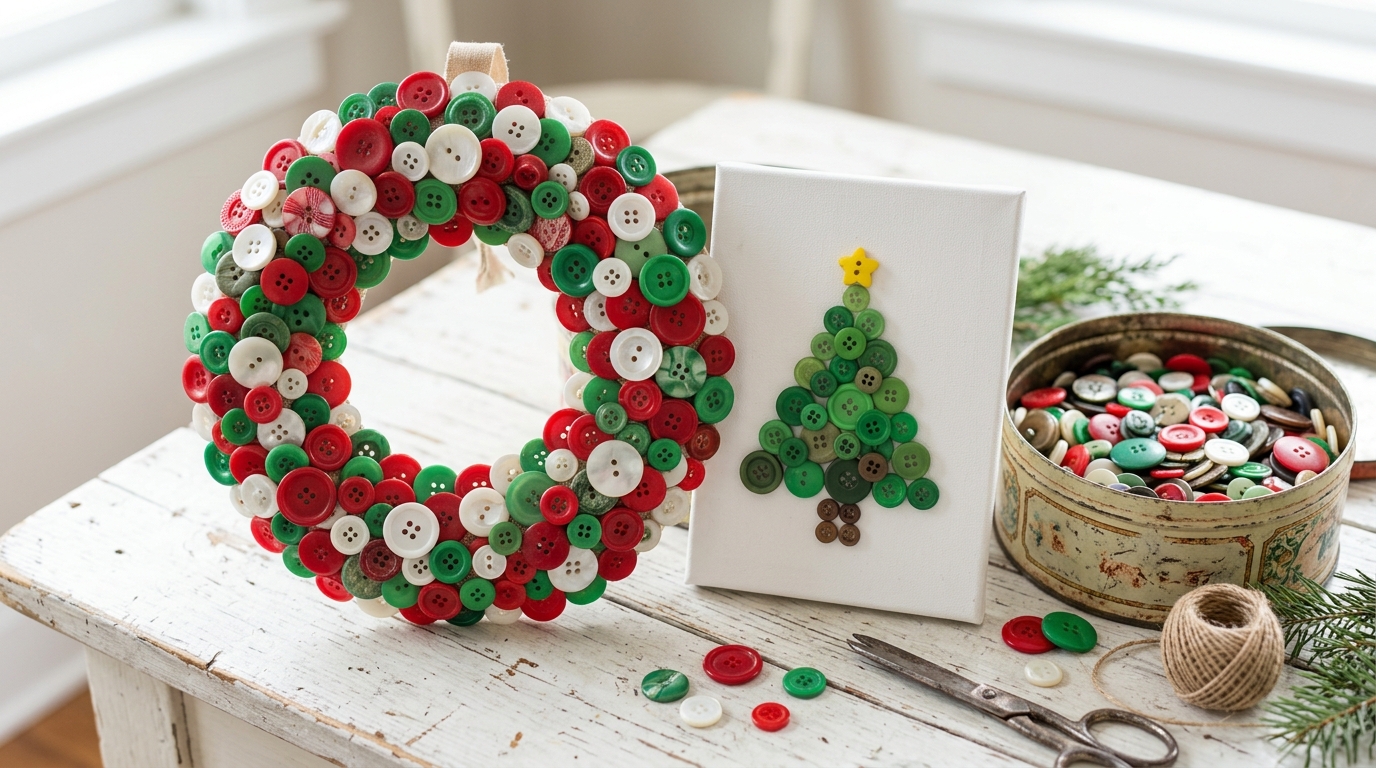
The button wreath is where most button Christmas crafts begin, and it is the one people remember from their grandmother’s front door. Cover a foam or cardboard ring with red, green and white buttons, overlapping them so no base shows through. Layer bigger buttons first and fill gaps with tiny ones. It takes one evening and a few hundred buttons, and it will hang for decades. Do you remember a wreath like this from your childhood..
You will need: a 10 inch foam or cardboard wreath ring, 300 to 400 buttons in red, green and white, a low temp glue gun (adult help), a ribbon for hanging.
How to make it: 1. Sort the buttons by size and color. 2. Glue the biggest buttons around the ring first. 3. Fill gaps with medium and small buttons, stacking some for depth. 4. Tie a ribbon loop at the top and hang.
Button Christmas Tree Canvas
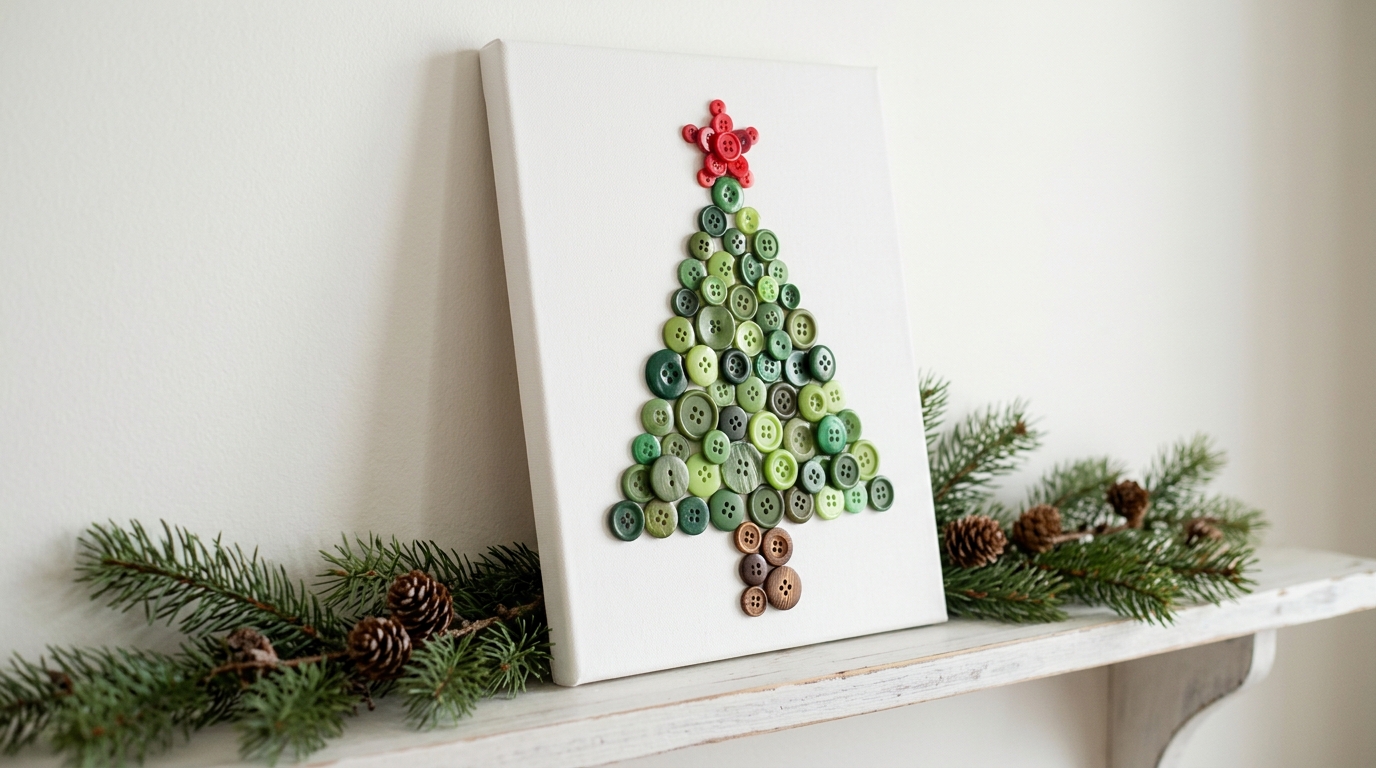
Some of the prettiest button Christmas crafts are pure wall art. A plain white canvas and a pile of green buttons make wall art that looks like it came from a gift shop. Lightly draw a triangle, fill it with buttons in every shade of green, then add a red button star and a brown trunk. Mixing light and dark greens gives it a lovely depth. Make a set of three in different sizes for a mantel or shelf. Where would you hang yours?
You will need: a small stretched canvas, green buttons in several shades, one red button for the star, 2 or 3 brown buttons, craft glue, a pencil.
How to make it: 1. Draw a light triangle and a short trunk. 2. Glue the largest green buttons along the bottom rows. 3. Work upward with smaller buttons to the tip. 4. Add the star and trunk and let it dry flat overnight.
Embroidery Hoop Button Wreath
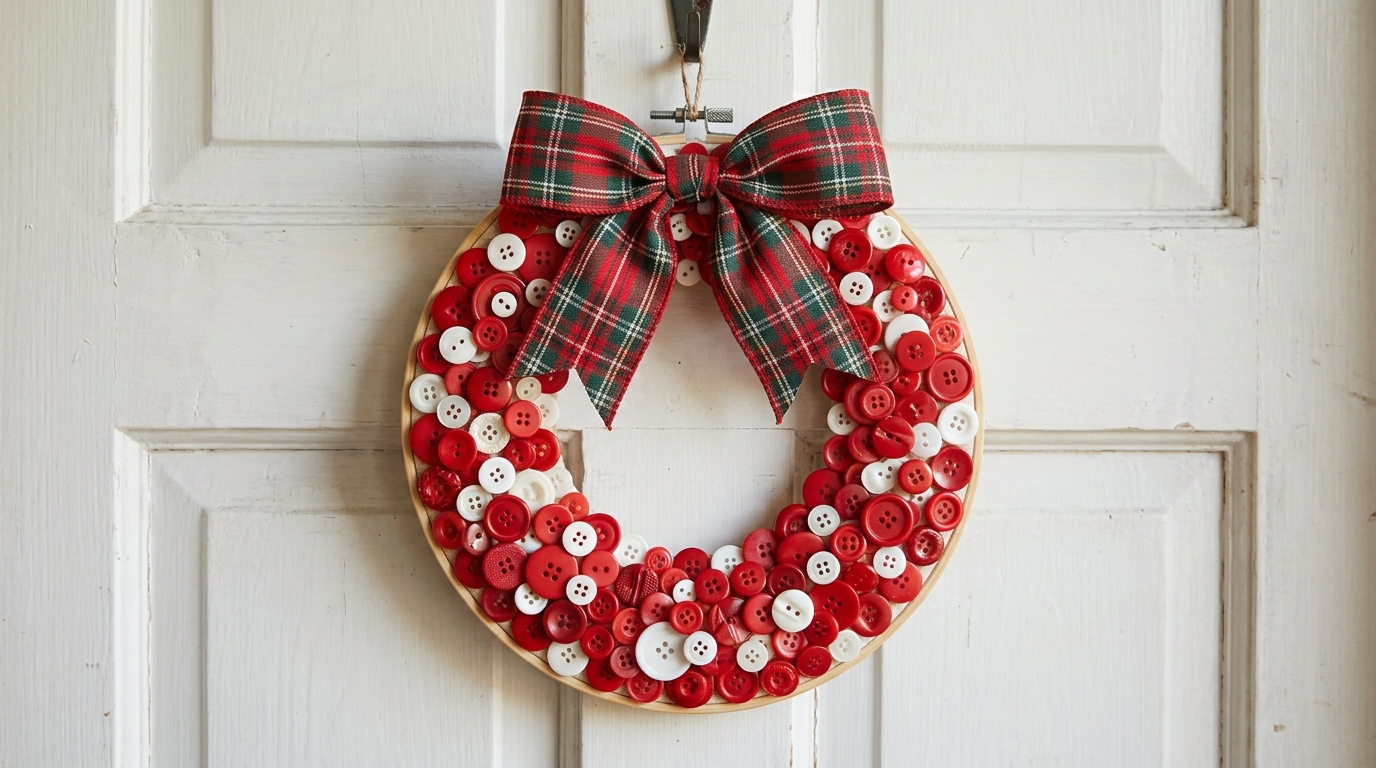
For quick button Christmas crafts, embroidery hoops are a gift: they cost about a dollar and make a perfect round base. Glue red and white buttons all the way around the outer ring and finish with a plaid bow at the top. The metal screw at the top doubles as a hanger, so there is no extra hardware. This one looks lovely on a cabinet door or a bedroom door. Would you try red and white or go with green?
You will need: a 6 to 8 inch wooden embroidery hoop (outer ring only), red and white buttons, a low temp glue gun (adult help), plaid ribbon.
How to make it: 1. Separate the hoop and use the outer ring. 2. Glue a row of large buttons around it. 3. Add a second layer of small buttons over the gaps. 4. Tie a plaid bow over the screw at the top.
Button Snowman Ornaments
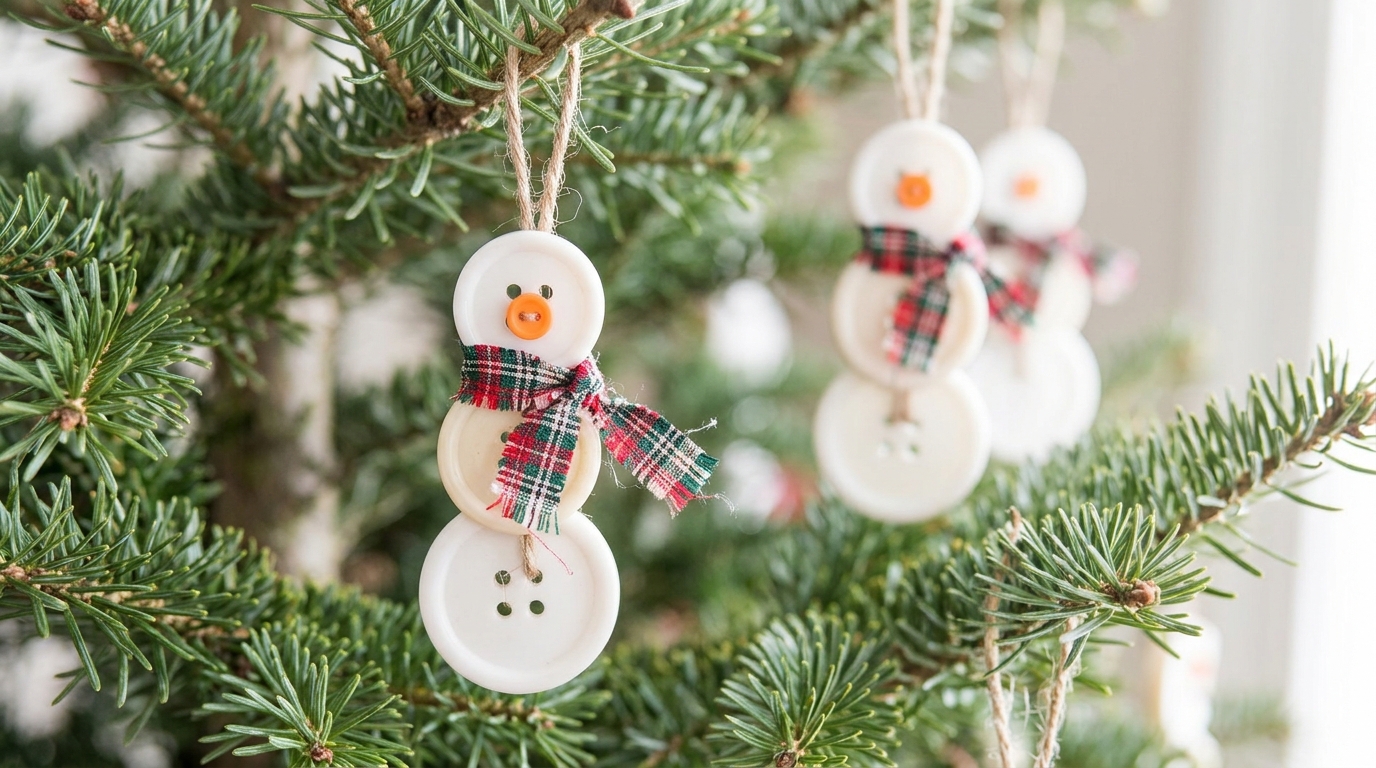
Kids and grown ups both love these button Christmas crafts. Three white buttons stacked from big to small make the cutest snowman. Glue them together, add a tiny orange button nose and a scrap of plaid fabric for a scarf, and loop twine through the top button. They take five minutes each, so you can make a whole family of them for the tree. They also make sweet gift tags. How many snowmen will your tree get?
You will need: white buttons in three sizes, tiny orange buttons, black paint pen for eyes, fabric scraps, strong craft glue, twine.
How to make it: 1. Glue a large, medium and small button in a vertical stack. 2. Add the orange nose and dot on eyes. 3. Tie a thin fabric strip around the neck. 4. Thread twine through the top button and knot.
Red and Green Button Garland
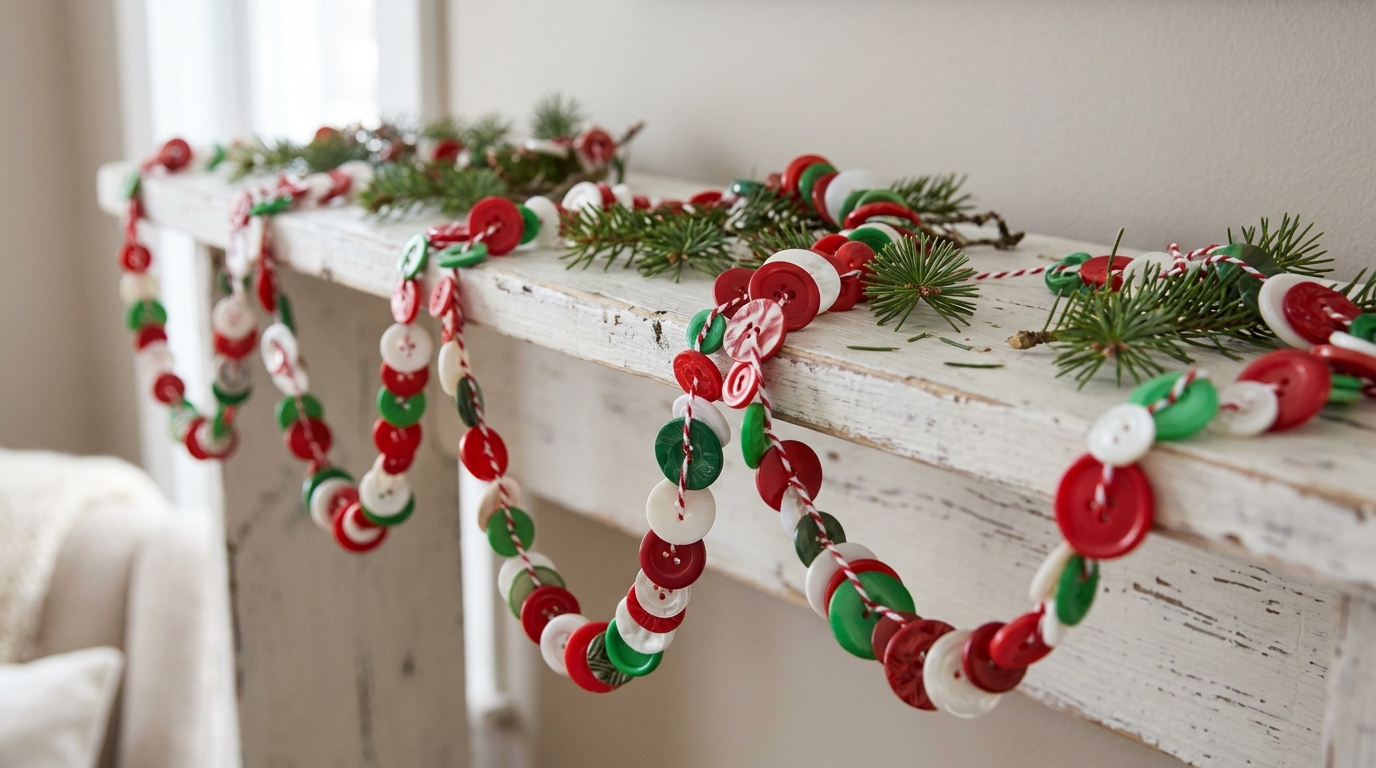
This is the easiest of all button Christmas crafts and it uses up a lot of buttons fast. Thread red, white and green buttons onto baker’s twine in a repeating pattern and drape the strand across a shelf, a doorway or the tree. It is a lovely, quiet project for an evening in front of a holiday movie. Want a longer garland? Just keep threading. Which pattern would you pick?
You will need: baker’s twine or embroidery floss, a large blunt needle, buttons in three colors, scissors.
How to make it: 1. Cut a length of twine and knot one end around a button. 2. Thread buttons through two holes so they lie flat. 3. Repeat your color pattern to the end. 4. Knot the last button and hang.
Button Candy Cane Ornaments
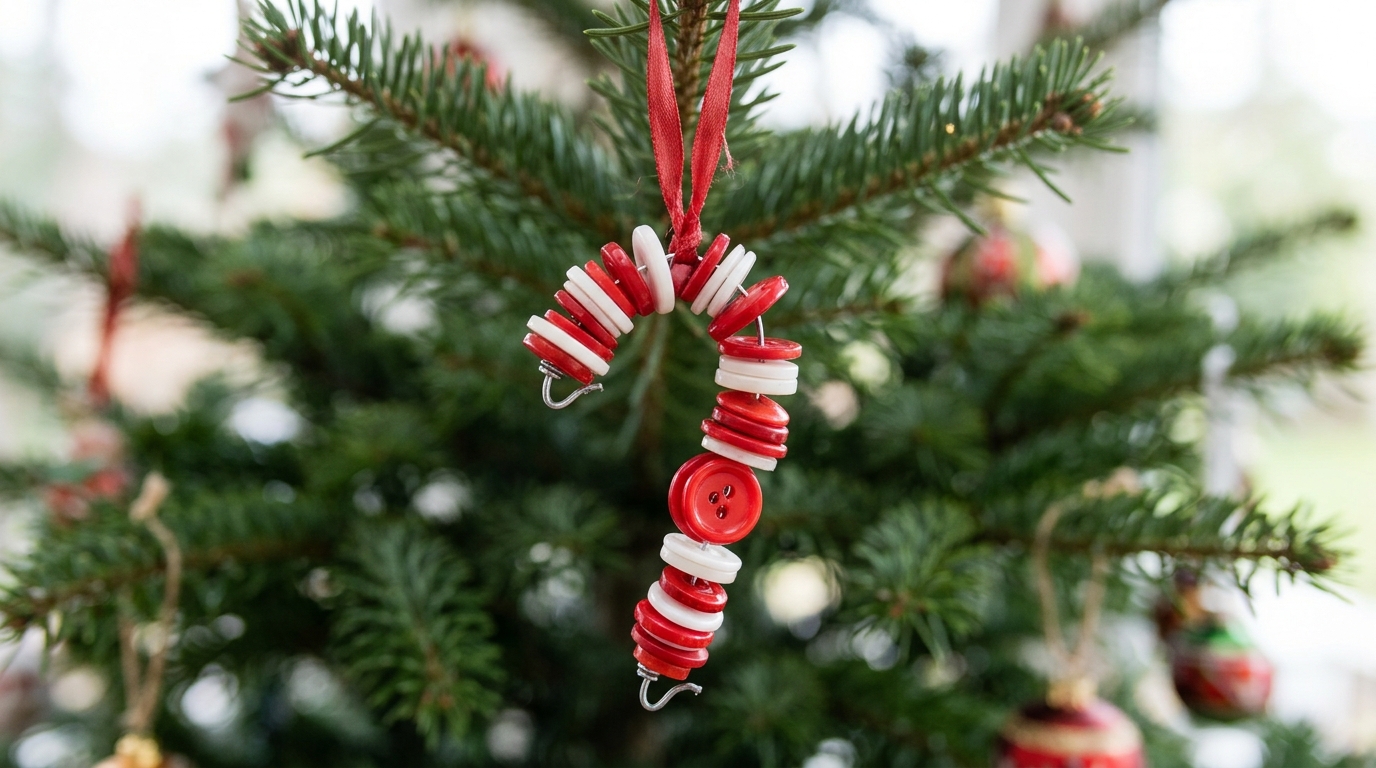
Here is one of the fastest button Christmas crafts on the list. Stack red and white buttons onto craft wire, then bend the top into a hook and you have a candy cane that will never melt. They look sweet on the tree, tied onto gifts or hanging in a window. Kids can help thread the buttons, while an adult bends the wire and tucks in the sharp ends. Make a dozen in one sitting. Would you hang these on your tree or your gifts?
You will need: 18 gauge craft wire, red and white buttons of the same size, round nose pliers, wire cutters (adult use), thin red ribbon.
How to make it: 1. Cut 7 inches of wire and curl one end into a small loop. 2. Thread buttons through one hole, alternating colors. 3. Leave an inch of wire and curl it closed. 4. Bend the top into a hook and add a ribbon.
Button Christmas Crafts for Gift Wrapping

Skip the store bought bows this year. Plain kraft paper, red twine and a little cluster of buttons on top look charming and cost nothing. Stack two or three buttons and thread twine through the holes before you tie the gift, and the topper stays put. The person who opens it gets a bonus button for their own jar. Would your family notice the difference from a bow?
You will need: kraft wrapping paper, red and white twine, a handful of buttons in Christmas colors, tape, scissors.
How to make it: 1. Wrap the gift in kraft paper. 2. Thread twine through a stack of two or three buttons. 3. Tie the twine around the gift so the buttons sit on top. 4. Knot and trim the ends.
Button Bowl Filler From Grandma’s Jar
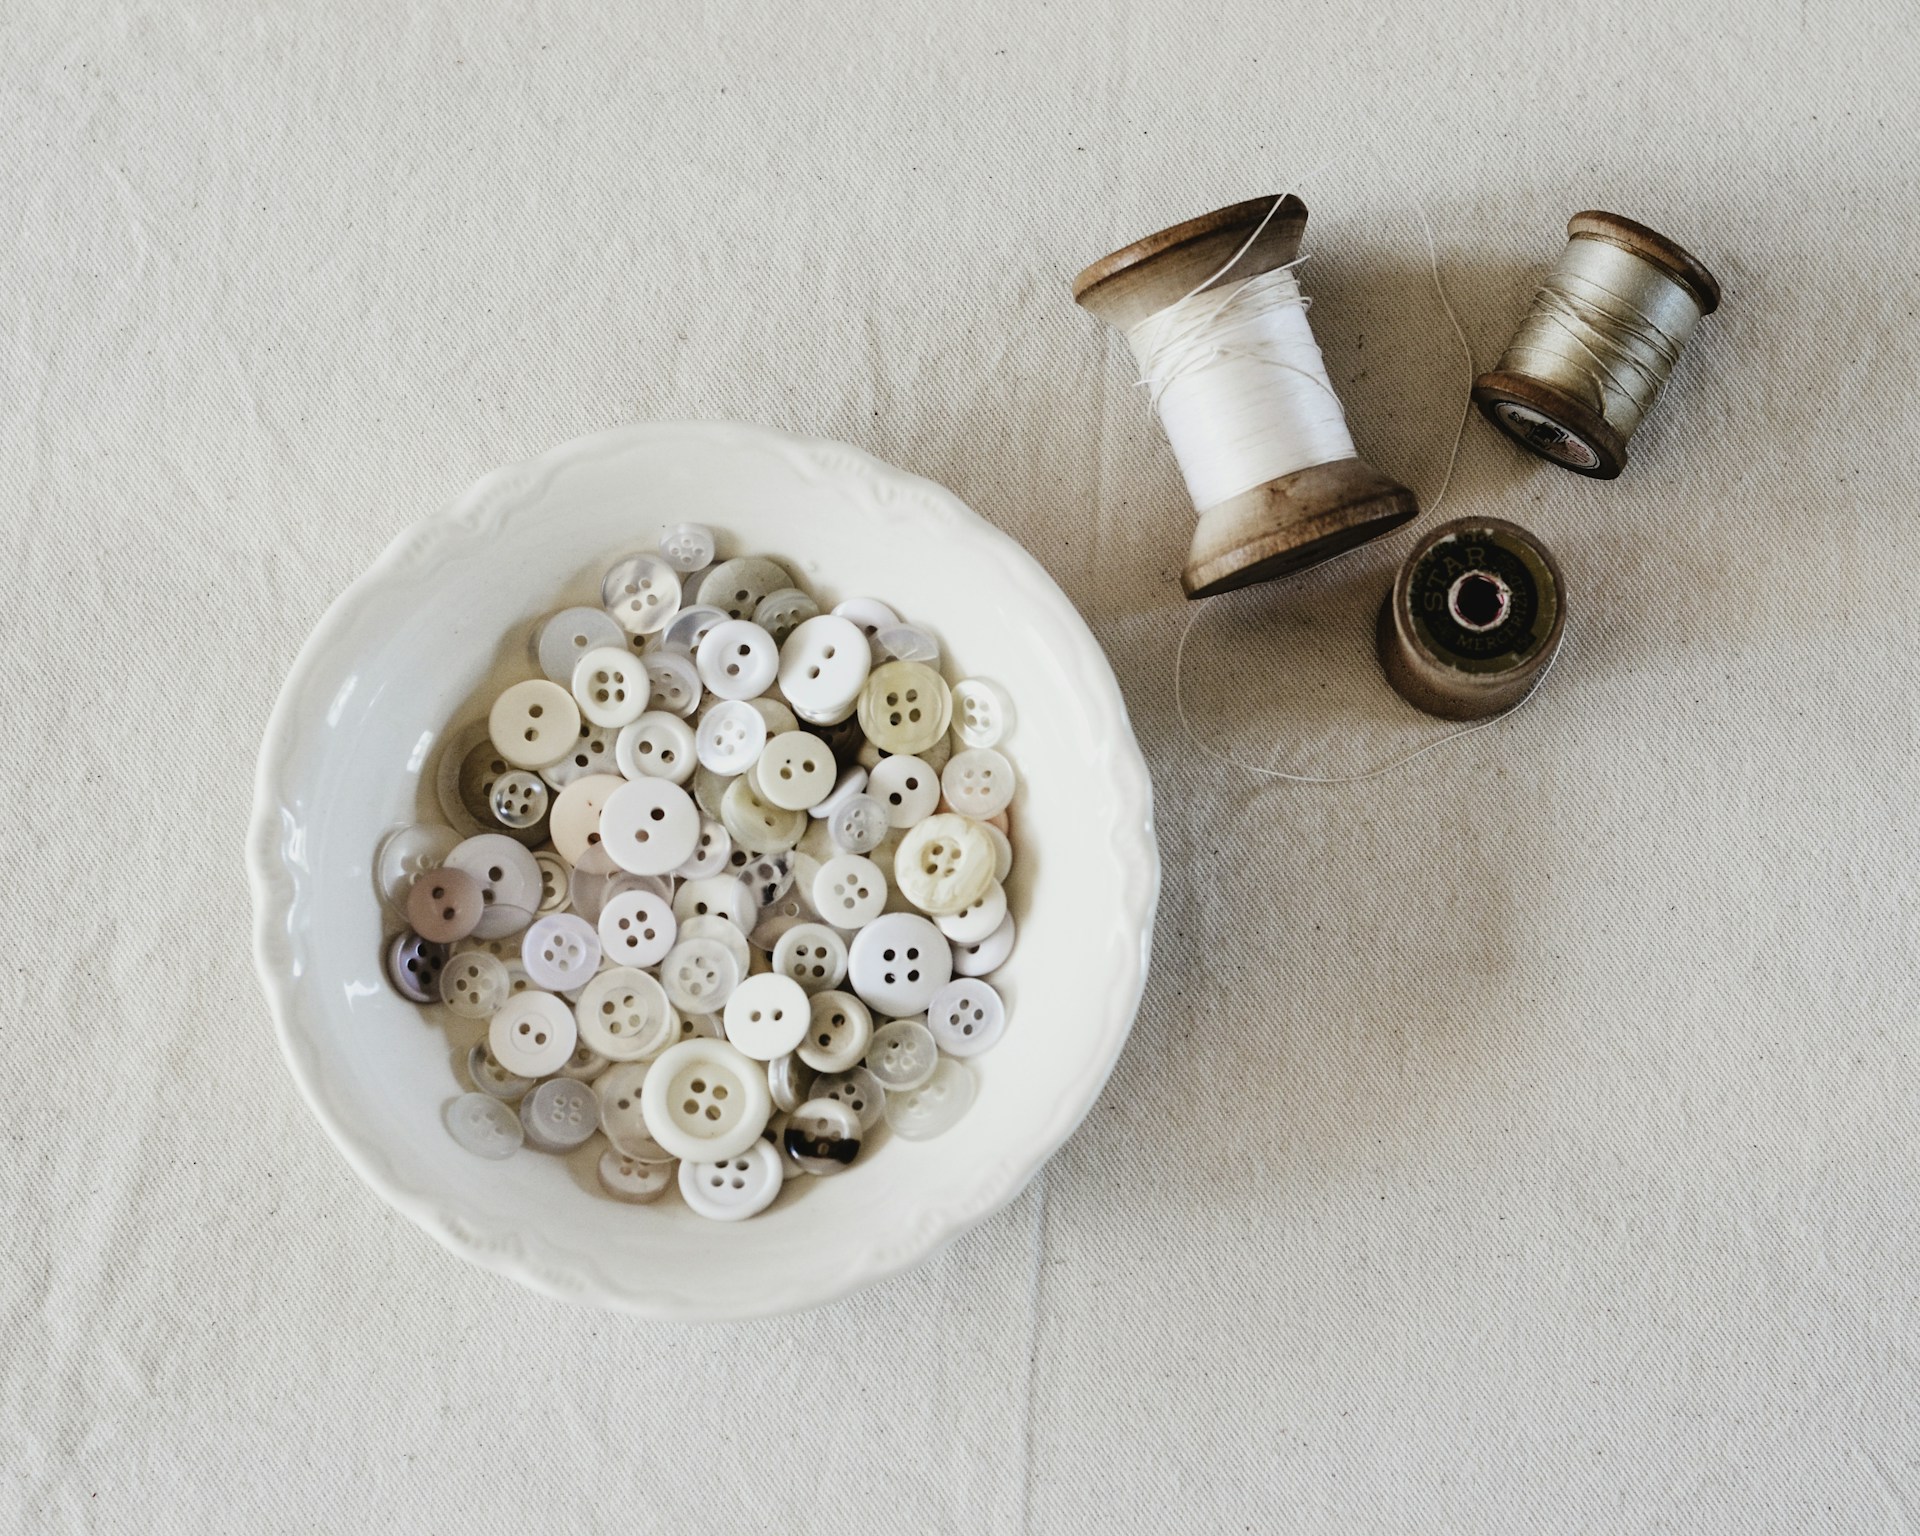
Sometimes the best decor is no project at all. Pour a few handfuls of pretty vintage buttons into a white bowl or a glass dish, tuck in a few old wooden thread spools, and set it on a side table. It looks like a little piece of family history and costs nothing. Mix in a few mini ornaments for December. If you love this old fashioned feeling, our Little Women Christmas gallery is full of it. What is hiding in your button tin?
You will need: a shallow bowl or glass dish, vintage buttons, old wooden thread spools, a few small ornaments.
How to make it: 1. Wash the buttons in warm soapy water and dry them on a towel. 2. Pour them into the bowl. 3. Tuck spools and ornaments on top. 4. Place it out of reach of small kids and pets.
Button Snowflake Ornaments
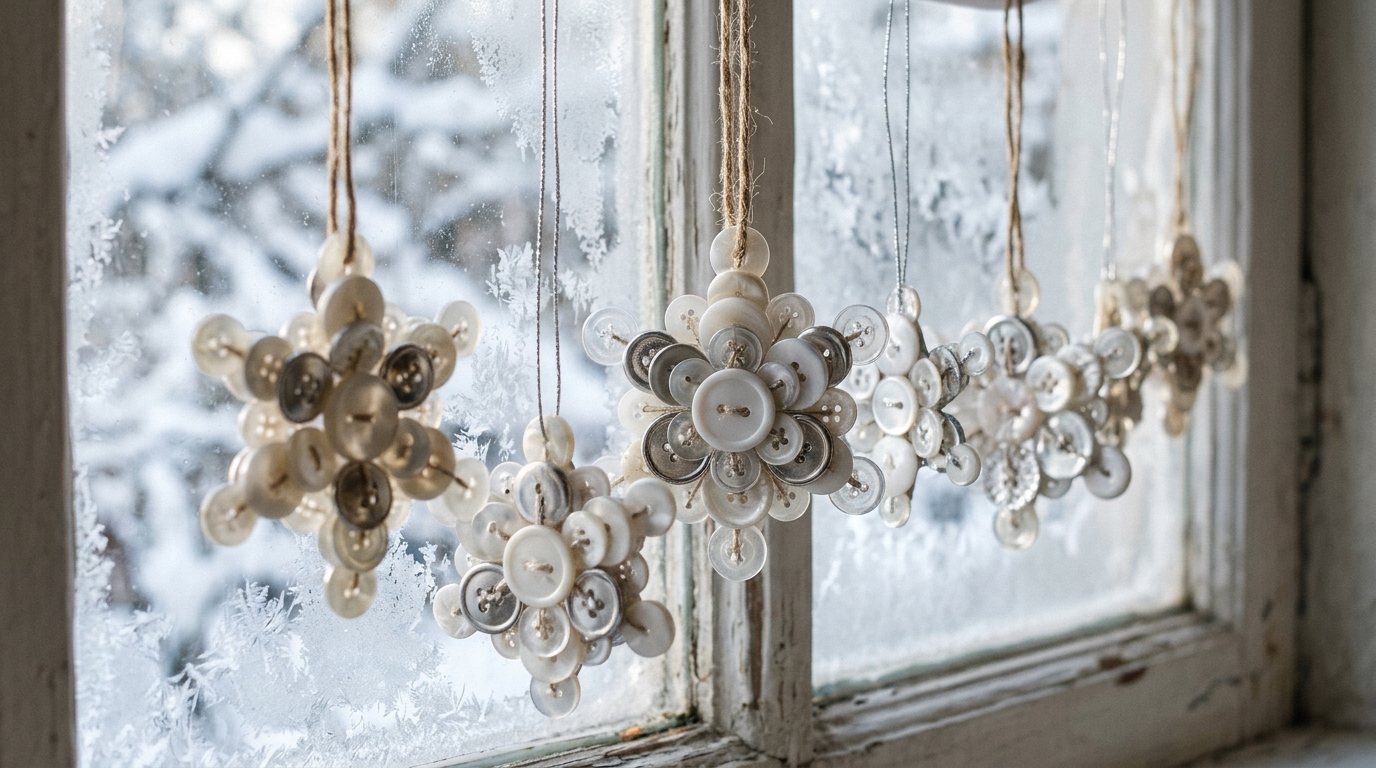
Not all button Christmas crafts need red and green. White, silver and clear buttons glued into star shapes make snowflakes that sparkle in a frosty window. Lay six buttons around a center button and add tiny buttons on each point. Hang them at different heights with fishing line so they seem to float. They look like real ice crystals catching the winter light. Which window would you fill with snowflakes?
You will need: white, silver and clear buttons in two sizes, strong clear craft glue, wax paper, clear fishing line, a suction hook.
How to make it: 1. Lay the snowflake out on wax paper. 2. Glue the buttons where they touch and let dry for a few hours. 3. Peel off the paper. 4. Tie fishing line to one point and hang.
Button Covered Monogram Letter
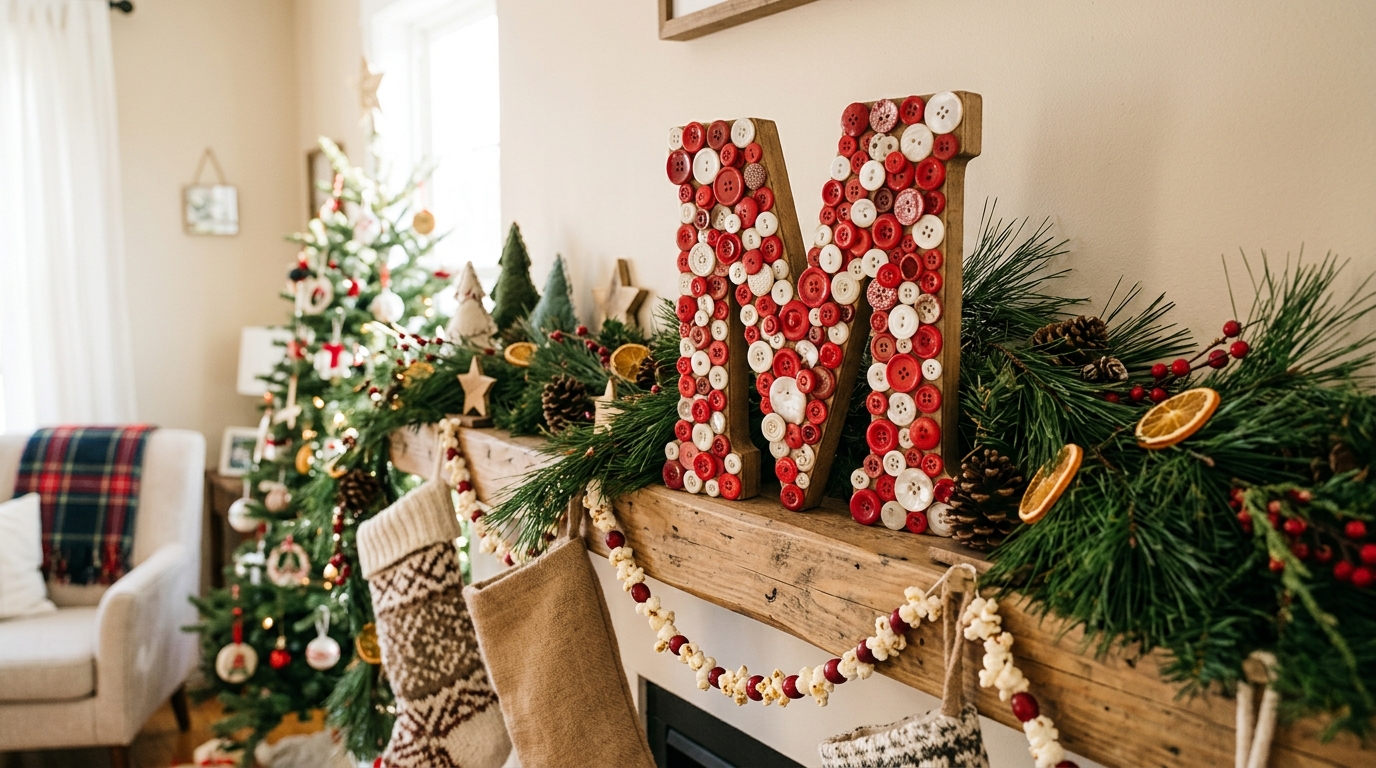
A wooden craft letter covered in red and white buttons is a family name sign with real charm. Paint the letter first so gaps do not show, then glue buttons all over the front, stacking a few for depth. Set it on a shelf with greenery or hang it on the front door with a ribbon. It also makes a thoughtful gift for newlyweds. Which letter would you make?
You will need: a wooden or papier mache letter, red acrylic paint, red and white buttons, a low temp glue gun (adult help), greenery or ribbon.
How to make it: 1. Paint the letter and let it dry. 2. Glue big buttons along the edges first. 3. Fill the middle and stack small buttons on top. 4. Style it with greenery on a shelf.
Button Christmas Crafts in a Jar: The Layered Tree
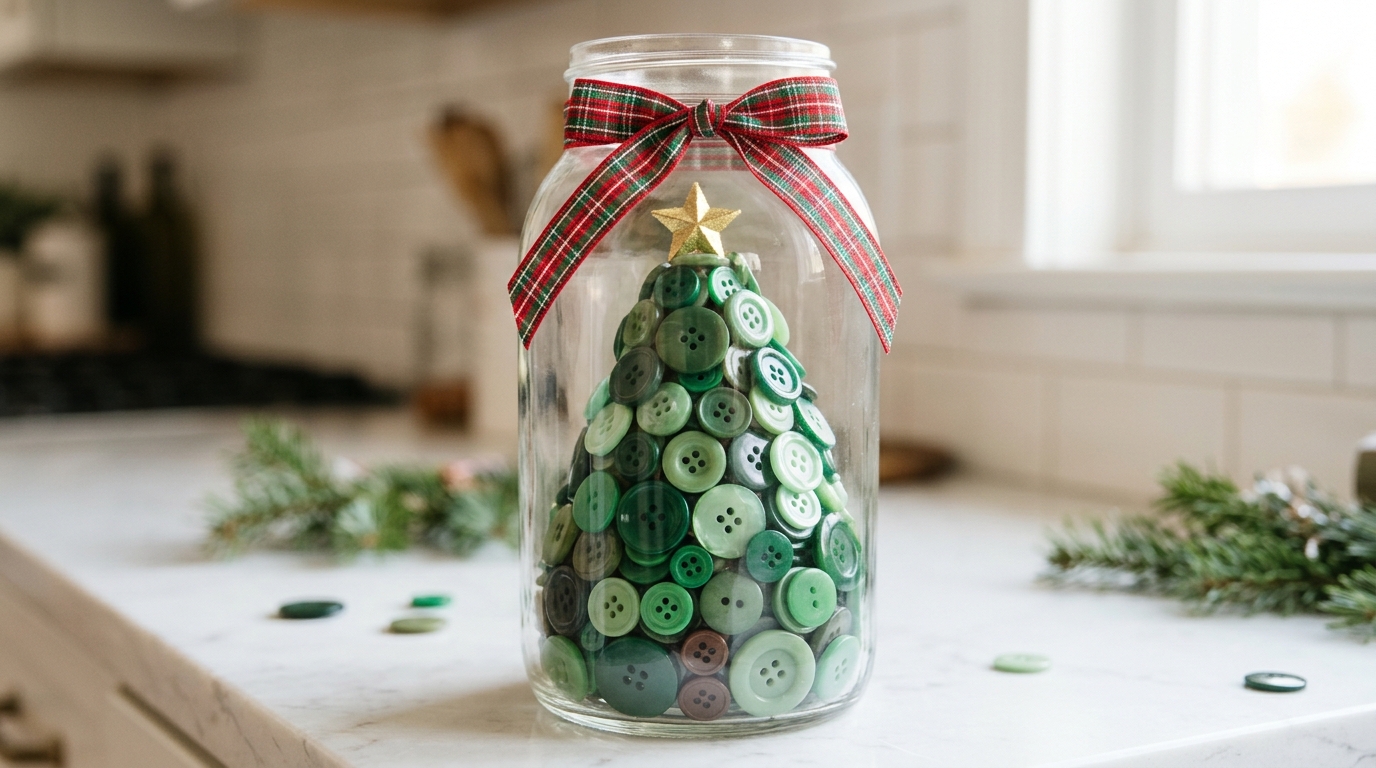
This jar tree looks like magic, but the trick is simple. Glue green buttons around a paper cone, then slide the cone inside a tall glass jar and top it with a little gold star. A plaid ribbon around the neck finishes it. It is a lovely kitchen counter decoration and a sweet gift for a teacher or neighbor. Would you make a green tree or a white snowy one?
You will need: a tall glass jar with a wide mouth, a paper or foam cone that fits inside, green buttons, craft glue, a small gold star, ribbon.
How to make it: 1. Glue buttons around the cone from the bottom up. 2. Glue the star to the tip. 3. Lower the tree gently into the jar. 4. Tie ribbon around the neck.
Button Christmas Crafts for Cards
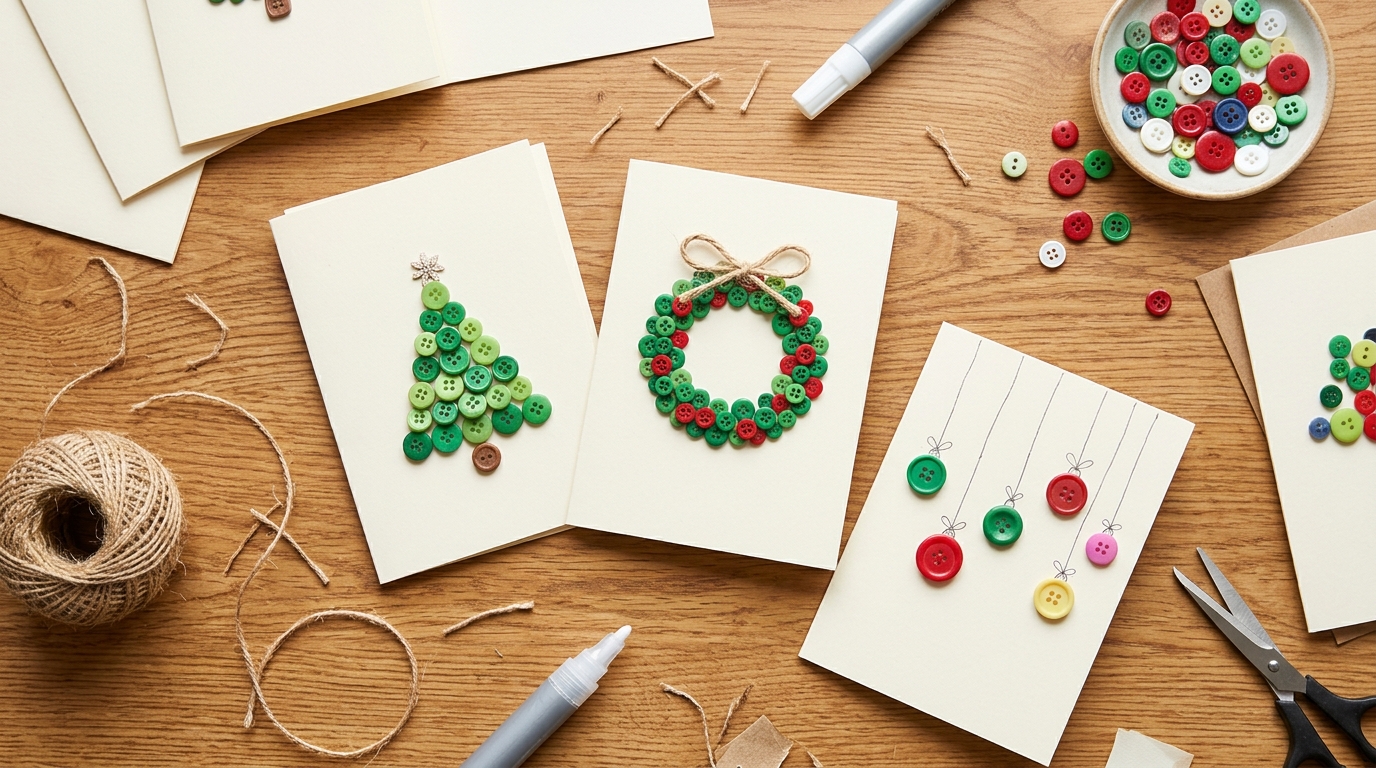
Button Christmas crafts make the sweetest mail. Handmade cards with buttons feel personal, and people tend to keep them. A button tree, a little button wreath or a row of button ornaments on strings takes minutes per card. Use cream cardstock, a glue pen and a fine marker to draw the strings and trunks. Make a batch at the kitchen table with family. Who would you send your first button card to?
You will need: folded cream cardstock, small buttons, a glue pen or craft glue, a fine black marker, twine, envelopes.
How to make it: 1. Sketch the design lightly in pencil. 2. Glue buttons in place and let dry. 3. Draw strings, trunks or bows with the marker. 4. Write your note inside and mail it in a padded envelope.
Button Christmas Crafts Finale: A Gold Star Tree Topper
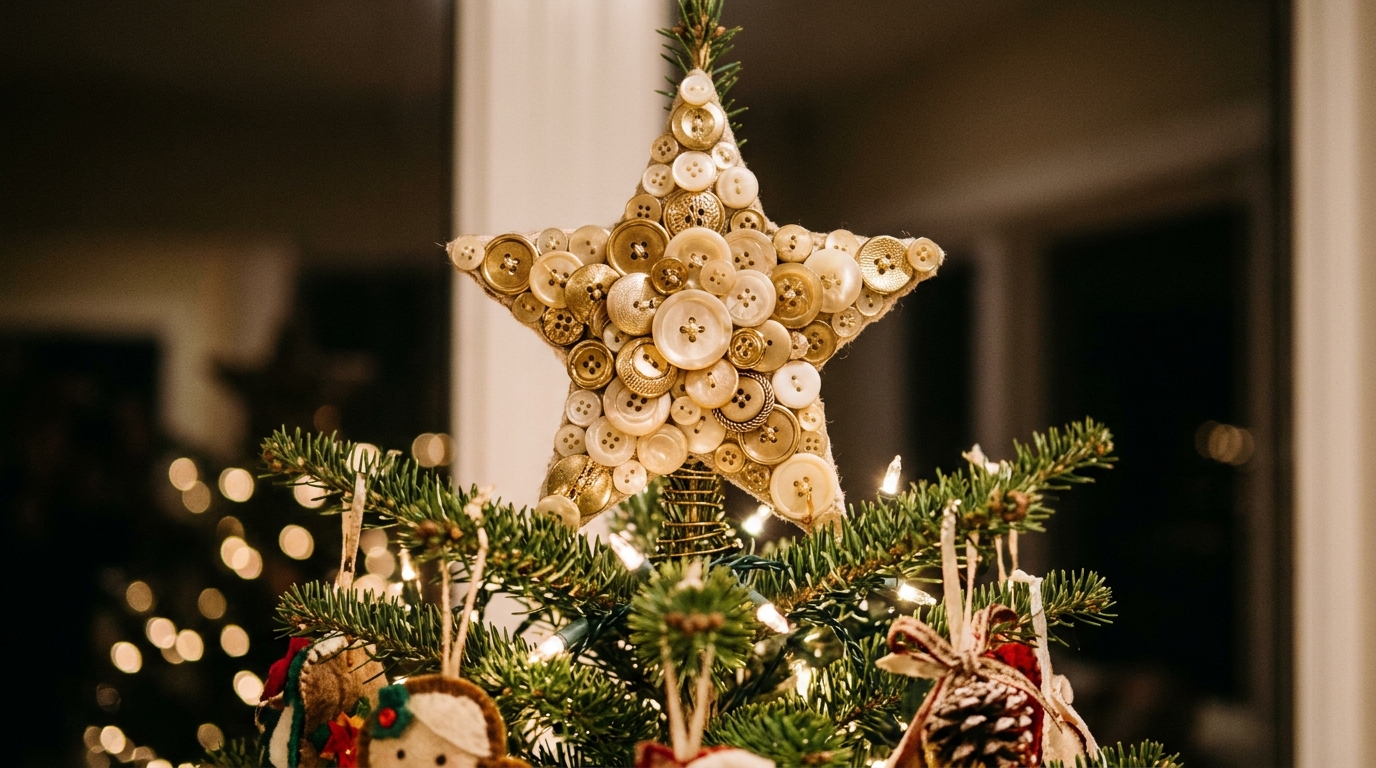
Finish your tree with a star made from gold and cream buttons. Cut a star from sturdy cardboard, cover it with buttons on both sides, and attach a cardboard tube or wire coil on the back so it sits on the top branch. Antique brass buttons look especially rich here. Learn a little about the long history of the humble button while the glue dries. Will your star be gold, silver or red?
You will need: thick cardboard, a star template, gold, cream and brass buttons, a low temp glue gun (adult help), a short cardboard tube or a coil of wire.
How to make it: 1. Cut two matching stars from cardboard and glue them together. 2. Cover the front and back with buttons. 3. Glue the tube or wire coil to the back bottom. 4. Slide it onto the top branch.