Ornament Tree Ideas: 14 Bauble Trees That Look Like Boutique Decor
Ornament tree ideas are the sweetest little trend of the season, and they start with a plain foam cone and a box of shiny balls. Glue the baubles on, one by one, and you end up with a sparkling mini tree that looks like it came from a fancy home shop. One ornament tree video from the Our Winton Home page pulled in more than 57,000 reactions and 3,100 shares in the days after it went up on October 23, and people keep asking how to make their own. The good news is that you do not need any special skill. If you can hold a glue gun with a little care, you can make one in an afternoon. Below are 14 versions, from glowing gold to candy pink, plus a kid friendly tree made with shatterproof balls. Pick your colors, clear the kitchen table and let’s make something pretty..
Ornament Tree Ideas Start With a Simple Foam Cone
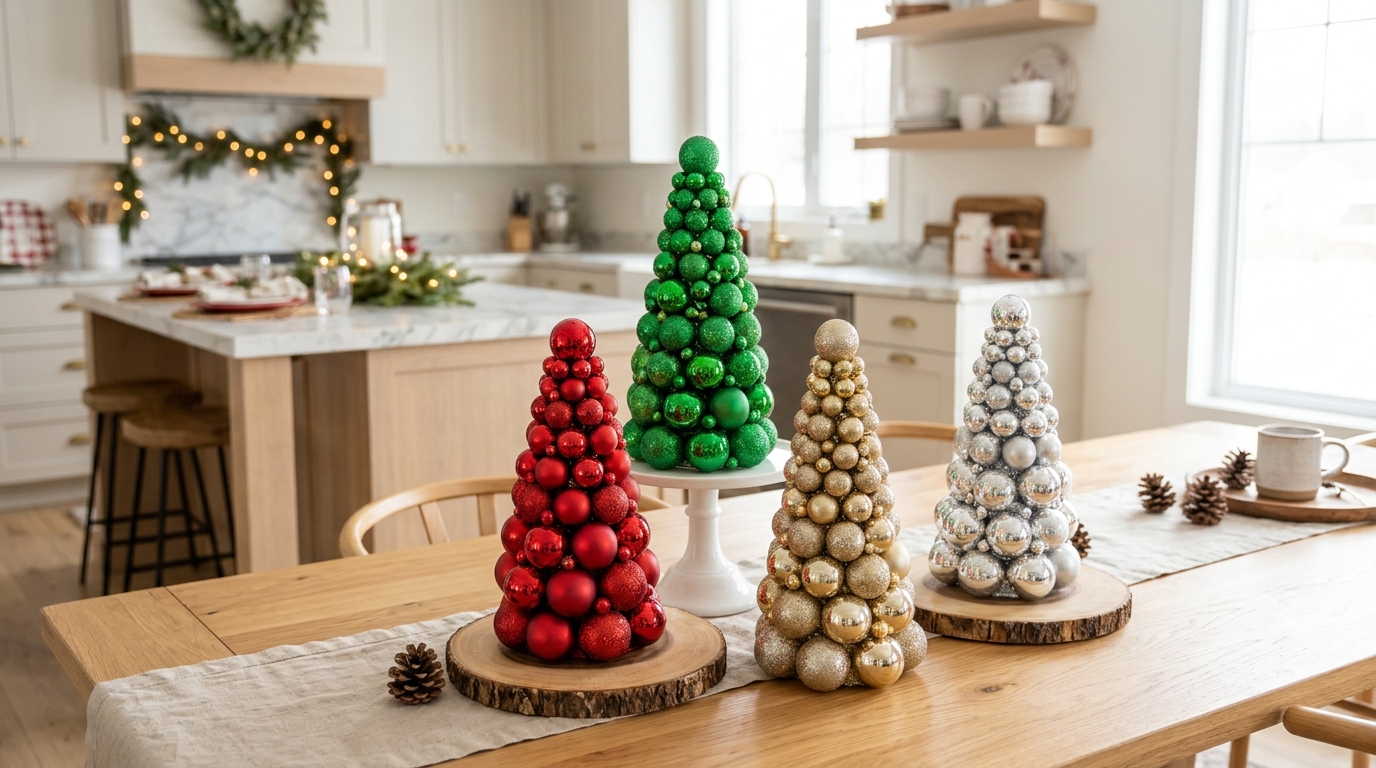
Every tree in this list starts the same way. You take a foam cone from the craft aisle, then cover it with Christmas balls until no foam shows. Big balls go on first, then medium ones fill the spaces, and tiny ones tuck into the last gaps. That mix of sizes is what makes these trees look so full and rich. Make one in each color and group them on a cake stand, a tray or a kitchen island for a display that looks like a store window. Shatterproof plastic balls are lighter and safer than glass, so they are the best pick for most homes..
You will need: A foam cone 12 to 18 inches tall, about 60 to 90 shatterproof Christmas balls in three sizes, a hot glue gun and glue sticks (adult help), a paint brush and craft paint to match.
How to make it: 1. Paint the foam cone in a color close to your balls so small gaps disappear. 2. Pull the metal caps off the balls, or leave them on and turn them toward the cone. 3. Glue the largest balls around the bottom first, then work up with medium and small ones, filling every gap.
All Gold Mini Tree on a Cake Stand
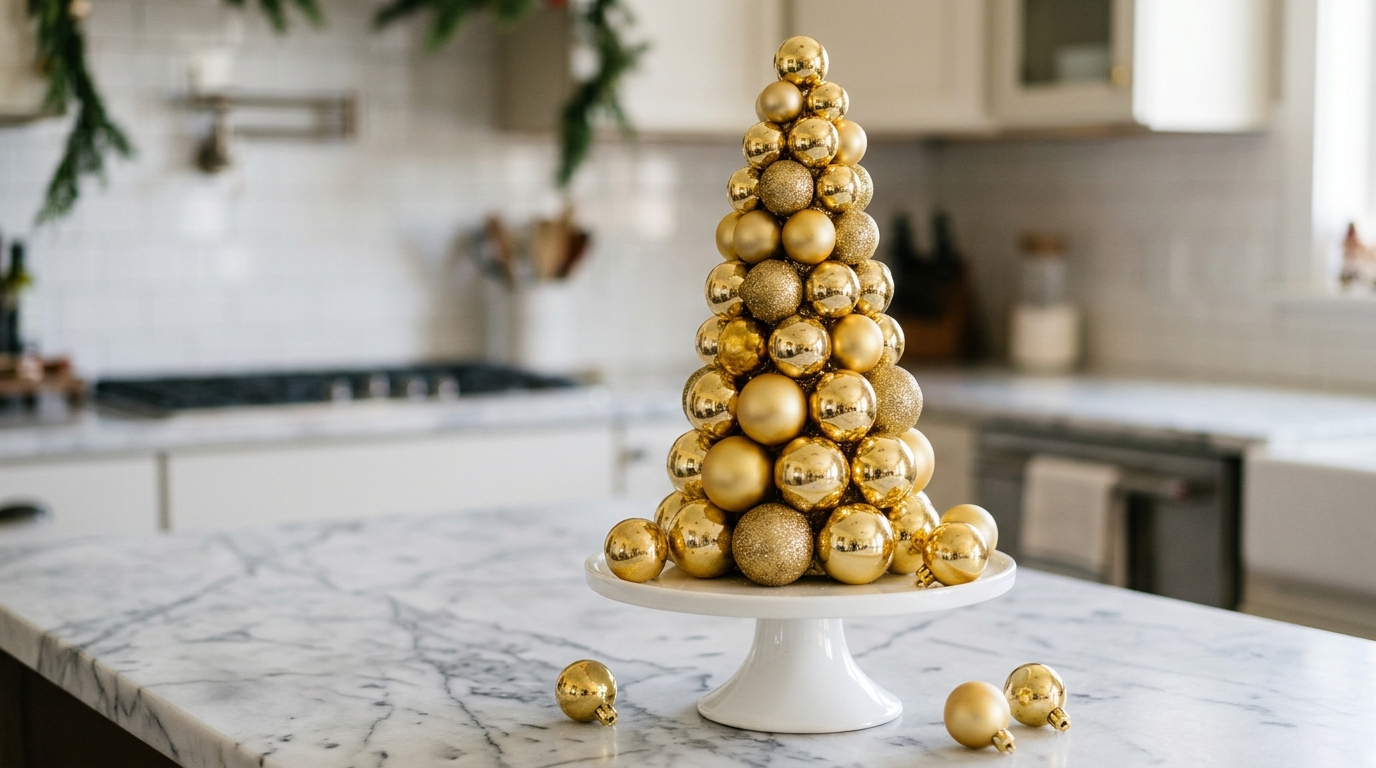
If you only make one tree this year, make it gold. A single color looks calm and expensive, and mixing shiny, matte and glitter finishes keeps it from looking flat. Set it on a white cake stand and suddenly it looks like a centerpiece from a hotel lobby. It works with almost any decor, from farmhouse to modern, and it shines even in daylight. It is also the easiest of these ornament tree ideas to style. Leftover balls can go in a glass bowl beside it. Would you keep it all gold, or slip in a few champagne balls for a softer look?
You will need: A foam cone, gold craft paint, about 70 gold balls in shiny, matte and glitter finishes, a hot glue gun (adult help) and a white cake stand.
How to make it: 1. Paint the cone gold and let it dry. 2. Glue the large balls in a ring at the base, then build upward, mixing the three finishes as you go. 3. Fill the gaps with mini balls and set the tree on the cake stand.
Ornament Tree Ideas in Candy Colors
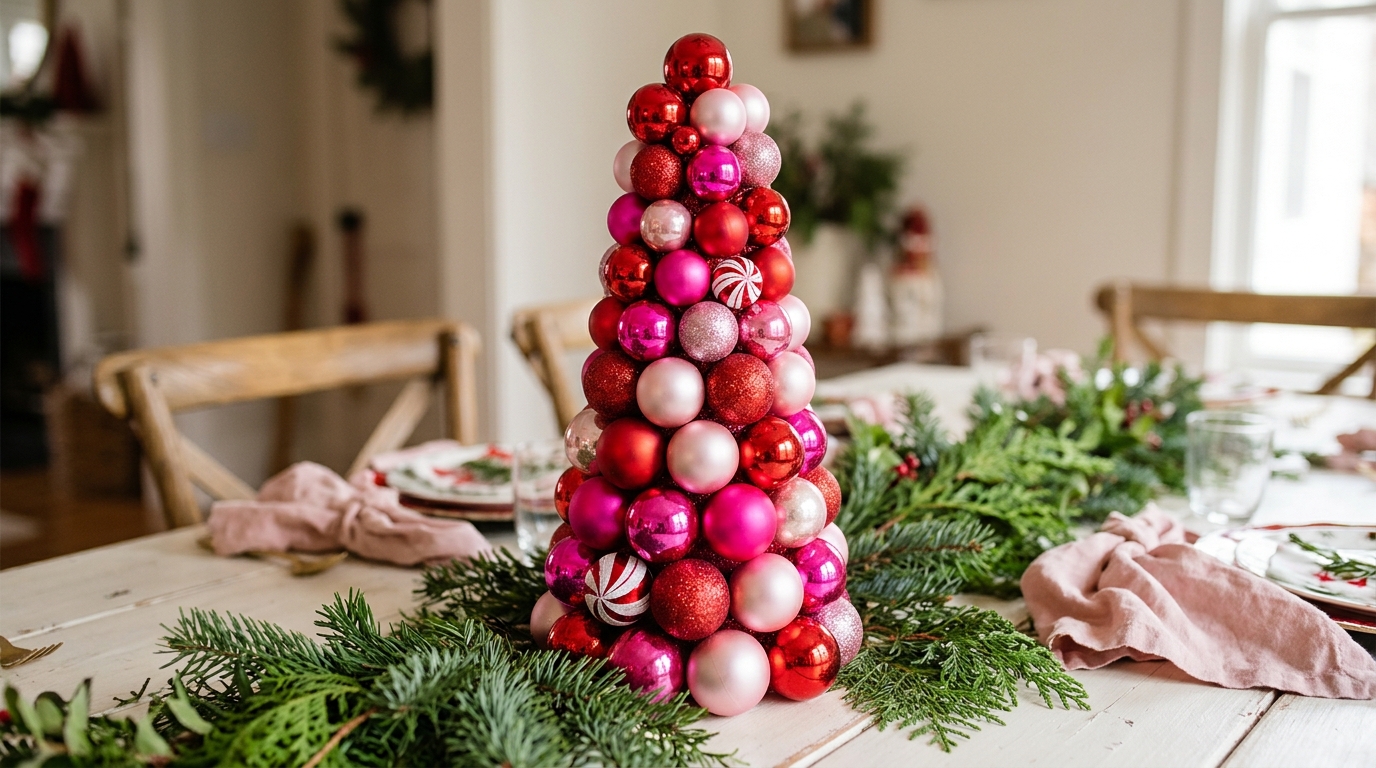
Red and pink together feel playful and sweet, like a bakery window at Christmas. Use mostly red and hot pink balls, then add pale pink and a few striped balls that look like peppermint candy. This tree is perfect for a kitchen, a kids room or a holiday baking party table. It also makes a fun gift for a friend who loves bright colors. Among all the ornament tree ideas here, this one is the most cheerful, and it looks great in photos. Which room in your home needs a little candy color?
You will need: A foam cone, pink craft paint, red, hot pink and pale pink balls in three sizes, a few small striped balls, and a hot glue gun (adult help).
How to make it: 1. Paint the cone pink. 2. Glue the red and hot pink balls first, spreading the colors evenly so no side looks heavy. 3. Add pale pink balls and striped balls last as little pops of color.
Silver Mercury Glass Look Tree
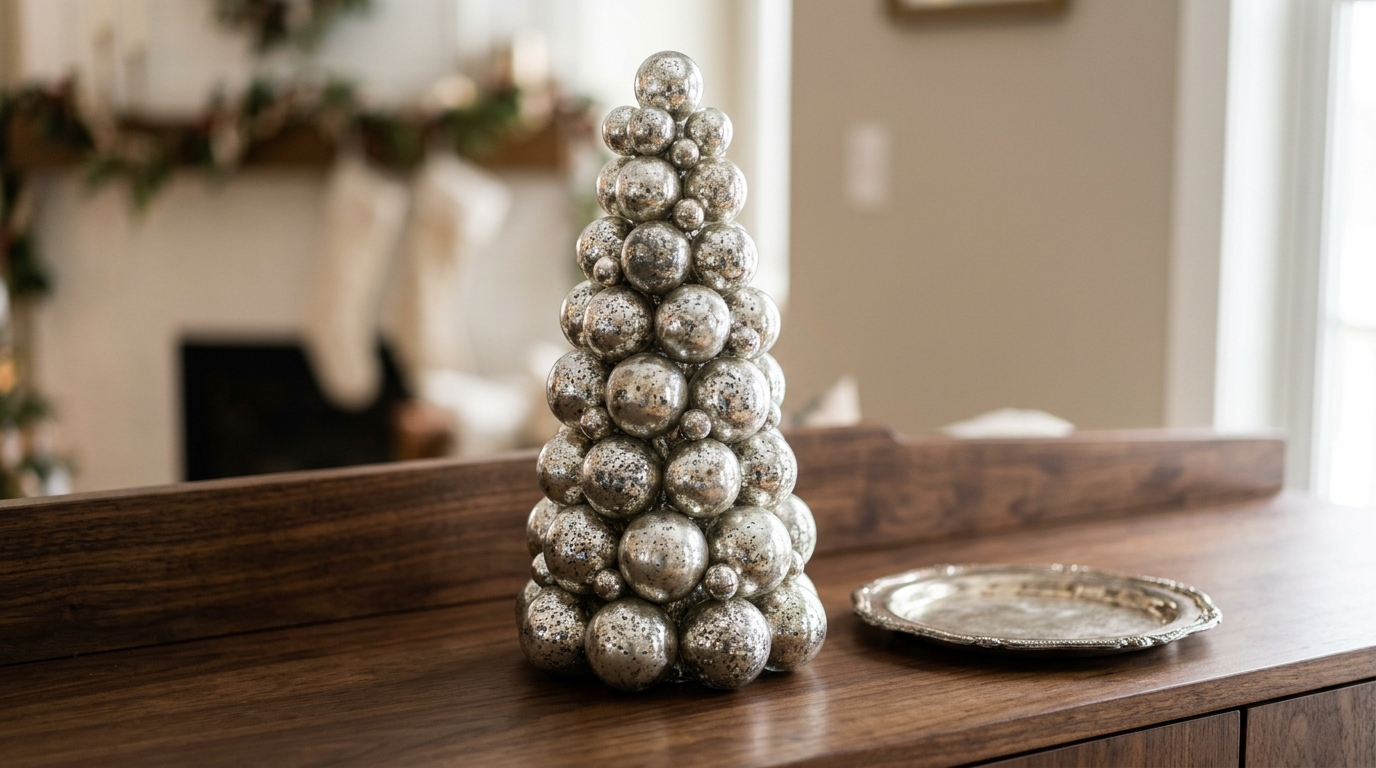
Mercury glass has a speckled, slightly worn silver finish that feels like an old family treasure. You can find balls with that look, or make your own by misting plain silver balls with a little water and vinegar spray and dabbing them with a paper towel before they dry. Set the finished tree on a dark wood sideboard or a mirror tray and the silver will bounce the light all around the room. It looks elegant in a dining room or an entryway, and it proves ornament tree ideas can feel grown up too. Do you lean toward shiny silver or that soft antique look?
You will need: A foam cone, silver craft paint, about 70 silver balls with a speckled or antique finish, a hot glue gun (adult help) and a mirror or silver tray.
How to make it: 1. Paint the cone silver and let it dry. 2. Glue the balls in rings from the base up, turning the most speckled sides outward. 3. Fill gaps with small balls and display the tree on the tray.
Vintage Shiny Style Ornament Tree
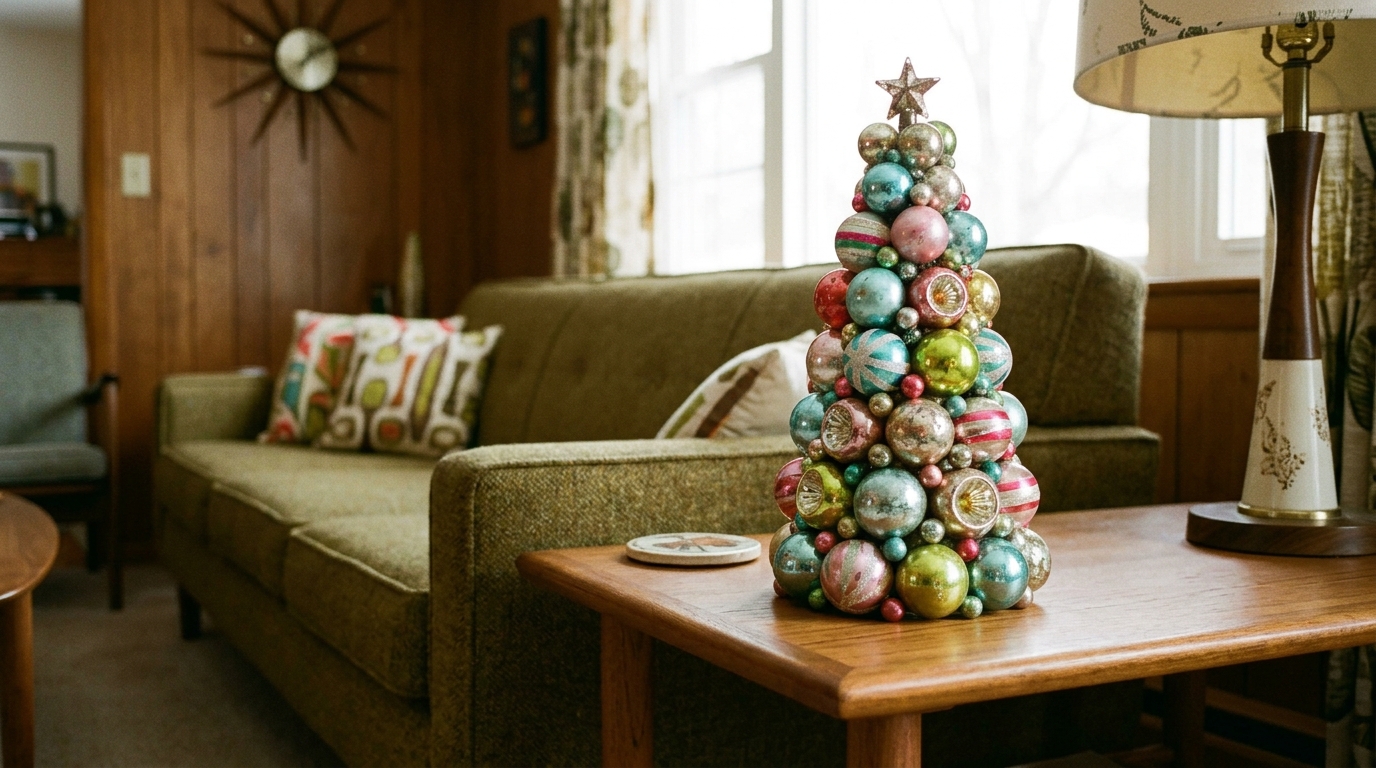
Small retro balls in aqua, pink, lime and gold bring back the look of a 1950s Christmas. Many have painted stripes or a dimple pressed into the side, which adds lovely texture. If you already collect vintage Christmas ornaments, this is a great way to show off the ones that have lost their hooks or have a tiny chip on one side, since you can turn the flaw toward the cone. Set it on a wooden side table and the whole room feels a little nostalgic. What colors were on the tree you grew up with?
You will need: A small foam cone, white craft paint, small retro style balls in mixed colors, a hot glue gun (adult help) and a wooden or retro tray.
How to make it: 1. Paint the cone white. 2. Sort the balls by size and glue the larger ones around the bottom. 3. Fill the rest with small balls, spreading each color evenly around the tree.
Ornament Tree Ideas on a Dowel and Candlestick Base
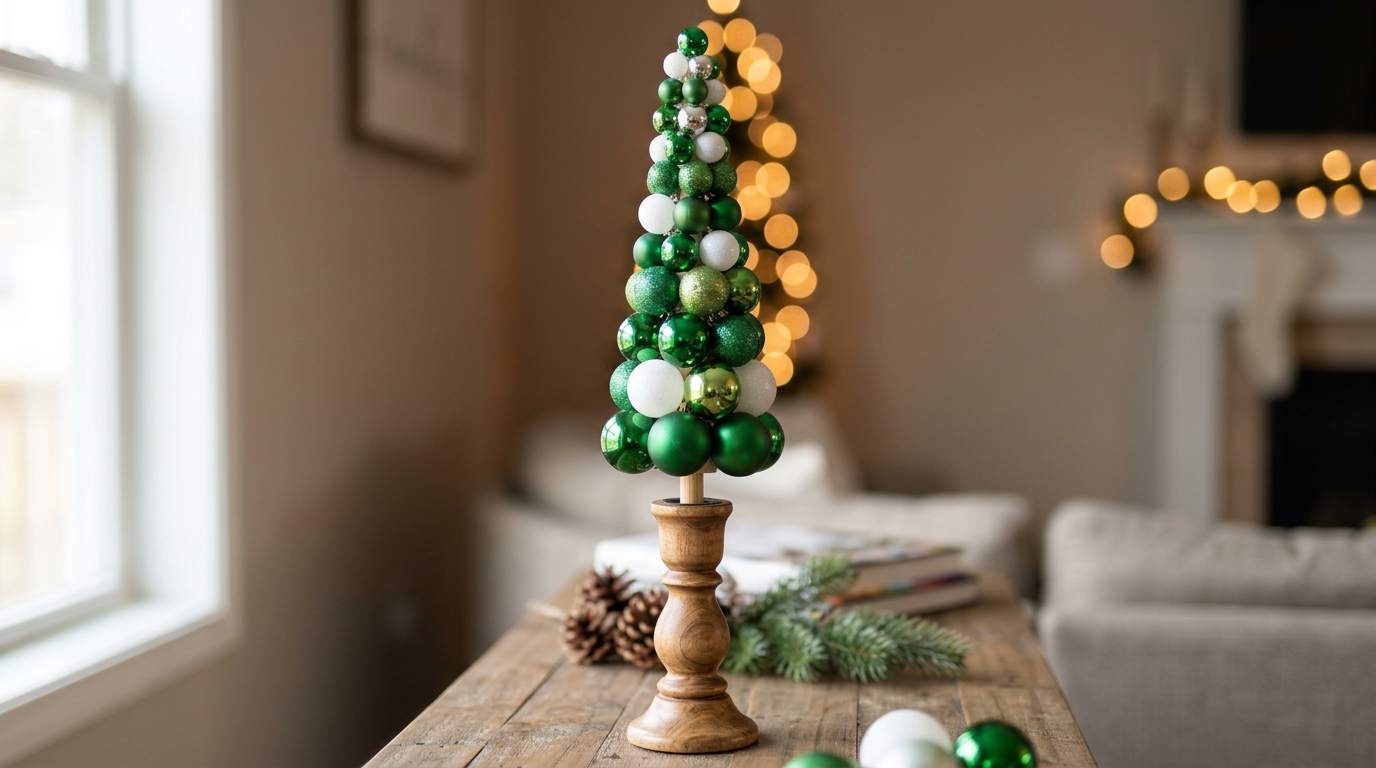
This version skips the usual wide cone and builds a tall, slim tree around a wooden dowel. The dowel sits in an old wooden candlestick, so you get a pretty turned base for almost nothing. A small foam ball stack or a narrow foam cone slid over the dowel gives the balls something to hold onto. Green and white balls look fresh and classic, but any colors work. It is a nice choice for a narrow console table where a wide tree will not fit. Do you have an old candlestick sitting in a cupboard?
You will need: A wooden dowel about 18 inches long, a wooden candlestick, a narrow foam cone, wood glue, green and white balls, and a hot glue gun (adult help).
How to make it: 1. Glue the dowel firmly into the candlestick hole and let it set overnight. 2. Push the narrow foam cone down over the dowel and glue it in place. 3. Glue on the balls from the bottom up, largest first.
Pastel Ornament Tree for a Soft Palette
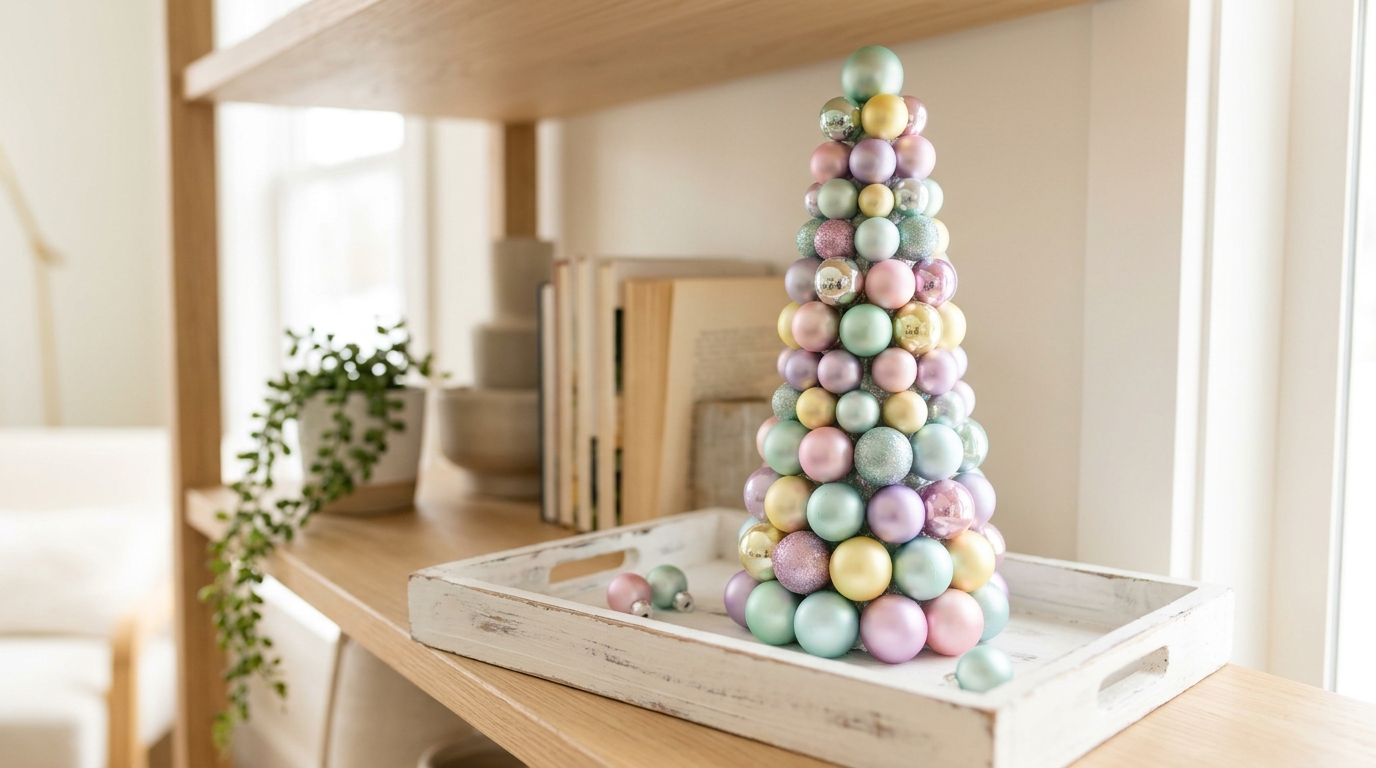
Not every home wants red and green, and pastel trees have become a quiet favorite. Mint, baby pink, lavender, butter yellow and powder blue together look like a box of sugared almonds. The tree feels light and happy, and it fits beautifully on a white shelf or in a bedroom. You could even keep it out after the holidays and call it spring decor, which makes it one of the most useful ornament tree ideas around. Set it on a white tray with a few loose balls around it. Which pastel would you use the most of?
You will need: A foam cone, white craft paint, pastel balls in five colors and three sizes, a hot glue gun (adult help) and a white tray.
How to make it: 1. Paint the cone white. 2. Glue large balls around the base, mixing the colors so no two matching balls touch. 3. Work up to the tip with smaller balls and fill any gaps with minis.
Ornament Tree Ideas for a Mantel Row
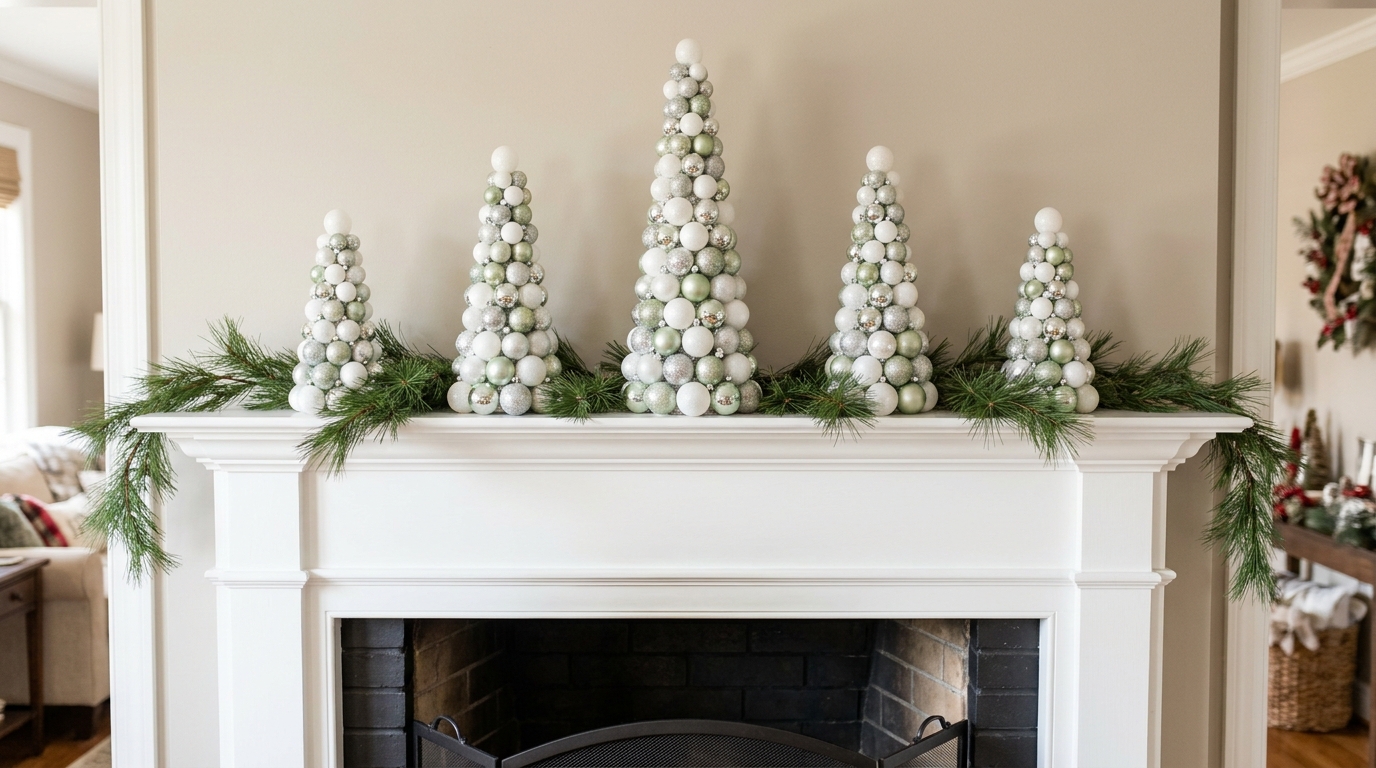
One tree is pretty, but five trees in a row look like a tiny snowy forest. Make them in graduated heights, with the tallest in the middle and the shortest at each end. White, silver and pale green balls keep the look calm, so the trees do not fight with your stockings or garland. If you light your fireplace, place the trees on a shelf or a sideboard instead, since foam and plastic should stay well away from heat. How many trees would fill your mantel?
You will need: Five foam cones in three heights, white craft paint, white, silver and pale green balls, a hot glue gun (adult help) and a short garland.
How to make it: 1. Paint all the cones white. 2. Cover each cone with balls, using the biggest balls on the tallest trees. 3. Line them up from tall in the middle to short at the ends and tuck the garland around their bases.
Tiny Ornament Tree Inside a Glass Cloche
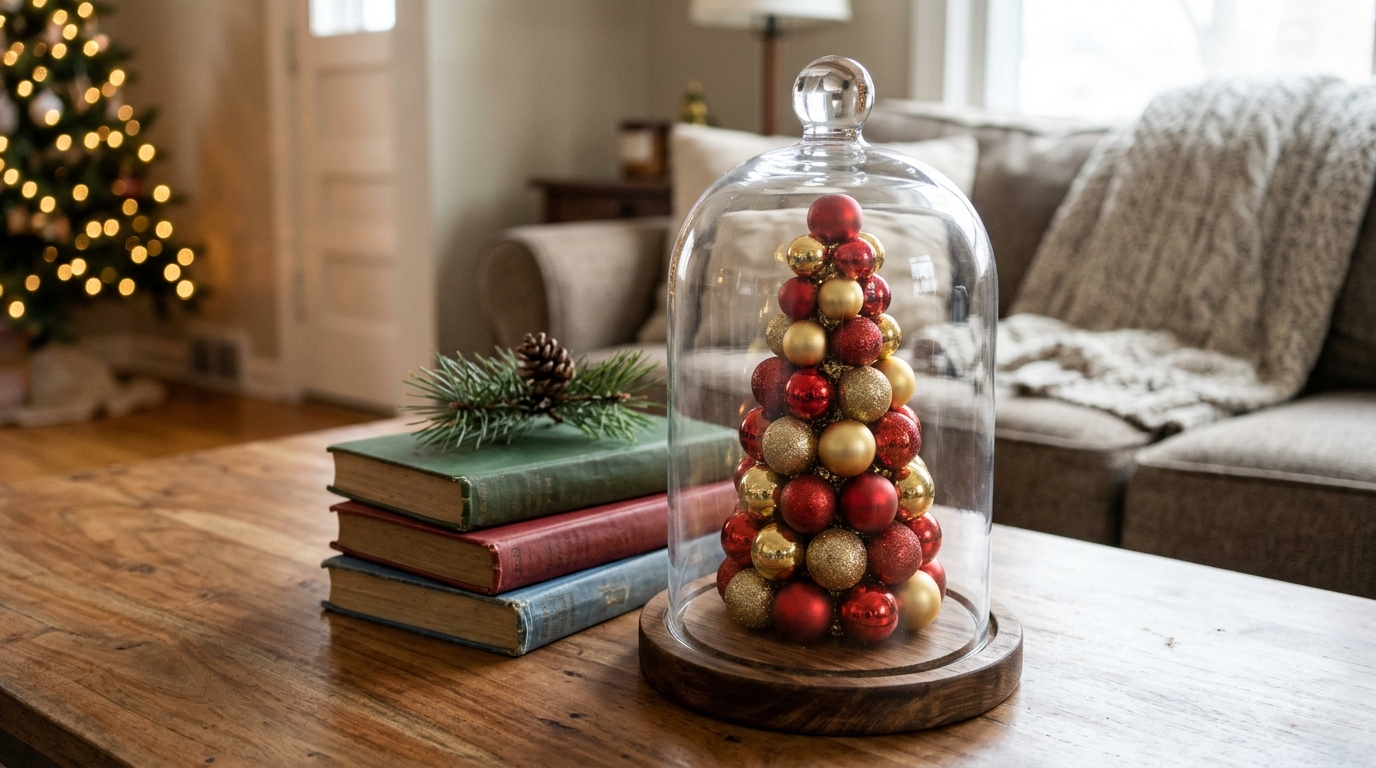
A small tree under a glass bell jar looks like something from a museum case. Use the tiniest balls you can find, often sold in big bags of mixed colors, and a cone about 8 inches tall. The glass keeps dust off and stops pets or little hands from pulling balls loose. Red and gold feel classic, but you could match any room. Set it on a coffee table with a stack of books and it becomes the first thing guests notice. Where would a little cloche tree look best in your home?
You will need: A foam cone about 8 inches tall, mini balls in red and gold, red craft paint, a hot glue gun (adult help) and a glass cloche with a wooden base.
How to make it: 1. Measure the cloche first so the tree fits with room to spare. 2. Paint the cone and glue on the mini balls in tight rows. 3. Glue the tree to the center of the wooden base and lower the glass over it.
Plaid Ribbon Wrapped Ornament Tree
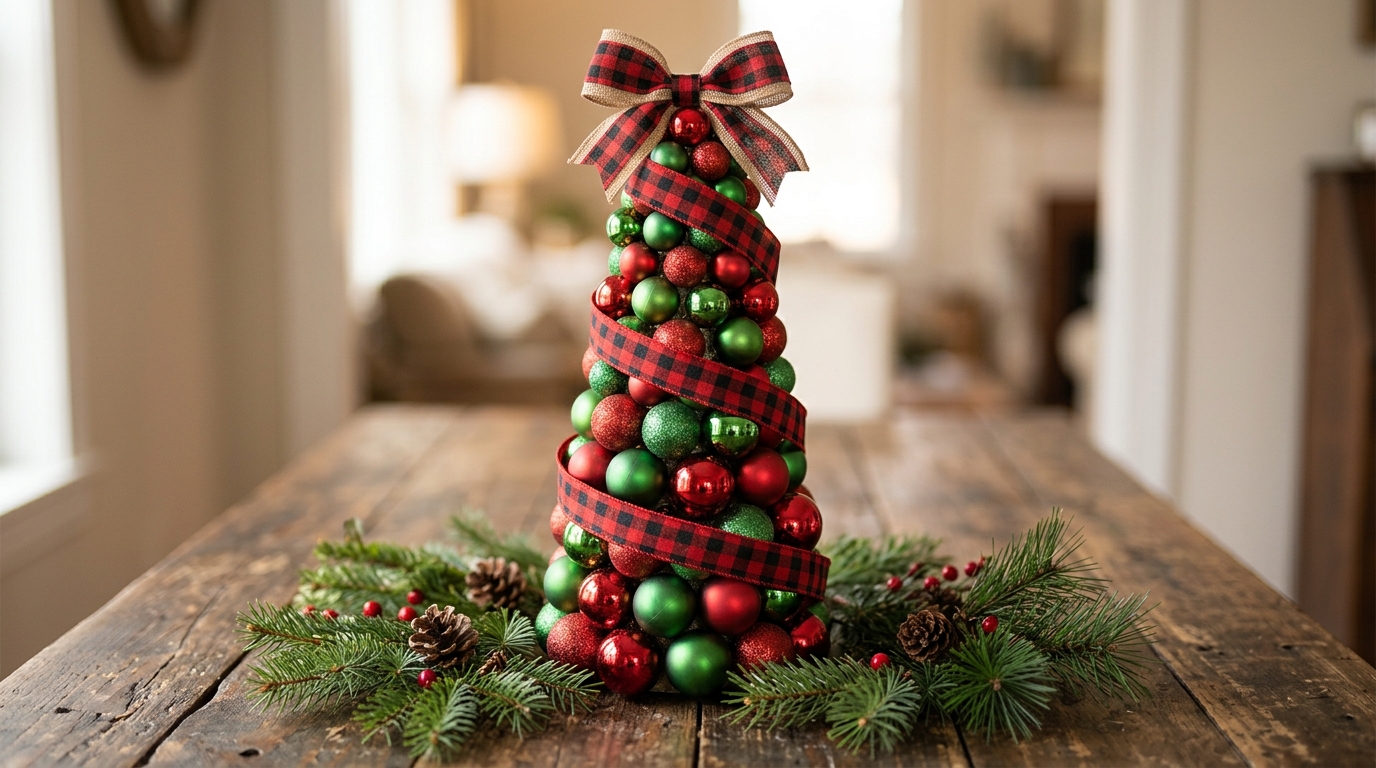
A spiral of plaid ribbon turns a red and green bauble tree into pure cabin coziness. Glue the balls first, then wind a wired ribbon from the top down, tucking it between the balls and pinning it in a few spots. Finish with a big plaid bow at the tip in place of a star. It looks great on a rustic table with some pine sprigs and a lantern that uses a battery light. If you love the farmhouse look, this one is for you. Will you use buffalo check or a traditional tartan?
You will need: A foam cone, green craft paint, red and green balls, about 3 yards of wired plaid ribbon, a few straight pins, and a hot glue gun (adult help).
How to make it: 1. Paint the cone and cover it with red and green balls. 2. Pin the ribbon at the top, then spiral it down, tucking it between the balls and pinning or gluing as you go. 3. Tie a bow with the leftover ribbon and glue it to the tip.
Blue and White China Look Tree
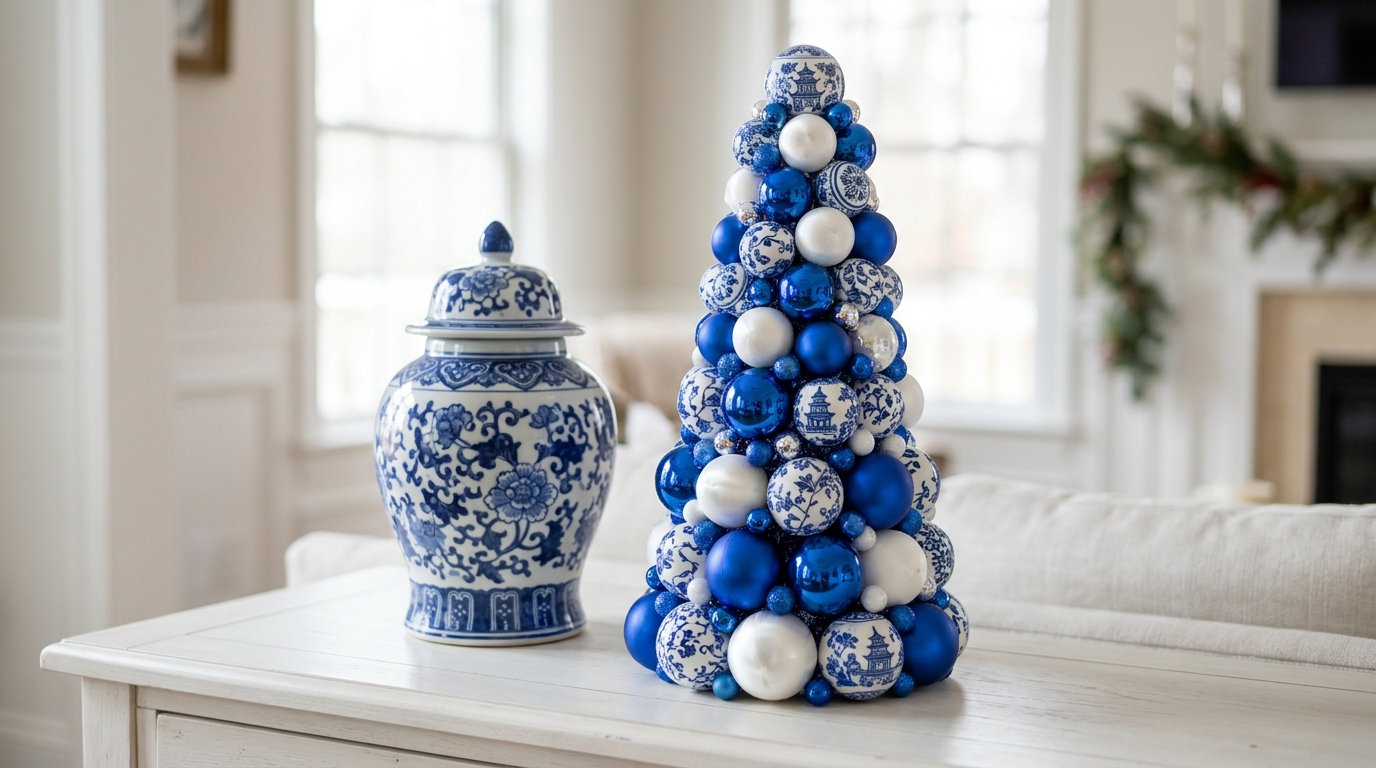
Blue and white never goes out of style, and it looks fresh at Christmas too. Mix solid cobalt balls, plain white balls and a few with a painted pattern that looks like fine china. The tree pairs beautifully with ginger jars, blue plates or a white table runner. It is a lovely choice if your home leans classic or coastal, and one of the ornament tree ideas that photographs best. You can also keep a few patterned balls loose in a bowl nearby to tie the look together. Do you already own a few blue and white pieces that would match?
You will need: A foam cone, white craft paint, cobalt blue, white and patterned blue and white balls, and a hot glue gun (adult help).
How to make it: 1. Paint the cone white. 2. Glue the patterned balls first, spacing them evenly around the tree so they stand out. 3. Fill in with solid blue and white balls, then add small ones to close the gaps.
Pinecone and Ornament Combo Tree
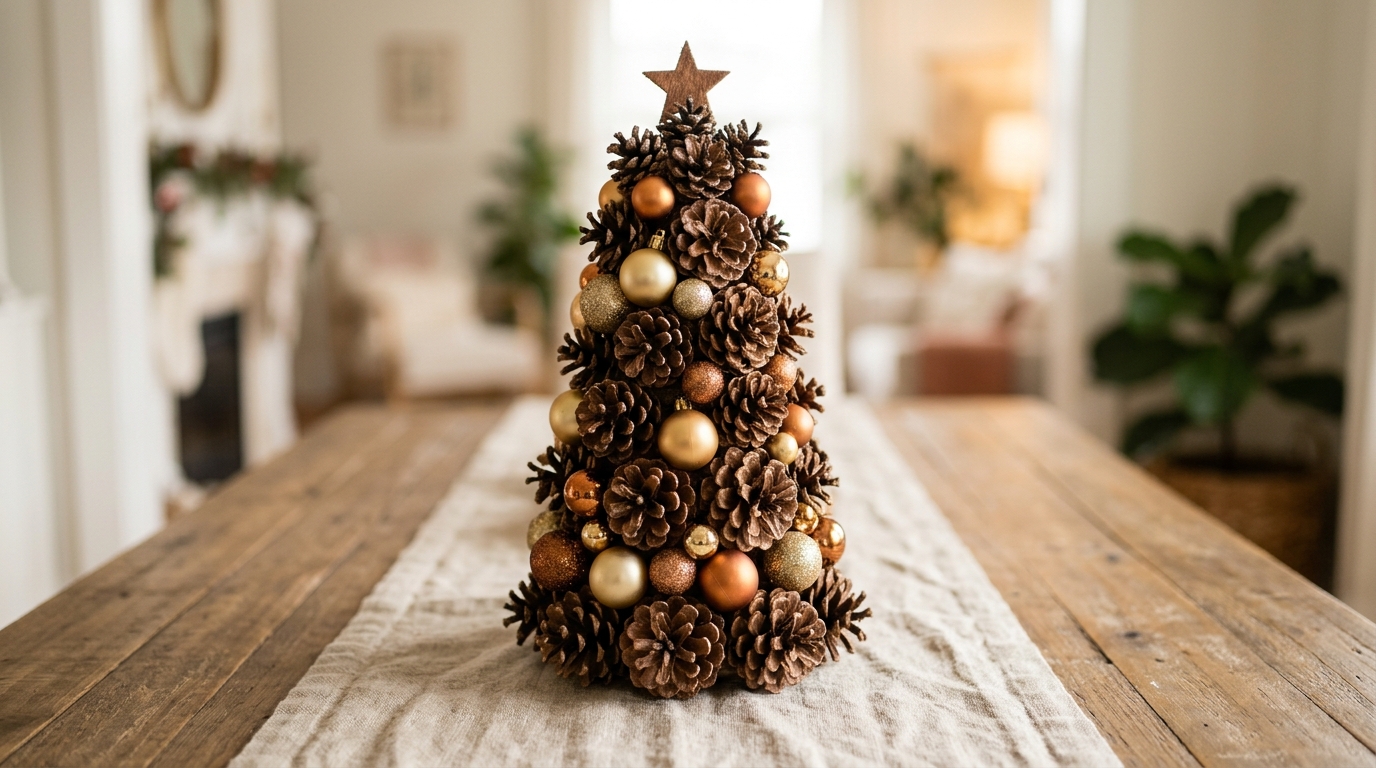
For a woodsy look, mix real pine cones with gold and copper balls. The rough texture of the cones next to the shiny balls looks natural and rich at the same time. Collect cones on a walk, bake them on a foil lined tray at a low oven setting with an adult to dry them out and send any bugs packing, then let them cool. A little star on top finishes it off. This tree looks lovely on a linen runner with some greenery. Who in your family would love to help gather the cones?
You will need: A foam cone, brown craft paint, 20 to 30 small dry pine cones, gold and copper balls, a small star topper and a hot glue gun (adult help).
How to make it: 1. Paint the cone brown so gaps blend in. 2. Glue the pine cones in a loose spiral from bottom to top. 3. Fill the spaces between them with gold and copper balls and glue the star to the tip.
Kids Table Tree With Shatterproof Balls

Kids love this project, and it is easy to make it safe for them. Use only shatterproof plastic balls in bright primary colors, and swap the hot glue gun for strong craft glue dots or a low temperature glue gun run by an adult. Children can pick the colors and press each ball into place while the grown up handles the glue. The finished tree looks wonderful on a kids table during the holiday meal. Little ones will be proud to say they made the centerpiece, and it is a gentle way to share ornament tree ideas with the next generation. Who will be your helper this year?
You will need: A foam cone, bright craft paint, shatterproof plastic balls in red, blue, yellow and green, strong glue dots or a low temperature glue gun (adult use only).
How to make it: 1. Let the kids paint the cone and wait for it to dry. 2. The adult adds glue to each spot, and the kids press a ball on. 3. Keep going until the cone is covered, then set the tree on the kids table.
Ornament Tree Ideas Finale With Battery Fairy Lights
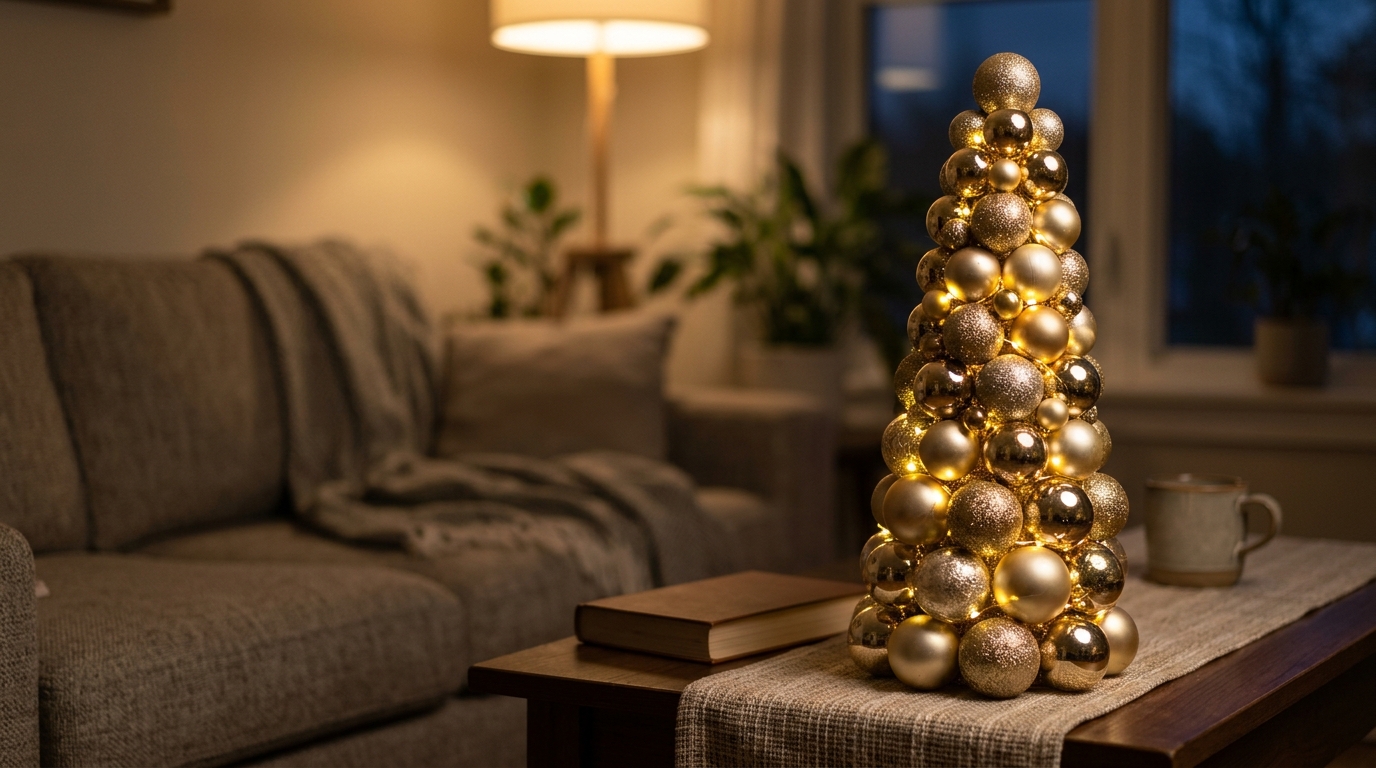
End with a tree that glows. After you glue on the balls, tuck a strand of tiny battery fairy lights into the gaps and hide the battery pack under the base. At night, the gold and champagne balls catch the light and the whole tree sparkles. Always use battery lights here, never real candles, since foam and plastic must stay far from flames. It is the perfect finish for all your ornament tree ideas, and a sweet way to light up a dark winter evening. Where will your glowing tree go?
You will need: A foam cone, gold craft paint, gold and champagne balls, a strand of battery fairy lights on thin wire, and a hot glue gun (adult help).
How to make it: 1. Paint the cone gold and glue on the balls, leaving tiny gaps here and there. 2. Starting at the top, tuck the fairy light wire down into the gaps in a spiral. 3. Hide the battery pack under the base and switch it on.