Cement Crafts: 12 Stunning Ideas That Turn Cheap Cups and Crates Into Luxury Decor
Cement crafts have a way of making people stop and ask where you bought that. A bag of cement mix, a few plastic cups and an old towel can turn into decor that looks like it came from a fancy boutique. One short video of gold rimmed cement holders made in plastic cups pulled in over a million reactions, and it is easy to see why. The look is clean, modern and natural all at once, and every piece comes out a little different. Below are 12 ideas, from planters and coasters to tiny pumpkins and Christmas trees. Before you start, remember that wet cement can irritate skin, so always wear gloves, a dust mask when mixing and work in a well aired space..
Cement Crafts Start With Gold Rim Cup Holders
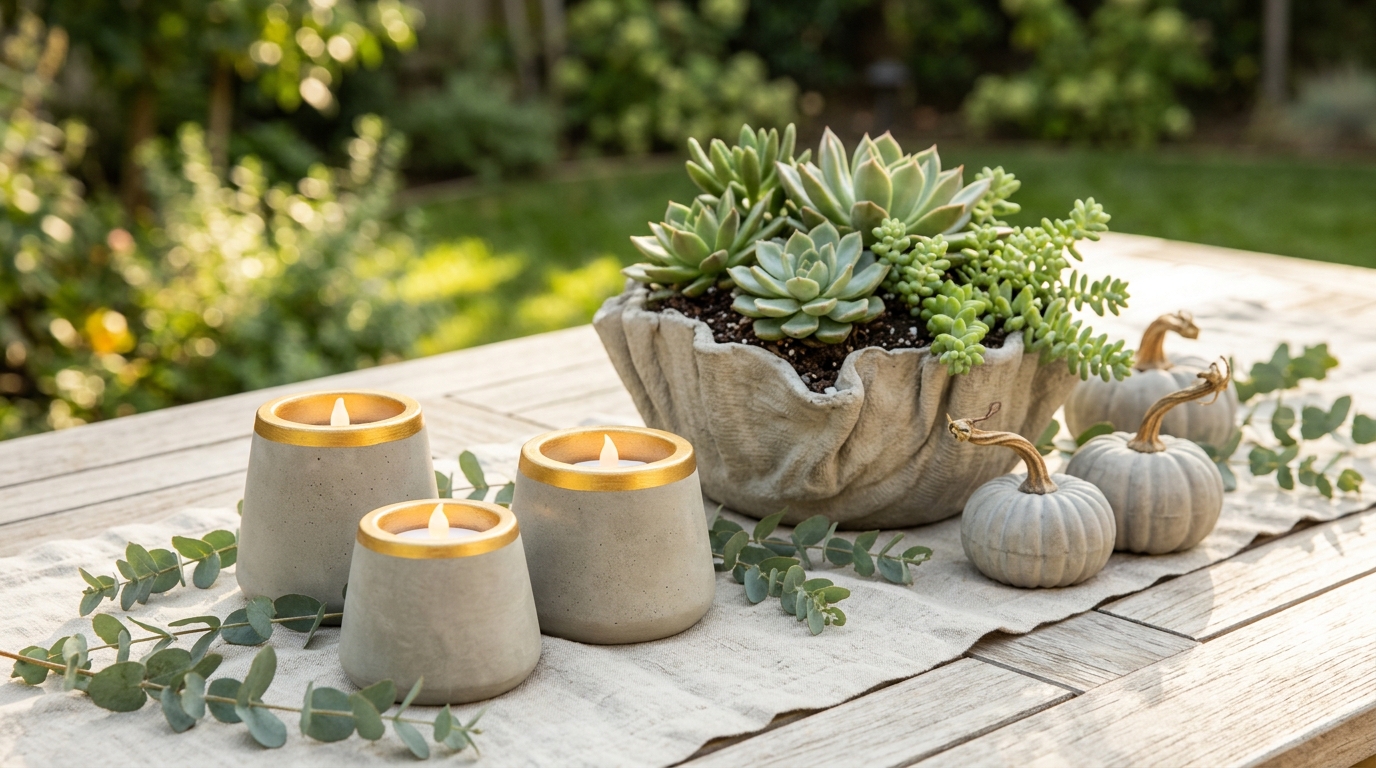
This is the project that went viral. A Facebook reel showed plain plastic cups used as molds for chunky cement holders, finished with a shiny gold rim, and people could not get enough. Pour cement into a larger cup, press a smaller cup into the middle and let it set. Once you pop it out and paint the rim gold, it looks like designer decor. Use a battery LED tea light inside so it glows safely. Ready to see what else you can make with a few cups and a bag of cement..
You will need: Cement or concrete mix, water, two sizes of plastic cups, cooking spray, gold paint, gloves, a dust mask and LED tea lights.
How to make it: 1. Spray the cups with cooking spray. 2. Fill the large cup with mixed cement and press the small cup into the center, weighting it down. 3. Let it cure for a day, pop it out, paint the rim gold and add an LED light.
Crate Mold Planter
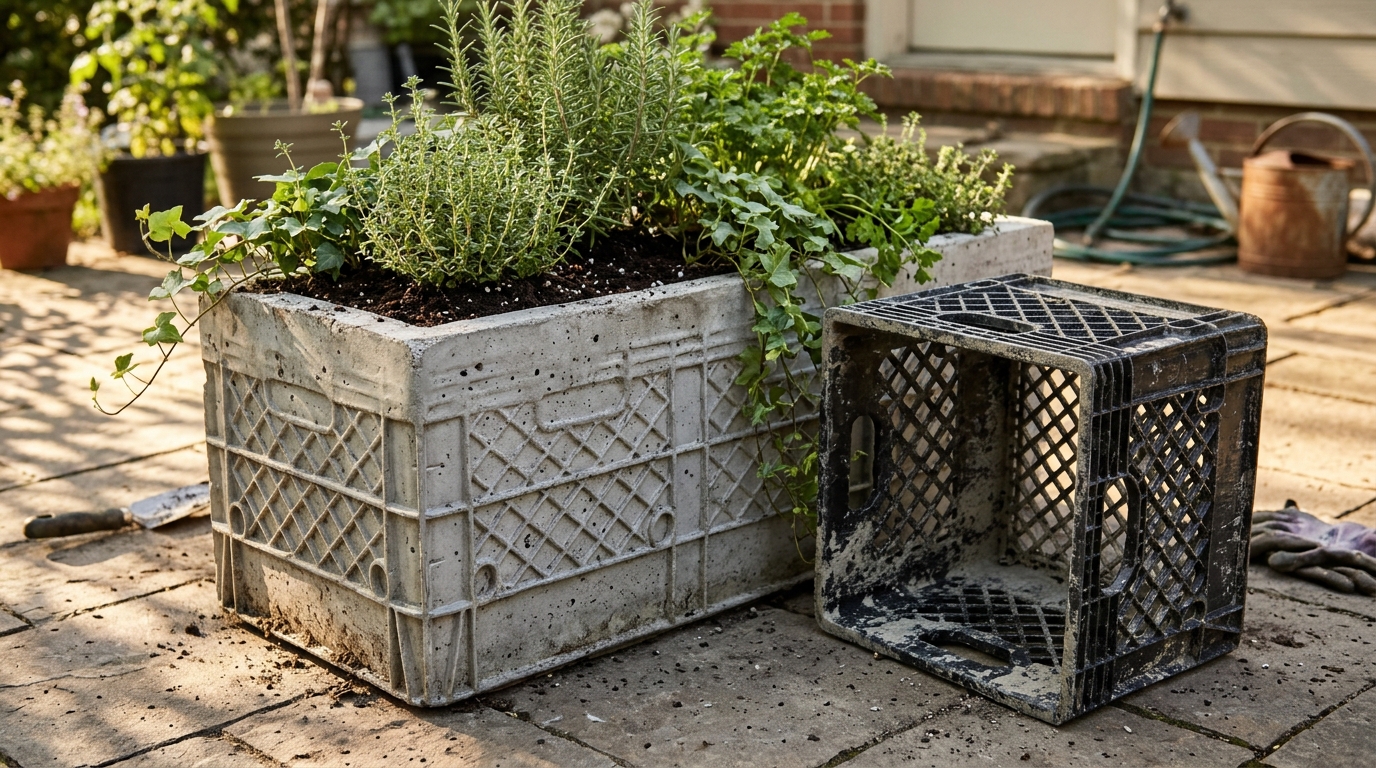
A plastic crate can give a cement planter a cool grid pattern on every side. Line the inside of a crate with plastic, pour in cement and press a smaller box or bucket into the center to make room for soil. When it cures, the crate pattern shows on the outside. It is heavy, sturdy and perfect for herbs on a sunny patio. This idea pulled in hundreds of thousands of reactions online. Would you plant herbs or flowers in yours?
You will need: A plastic crate, a smaller bucket or box, plastic sheet, cement mix, gloves, a dust mask and a drill bit for a drainage hole.
How to make it: 1. Line the crate and spray it with oil. 2. Pour cement and press the smaller bucket into the middle, weighting it down. 3. Cure for two days, unmold and have an adult drill a drainage hole.
Cement Dipped Fabric Flowers
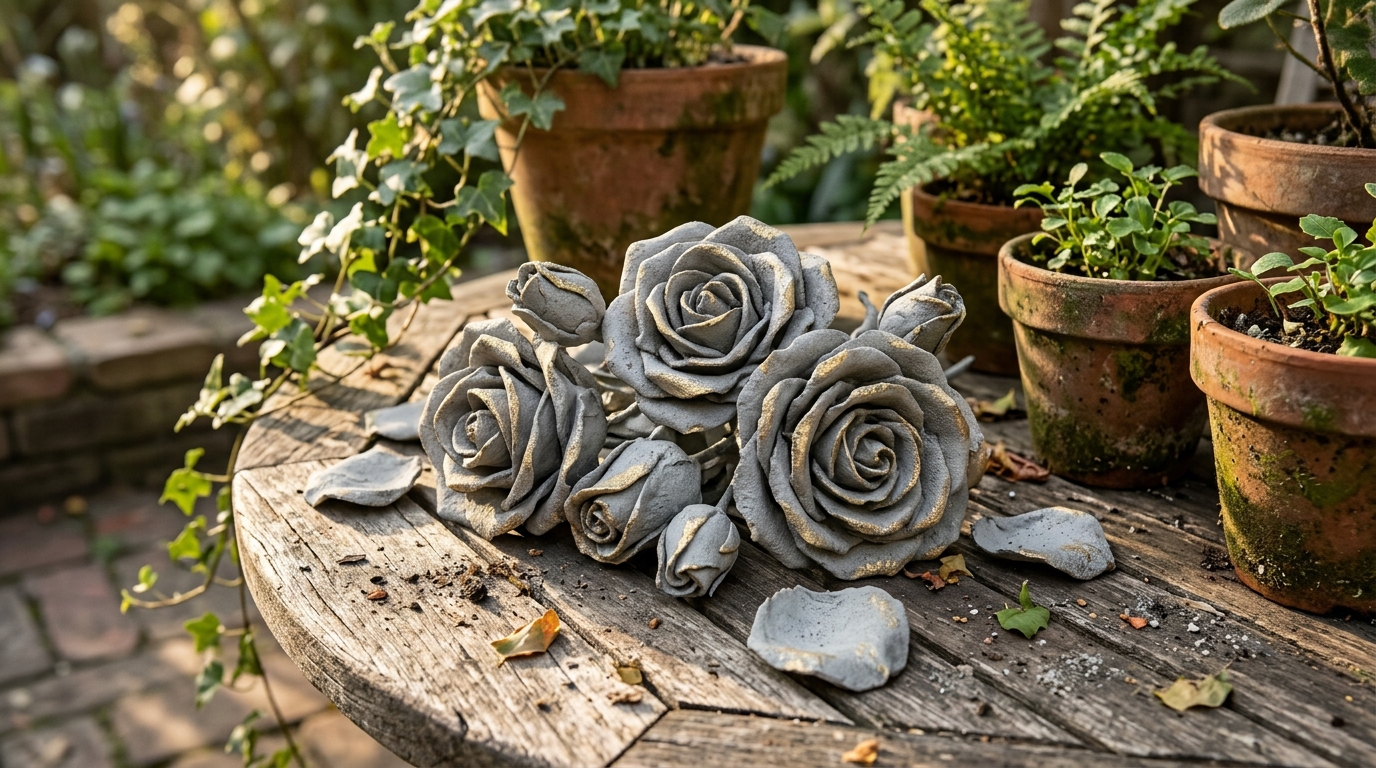
Fabric dipped in thin cement turns into flowers that look like they are carved from stone. Roll strips of old cotton fabric into rose shapes, dip them in a soupy cement mix and let them dry in place. A light brush of gold on the edges makes them shine. They look beautiful on a garden table and never need watering. It is a lovely way to use up old sheets or t shirts. Which color would you brush on the petals?
You will need: Old cotton fabric strips, cement mix, a bucket, gloves, a dust mask, wire for stems and gold paint.
How to make it: 1. Roll fabric strips into rose shapes and tie the base with wire. 2. Dip each flower in a thin cement mix and squeeze off the extra. 3. Let them dry on a rack and brush gold on the edges.
Draped Towel Planter, the Showstopper of Cement Crafts
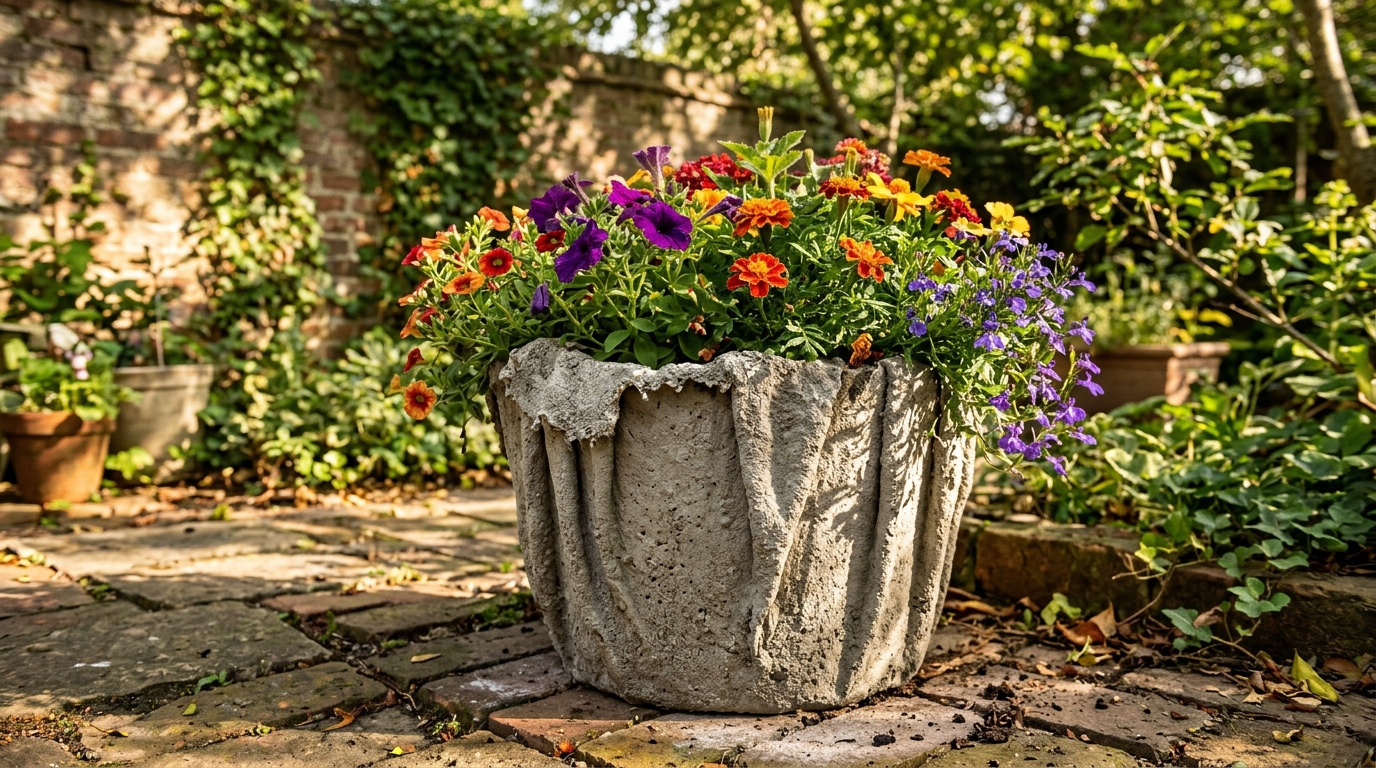
This is one of those cement crafts that looks like magic. Soak an old towel in cement, drape it over an upside down bucket and let the folds set. When it is hard, flip it over and you have a flowing, sculptural planter. Every one turns out different, which is part of the charm. Put the bucket on a plastic sheet and wear gloves, because this one gets messy. Fill it with bright flowers for a big pop of color. Do you have an old towel ready to retire?
You will need: An old towel, cement mix, a bucket to drape over, a plastic sheet, gloves and a dust mask.
How to make it: 1. Mix cement to a thick soup and soak the towel completely. 2. Drape it over the upside down bucket and shape the folds. 3. Let it cure for two days, then lift it off and seal it.
Real Leaf Stepping Stones
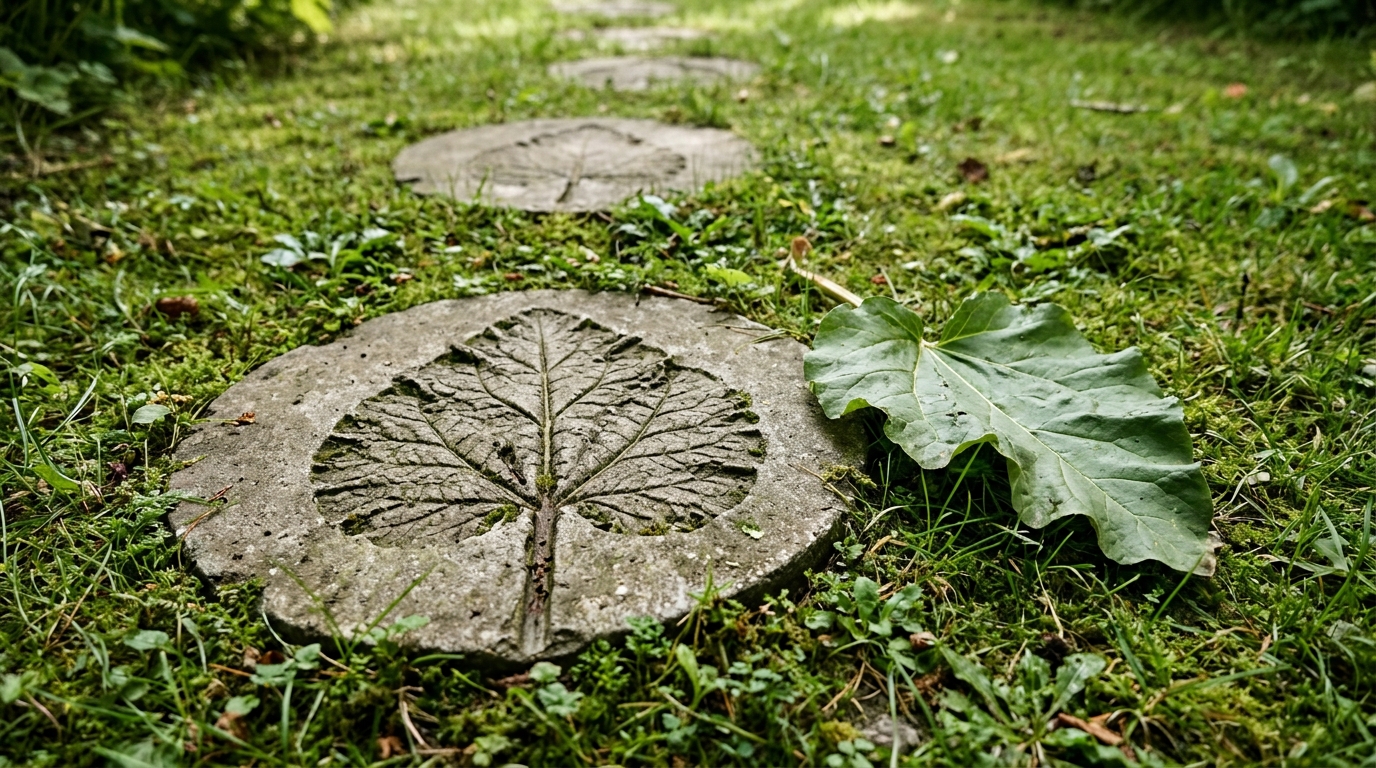
Big garden leaves leave beautiful prints in wet cement. Pour cement into a round mold, press a large leaf vein side down into the surface and gently peel it away once the cement starts to firm up. The veins stay behind like a fossil. Rhubarb, hosta and elephant ear leaves work wonderfully. Set the stones along a garden path and you will smile every time you walk by. Which leaf from your yard would you choose?
You will need: A round mold or plant saucer, cement mix, a large fresh leaf, cooking spray, gloves and a dust mask.
How to make it: 1. Spray the mold and fill it with cement. 2. Press the leaf vein side down and smooth it with your hand. 3. Peel the leaf after a few hours and cure the stone for two days.
Cement Crafts for Succulents: Egg Carton Pots
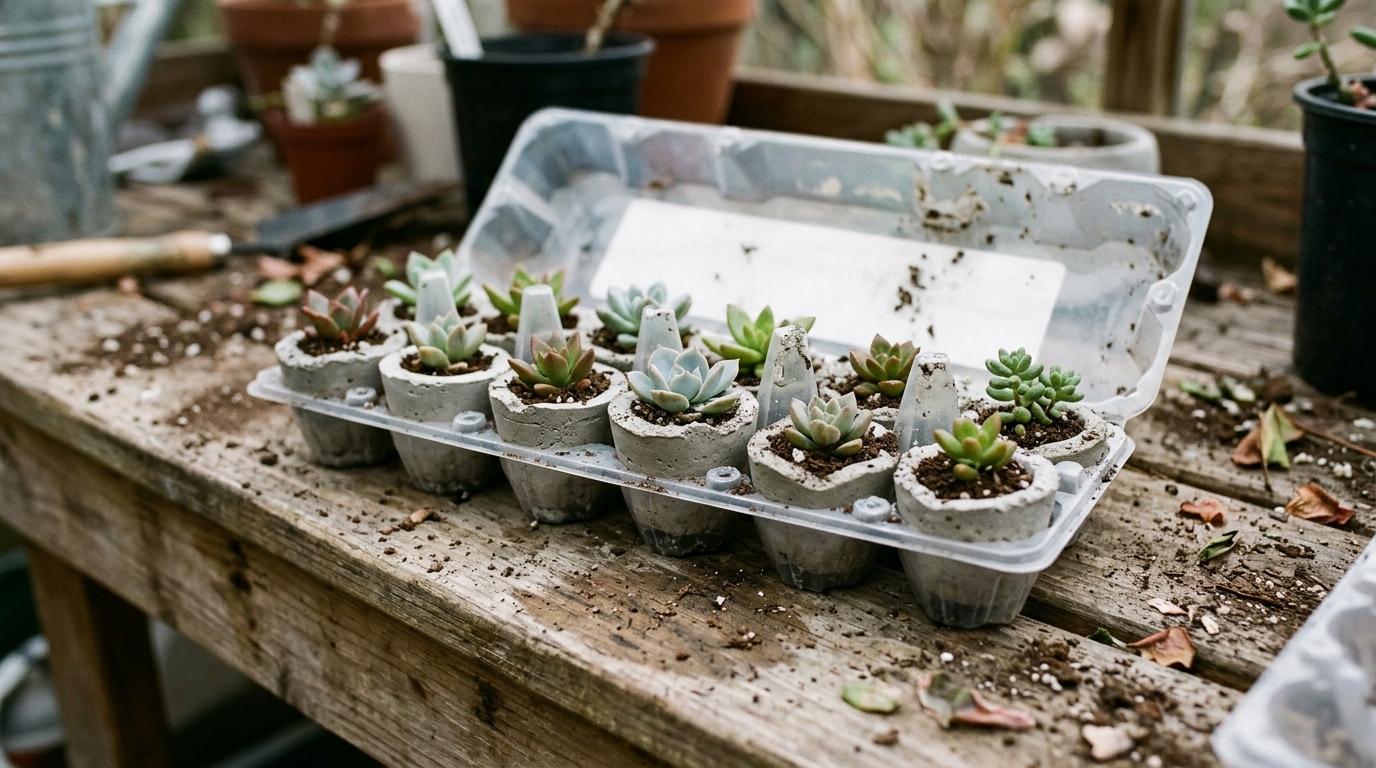
A plastic egg carton makes a whole batch of tiny pots at once. Fill each cup with cement, press a small stone or a smaller cup into the middle and let them cure. Pop them out and you have a dozen mini planters for little succulents. They make sweet party favors or teacher gifts. Plastic cartons work best because they bend and release easily. How many tiny pots could you fill?
You will need: A plastic egg carton, cement mix, small stones or tiny cups, cooking spray, gloves and a dust mask.
How to make it: 1. Spray the carton with cooking spray. 2. Fill each cup with cement and press a small stone into the center. 3. Cure for a day, pop out the pots and add tiny succulents.
Mini White Pots From Plastic Cups

Use white cement or add a little white paint to your mix and you get soft, light pots that look perfect on a windowsill. Plastic cups of different sizes make a family of pots that look great grouped together. Lightly sand the rims for a smooth finish. With a couple of succulents tucked inside, they look like something from a home store. They are also a great first project if you are new to cement crafts. Which windowsill would get your first set?
You will need: Plastic cups in two sizes, white cement or cement mix, sandpaper, gloves, a dust mask and small plants.
How to make it: 1. Fill the larger cup with cement and press a smaller cup into the middle. 2. Let it cure for a day and pop it out. 3. Sand the rim smooth and plant a small succulent.
Simple Cement Coasters

Cement coasters are cheap, quick and look great under a bright mug. Use plastic lids or silicone molds, pour in a thin layer of cement and tap out the air bubbles. Once they cure, sand the bottoms and stick on felt circles so they do not scratch the table. Seal the tops so drinks do not leave rings. Make a set of four and tie them with twine for an easy gift. Who would love a set of these?
You will need: Plastic lids or round silicone molds, cement mix, sandpaper, felt circles, clear sealer, gloves and a dust mask.
How to make it: 1. Pour about half an inch of cement into each mold. 2. Tap the sides to release air bubbles and cure for a day. 3. Sand, seal and add felt circles underneath.
Geometric Planter From a Juice Carton
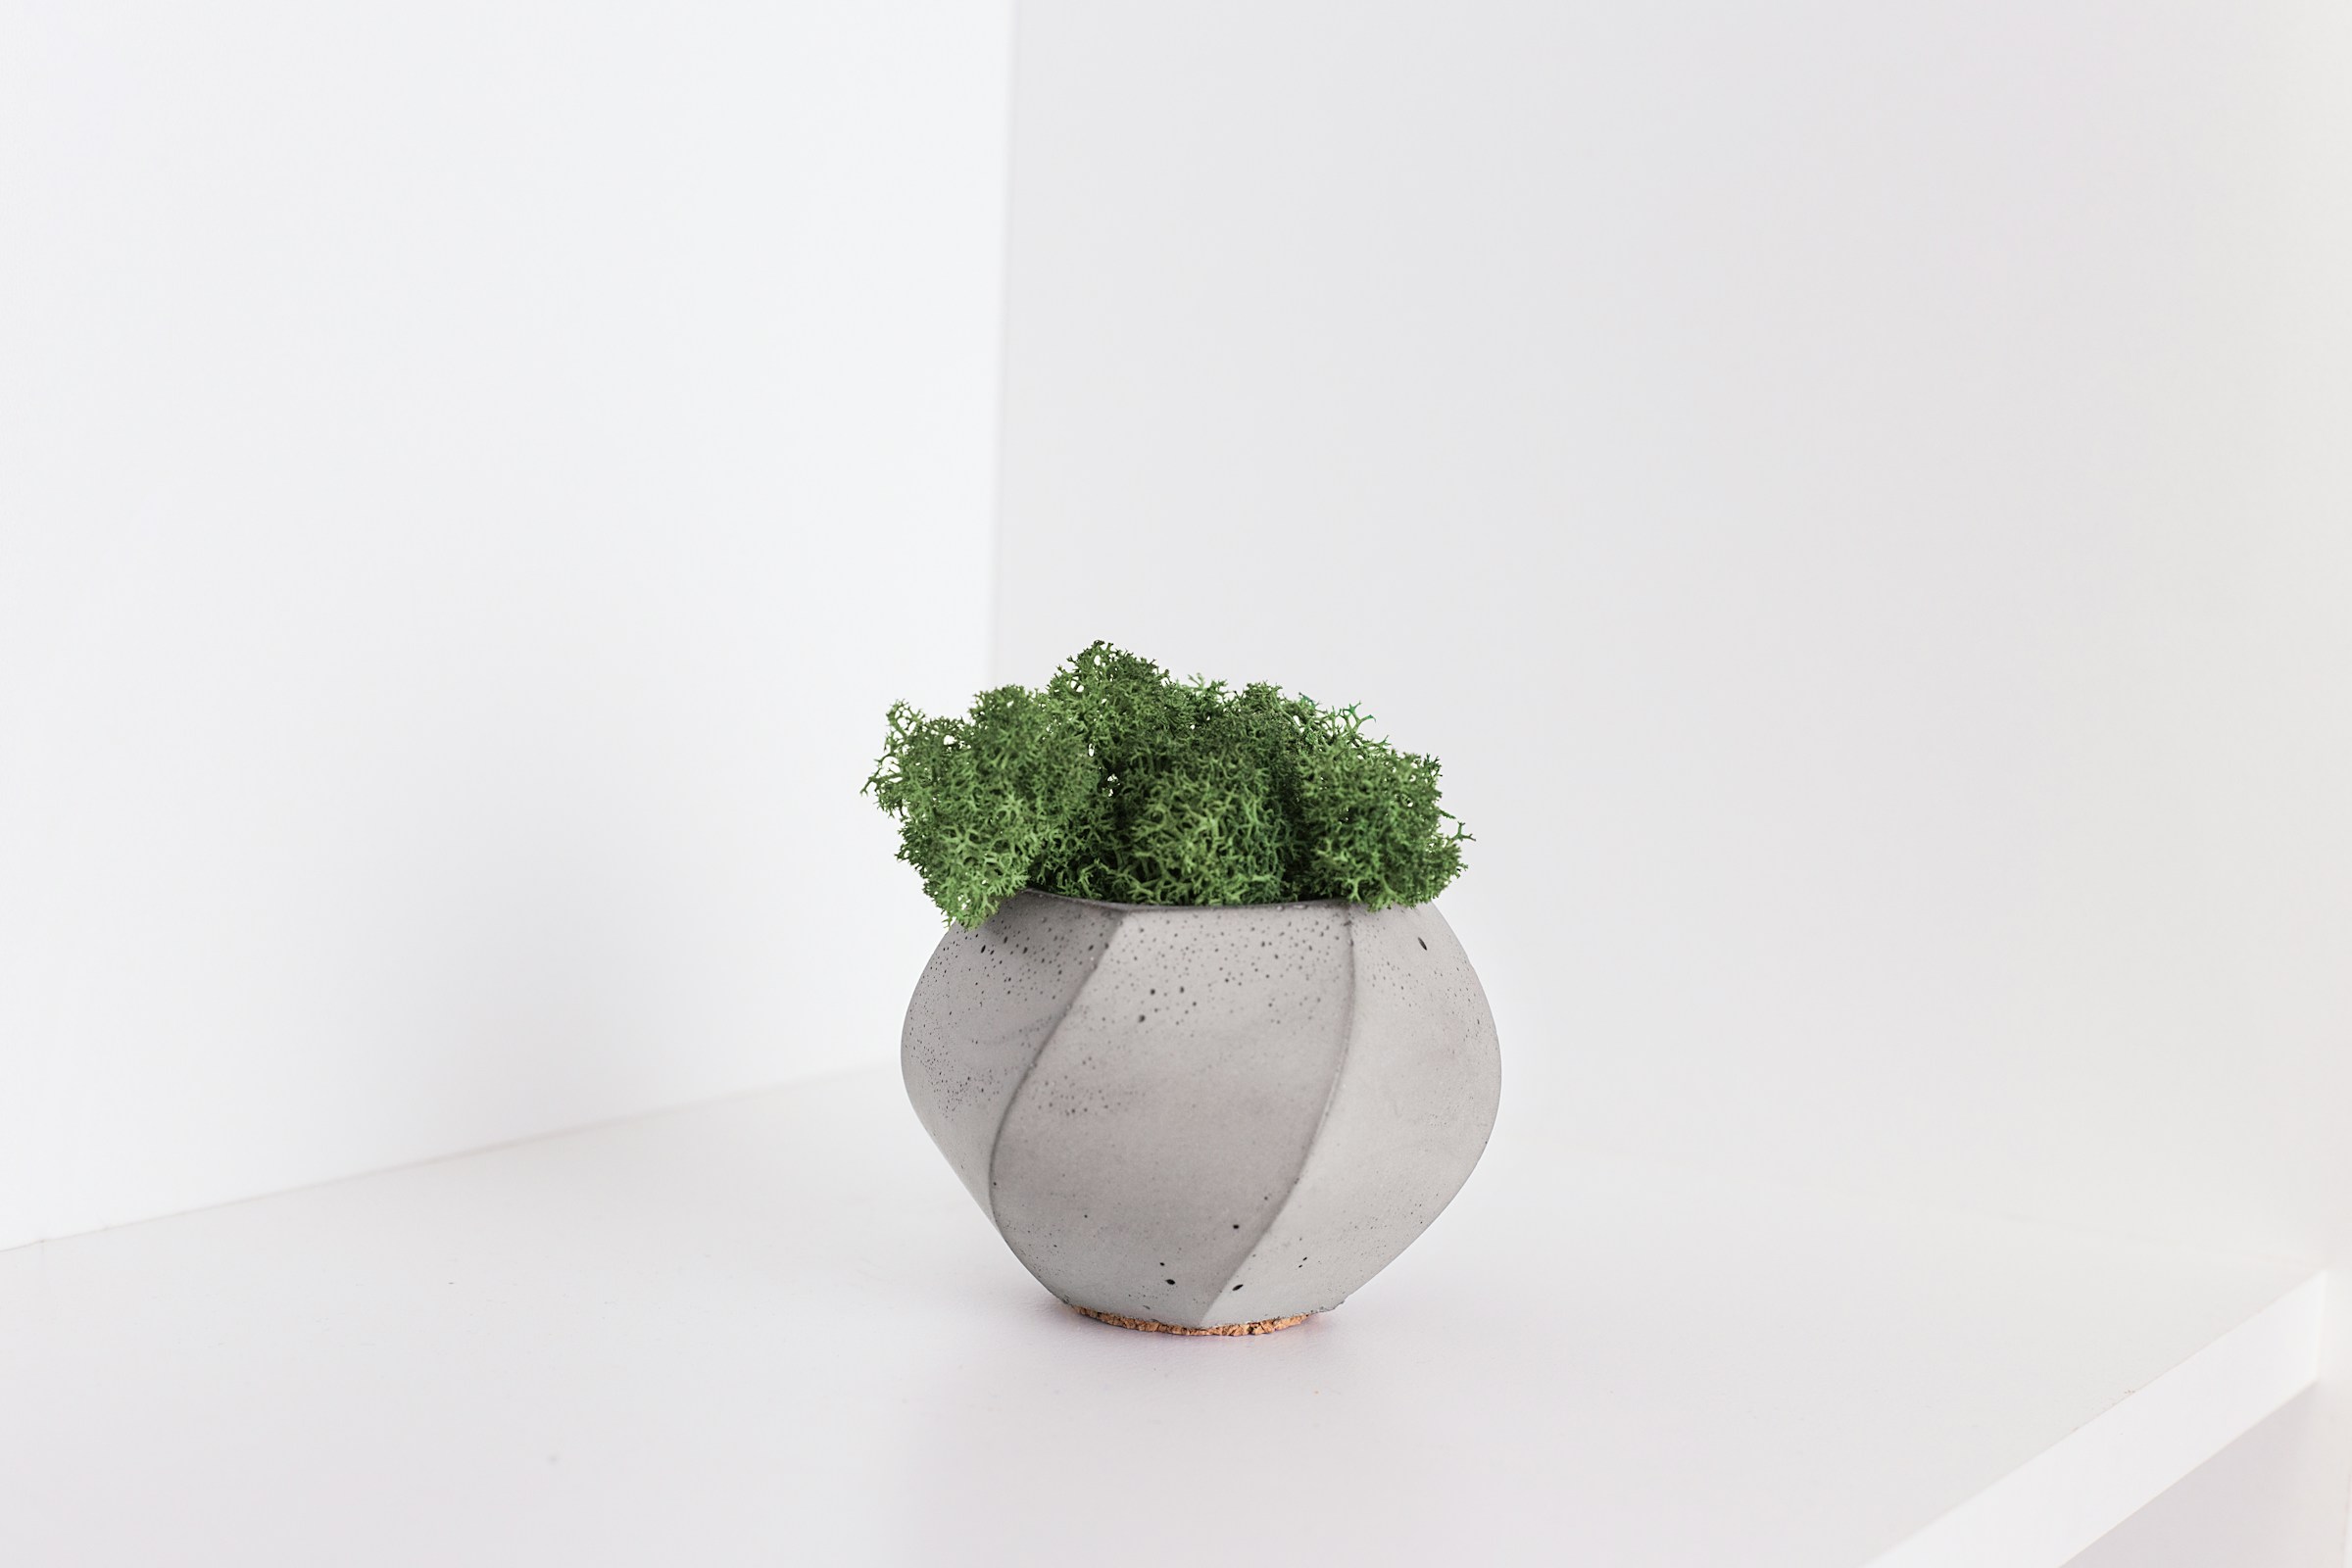
An empty juice carton or milk carton can make a planter with crisp angles. Cut the carton, press in a smaller carton for the inside and pour cement between them. You can tilt it while it sets for a fun slanted shape. Peel away the carton and you have a modern little pot that looks like it came from a design shop. A bit of moss on top makes it look extra fresh. Would you go for straight lines or a tilted look?
You will need: An empty juice or milk carton, a smaller carton or box, cement mix, tape, gloves and a dust mask.
How to make it: 1. Cut the top off both cartons and tape the small one inside the large one. 2. Pour cement between them and tilt if you like. 3. Cure for a day, peel off the cartons and plant moss or a succulent.
Pedestal Trinket Bowls

Little cement bowls on a short base are perfect for rings, keys or tiny plants. Use a plastic bowl as your mold and add a short cup underneath for the pedestal. Make a few in different sizes and they look like a matching set. Smooth the edges with fine sandpaper and seal them so they stay clean. They look calm and stylish on a dresser or entry table. If you love budget decor that looks expensive, see our dollar store decor ideas. Where would yours go?
You will need: Small plastic bowls, short plastic cups, cement mix, fine sandpaper, sealer, gloves and a dust mask.
How to make it: 1. Pour cement into a bowl and press a smaller bowl in to shape the inside. 2. Cast a short cup of cement for the base and join them with a little wet cement. 3. Cure, sand and seal.
Cement Crafts for Fall: Little Pumpkins
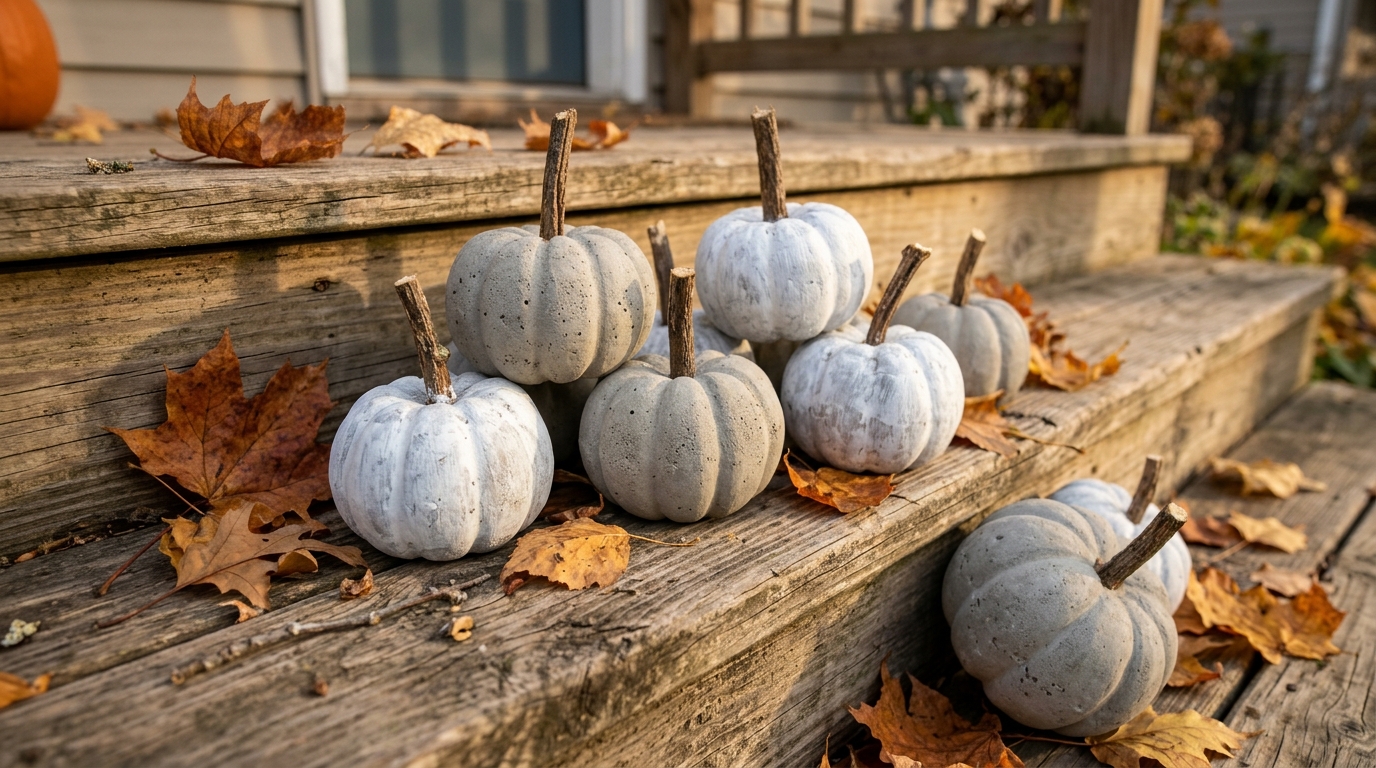
Cement pumpkins look amazing on a porch step and last for many seasons. Pour cement into an old stretchy sock or a round balloon mold, tie it off and wrap rubber bands around it to make the ribs. Once it cures, peel away the mold and add a real dried twig as the stem. Leave them gray or wash them with a little white paint for a soft farmhouse look. Which spot on your porch needs a little fall charm?
You will need: Old stretchy socks or round molds, cement mix, rubber bands, small twigs, glue, gloves and a dust mask.
How to make it: 1. Fill the sock with cement and tie it closed. 2. Wrap rubber bands around it to form the ribs and let it cure for two days. 3. Peel off the sock, remove the bands and glue on a twig stem.
Cement Crafts for Christmas: Paper Cone Trees

Roll poster board into cones, tape them well and fill them with cement to make a little forest of modern Christmas trees. Stand the cones point down in tall cups while they set. Once they cure, peel off the paper and touch the tips with gold paint. They look stunning on a mantel with greenery and battery fairy lights. It is the perfect way to finish a season of cement crafts. How many trees would you make for your mantel?
You will need: Poster board, strong tape, tall cups to hold the cones, cement mix, gold paint, gloves and a dust mask.
How to make it: 1. Roll the poster board into cones of different sizes and tape them. 2. Stand them point down in cups and fill with cement. 3. Cure for two days, peel off the paper and add gold to the tips.