DIY Christmas Coasters: 14 Cute Ideas for a Cozy Girls Night Craft Party
DIY Christmas coasters might be the coziest little craft you can make this season, and they are perfect for a girls night around the kitchen table. Picture it: mugs of cocoa, a pile of festive napkins, a few friends laughing while everyone makes a set to take home. Coasters are small, quick and cheap, so nobody feels pressure, and every finished one is useful the very next morning. They also make lovely gifts when you tie four together with ribbon, and they sell well at holiday craft fairs. Below you will find 14 easy DIY Christmas coasters, from napkin decoupage tiles to felt trees, crochet snowflakes and gingerbread wood rounds. Pick two or three favorites, gather your supplies, put the kettle on and invite your people over..
Napkin Decoupage Tile Coasters
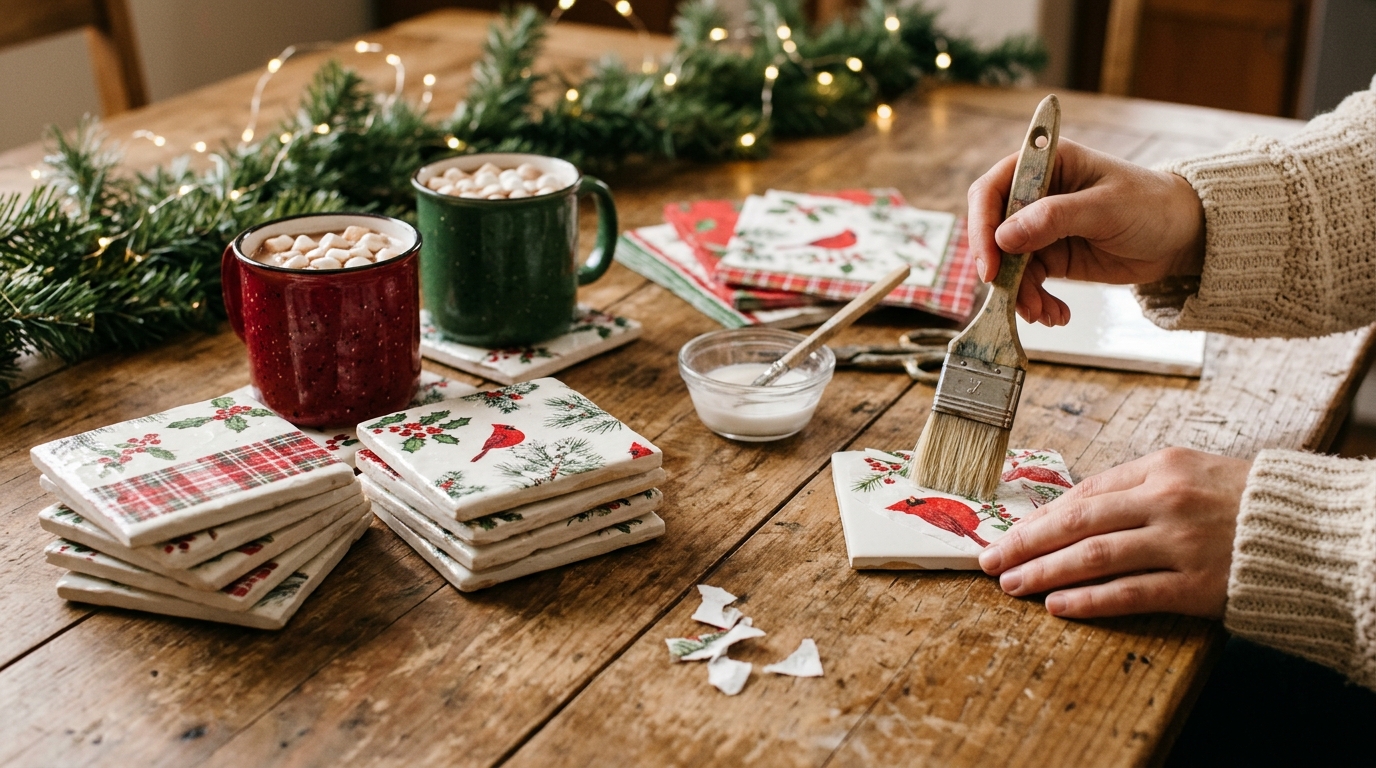
This is the one that started the whole craze. A plain white tile from the hardware store turns into a little holiday treasure once you smooth a printed paper napkin over it. Red plaid, cardinals and holly berries all look gorgeous, and nobody can tell it cost under two dollars. One crafter shared a festive napkin coaster post that collected thousands of likes in a single week, and it is easy to see why. Peel the napkin layers apart, keep only the printed top layer, and go slowly with the brush. Who will you make the first set for..
You will need: Plain white ceramic tiles (4 inch), printed Christmas paper napkins, decoupage glue, a soft flat brush, scissors, felt pads for the bottoms, clear acrylic sealer spray.
How to make it: 1. Separate the napkin and keep only the thin printed top layer. 2. Brush glue on the tile, lay the napkin on top and smooth it from the center out with the brush. 3. Let it dry, trim the edges, add two more thin coats of glue, then seal it and stick felt pads underneath.
Peppermint Candy Coasters
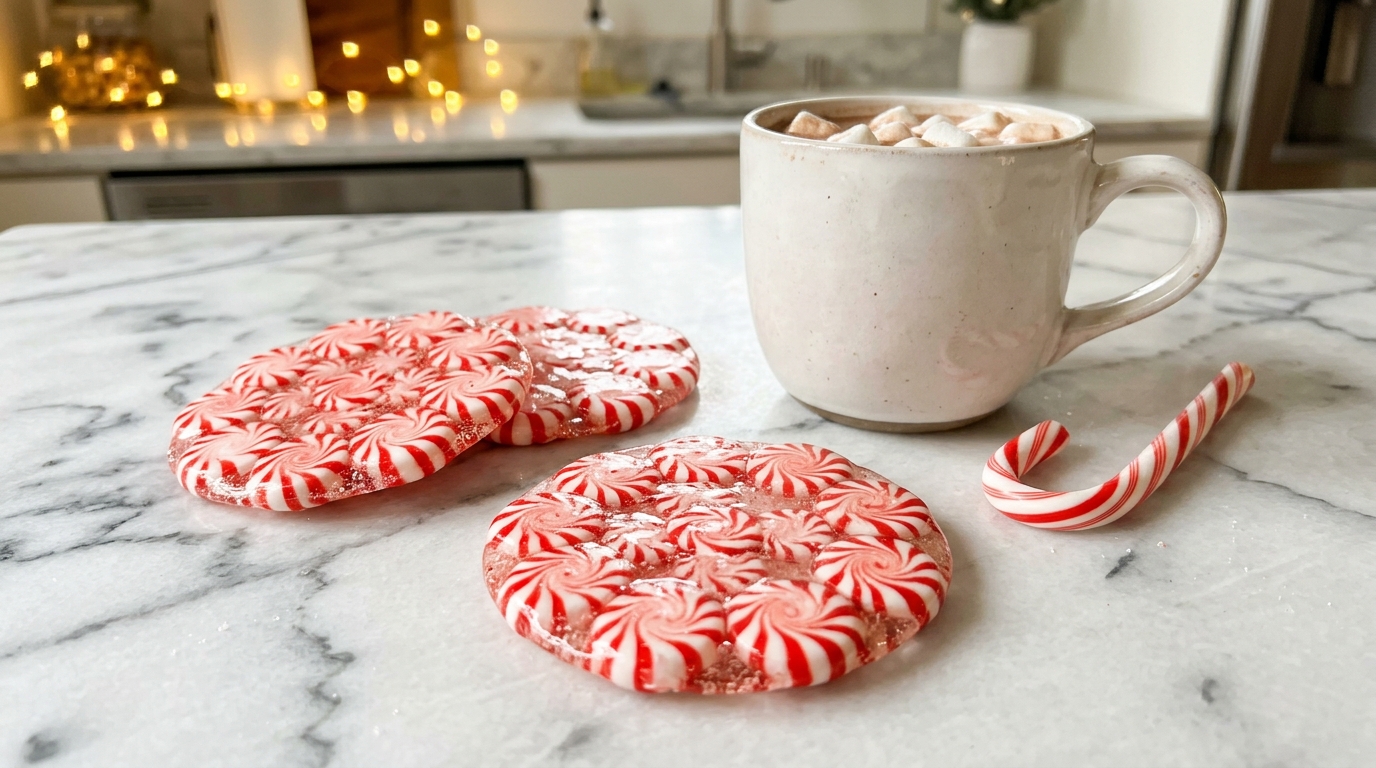
These sparkle like stained glass and smell like the holidays. Round peppermint candies are laid in a tight flower circle on a lined baking sheet and warmed until they just touch and melt together. Once cool, they lift off as one shiny disc that looks straight out of a candy shop window. They are best for cold drinks or as a sweet table decoration, since hot mugs can soften them. Kids love to unwrap the candies while the grown ups handle the oven. Would you make red and white or try green mint too?
You will need: Round peppermint candies, parchment paper, a baking sheet, an oven (adult help), a small spatula, an airtight tin for storing.
How to make it: 1. Unwrap the candies and place them touching in a circle on parchment. 2. Bake at a low heat for a few minutes, watching closely, just until they melt together. 3. Let them cool fully before lifting, then store in a tin between parchment sheets.
DIY Christmas Coasters in Crochet Snowflakes
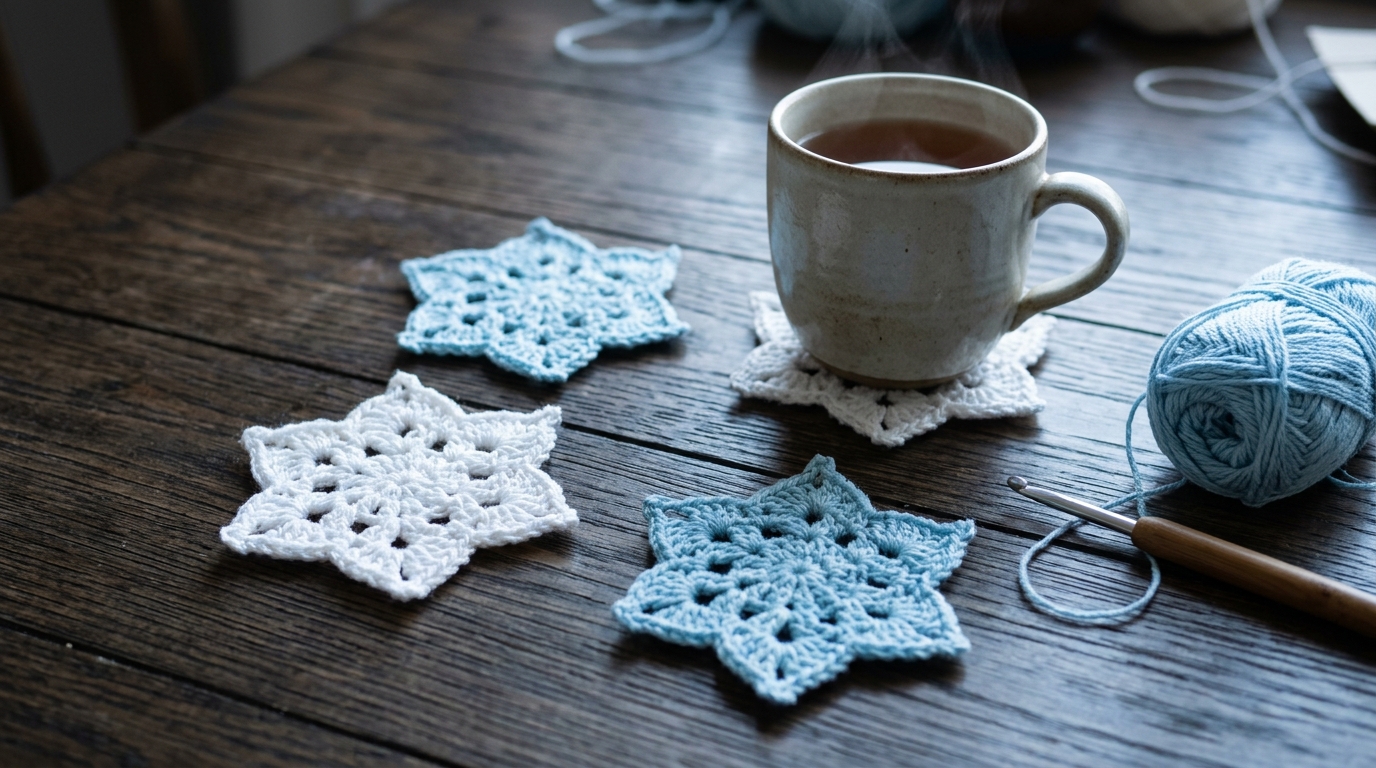
If someone in your group loves yarn, this is her moment. Lacy crochet snowflakes look delicate, but they make soft, washable DIY Christmas coasters that protect any table. White and icy blue cotton yarn gives a frosty, Scandinavian feel, and a whole set can be finished during one long movie night. Beginners can start with a simple six point pattern and add picot tips once they feel confident. Starch them lightly so they lie flat. Will you make a full set of six or just a pair for your tea?
You will need: Cotton yarn in white and icy blue, a 3.5 mm crochet hook, scissors, a yarn needle, light spray starch, a few pins and a towel for blocking.
How to make it: 1. Crochet a small center ring and work rounds of chains and double crochet to form six points. 2. Finish each point with a small picot and weave in the ends. 3. Pin the snowflake flat on a towel, spray with starch and let it dry overnight.
Painted Cork Board Coasters
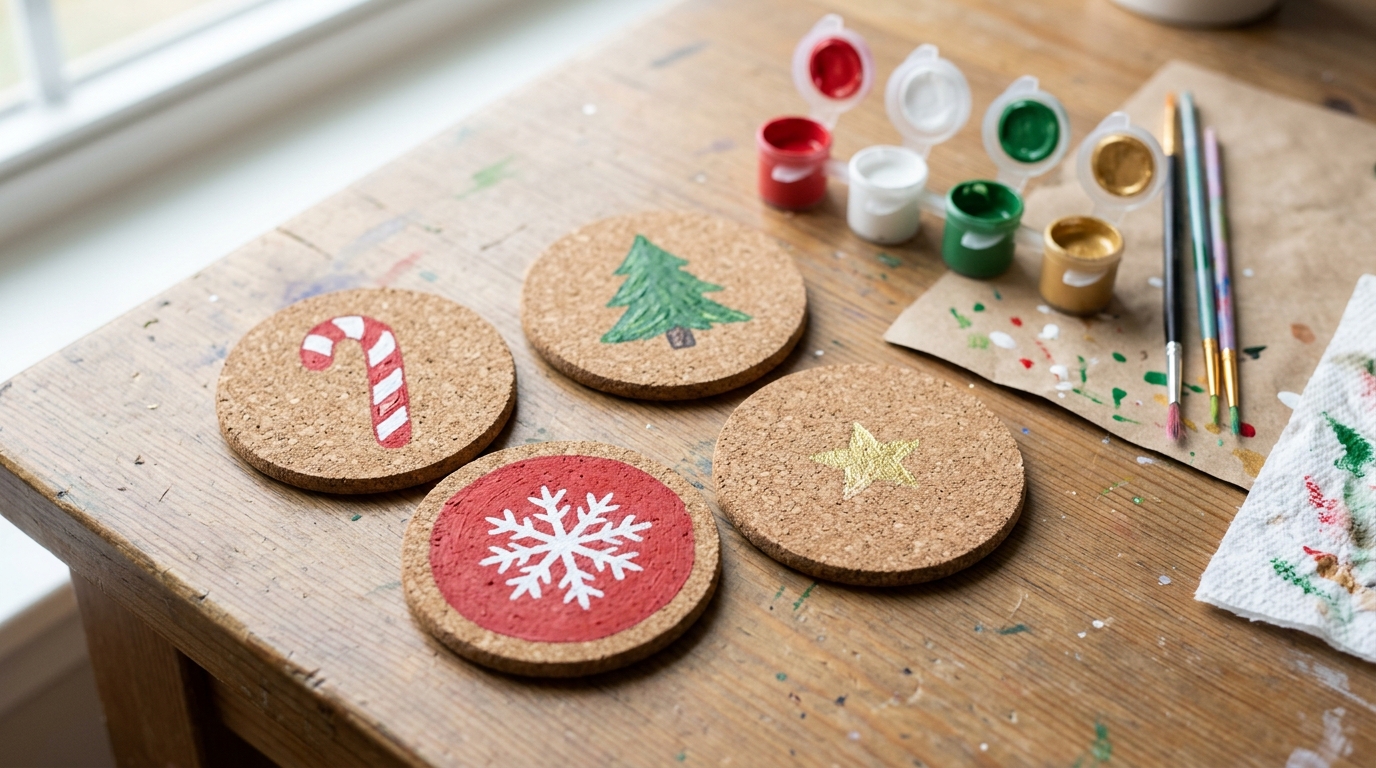
Cork rounds are cheap, light and drink a little moisture, which makes them perfect for painting. A candy cane, a tiny pine tree, a snowflake on red and a gold star make a cheerful mixed set, and simple shapes look the most stylish. Use a pencil to sketch first, then fill in with acrylic paint and a fine brush. Even friends who say they cannot draw will surprise themselves here. Leave some natural cork showing for a rustic feel. Which simple shape would you paint first?
You will need: Plain round cork coasters, acrylic craft paints in red, green, white and gold, fine brushes, a pencil, a paper plate for mixing, clear matte sealer.
How to make it: 1. Sketch a simple holiday shape lightly in pencil. 2. Paint the shape in two thin coats and let each coat dry. 3. Add white or gold details, then seal the top with a clear matte sealer.
DIY Christmas Coasters From Wood Slices
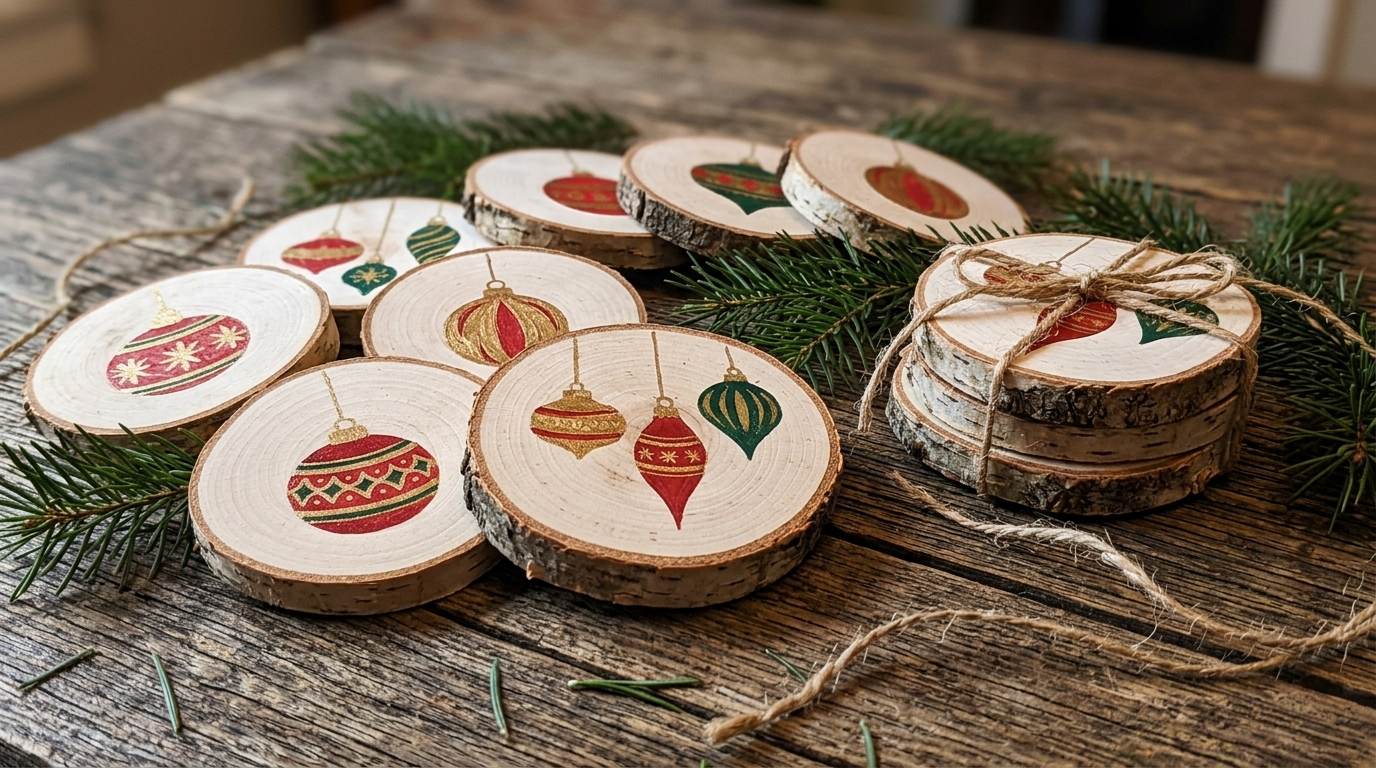
Nothing feels more farmhouse than birch wood slices with the bark still on. These DIY Christmas coasters show painted vintage ornaments on the pale wood, and the bark edge frames each one like a little picture. Buy sanded slices in a craft pack or ask a handy family member to cut and dry a few from a fallen branch. Sand the face smooth, paint a round ornament with a cap and hook, and add gold lines for shine. A stack tied with twine is a gift any grandma would treasure. Who on your list loves rustic decor?
You will need: Sanded birch wood slices about 4 inches wide, fine sandpaper, acrylic paints in red, green and gold, small brushes, clear water based sealer, jute twine.
How to make it: 1. Sand each slice smooth and wipe off the dust. 2. Paint an ornament shape in the center, then add stripes, dots and a gold cap. 3. Seal the top and edges twice and tie four together with twine for gifting.
DIY Christmas Coasters With Felt Trees
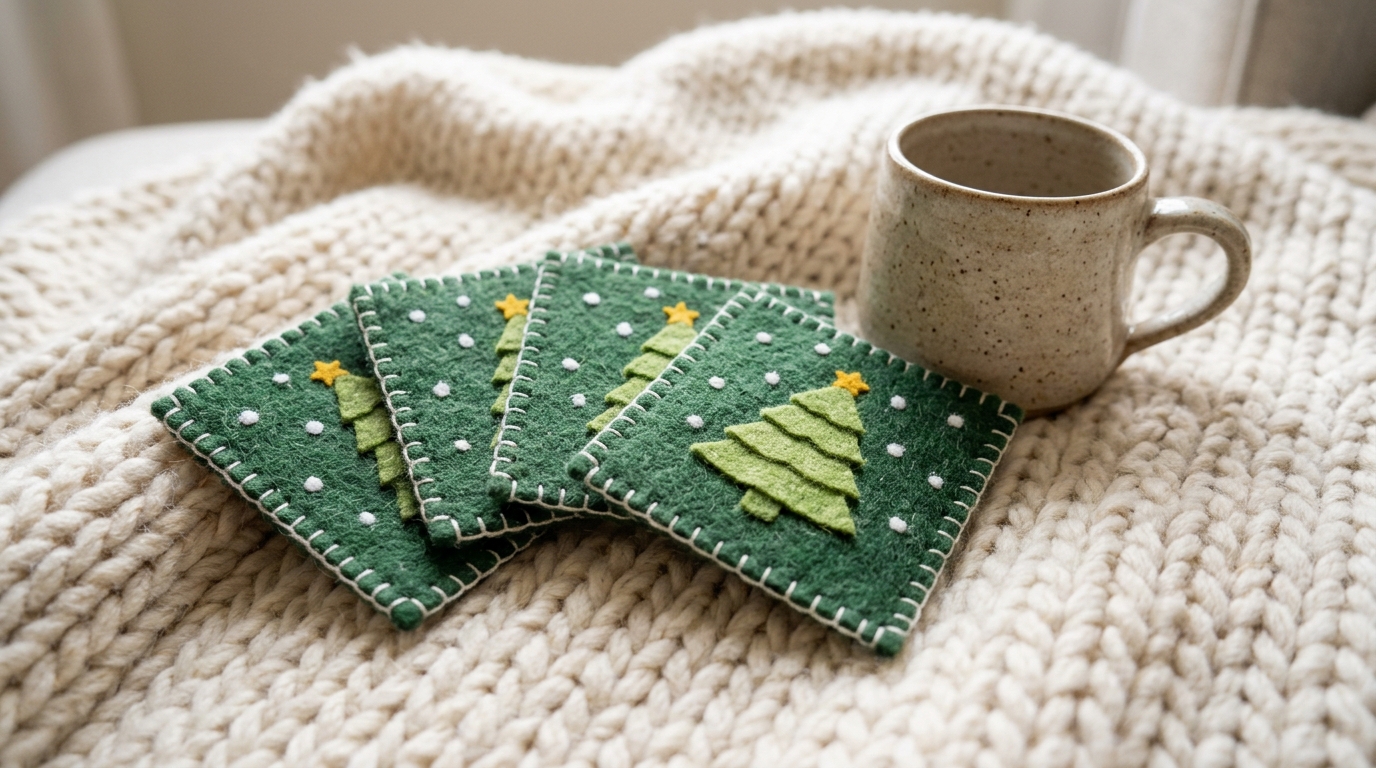
Felt is friendly, forgiving and soft under a mug, so these are a great pick for friends who are new to sewing. A dark green square gets a layered lighter green tree, tiny white dots for snow and a little yellow star on top. Blanket stitch around the edge in white thread for that cozy handmade look. If you skip sewing, fabric glue works too. Lay four of them out on a knit throw and the whole room feels warmer. Would you add a small felt gift under each tree?
You will need: Stiff felt sheets in dark green, light green, white and yellow, white embroidery thread, an embroidery needle, sharp scissors, fabric glue, a paper tree template.
How to make it: 1. Cut two dark green squares and one layered tree, one star and small snow dots. 2. Glue or stitch the tree, star and dots onto one square. 3. Stack both squares and blanket stitch around all four sides.
Plaid Fabric Coasters
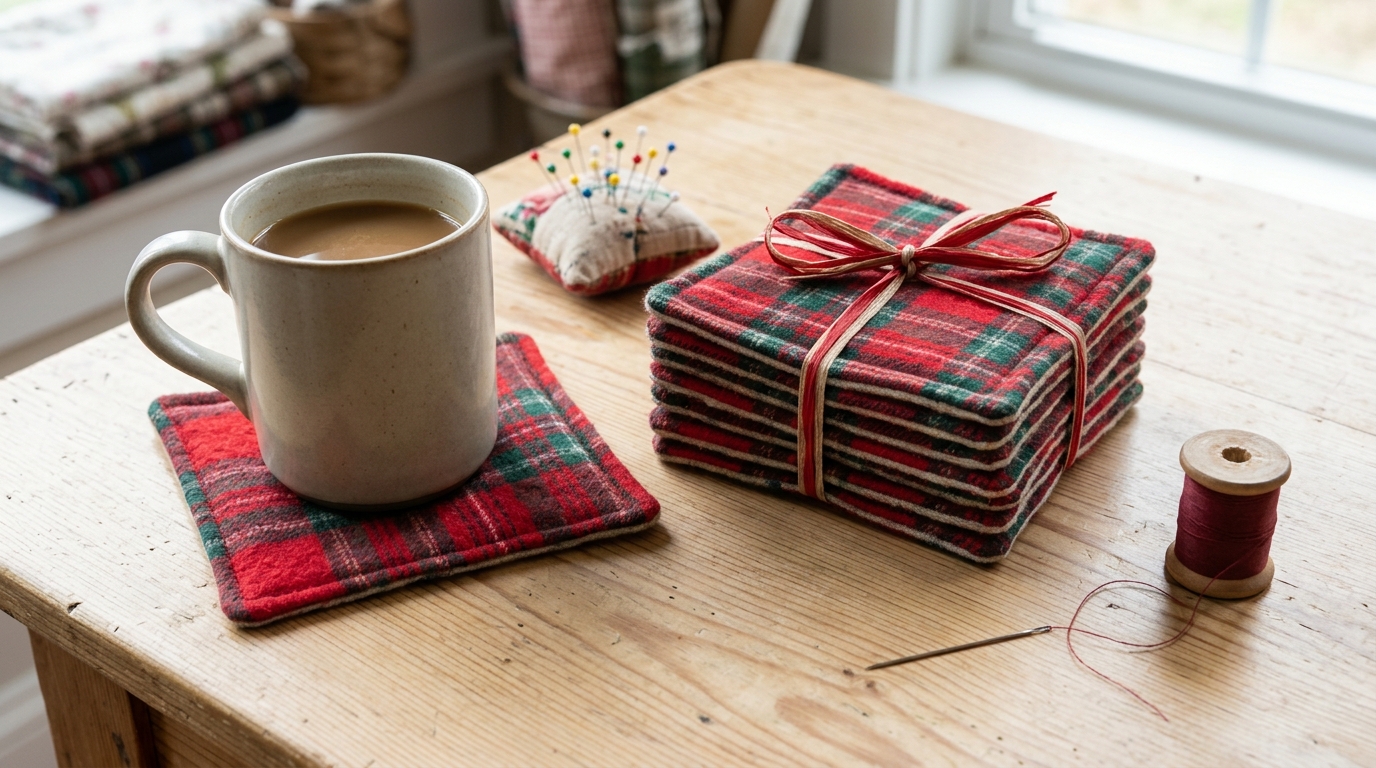
Red and green tartan flannel instantly says cabin Christmas. These sewn fabric coasters are two squares of plaid with a thin layer of batting inside, turned and topstitched so they feel padded and neat. They wash beautifully and soak up drips from cold drinks. Use scraps from an old flannel shirt to keep the cost close to zero. A stack of six tied with a thin red ribbon looks like something from a boutique gift shop. Do you have a plaid shirt waiting in a drawer for a second life?
You will need: Plaid flannel fabric, thin cotton batting, matching thread, a sewing machine or needle, pins, scissors, an iron, narrow red ribbon.
How to make it: 1. Cut two 5 inch fabric squares and one batting square for each coaster. 2. Sew around the edges with right sides together, leaving a small gap, then turn and press. 3. Topstitch all the way around to close the gap and give a crisp finish.
DIY Christmas Coasters With Stamped Clay
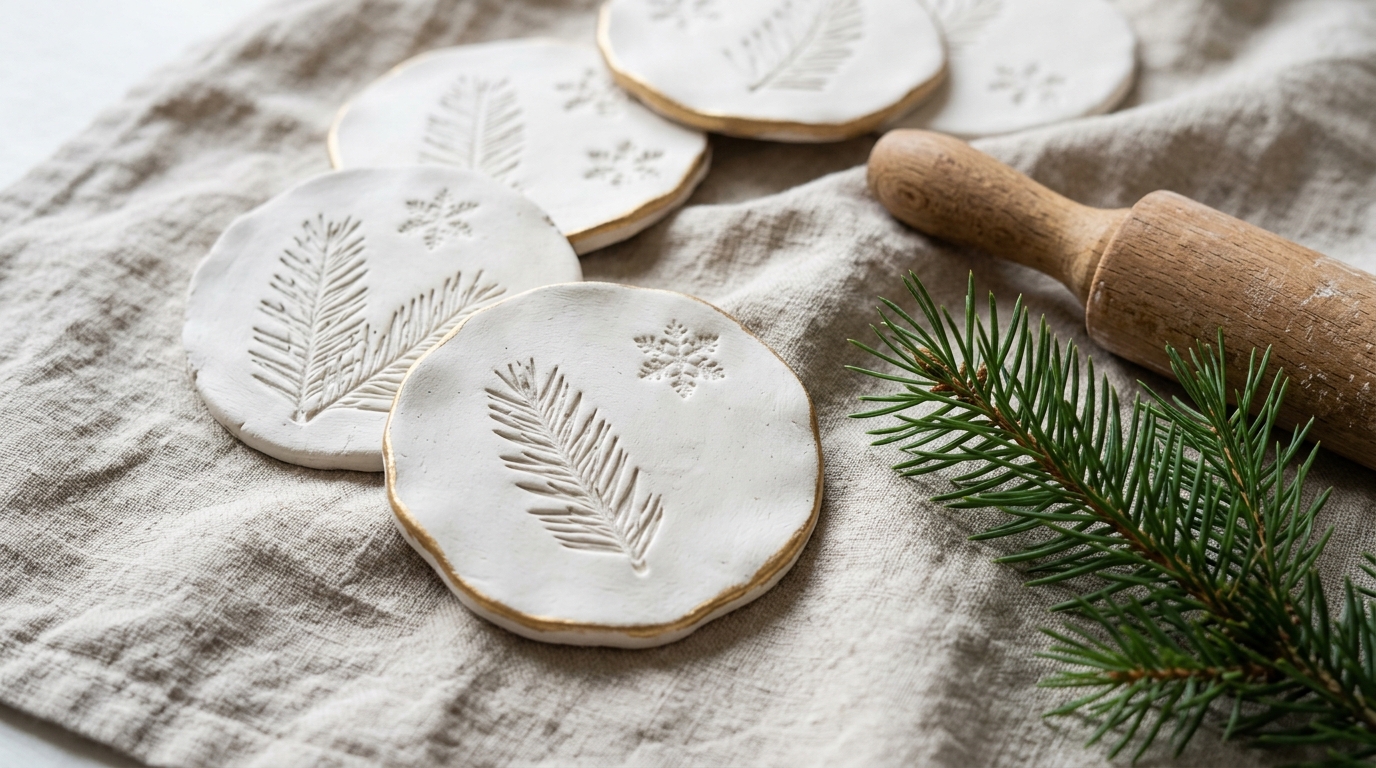
Air dry clay is the quiet star of this list. Roll it out, press a real pine sprig or a rubber snowflake stamp into the surface, and cut a circle with a bowl as your guide. Once dry, the pattern looks like fine pottery. A little gold paint on the edges takes these DIY Christmas coasters from simple to elegant. They take about two days to dry, so make them early in the season. Seal them well so they can handle a damp mug. Would you keep them pure white or add a touch of gold?
You will need: White air dry clay, a rolling pin, a small bowl to cut circles, real pine sprigs or snowflake stamps, fine sandpaper, gold acrylic paint, clear waterproof sealer, felt pads.
How to make it: 1. Roll the clay to about a quarter inch thick and press pine sprigs or stamps into it. 2. Cut circles, smooth the edges with a damp finger and let them dry for 48 hours, flipping once. 3. Sand lightly, paint the edges gold and seal them twice.
Gingerbread Painted Coasters
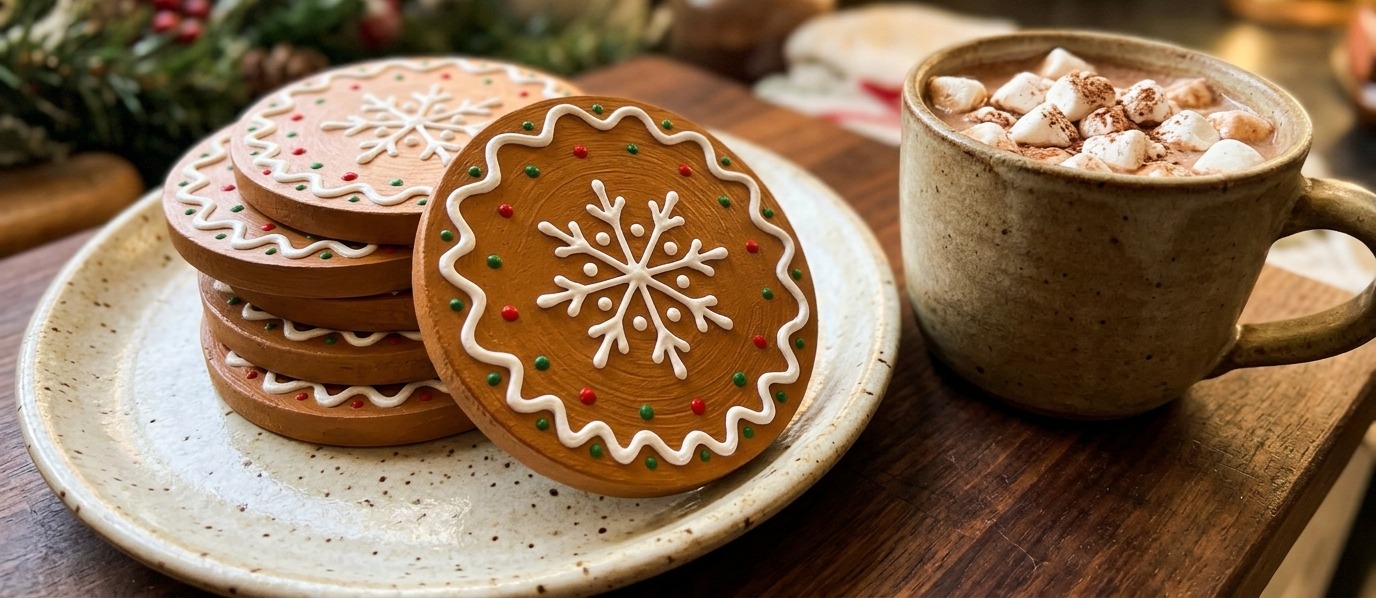
These look good enough to eat, which always gets a laugh at the table. Plain wood rounds are painted a warm cookie brown, then decorated with white paint pens to copy piped icing: wavy borders, little dots and a snowflake in the middle. Red and green dots look like candy buttons. They are fun for a mixed group because there is no wrong way to decorate a gingerbread cookie. Set them next to a plate of real cookies and watch guests reach for the wrong one. Which icing pattern would you try?
You will need: Unfinished round wood coasters, brown acrylic paint, a white paint pen, red and green paint for dots, a small brush, clear sealer.
How to make it: 1. Paint the wood rounds warm brown on the top and edges and let them dry. 2. Use a white paint pen to draw wavy icing borders and a snowflake or swirl. 3. Dot on red and green candy buttons and finish with clear sealer.
Mosaic Tile Coasters
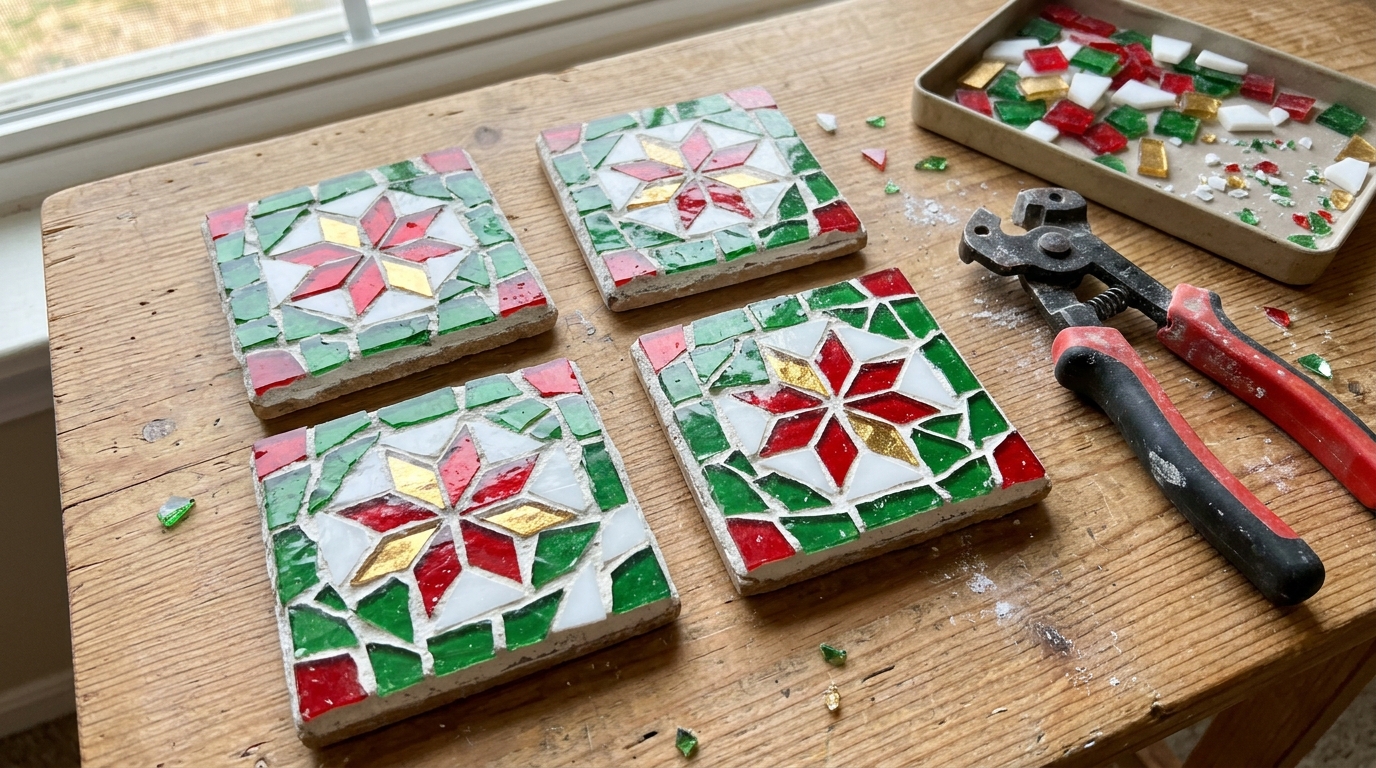
Mosaic is slow and relaxing, which makes it perfect for a long evening of chatting. Small pieces of red, green, white and gold glass tile are pressed onto a square base in a simple star pattern, then grouted so the colors pop. Tile nippers make it easy to shape pieces, and safety glasses keep stray chips away from eyes. The finished coasters feel heavy and expensive, like something from a high end shop. Mix gold pieces in for a little holiday glow. Would you choose a star, a tree or a simple stripe?
You will need: Square tile or wood base, small glass mosaic tiles, tile nippers, safety glasses, tile adhesive, sanded grout in white, a sponge, cork backing.
How to make it: 1. Plan your star on paper and nip tiles into small pieces while wearing safety glasses. 2. Glue the pieces onto the base, leaving small gaps, and let them set overnight. 3. Spread grout, wipe off the extra with a damp sponge, buff and add cork to the back.
DIY Christmas Coasters With Embroidery
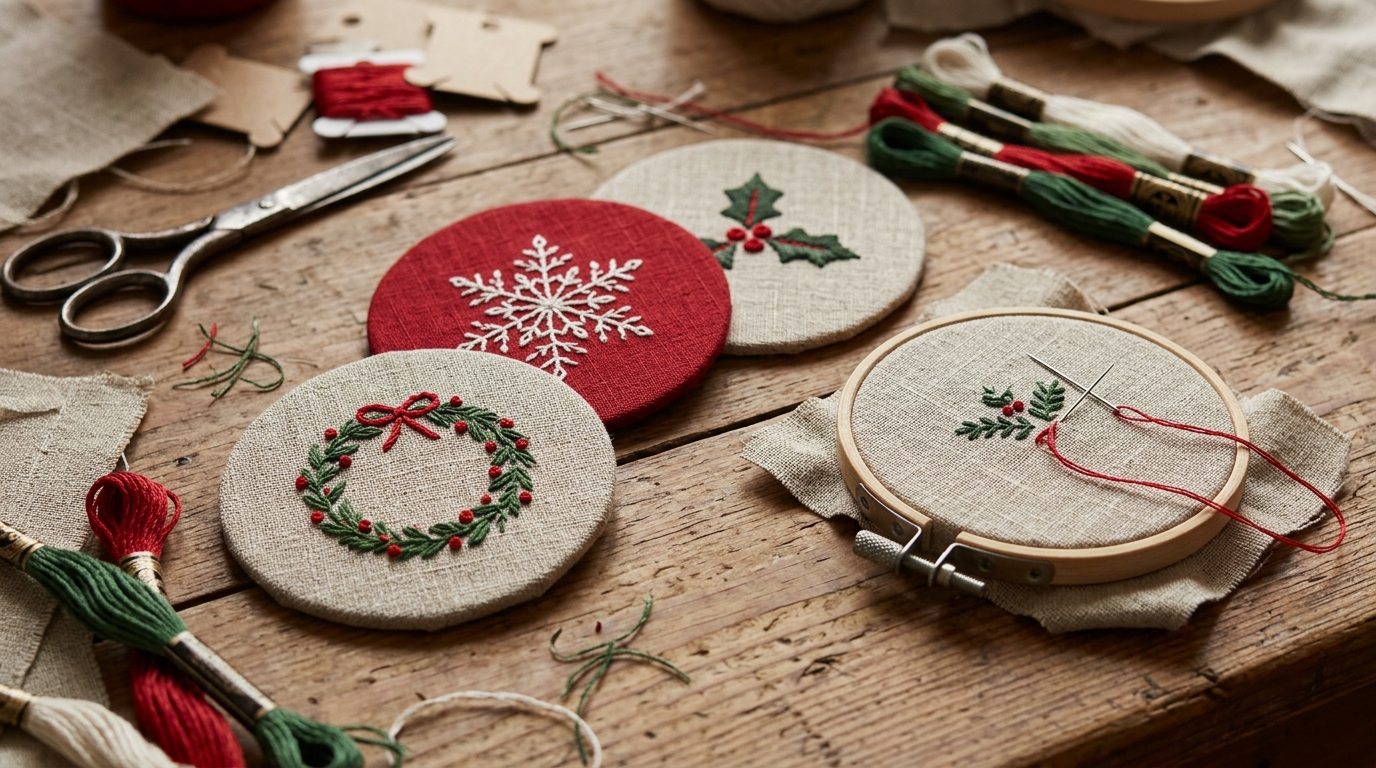
Embroidery hoops and holiday thread make a wonderfully calm craft night. These DIY Christmas coasters use natural linen with a stitched holly sprig, a tiny green wreath with a bow and a white snowflake on red. Simple stitches like back stitch, satin stitch and French knots are all you need. Once the design is done, back each circle with felt and trim neatly. Linen softens with every wash, so they only get prettier with use. If you enjoy slow projects like this, you will also love these Christmas crafts for adults. Which stitch will you learn first?
You will need: Natural linen and red linen scraps, embroidery floss in red, green and white, a small embroidery hoop, an embroidery needle, felt for backing, fabric glue, small scissors.
How to make it: 1. Trace a small holly, wreath or snowflake design lightly onto linen in the hoop. 2. Stitch the design with back stitch, satin stitch and French knots. 3. Cut the linen into a circle, glue it to a felt backing and trim the edges neatly.
Photo Transfer Coasters
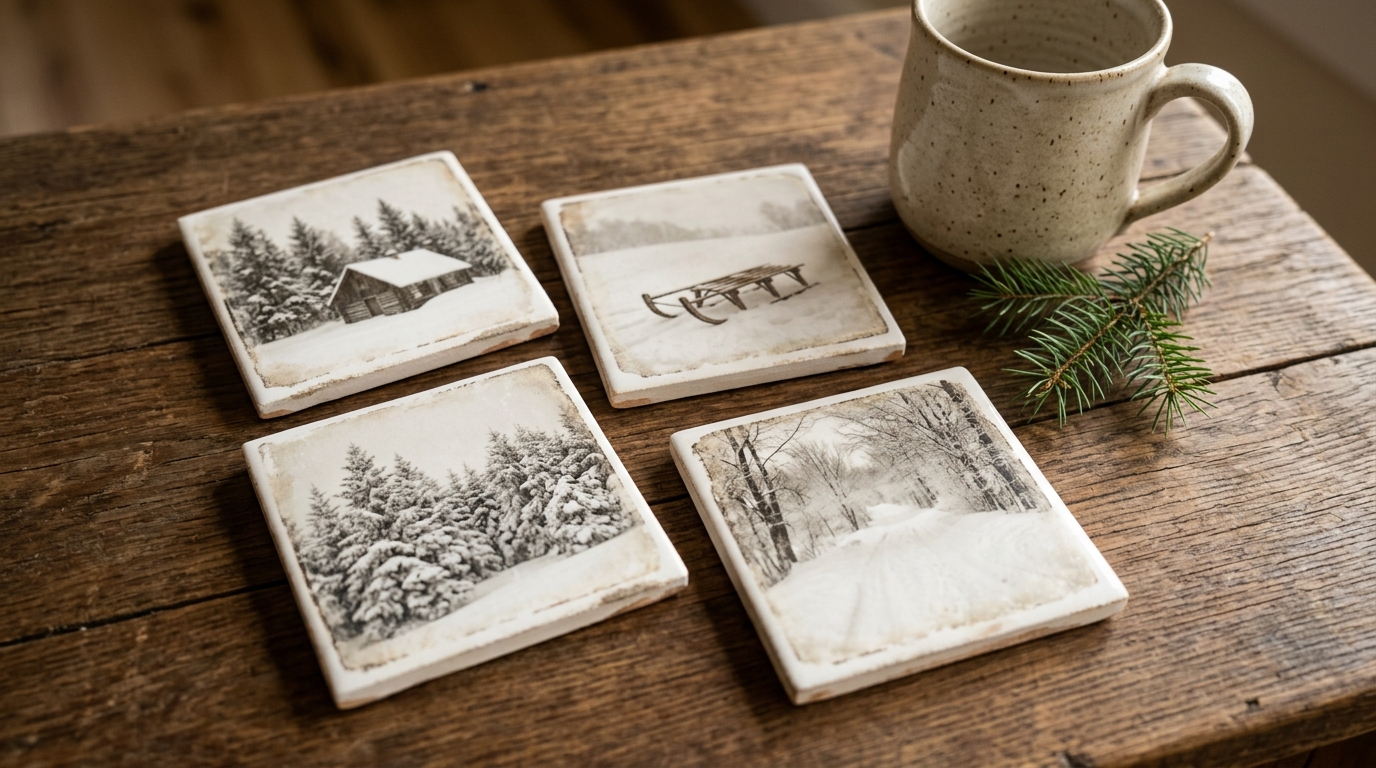
Photo transfer coasters feel personal and a little vintage. Print snowy winter photos, a cabin, a sled on a hill or a frosted forest, on a laser printer, then transfer the ink onto white tiles with transfer medium. Rubbing away the paper reveals a soft, faded image that looks like an old postcard. You can also use family photos from past holidays for a gift that brings happy tears. Remember that images reverse during the transfer. Which winter memory would you put on a tile?
You will need: White ceramic tiles, laser printed photos (reversed), photo transfer medium, a foam brush, a damp sponge, clear sealer, felt pads.
How to make it: 1. Brush transfer medium on the printed side of the photo and press it face down onto the tile. 2. Let it dry overnight, then wet the paper and gently rub it away with a sponge. 3. Let it dry, seal the top and add felt pads underneath.
Gift Set Tied With Ribbon
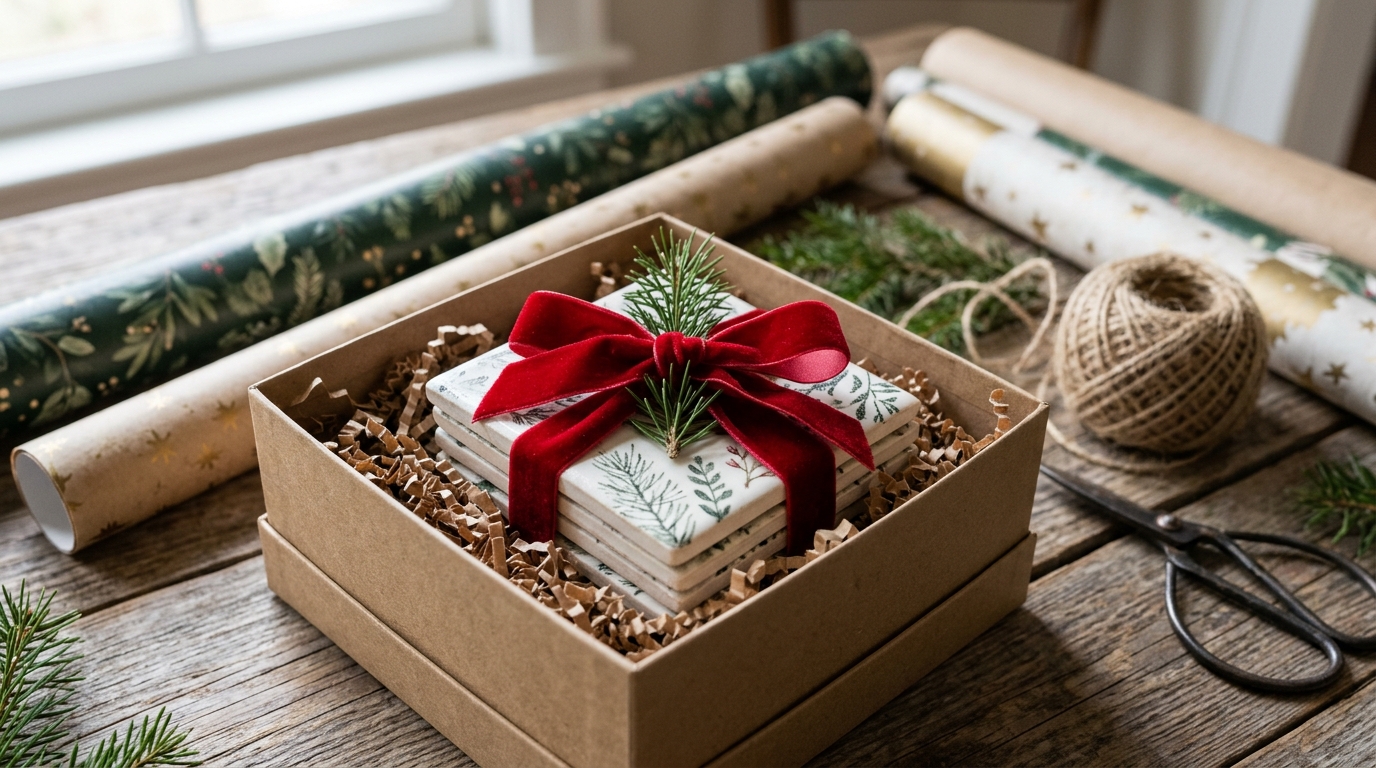
A set of four matching coasters is one of the easiest handmade gifts to wrap. Stack them, tie a wide velvet ribbon in a bow, tuck in a sprig of pine and nestle them in a kraft box with crinkle paper. Suddenly a project that cost a few dollars looks like a boutique present. These sets are perfect for teachers, neighbors, hostesses and coworkers. If you plan to sell them, a bundle of four with a matching ribbon always moves faster than single pieces. Who on your list would love a set?
You will need: Four finished coasters, wide red velvet ribbon, a small kraft gift box, crinkle paper shred, a fresh pine sprig, a handwritten gift tag.
How to make it: 1. Stack four matching coasters with felt sides down. 2. Tie them together with a wide velvet ribbon and tuck a pine sprig under the bow. 3. Place them in a kraft box on crinkle paper and add a handwritten tag.
Girls Night Setup Tips for DIY Christmas Coasters
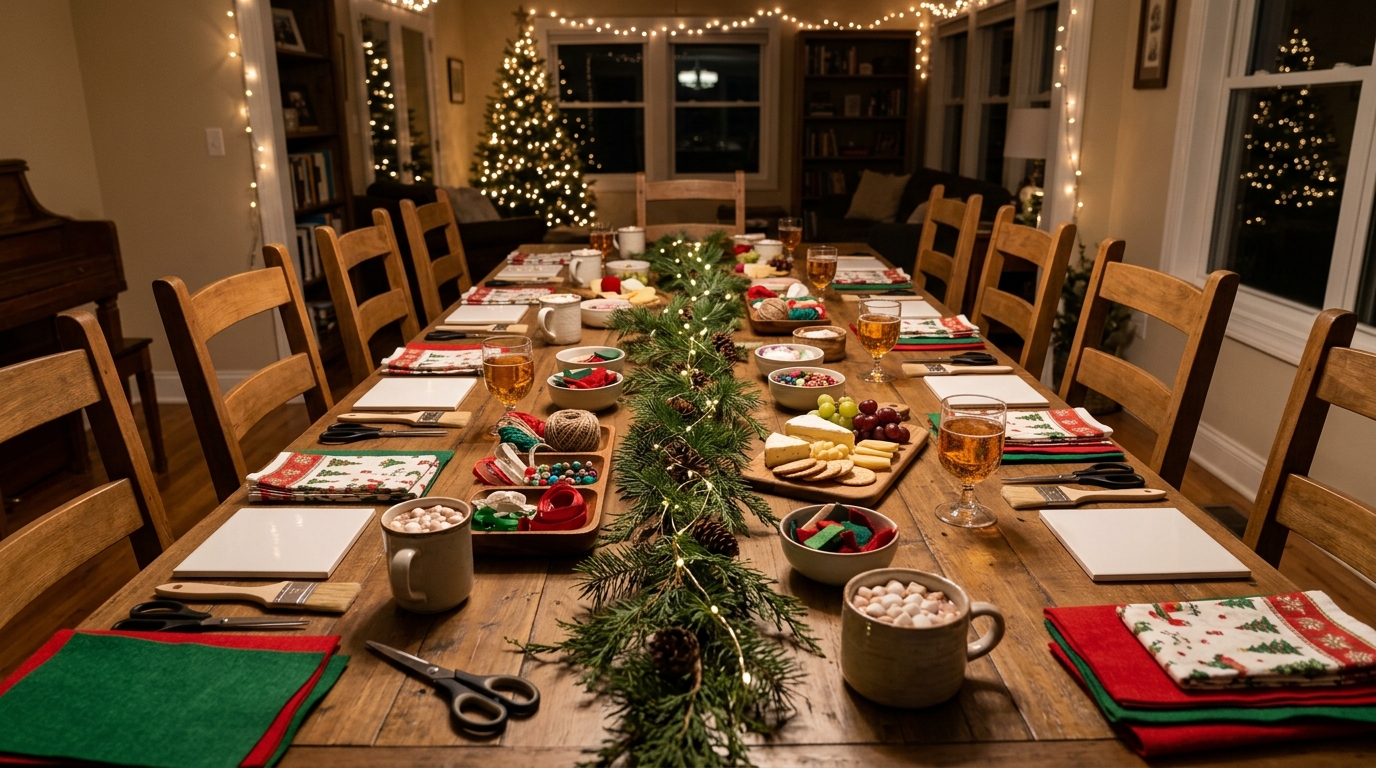
A little planning turns a craft session into a night everyone talks about. Set up stations so friends can move between decoupage tiles, felt trees and painting without bumping elbows. Put supplies in small bowls, lay out paper towels and keep drinks on their own little table away from the glue. A simple cheese board and cocoa bar keeps things relaxed. Cut tiles, felt and napkins ahead of time so guests can start right away. Plan DIY Christmas coasters that dry fast so everyone leaves with a finished set. When will you host yours?
You will need: Long table, drop cloth or kraft paper runner, small bowls for supplies, paper towels, pre cut tiles and felt, festive napkins, a cocoa bar and snacks, gift bags to take sets home.
How to make it: 1. Choose three projects and pre cut all materials. 2. Set up one station per project with tools and a sample coaster. 3. Leave a drying spot and gift bags by the door so everyone takes a finished set home.