Paper Christmas Trees: 14 Folded and Layered Trees That Look Like Magic
Paper Christmas trees are some of the fastest growing holiday crafts online this month. One short video of a fluffy foam paper tree passed 1.1 million views in just nine days, and other paper tree clips pulled more than 300,000 views in two days. We watched this foam paper tree video more times than we want to admit. It makes sense: a sheet of paper costs almost nothing, there is no mess of needles, and a little tree fits on a shelf, a desk or a windowsill. Some of these take five minutes, others are a cozy weekend project. Grab your scissors and a glue stick. Here are 14 folded, layered and stacked trees that look like pure holiday magic..
Paper Christmas Trees for Every Shelf
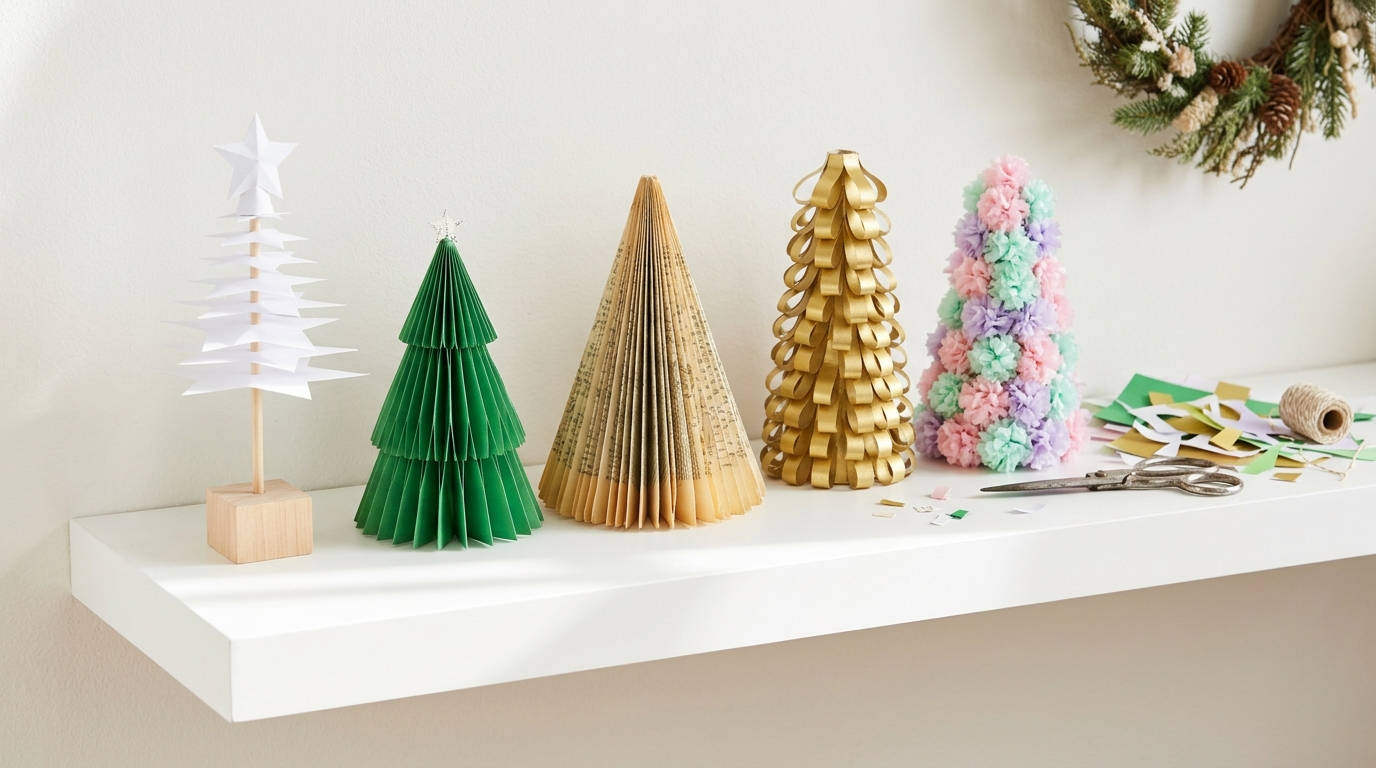
Look at what you can make with paper and a free afternoon. A white star tree, a green accordion fold, a tree from old book pages, a gold loop tree and a soft pastel pom tree all stand together on one shelf. Each one uses a different trick, and none of them needs special tools. Line up a few different paper Christmas trees and the whole shelf looks like a little winter forest. Choose your favorite style below and start folding..
You will need: cardstock, old book pages, tissue paper, scissors, a glue stick, double sided tape, wooden dowels.
How to make it: 1. Pick three styles from this list. 2. Make them in different heights. 3. Group them on a shelf with a few pine sprigs.
Layered Paper Star Tree

This tree looks so elegant, and it is just stars stacked on a stick. Cut paper stars in about ten sizes, from large to tiny. Poke a hole in each center and slide them onto a wooden dowel set in a small wood base, biggest at the bottom. Twist each star a little so the points spread out like branches. White and silver feel frosty and calm. If you love stars, see our paper Christmas stars too. Would you make yours white or gold?
You will need: white and silver cardstock, a star template in ten sizes, a pencil, scissors, a wooden dowel, a small wood block base.
How to make it: 1. Trace and cut stars from large to small. 2. Poke a hole in each center. 3. Stack them on the dowel from biggest to smallest and twist each one.
Paper Christmas Trees From One Sheet: Accordion Fold

This one takes about five minutes and one sheet of paper. Fold the paper back and forth like a fan, pinch it at the top, and spread the bottom into a triangle. A little glue holds the shape. Add a tiny gold star on top and it stands up by itself. Kids can make a whole row of them in different colors. It is the easiest of all the paper Christmas trees in this list. How many colors would you try?
You will need: one sheet of green paper, a glue stick, a small gold paper star.
How to make it: 1. Fold the sheet into narrow accordion pleats. 2. Pinch and glue the top together. 3. Spread the bottom open and glue on the star.
Paper Christmas Trees From Old Book Pages

An old paperback from a thrift store can become one of the most beautiful paper Christmas trees you will ever make. Fold each page toward the spine in the same pattern, and the book slowly turns into a round tree shape. It is calming work, like knitting with paper. Put a tiny star on top and set it on a bookshelf or a reading nook. It looks especially pretty with a warm battery fairy light strand nearby. What book would you fold?
You will need: an old paperback book, a ruler, a small star, glue.
How to make it: 1. Fold the top corner of each page down to the spine. 2. Fold the new bottom edge in to make a point. 3. Repeat on every page and stand the book up.
Fringe Layer Foam Paper Tree
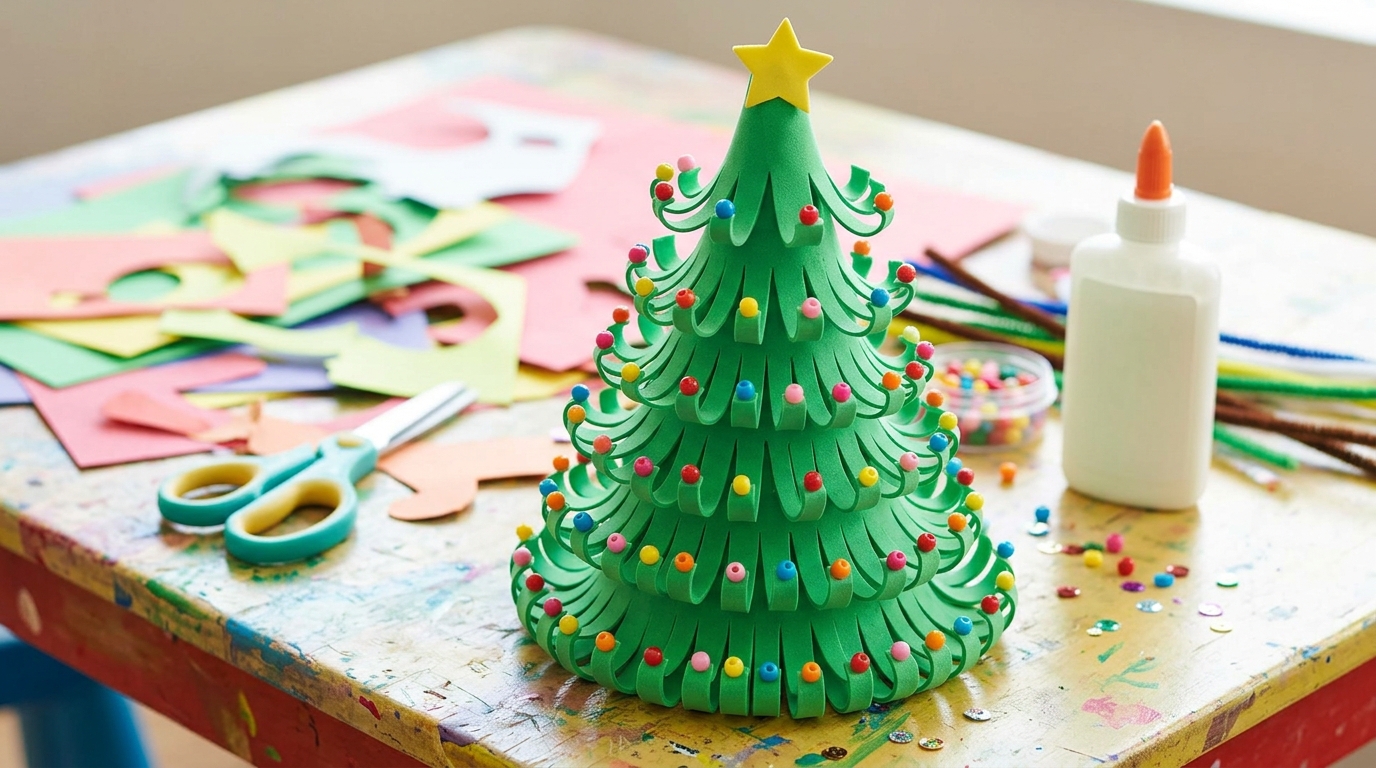
This is the tree that hit 1.1 million views in nine days, and it is still climbing this week. Cut strips of green foam paper, snip fringe along one edge and roll the fringe so it curls. Wrap the strips around a paper tube from the bottom up, each layer a little shorter. The curly fringe looks soft and fluffy, like a real fir. Glue on bead ornaments and a star. Kids love this one. Would you use green or snowy white?
You will need: green foam sheets, scissors, a paper tube, craft glue, small beads, a pencil for curling.
How to make it: 1. Cut strips and snip fringe along one long edge. 2. Curl the fringe around a pencil. 3. Wrap the strips around the tube in layers and add beads.
Honeycomb Paper Tree That Opens Flat

Honeycomb paper trees fold flat for storage and pop open into a full shape. You can buy honeycomb paper sheets or make your own by gluing stacks of tissue paper in stripes. Cut a half tree shape through the stack, then open it up and clip the two ends together. Bright red and green feel retro and fun. Store them flat in a folder after Christmas. Which color combo would you choose?
You will need: honeycomb tissue paper sheets, cardstock, scissors, glue, a binder clip or magnet.
How to make it: 1. Glue cardstock covers on both sides of the honeycomb stack. 2. Cut a half tree shape. 3. Open it up and clip the ends together.
Paper Christmas Trees That Slot Together
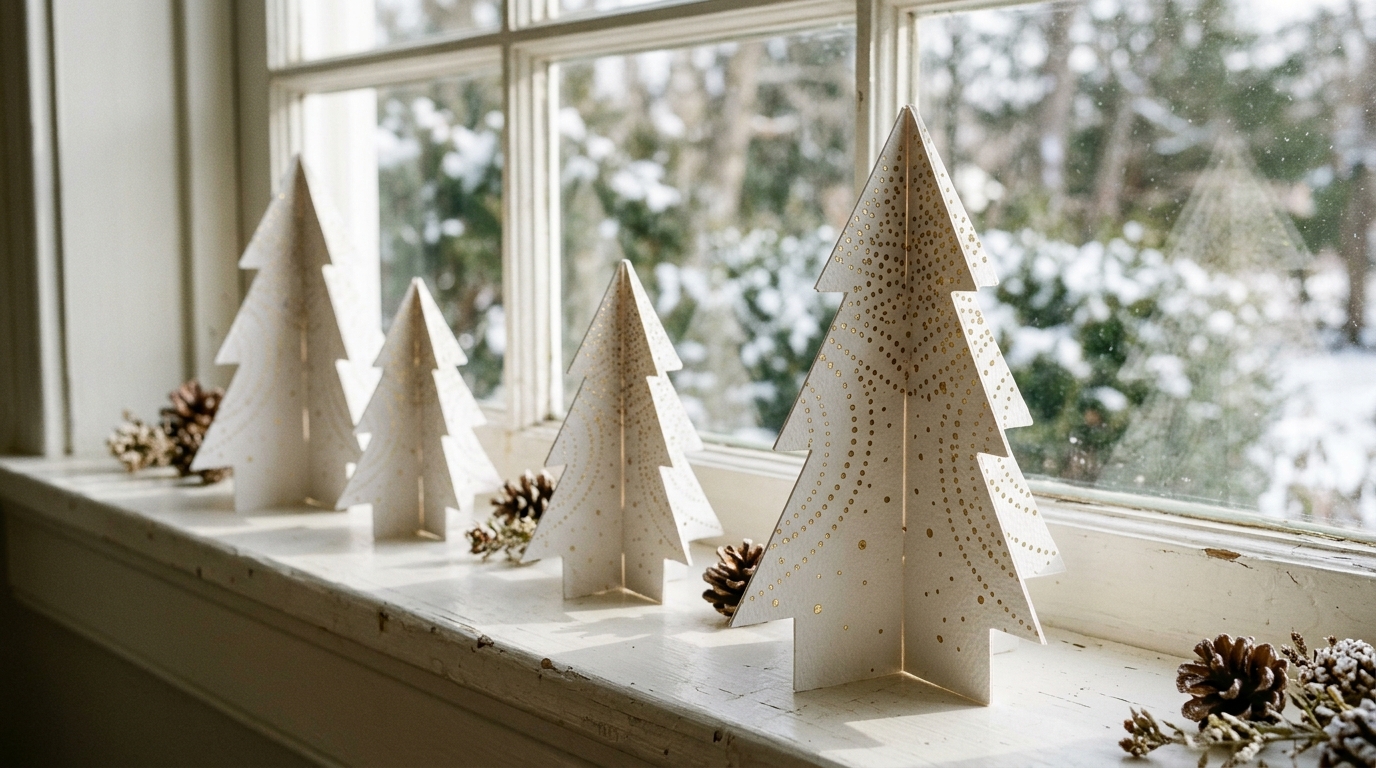
Two flat tree shapes become a 3D tree with one clever cut, and it is one of the sturdiest paper Christmas trees you can make. Cut a slit from the top down halfway on one piece and from the bottom up on the other, then slide them together. They stand up on their own and look great in a row on a windowsill. Draw gold dots with a paint pen for a fancy look. These paper Christmas trees also make great place cards with a name on each one. How many would fit on your windowsill?
You will need: white cardstock, a tree template, scissors, a craft knife (adults only), a gold paint pen.
How to make it: 1. Cut two identical tree shapes. 2. Cut a slit halfway down one and halfway up the other. 3. Slide them together and decorate.
Paper Strip Loop Tree

Paper strips folded into loops make a tree with lots of texture. Fold each strip into a teardrop loop and staple or glue rows of loops onto a triangle of cardboard, smaller toward the top. White and gold looks elegant, while green and red feels playful. Kids can help fold loops while you glue. It looks lovely on a sideboard. Would you stick to two colors or go rainbow?
You will need: white and gold paper strips, a stapler or glue, a cardboard triangle, a small gold star.
How to make it: 1. Fold each strip into a loop and staple the ends. 2. Glue rows of loops to the cardboard from the bottom up. 3. Finish with a star on top.
Rolled Paper Quill Tree
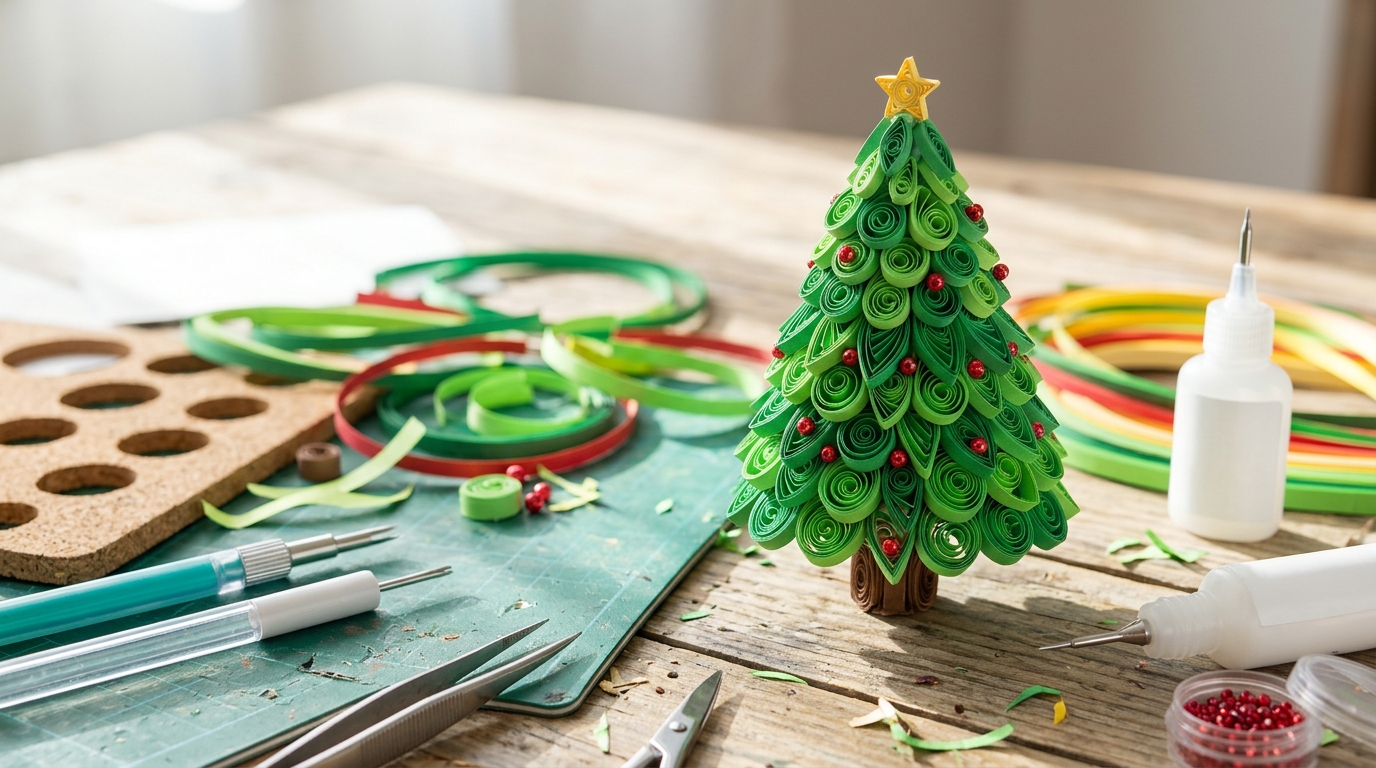
Paper quilling is the art of rolling thin paper strips into tight coils, and it makes the sweetest little trees. Roll dozens of green coils, pinch some into teardrops, and glue them together in a triangle. Add tiny red beads as ornaments. It takes patience, but it is very relaxing. A small one makes a lovely card topper or a frame for a gift. Have you ever tried quilling?
You will need: green quilling paper strips, a quilling tool or toothpick, white glue, small red beads, tweezers.
How to make it: 1. Roll strips into tight coils and let them loosen a little. 2. Pinch some into teardrop shapes. 3. Glue them into a tree shape and add beads.
Paper Christmas Trees in Origami
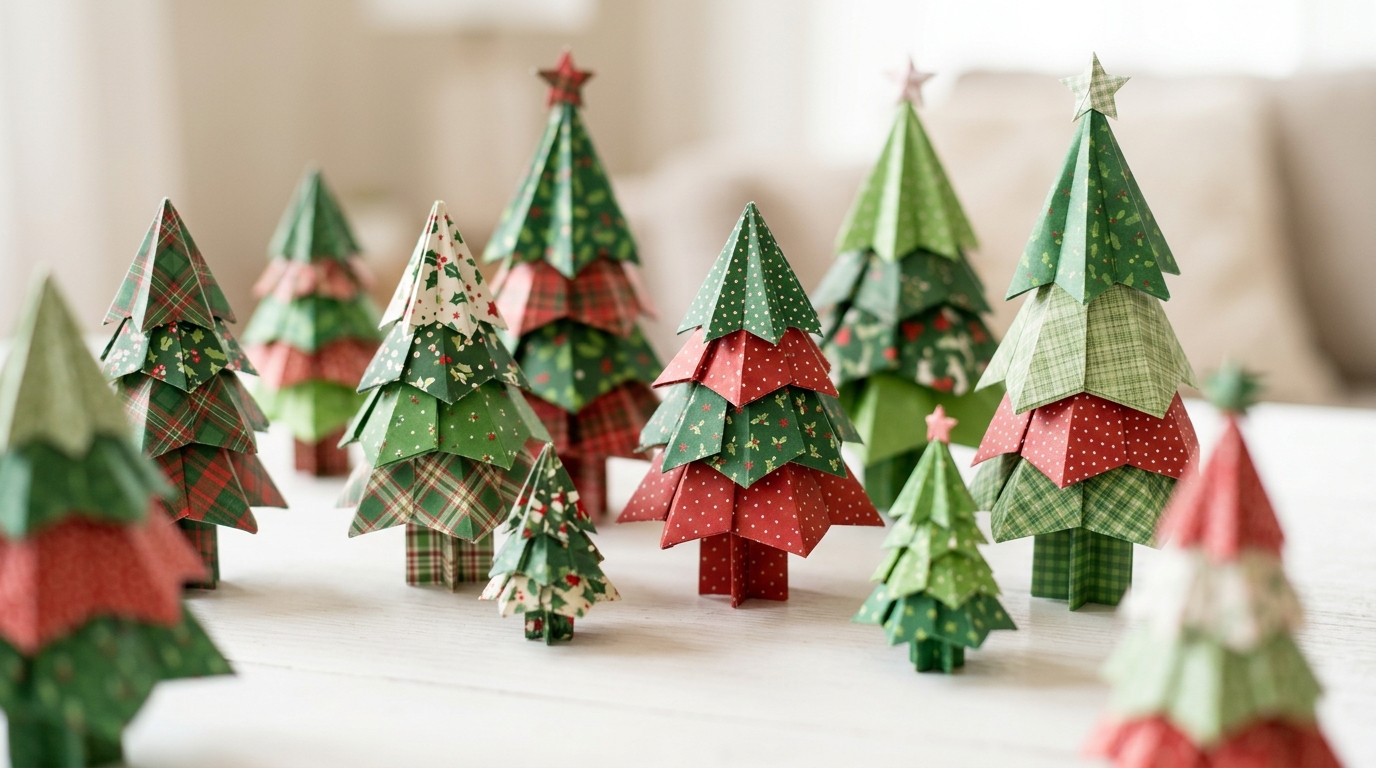
Origami paper Christmas trees are a fun way to use pretty patterned paper. One square becomes a tree with layered tiers after a few simple folds. Make them in different sizes and stand them in a little forest on your desk. They also make great gift tags if you fold them flat and add a string. Older kids love learning this one. Would you try plaid, polka dots or stars?
You will need: square origami paper in red and green patterns, a bone folder or ruler.
How to make it: 1. Fold the square into a triangle base. 2. Fold the tiers in and out following a simple tree pattern. 3. Open the bottom so it stands up.
Sheet Music Tree for the Piano
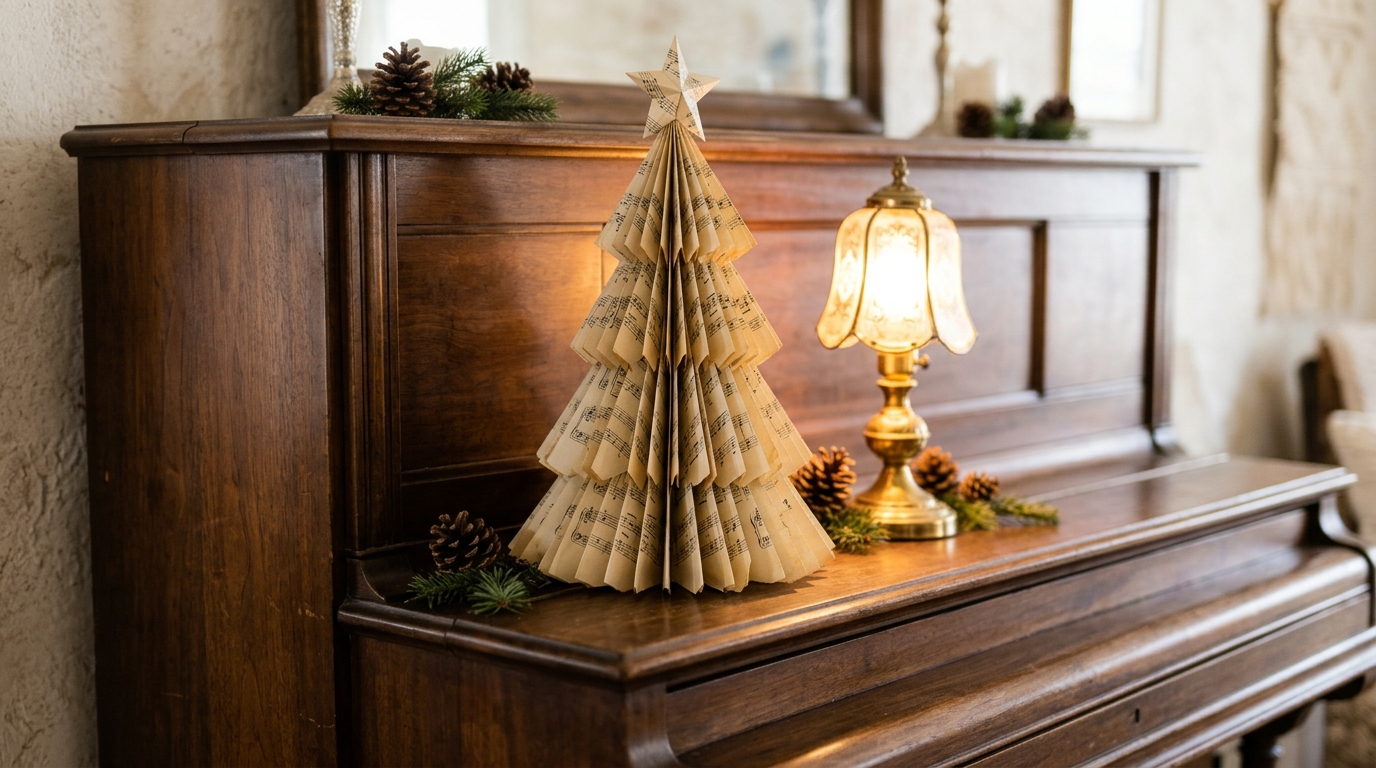
If someone in your house plays the piano, this tree is a must. Fold old sheet music pages into fans and stack them into a tree on a dowel, or roll them into tubes and glue them in a triangle. The notes and lines give it a soft vintage look. Set it on top of the piano with a battery lamp or LED fairy lights nearby. Use copies, not the songs you still play. What song would you use?
You will need: old sheet music or copies, a wooden dowel, a base, glue, a small star.
How to make it: 1. Fold pages into fans of different sizes. 2. Stack the fans on the dowel from big to small. 3. Top it with a star.
Kraft Paper Tree With Stamped Snowflakes

Plain brown kraft paper gets a cozy farmhouse look with a few white snowflakes. Stamp the paper first with white ink, let it dry, then cut out tree shapes and fold or slot them into 3D trees. They look great on a table with twine and pine cones. Kraft paper is cheap and strong, so you can make a whole forest for very little. Would you add a tiny wood star on top?
You will need: brown kraft paper or cardstock, a snowflake stamp, white ink, scissors, glue, twine.
How to make it: 1. Stamp snowflakes all over the paper and let it dry. 2. Cut out tree shapes. 3. Fold or slot them together and tie twine around the base.
Tissue Paper Pom Tree in Pastels
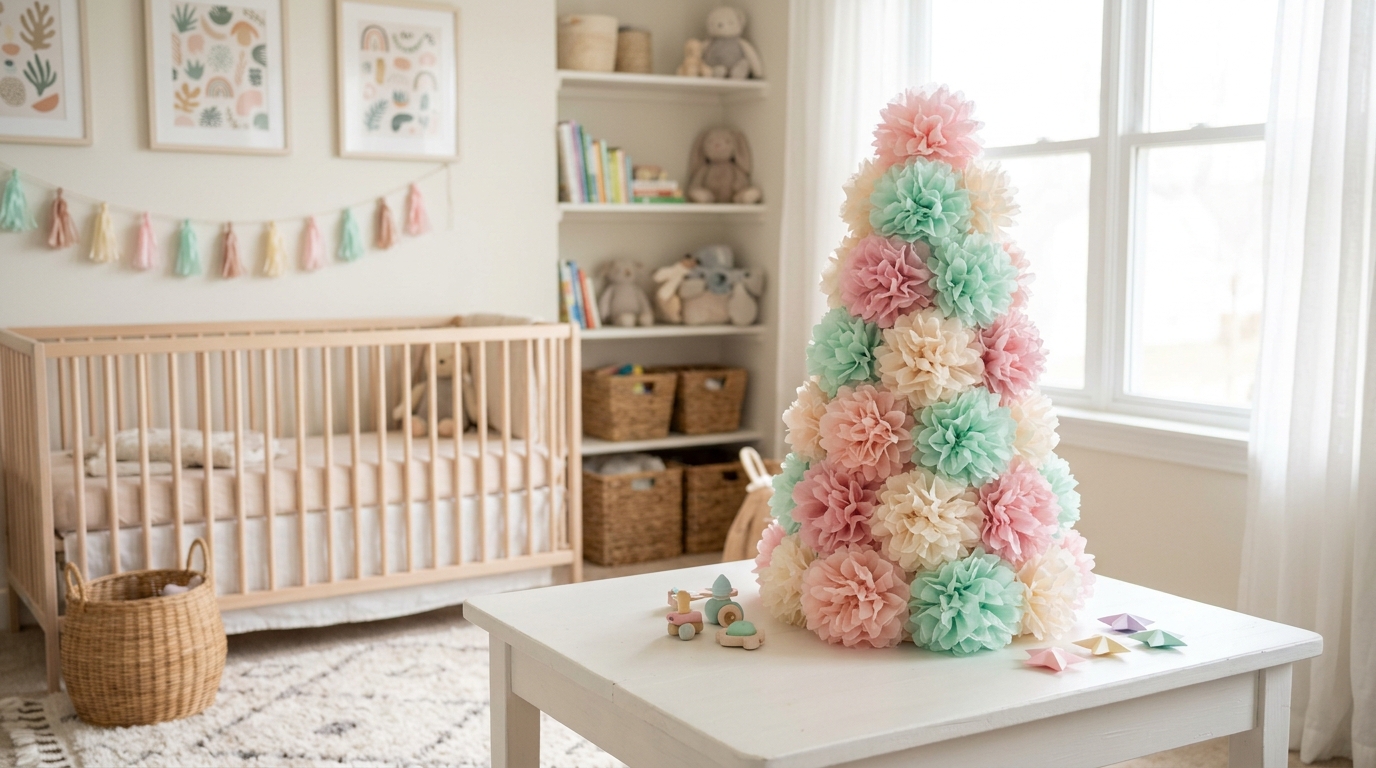
Soft pastel trees are a big trend this year, and this one is pure joy. Make small tissue paper poms by folding sheets like a fan, tying the middle and fluffing the layers. Glue them onto a cardboard triangle until it is fully covered. Pink, mint and cream look sweet in a nursery or kids room. Make one more of the paper Christmas trees in this list to sit next to it. Which pastel is your favorite?
You will need: tissue paper in pink, mint and cream, thin wire or string, scissors, a cardboard triangle, glue.
How to make it: 1. Stack four sheets, fold like a fan and tie the middle. 2. Fluff each layer apart to make a pom. 3. Glue the poms onto the cardboard triangle.
Paper Fan Wall Tree

No floor space? Put your tree on the wall. Fold paper into fans, glue them into circles or half circles, and arrange them in a big triangle with removable tape. Green, white and gold look festive, and a paper star finishes it off. It is perfect for small apartments, dorms and kids rooms. These paper Christmas trees cost almost nothing and come down in minutes. Where in your home would this fit?
You will need: cardstock in green, white and gold, a stapler, glue, removable mounting tape, a paper star.
How to make it: 1. Fold strips of paper into fans and glue them into circles. 2. Lay them out in a triangle on the floor first. 3. Move them to the wall with removable tape and add the star.