Christmas Hutch Decor: 15 Ways to Style Grandma’s China Cabinet for the Holidays
Christmas hutch decor is the easiest way to turn an old china cabinet into the warmest corner of the house. Maybe yours came from Grandma, maybe from a thrift store for twenty dollars, or maybe it has just been holding the good plates all year. Either way, it already has shelves, glass doors and a top ledge waiting for a little holiday love. You do not need new dishes or a big budget. A few yards of ribbon, some greenery, a strand of battery lights and the things you already own can make it look like a page from a magazine. Below are 15 simple ideas, from painting the cabinet to filling jars with ornaments, each with a supply list and easy steps. Pick one or try them all..
Christmas Hutch Decor That Starts With One Full Look
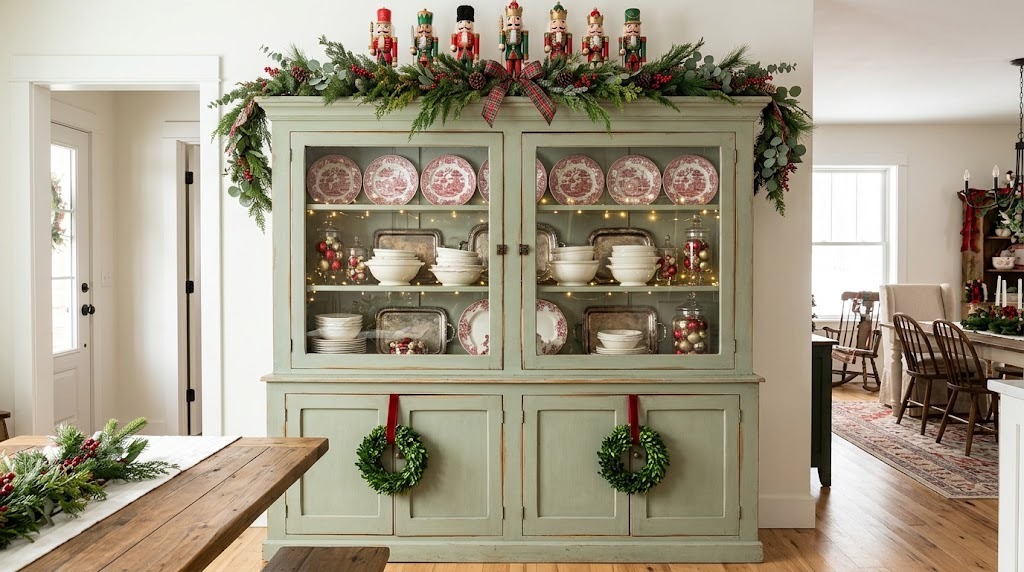
Before you move a single plate, picture the whole cabinet as one scene. This sage hutch works because every shelf repeats the same three colors: red, green and creamy white. Plates stand tall in the back, small pieces sit in front, and a garland ties the top together. Nutcrackers add height, and tiny wreaths finish the lower doors. Good Christmas hutch decor is less about buying new things and more about grouping what you have. Start by emptying the hutch, wiping the shelves and choosing your palette. Choose your three colors first and the rest gets easy..
You will need: Plates in two or three colors, a fresh or faux garland, two small wreaths, a few nutcrackers, battery fairy lights, a soft cloth.
How to make it: 1. Empty the hutch and wipe every shelf. 2. Pick three colors and set aside anything that does not fit. 3. Place the largest plates at the back of each shelf first. 4. Add smaller pieces in front, then the garland, lights and toppers last.
Red Transferware Plates in Neat Rows
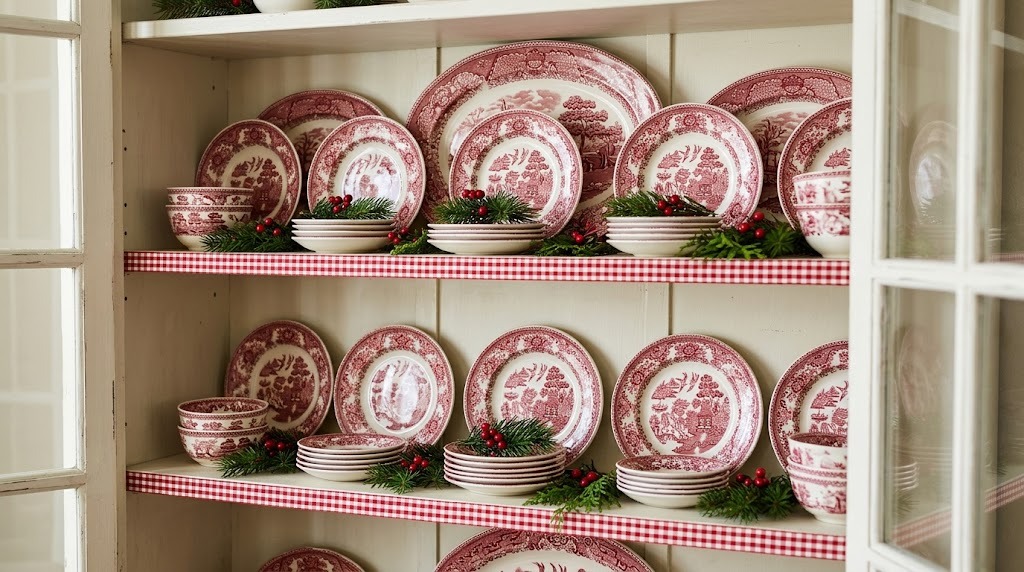
Red transferware is the star of so many holiday cabinets, and you can often find it at thrift stores and estate sales for a few dollars a plate. The busy red and white patterns look rich when you line them up in rows of the same size. Standing them upright in plate grooves shows off every little scene. Tuck pine sprigs between them and run a checked ribbon along the shelf edge. If you love teacups too, our vintage china Christmas decor ideas show even more ways to use old dishes. Have you checked the back shelves of your local thrift store lately?
You will need: Red and white transferware plates, plate stands or a shelf groove, fresh pine sprigs, checked ribbon, museum putty.
How to make it: 1. Sort plates by size so each row matches. 2. Stand them in the groove or on small plate stands, largest at the back. 3. Add a dot of museum putty under each plate so it stays put. 4. Tuck pine sprigs between the plates and lay ribbon along the edge.
Garland Draped Along the Top
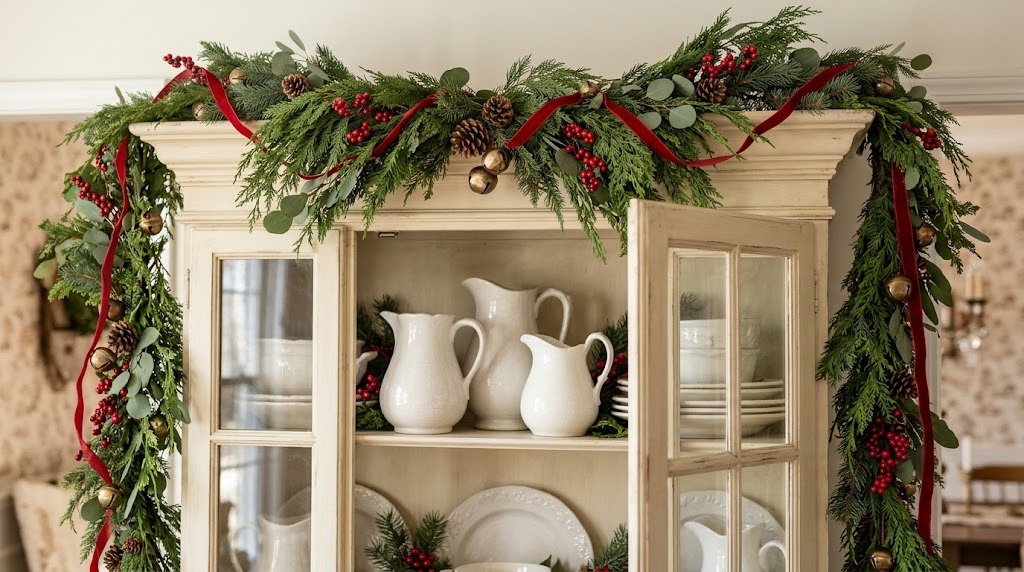
A big garland across the crown of a hutch makes the whole piece feel taller and more special. Let it hang down both sides like a frame, and the cabinet suddenly becomes the star of the dining room. Mixing cedar, pine and eucalyptus gives it a full, layered look, and a loose velvet ribbon woven through adds soft color. Small pinecones and brass bells catch the light. If you use fresh greens, mist them every few days so they stay green. Would you go fresh, or faux so you can reuse it every year?
You will need: One 9 foot garland (fresh or faux), extra cedar and eucalyptus stems, red velvet ribbon, small pinecones, brass bells, floral wire, removable hooks.
How to make it: 1. Stick removable hooks to the top back corners of the hutch. 2. Lay the garland across the top and let the ends fall down each side. 3. Wire in extra cedar and eucalyptus stems to fill thin spots. 4. Weave the ribbon loosely and wire on the pinecones and bells.
Christmas Hutch Decor Starts With a Deep Green Paint Job
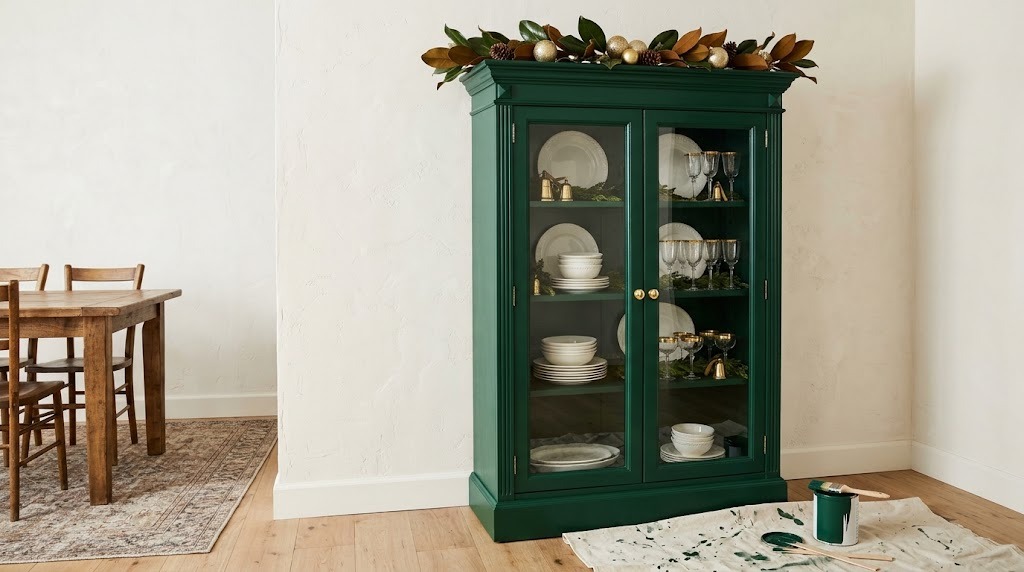
If your hutch is scratched, orange or just plain tired, a fresh coat of paint can change everything before you add one ornament. Deep hunter green feels classic at Christmas and still looks good in July. Brass knobs and white dishes really pop against it. People are sharing this kind of makeover right now, like this video on painting an old hutch cabinet. Most hutches only need a light sanding, a primer and two coats. Work with the windows open and let each coat dry overnight. Could one weekend of painting give your old cabinet a whole new life?
You will need: 220 grit sandpaper, degreaser, painter’s tape, bonding primer, deep green furniture paint, a good brush and small foam roller, new brass knobs (optional).
How to make it: 1. Remove the doors and hardware and clean everything with degreaser. 2. Sand lightly, wipe off the dust and tape the glass. 3. Roll on one coat of primer and let it dry. 4. Paint two thin coats, drying overnight between them, then put the doors and knobs back on.
Vintage Christmas Mugs on Cup Hooks
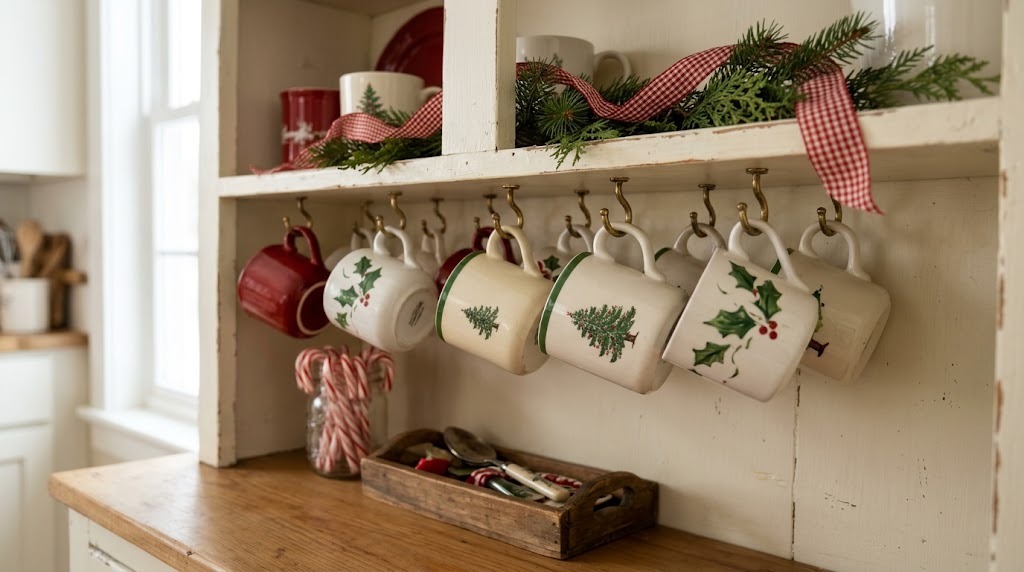
Grandma’s hutch almost always had a row of cups hanging under a shelf, and it is such a sweet look to bring back at Christmas. Little brass cup hooks cost a few dollars and twist in by hand. Hang your holiday mugs in a row, mixing red ones with white holly prints, and you get instant cheer plus an easy cocoa station built right into your Christmas hutch decor. Set a jar of peppermint sticks on the counter below so everyone can help themselves. Do you already have a few holiday mugs hiding in the back of a kitchen cabinet?
You will need: Brass cup hooks, a pencil, a ruler, an awl, holiday mugs, a short pine sprig, gingham ribbon, a glass jar for peppermints.
How to make it: 1. Mark a spot every 4 inches along the underside of the shelf. 2. Press a small starter hole with the awl, then twist in the hooks by hand. 3. Hang the mugs with the handles all facing the same way. 4. Lay the pine sprig and ribbon along the shelf above.
Plaid Ribbon Behind the Plates
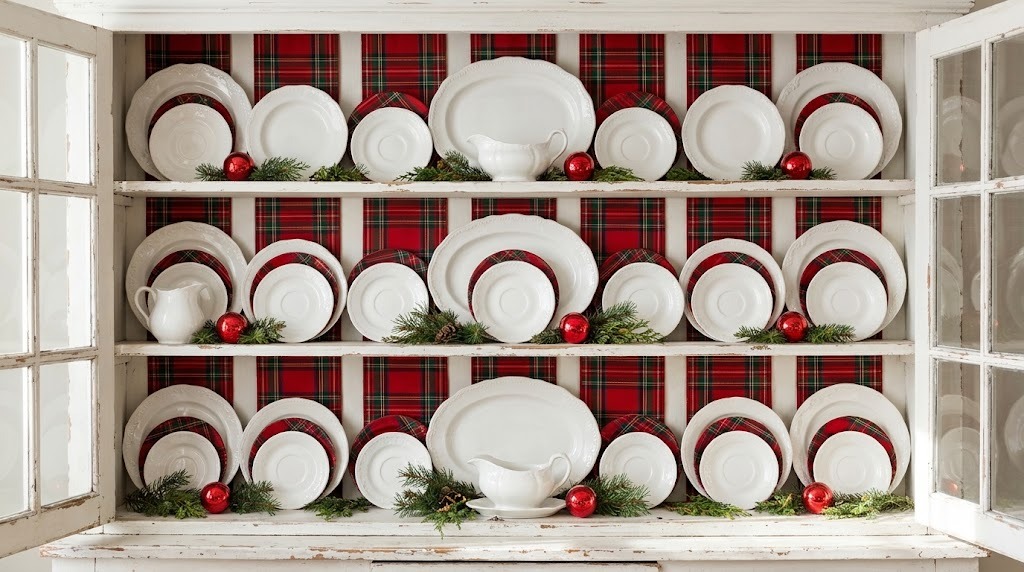
This trick is so simple you will wonder why you never tried it. Lay wide plaid ribbon flat against the back of each shelf, then stand white plates in front. The pattern peeks out around every rim and makes plain dishes look festive right away. It is renter friendly too, and it leaves no marks when you take it down in January. Wired tartan ribbon in red and green works best, but any wide strip of fabric will do. Want the plates to really stand out? Stick with plain white or cream dishes.
You will need: Wide plaid ribbon (2.5 to 4 inches), removable mounting tape or putty, scissors, white plates, pine sprigs, small red ornaments.
How to make it: 1. Measure the back of each shelf and cut ribbon strips to fit. 2. Stick them flat with small pieces of removable tape. 3. Stand white plates in front, overlapping the ribbon. 4. Add pine sprigs and a few red ornaments along the front edge.
Christmas Hutch Decor With Silver Trays and Ornaments
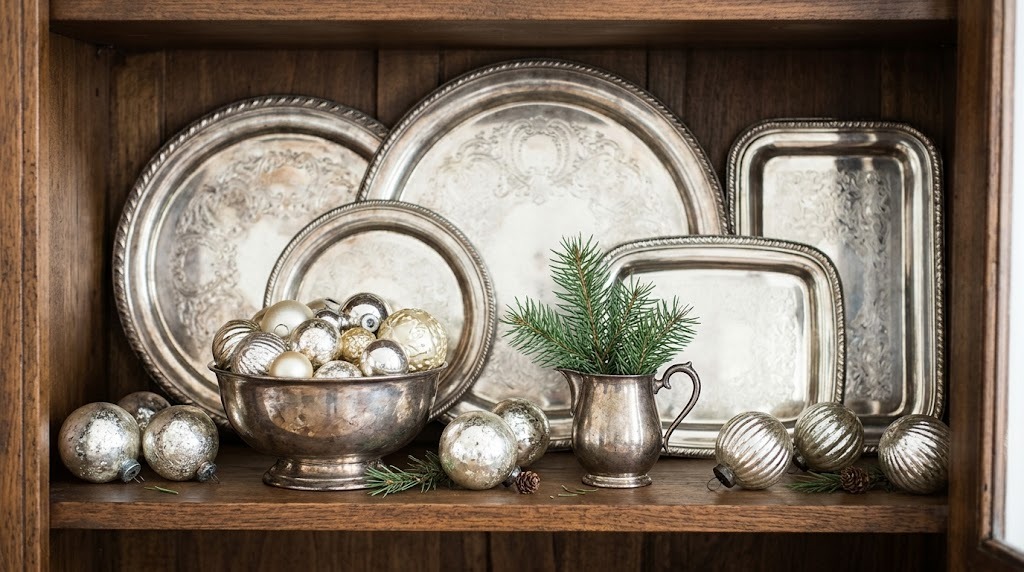
Old silver trays are one of the best thrift store buys of the season, and a hutch is the perfect place to show them off. Stand a few trays upright like a shiny wall, then fill a silver bowl with mercury glass and pale gold ornaments in front. Do not worry about polishing every spot. A little tarnish looks warm and old fashioned. Add a small creamer holding a pine sprig for a touch of green. How many silver pieces could you bring home from one thrift store trip?
You will need: Two to four silver trays or platters, a silver bowl, mercury glass and gold ornaments, a small silver creamer, a pine sprig, plate stands.
How to make it: 1. Stand the largest tray at the back on a plate stand. 2. Layer smaller trays in front at different heights. 3. Fill the bowl with ornaments and set it in the middle. 4. Add the creamer with a pine sprig to one side.
Glass Apothecary Jars Full of Ornaments
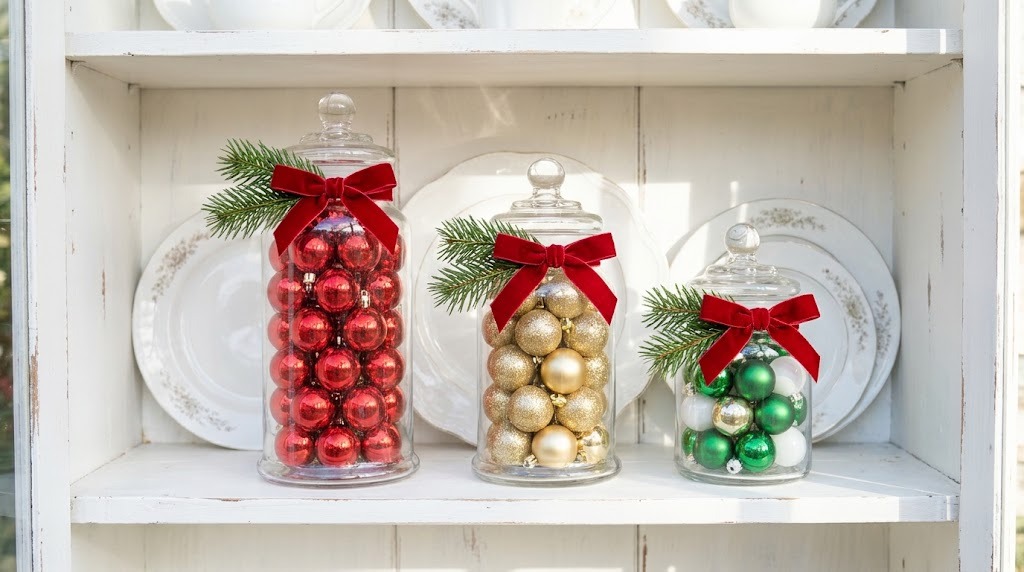
Clear jars filled with ornaments are pretty, cheap and easy to change each year. Sort your ornaments by color so every jar has its own look: one red, one gold, one green and white. Using three jars of different heights keeps the shelf from looking flat. A pine sprig and a velvet bow on each neck makes them feel finished. This is the kind of Christmas hutch decor kids can help with, so pick shatterproof ornaments if little hands are joining in. Which colors will you put in yours?
You will need: Three glass jars with lids in different heights, small shatterproof ornaments, red velvet ribbon, pine sprigs, scissors.
How to make it: 1. Wash and dry the jars well. 2. Fill each jar with one color of ornaments. 3. Tie a velvet bow around each neck and tuck in a pine sprig. 4. Group the jars tallest to shortest in the middle of a shelf.
Gingerbread House on the Middle Shelf
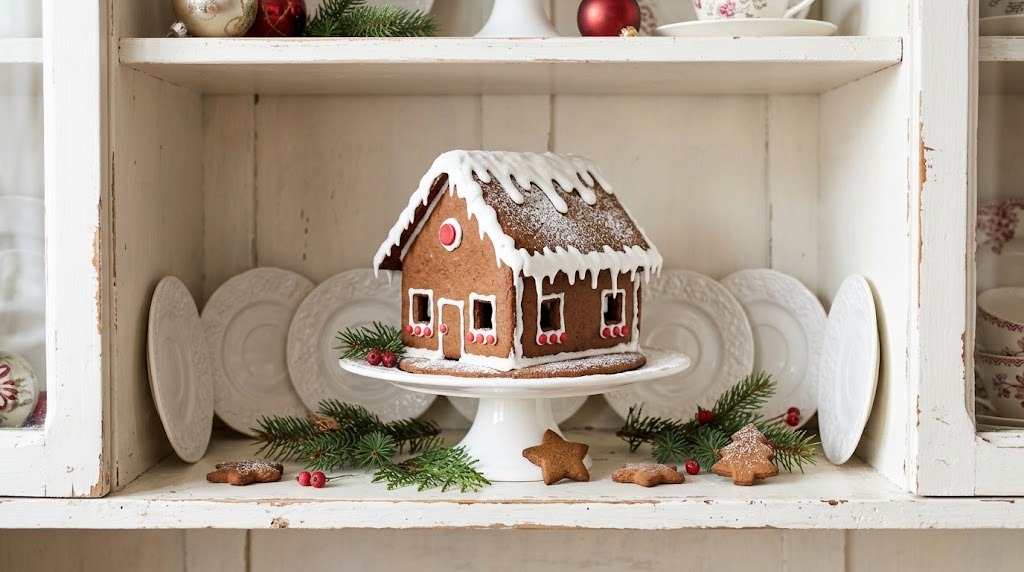
A gingerbread house gives your Christmas hutch decor a happy focal point, and it does not need to be perfect. A simple kit or a homemade house works fine. Set it on a white cake plate so it sits a little higher, then stand white plates behind it as a clean backdrop. Scatter a few gingerbread cookies and pine sprigs around the base. Kids love helping with this one. If you want it to last all season, make it with plenty of icing and treat it as decor, not a snack. Is this the year you finally build one?
You will need: A gingerbread house (kit or homemade), royal icing, a white cake plate, gingerbread cookies, small pine sprigs, white plates.
How to make it: 1. Build the house a day ahead so the icing sets firm. 2. Place it on the cake plate in the center of the shelf. 3. Stand white plates behind it. 4. Add cookies and pine sprigs around the base.
Christmas Hutch Decor That Glows With Fairy Lights
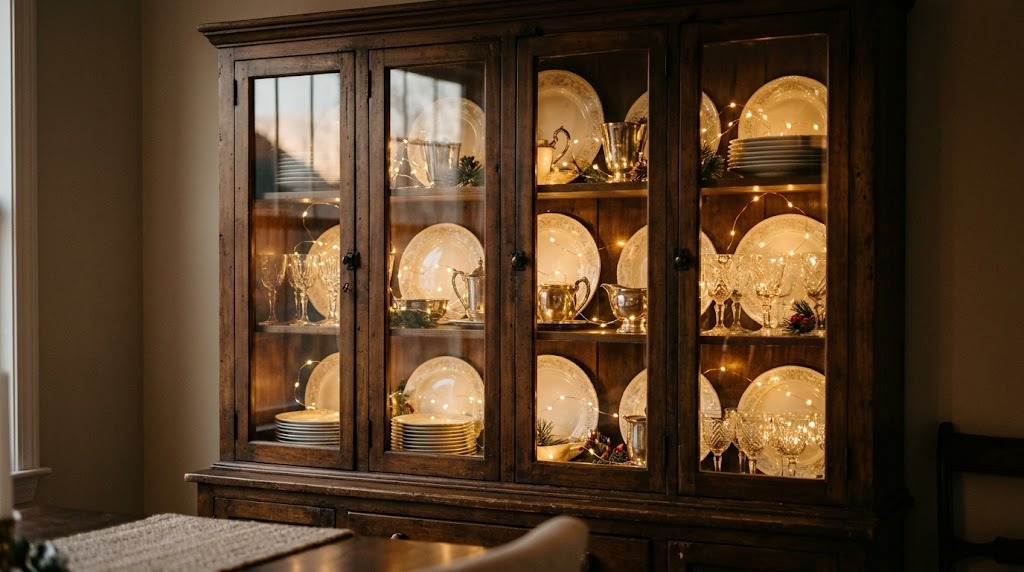
Once the sun goes down, a few strands of battery fairy lights make the whole cabinet glow like a little shop window. Tiny copper wire lights hide easily between plates and glasses, so you only see the warm sparkle. Choose strands with a timer so they turn on every evening by themselves. Battery lights stay cool on wood and glass and need no outlet nearby. Tuck the battery box behind a plate in a back corner. Will you leave yours on through dinner every night in December?
You will need: Two or three strands of battery fairy lights with timers, AA batteries, small clear hooks or tape, a soft cloth.
How to make it: 1. Wipe the glass so the light looks clean. 2. Hide each battery box behind a plate at the back corner. 3. Weave the wire loosely between the dishes, shelf by shelf. 4. Set the timer for six hours each evening.
Stacked Cake Stands With Ornaments
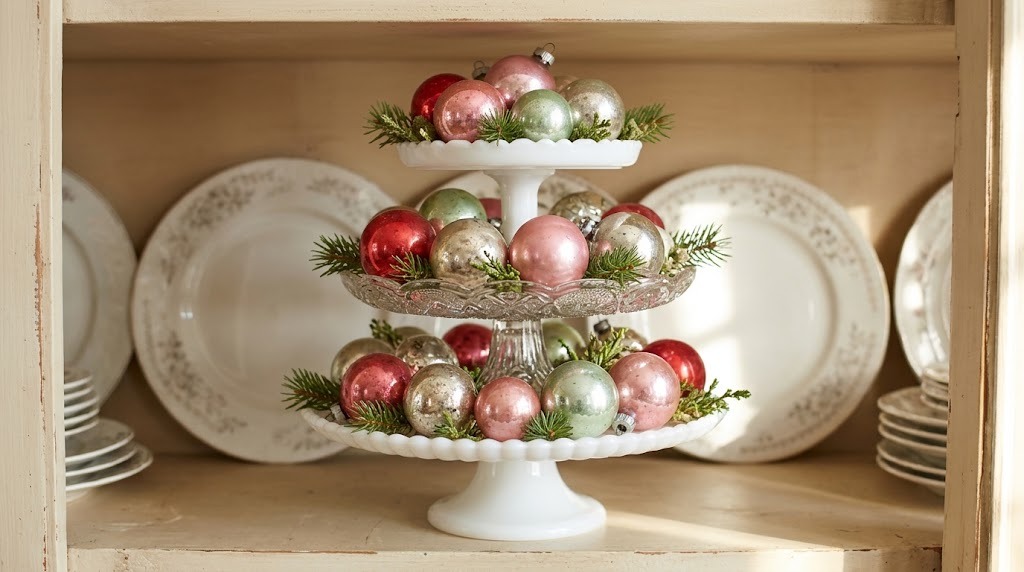
Cake stands are not just for dessert. Stack two or three of them, milk glass or pressed glass, and fill each tier with vintage ornaments for an easy tower of color. The height draws the eye and makes even a small hutch shelf feel full. Soft pink, red, silver and pale green feel very old fashioned and sweet together. A little museum putty between the stands keeps them steady when someone opens the doors. Do you have a cake stand sitting in a cupboard right now?
You will need: Two or three cake stands in different sizes, museum putty, vintage or shatterproof ornaments, small pine sprigs.
How to make it: 1. Put the largest stand on the shelf first. 2. Press a ball of museum putty on its center and set the next stand on top. 3. Repeat with the smallest stand. 4. Fill each tier with ornaments and tuck in the pine sprigs.
Mini Wreaths Hanging on the Doors
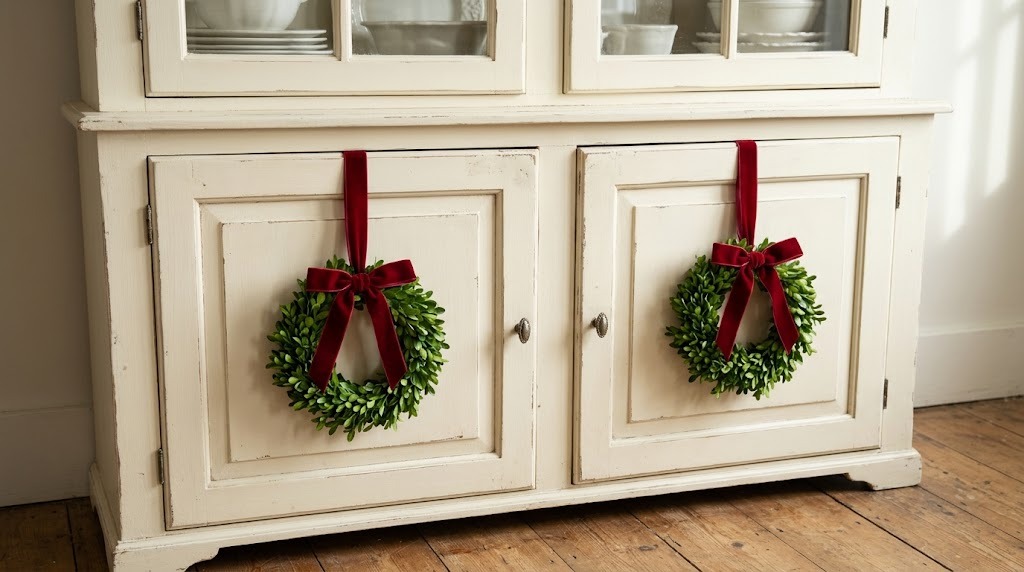
Do not forget the bottom half of the hutch. Two small wreaths on the lower doors pull the whole look down to the floor and make the cabinet feel balanced. Boxwood wreaths look neat and classic, and faux ones last for years. Hang them from velvet ribbon looped over the top of each door, then finish with a bow. Because nothing is nailed in, you can still open the doors to grab napkins. It is a small step that makes your Christmas hutch decor feel complete. Would red ribbon or soft green plaid look better on yours?
You will need: Two 8 to 10 inch boxwood wreaths, 3 yards of red velvet ribbon, scissors, small removable hooks (optional).
How to make it: 1. Cut ribbon long enough to loop over the door and hang the wreath at the middle. 2. Thread the ribbon through the wreath. 3. Loop it over the top of the door and hold it inside with a removable hook. 4. Tie a neat bow at the top.
Christmas Cards Clipped to the Shelves
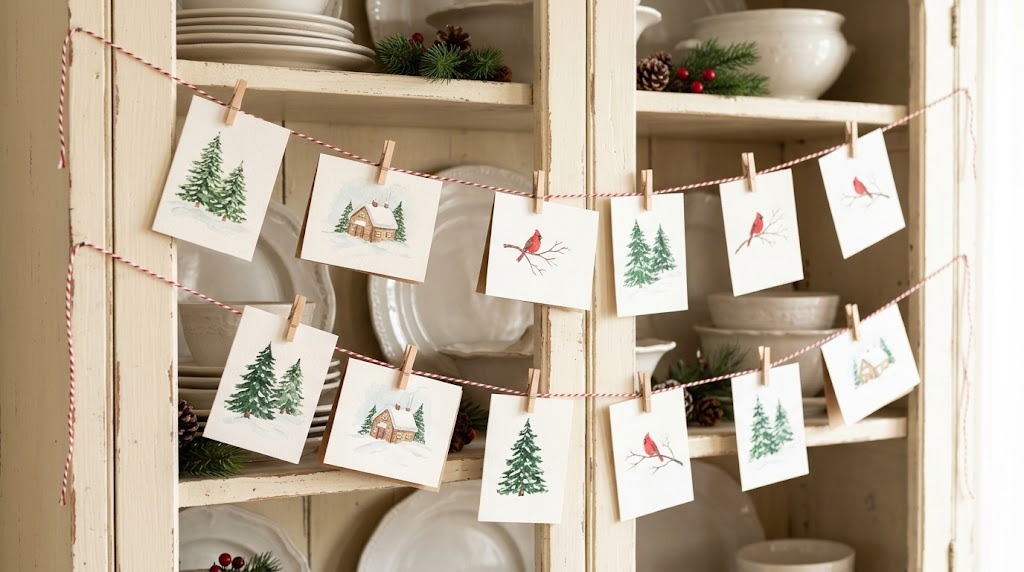
Every year the Christmas cards pile up on the kitchen counter. This year, make them part of your Christmas hutch decor. Run baker’s twine along each shelf edge and clip the cards on with tiny wooden clothespins. It turns your mail into decor and keeps friends and family in view all month long. Add new cards as they arrive. Painted cards with birds, trees and little houses look especially pretty against white dishes. Who sends the very first card to your house every year?
You will need: Red and white baker’s twine, mini wooden clothespins, removable tape or tiny hooks, your holiday cards.
How to make it: 1. Tape or hook the twine at each end of a shelf. 2. Let it sag a little in the middle. 3. Clip the cards along the twine with mini clothespins. 4. Add more rows as the cards keep coming.
Dried Orange Garland Across the Shelves
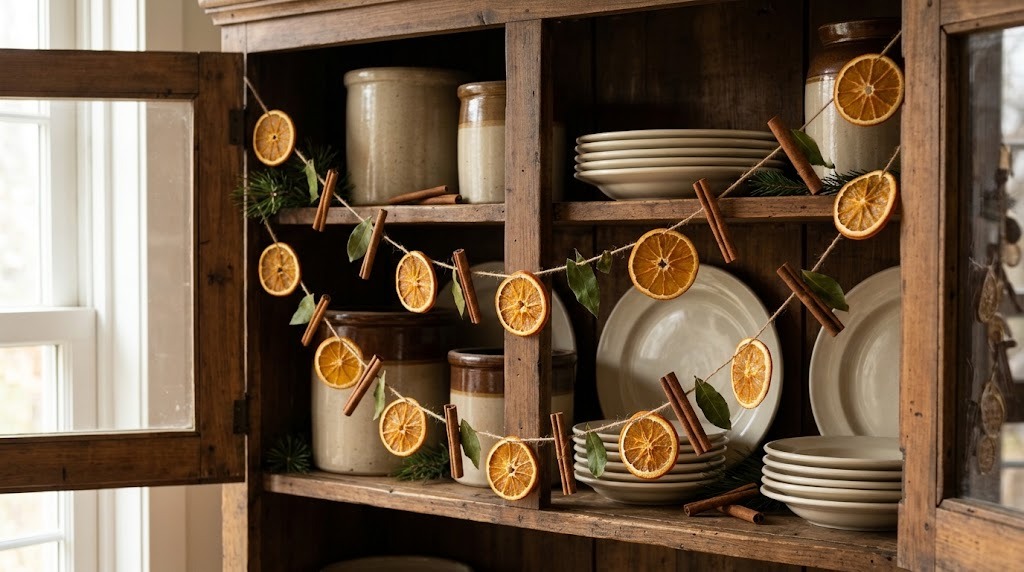
Dried orange slices bring a warm, natural glow, especially on a wooden hutch. When the light comes through, they shine like little stained glass windows. You can dry them in a low oven in a few hours with an adult in charge, then string them with cinnamon sticks and bay leaves on jute twine. The garland smells lovely too. Loop it across the open shelves between crocks and plates for a cozy country look. Have you ever made a garland straight from your kitchen pantry?
You will need: 3 or 4 oranges, a sharp knife (adult help), a baking sheet, parchment paper, jute twine, cinnamon sticks, bay leaves, a large needle.
How to make it: 1. An adult slices the oranges thin, about 1/4 inch. 2. Pat them dry and bake on parchment at 200 F for 3 to 4 hours, turning every hour. 3. Let them cool fully. 4. Thread the oranges, cinnamon sticks and bay leaves onto the twine and loop it across the shelves.
Christmas Hutch Decor Topped With Nutcrackers
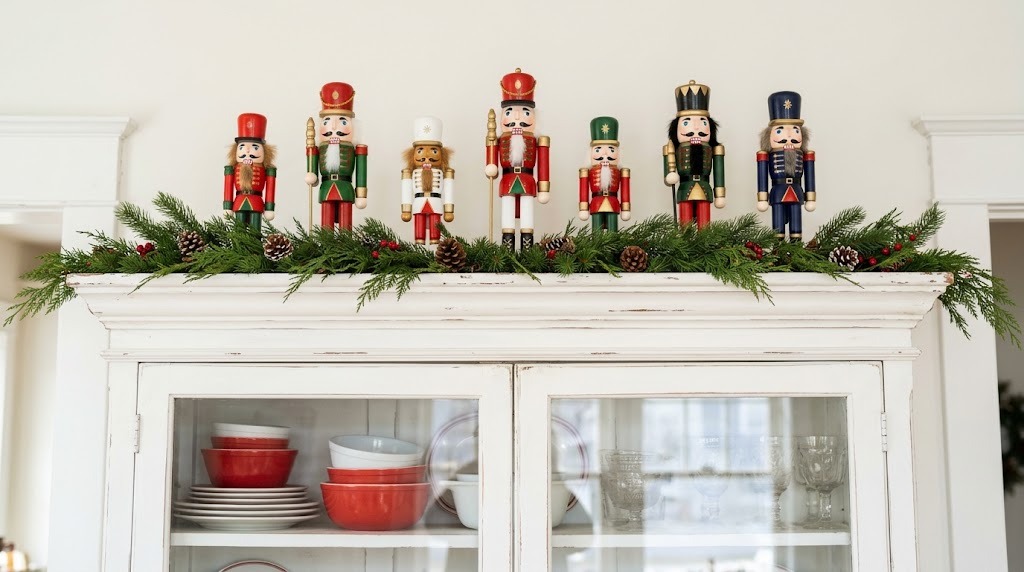
A row of nutcrackers on top is the finishing touch that makes people smile when they walk in. Line them up from tallest to shortest, or put the tallest in the middle for a balanced look. Tuck them into a low pine garland with pinecones so they look like they are standing in a little forest. Plain wooden nutcrackers are easy to find at thrift stores, and odd numbers look best. Now stand back and enjoy your Christmas hutch decor. Which spot in your hutch turned into your favorite?
You will need: Five to seven wooden nutcrackers, a low pine garland, small pinecones, museum putty.
How to make it: 1. Lay the garland along the top of the hutch. 2. Arrange the nutcrackers in a row, tallest in the center. 3. Press museum putty under each base so they stay put. 4. Tuck pinecones between them.