Ornament Makeovers: 14 Ways to Make Cheap Ornaments Look Like Designer Decor
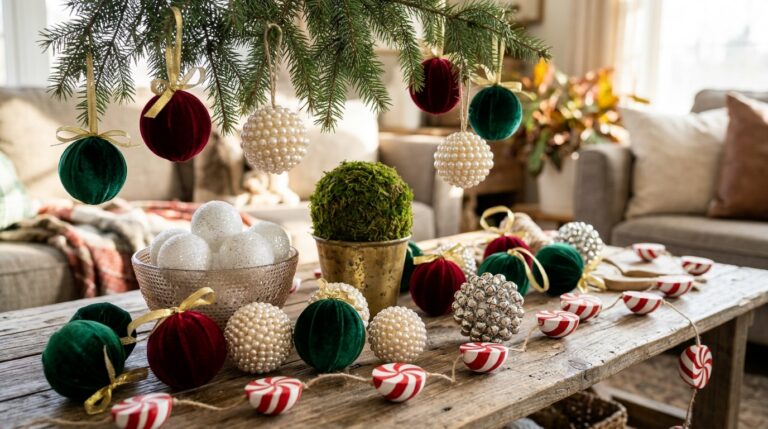
Ornament Makeovers are the happiest way to rescue that box of plain, shiny balls sitting in the basement. You know the ones: a little scratched, a little boring, bought in a big pack years ago. With some fabric, paint, ribbon and a few cheap supplies, those same balls can look like the pricey ones you see in fancy holiday shops. It feels so good to hang something you made and hear someone ask where you bought it. Below are 14 easy ideas, from soft velvet and swirly marble to pearls and icy frost, each with a short supply list and simple steps. Grab your old ornaments and let us give them a second life..
The Big Idea Behind Ornament Makeovers
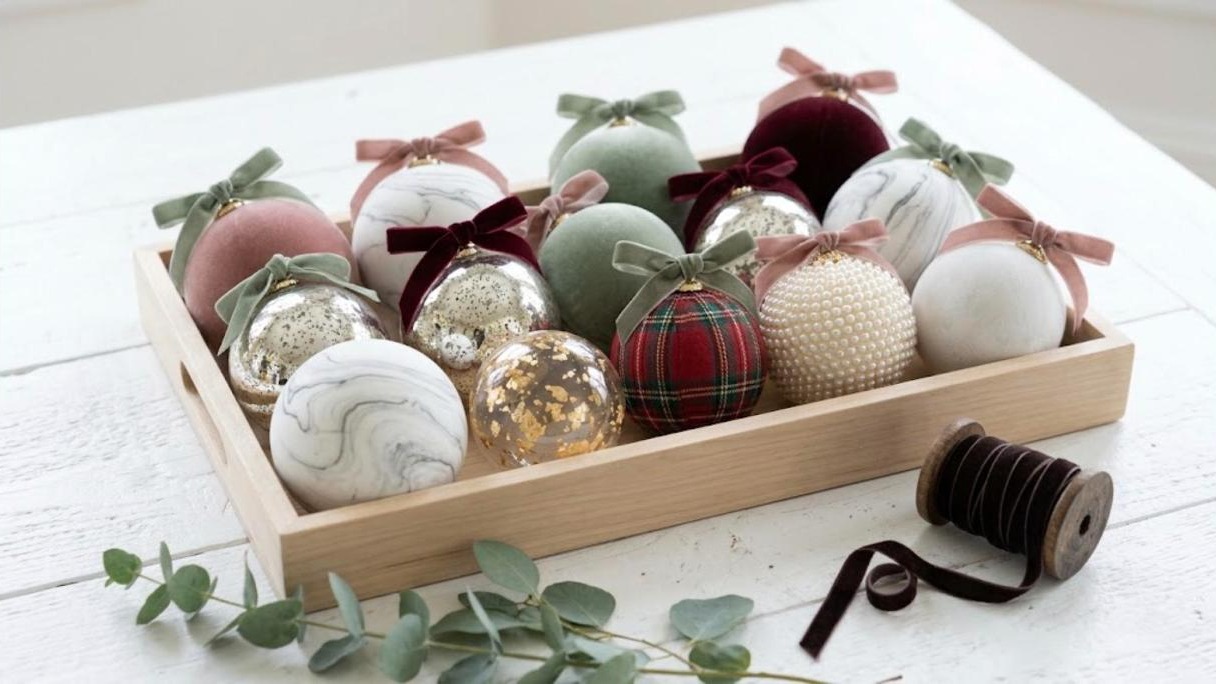
The secret to great ornament makeovers is not the price. It is texture, a calm color palette and a pretty finish on top. A tray of velvet, marble, gold leaf, plaid and pearl balls looks rich because every piece feels touchable and special. Pick three or four finishes that share the same colors, like blush, sage, burgundy and gold, and your whole tree will look planned. You can start with the cheapest pack of plastic balls you can find, because none of the old shine will show when you are done..
You will need: A pack of plain plastic ball ornaments, fabric scraps, paint, ribbon, craft glue, a few finishing supplies from the ideas below.
How to make it: 1. Choose a color palette of three or four shades. 2. Pick a few finishes from this list that suit those colors. 3. Make a small batch of each and mix them together on the tree.
Wrap Plain Balls in Soft Velvet
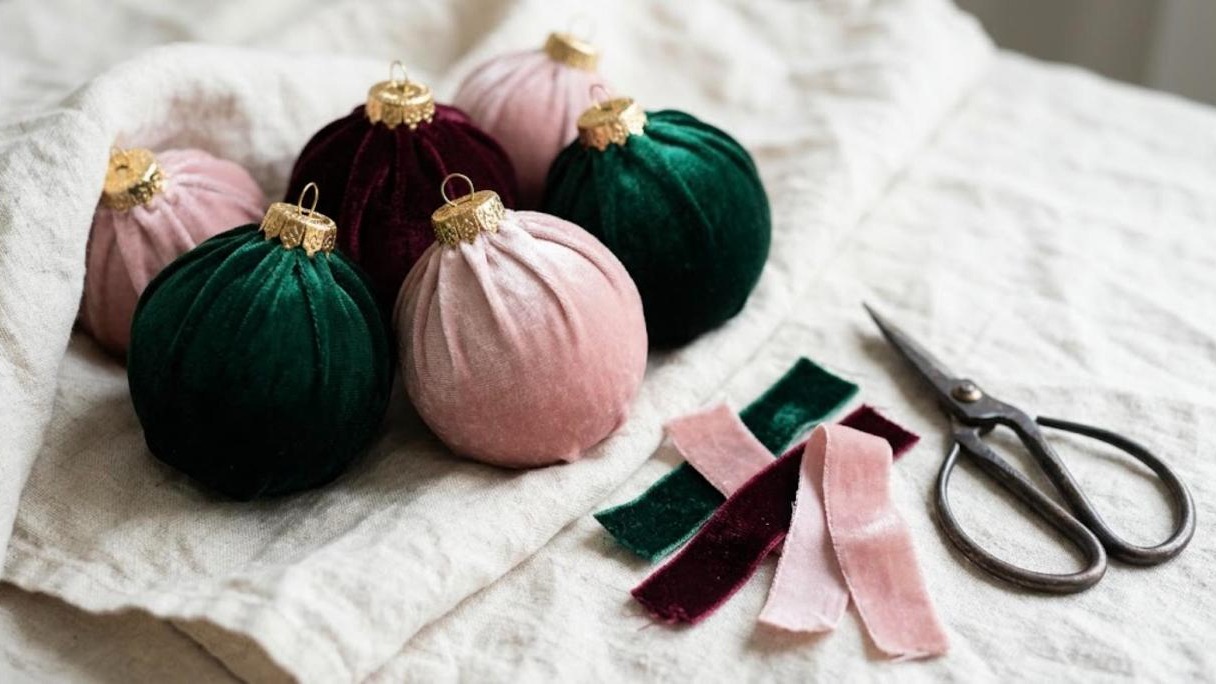
Velvet ornaments are everywhere this year, they cost a small fortune in stores, and they are one of the easiest ornament makeovers you can do. You can make your own from scraps of crushed velvet or an old velvet top. Cut a circle of fabric, set the ornament in the middle and gather the edges at the top. Slip the cap back on to hide the gathers. The result is soft, matte and so pretty in jewel tones or blush pink. Which color of velvet would you try first?
You will need: Plastic ball ornaments, velvet fabric scraps, a rubber band or thread, fabric glue, scissors, the original ornament caps.
How to make it: 1. Remove the cap and cut a fabric circle about three times wider than the ball. 2. Gather the fabric up around the ball and tie it tight at the neck. 3. Trim the extra fabric, add a dab of glue and push the cap back on.
Ornament Makeovers With Swirly Marble Paint
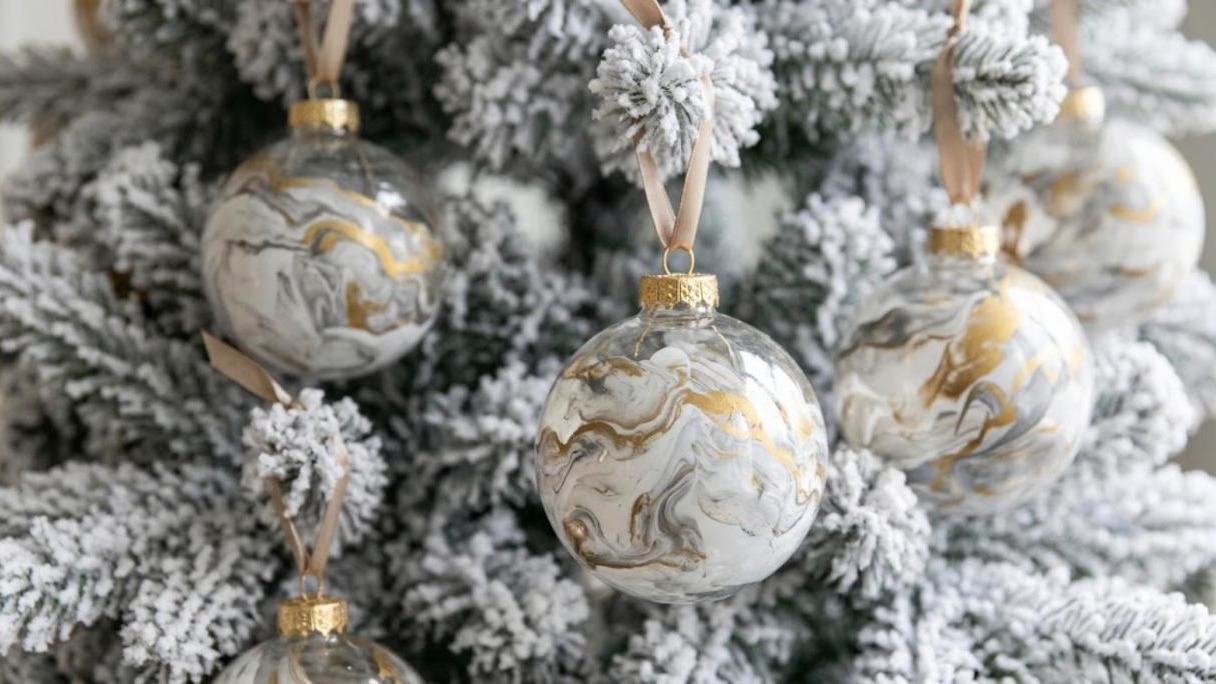
A clear ornament and a few bottles of acrylic paint can look just like real marble. The paint goes inside the ball, so the outside stays smooth and shiny. Use white as the base, then add thin streaks of gray and gold. Swirl slowly and let gravity do the work. Every single one comes out different, which makes them feel handmade in the best way. Would you go classic white and gold or try a moody black marble?
You will need: Clear plastic ball ornaments, white, gray and metallic gold acrylic paint, a paper cup, a few drops of water.
How to make it: 1. Remove the cap and squeeze a little of each paint color inside. 2. Turn the ball slowly in your hands until the paint coats the inside in swirls. 3. Set it upside down in a paper cup to drain and dry for a day, then put the cap back.
Make Faux Mercury Glass Ornaments
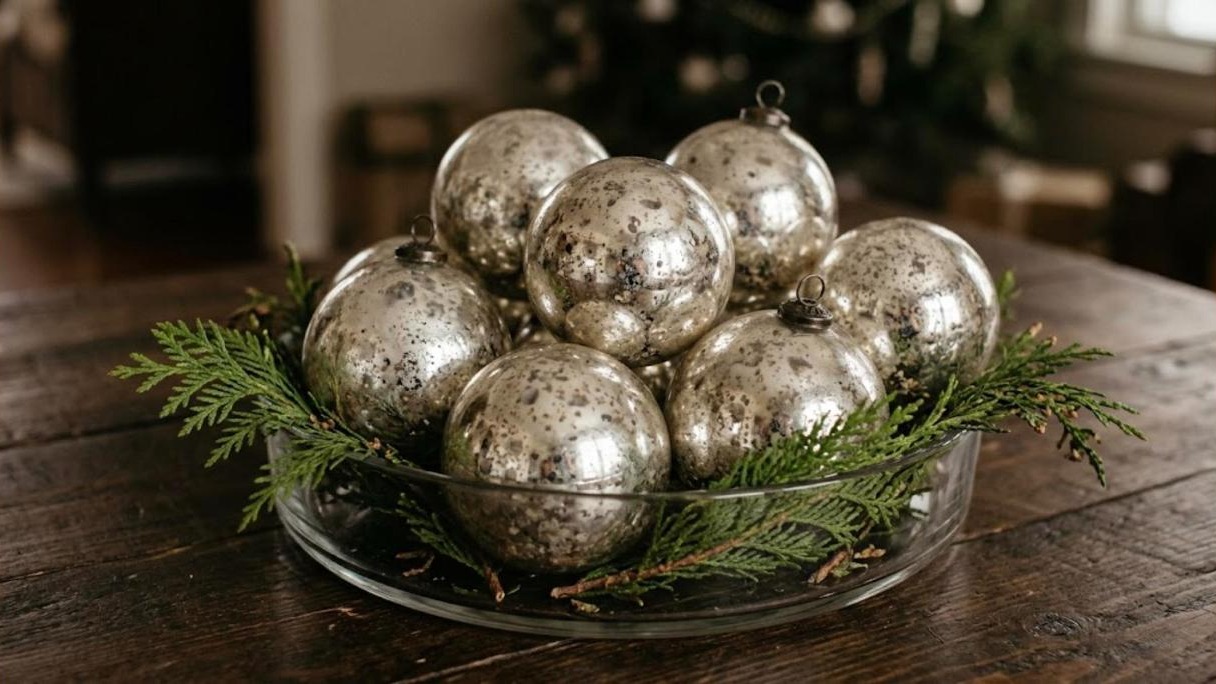
Old mercury glass has a soft, speckled silver look that people pay a lot for at antique shops. You can fake it with a clear ornament, mirror effect spray paint and a spray bottle of water and vinegar. The spots appear where the water beads up, giving that worn, antique glow. Pile them in a glass bowl with some cedar for an instant centerpiece. Ask an adult to do the spray painting outdoors or in a well ventilated area. Where would you show off a bowl like this?
You will need: Clear glass or plastic ornaments, mirror effect spray paint, a small spray bottle with half water and half vinegar, a paper towel.
How to make it: 1. Remove the cap and lightly mist the inside of the ball with the water mix. 2. Spray a light coat of mirror paint inside, outdoors and with adult help. 3. Dab out extra drops with a rolled paper towel and let it dry before adding the cap.
Add Gold Leaf for Instant Luxury
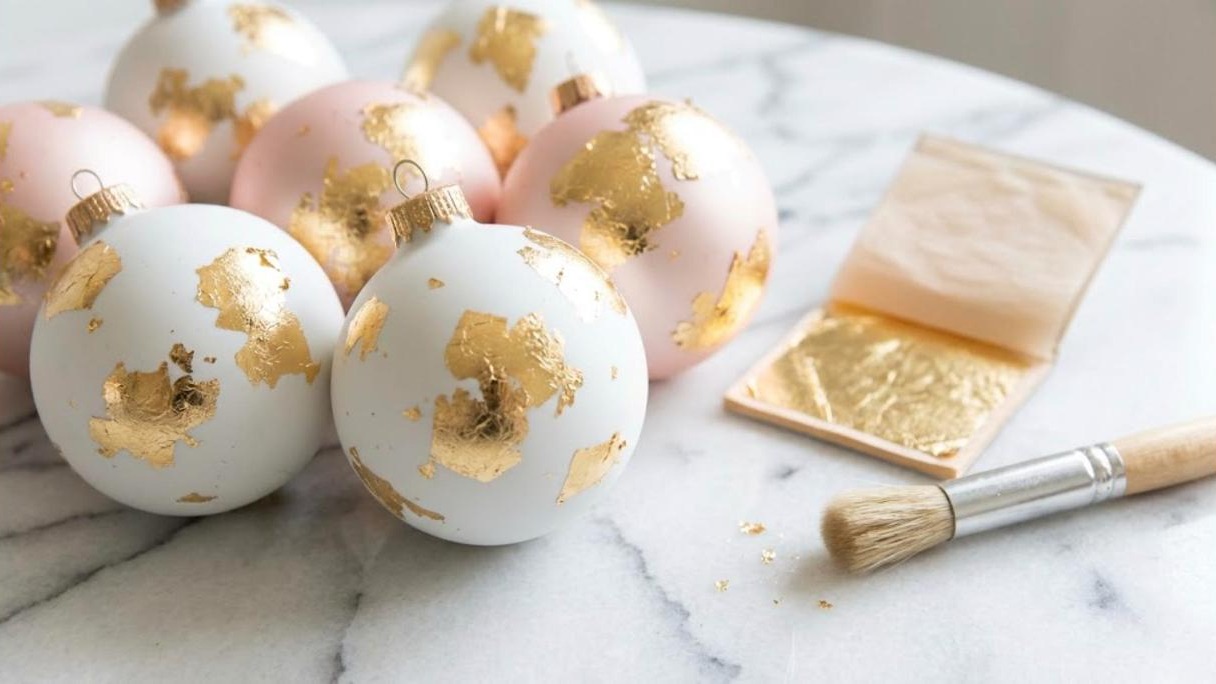
Of all the ornament makeovers here, gold leaf might be the fastest way to make a cheap ornament look expensive. Thin sheets of imitation gold leaf are sold in little booklets at craft stores and cost very little. Brush a few patches of glue on a matte ornament, lay the gold on top and brush off the extra. Torn, uneven edges look more natural than perfect shapes. These look stunning on a white or blush ball. Would you cover the whole ornament or keep it to a few patches?
You will need: Matte painted ornaments, imitation gold leaf sheets, gilding size or craft glue, a soft brush.
How to make it: 1. Brush small patches of gilding glue on the ornament and wait until it feels tacky. 2. Lay gold leaf over the patches and press gently. 3. Brush away the loose flakes with a soft dry brush.
Twine Wrapped Ornament Makeovers
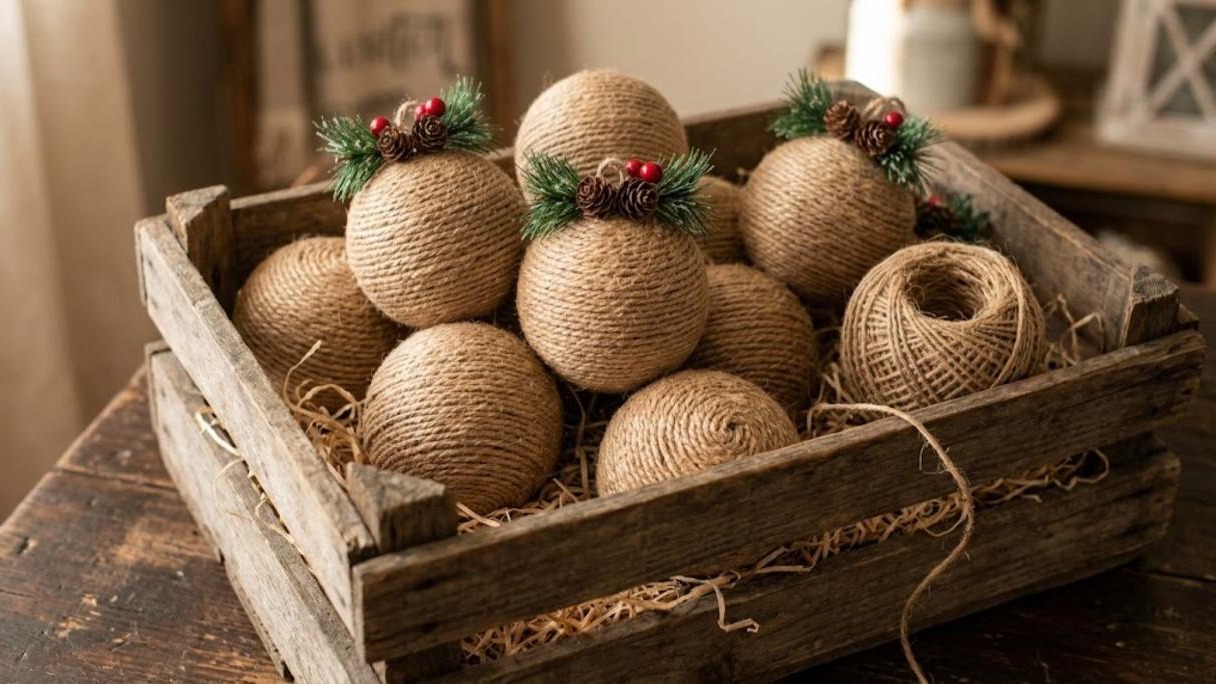
If your style leans farmhouse, jute twine is your best friend. Wrapping an ornament in twine hides every scratch and gives it a cozy, natural look. Start at the bottom and work your way up in tight circles. Top it with a tiny pinecone, a sprig of faux greenery and a red berry. They look great in a wooden crate on the porch or hanging on a rustic tree. Ask an adult for help if you use a hot glue gun. How many could you wrap during one movie night?
You will need: Plastic ball ornaments, jute twine, craft glue or a low temp glue gun with adult help, mini pinecones, faux greenery picks, faux berries.
How to make it: 1. Put a dot of glue at the bottom of the ball and press the twine end into it. 2. Wrap the twine around in tight circles, adding small dots of glue as you go. 3. Glue the pinecone, greenery and berry on top.
Cover Ornaments in Cozy Plaid Fabric
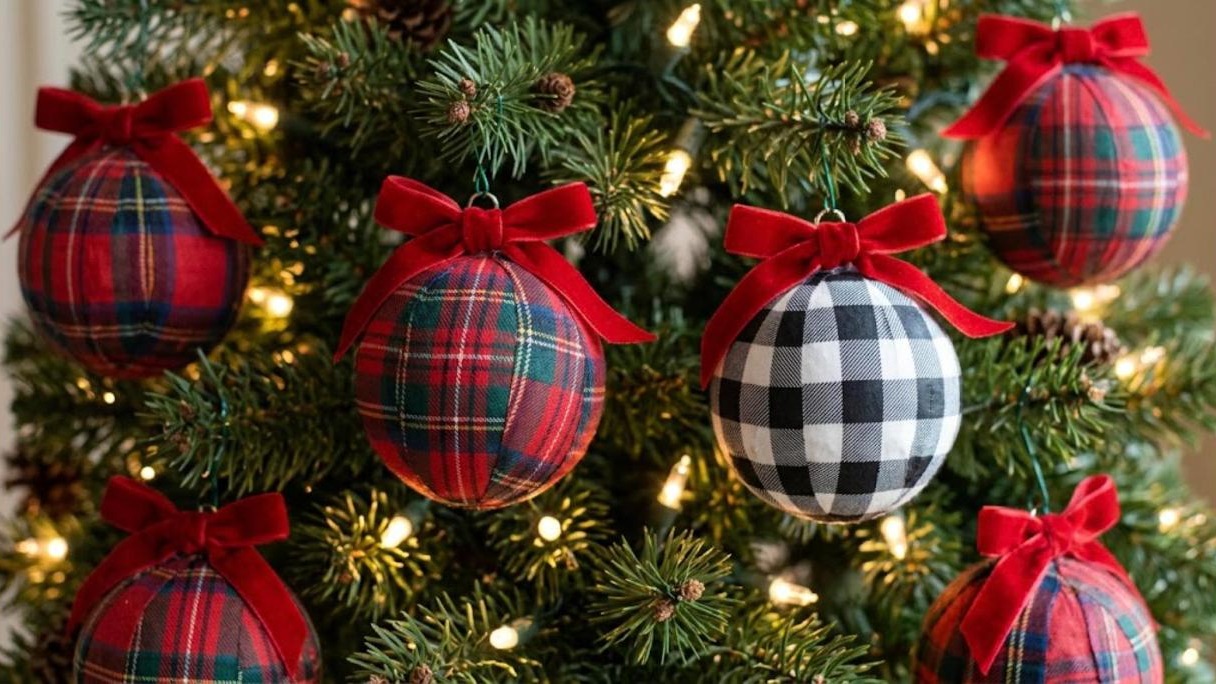
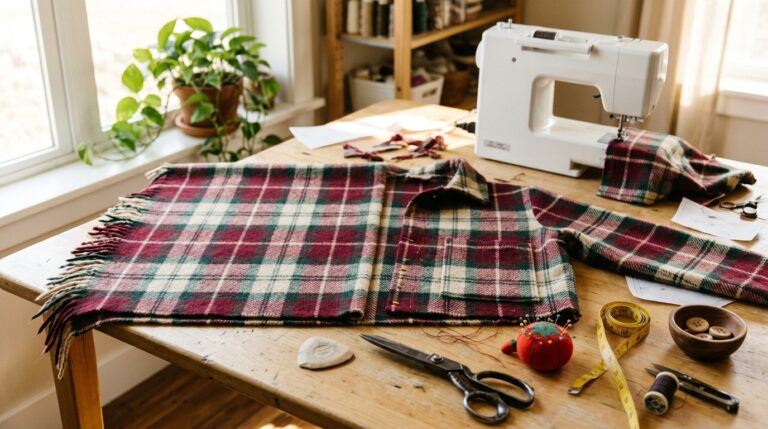
Plaid ornament makeovers look like they came straight from a cozy cabin, and they are easy to make with fabric strips and decoupage glue. Cut flannel or cotton plaid into thin strips and smooth them over the ball, overlapping a little. Red tartan is classic, but black and white buffalo check looks fresh too. Finish with a big velvet bow on top. Old flannel shirts work perfectly for this project. Do you have a plaid shirt you could cut up?
You will need: Plastic ball ornaments, thin plaid fabric or an old flannel shirt, decoupage glue, a foam brush, scissors, velvet ribbon.
How to make it: 1. Cut the fabric into strips about 1 inch wide. 2. Brush glue on the ball and smooth the strips on, overlapping slightly, then brush more glue on top. 3. Let it dry and tie a velvet bow at the top.
Turn Old Book Pages Into Ornaments
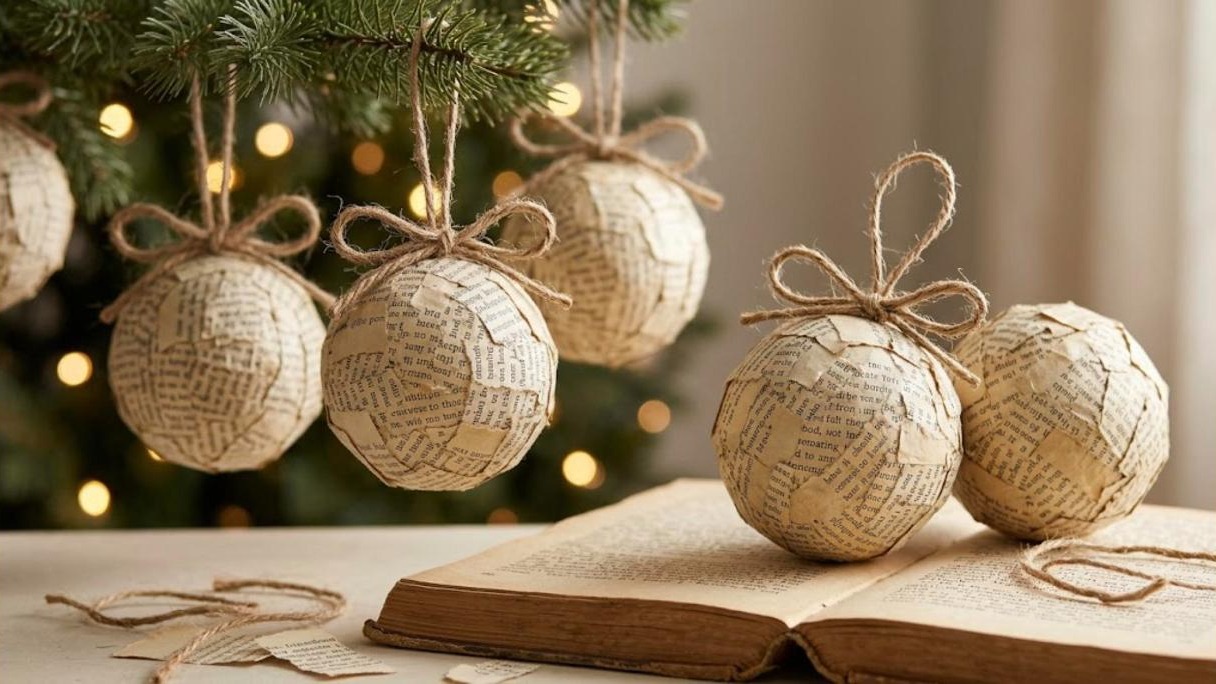
Torn book pages give ornaments a soft, cream color and a sweet vintage feel. Use pages from a falling apart book or old sheet music from a thrift store. Tear them into small pieces and glue them on like papier mache. A twine bow on top keeps the look simple. They are perfect for a book lover’s tree or a cozy reading nook. If you love projects like this, our Christmas Ornament Hacks show even more ways to use a pack of cheap ornaments. Which book would you happily tear up?
You will need: Plastic ball ornaments, old book pages or sheet music, decoupage glue, a foam brush, jute twine.
How to make it: 1. Tear the pages into pieces about the size of a postage stamp. 2. Brush glue on a small area of the ball, press the paper on and brush glue over it. 3. Cover the whole ball, let it dry and tie a twine bow on top.
Ornament Makeovers From an Old Sweater
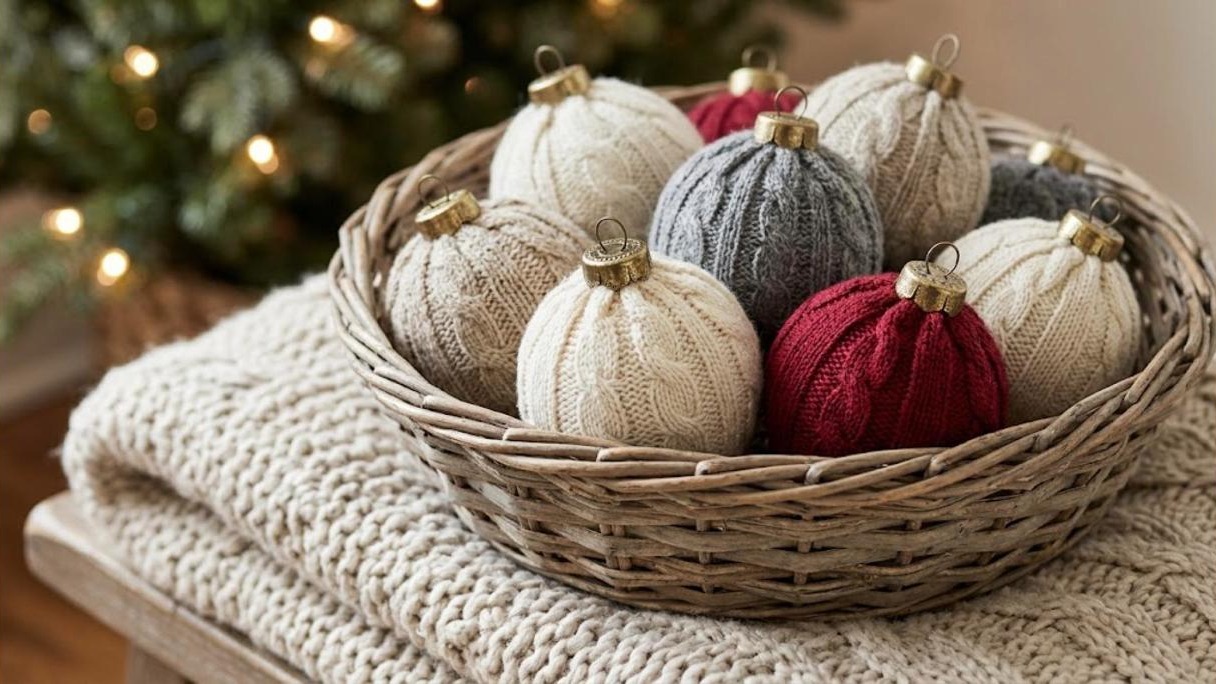
An old sweater with a hole in it can become a whole set of cozy ornaments. The sleeves are already shaped like a tube, so they slide right over a ball. Cable knit looks especially pretty, and cream, oatmeal, gray and cranberry all go together. Gather the top under the cap and tie the bottom closed. Pile them in a basket on a blanket and your living room instantly feels warmer. Do you have a sweater ready to retire?
You will need: Plastic ball ornaments, an old knit sweater, scissors, thread or a rubber band, fabric glue, ornament caps.
How to make it: 1. Cut a section of sleeve a little longer than the ball. 2. Slide the ball in, tie the bottom closed and tuck the ends inside. 3. Gather the top, add glue and press the cap back on.
Stud Ornaments With Faux Pearls
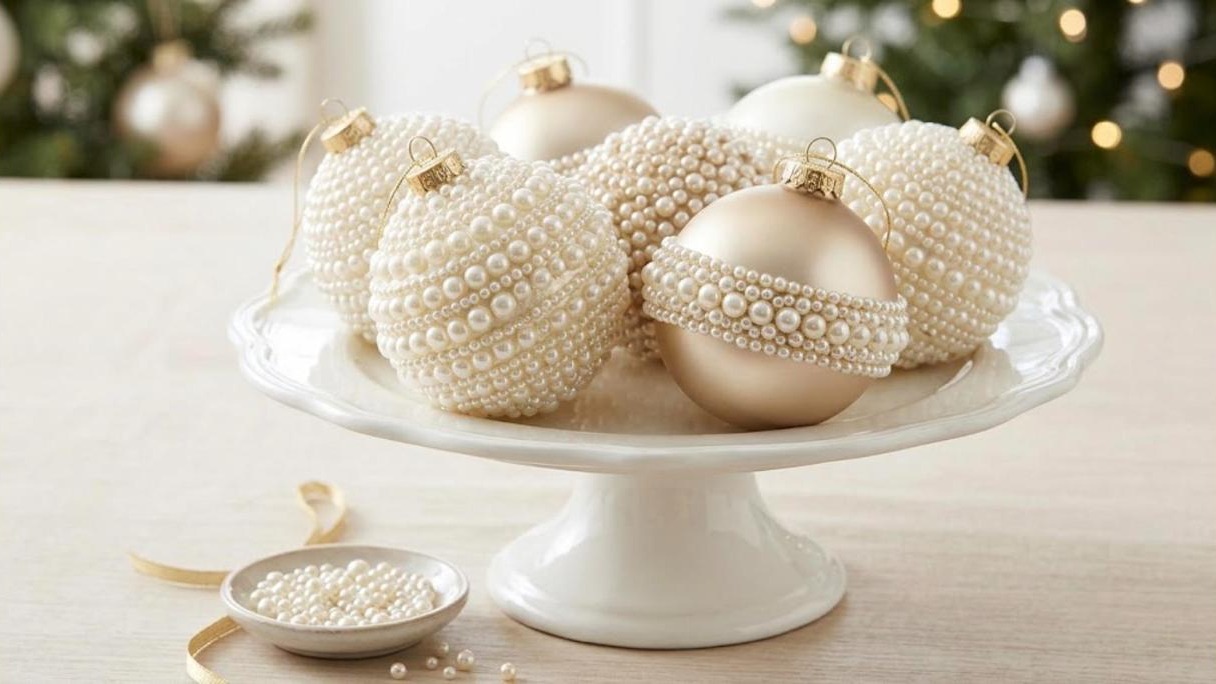
Pearls make ornament makeovers look like they belong in a fancy hotel lobby. Craft pearls with flat backs are easy to glue on, and you can buy a big bag for very little. Cover a whole ball in neat rows or just add a single band around the middle. Ivory, champagne and soft gold look elegant together on a white cake stand. This one takes a little patience, so put on some music. Ask an adult for help with hot glue. Would you go all over pearl or just a band?
You will need: Matte ivory or champagne ornaments, flat back craft pearls in two sizes, tacky glue or a low temp glue gun with adult help, tweezers.
How to make it: 1. Start at the top and glue a ring of pearls around the cap. 2. Keep adding rows downward, mixing big and small pearls. 3. Let it dry fully before hanging.
Give Ornaments a Matte Chalk Paint Finish
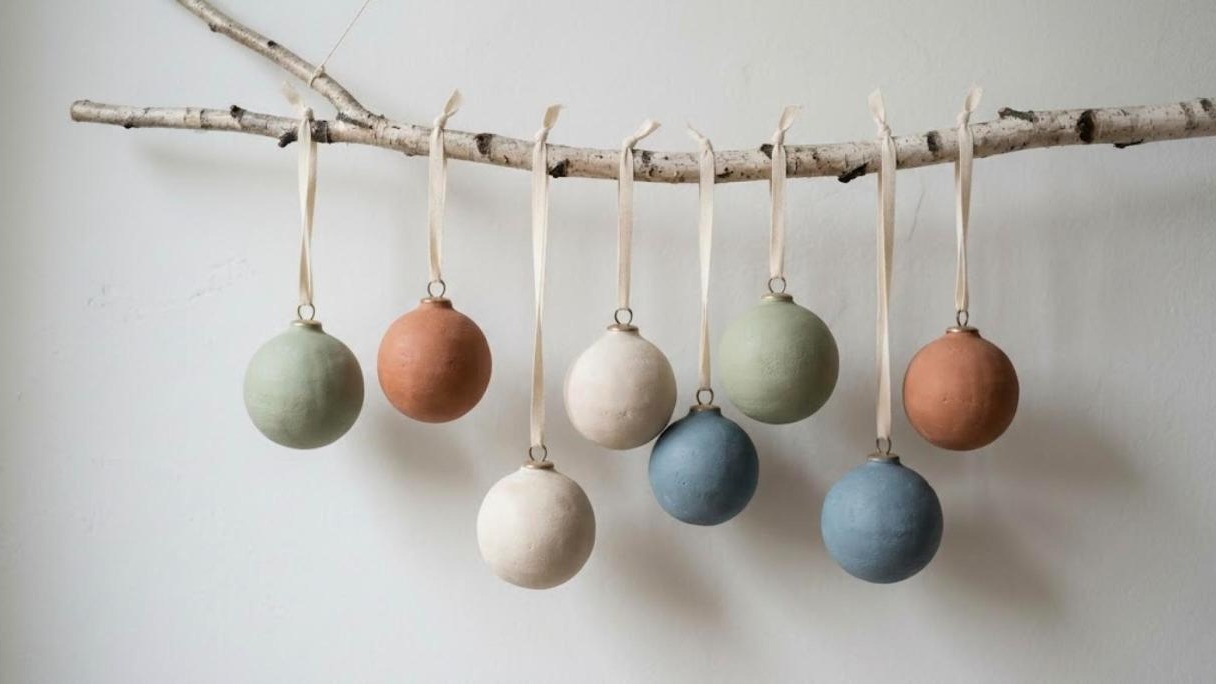
A matte, chalky finish is one of the simplest ornament makeovers, and it makes shiny plastic look like handmade pottery. Mix a spoonful of baking soda into chalk paint or acrylic paint and dab it on with a sponge for a soft stone texture. Earthy colors like sage, terracotta, dusty blue and warm white look calm and modern. Hang them from a bare birch branch with cream ribbon for a simple Scandinavian look. Which color would fit your home best?
You will need: Plastic ball ornaments, chalk paint or acrylic paint, baking soda, a sponge brush, cream ribbon, a paper cup for drying.
How to make it: 1. Stir about 1 tablespoon of baking soda into 1/4 cup of paint. 2. Dab the paint over the ball with a sponge for texture. 3. Let it dry in a paper cup, add a second coat and tie on a ribbon.
Upgrade the Toppers With Big Ribbon Bows

Sometimes the easiest ornament makeovers happen right at the top. Those plain metal caps instantly look fancy when you hide them under a big bow made from wide velvet or satin ribbon. Layer two ribbons, like velvet on top of champagne satin, and leave long tails that drape down the tree. This works even on plain red and gold balls straight from the box. It is a great last minute fix if guests are coming tonight. How many bows could you tie in an hour?
You will need: Plain ball ornaments, wide velvet ribbon, wide satin ribbon, floral wire or thin ribbon, scissors.
How to make it: 1. Cut an 18 inch piece of each ribbon and layer them together. 2. Tie them into a bow and pinch the center with floral wire. 3. Wire the bow onto the ornament cap and trim the tails at an angle.
Ornament Makeovers With a Frosty Finish
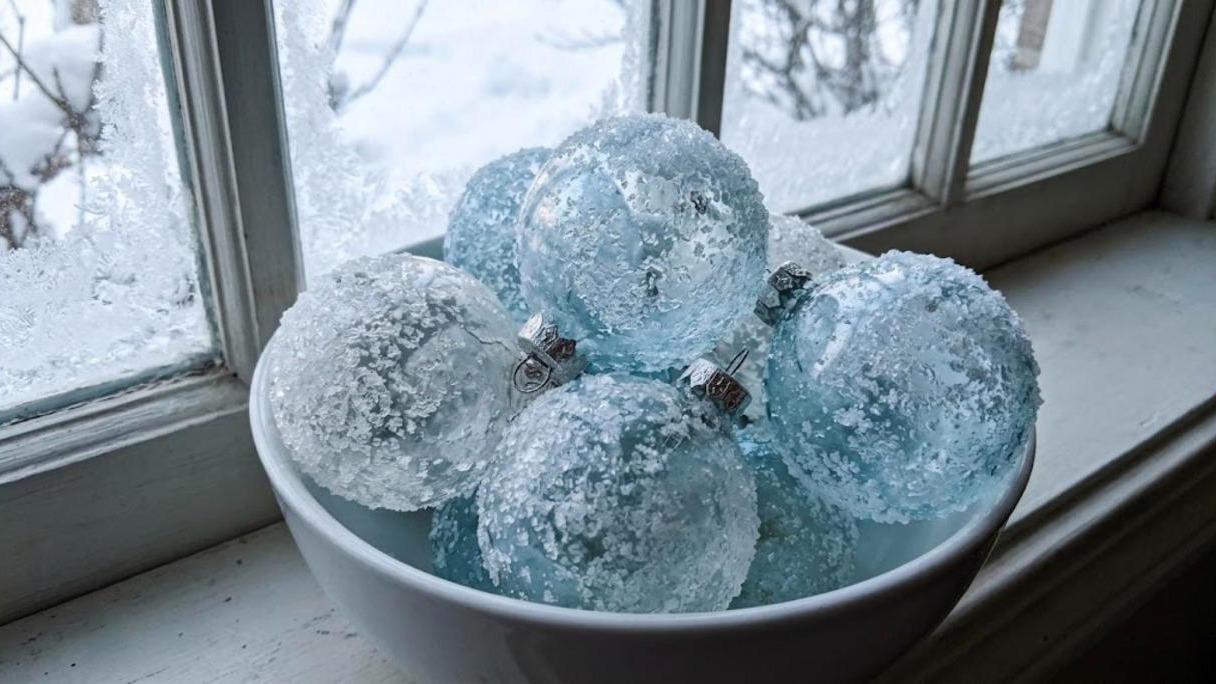
Epsom salt is a cheap pantry find that makes ornaments look icy and frosted, like the edges of a winter window. Brush decoupage glue over a clear or pale blue ball, then roll it in coarse Epsom salt. The crystals catch the light and sparkle without any glitter mess. Pile them in a white bowl by the window for a cool winter look. A great idea came from a dollar store ornament styling post on Instagram that shows how far simple supplies can go. Would you try this on clear or colored balls?
You will need: Clear or pale blue ornaments, coarse Epsom salt, decoupage glue, a foam brush, a shallow bowl.
How to make it: 1. Pour Epsom salt into a shallow bowl. 2. Brush glue all over the ornament. 3. Roll it in the salt, press gently and let it dry for a few hours.
Mix Metals for a Designer Set
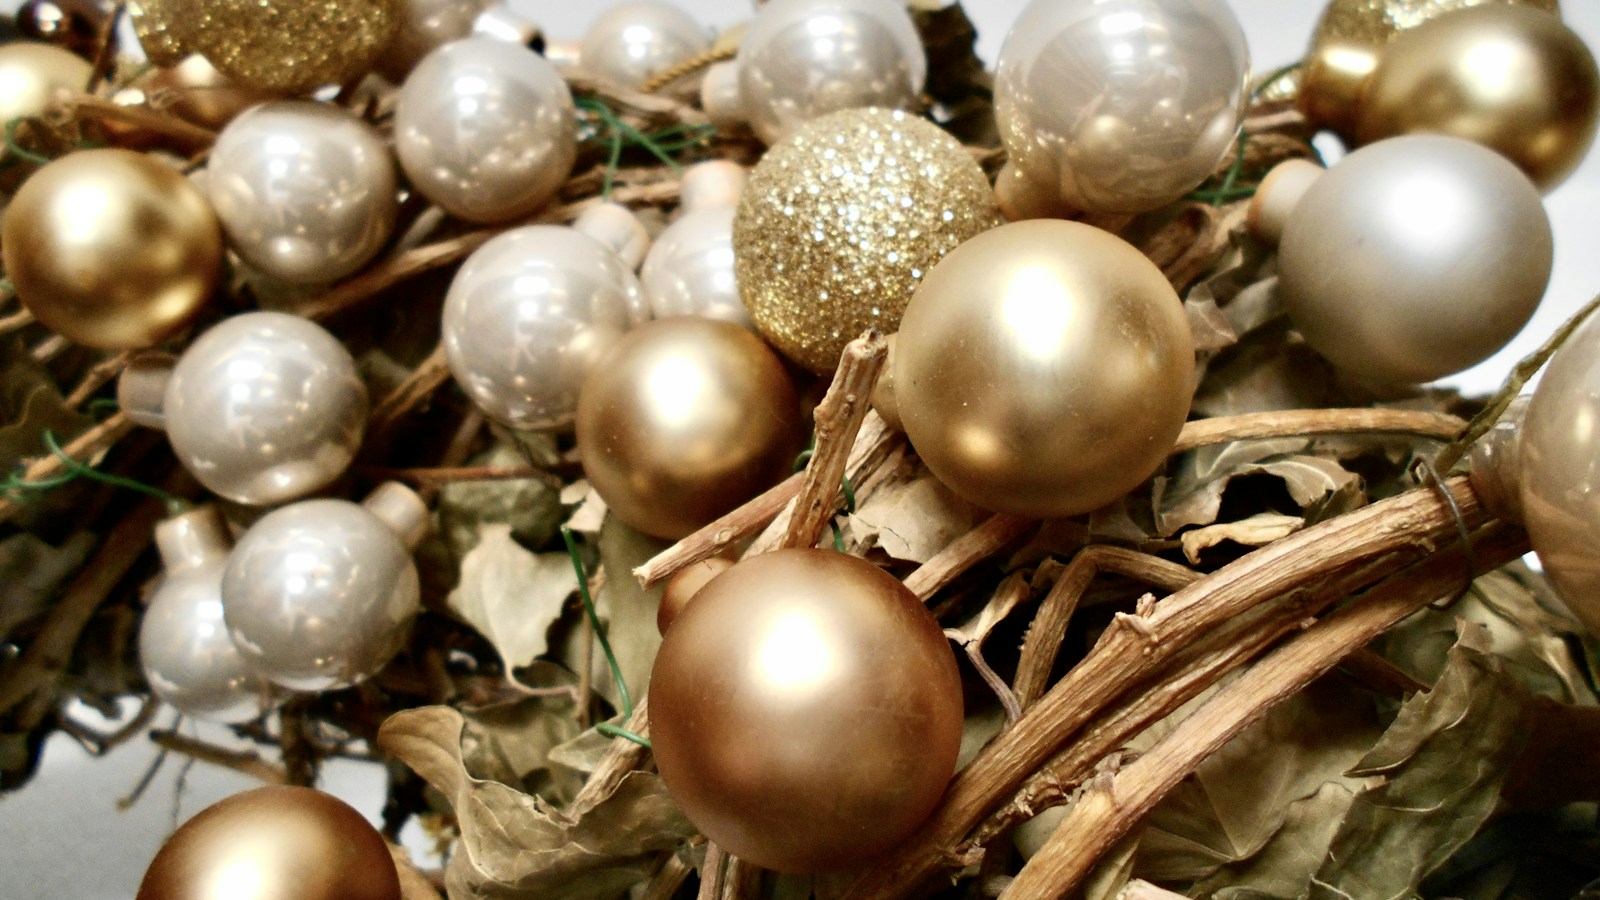
Designer trees rarely use just one shade of gold, so finish your ornament makeovers with a mixed metal set. Stylists mix warm gold, soft champagne, pearly silver and a touch of glitter for depth. Take your plainest ornaments and spray them in two or three metallic colors outdoors with adult help, then add a few glittery ones. Cluster them in groups of three on the tree or tuck them into a grapevine wreath. Mixing finishes, shiny and matte, makes the whole set look rich. Which metals would you mix?
You will need: Plain ornaments, metallic spray paint in gold, champagne and silver, fine glitter, craft glue, a grapevine wreath if you like.
How to make it: 1. Spray the ornaments in two or three metal shades outdoors with adult help. 2. Brush glue on a few and sprinkle with glitter. 3. Group them in threes on the tree or wire them into a wreath.