Velvet Christmas Ornaments: 17 Plush DIY Pieces That Look Like Boutique Heirlooms
Velvet Christmas Ornaments are the soft, rich touch that makes a tree look like it came from a fancy hotel lobby. Run your hand over one and you understand the appeal right away. They feel cozy, they catch the light in a gentle way, and they never look cheap. The catch is the price tag in stores, where a small box can cost more than a whole tree. The good news is that you can make your own from velvet scraps, ribbon, old plastic balls and a little patience. Searches for DIY velvet and flocked ornaments are climbing fast this season, and once you try one you will see why. Most of these ideas take an evening, a cup of cocoa and a pile of fabric you may already have. Pick your favorite jewel colors and let’s get started..
Velvet Christmas Ornaments Piled in a Wooden Bowl
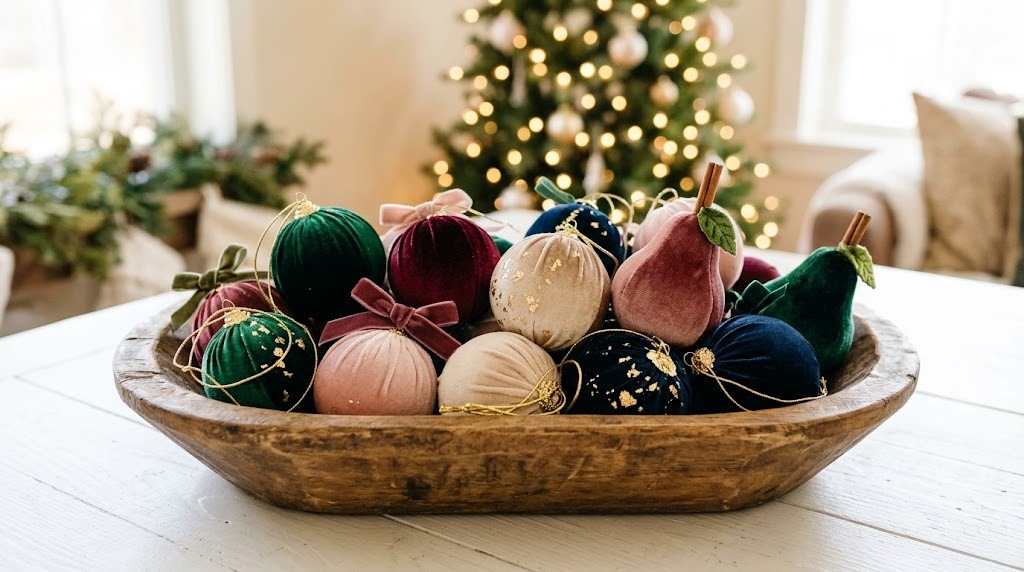
Before you hang a single one, try this. Fill a wooden dough bowl with every velvet ball you make and set it in the middle of the table. Emerald, burgundy, blush and champagne look like a bowl of jewels, and the soft fabric glows in morning light. It is the easiest display in this whole list and it changes the room in seconds. If you love making your own ornaments, our clay Christmas ornaments mix in beautifully. Which color will you start with..
You will need: A wooden dough bowl or tray, a mix of finished velvet ornaments, a few sprigs of greenery, a short strand of battery fairy lights.
How to make it: 1. Lay the greenery in the bottom of the bowl. 2. Pile the ornaments in, largest first, then fill gaps with small ones. 3. Tuck the battery lights between them and switch them on at night.
Plush Velvet Pears With Cinnamon Stick Stems

Velvet pears are the velvet Christmas ornaments everyone asks about. They look like something from an old European market, yet they are just a foam pear shape, a circle of velvet and a cinnamon stick. The fabric gathers at the top, the cinnamon covers the gap and adds a sweet smell. Make them in sage, gold and rose so they look like a basket of fruit on the branches. They also make lovely place card holders at Christmas dinner. Would you hang them on the tree or set them on the table?
You will need: Foam pear shapes or a small egg shaped foam form, velvet fabric, needle and strong thread, cinnamon sticks, green felt or velvet for leaves, glue (hot glue with adult help).
How to make it: 1. Cut a velvet circle about three times as wide as the pear. 2. Sew a running stitch around the edge, set the pear inside and pull the thread tight. 3. Glue a short cinnamon stick and a felt leaf over the gathered top.
Velvet Ribbon Wrapped Balls From Old Plastic Ornaments
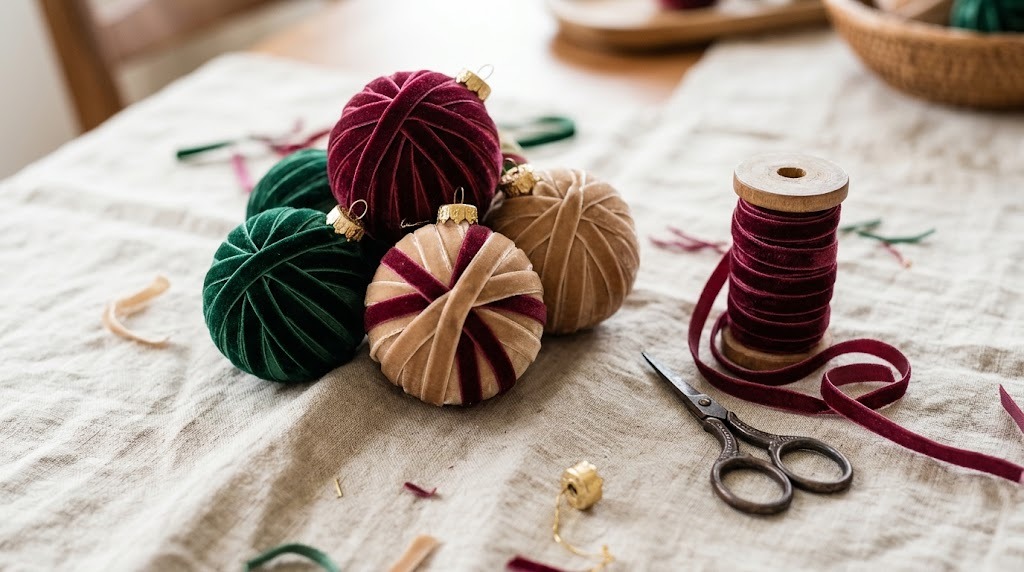
Got a box of tired plastic ornaments with scuffed paint? Do not toss them. Wrap each one in strips of velvet ribbon, crossing over the top and bottom like slices of an orange, and they turn into plush velvet Christmas ornaments with a lovely striped texture. Narrow ribbon works best because it hugs the curve without bunching. Use one color per ball, or mix two shades of green for a subtle look. It is a quiet, cozy evening project. How many old balls are hiding in your storage bins?
You will need: Old plastic ball ornaments, narrow velvet ribbon (about a quarter inch), tacky glue or a glue gun with adult help, scissors, a ribbon for hanging.
How to make it: 1. Pull the cap off and glue the ribbon end at the top. 2. Wrap down and around the ball, crossing at top and bottom until it is covered. 3. Glue the end under the cap, press the cap back on and add a hanging loop.
Gold Leaf Touches on Velvet Christmas Ornaments

Gold leaf is the trick that makes homemade pieces look designer. A few flakes on a deep green or navy velvet ball look like real jewelry. You do not need to cover the whole thing. A band around the middle or a dab near the cap is enough. The thin metal sheets come in small books at any craft store and cost a few dollars. Brush on the size glue, wait until it turns clear and tacky, then press the leaf on with a soft brush. Do you prefer bright gold or soft champagne?
You will need: Velvet covered ornaments, imitation gold leaf sheets, gold leaf adhesive (size), a small paintbrush, a soft dry brush, gold cord for hanging.
How to make it: 1. Paint a thin band of adhesive where you want the gold and wait until it is tacky. 2. Lay a piece of gold leaf on and press it down gently. 3. Brush away the loose flakes and tie on gold cord.
Clip On Velvet Bows for Every Branch

Velvet bows are the quickest way to fill a tree, and they cost far less than a box of ornaments. Tie them from wide ribbon and add a small clip on the back so you can move them around until the spacing looks right. Deep red velvet bows on a green tree feel classic, while blush or ivory bows look soft and modern. Make a big batch while you watch a holiday movie. Thirty bows can take less than an hour once you get the rhythm. Want to try a whole tree of bows?
You will need: Wide velvet ribbon, scissors, thin floral wire, small wooden or metal clips, glue (hot glue with adult help).
How to make it: 1. Cut ribbon into lengths about 20 inches long. 2. Tie a simple bow and pinch the center with floral wire. 3. Trim the tails at an angle and glue a clip to the back.
Flocked Ornaments That Feel Like Velvet
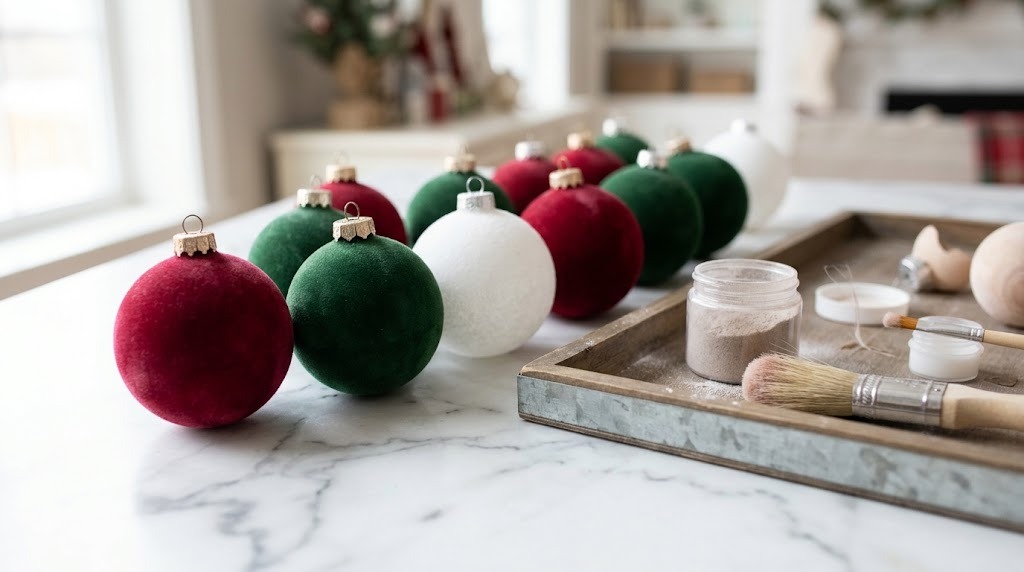
Flocking is how factories make that velvety finish on ornaments, and you can do it at home. You paint glue on a plain ball, then shake fine fibers over it until it is fully coated. The result is a soft matte ball that looks like it was dipped in suede, a close cousin of velvet Christmas ornaments at a fraction of the price. Work over a tray so you can pour the extra powder back into the jar, and do it in a well aired room. White flocking on clear glass gives a snowy look. Will you try white, red or a deep forest green?
You will need: Plain plastic or glass ornaments, flocking powder in your color, matching acrylic paint, white craft glue or flocking adhesive, a paintbrush, a tray.
How to make it: 1. Paint the ball in a matching color and let it dry. 2. Brush on a thin even coat of glue. 3. Spoon flocking powder over the ball, tap off the extra and let it dry overnight.
Stuffed Velvet Stars Sewn From Scraps
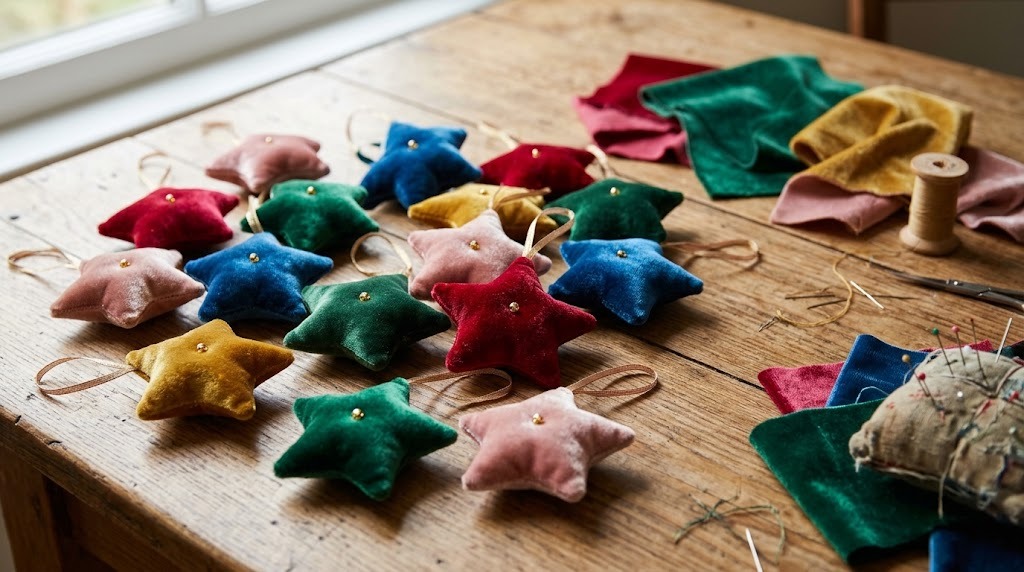
Small scraps of velvet are perfect for little stuffed stars. Cut two star shapes, sew around the edge and stuff them softly so the points stay sharp. A tiny gold bead in the center makes them look finished. These are great for beginners because the seams hide in the plush fabric, so even wobbly stitches look fine. Make a set of five in different colors and tie them together as a gift for a friend who loves to sew. Do you have a scrap bag waiting for a project like this?
You will need: Velvet scraps, a paper star template, pins, needle and thread or a sewing machine, fiberfill stuffing, small gold beads, thin ribbon.
How to make it: 1. Trace the star on the back of the fabric and cut two pieces. 2. Sew around the edges right sides together, leaving a small gap, then turn it out. 3. Stuff, stitch the gap closed and sew a bead and ribbon loop on top.
Soft Velvet Heart Ornaments for a Sweet Tree
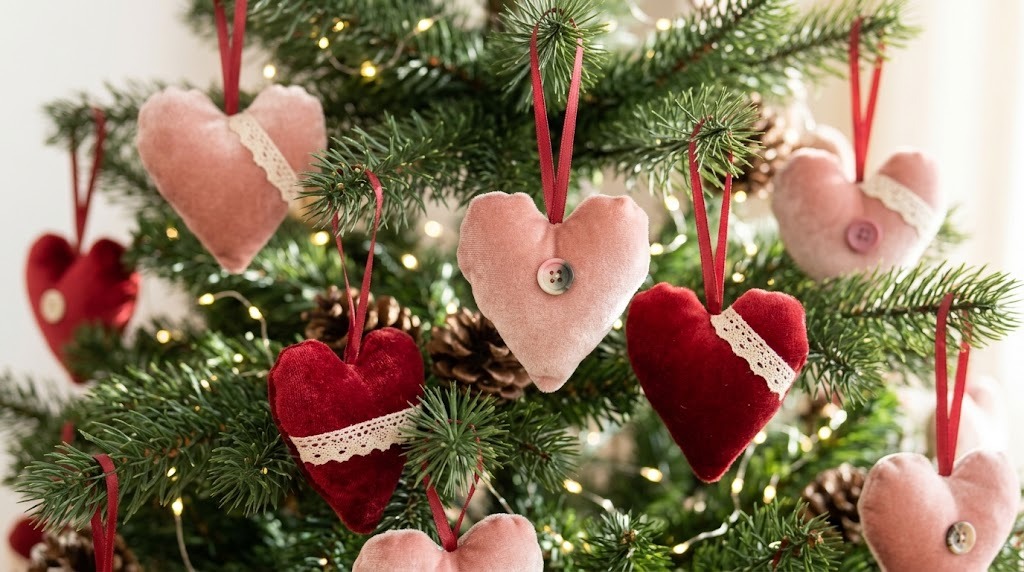
Velvet hearts give a tree that old world Scandinavian feeling, only softer and a bit more luxe. Blush pink and deep red look sweet together, and they double as Valentine decor later. You can sew them, or skip the sewing and glue velvet onto a cardboard heart for a flat version that is quick enough for kids to help with. Add a strip of lace or a small button and each one feels like a keepsake. Who would you make a heart for first?
You will need: Velvet fabric, a heart template, needle and thread or tacky glue, light cardboard, stuffing, small buttons or lace, ribbon.
How to make it: 1. Cut two velvet hearts, or one cardboard heart and two velvet pieces slightly bigger. 2. Sew and stuff, or glue the velvet onto each side of the cardboard. 3. Add a button or lace and a ribbon loop.
Velvet Mushroom Ornaments for a Woodland Tree
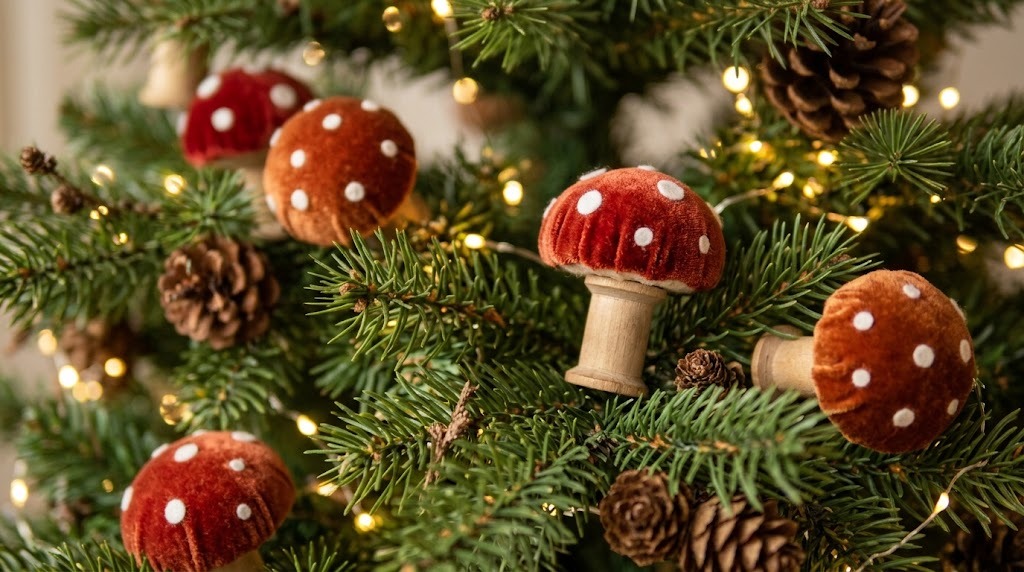
Little mushroom ornaments are everywhere this year, and velvet makes them extra cute. The cap is a half foam ball covered in red or rust velvet, the stem is a wooden spool or a rolled scrap of felt. A few white felt dots on the cap make it look like a storybook toadstool. They look sweet tucked deep into branches, as if they grew there. Make them in cream and caramel for a calmer look, and mix them with your other velvet Christmas ornaments. Would these fit on your tree or would you set them on a shelf?
You will need: Half foam balls, red or rust velvet, small wooden spools or felt, white felt dots, glue (hot glue with adult help), thin cord.
How to make it: 1. Wrap velvet over the round side of the foam half and glue it underneath. 2. Glue the spool or rolled felt under the cap as a stem. 3. Add white felt dots and a cord loop on top.
Velvet Acorns With Real Acorn Caps
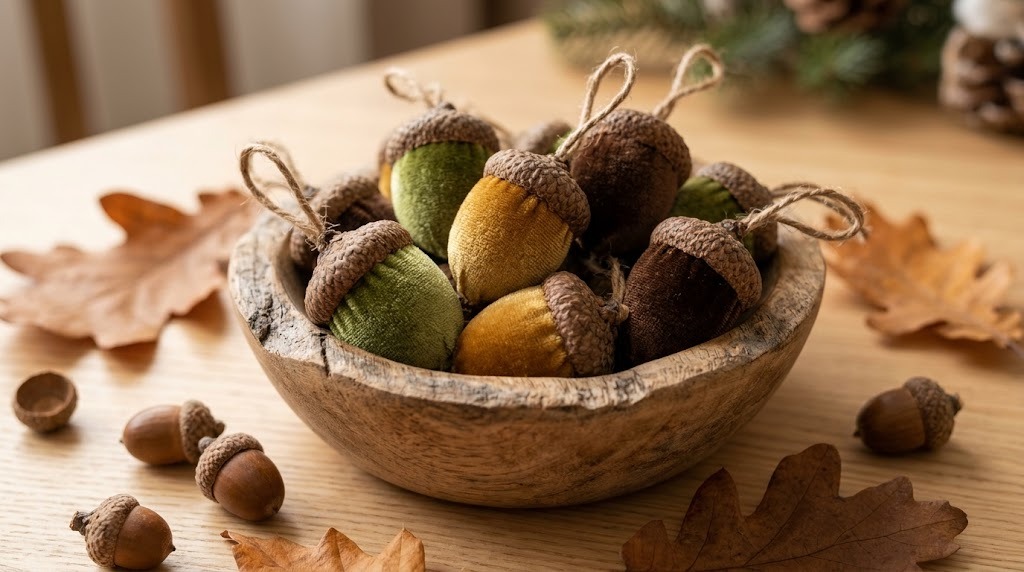
Save the acorn caps you find on your next walk. A small velvet ball glued into a real cap turns into a soft little acorn that looks charming in a bowl, on a garland or on the tree. Make the nut from a wooden bead or a small foam egg wrapped in velvet. Mix moss green, gold and brown for a forest look. They are tiny, so they are perfect for small trees and wreaths. Have you ever saved acorn caps just because they were pretty?
You will need: Clean dry acorn caps, small foam eggs or wooden beads, velvet scraps, tacky glue, thin twine, a needle.
How to make it: 1. Wrap each bead or egg in velvet and glue it closed at the top. 2. Glue the velvet nut into an acorn cap. 3. Glue a twine loop to the top of the cap and let it dry.
Velvet Tassel Ornaments With a Wooden Bead Top
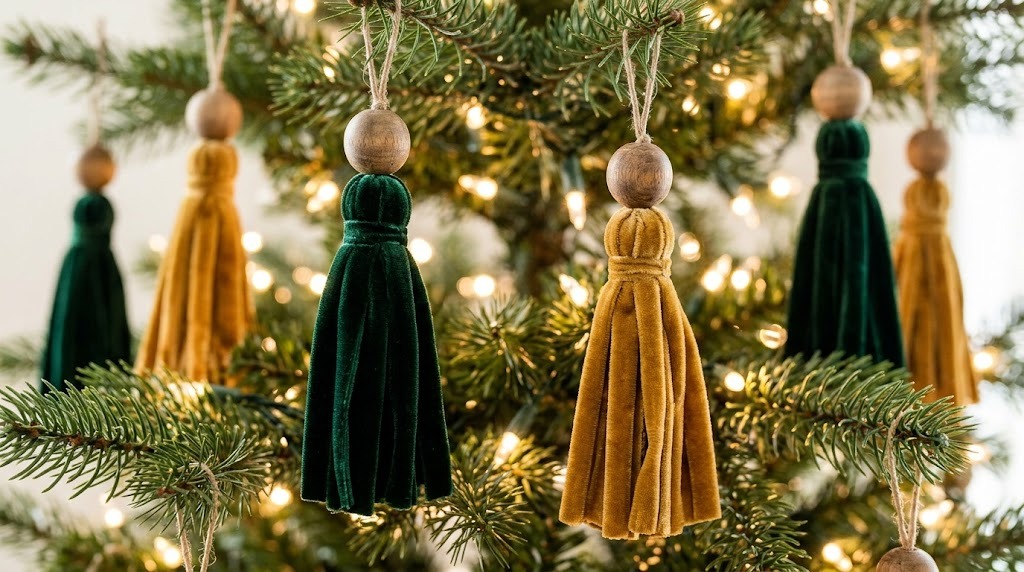
Tassels are the easy way to add movement to a tree. Cut thin velvet ribbon or velvet yarn, fold it over and wrap the top tight, then thread on a big wooden bead. They swing a little whenever someone walks by, and that tiny motion makes the whole tree feel alive. Hang them from door knobs, gift bags or the ends of curtain rods too. Gold and green tassels with a natural bead look like something from a designer shop. Which spot in your house would you hang one first?
You will need: Thin velvet ribbon or velvet chenille yarn, large wooden beads, embroidery thread, cardboard, scissors, a ribbon loop.
How to make it: 1. Wrap ribbon about 25 times around a piece of cardboard and slide it off. 2. Tie the top loop, then wrap thread tightly about an inch below to form the head. 3. Cut the bottom loops, thread on the bead and add a hanging ribbon.
Patchwork Velvet Balls From Thrifted Clothes
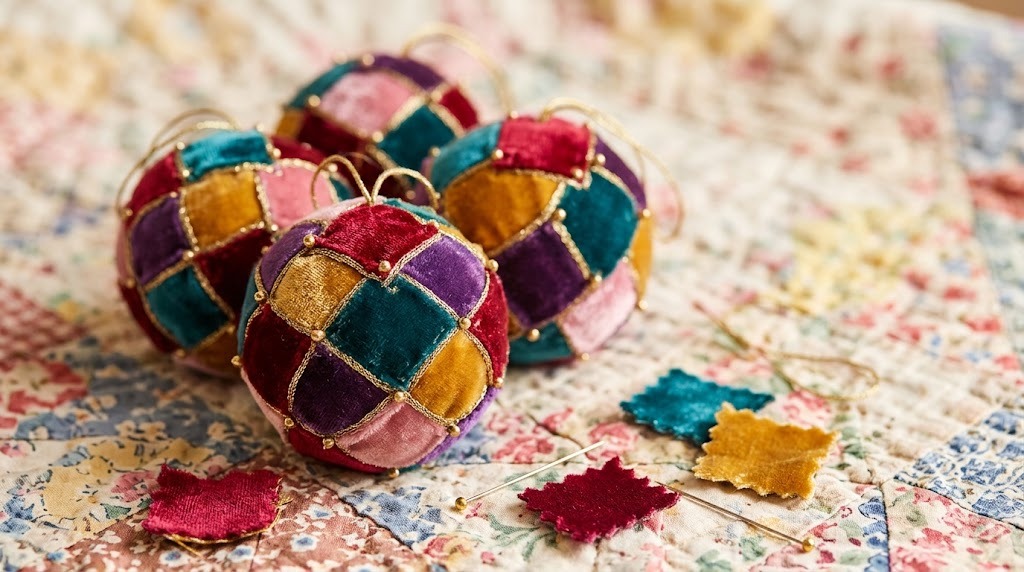
An old velvet dress or blazer from a thrift store can become a whole set of ornaments. Cut small squares and pin them on a foam ball to make patchwork velvet Christmas ornaments, overlapping like a patchwork quilt, and finish the seams with thin trim. Mixed colors look cheerful and a bit vintage, like something grandma would have made. Use sequin pins with a little bead for sparkle. It is a nice way to give a favorite old piece of clothing a new life. Is there a velvet piece in your closet you never wear anymore?
You will need: Foam balls, velvet scraps or a thrifted velvet garment, sequin pins with beads, thin gold trim, glue, ribbon for hanging.
How to make it: 1. Cut velvet into small squares and triangles. 2. Pin them over the foam ball, overlapping the edges until it is covered. 3. Glue thin trim along a few seams and pin a ribbon loop at the top.
Mini Velvet Stockings for Little Branches
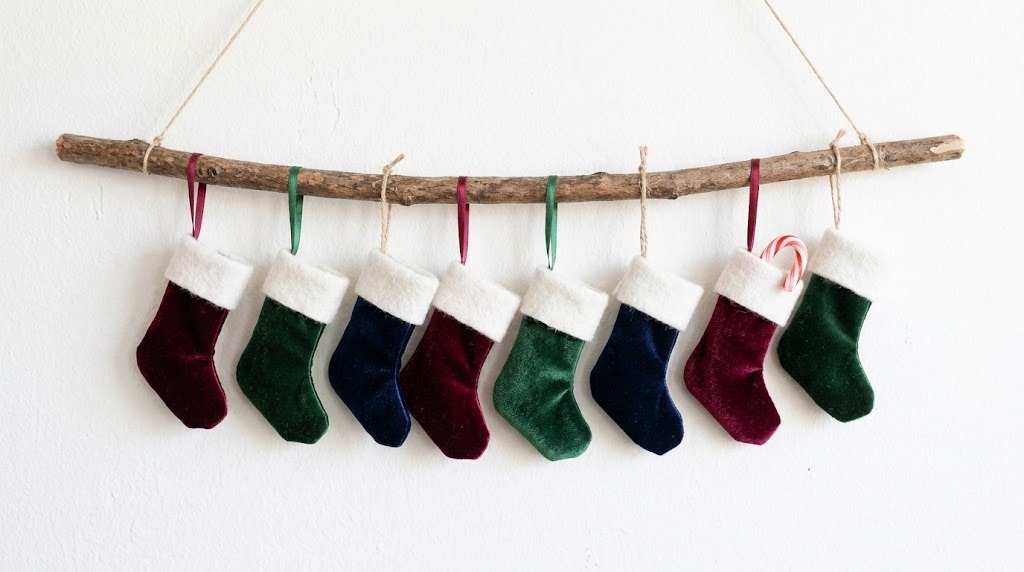
Tiny stockings are a classic, and in velvet they look extra special. Cut two small stocking shapes, add a white faux fur or felt cuff, and stitch them together. They are perfect for tucking a candy cane, a gift card or a little note inside. Make one for each person in the family and write names on the cuffs with a fabric pen. Kids love checking them every morning for a small surprise. Would you hide a sweet treat or a kind note inside yours?
You will need: Velvet scraps, white felt or faux fur for the cuff, a stocking template, needle and thread or fabric glue, ribbon, a fabric pen.
How to make it: 1. Cut two stocking shapes and one cuff strip. 2. Sew or glue the sides together, leaving the top open. 3. Glue the cuff around the top, add a ribbon loop and write a name.
Velvet Christmas Ornaments Strung Into a Mantel Garland
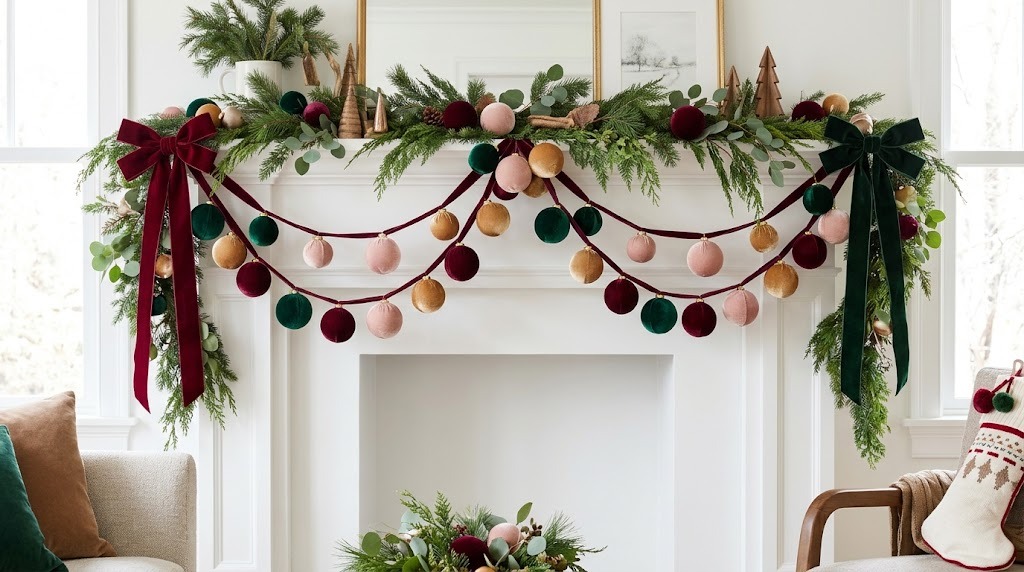
Not all velvet Christmas ornaments have to go on the tree. String a row of velvet balls on thick velvet ribbon and drape it across the mantel, a mirror or a staircase. Space them out with knots so they do not slide together. Mix sizes for a more natural look and add a few velvet bows at the ends. It looks rich, and it is soft, so there is nothing to break if the cat gets curious. Where would a garland like this look best in your home?
You will need: Velvet balls with caps, wide velvet ribbon, a few velvet bows, command hooks or garland clips.
How to make it: 1. Thread the ribbon through each ornament cap and tie a knot on both sides to hold it in place. 2. Leave about 6 inches between ornaments. 3. Hang the garland with hooks and add bows at the ends.
Velvet Ribbon Hangers Instead of Metal Hooks

Here is a small detail designers swear by, and it works with velvet Christmas ornaments or plain glass: swap the thin metal hooks for short loops of velvet ribbon. Suddenly even plain glass balls look custom, and the ornaments hang a little lower on the branch so they show better. Tie a small bow at the top of each loop for an extra polished look. Use one color for the whole tree so it looks planned. It is cheap, quick and works on store bought ornaments too. Have you ever noticed how much the hanger changes the look?
You will need: Narrow velvet ribbon, scissors, your ornaments, a little glue for the knots.
How to make it: 1. Cut ribbon into 10 inch pieces. 2. Thread each piece through the ornament cap and tie a knot at the top. 3. Tie a tiny bow over the knot and dab the knot with glue so it stays.
Velvet Christmas Ornaments as Gift Toppers

A small velvet ornament tied on top of a gift is two presents in one. Plain brown kraft paper with a velvet ribbon and a velvet pear or ball on top looks like a gift from a boutique. The person can hang it on their own tree afterward and think of you every year. Match the ornament color to the ribbon for a calm, expensive look. It also saves money on fancy bows. Who on your list would love a little ornament on top of their gift?
You will need: Kraft or plain wrapping paper, velvet ribbon, small velvet ornaments, a gift tag, tape.
How to make it: 1. Wrap the gift in plain paper. 2. Tie velvet ribbon around it both ways. 3. Thread the ornament loop onto the ribbon before tying the final bow.
A Jewel Tone Tree Full of Velvet Christmas Ornaments
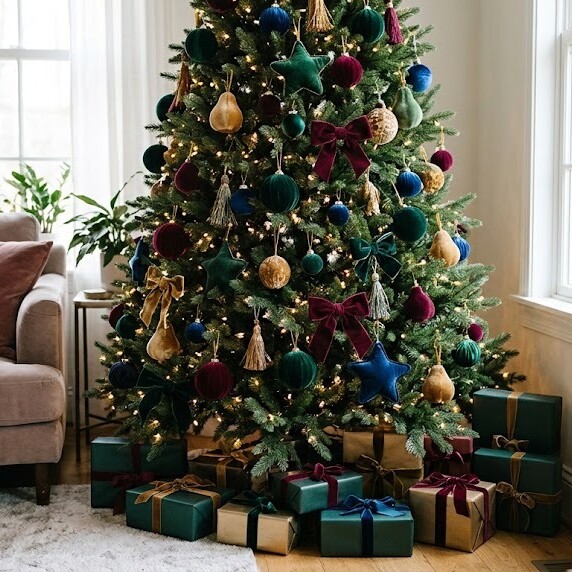
When you put it all together, you get a tree that looks soft, warm and rich from across the room. Mix your pears, bows, gold leaf balls and flocked baubles in two or three jewel colors, and add warm white lights so the velvet glows. Hang bigger pieces deep inside the branches and small ones near the tips for depth. Velvet Christmas Ornaments last for years if you store them in a box with tissue paper, so this tree only gets better. Read more about the long history of velvet, a fabric once linked to royalty. Which jewel colors will you pick for your tree?
You will need: Your handmade velvet ornaments, warm white string lights, velvet ribbon, tissue paper and a box for storage.
How to make it: 1. Put the lights on first, tucking them deep into the branches. 2. Hang the largest ornaments inside the tree, then medium, then small near the tips. 3. Finish with bows and step back to fill any gaps.