Christmas Wine Bottle Crafts: 15 Ways to Turn Empties Into Holiday Magic
Christmas wine bottle crafts are the easiest way to turn empty glass into decor that looks like it came from a boutique. Searches for these projects are climbing fast this season, and once you see what a little paint, twine and a string of fairy lights can do, you will understand why. Every bottle on this list starts with a simple soak to remove the label, then becomes a glowing centerpiece, a cheerful Santa or a frosty vase for evergreens. Most cost next to nothing, use supplies you already own and take less than an hour. They also make thoughtful gifts for neighbors and teachers. Gather a few clean bottles, clear the kitchen table and let the holiday crafting begin..
Christmas Wine Bottle Crafts That Glow on the Mantel
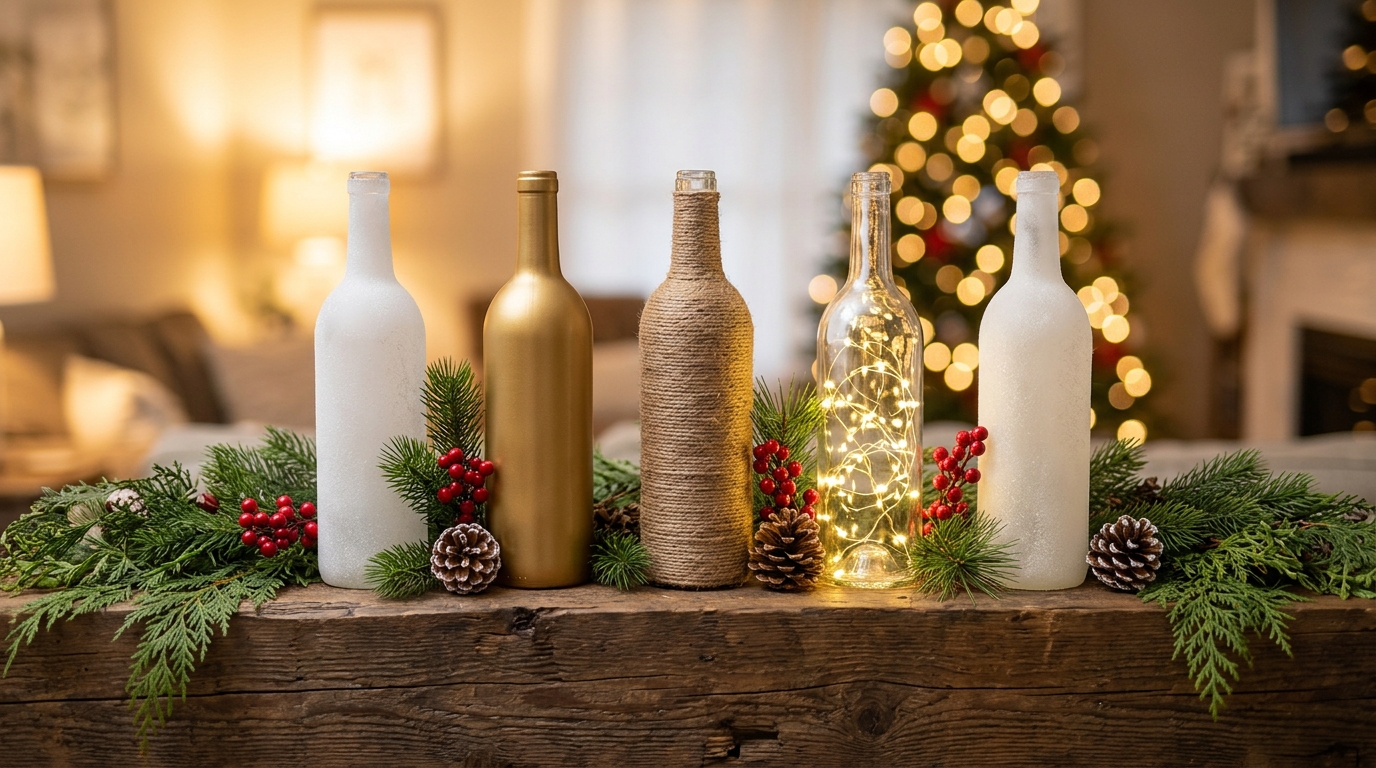
This mantel shows how a handful of bottles can set the whole holiday mood. Mix finishes like frosted white, matte gold and natural twine, then add one clear bottle filled with fairy lights so the group glows at night. Tuck pine sprigs, berries and a few pine cones between them, and the display looks planned and pricey. If you love natural touches, these pine cone Christmas crafts pair beautifully. Use battery fairy lights only, never real candles in bottles. Which finish will you try first..
You will need: Five or six clean bottles with the labels removed, white and gold spray paint, jute twine, battery fairy lights, pine sprigs and pine cones.
How to make it: 1. Soak the bottles in warm soapy water and peel off the labels. 2. Give each bottle a different finish from the ideas below. 3. Group them in odd numbers with greenery and switch on the lights.
Fairy Light Bottle
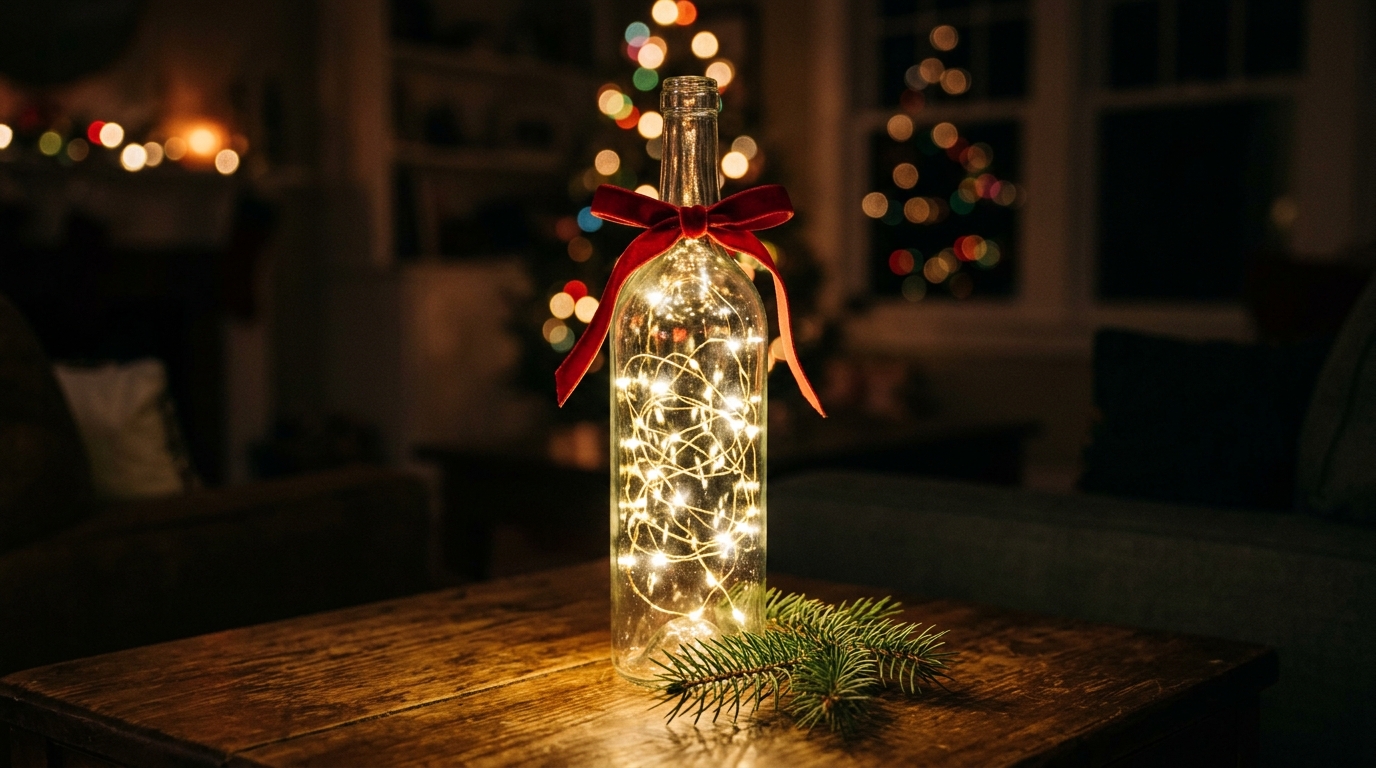
This is the craft everyone recognizes, and for good reason. Feed a strand of battery fairy lights into a clean clear bottle and it glows like a jar full of stars. Tie a velvet bow around the neck and it is ready for a side table, bookshelf or bathroom counter. Choose lights with a small battery pack you can tuck behind the bottle or hide under the bow. Some crafters drill a hole near the base, but that needs special tools, so we skip it here. Where would you put yours?
You will need: A clear bottle, a strand of battery fairy lights on thin copper wire, a ribbon and a pencil.
How to make it: 1. Clean and dry the bottle well. 2. Feed the lights in, using a pencil to push them down. 3. Tuck the battery pack behind the bottle and tie a bow.
Glitter Dipped Bottles
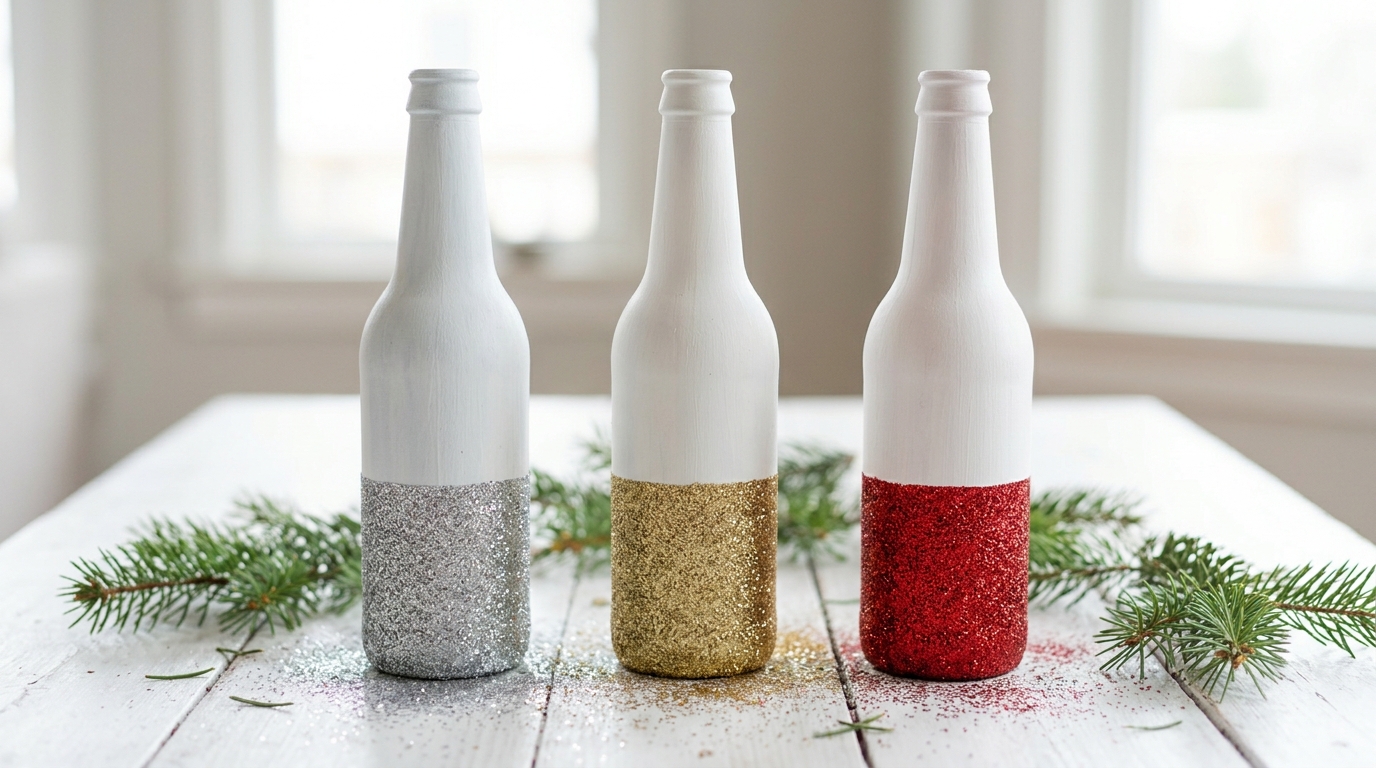
A little glitter goes a long way. Paint the whole bottle white, then tape a straight line around the middle and coat the bottom half in craft glue and fine glitter. Silver, gold and red make a classic trio. Seal the glitter with a clear spray so it does not shed all over the house. These look stunning lined up on a windowsill or dining table. Spray outdoors or near an open window, and cover your table first. Which color trio would you choose?
You will need: Bottles, white spray paint, painter’s tape, craft glue or decoupage glue, fine glitter and clear sealer.
How to make it: 1. Spray paint the bottles white and let them dry. 2. Tape a line and brush glue below it. 3. Sprinkle on glitter, remove the tape and seal.
Painted Santa Bottle
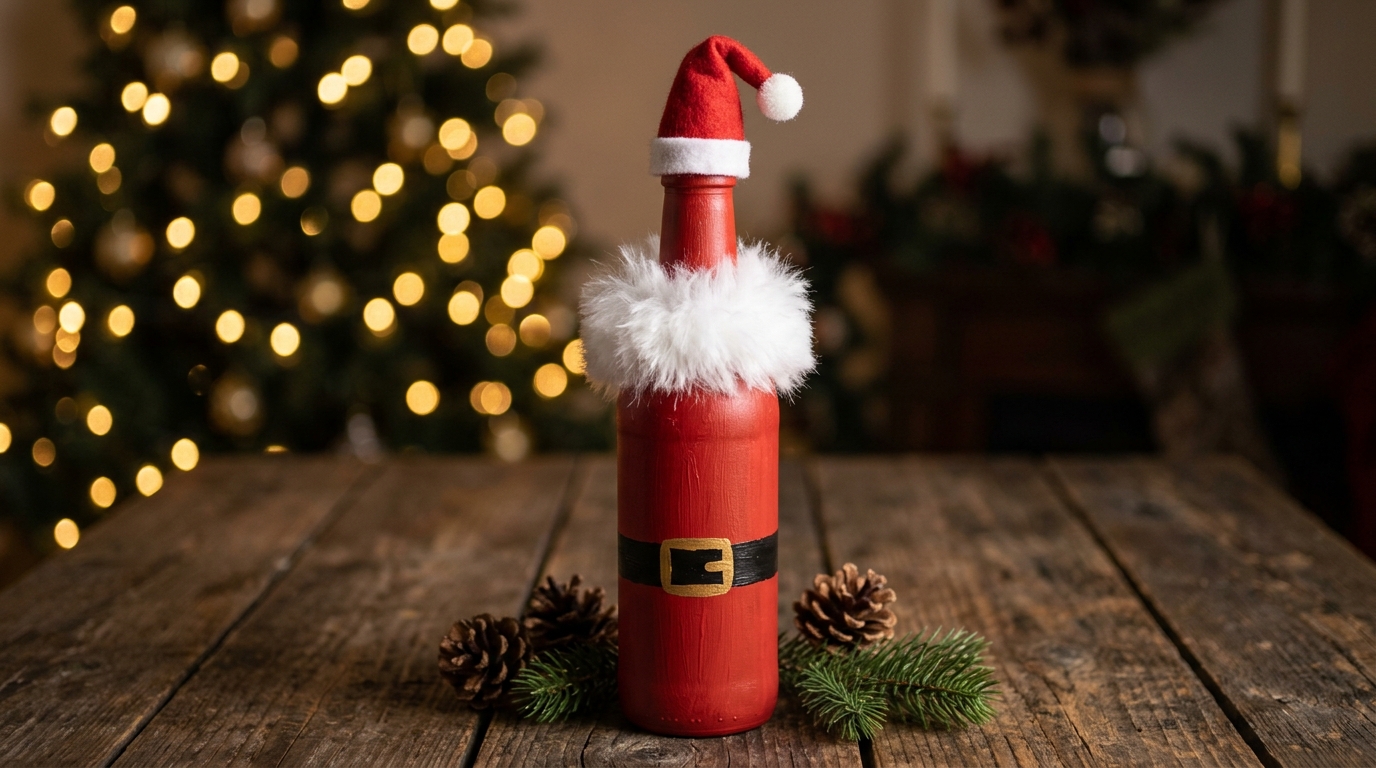
This jolly bottle makes everyone smile. Paint it bright red, add a wide black belt with a gold buckle, then glue a band of cotton or faux fur around the neck. A tiny felt Santa hat on top finishes the look. Kids can help paint the belt and buckle while an adult handles the glue gun. Make a whole set with elves and reindeer for a fun holiday table. Will you add a face or keep it simple like this one?
You will need: A bottle, red and black acrylic paint, a gold paint pen, cotton or faux fur trim, red felt and a low-temp glue gun (adult use).
How to make it: 1. Paint the bottle red in two coats. 2. Paint a black belt and add a gold buckle. 3. Glue on the fur trim and a small felt hat.
Christmas Wine Bottle Crafts Start With Clean Glass
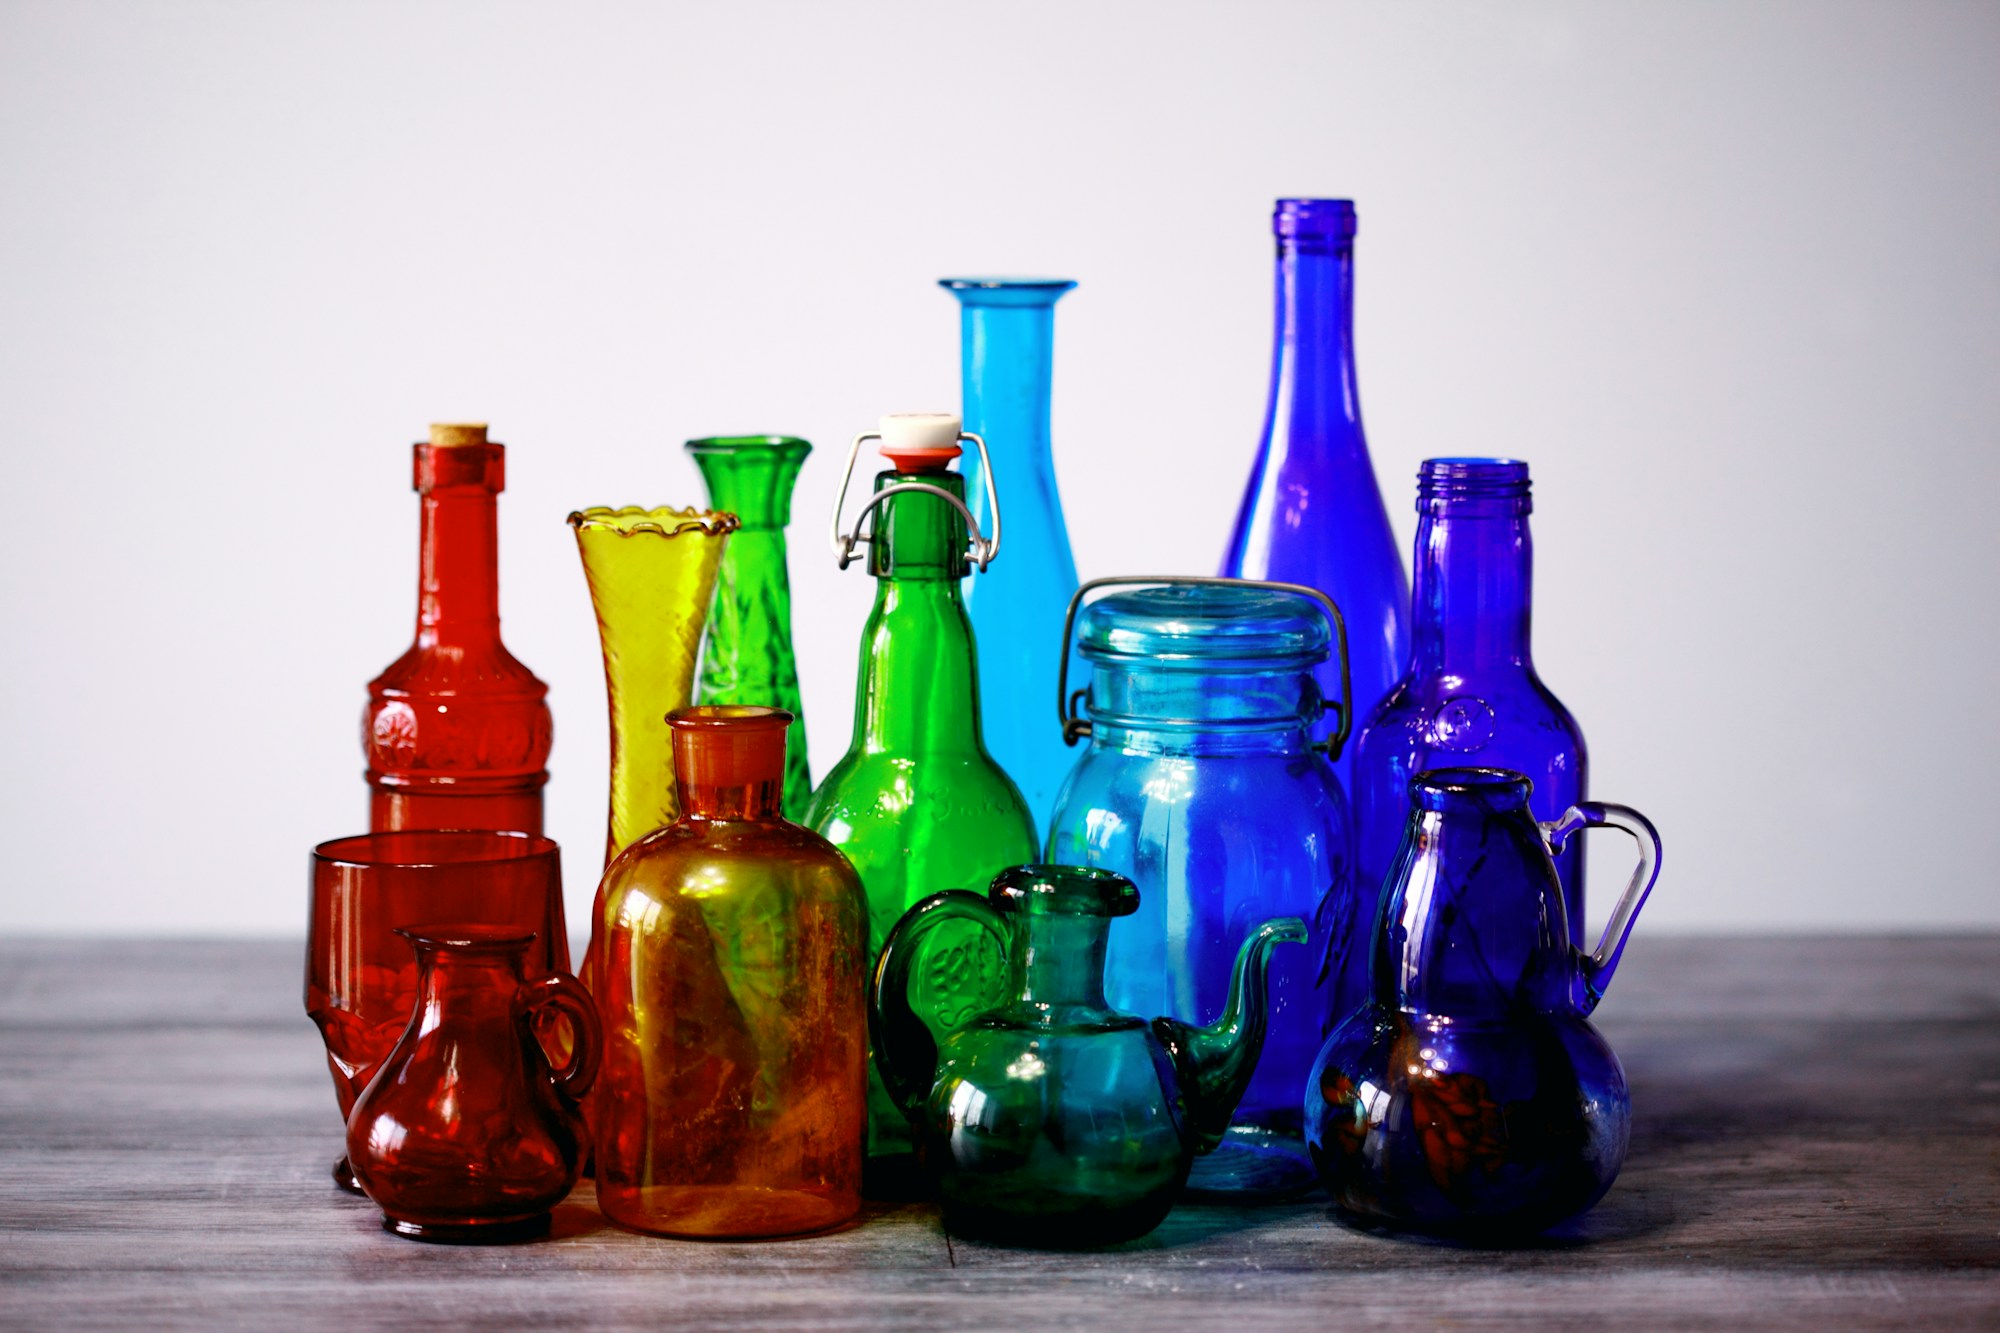
Every good project starts with clean glass. Soak bottles in hot soapy water for half an hour and most labels slide right off. For sticky glue, rub on a little cooking oil and baking soda, then wash again. Collect different shapes and colors, because a mix of tall, short, green and clear looks great in a group. Let them dry completely before you paint. Ask friends and neighbors to save their empties for you, too. How many bottles do you have waiting?
You will need: Empty bottles, a sink of hot soapy water, a scrub pad, cooking oil, baking soda and a towel.
How to make it: 1. Soak the bottles for 30 minutes. 2. Peel off the labels and scrub away the glue with oil and baking soda. 3. Wash, rinse and dry upside down.
Twine Wrapped Bottle Vase
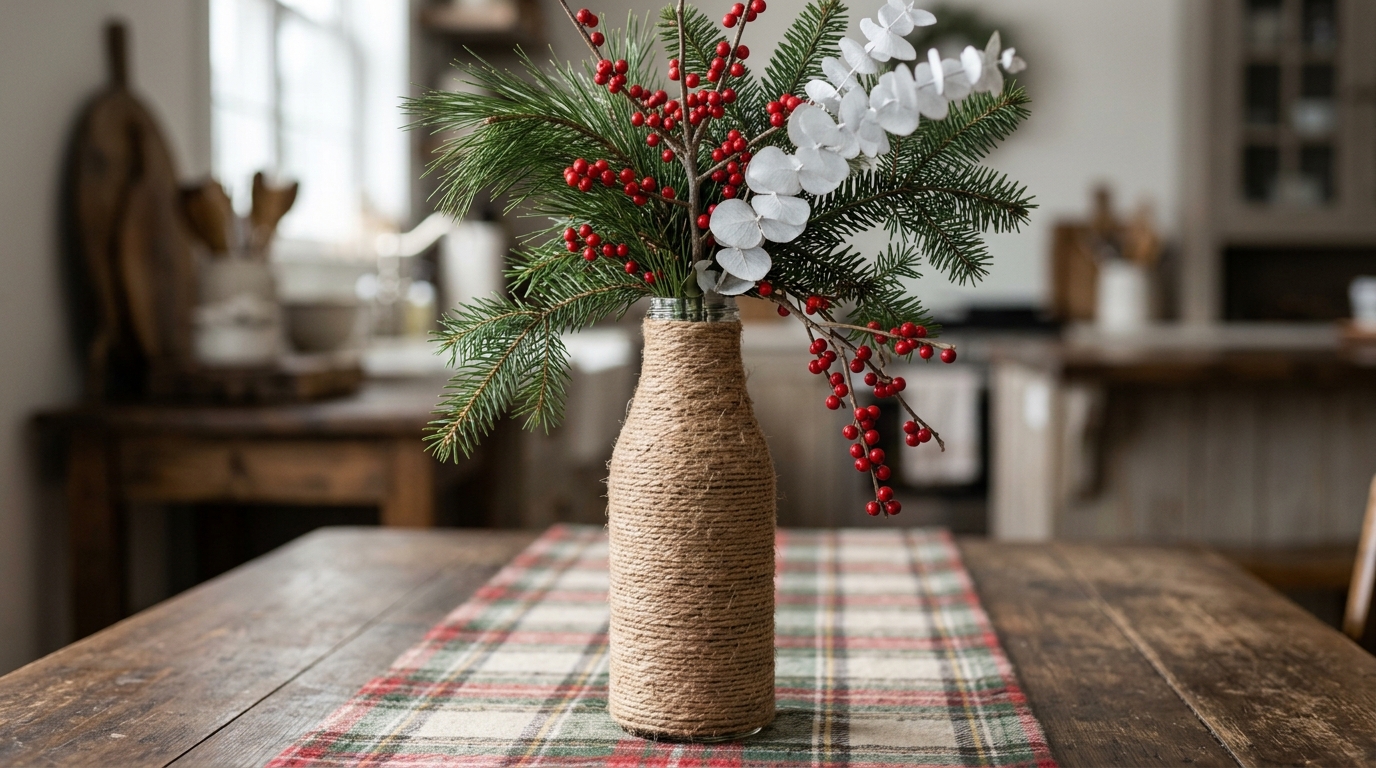
If you like rustic farmhouse style, this one is for you. Wrap jute twine around a bottle from bottom to top, adding dots of glue as you go so it stays tight. It takes about an hour, and the texture feels so cozy. Fill it with evergreen branches, red berries and white eucalyptus for a centerpiece that lasts all season. It also works for spring flowers later in the year. What would you put in your twine vase?
You will need: A tall bottle, a roll of jute twine, a low-temp glue gun (adult use) and fresh or faux greenery.
How to make it: 1. Start at the bottom with a dot of glue. 2. Wrap the twine tightly upward, gluing every few rounds. 3. Trim the end at the neck and add greenery.
Chalk Paint Winter Village
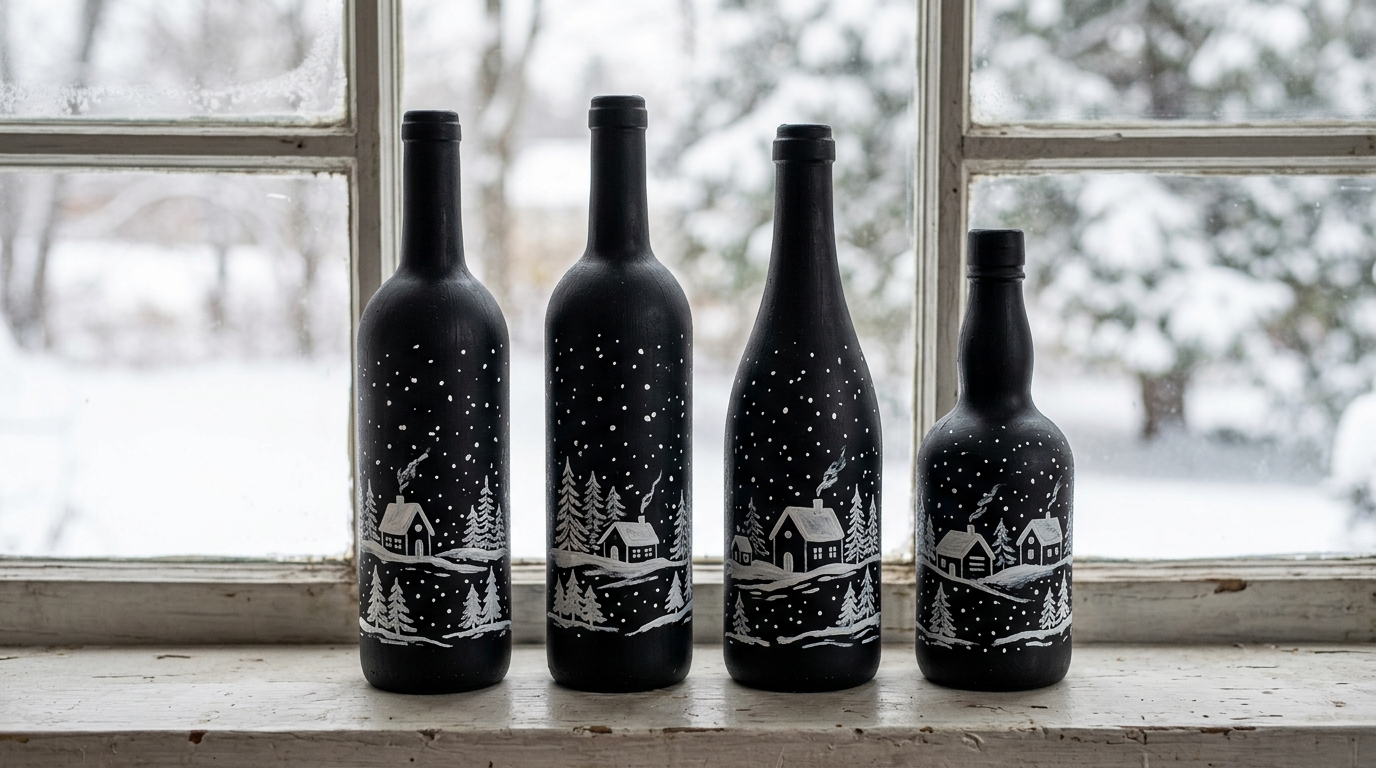
These are little works of art. Paint bottles matte black with chalk paint, then use a white paint pen to draw a simple winter village around each one. Little houses, pine trees and dots of falling snow are all you need. Line them up on a windowsill and the village seems to continue from one bottle to the next. Even if you think you cannot draw, simple shapes look charming. Which scene would you paint?
You will need: Bottles, black chalk paint, a foam brush, a white paint pen and clear matte sealer.
How to make it: 1. Paint the bottles black in two thin coats. 2. Sketch houses and trees with the white paint pen. 3. Add snow dots and seal when dry.
Christmas Wine Bottle Crafts With a Frosted Snow Finish
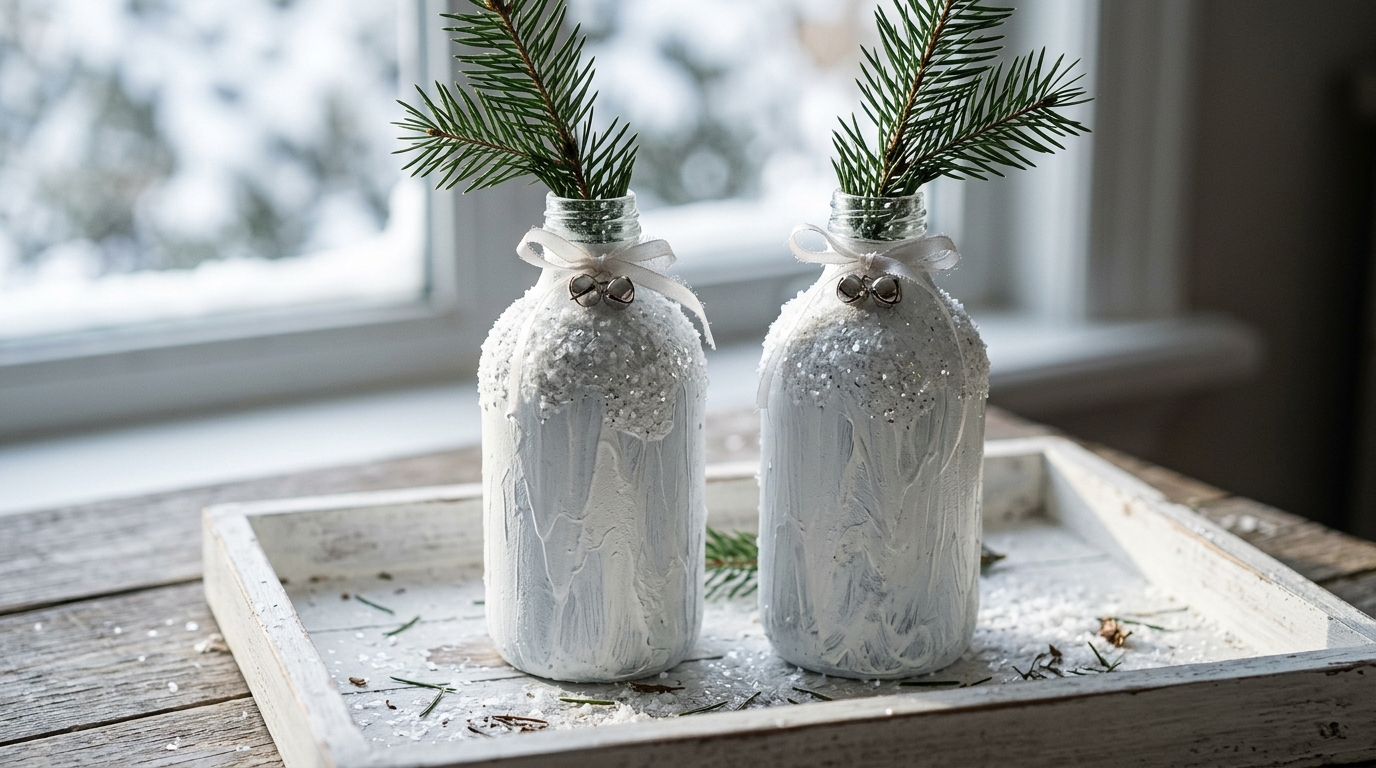
Want a bottle that looks like it was left out in a snowstorm? Dab on white paint mixed with a little baking soda using a sponge, then sprinkle faux snow on the shoulders while it is still wet. Tie on tiny silver bells with white ribbon and add a sprig of pine. Set a pair on a white tray for an instant wintry display. These stay pretty well past Christmas, all the way through January. Would you go all white or add a touch of silver?
You will need: Bottles, white acrylic paint, baking soda, a sponge, faux snow, silver bells, white ribbon and pine sprigs.
How to make it: 1. Mix the paint with a spoonful of baking soda for texture. 2. Sponge it onto the bottles and sprinkle on faux snow. 3. Let dry, then add ribbon, bells and pine.
Gold Leaf Bottle
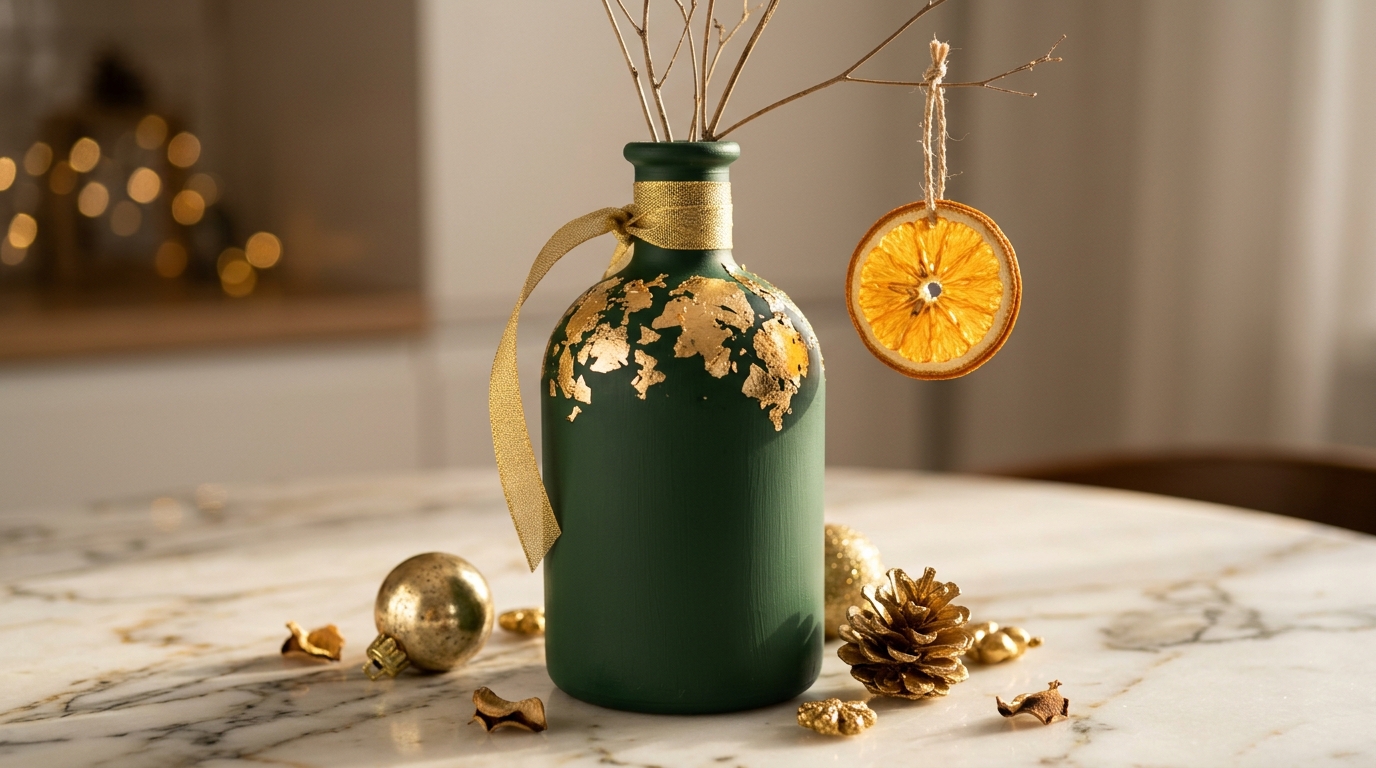
Gold leaf makes any bottle look expensive. Paint it a deep green or navy, then brush adhesive in random patches near the top and press on gold leaf sheets. Brush away the loose bits and you get a beautiful flaky finish. A dried orange slice tied on with gold ribbon adds a natural touch. It is a lovely gift for a host or a teacher. Do you love gold or silver more?
You will need: A bottle, deep green paint, gold leaf sheets, gold leaf adhesive, a soft brush and gold ribbon.
How to make it: 1. Paint the bottle and let it dry. 2. Brush adhesive where you want gold and wait until it is tacky. 3. Press on the leaf and brush off the extra.
Lace Doily Stencil Bottle
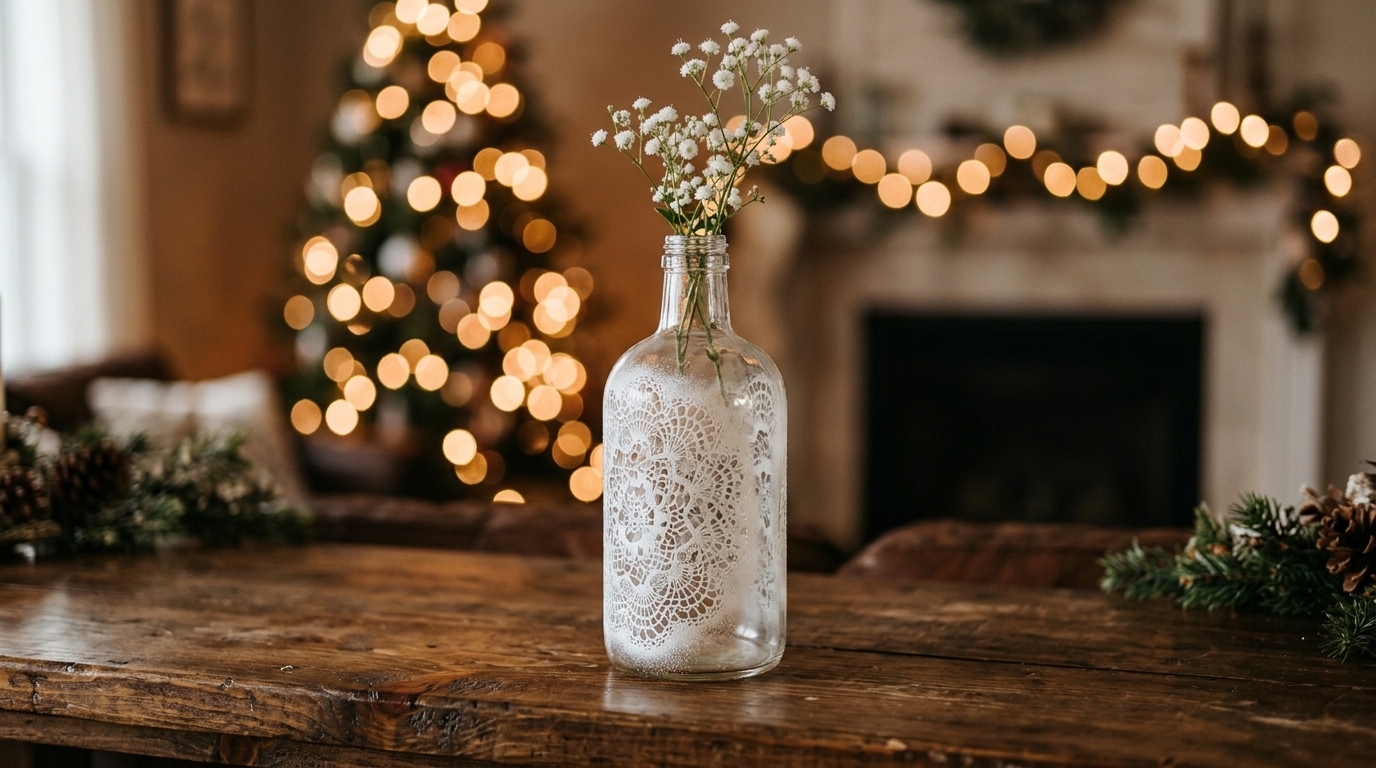
This one looks delicate and vintage. Wrap a paper or fabric doily snugly around a clear bottle, tape it in place and lightly mist it with white spray paint. Peel the doily away and a lace pattern stays on the glass. Add a few white flowers or baby’s breath and it feels like a winter wedding. Spray outdoors and wear a mask. Do you have an old doily tucked away in a drawer?
You will need: A clear bottle, a paper or lace doily, painter’s tape, white spray paint and a mask.
How to make it: 1. Wrap the doily tightly around the bottle and tape it. 2. Mist with light coats of white spray paint. 3. Peel off the doily once the paint is dry to the touch.
Candy Cane Stripe Bottle
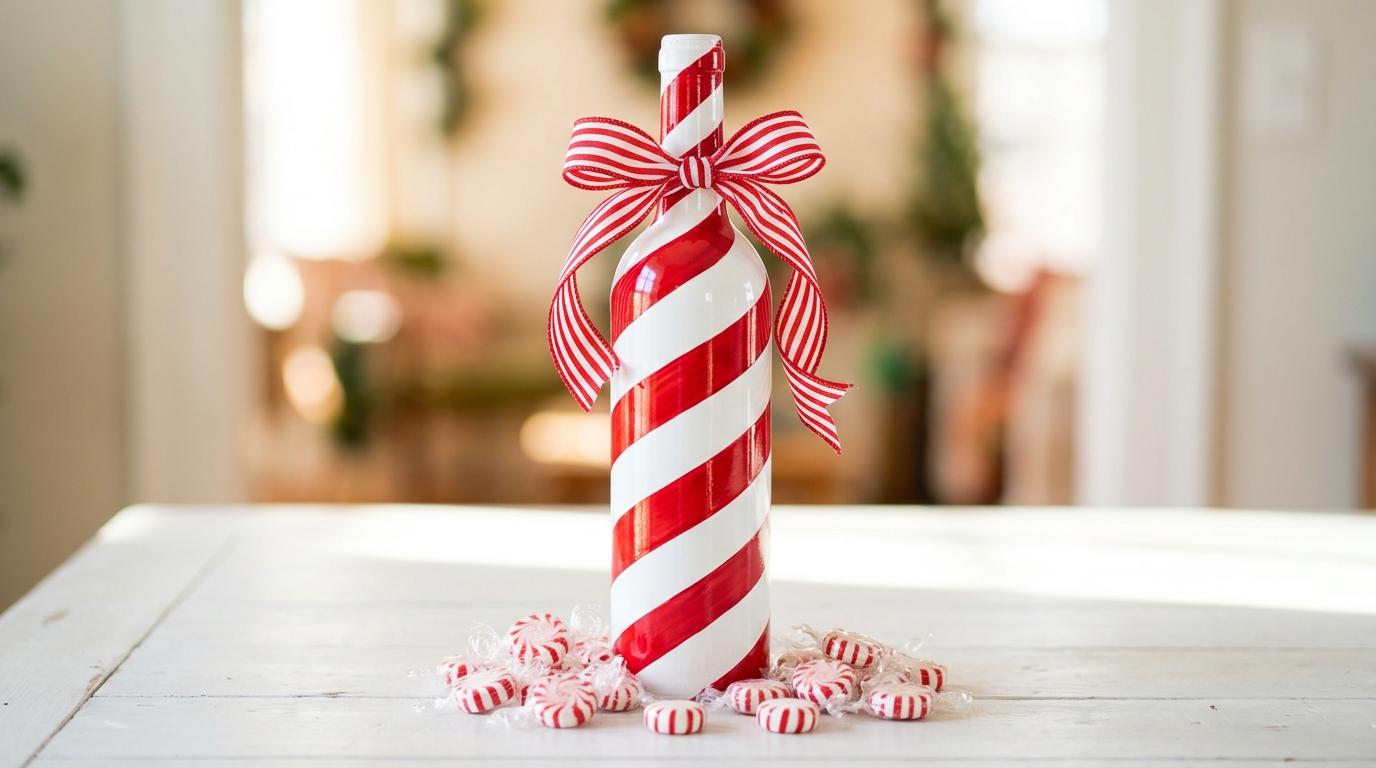
Nothing says Christmas like peppermint stripes. Paint a bottle white, then wrap thin tape in a spiral around it and paint red between the lines. Peel the tape and you have a giant candy cane. A red and white ribbon bow at the neck finishes it off. Set it next to a bowl of peppermints for a sweet holiday station. Interest in these projects keeps rising on Google Trends every December. Would you try red, green or both?
You will need: A bottle, white and red acrylic paint, thin painter’s tape, a flat brush and striped ribbon.
How to make it: 1. Paint the bottle white and let it dry. 2. Wrap the tape in a spiral and paint red stripes. 3. Peel the tape while the red is still slightly damp.
Cork Reindeer
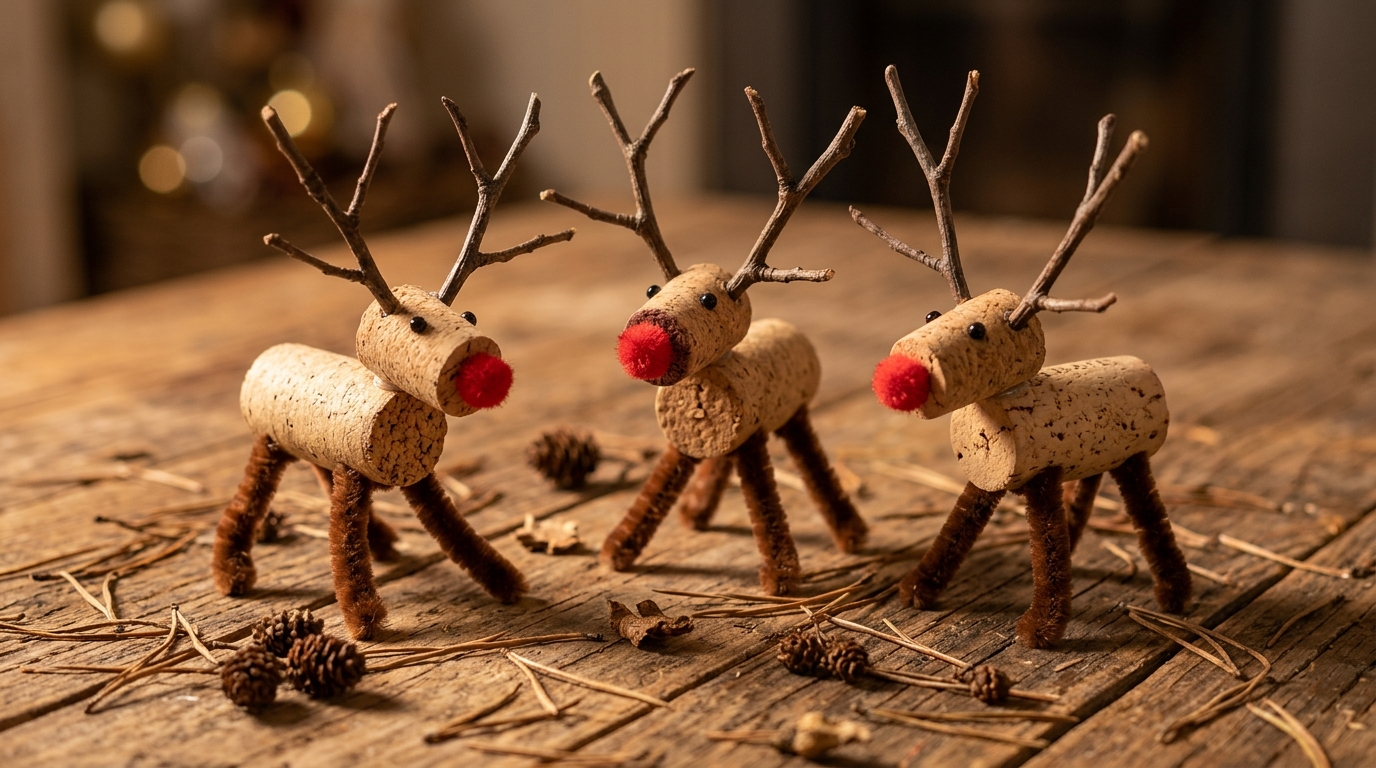
Don’t toss the corks. A few corks and some pipe cleaners turn into the cutest little reindeer. Glue one cork sideways on top of another for the head, add pipe cleaner legs, twig antlers and a red pom pom nose. Kids love making a whole herd for the mantel or the tree. They also make sweet gift toppers. Small parts can be a choking risk, so keep them away from toddlers. What would you name yours?
You will need: Natural corks, brown pipe cleaners, small twigs, red pom poms and a low-temp glue gun (adult use).
How to make it: 1. Glue a cork sideways on top of another for the head. 2. Push in pipe cleaner legs. 3. Add twig antlers and a red pom pom nose.
Evergreen and Berry Vases
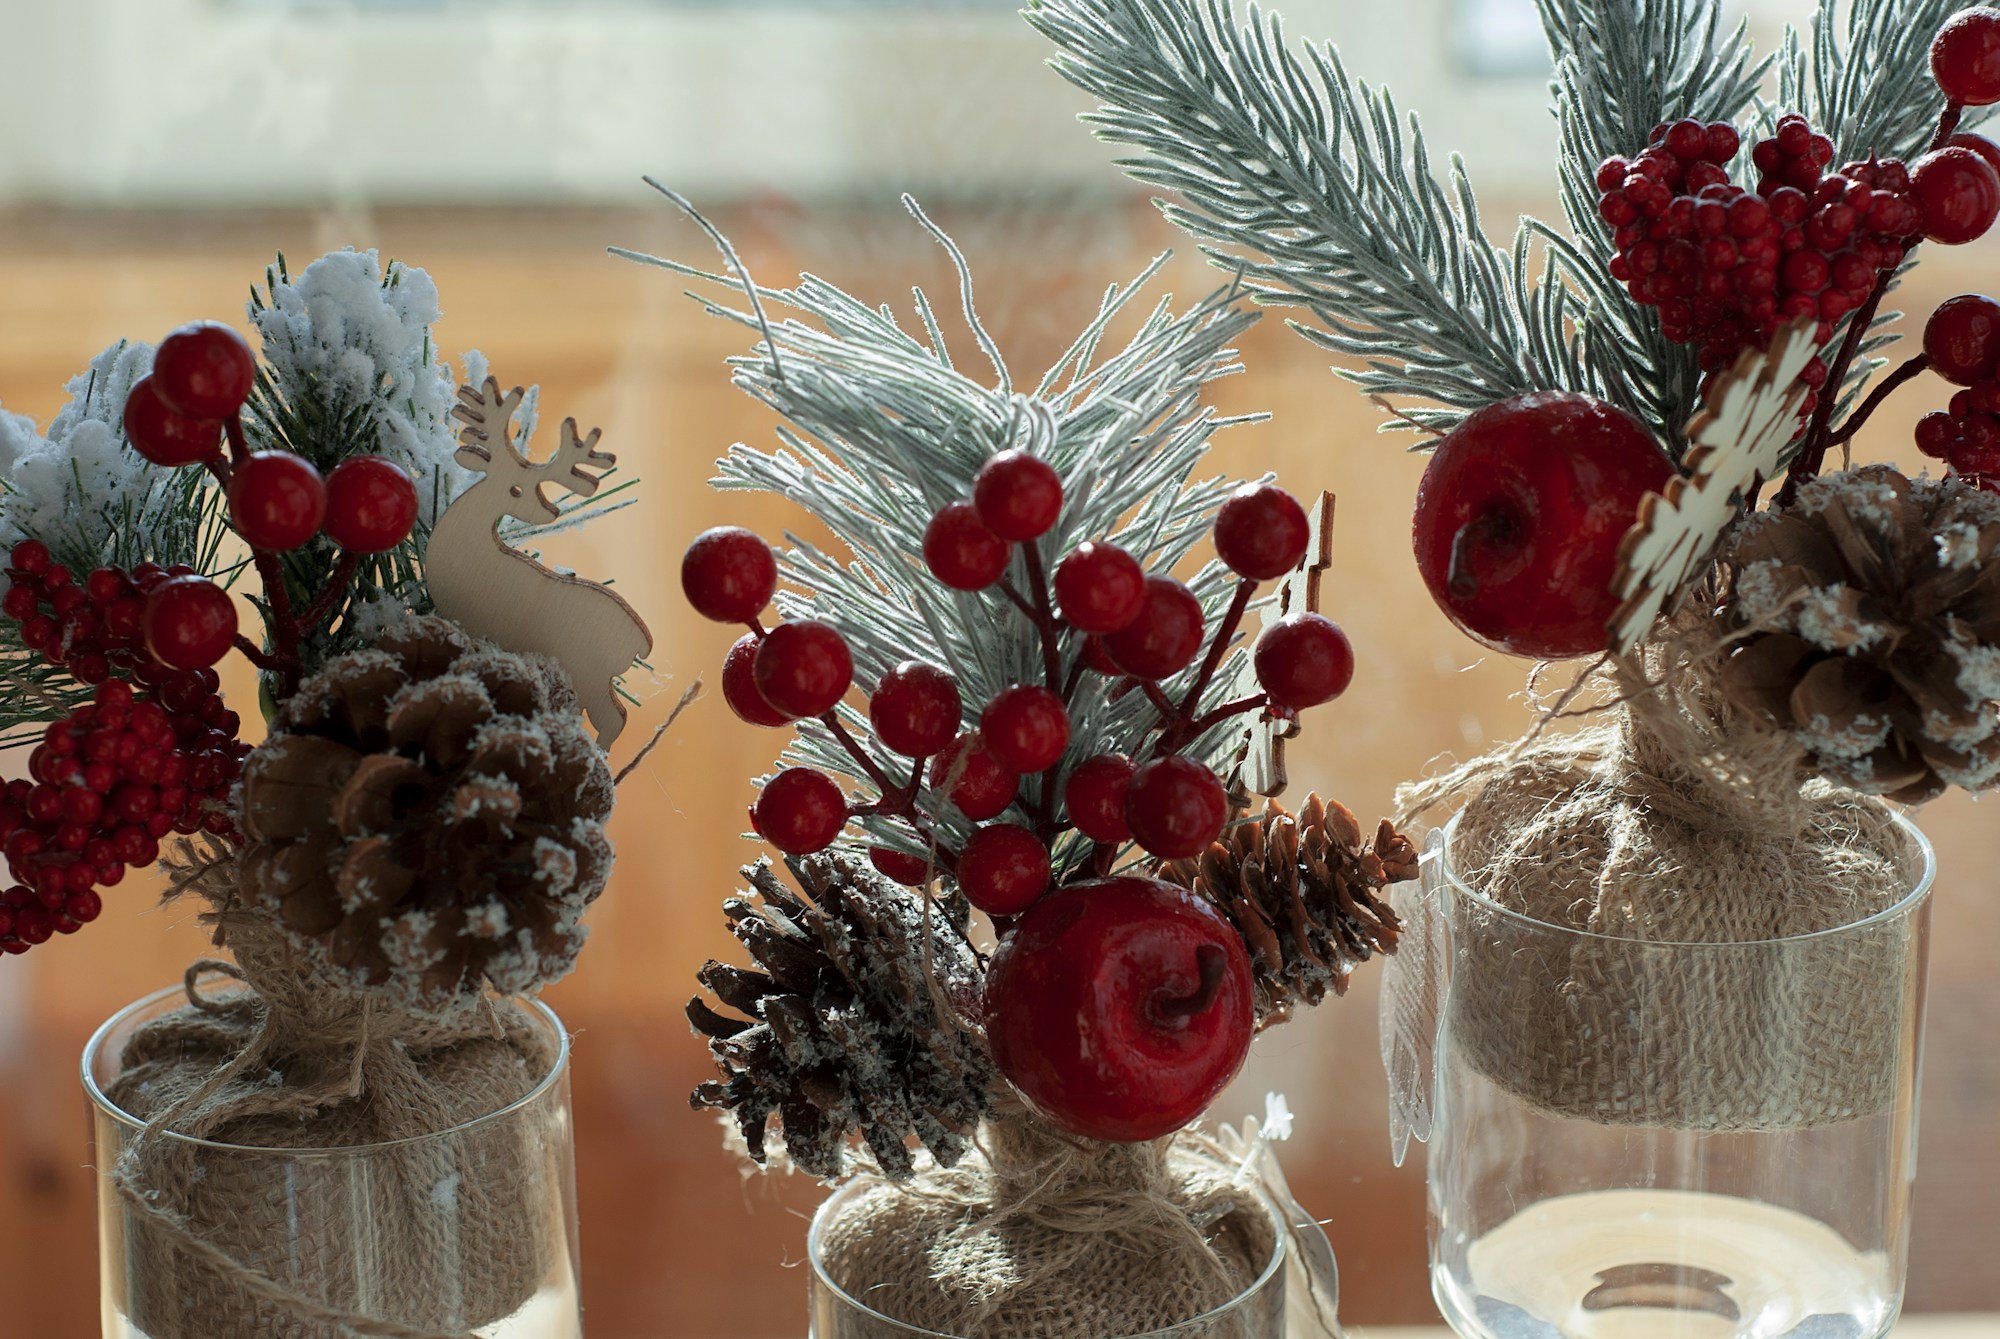
Sometimes the simplest idea is the prettiest. Wrap the base of clear bottles or jars in burlap, then fill them with evergreen sprigs, red berries and a pine cone or two. Group three together on a table and you have a centerpiece in minutes. Real greenery smells wonderful, while faux stems last for years. Keep real stems fresh by changing the water every few days. Would you go real or faux?
You will need: Clear bottles or jars, burlap scraps, twine, evergreen sprigs, berry stems and pine cones.
How to make it: 1. Wrap a band of burlap around each bottle and tie it with twine. 2. Add water and evergreen sprigs. 3. Tuck in the berries and pine cones.
Christmas Wine Bottle Crafts on a Shelf
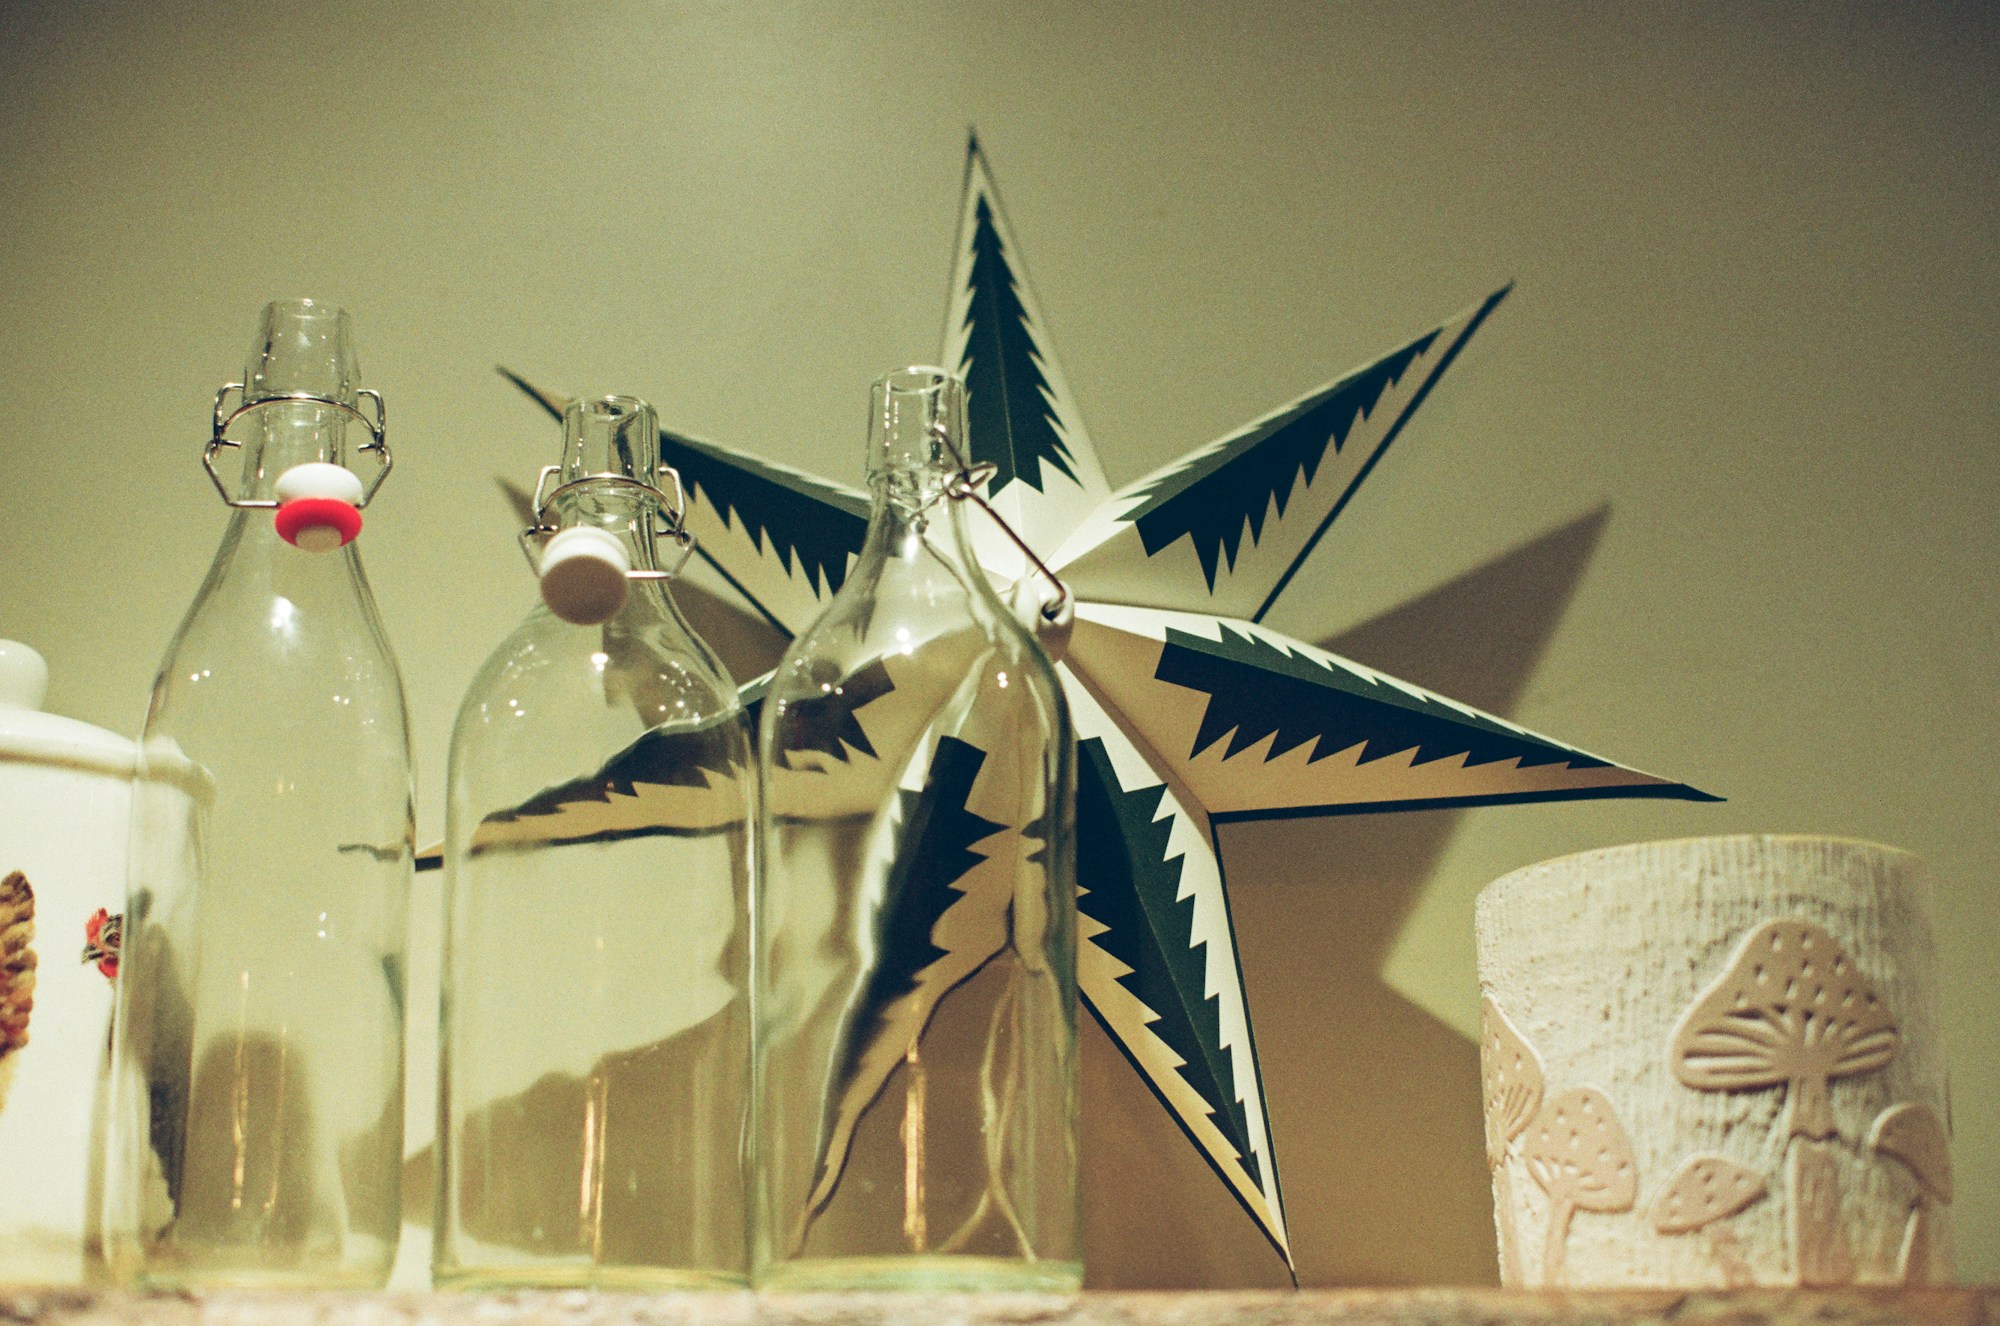
Styling matters as much as making. Clear swing top bottles look lovely grouped with a paper star and a small pot on a shelf. Mix the heights, leave some breathing room and repeat one color so it feels calm. You can use the same trick with any bottle in this list. A shelf of Christmas wine bottle crafts makes a cozy corner feel finished. Which shelf in your home needs a little holiday sparkle?
You will need: Three to five bottles in different heights, a paper or wooden star and a small plant or an LED candle.
How to make it: 1. Place the tallest bottle at the back. 2. Add shorter pieces in front in a loose triangle. 3. Step back and adjust until it feels balanced.
Christmas Wine Bottle Crafts for a Glowing Garland
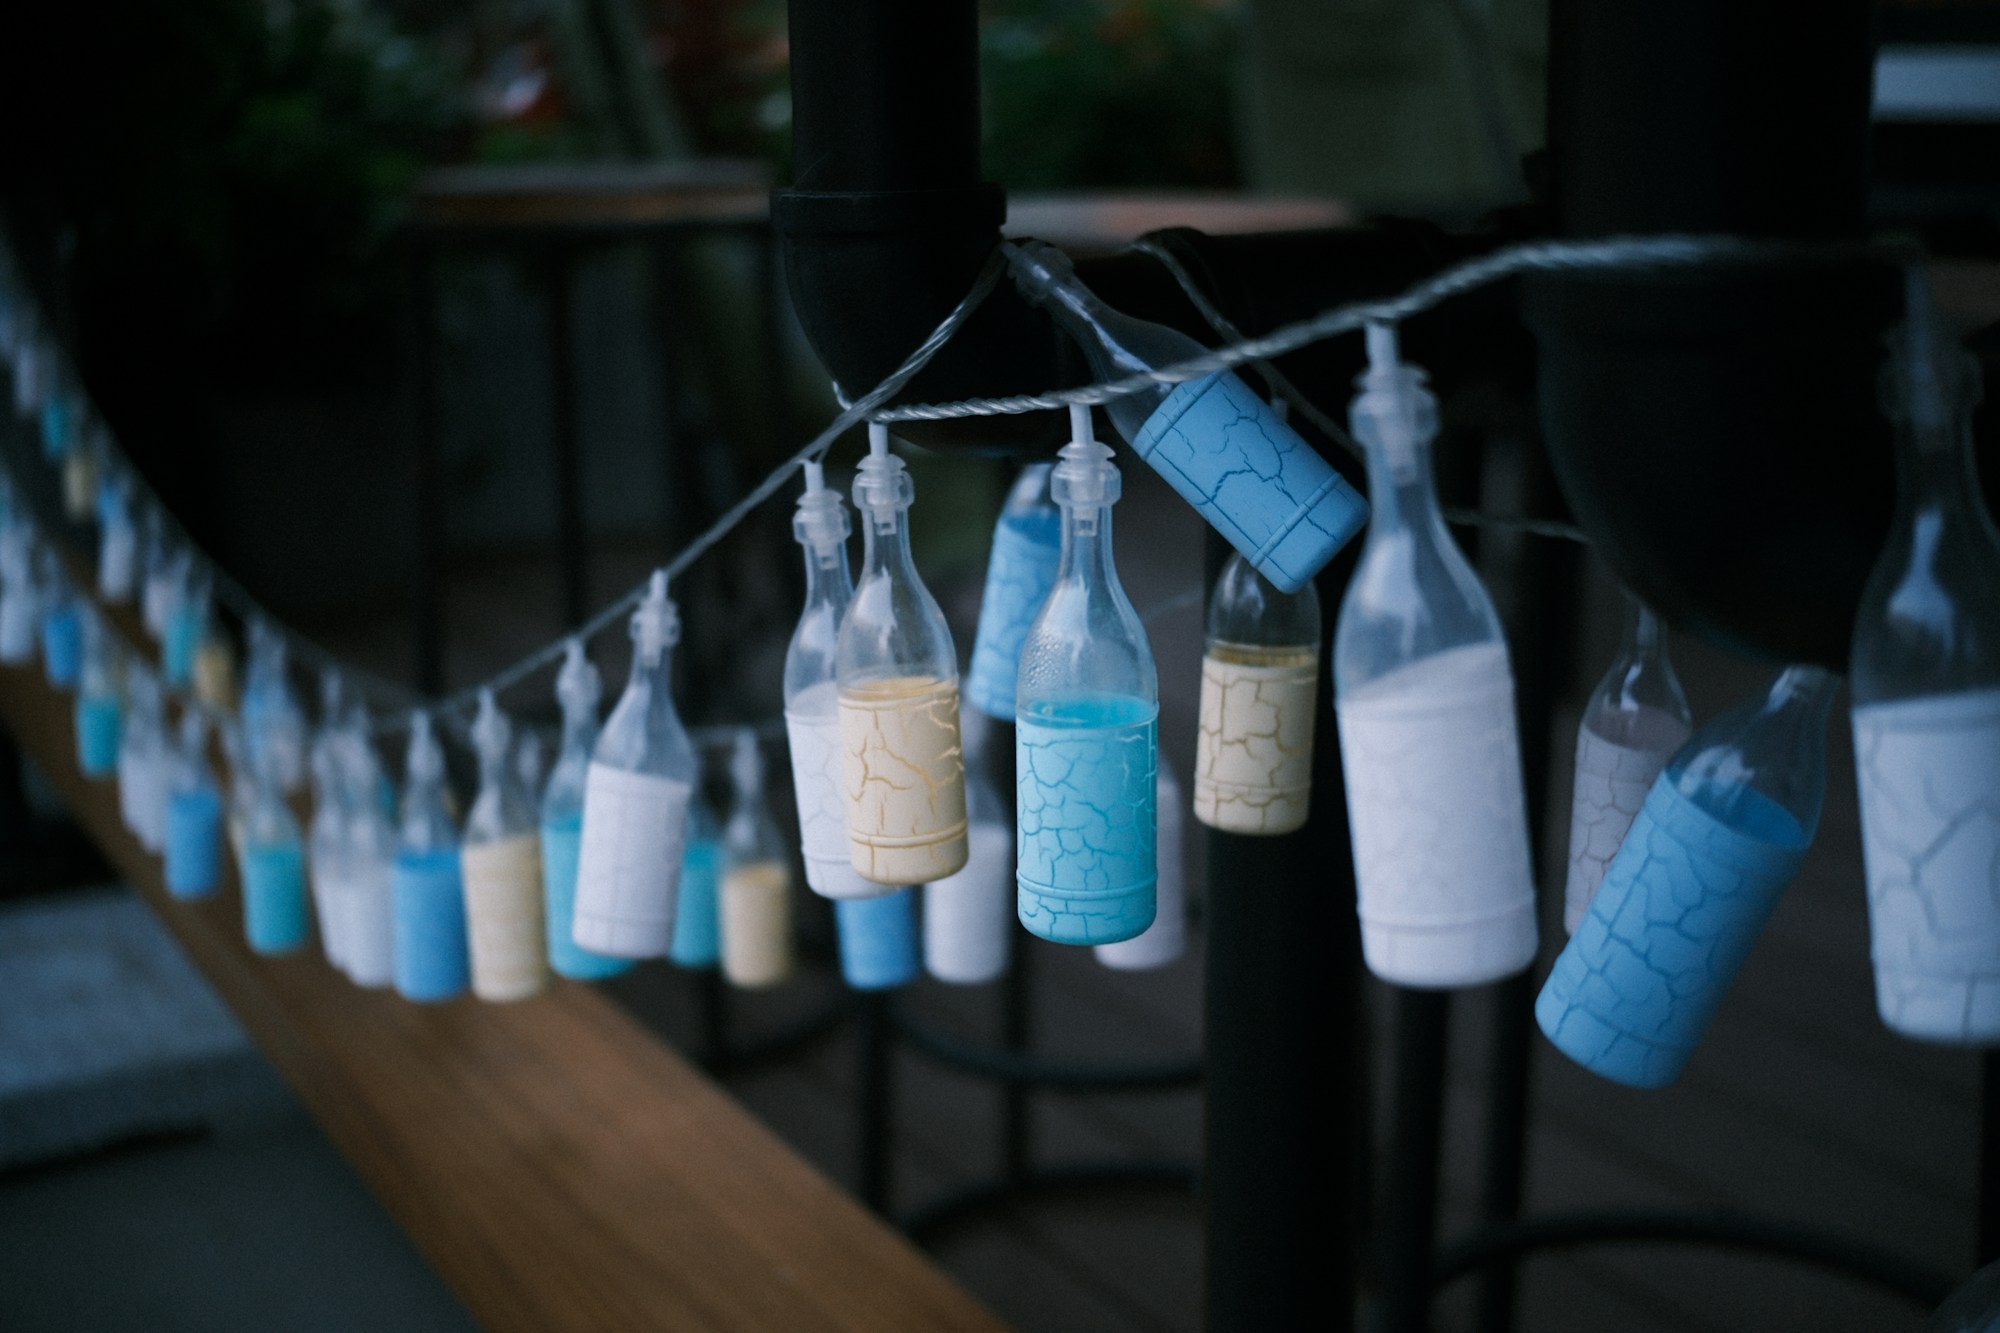
A string of small glowing bottles makes a magical garland for a porch, patio or kitchen window. Use small lightweight bottles, add a mini battery light inside each one, and hang them from sturdy twine. Very small bottles keep the garland light and safe to hang. It is a fun party decoration that works all winter long. Battery lights only, never candles. Where would you hang yours?
You will need: Several small bottles, mini battery LED lights, sturdy twine, thin wire and small hooks.
How to make it: 1. Wrap wire around each bottle neck to make a hanger. 2. Add a battery light inside each one. 3. Tie the bottles along the twine and hang it securely.