Handmade Earrings: 16 Gift Pairs With Beads and Pretty Charms
Handmade Earrings make a gift feel personal through a favorite color, a small shape, or a lovely pair of beads. These projects use loose beads, pre-woven bead panels, and ready-set charms with separate earring fittings. You will assemble the wearable pairs, rather than carve stones or build their metal settings. Start with matching components and earwires suited to the recipient. For the bead drops, the Fire Mountain Gems wrapped-loop tutorial explains the basic wire connection. Keep the two sides beside each other as you work, check every connection, and smooth any cut wire ends. Some designs are quiet enough for everyday wear; others bring a brighter accent to a simple outfit..
Handmade Earrings With Warm Wooden Beads
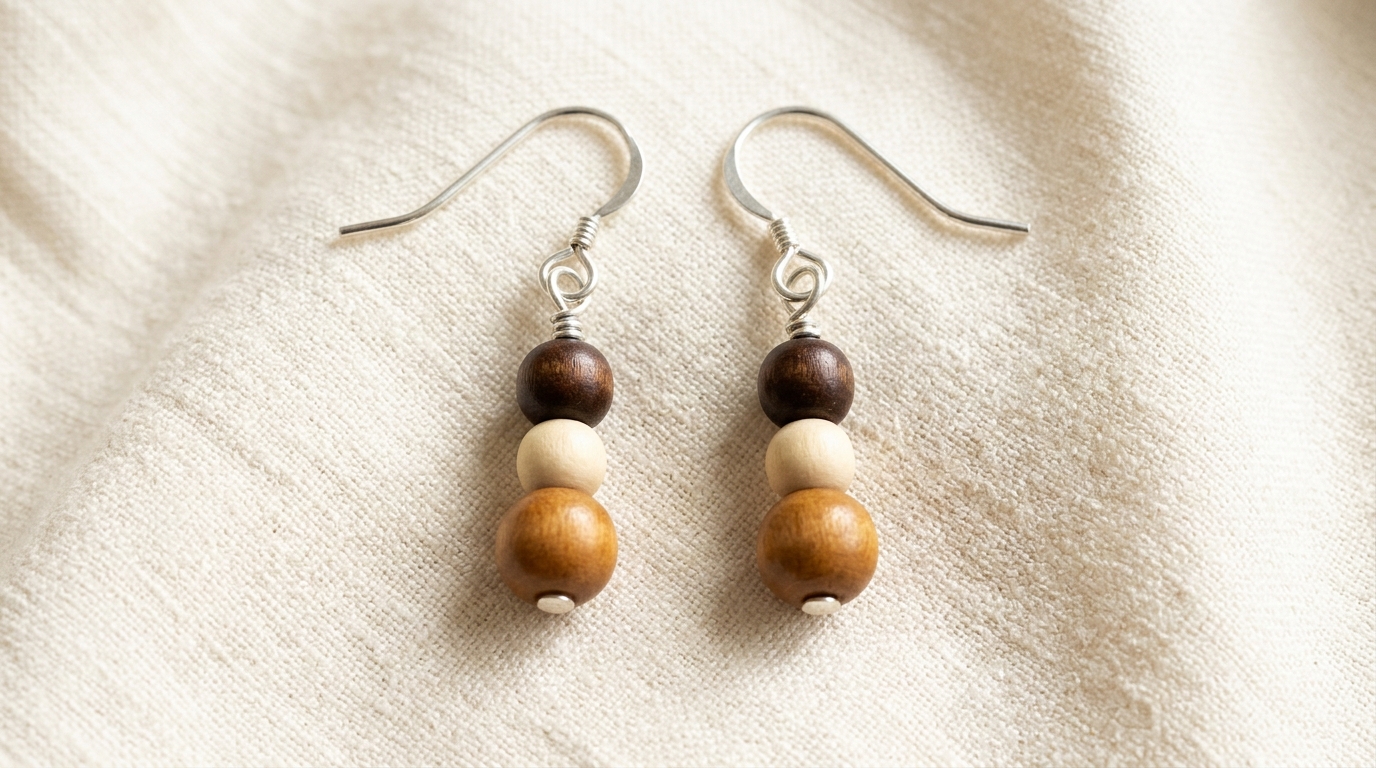
Three wooden beads make a small gift feel warm and personal. A honey-colored bead anchors each drop, with paler wood in the middle and a darker bead above. Keeping the same order in both earrings gives the pair a considered finish without needing a complicated pattern. Handmade Earrings like these work well for someone who enjoys natural textures and mostly neutral clothes. Set the completed pair beside a plain card so the different wood tones remain the detail you notice first. Pair it with a small woven gift..
You will need: Two ear hooks, two jewelry headpins, six matching wooden beads in three sizes/colors, round-nose and flat-nose pliers, flush cutters.
How to make it:
1. Lay out identical three-bead sequences. Slide the larger honey bead, smaller pale bead and small darker bead onto each headpin so the fixed head supports the stack.
2. Bend the pin above each stack, form a small round loop with round-nose pliers, and wind the tail around its stem two or three times. Trim and tuck the end flush.
3. Open only the hook attachment eye sideways with pliers, add the wrapped loop and close the eye flush. Check both stacks match and all connections are smooth.
Green Teardrops Beneath Purple-Center Squares
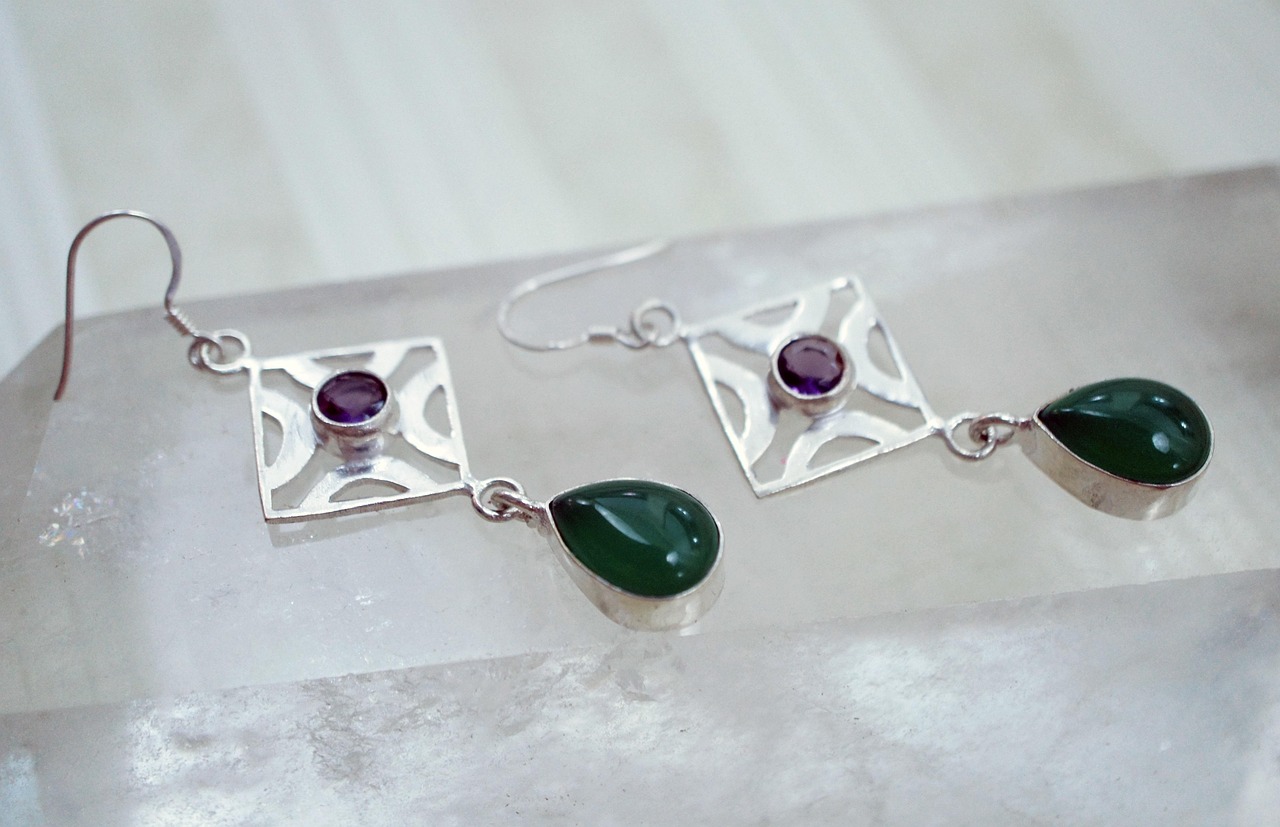
A square openwork connector and a green teardrop make a graceful two-part pair. The small purple center gives the silver-colored square a focal point, while the darker green below adds depth. Start with the stones already mounted in their settings, then join the components and hooks. Handmade Earrings can feel personal through color choices alone. Keep the two drops facing forward and compare their movement before closing the final connections. A small linked section is enough to give this pair a gentle swing. Pair it with soft embroidery gifts.
You will need: Two ready-set purple-center square connectors, two green teardrop charms, two hooks, connecting rings, and two jewelry pliers.
How to make it:
1. Lay out two ready-set purple-center square connectors, two green teardrop charms, and two hooks, with every component facing forward.
2. With two pliers, twist each connecting ring open sideways. Join one green drop to the lower eye of each square, then close the ring ends flush.
3. Open each hook eye sideways, add the upper square eye, and close it flush. Check equal lengths and free movement.
Fossil Spirals With Simple Hooks
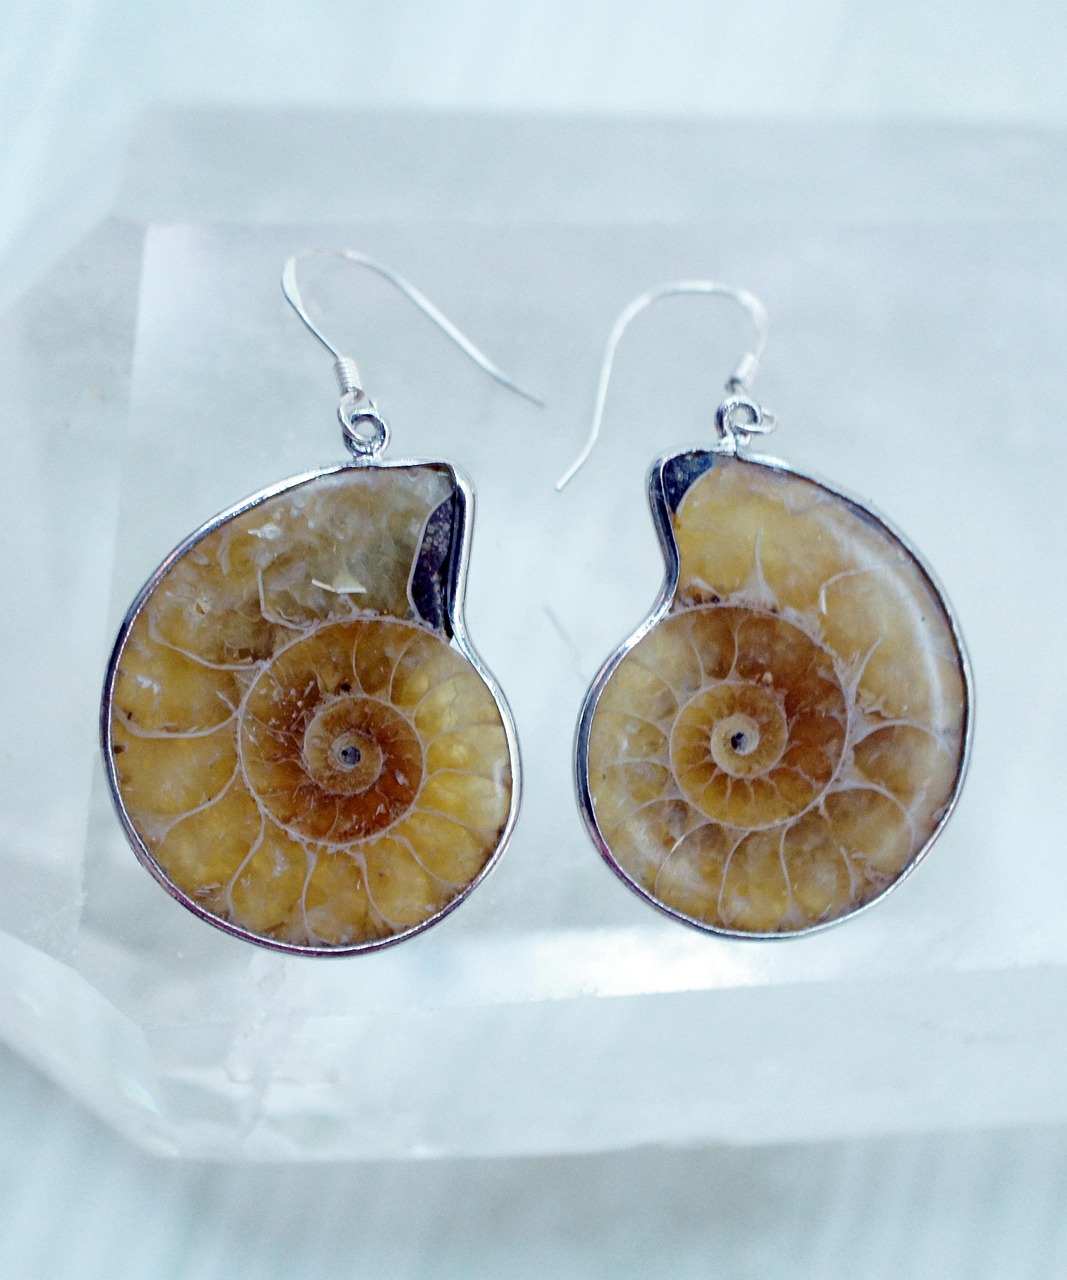
The spiral pattern in a fossil slice already provides the decoration. A simple metal border and a slim hook leave that natural shape easy to see. Choose a matched pair of ready-set fossil drops, with similar sizes and mirrored curves where possible. The warm honey and brown shades make the earrings feel rich without extra beads. Check that both drops hang at the same height and that their top eyes are sound before attaching the hooks. Let the spiral faces remain the focus. Pair it with neat gift packaging.
You will need: Two ready-set fossil-slice charms with top eyes, two ear hooks, and flat-nose jewelry pliers.
How to make it:
1. Choose two ready-set fossil-slice drops with matching top eyes and check their mounts and edges are sound.
2. Twist one hook attachment eye open sideways with pliers. Add the drop top eye, then bring the hook eye ends back flush.
3. Repeat for the other side. Hold both hooks level and check that the fossil faces point forward and the connections feel smooth.
Pearl-Look Handmade Earrings With a Quiet Finish
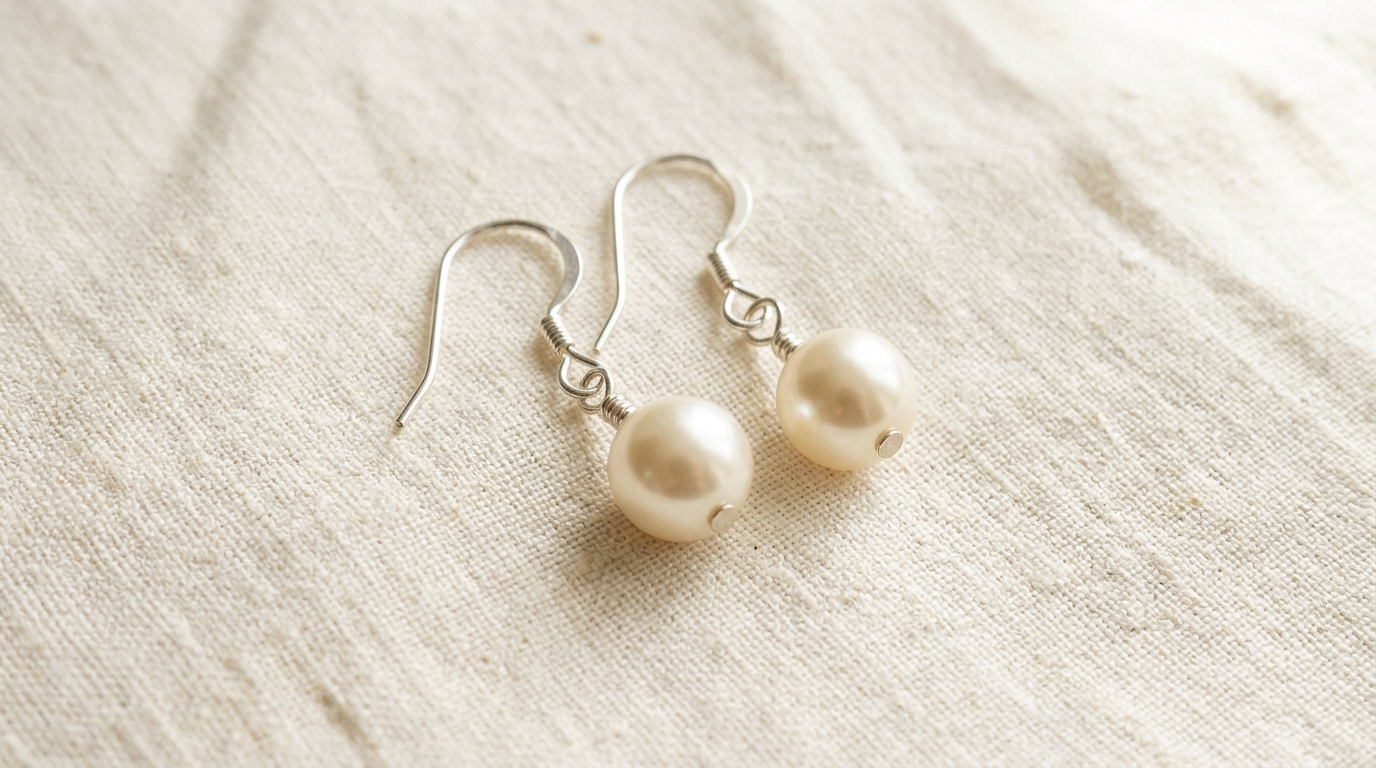
One cream pearl-look bead beneath each hook makes a quiet, useful pair. The smooth surface feels different from faceted clear-colored or patterned stone, so there is little reason to add another layer of decoration. Handmade Earrings in this simple style can suit someone who wears small drops every day. A compact wrapped loop keeps the bead close to the hook without a long bare section of pin. Work on the two pieces together, comparing the drop lengths before completing the second loop. Pair it with gifts for couples.
You will need: Two ear hooks, two headpins, two matching imitation pearl beads with suitable drilled channels, round-nose and flat-nose pliers, flush cutters.
How to make it:
1. Slide one imitation pearl onto each headpin, checking that the fixed head prevents it slipping off.
2. Form matching small loops above the beads, then wrap each remaining wire tail around its stem two or three times. Trim and press the tail flat.
3. Attach each wrapped loop to a hook attachment eye by opening the eye sideways and closing it flush. Check equal drop length and smooth wire ends.
Square Yellow Drops That Catch the Light
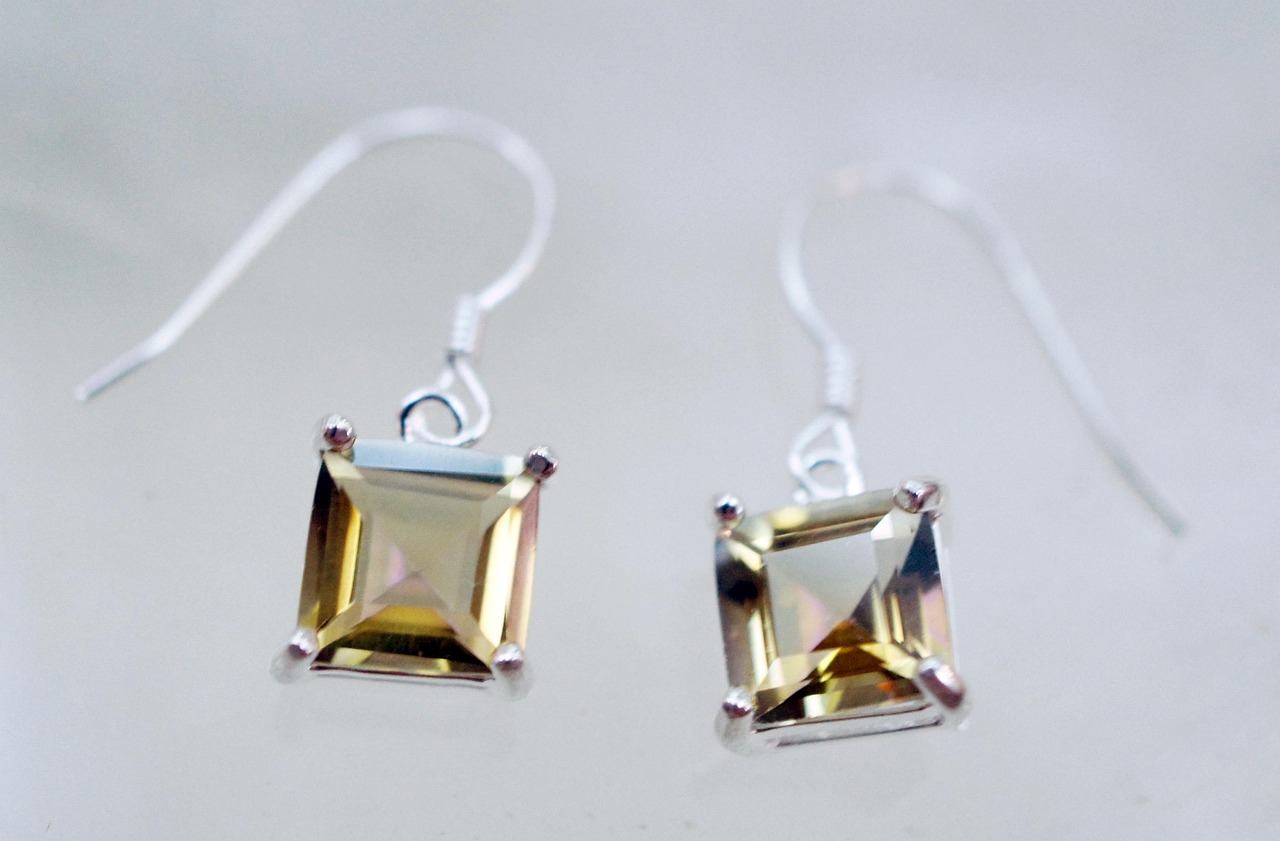
A pale yellow square gives a small pair of earrings a clear geometric shape. The four corner prongs are part of the ready-set charm, leaving you to attach the earwire rather than make a stone setting. Keep the metal finish consistent through the hook and charm so the yellow remains the brightest detail. These drops look particularly neat when the top loops sit in the same plane. Their compact outline is a good choice for someone who likes a little shine without a long dangling design. Pair it with a handmade picture frame.
You will need: Two ready-set square yellow charms with top eyes, two matching hooks, and flat-nose pliers.
How to make it:
1. Choose two matching ready-set square yellow charms with top eyes and two compatible preformed hooks.
2. Open one hook attachment eye sideways using pliers. Pass it through the charm top eye, then close the eye flush.
3. Repeat for the second earring. Compare the square orientation and drop length, then check the prongs and connecting eyes for movement.
Pale Green Ovals With a Textured Border
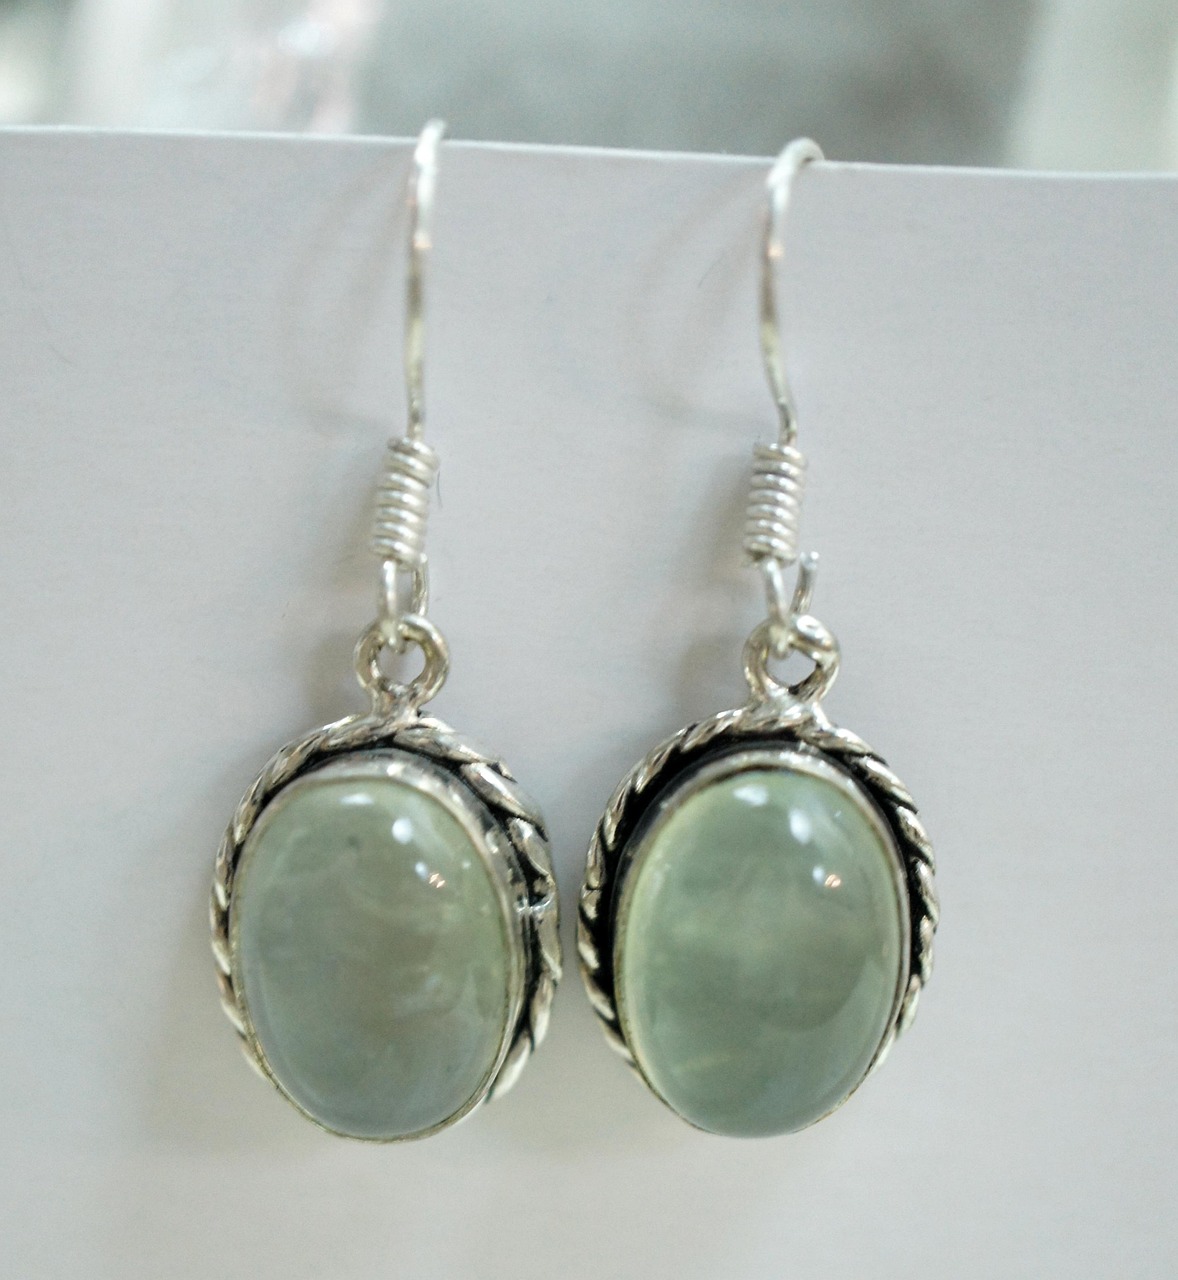
Pale green oval drops bring a softer note to metal jewelry. The stones have a smooth rounded surface, with a darker textured border giving each oval a clear edge. Choose the drops already mounted, including sound top eyes. Handmade Earrings with this restrained color can feel thoughtful for a recipient who rarely wears bright accessories. Compare the two pieces in daylight before attaching the hooks; similar size and tone matter more than matching every natural mark inside the stones. Pair it with small table favors.
You will need: Two ready-set pale green oval charms with top eyes, two ear hooks, and flat-nose jewelry pliers.
How to make it:
1. Select two ready-set pale green oval charms with sound top eyes and matching ear hooks.
2. Twist each hook attachment eye open sideways, pass it through the charm eye, and close the ends flush with pliers.
3. Lift both earrings together to compare their length and orientation. Check the textured borders are smooth and the drops hang freely.
Handmade Earrings With Three Bead Colors
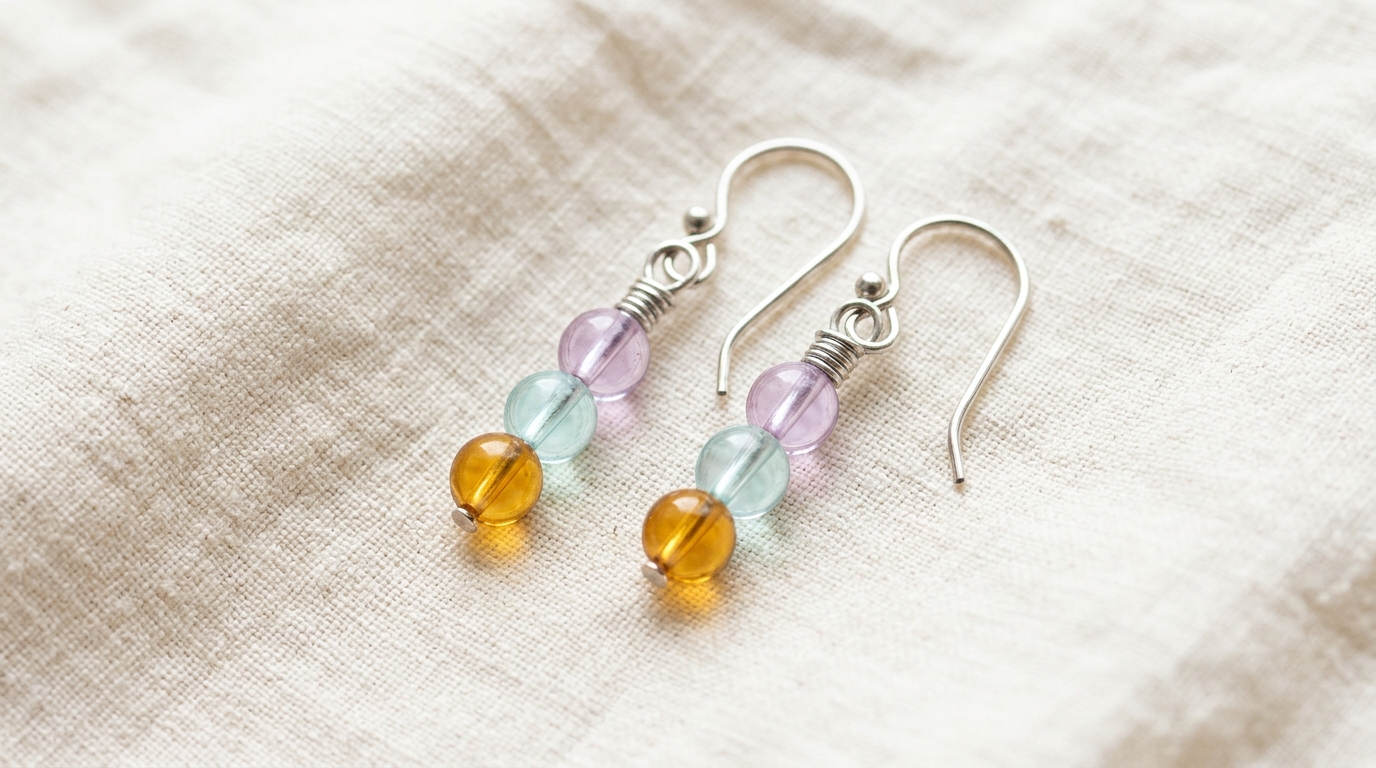
Amber, aqua, and lilac clear-colored beads make a small vertical stack with a cheerful color change. Each round bead stays separate enough to show its own shade, while one continuous pin keeps the arrangement simple. Handmade Earrings with three small beads can bring color to a plain outfit without becoming a heavy statement pair. A neat wrapped loop finishes the top of each stack. Keep the beads resting together, with no long exposed pin section interrupting the line between them. Pair it with a handmade gift tag.
You will need: Two hooks, two headpins, two amber, two aqua and two lilac clear-colored beads, jewelry pliers and flush cutters.
How to make it:
1. Arrange matching amber, aqua and lilac sequences. Thread each headpin from the bottom upward in that order, keeping its fixed head beneath the amber bead.
2. Make matching round loops above the lilac beads and wrap the tails tightly around the straight stems. Trim and tuck each wire end.
3. Attach both drops to ear hooks through their attachment eyes, close those eyes flush and check that the bead sequences and hanging lengths match.
Two Purple Shapes With a Little Movement
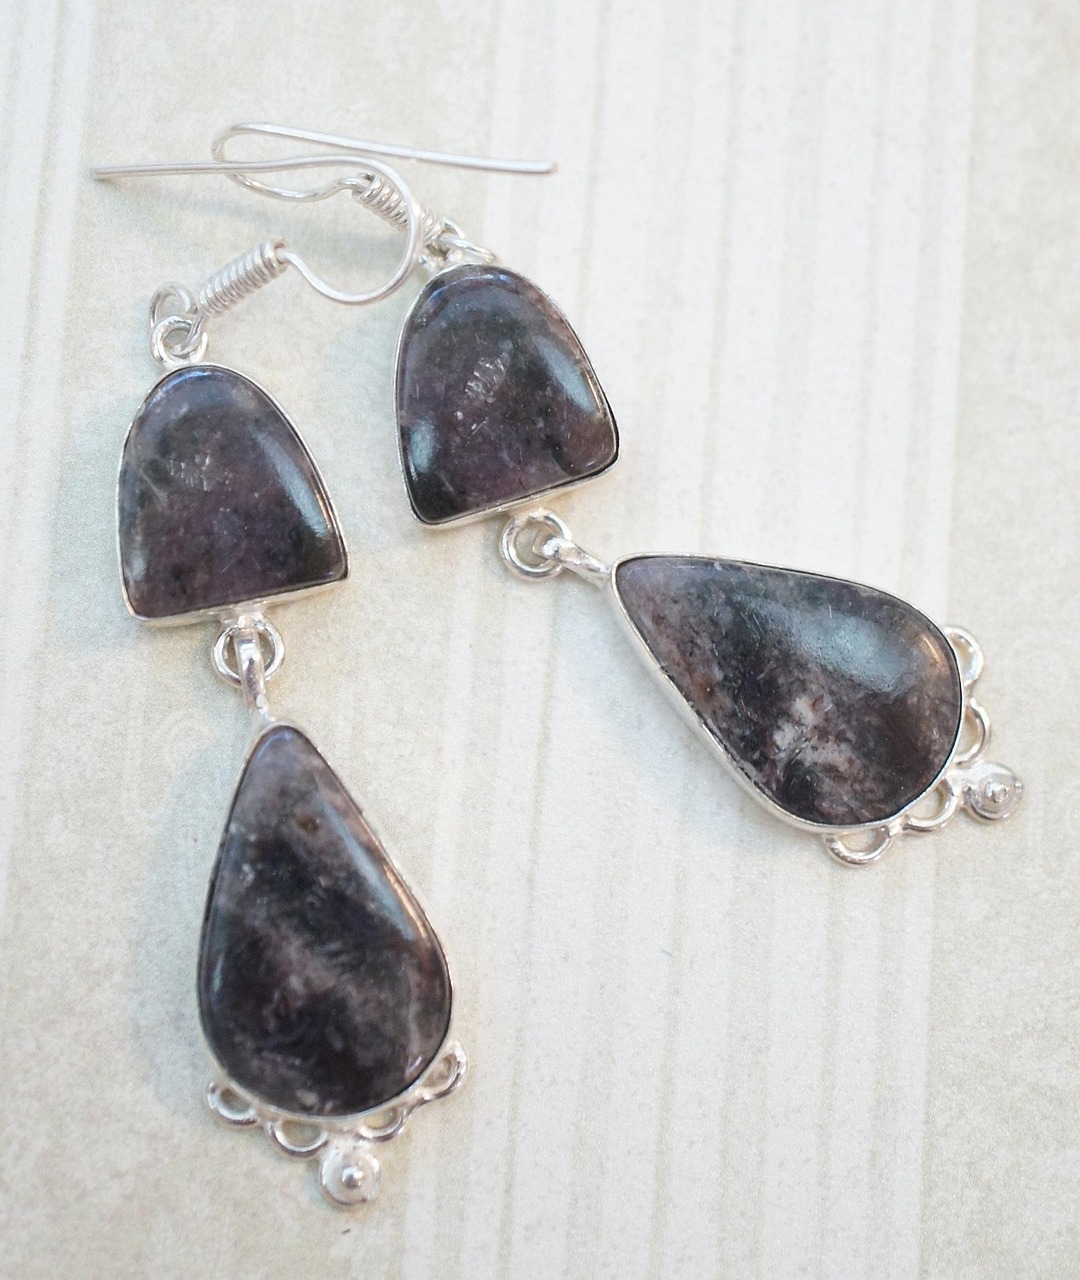
Two purple shapes give these earrings more movement than one solid drop. The lower setting has a delicate scalloped edge and a tiny round accent, so extra charms would make the pair feel crowded. Use ready-set purple components with the required connecting eyes already in place. Match the two sides by size and overall tone, then check that the lower sections swing freely. This is a useful assembly project when you want a longer pair without making metal settings. Pair it with gifts for Grandpa.
You will need: Two ready-set purple upper connectors, two purple teardrop charms, two hooks, connecting rings, and two pliers.
How to make it:
1. Lay out two ready-set purple upper connectors with top and bottom eyes, two matching purple teardrop charms, connecting rings, and hooks.
2. Open the connecting rings sideways with two pliers. Join each teardrop to a lower connector eye and close the ring ends flush.
3. Connect a hook to each upper eye by opening only the hook attachment loop sideways. Close it flush and check both joints move freely.
A Playful arrangement of Fruit-Shaped Beads
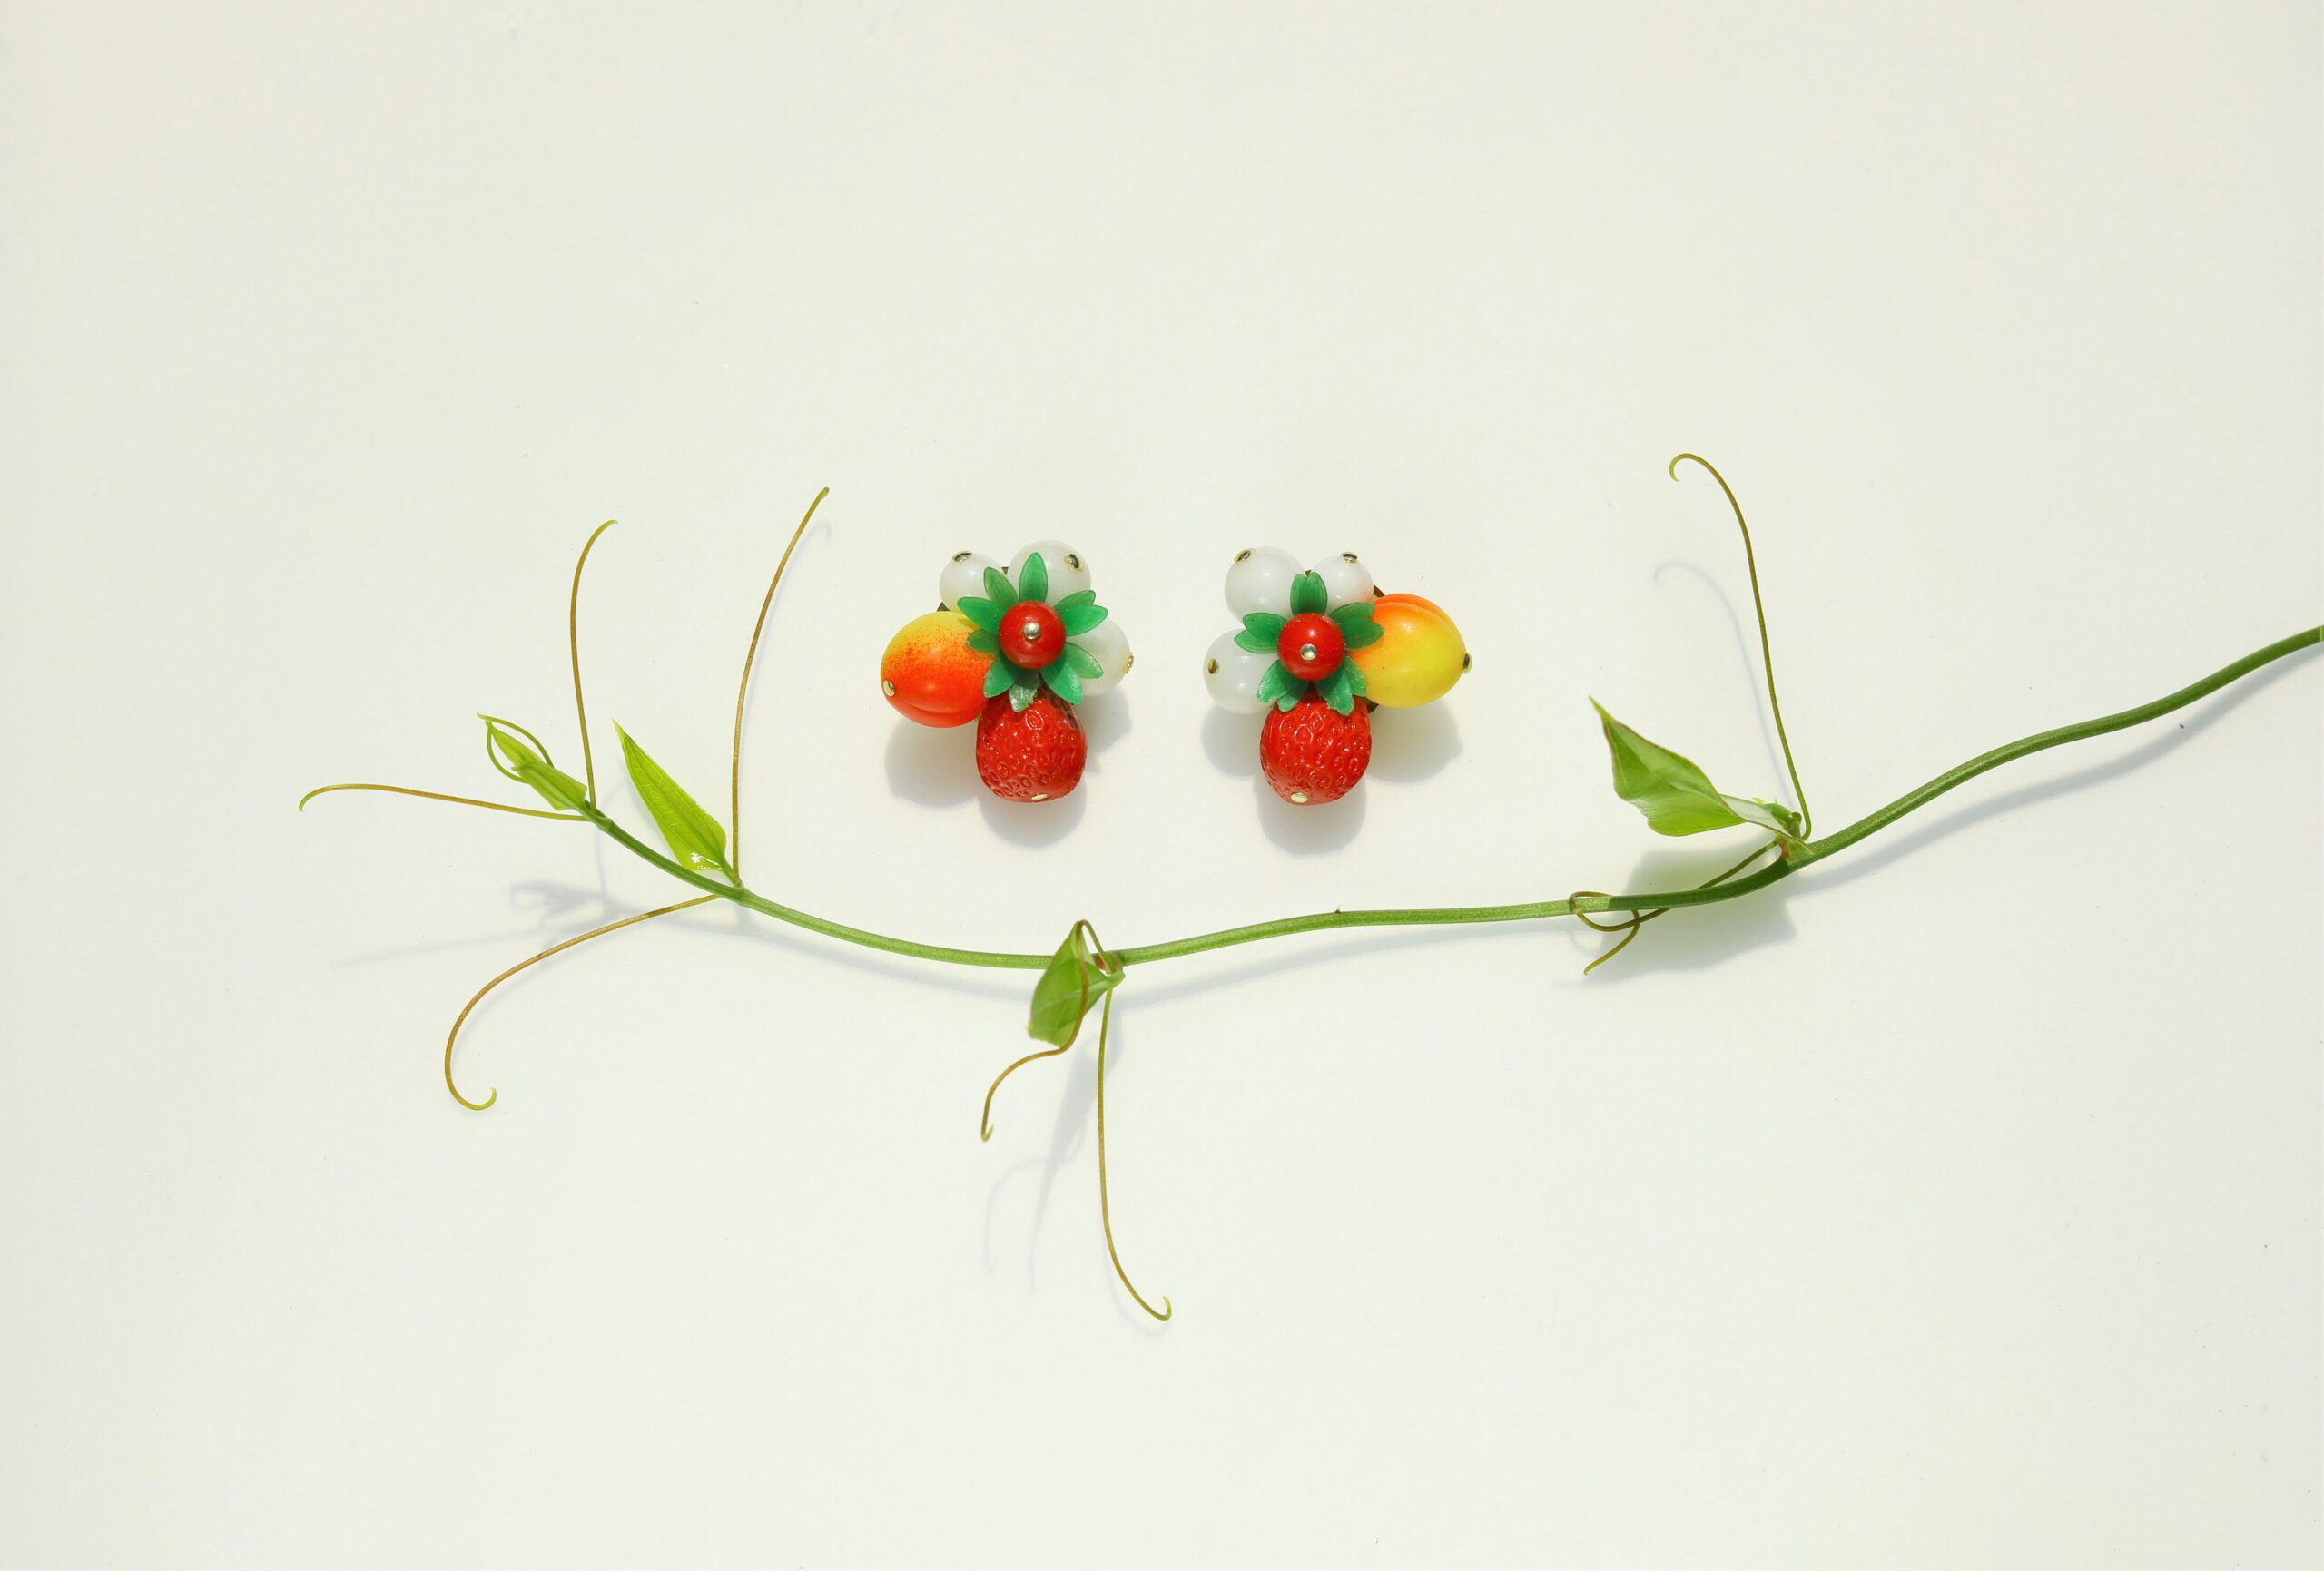
Fruit-shaped beads turn a small earring into a cheerful arrangement. Red strawberry forms sit below pale round beads, green leaf shapes, and warm orange accents. Start with matching ready-assembled arrangement fronts designed for earring findings. Flat attachment areas on the reverse let you fit compatible clip-on pads without disturbing the beadwork. Choose the fittings before buying the fronts, and check that the adhesive suits both materials. Keep the two arrangements upright while the bond cures fully, then test the clips gently. Pair it with gifts for creative teens.
You will need: Two matching ready-assembled fruit bead arrangement fronts with flat rear attachment pads, two compatible clip-on earring pad backs, and jewelry adhesive rated for both surfaces.
How to make it:
1. Choose arrangement fronts intended for pad-backed earrings, with sound flat rear attachment areas. Match them to clip-on pad fittings; do not dismantle vintage earrings or glue fittings to rounded beads.
2. Clean both joining surfaces as the adhesive maker directs. Apply the specified amount, align each clip-on pad behind its arrangement, and support the pieces without shifting.
3. Leave the adhesive undisturbed for its full specified cure. Gently test the bond, open and close both clips, and check that the fronts sit upright before wearing.
Tiny Turquoise Beads Around Small Hoops
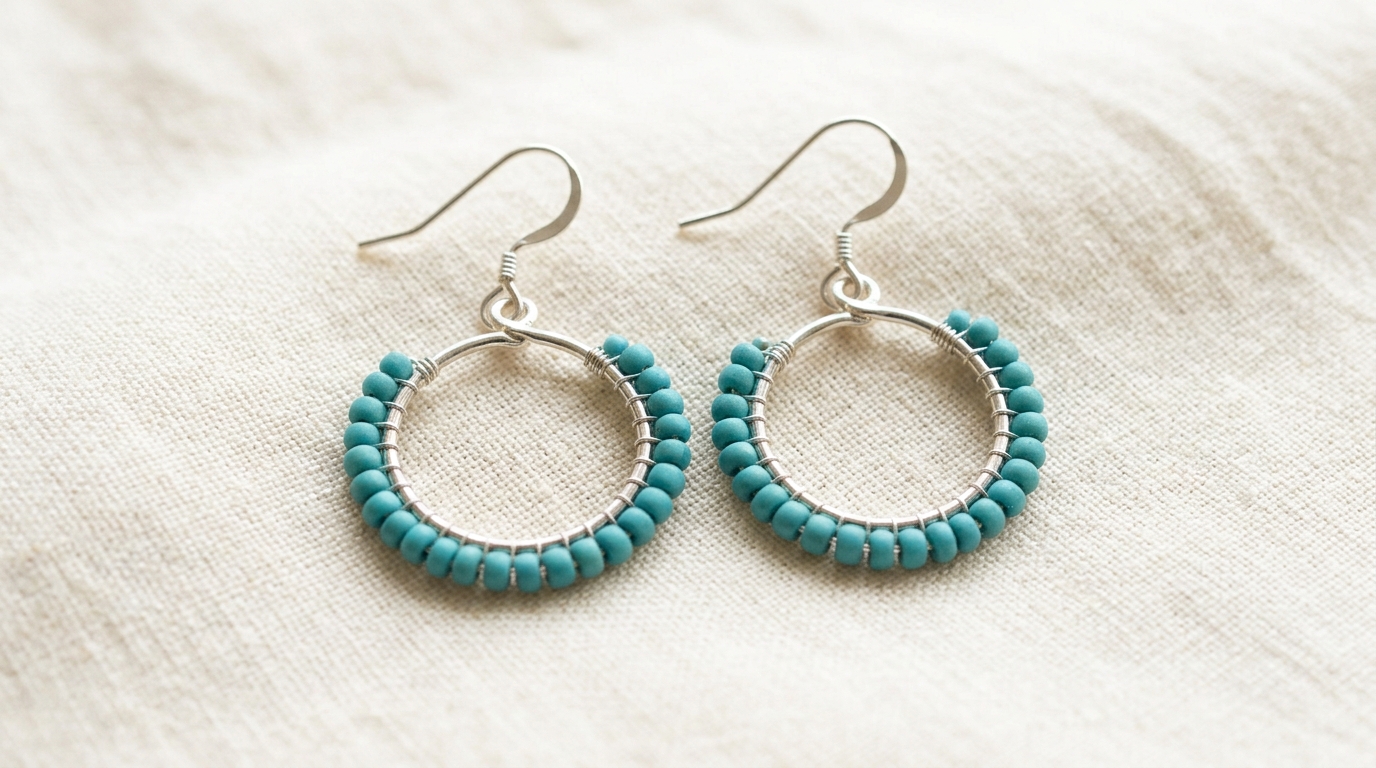
Tiny turquoise beads give a small hoop a bright, tidy outline. Fine wire lashes each bead against the outside of a closed metal ring, leaving the upper arc clear. Consistent bead sizes help the curved row look even. Handmade Earrings like these bring one favorite color into a compact design without a long dangling stack. Work carefully around the lower arc, checking the spacing as you go. Tuck every wire end before adding the hooks, then compare the finished hoops from the front and side. Pair it with a little gift basket.
You will need: Two closed small metal hoops with top attachment eyes, turquoise seed beads, fine jewelry wire that fits through the beads, two ear hooks, wire cutters, and flat-nose pliers.
How to make it:
1. Anchor fine wire near the upper edge of a closed hoop with several snug turns. Thread one seed bead onto the fine wire, seat it against the outside of the hoop, and wrap the wire around the hoop immediately beside the bead.
2. Repeat the bead-and-wrap sequence around the lower arc, spacing the beads evenly and leaving the upper arc bare. Secure the finishing wire with several tight turns; trim and tuck both ends so no sharp wire remains.
3. Make the second hoop with the same bead coverage. Open each ear-hook connection sideways, attach the hoop top eye, close securely, and check that the wirework and drops are sound.
Handmade Earrings With Autumn Bead Chevrons
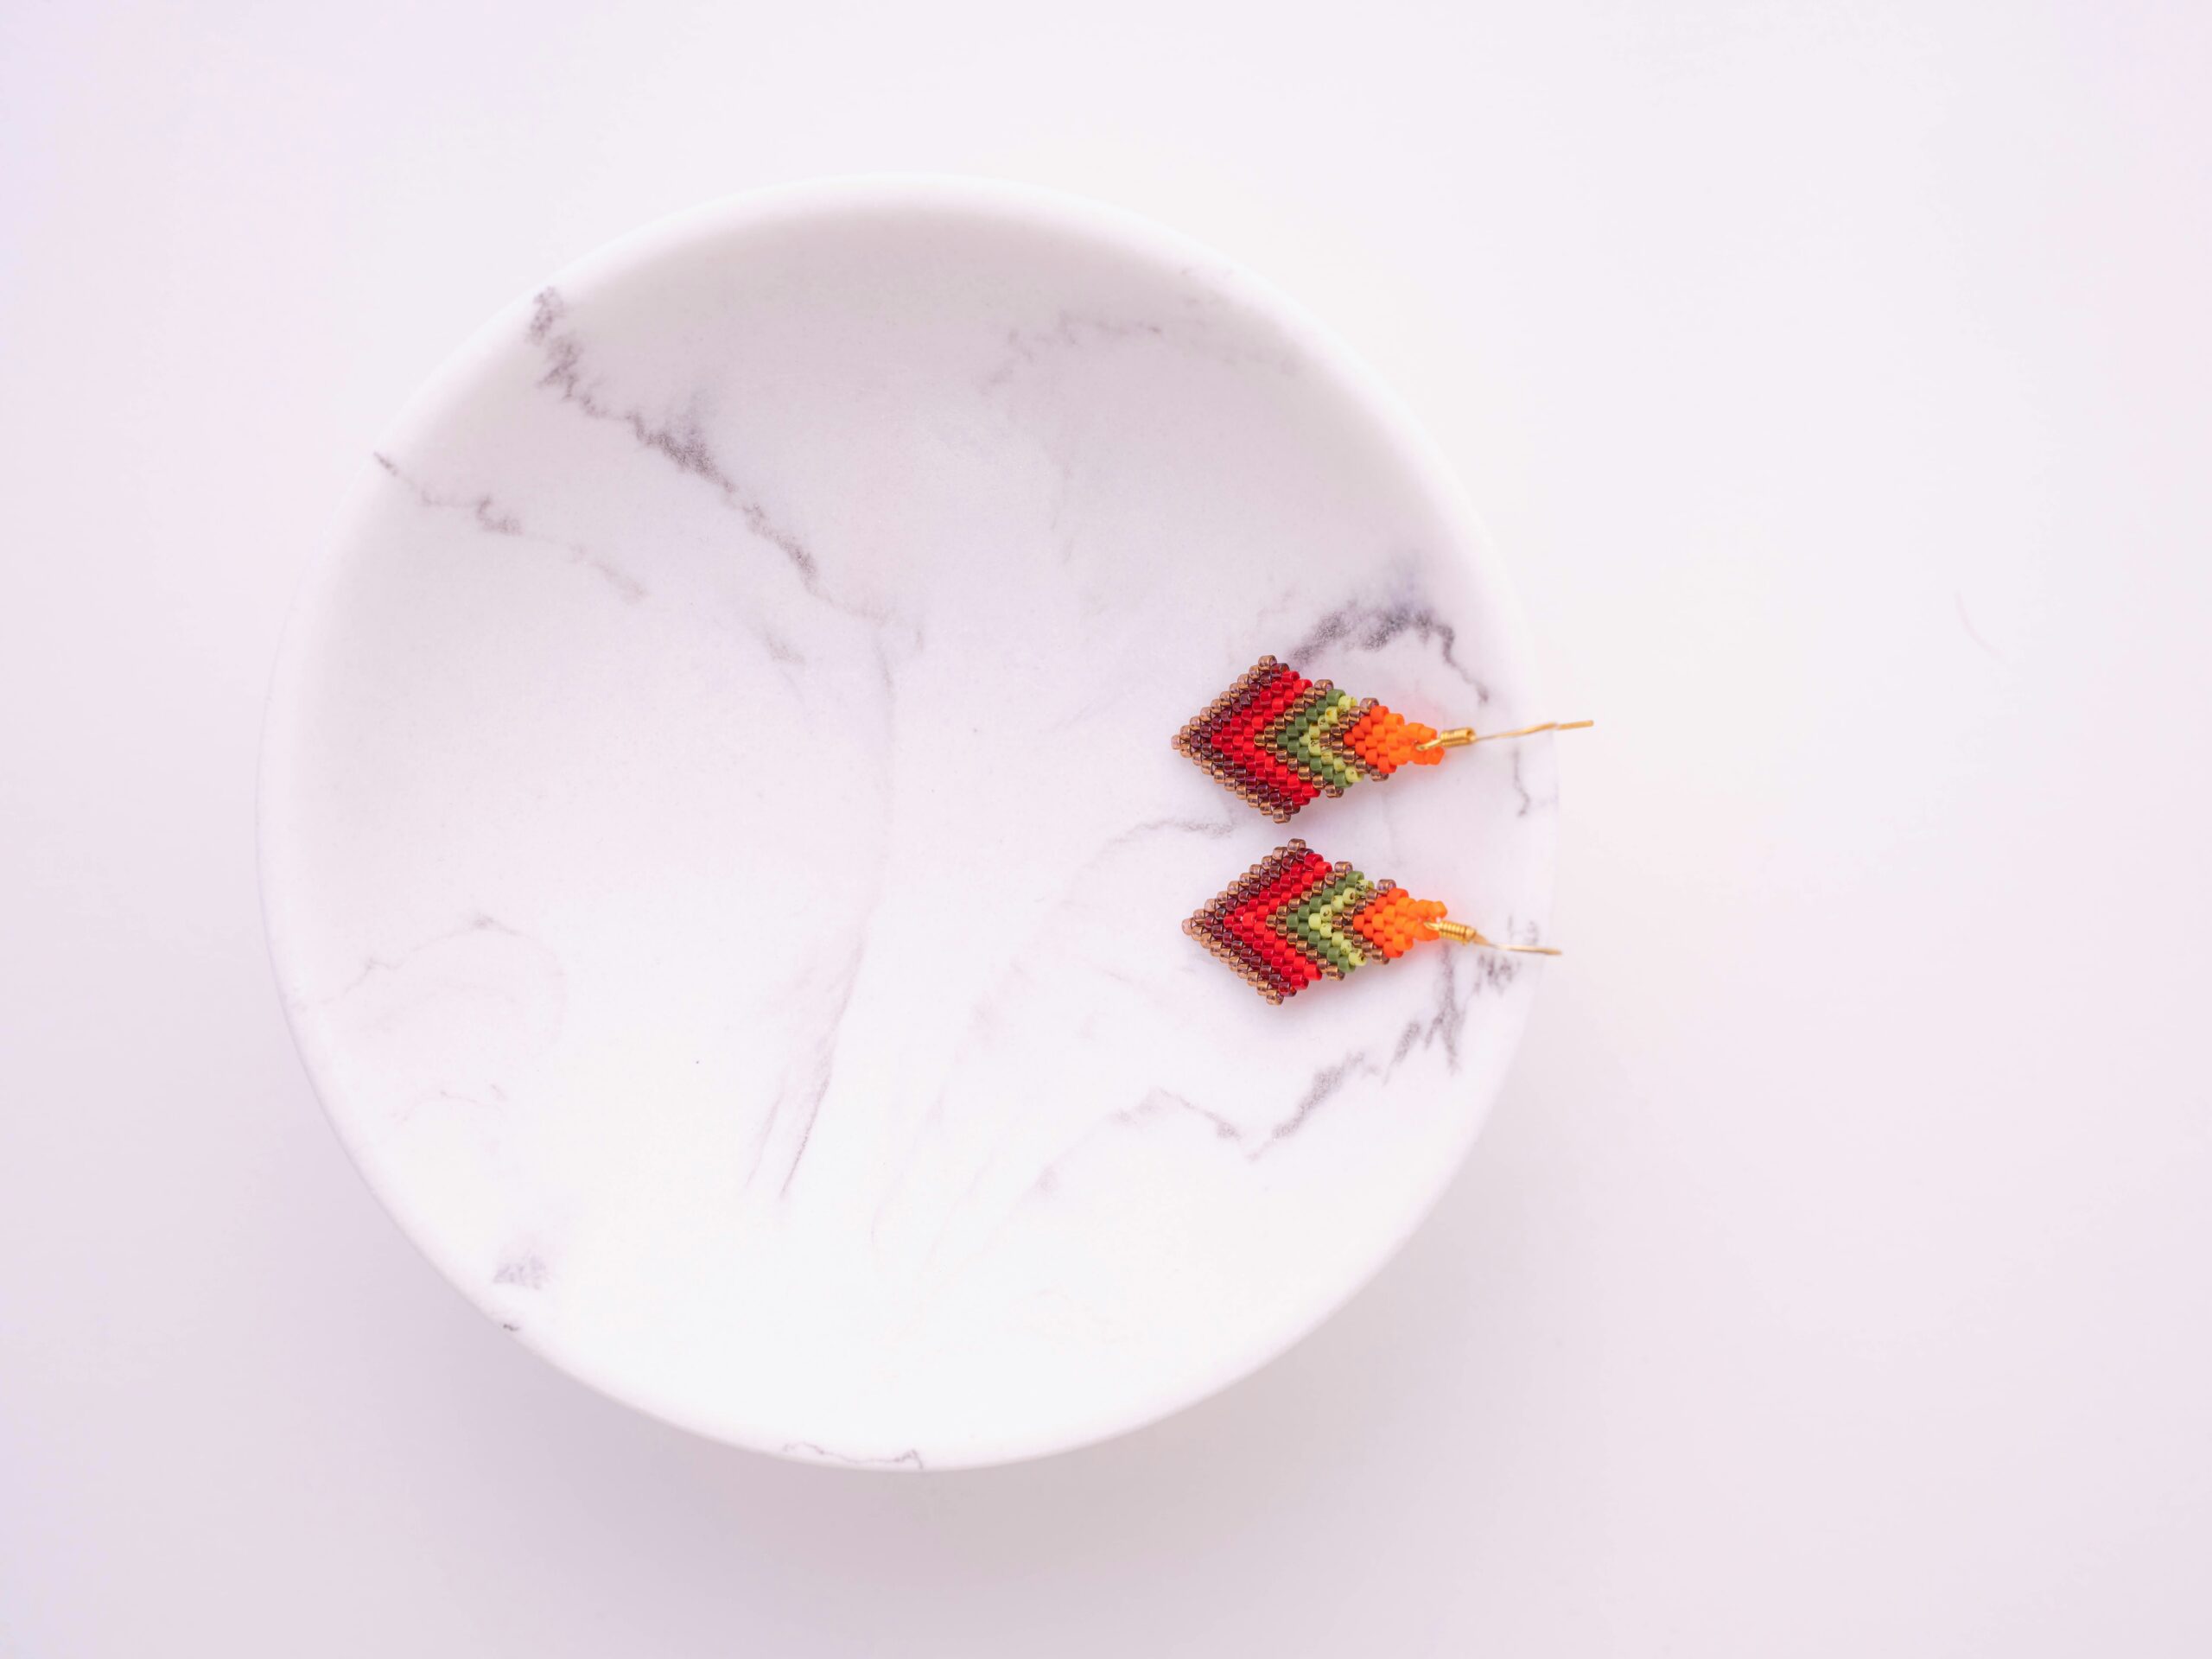
Red, orange, green, and bronze-colored seed beads make a compact chevron pattern. Start with pre-woven bead panels that have reinforced attachment loops at the top, then add matching hooks. This keeps the tiny woven rows intact while you finish the wearable pair. Handmade Earrings can show a detailed pattern without requiring you to invent a bead-weaving chart. Choose panels with the same colors and size, inspect the top loops carefully, and keep the connecting rings small enough to suit the delicate beadwork. Pair it with another weaving project.
You will need: Two matching pre-woven chevron panels with reinforced top loops, two hooks, small compatible jump rings, and two jewelry pliers.
How to make it:
1. Choose two matching pre-woven chevron bead panels with reinforced top attachment loops, small compatible jump rings, and two hooks.
2. Open each jump ring sideways with two pliers. Pass it through a reinforced panel loop and the hook eye, avoiding the woven bead rows.
3. Close each ring with its ends flush. Check the panel hangs forward, the loop is not strained, and the two earrings match in length.
Purple Triangles With a Soft White Fringe
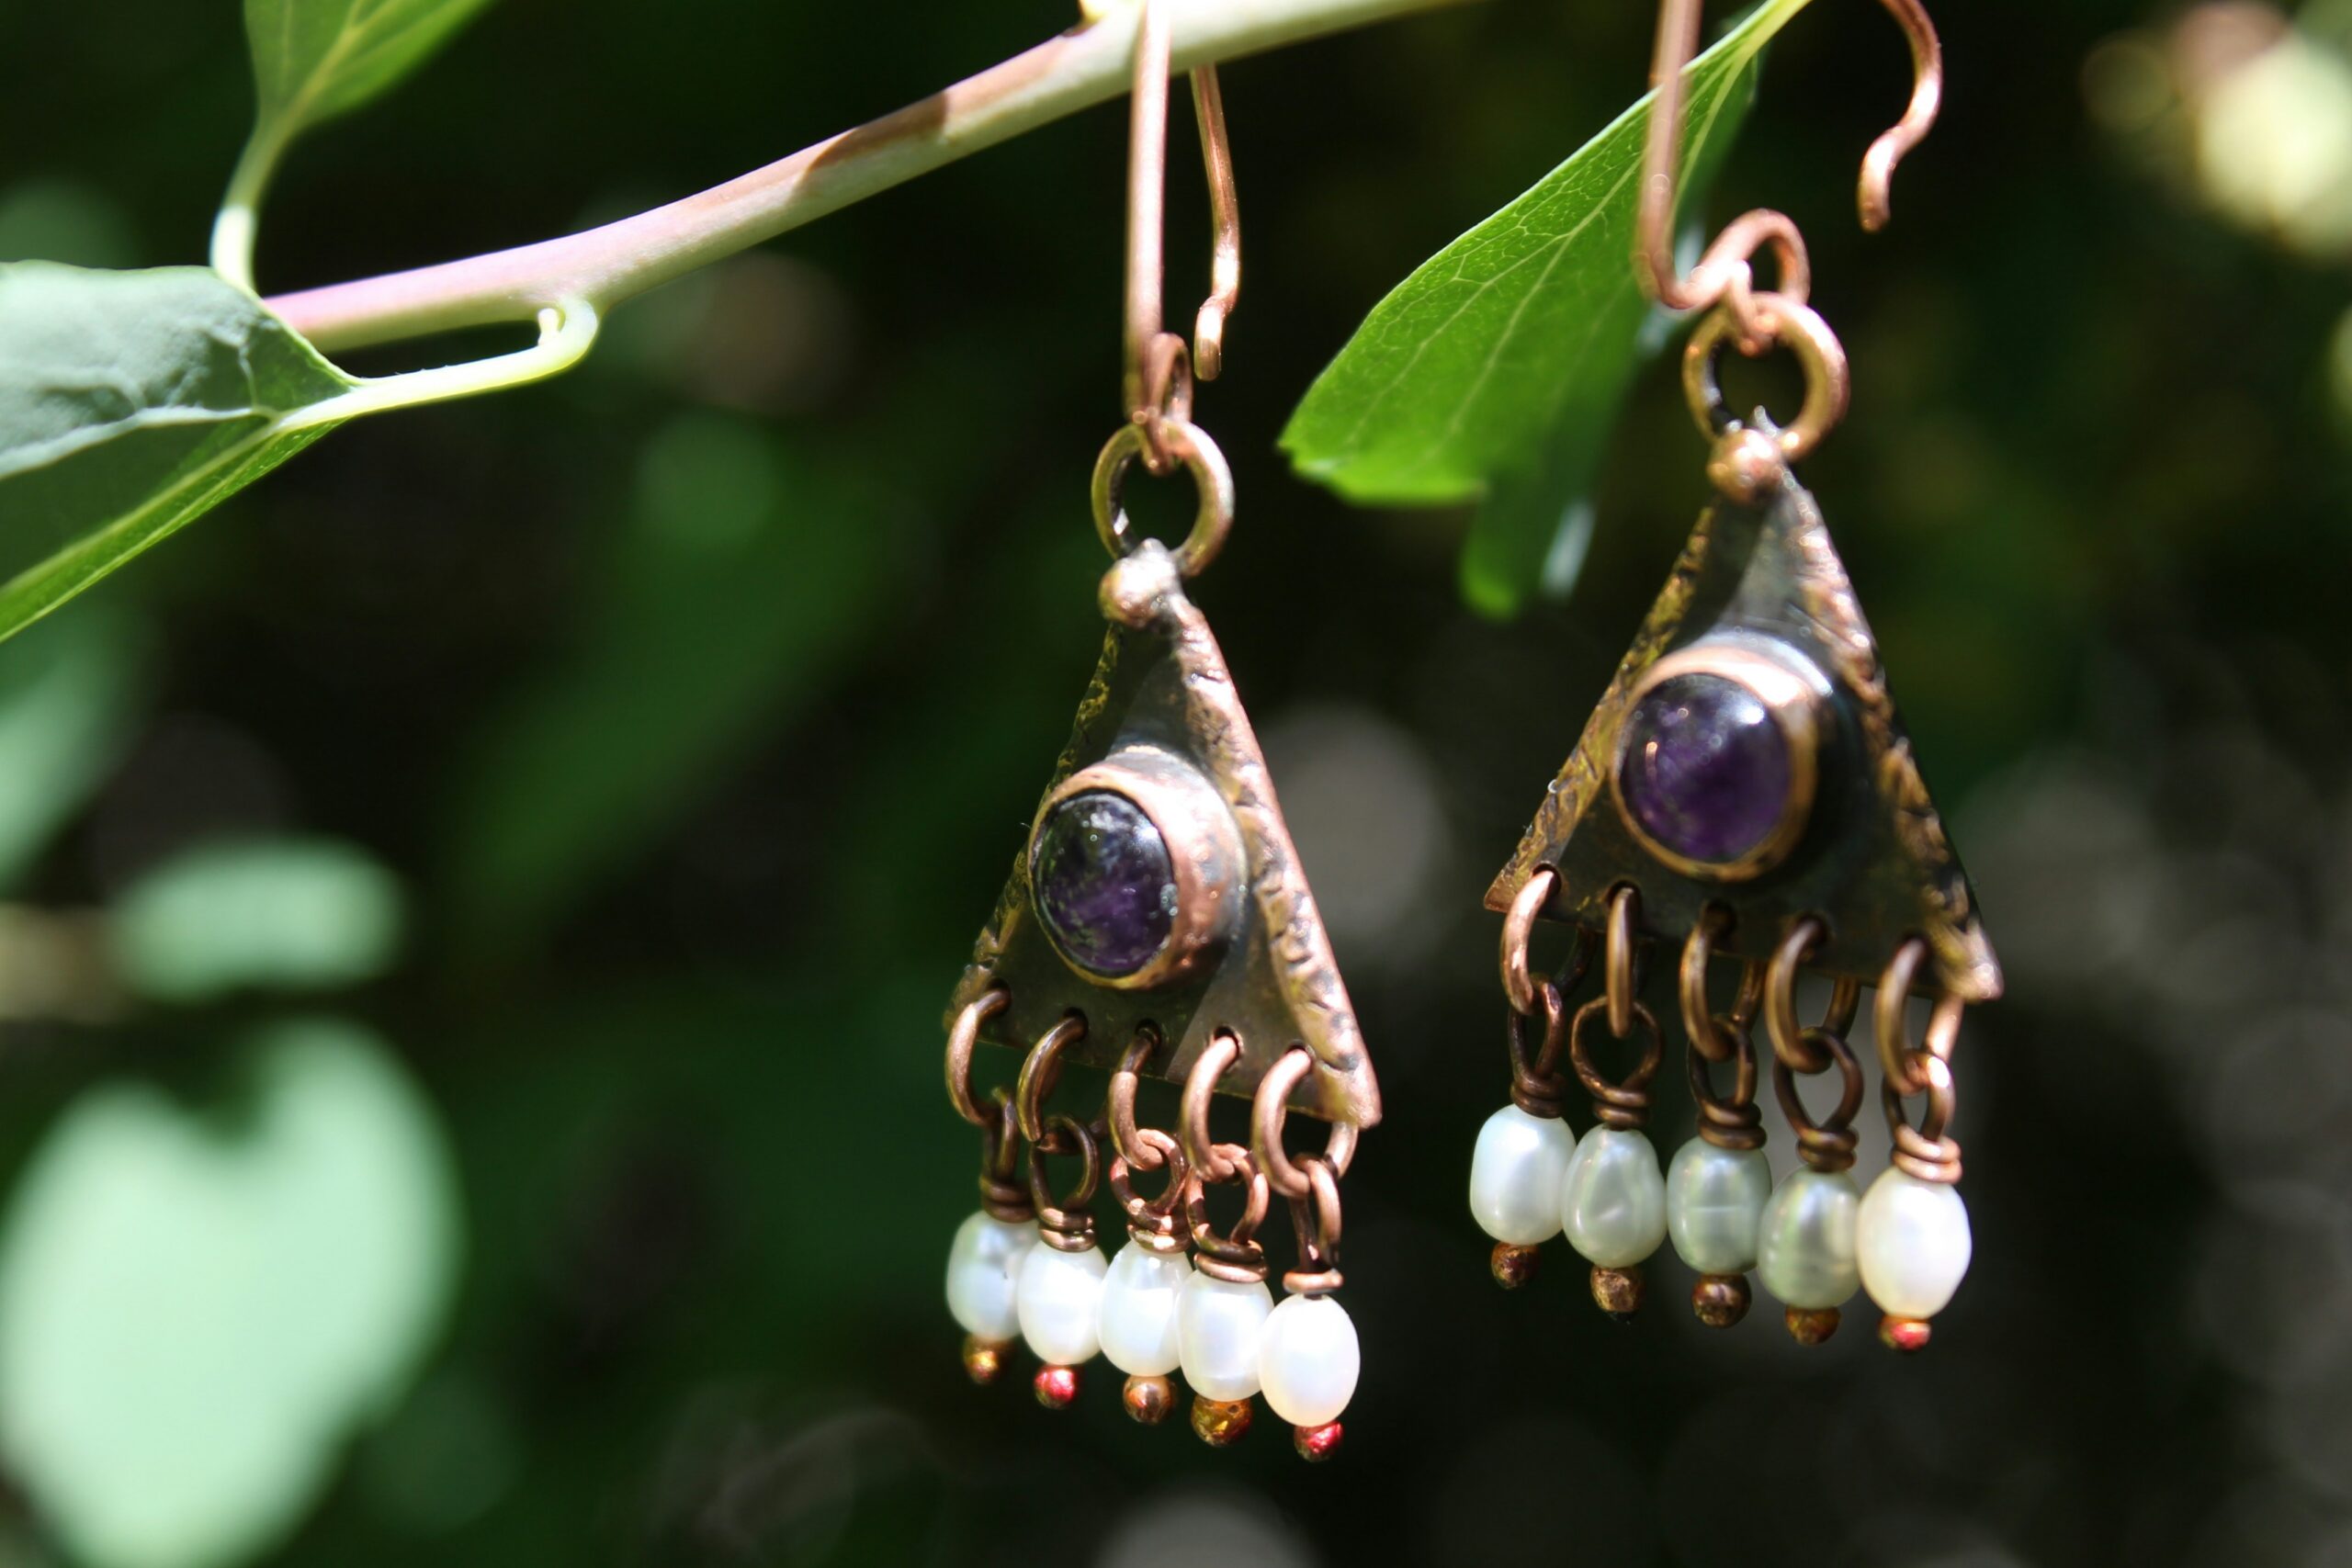
A purple center and pale bead fringe soften the angular outline of a triangular panel. The copper-colored frame gives the pair warmth, while the white drops move below it. Use ready-set triangle connectors with the center stones mounted and five sound attachment points along the base. Then make the five little bead drops for each side yourself. The repeated fringe gives these earrings their character, so keep the rest of the design restrained. A simple hook leaves the triangle and moving beads easy to enjoy. Pair it with a reusable fabric gift bag.
You will need: Two ready-set purple-center triangle panels with five lower attachment points each, ten white beads, ten headpins, rings, hooks, pliers, and flush cutters.
How to make it:
1. Choose two ready-set purple-center triangle panels with five lower attachment points each. Thread one white bead onto each of ten headpins.
2. Above each bead, bend the pin, form a loop with round-nose pliers, then wind the tail around the stem two or three times. Trim and tuck the tip; connect each drop to a panel with a small ring.
3. Close every connecting ring flush. Attach matching hooks at the top eyes, then compare the five-drop fringes and check every connection.
Handmade Earrings With Wood Discs and Terracotta Drops
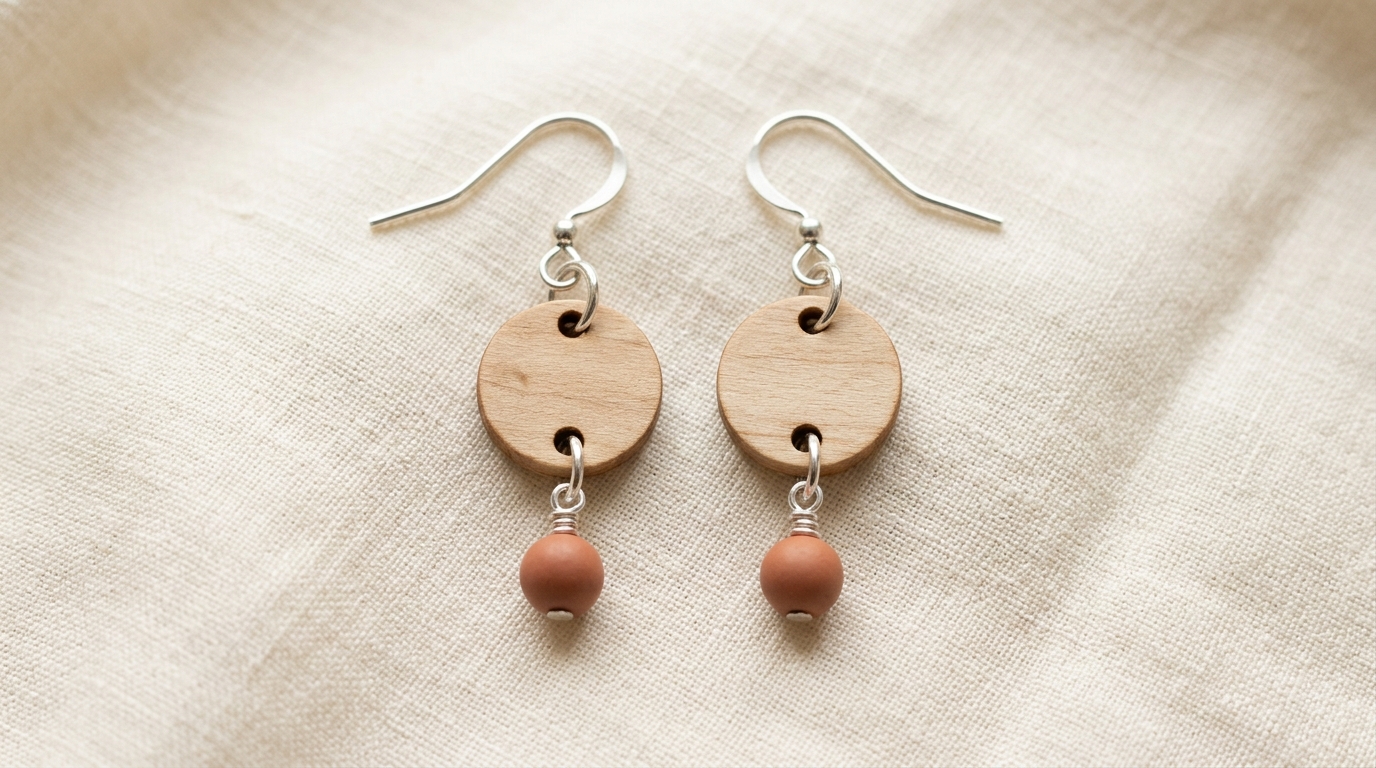
A flat wood disc with one terracotta bead below it makes a light-looking pair with a clear shape. The disc brings natural grain, while the small lower drop adds color and movement. Choose smooth unfinished discs with existing openings near the top and bottom. Handmade Earrings in warm wood and earthy red feel easy to wear with winter knits or a plain shirt. Keep the bead drops the same length and check that both discs can move without catching their connecting rings. Pair it with textured handmade art.
You will need: Two unfinished smooth wood discs already drilled through near top and bottom, two terracotta beads, two headpins, four suitable jump rings, two ear hooks, jewelry pliers and flush cutters.
How to make it:
1. Check the disc edges and both existing through-openings are smooth and sound. Form one bead drop per disc on a headpin: make a loop, wind the tail around its stem two or three times, then trim and tuck the wire end.
2. Use one jump ring through each lower disc through-opening to attach its bead drop. Open rings sideways with two pliers and bring their ends back flush.
3. Connect each top disc through-opening to an ear hook with another suitable jump ring, close flush and check free movement, equal drop length and smooth connections.
Red-Center Triangles With Five Bead Drops
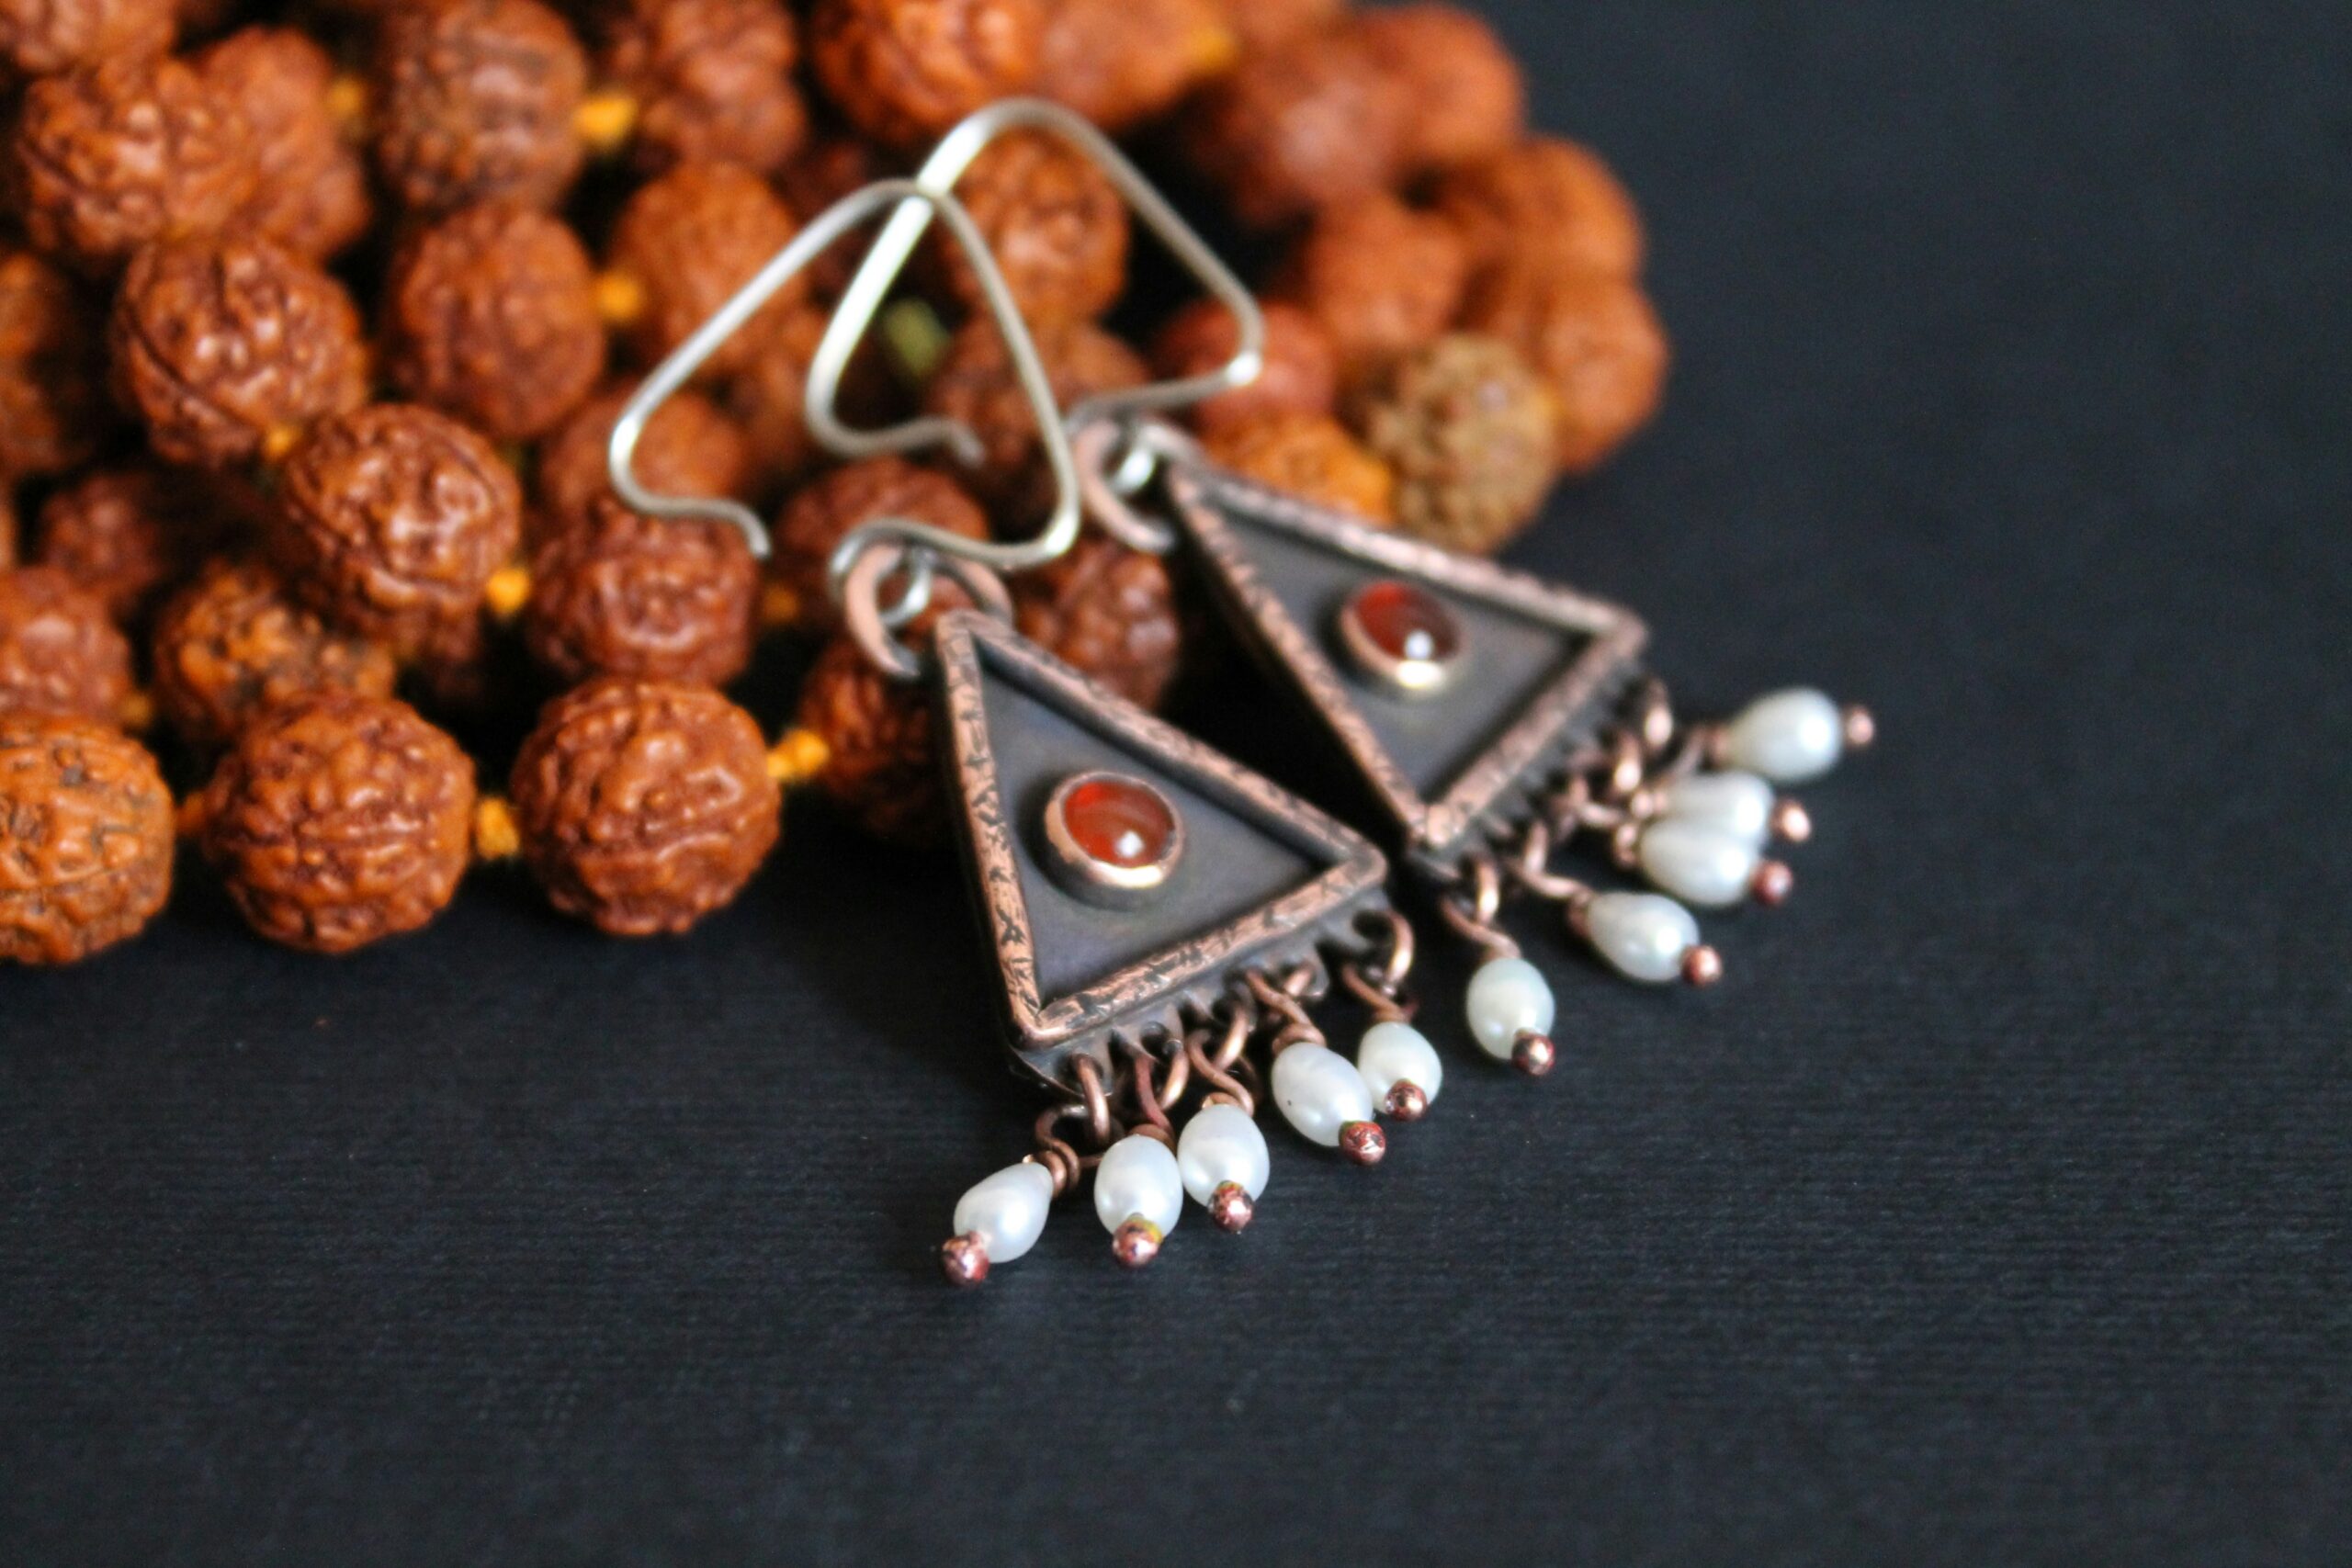
A red center gives a dark triangular panel a different mood from pale stone jewelry. Five small white bead drops hang across its base, brightening the lower edge without hiding the geometric shape. Use a ready-set triangle panel with five existing lower attachment points, then add individually made bead drops. Compare the two panels before starting so their sizes and tones work together. When you finish the fringe, lift each earring gently and make sure every drop can move independently. Pair it with an upcycled gift bag.
You will need: Two ready-set red-center triangle panels with five lower attachment points each, ten white beads, ten headpins, rings, hooks, pliers, and flush cutters.
How to make it:
1. Lay out two ready-set red-center triangle panels with five lower attachment points, ten white beads, ten headpins, connecting rings, and hooks.
2. Thread each bead onto a headpin. Form a loop above it, wrap the tail around the stem two or three times, and trim and tuck the tip. Attach five drops beneath each panel using rings.
3. Open the hook eyes sideways to join the panel top eyes, then close flush. Check all fringe rings are closed and both panels face forward.
Asymmetric Blue and White Drops
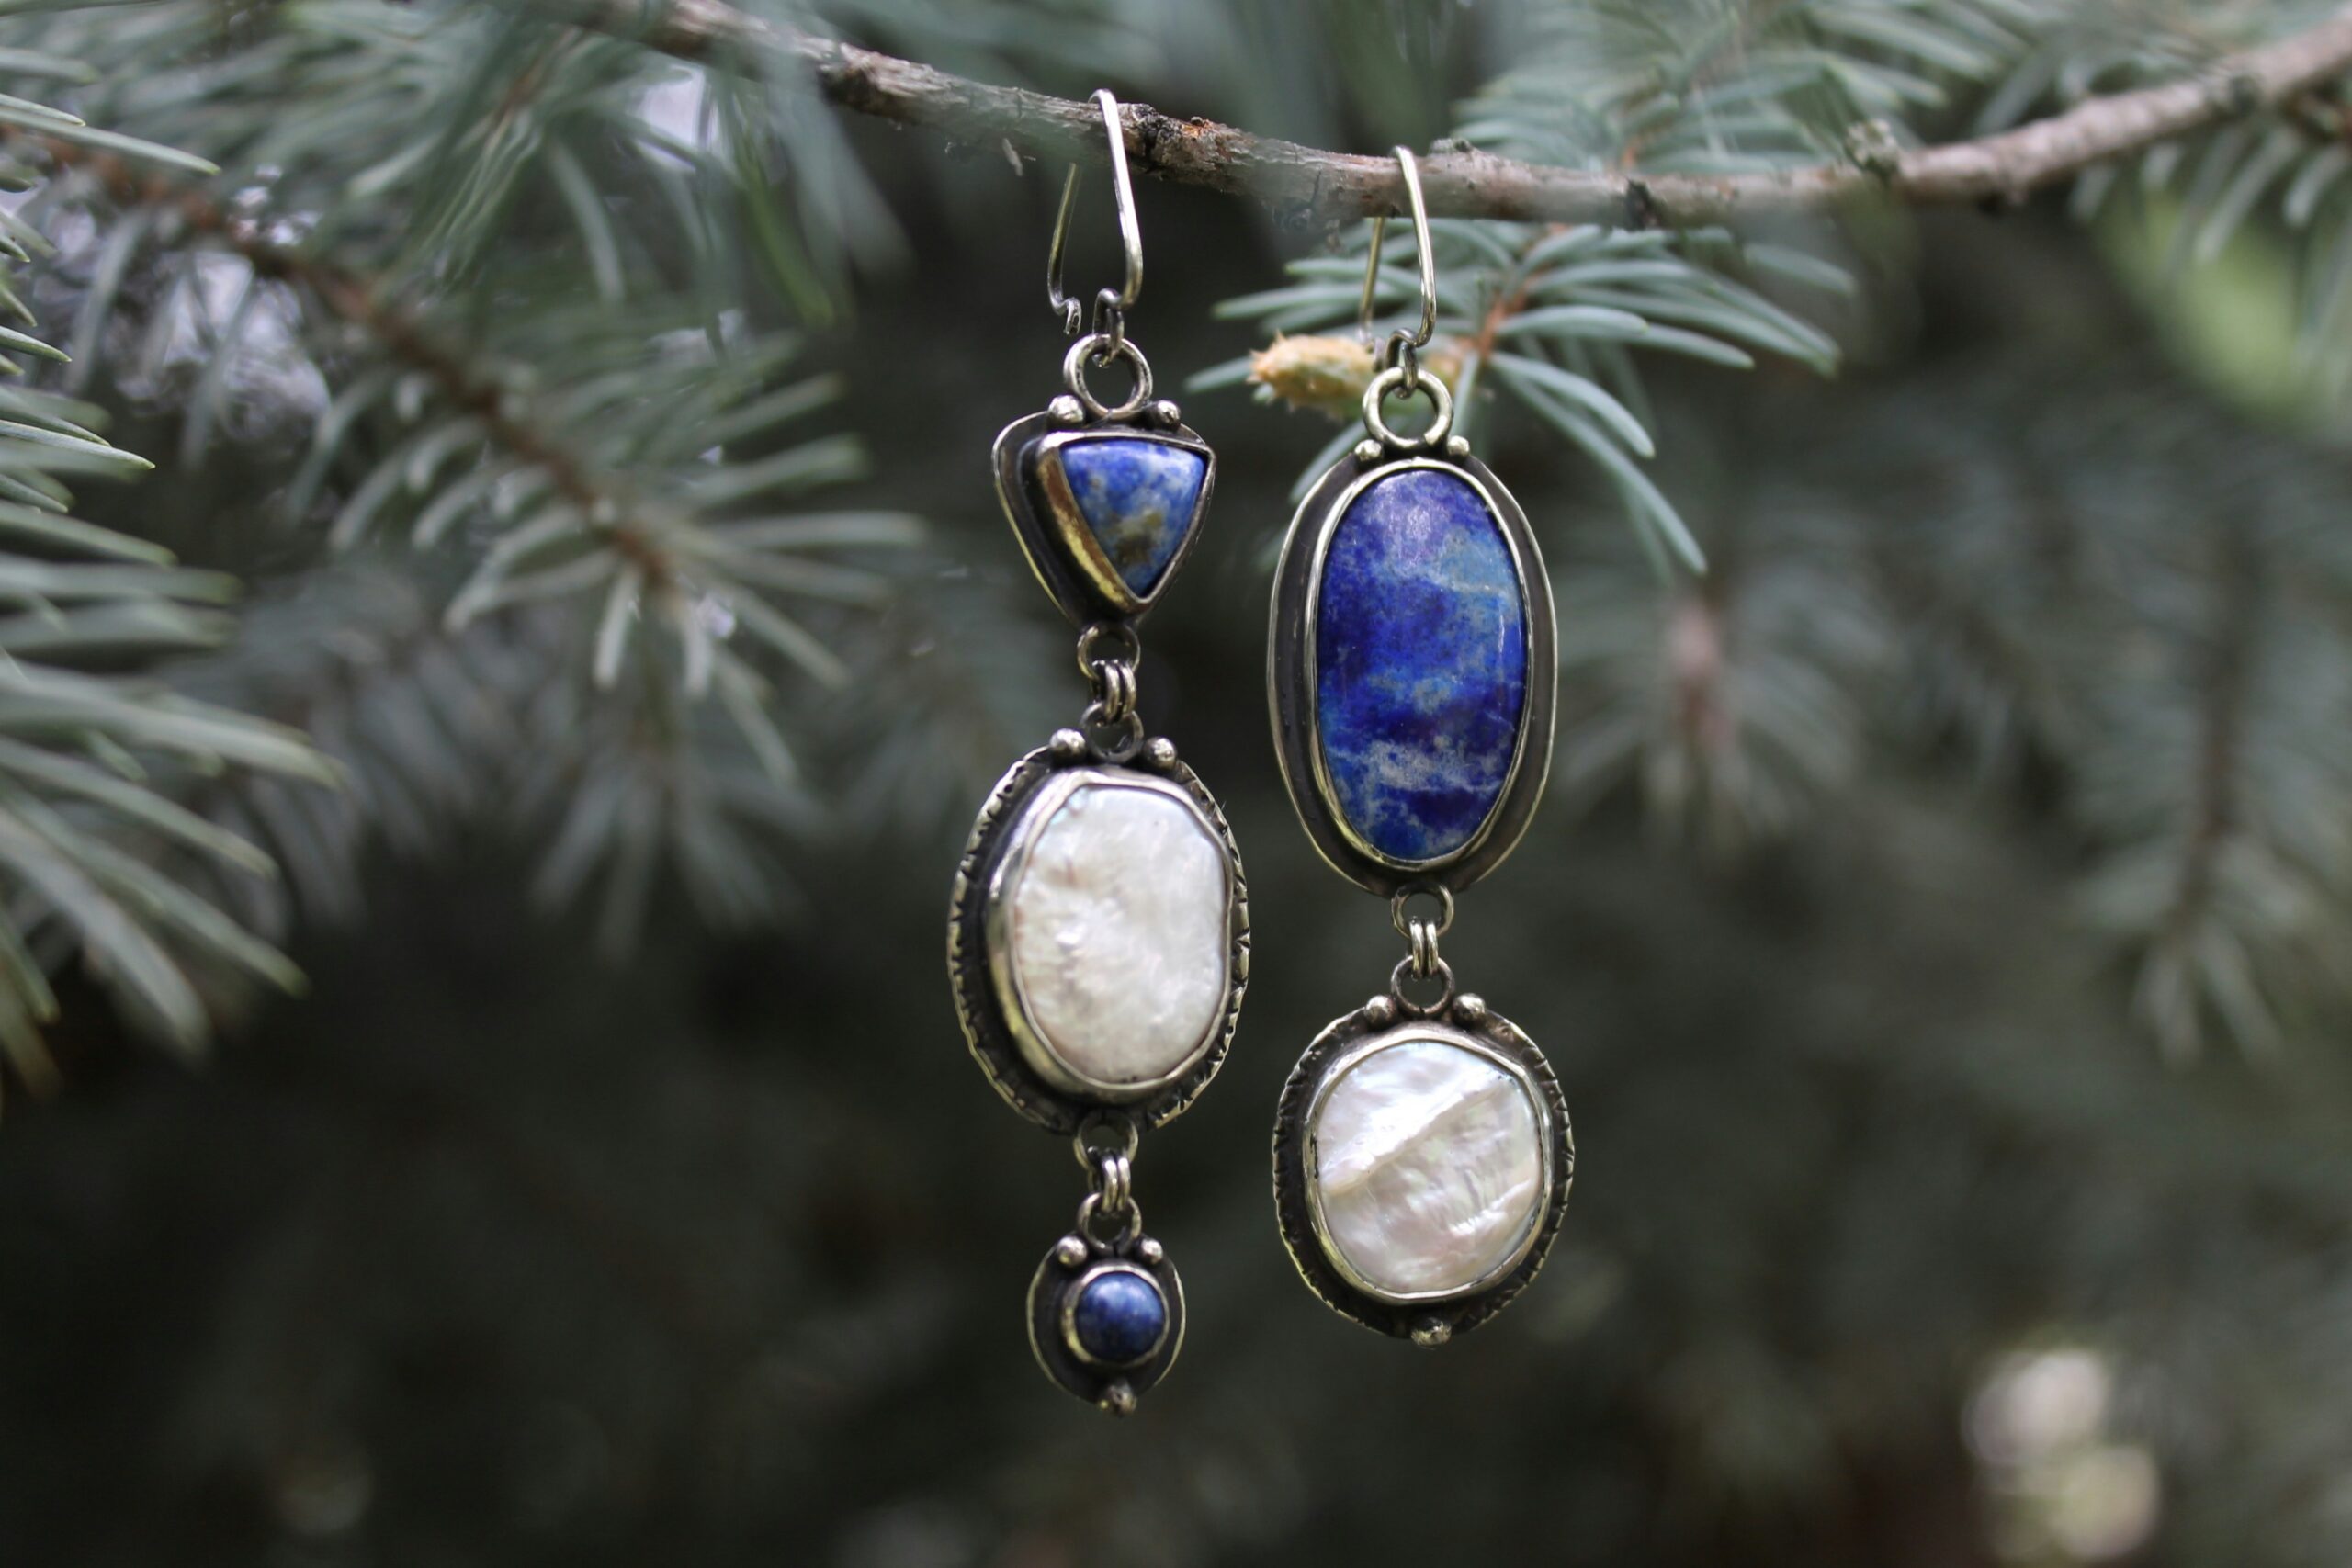
Different upper shapes make this blue and white pair intentionally asymmetric. One earring begins with a blue triangle, followed by a pale oval and a small blue drop. Its partner uses a longer blue oval above a pale oval, with no third component. Repeated colors connect the two sides without making them identical. Choose ready-set pieces with sound attachment eyes, then lay out each arrangement before joining. Compare the overall lengths and leave enough movement at the links for both earrings to hang freely. Pair it with hand-painted decorations.
You will need: One blue triangular two-ended connector, one longer blue oval two-ended connector, two pale oval components (one two-ended connector and one bottom drop), one small blue bottom drop, jump rings, two ear hooks, and two pliers. All stone components are ready-set.
How to make it:
1. Arrange the first side as blue triangle, pale oval connector, and small blue bottom drop. Arrange the second as the longer blue oval connector and a pale oval bottom drop. Compare the overall hanging lengths.
2. Use two pliers to twist jump rings sideways. Join adjacent component eyes in each arrangement, then close every ring flush. Keep the fronts facing the same direction.
3. Attach one ear hook above each blue upper component. Check that all links move freely and that both hooks close securely. Preserve the intended three-part and two-part difference.
Handmade Earrings With Twisted Ribbons and Red Accents
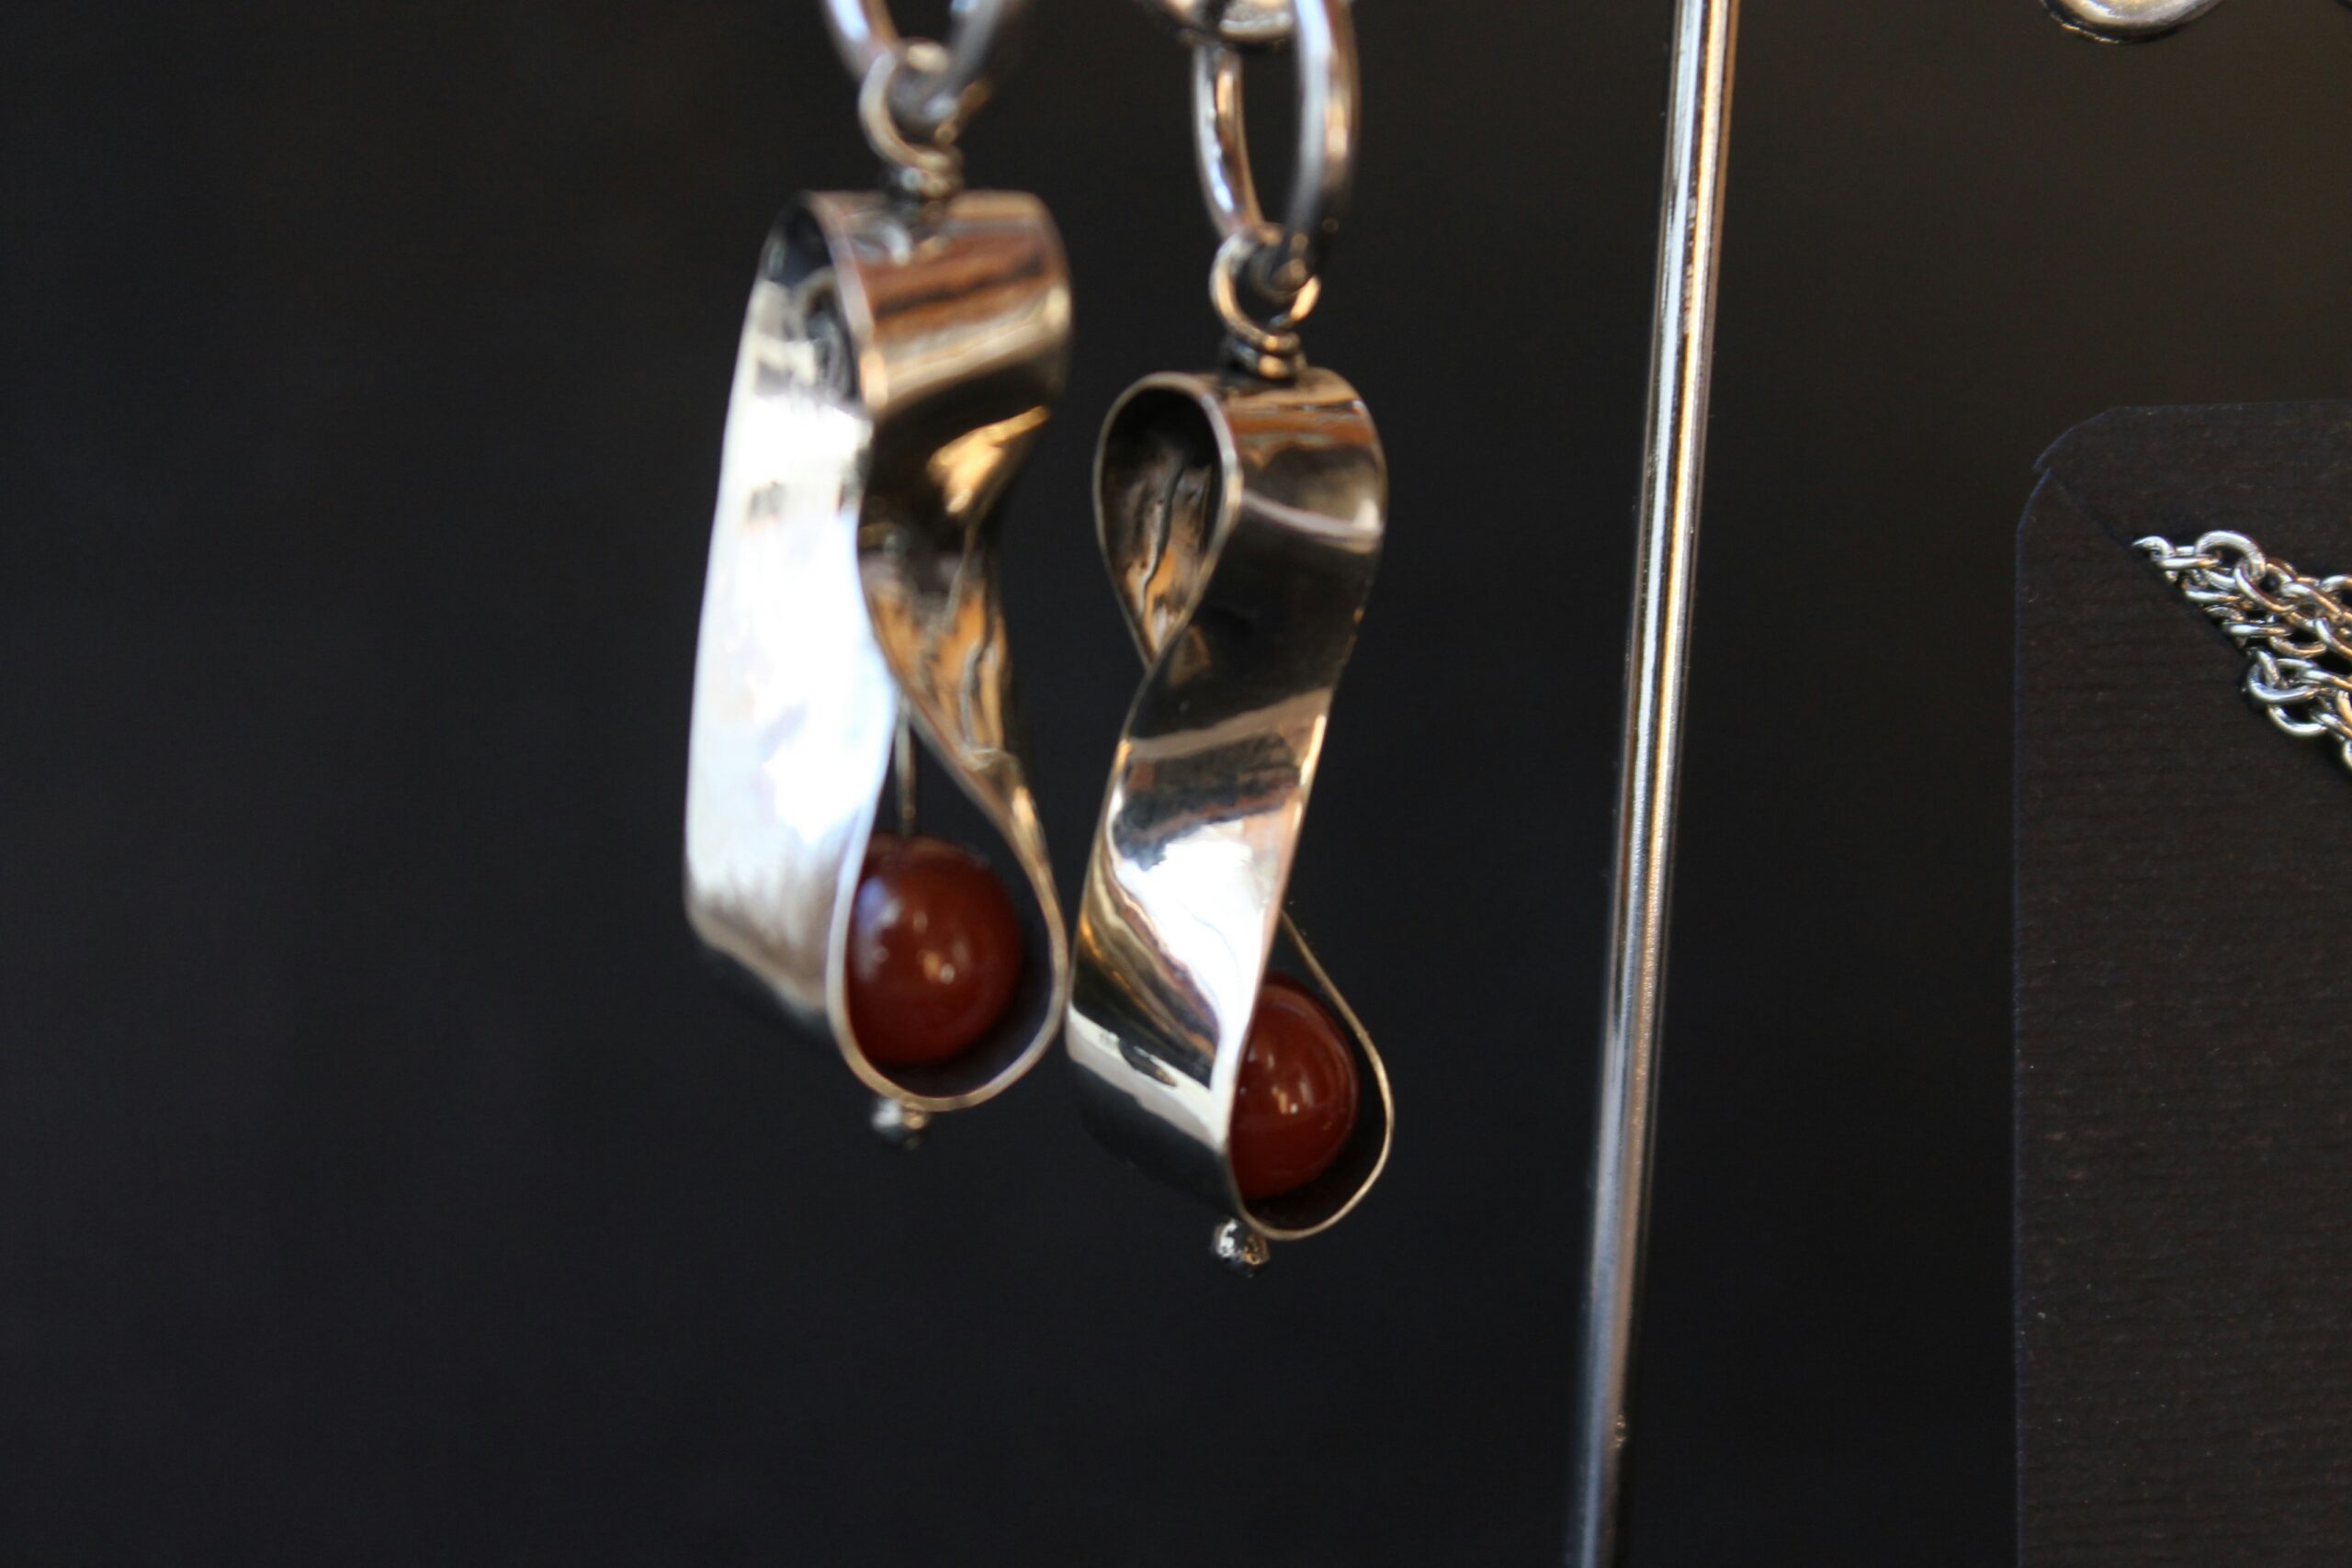
A twisted ribbon shape creates a long bright line above a small red accent bead. The curve is already formed in the metal component, so choose matching ribbon drops with securely mounted beads and top attachment eyes. Handmade Earrings can have a sculptural look without asking you to cut and bend sheet metal at home. Compare the direction of the two twists before joining them to the hooks. The pair should feel balanced, with the red beads sitting at similar heights beneath the reflective curves. Pair it with more handmade jewelry gifts.
You will need: Two preformed ribbon charms with securely mounted red beads and top eyes, two compatible ear hooks, and flat-nose pliers.
How to make it:
1. Choose two matching preformed ribbon drops with red beads already securely mounted and sound top attachment eyes.
2. Open each preformed hook attachment eye sideways with pliers, add the ribbon eye, and bring the hook eye ends back flush.
3. Check the two twists face the intended directions, the red beads remain secure, and both earrings hang at the same length.