Snowflake Bentley: 14 Snowflake Crafts Inspired by the Farmer Who First Photographed One
Snowflake Bentley was a Vermont farmer with a camera, a microscope and endless patience, and he changed the way the world sees winter. On January 15, 1885, Wilson Bentley photographed his first snowflake, catching it on black velvet before it could melt. Over his lifetime he captured more than 5,000 snow crystals and helped spread the idea that no two snowflakes are alike. His story is the perfect excuse to fill your home with handmade snowflakes this season. Below are 14 snowflake crafts inspired by him, from black velvet art and paper cuts to beaded ornaments, a cozy pillow and giant porch flakes. Most use simple supplies and work for every age, so grab some paper and let’s make it snow indoors..
Who Was Snowflake Bentley?
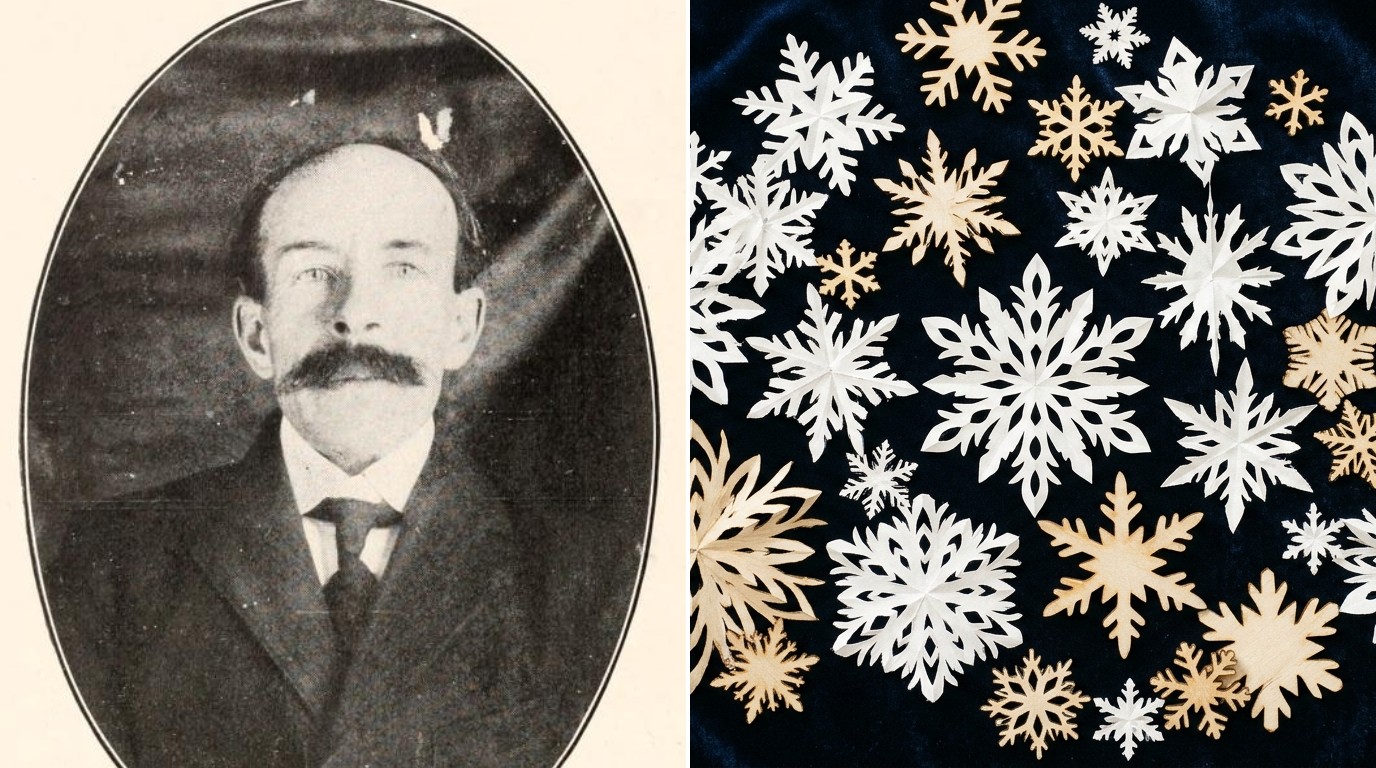
Wilson Alwyn Bentley was born on February 9, 1865, in Jericho, Vermont, and spent his life on the family farm. As a teen he tried drawing snowflakes through an old microscope from his mother, but they melted too fast. So he attached a bellows camera to a microscope and kept experimenting until it worked. You can read his full story on Wikipedia. Start your own tribute by laying paper and wooden snowflakes on dark velvet, just like his photos. Ready to see how lovely they look?..
You will need: Dark blue or black velvet fabric, white paper snowflakes, small wooden snowflake cutouts, a flat tray or board.
How to make it: 1. Stretch the velvet over a board or tray. 2. Cut or gather snowflakes in different sizes. 3. Arrange them with space around each one. 4. Display it on a table or photograph it from above.
Snowflake Bentley Black Velvet Art
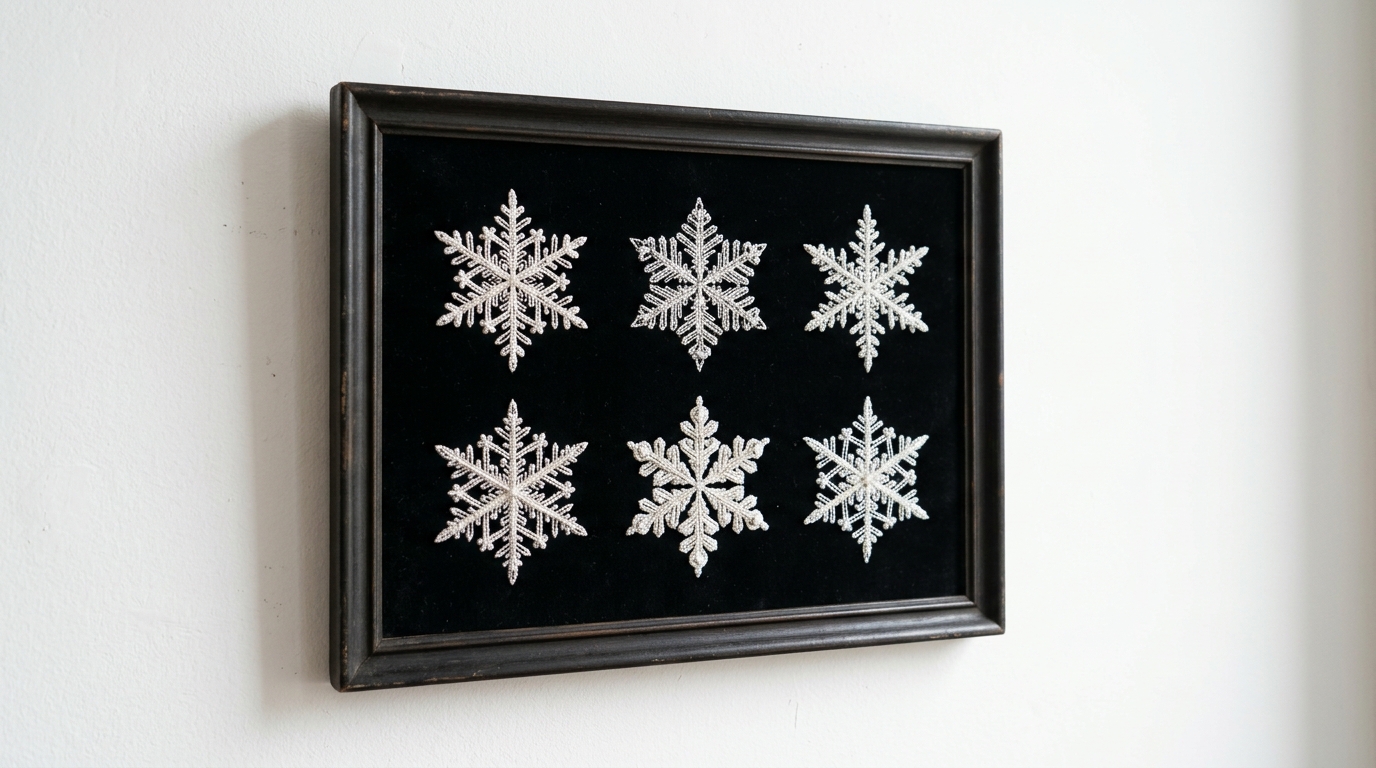
Snowflake Bentley caught his snowflakes on black velvet, and that idea makes stunning wall art. Stitch or glue six white snowflakes in a neat grid onto black velvet, then frame it behind glass. Thread embroidery with a few seed beads catches the light like real ice. It looks like a museum piece but costs only a frame, a scrap of velvet and some thread. Hang it near a window where winter light can reach it. Which room would you hang yours in?
You will need: A picture frame, black velvet, white embroidery thread, clear seed beads, a needle, fabric glue.
How to make it: 1. Cut the velvet to fit the frame backing. 2. Mark a grid of six dots with chalk. 3. Stitch a simple six arm snowflake at each dot and add beads. 4. Frame it behind glass.
Six Point Paper Snowflakes Like Snowflake Bentley Saw
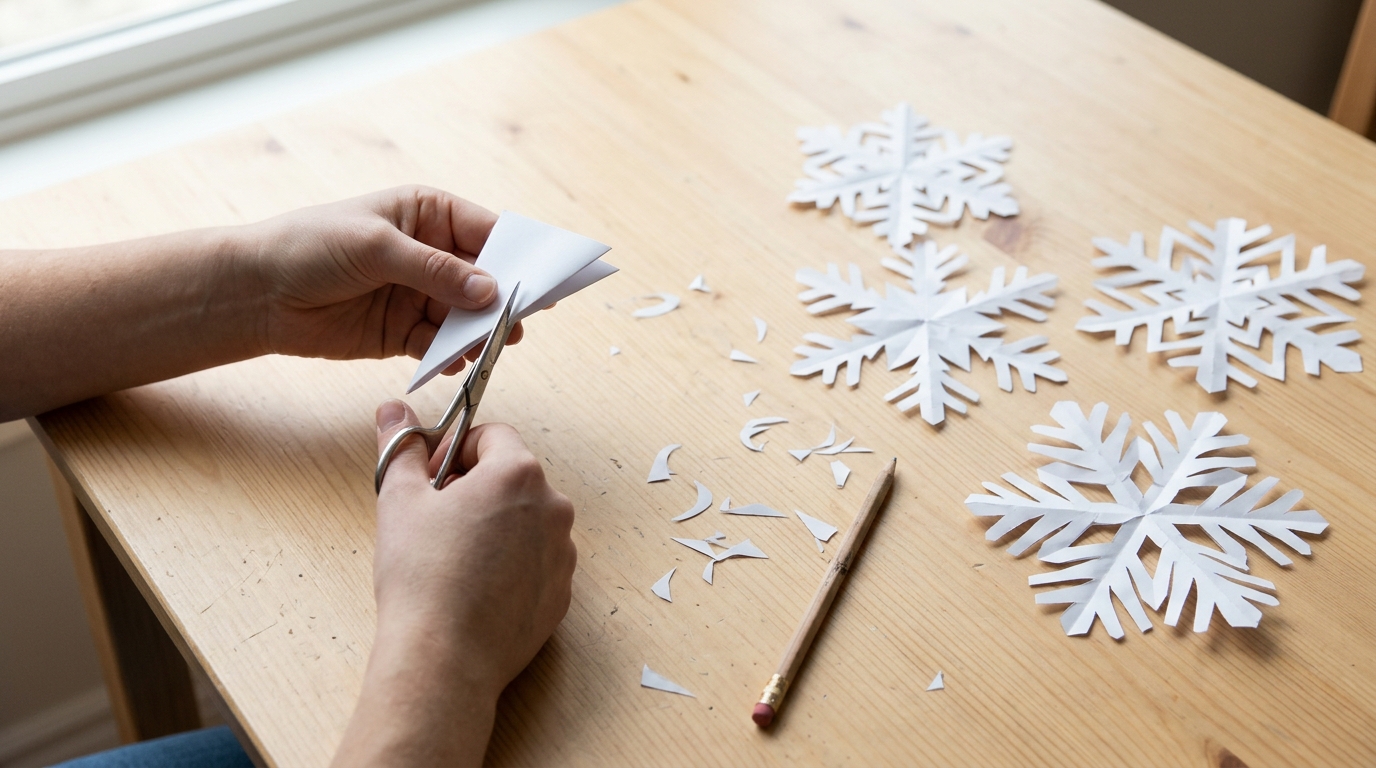
Real snowflakes always have six sides, something Snowflake Bentley’s photographs showed again and again. Most of us learned to fold paper into fourths, which gives eight points, so try the six point fold this year for a more realistic flake. Fold a square into a triangle, then fold it in thirds, trim the top and start cutting little notches and curves. Every one comes out different, just like the real thing. How many can you cut before dinner?
You will need: Thin white paper squares, sharp small scissors, a pencil.
How to make it: 1. Fold a square in half into a triangle. 2. Fold that triangle in thirds so the edges overlap evenly. 3. Trim the top straight across. 4. Cut shapes along both edges, then unfold slowly.
Popsicle Stick Snowflakes
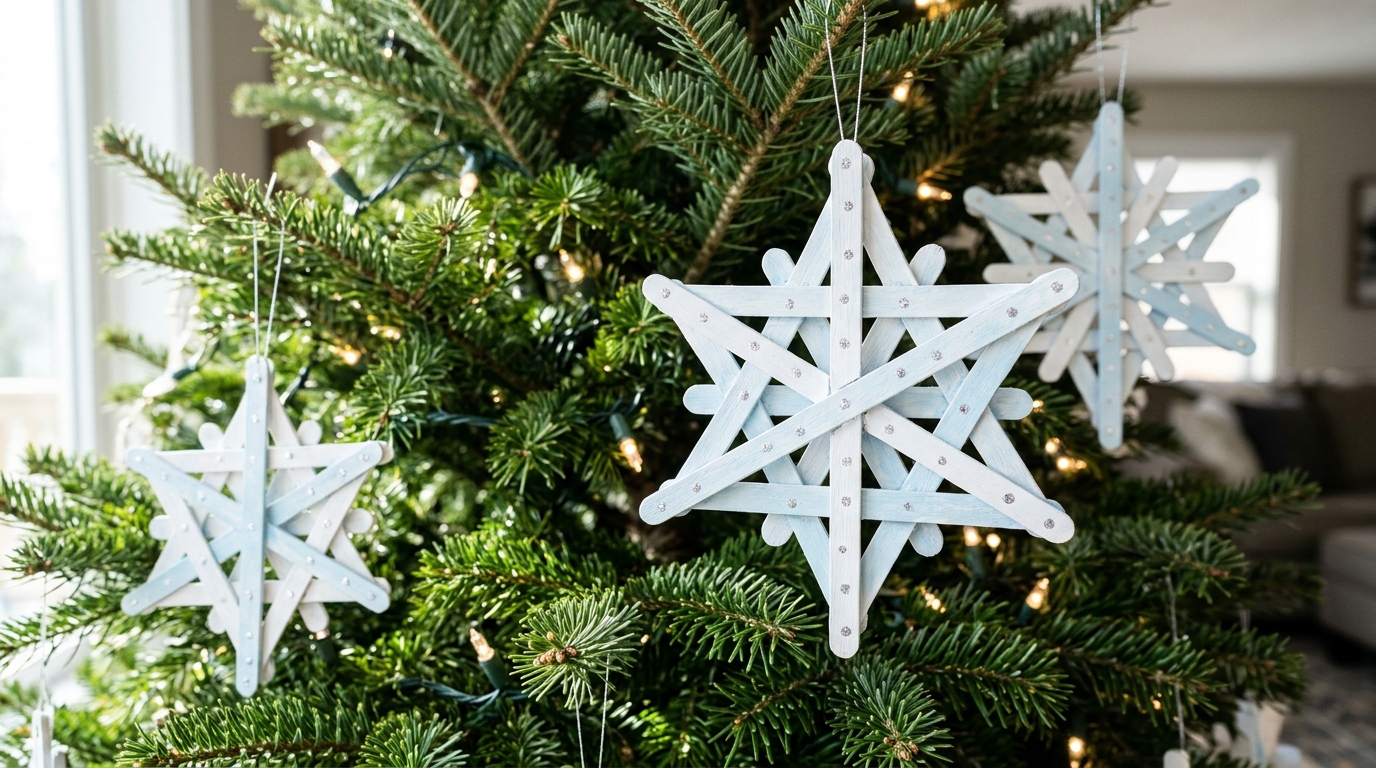
Craft sticks make sturdy six point snowflakes that kids can build in minutes. Glue three sticks across each other at the center, add shorter pieces for branches and paint them white or icy blue. A few silver dots of paint make them sparkle without any glitter mess. They are strong enough to survive years on the tree. Make a dozen and tie them onto gifts as tags too. Which color will you paint yours?
You will need: Craft sticks, tacky glue, white and pale blue acrylic paint, a silver paint pen, twine.
How to make it: 1. Glue three sticks crossing at the center. 2. Glue small stick pieces as branches. 3. Paint and let dry. 4. Add silver dots and a twine loop.
Frame Snowflake Bentley’s Real Photographs
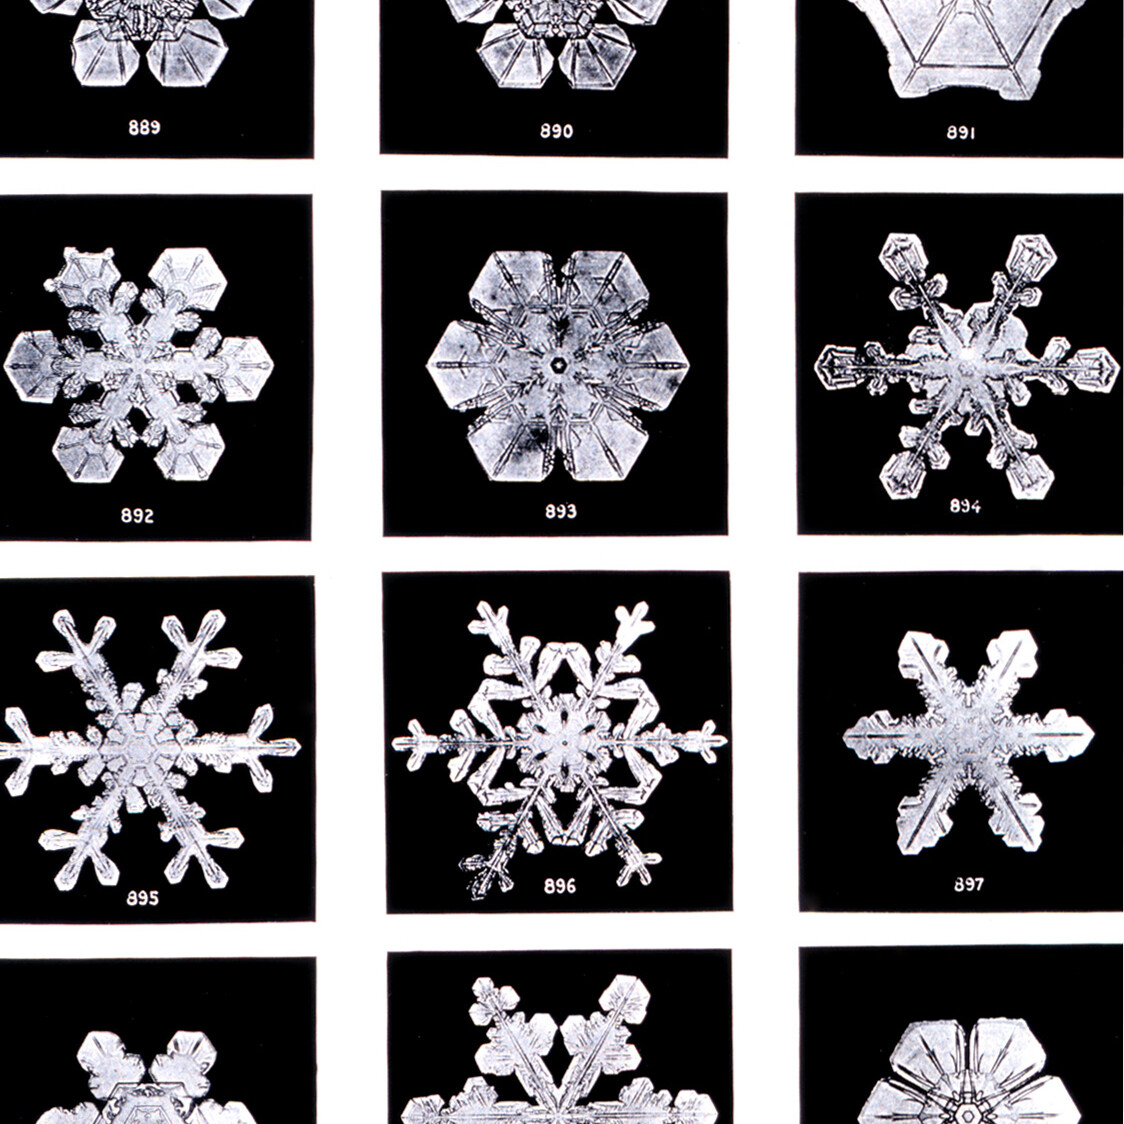
Here are some of Snowflake Bentley’s actual snowflake photographs, and because they are in the public domain you can print them for your own walls. Print a set of six or nine on matte paper, frame them in simple black frames and hang them in a grid for a gallery wall with a real story behind it. It is a beautiful, low cost winter display that sparks questions from every guest. Which snowflake would be your favorite?
You will need: Printed Bentley snowflake photos, matching black frames, a level, picture hooks, painter’s tape.
How to make it: 1. Download and print the photos at the same size. 2. Frame each one. 3. Plan the grid on the wall with painter’s tape. 4. Hang and level each frame.
Wooden Snowflake Garland
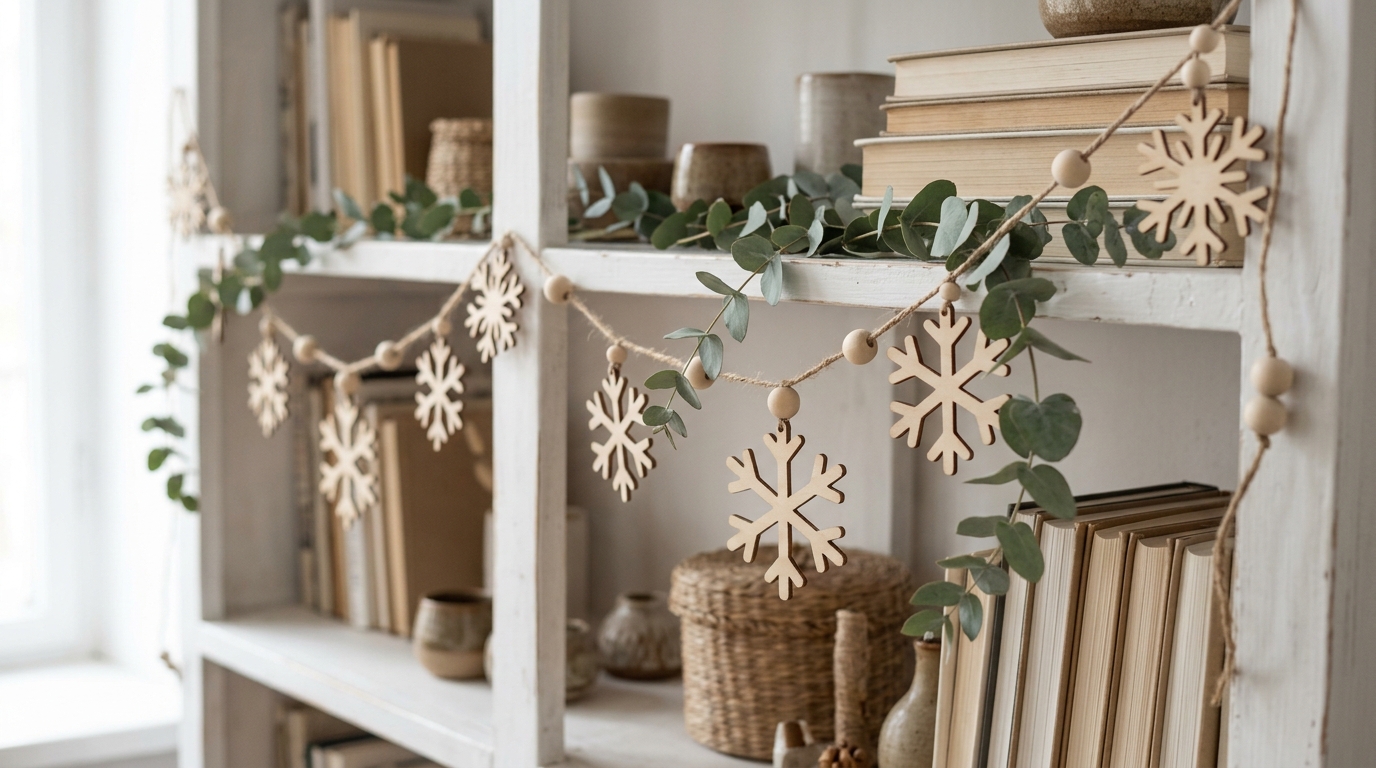
A string of thin wooden snowflakes and wooden beads on jute twine gives a soft Scandinavian look to a shelf, mantel or window. You can buy plain wooden snowflake cutouts at most craft stores or cut them from thin plywood with adult help. Leave them natural or whitewash a few. It is quiet, warm decor that stays up all winter, long after Christmas is packed away. Where would your garland look best?
You will need: Wooden snowflake cutouts, wooden beads, jute twine, a large needle, white paint (optional).
How to make it: 1. Drill or poke a small hole in each snowflake if needed. 2. Thread beads and snowflakes onto twine. 3. Space snowflakes every few beads. 4. Drape and tie the ends.
Sparkling Beaded Snowflakes
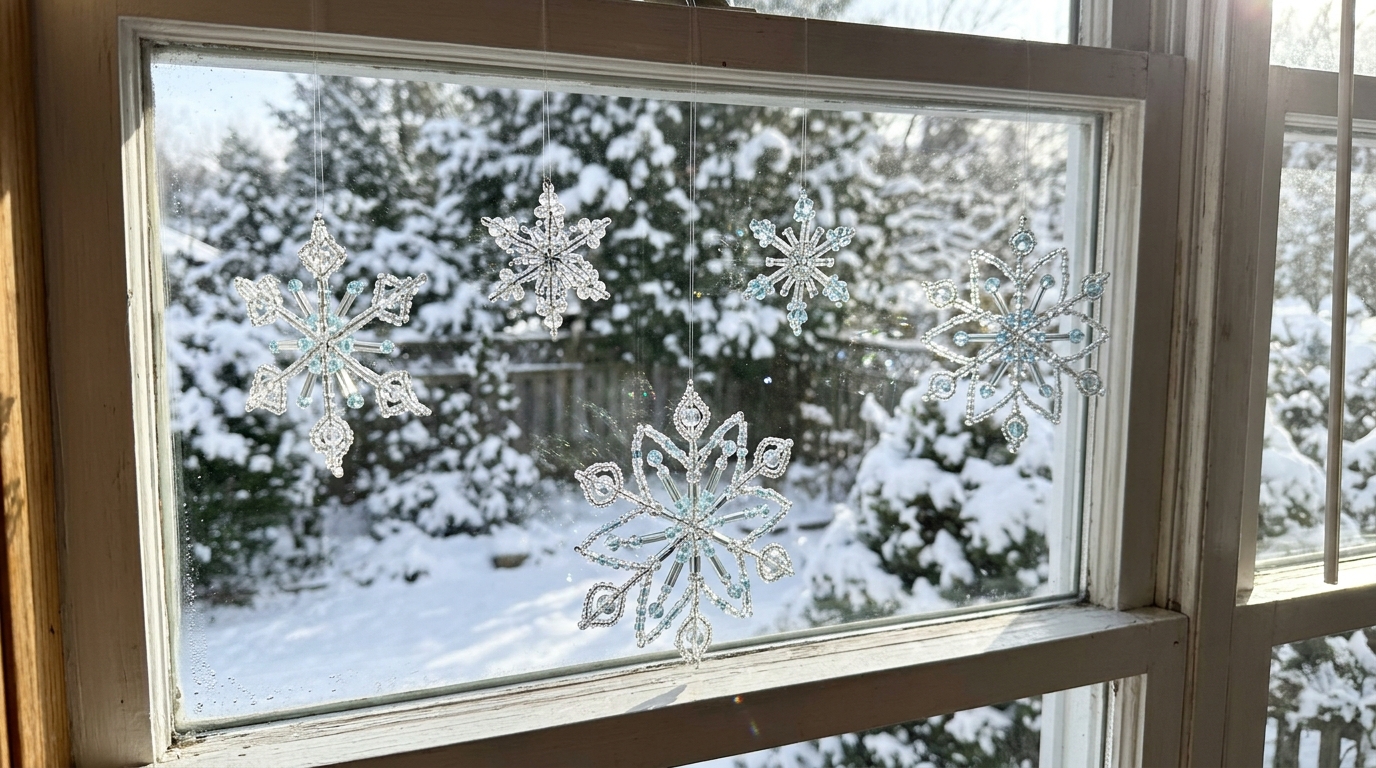
Beaded snowflakes catch the light like real ice crystals. Twist six arms of wire into a star, thread on clear, silver and pale blue beads and finish each arm with a small loop. Hang them in a sunny window and they throw tiny sparkles across the room. Snowflake Bentley spent his life chasing the shine of real snow, and this craft captures a bit of it. It is calm, focused work that is perfect for a quiet evening. Which bead colors will you choose?
You will need: Craft wire, wire cutters (adult help), clear and blue glass beads, small round nose pliers, fishing line.
How to make it: 1. Twist three wires together at the center to make six arms. 2. Thread beads onto each arm. 3. Bend a small loop at each tip. 4. Hang with fishing line.
Trace a Snowflake Bentley Original From 1890
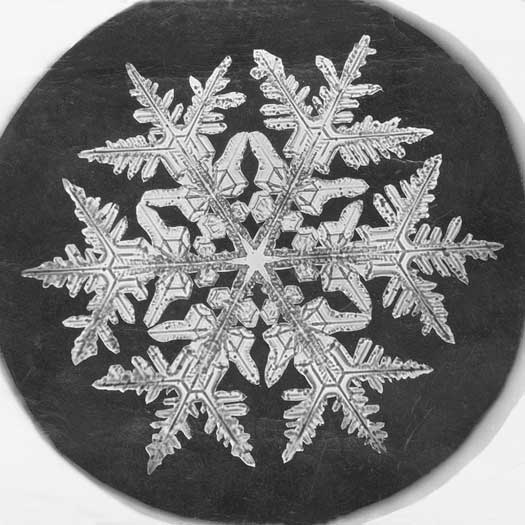
This single crystal was photographed by Snowflake Bentley in 1890, and its shape makes a perfect craft template. Print it, lay tracing paper on top and trace the outline. Use your tracing as a pattern for paper cutting, embroidery, a cookie stencil or a painted window design. Making a craft from a real snowflake that fell more than 130 years ago feels a little magical. What will you turn your tracing into?
You will need: A printout of the 1890 snowflake, tracing paper, a pencil, card stock for a template.
How to make it: 1. Print the snowflake at a size you like. 2. Trace the outline on tracing paper. 3. Transfer it to card stock and cut it out. 4. Use the template for any craft below.
Salt Dough Snowflake Ornaments
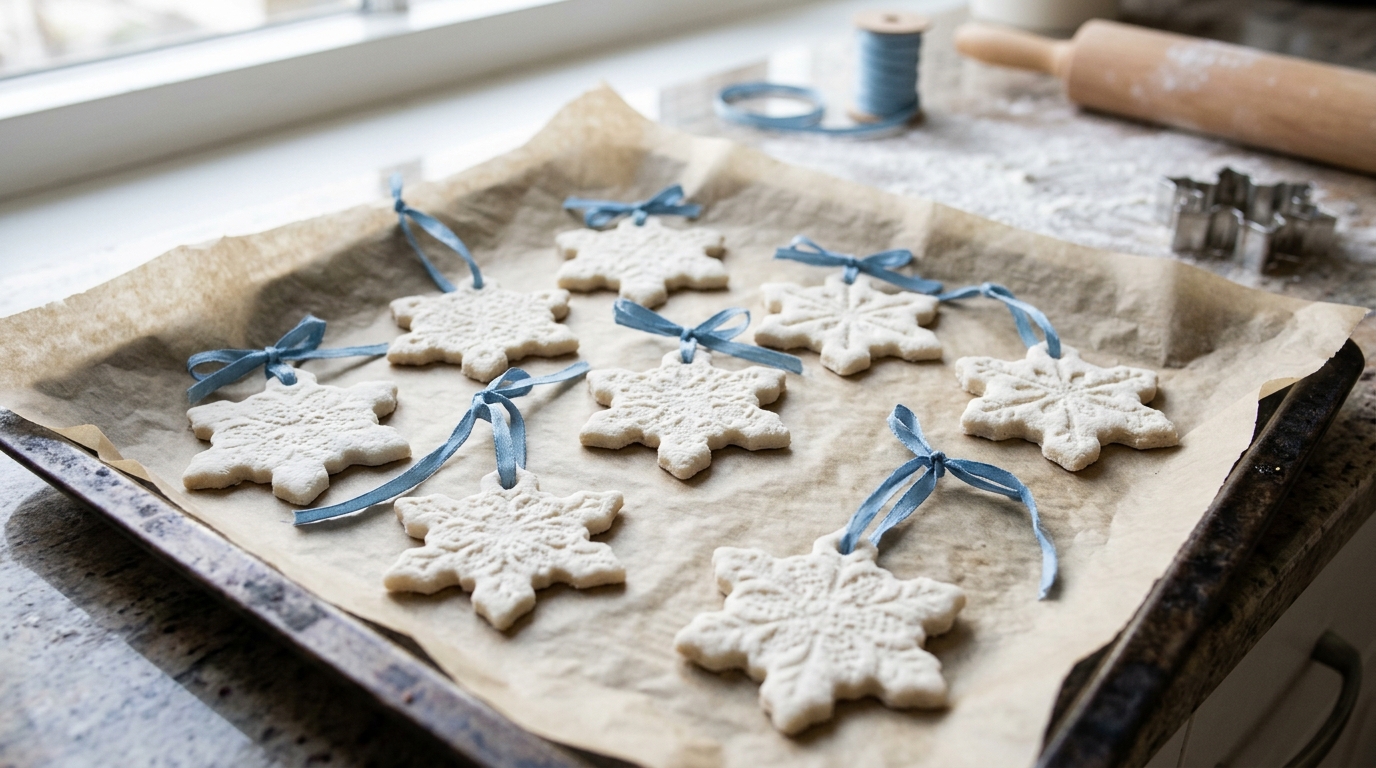
Salt dough is a cheap, old fashioned dough made from flour, salt and water, and it makes pretty white snowflakes. Roll it out, press a piece of lace on top for texture and cut shapes with a snowflake cookie cutter. Poke a hole for ribbon and bake low and slow until hard. They keep for years if stored dry. It is a wonderful afternoon with grandkids. Who would you make a set for?
You will need: 2 cups flour, 1 cup salt, about 3/4 cup water, a rolling pin, a snowflake cutter, a lace doily, a straw, ribbon.
How to make it: 1. Mix the flour, salt and water into a smooth dough. 2. Roll it out and press lace on top. 3. Cut snowflakes and poke a ribbon hole with a straw. 4. Bake at a low temperature until hard, then add ribbon.
Snowflake Stencil Pillow

A big white snowflake stenciled on a gray linen pillow turns a sofa into a winter retreat for very little money. Use a store bought stencil or cut your own from card stock, then dab on fabric paint with a sponge. Slide cardboard inside the cover so paint does not bleed through. It pairs perfectly with our winter decor ideas that stay up all season. Which sofa needs a cozy upgrade?
You will need: A plain pillow cover, a snowflake stencil, white fabric paint, a sponge dauber, cardboard, painter’s tape.
How to make it: 1. Slide cardboard inside the cover. 2. Tape the stencil in the center. 3. Dab paint lightly with the sponge. 4. Peel the stencil and heat set the paint as directed.
Melted Bead Snowflakes
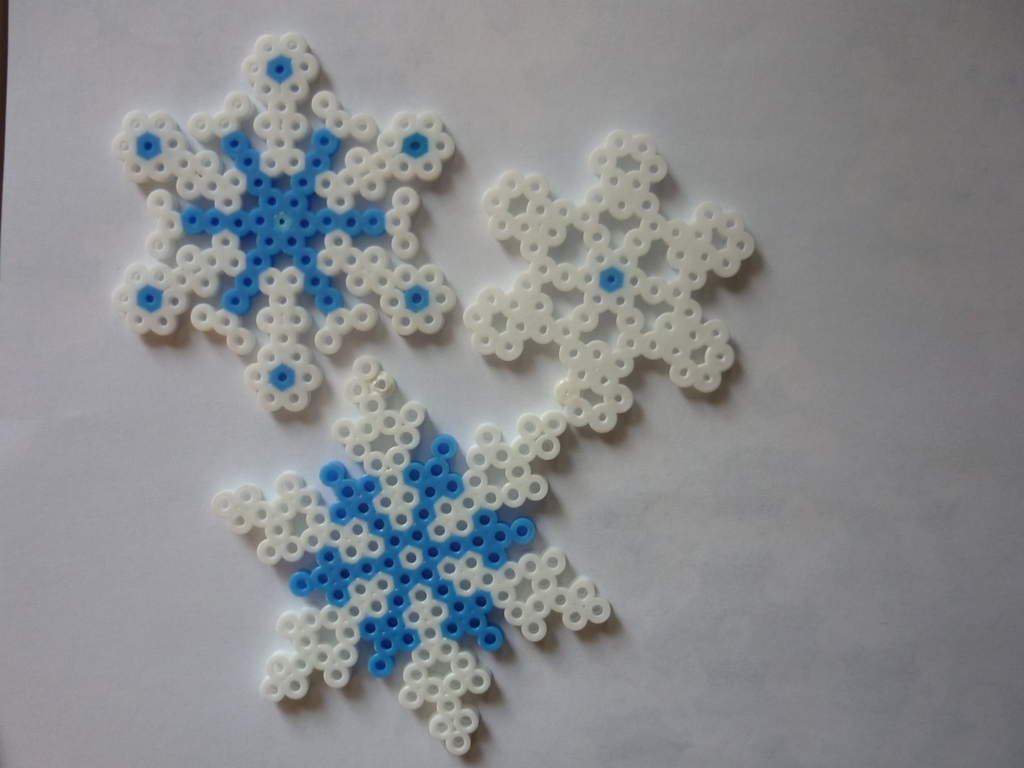
Melty fuse beads are a childhood favorite, and they make crisp, colorful snowflakes. Place beads on a hexagon pegboard in blue and white patterns, cover with ironing paper and an adult irons them until they fuse. They make great window hangers, gift tags and even coasters. Kids love designing their own patterns, and no two come out alike, which Snowflake Bentley would surely approve of. What pattern will you try first?
You will need: Fuse beads in white and blues, a hexagon pegboard, ironing paper, an iron (adult only), thread.
How to make it: 1. Fill the pegboard in a snowflake pattern. 2. Cover with ironing paper. 3. An adult irons on medium heat until the beads fuse. 4. Cool, flip and add a thread loop.
Giant Porch Paper Snowflakes
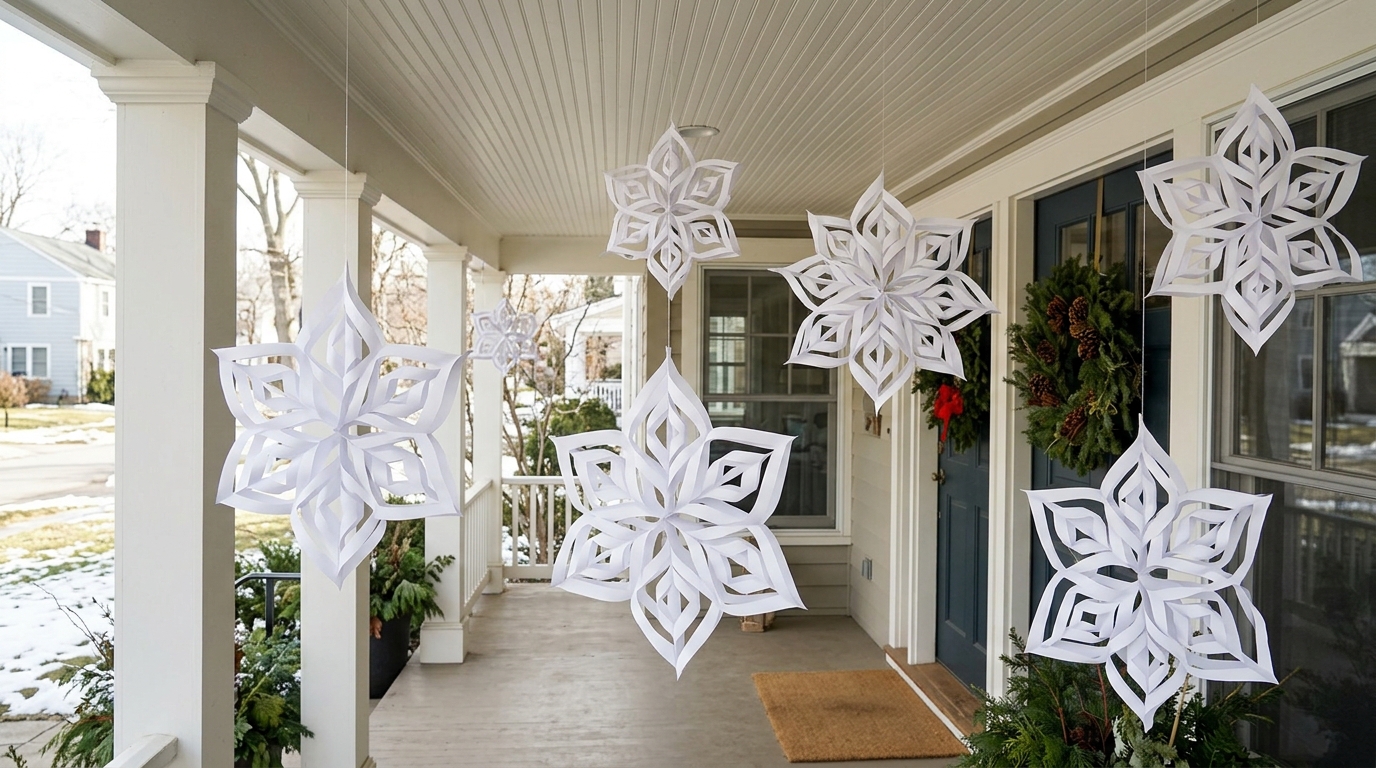
Scale up your paper cutting and hang giant snowflakes from the porch ceiling for a dramatic welcome. Use large sheets of white poster paper or wrapping paper, fold with the six point method and cut bold shapes, since big flakes need bigger cuts to read from the street. Hang them at different heights with fishing line on a covered porch. Neighbors will notice right away. How many can you fit on your porch?
You will need: Large white poster or kraft paper, big scissors, fishing line, clear tape or small hooks.
How to make it: 1. Cut large paper squares. 2. Fold with the six point method. 3. Cut bold notches and shapes. 4. Unfold, flatten under books and hang at different heights.
Crochet Snowflake Ornaments
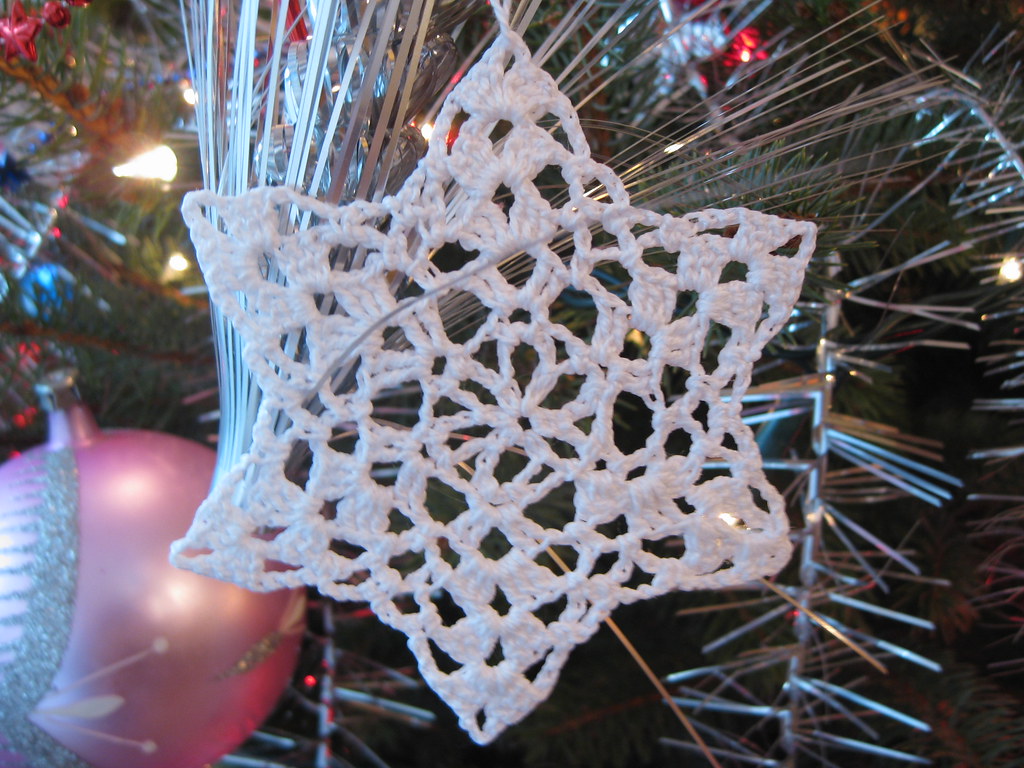
Crochet snowflakes are lacy, lightweight and look like heirlooms on the tree. Many free patterns use just a few rounds of chains and double crochet, and a small one takes less than an hour. Stiffen them with a little fabric stiffener or starch and pin them flat to dry so they hold their points. They make lovely gifts tucked into a card. Do you know someone who crochets and would love a new pattern?
You will need: White cotton thread, a small steel crochet hook, fabric stiffener or starch, pins, a foam board.
How to make it: 1. Crochet the snowflake following a simple pattern. 2. Soak it in stiffener. 3. Pin it flat on foam board, stretching each point. 4. Let it dry completely and add a hanger.
Embroidered Snowflake Hoop
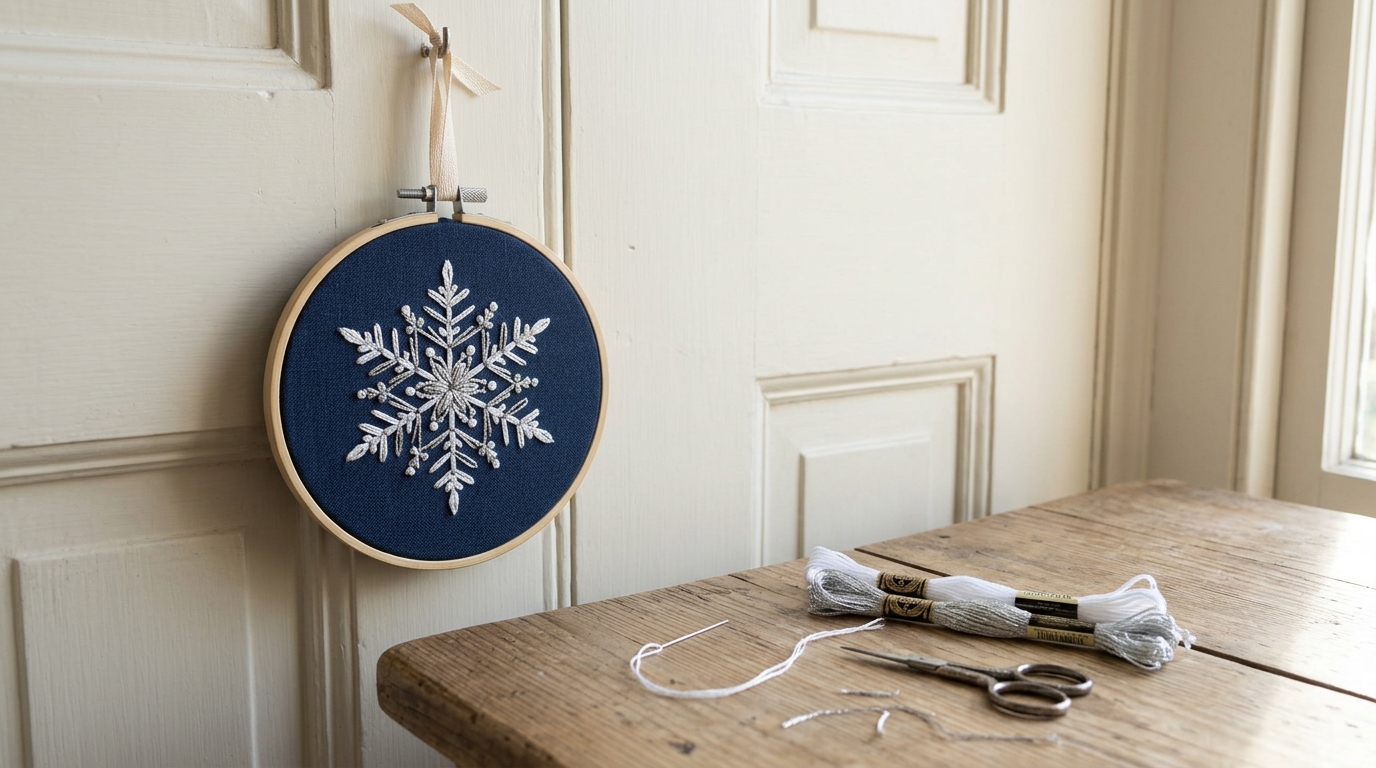
A single white snowflake stitched on navy linen in a wooden hoop is simple, elegant and very Bentley. Trace a snowflake onto the fabric with a washable marker, then use a backstitch for the arms and small straight stitches for the branches. Add a few silver threads for shimmer. Hang it on a door or a wall with a ribbon. It is a perfect first embroidery project. Will you stitch one or a whole set?
You will need: A wooden embroidery hoop, navy linen, white and silver embroidery floss, a needle, a washable fabric marker, ribbon.
How to make it: 1. Trace the snowflake on the fabric. 2. Place the fabric in the hoop and tighten. 3. Backstitch the arms and add small branch stitches. 4. Trim the back and tie a ribbon at the top.