Pine Cone Christmas Crafts: 14 Ways to Turn a Free Backyard Find Into Holiday Magic
Pine cone Christmas crafts might be the best holiday bargain of all, because the main supply literally falls from the trees for free. Every winter, families head outside with a basket, fill it with cones and come home with an afternoon of fun. A little paint, some felt and a dab of glue can turn those cones into gnomes, owls, angels, wreaths and ornaments that look straight out of a country store. These projects are great for kids, grandparents and anyone who loves a rustic, cozy look. Most cost almost nothing, and many take less than thirty minutes. Before you start, give your cones a quick clean and let them dry in the sun so they open up nicely. Then pick a project and let the holiday magic begin..
Pine Cone Christmas Crafts Start With a Farmhouse Centerpiece
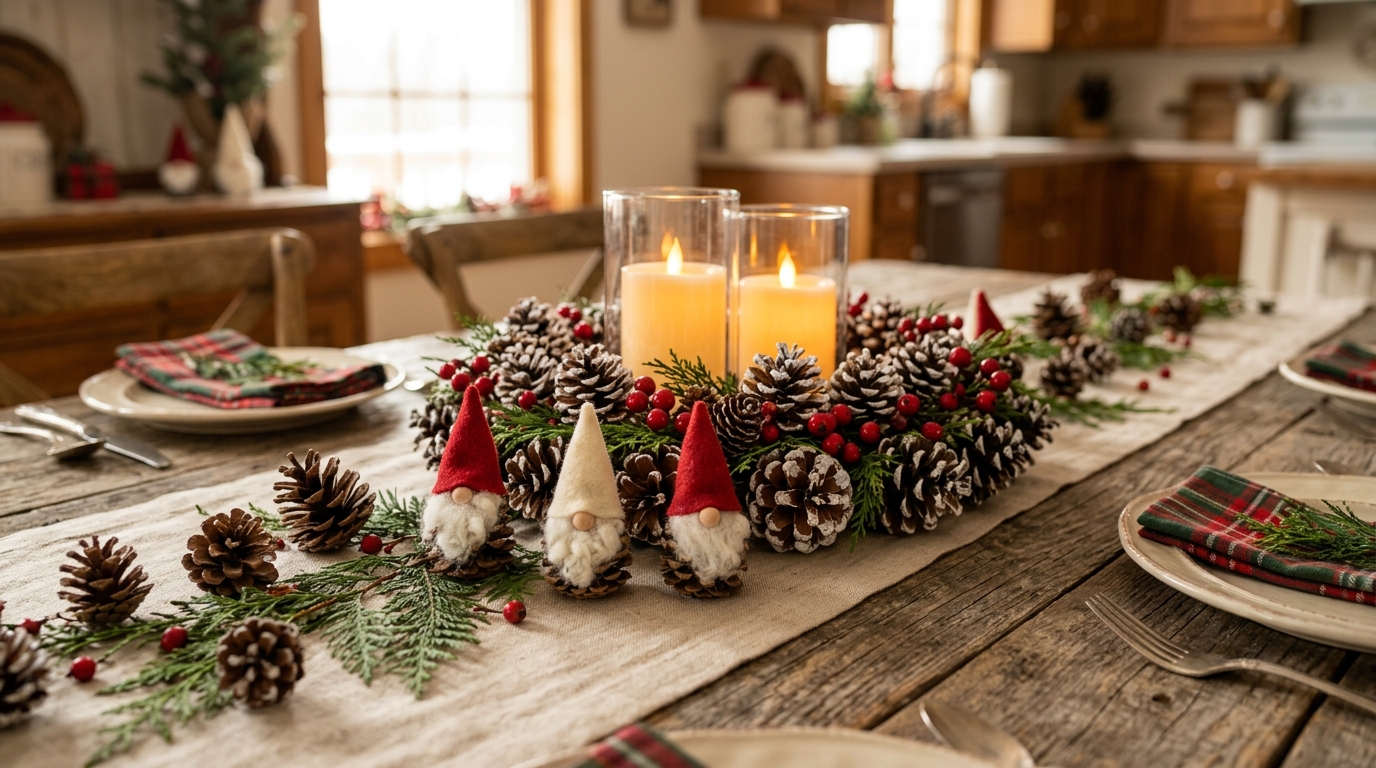
A long table runner of pine cones, greenery and berries is the easiest way to make a dinner table feel festive. Lay down a linen runner, then tuck in cones of different sizes, sprigs of cedar or fir and a few red berry picks. Brush the tips of some cones with white paint so they look snowy. Add glass hurricanes with battery LED pillar candles for a warm glow without any flames. Finish with a little gnome family to make guests smile..
You will need: Pine cones in different sizes, a linen table runner, evergreen sprigs, red berry picks, white craft paint, small brush, glass hurricanes, battery LED pillar candles.
How to make it: 1. Clean the cones and let them dry in the sun. 2. Dab white paint on the tips of a few cones. 3. Lay the runner down the table and arrange the greenery along it. 4. Tuck in cones and berries, then add hurricanes with LED candles.
Snow-Tipped Ornaments, the Classic Pine Cone Christmas Crafts
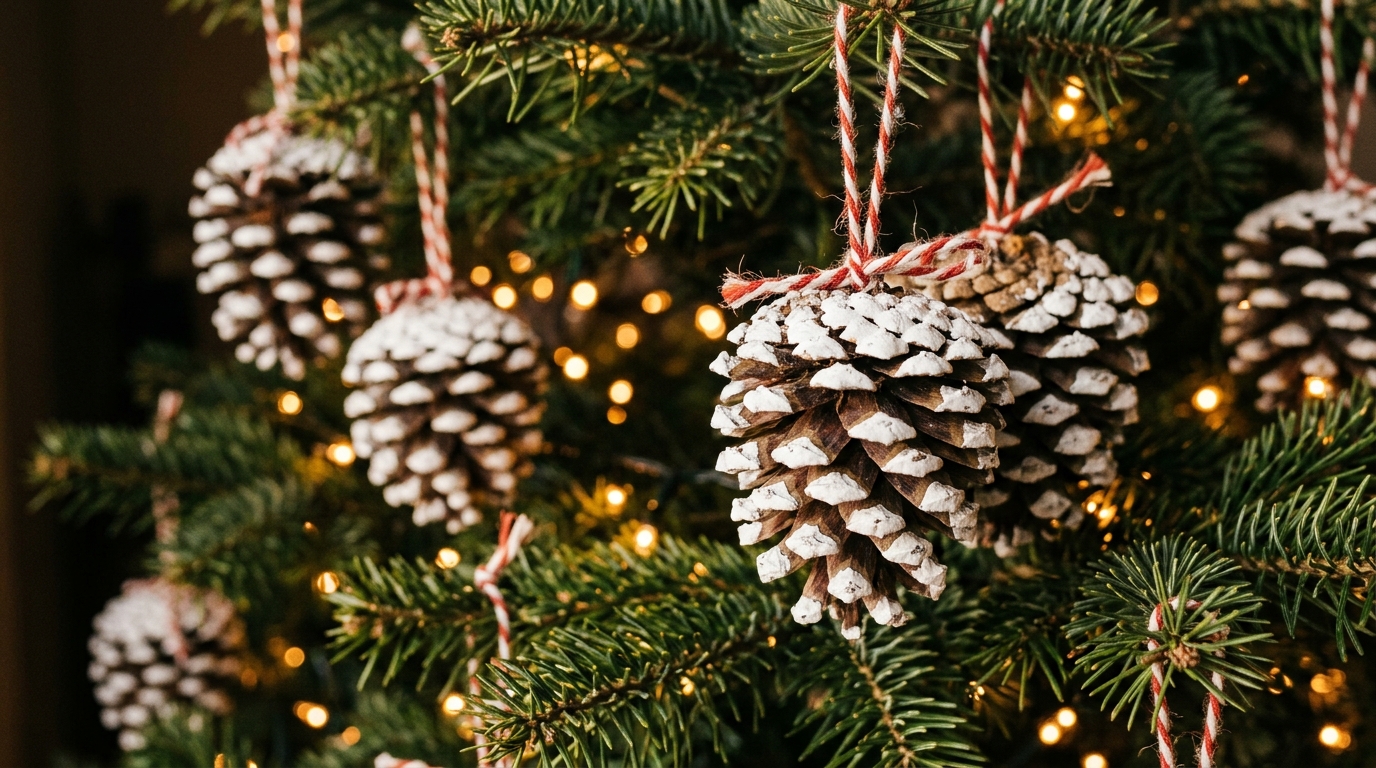
These are the classic pine cone ornaments, and they could not be simpler. Brush white paint on the outer edge of each scale so the cone looks dusted with fresh snow. Then tie a loop of red and white baker’s twine around the top. Hang them on the tree, on a garland or on cabinet knobs around the house. Kids can paint them at the kitchen table with a sponge brush. How many will your family make this year?
You will need: Pine cones, white acrylic paint, small sponge brush or paintbrush, red and white baker’s twine, small screw eyes (optional), scissors.
How to make it: 1. Clean the cones and let them dry. 2. Brush white paint lightly on the tips of the scales. 3. Let the paint dry. 4. Twist a small screw eye into the top or tie twine around the top scales and make a hanging loop.
Pine Cone Christmas Crafts for the Door: A Classic Wreath
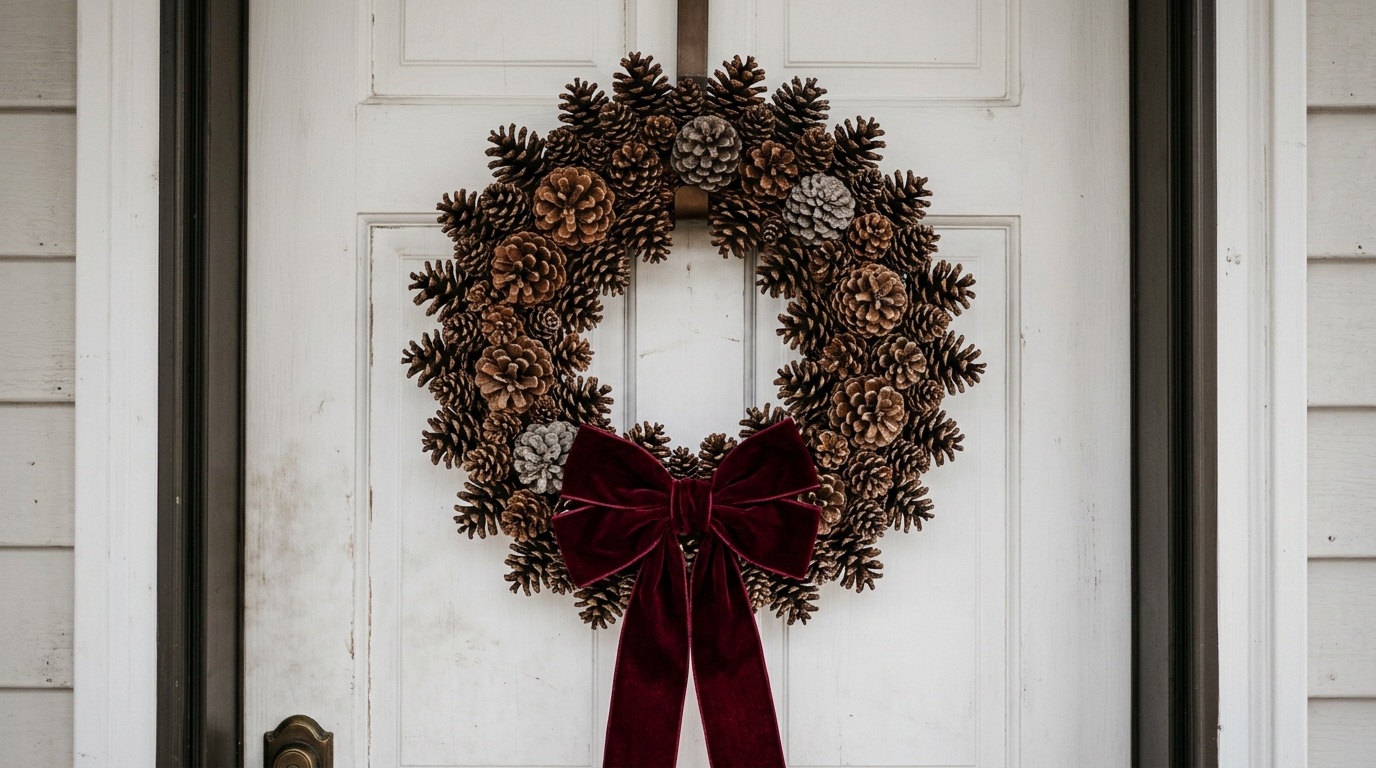
A pine cone wreath looks expensive but costs almost nothing. You glue cones tightly onto a wreath base, mixing big and small ones so there are no gaps. Some people face the cones outward, others lay them sideways for a fuller look. A big velvet bow at the bottom adds a pop of color. Hang it on the front door, above a fireplace or on a kitchen wall. An adult should handle the hot glue for this one. Which door would your wreath welcome guests at?
You will need: About 50 to 70 pine cones, a foam or straw wreath form, hot glue gun (adult use), velvet ribbon, floral wire.
How to make it: 1. Sort the cones into large, medium and small. 2. An adult glues the large cones around the form first. 3. Fill in the gaps with medium and small cones. 4. Tie a big velvet bow and wire it to the bottom.
Potted Mini Pine Cone Trees
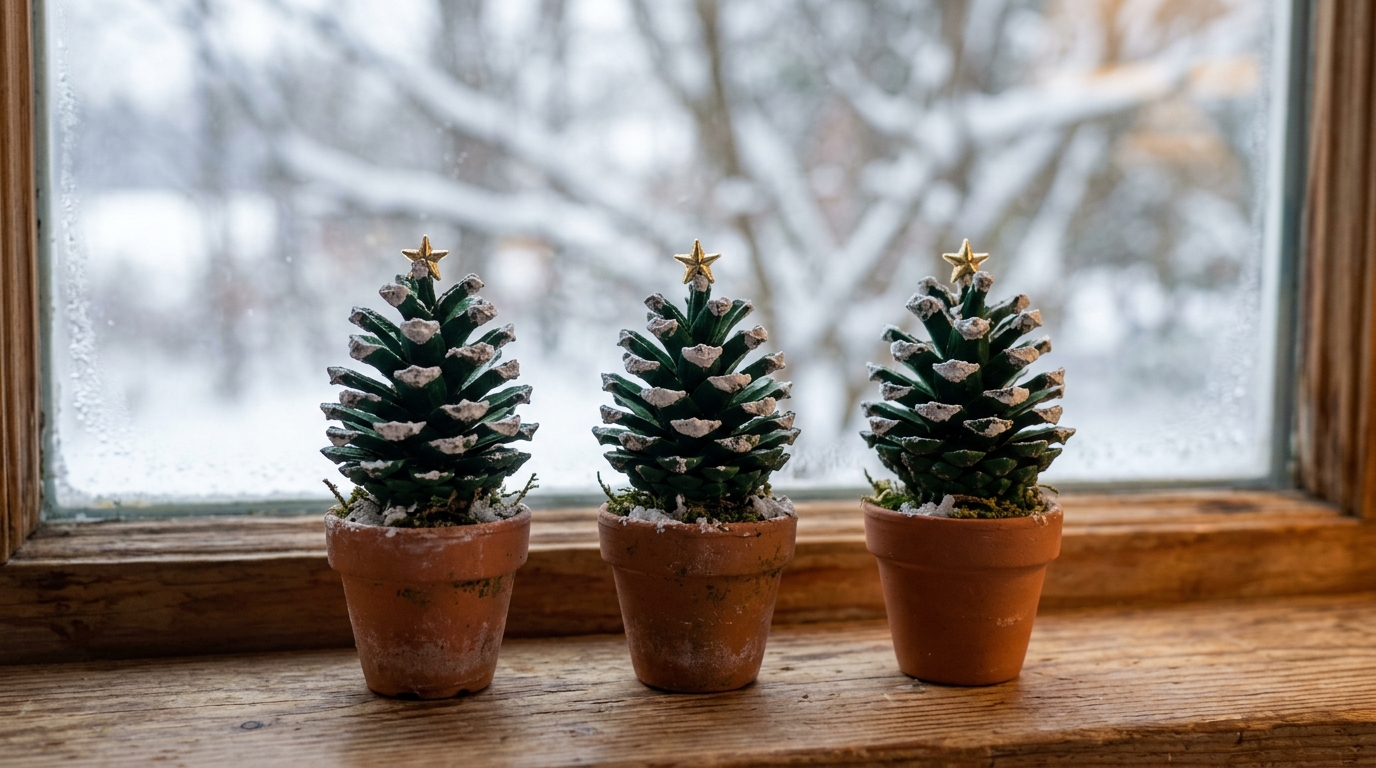
For tiny pine cone Christmas crafts, stand a pine cone upright in a tiny clay pot and it suddenly looks like a little Christmas tree. Paint it green, add white tips for snow and glue a small star bead on top. Line three on a windowsill or use them as place markers at holiday dinner. These are great for little kids because the painting is messy and fun. Fill the pots with a bit of moss or dried beans to hold the cones steady. Which windowsill needs a mini forest?
You will need: Pine cones, small terracotta pots, green and white acrylic paint, brushes, small star beads, moss or dried beans, craft glue.
How to make it: 1. Paint the cones green and let them dry. 2. Dab white paint on the tips. 3. Fill the pots with moss or beans and set a cone upright in each. 4. Glue a small star bead on top.
Pine Cone Owls With Big Felt Eyes
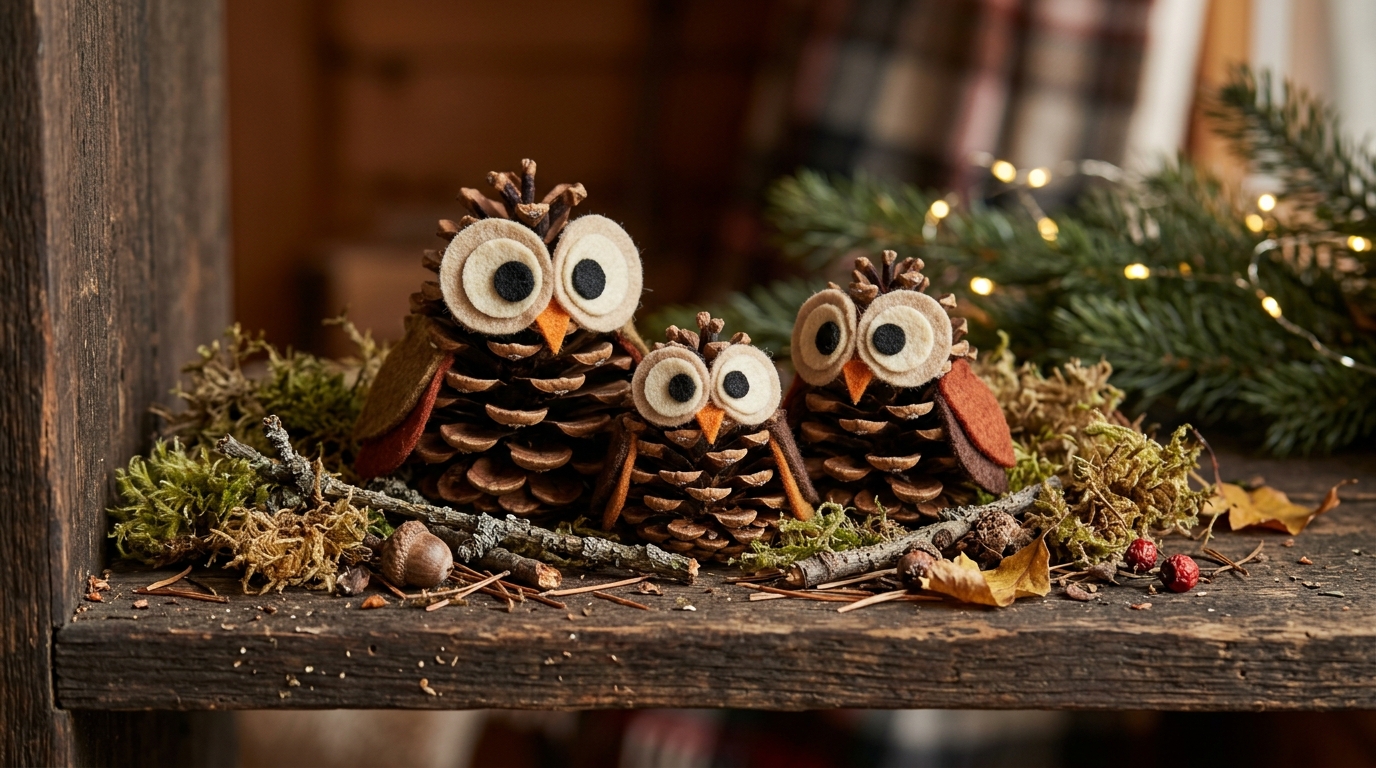
Pine cone owls are some of the cutest pine cone Christmas crafts, and kids love them. Cut two circles of cream felt for eyes, add smaller black circles on top, and glue on a tiny orange felt beak. Felt wings tucked into the side scales finish the look. Make a whole owl family in different sizes and set them on a shelf with some moss. They also make sweet gifts for teachers. What will you name your owls?
You will need: Pine cones, cream, black, orange and brown felt, scissors, craft glue, moss.
How to make it: 1. Cut two large cream felt circles and two small black circles for each owl. 2. Glue the eyes near the top of the cone. 3. Cut a small orange triangle beak and glue it between the eyes. 4. Cut felt wings and tuck them into the side scales with a dab of glue.
Felt-Hat Gnomes, the Cutest Pine Cone Christmas Crafts
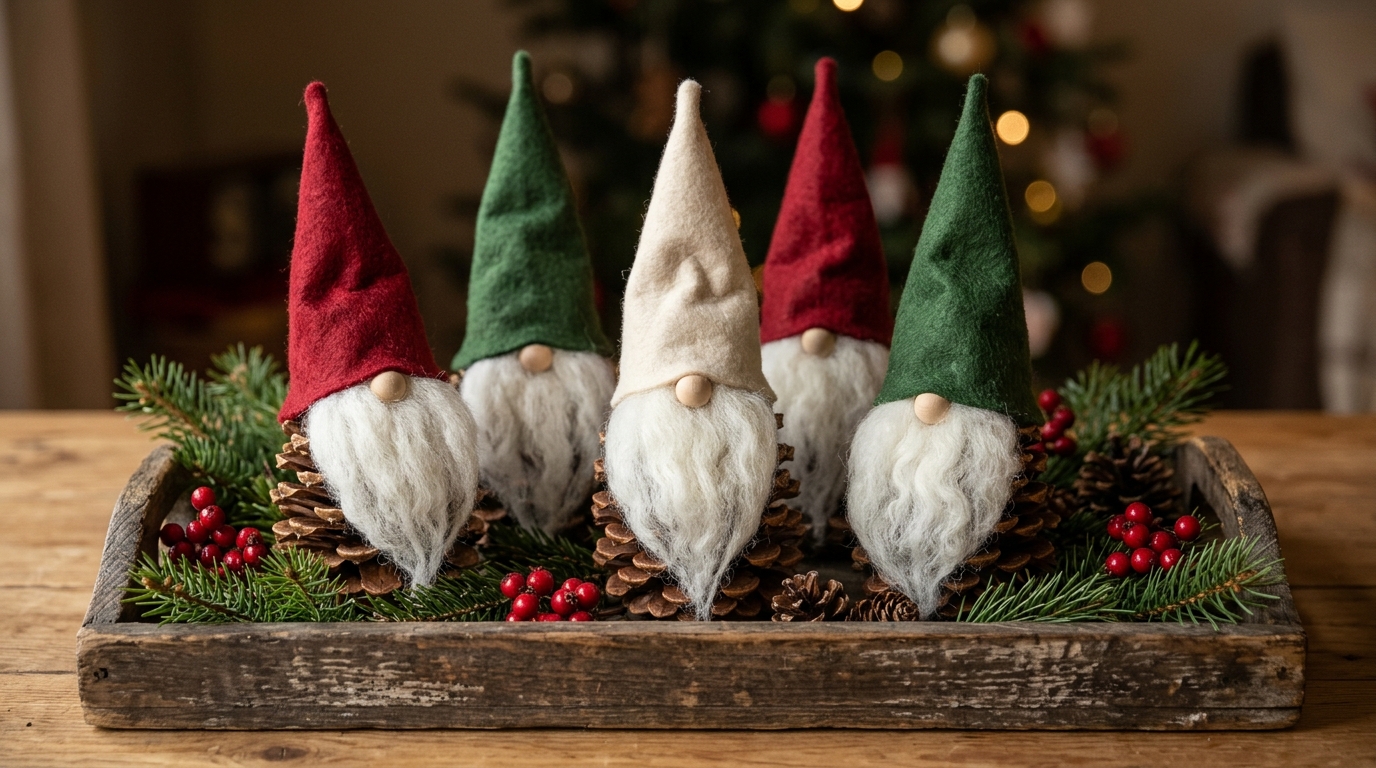
Gnomes are everywhere this season, and pine cones make perfect little gnome bodies. Roll a tall cone shape from red, green or cream felt and glue it on top for a hat. A tuft of white wool roving makes a fluffy beard, and a wooden bead is the nose. Line them up on a wooden tray with evergreen sprigs and berries. Each gnome takes about ten minutes, so making a family is easy. Of all the pine cone Christmas crafts here, this one gets the most smiles. Will yours be red or green?
You will need: Pine cones, felt in red, green and cream, white wool roving, small wooden beads, craft glue or hot glue (adult use), scissors.
How to make it: 1. Cut a quarter circle of felt and roll it into a tall cone hat. 2. Glue the hat onto the top of the pine cone. 3. Glue a tuft of wool roving under the hat as a beard. 4. Glue a wooden bead nose just above the beard.
Pine Cone Angel Ornaments
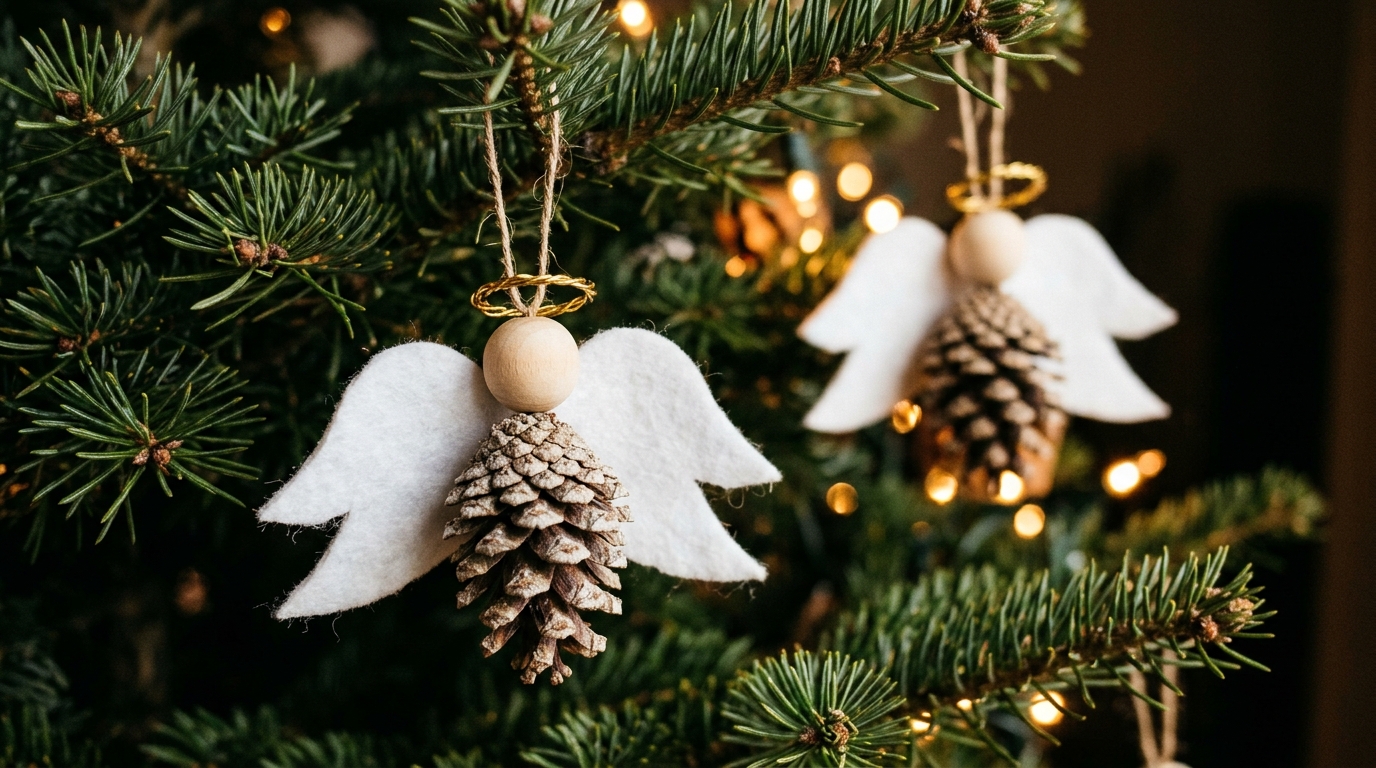
These sweet angels are a lovely old fashioned ornament. The pine cone is the angel’s gown, a wooden bead is the head, and white felt or paper makes the wings. A small loop of gold wire becomes a halo. Hang them on the tree, tie one to a gift or give a set to grandparents. They are simple enough for school age kids with a little help. Of all the pine cone Christmas crafts, these feel the most peaceful. Who would you give an angel to?
You will need: Small pine cones, wooden beads, white felt, gold craft wire, craft glue, scissors, ribbon for hanging.
How to make it: 1. Glue a wooden bead onto the top of each pine cone. 2. Cut wings from white felt and glue them to the back. 3. Twist gold wire into a small circle halo and glue it to the bead. 4. Tie a ribbon loop around the top for hanging.
Pine Cone Reindeer With Twig Antlers
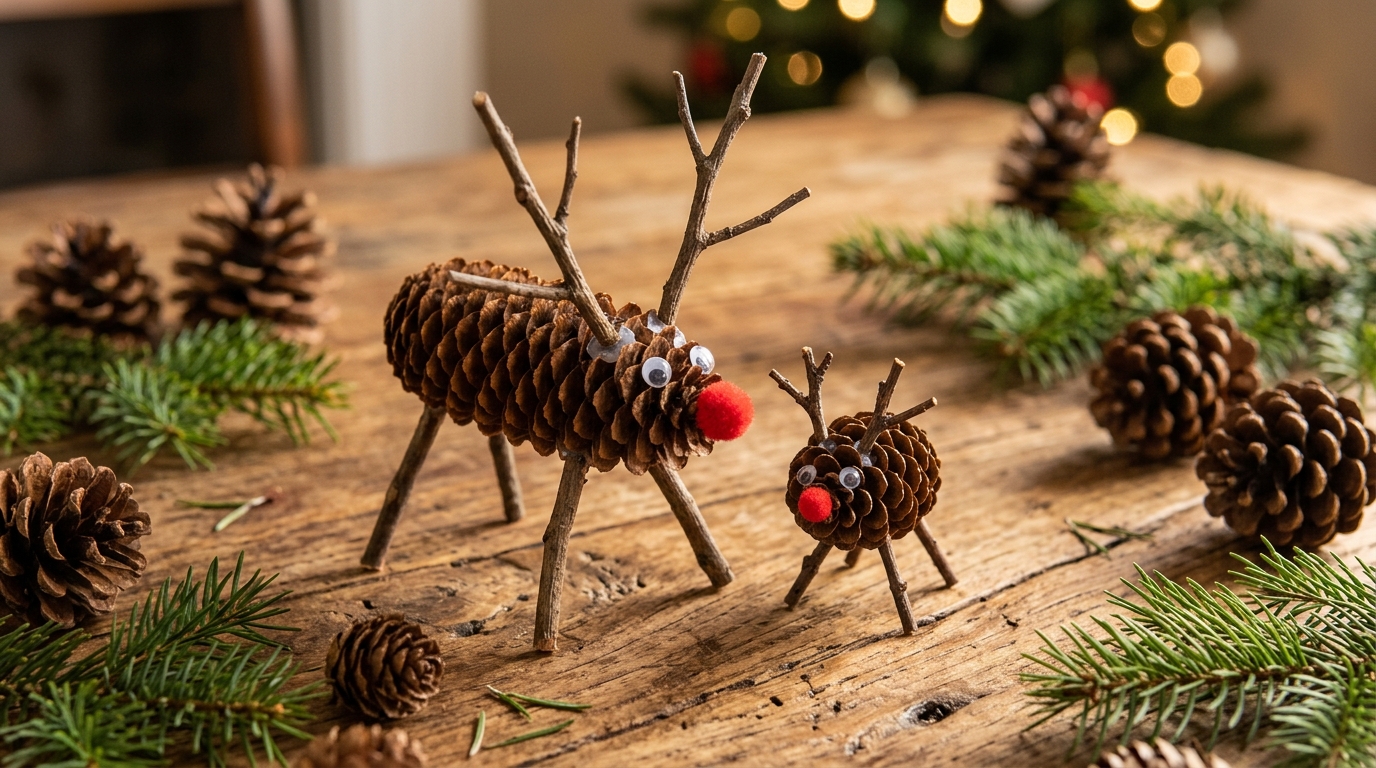
Turn a pine cone on its side and it becomes a little reindeer body. Twigs from the yard make legs and antlers, and a red pom pom nose makes it a famous one. Kids love going on a twig hunt for this craft. Make a big parent reindeer and a small baby to keep it company. They look great on a mantel with some greenery. Want even more easy handmade decor? Try our mason jar crafts. How many reindeer will pull your sleigh?
You will need: Pine cones, small twigs, a small pine cone or acorn for the head, red pom poms, googly eyes, hot glue (adult use).
How to make it: 1. Lay a pine cone on its side for the body. 2. An adult glues four short twigs underneath for legs. 3. Glue a small cone or acorn on the front for the head. 4. Add twig antlers, googly eyes and a red pom pom nose.
Pine Cone Kissing Ball
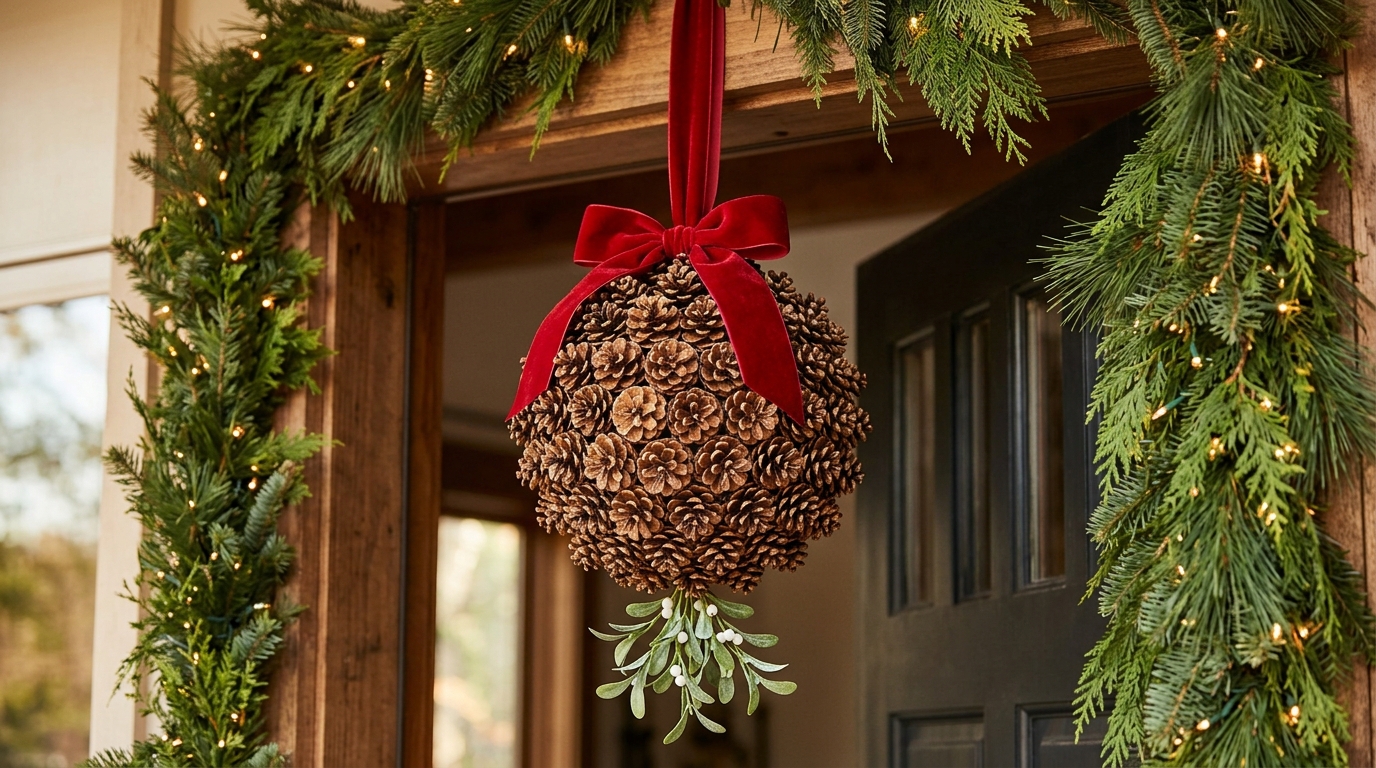
A kissing ball hanging in a doorway is a sweet old holiday tradition. This version uses small pine cones glued all over a foam ball, with a velvet ribbon for hanging and a sprig of faux greenery at the bottom. It looks rich and natural, and it lasts for years. Hang it from a doorway, a porch or a light fixture without a hot bulb. Hot glue is the fastest way to make it, so ask an adult to help. Who will you catch under it?
You will need: A 5 inch foam ball, about 40 small pine cones, hot glue gun (adult use), wide velvet ribbon, faux mistletoe or greenery, floral pin.
How to make it: 1. Pin a ribbon loop into the top of the foam ball. 2. An adult glues small cones all over the ball, packing them tightly. 3. Fill any gaps with tiny cones or cone scales. 4. Pin a sprig of faux greenery to the bottom.
Pine Cone Napkin Rings
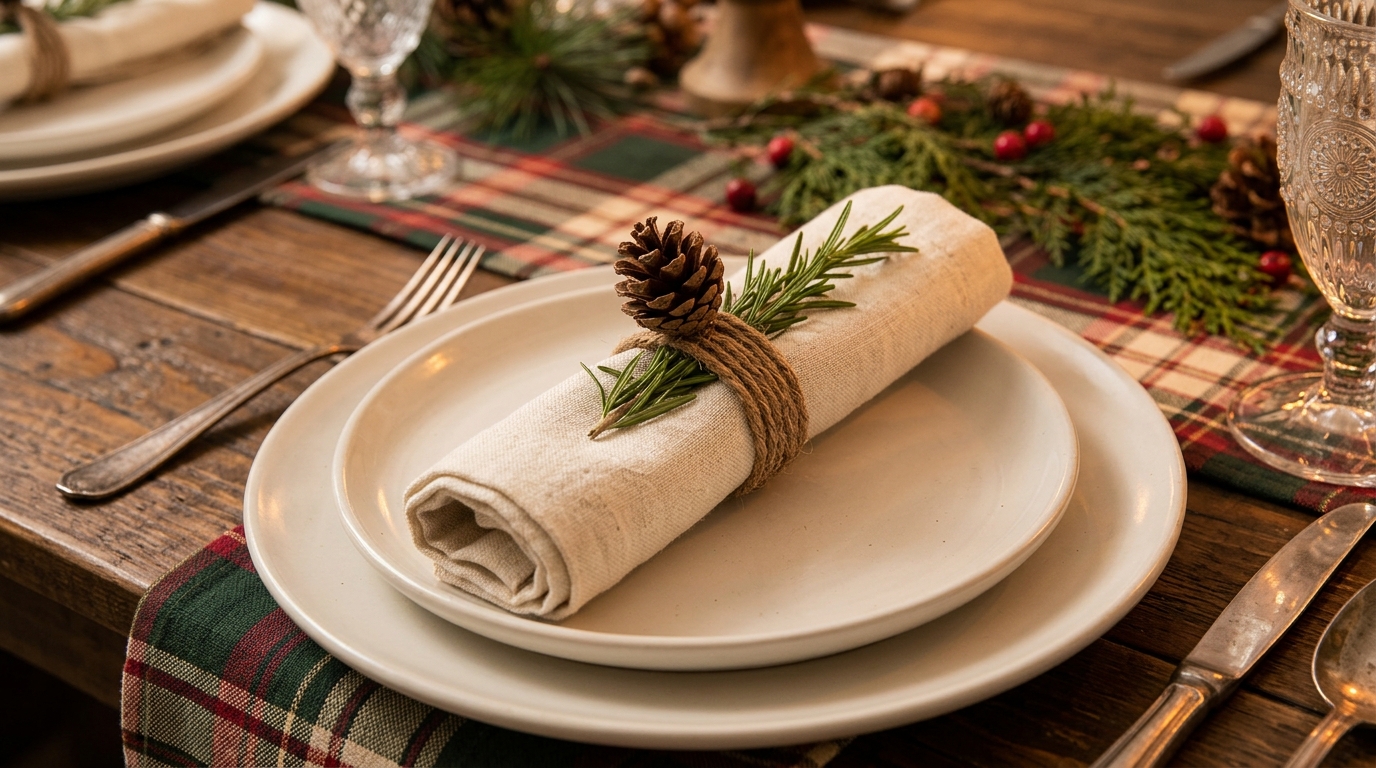
Little details make a holiday table feel special, and these napkin rings take just minutes. Wrap twine around a rolled napkin, then glue a tiny pine cone and a sprig of rosemary on top. The rosemary smells wonderful, and guests can take the pine cone home as a keepsake. Make one for every seat with the kids the night before. They are among the easiest pine cone Christmas crafts for a busy week. How many places will you set this year?
You will need: Tiny pine cones, jute twine, fresh rosemary sprigs, cream linen napkins, hot glue (adult use) or craft glue, scissors.
How to make it: 1. Roll each napkin and wrap twine around it three times. 2. Tie the twine in a knot. 3. Glue a tiny pine cone on top of the knot. 4. Tuck a sprig of rosemary under the twine.
White-Washed Pine Cones in a Bowl
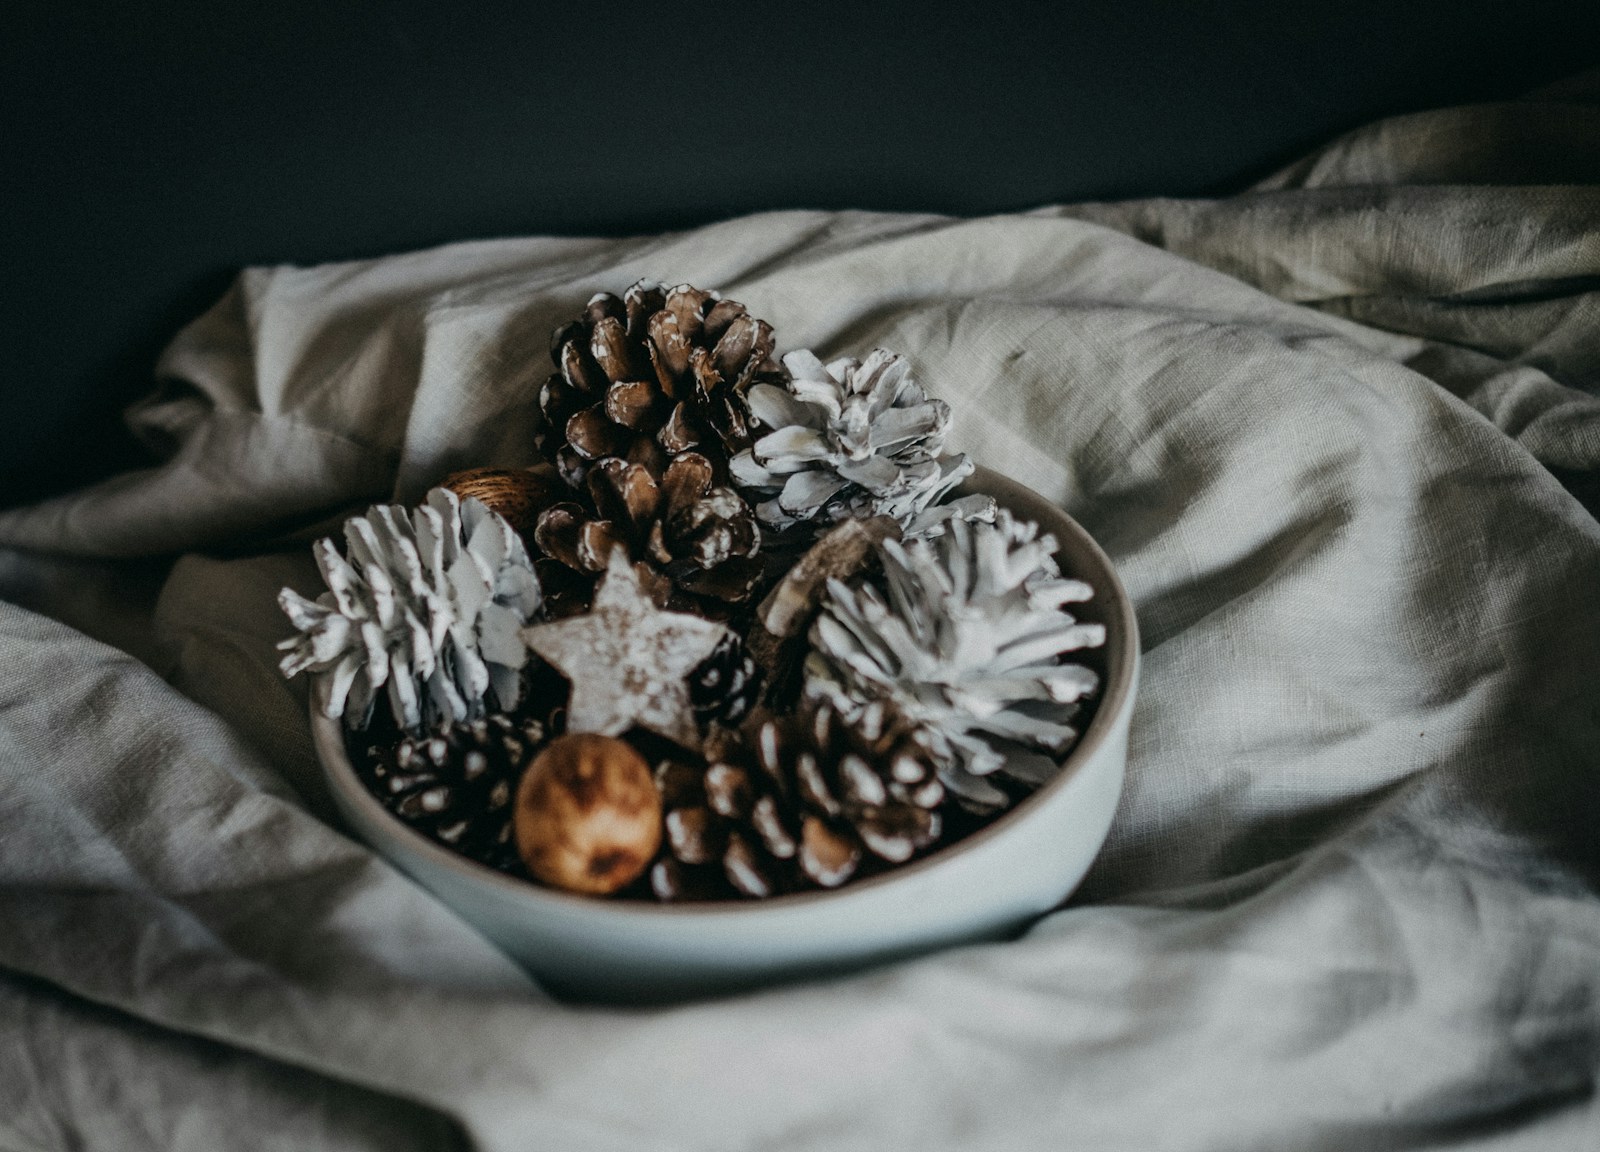
Sometimes the simplest pine cone Christmas crafts are the prettiest. Brush cones with watered down white paint or pastel colors, then pile them in a bowl for an easy centerpiece. Soft white looks Scandinavian and calm, while blush pink and mint feel playful. Put a bowl on the coffee table, a kitchen island or an entry table. The kids can paint while you sip tea. It is a five minute project with a big impact. What color would match your home?
You will need: Pine cones, white or pastel acrylic paint, water, a cup for mixing, a wide brush, a pretty bowl.
How to make it: 1. Mix one part paint with one part water. 2. Brush the wash over each cone, letting some brown show through. 3. Let them dry on newspaper. 4. Pile them in a bowl and enjoy.
Natural Pine Cones Straight on the Tree
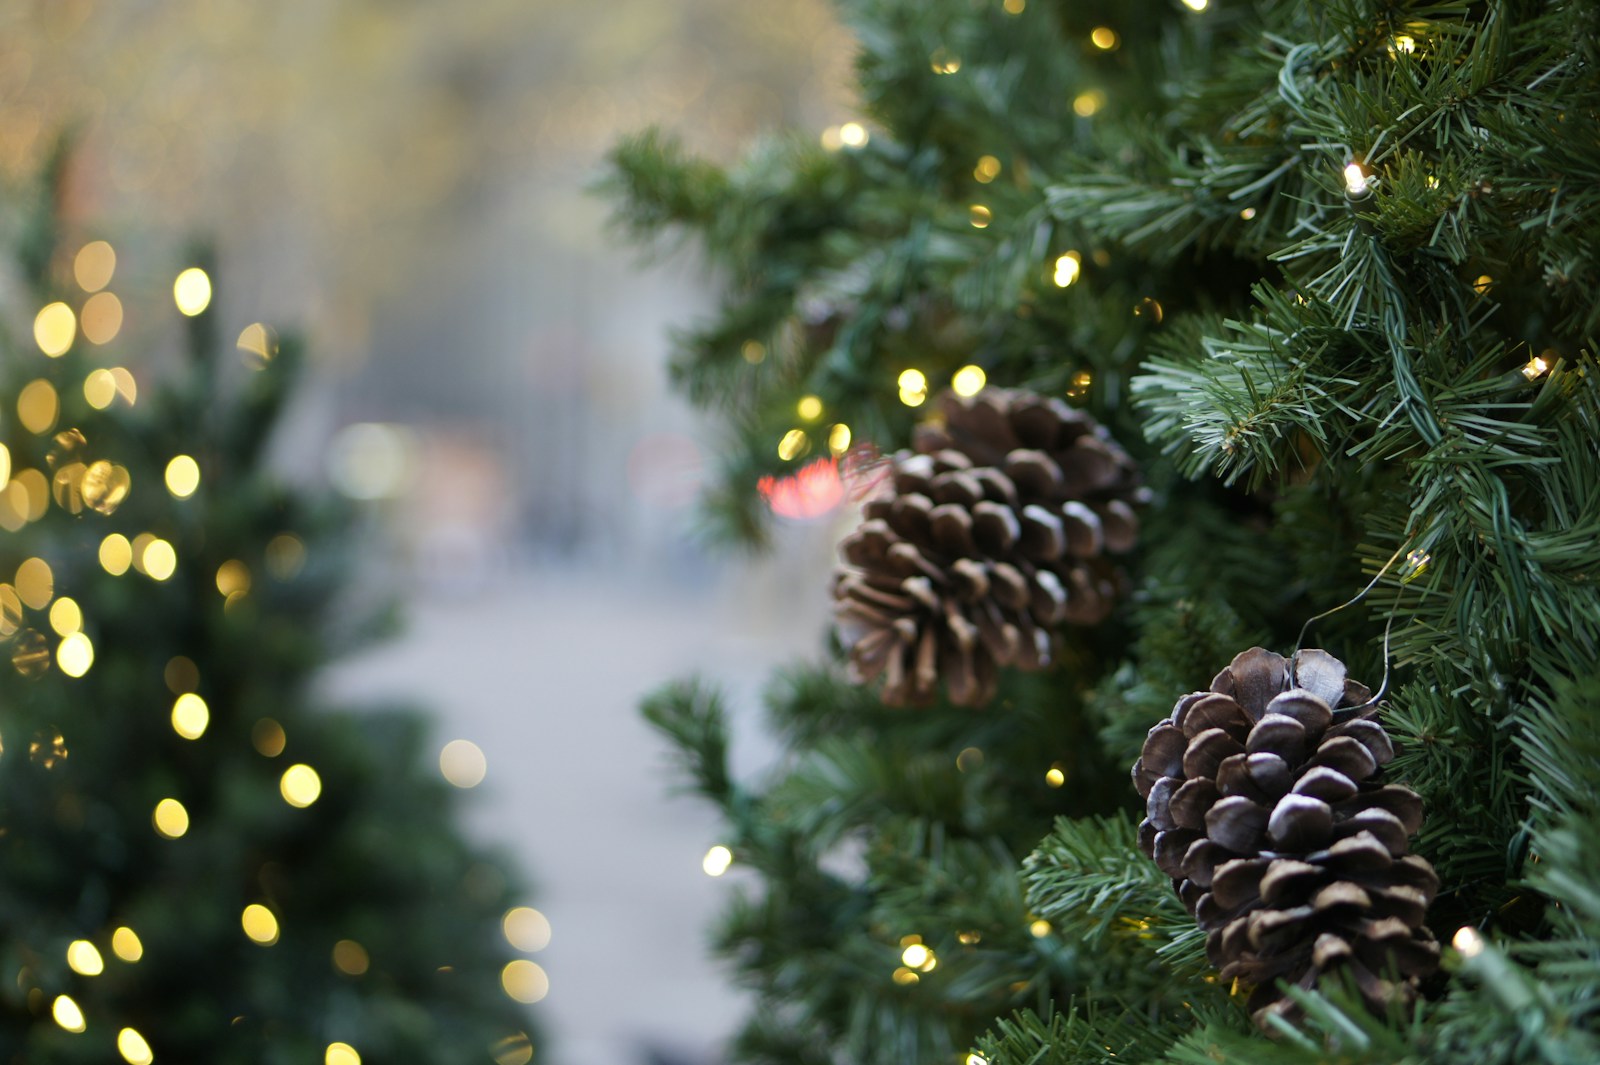
The most natural pine cone Christmas crafts need no paint at all. Natural cones bring a woodland feel to any tree, and they cost nothing. Clean them well, then tie wire or twine around the top scales and hang them among the lights. Big cones look wonderful on large trees, while small ones suit a tabletop tree. Mix them with red ornaments or plaid ribbon for a cozy cabin look. Cones are part of the life story of evergreen trees, as you can read about conifer cones. Ready for a walk to collect some?
You will need: Clean pine cones, floral wire or twine, scissors.
How to make it: 1. Soak the cones in warm water with a splash of vinegar, then let them dry in the sun for a few days. 2. Wrap floral wire around the top scales. 3. Twist the wire into a hook. 4. Hang the cones deep inside and on the tips of the branches.
Hanging Pine Cone and Flower Swag
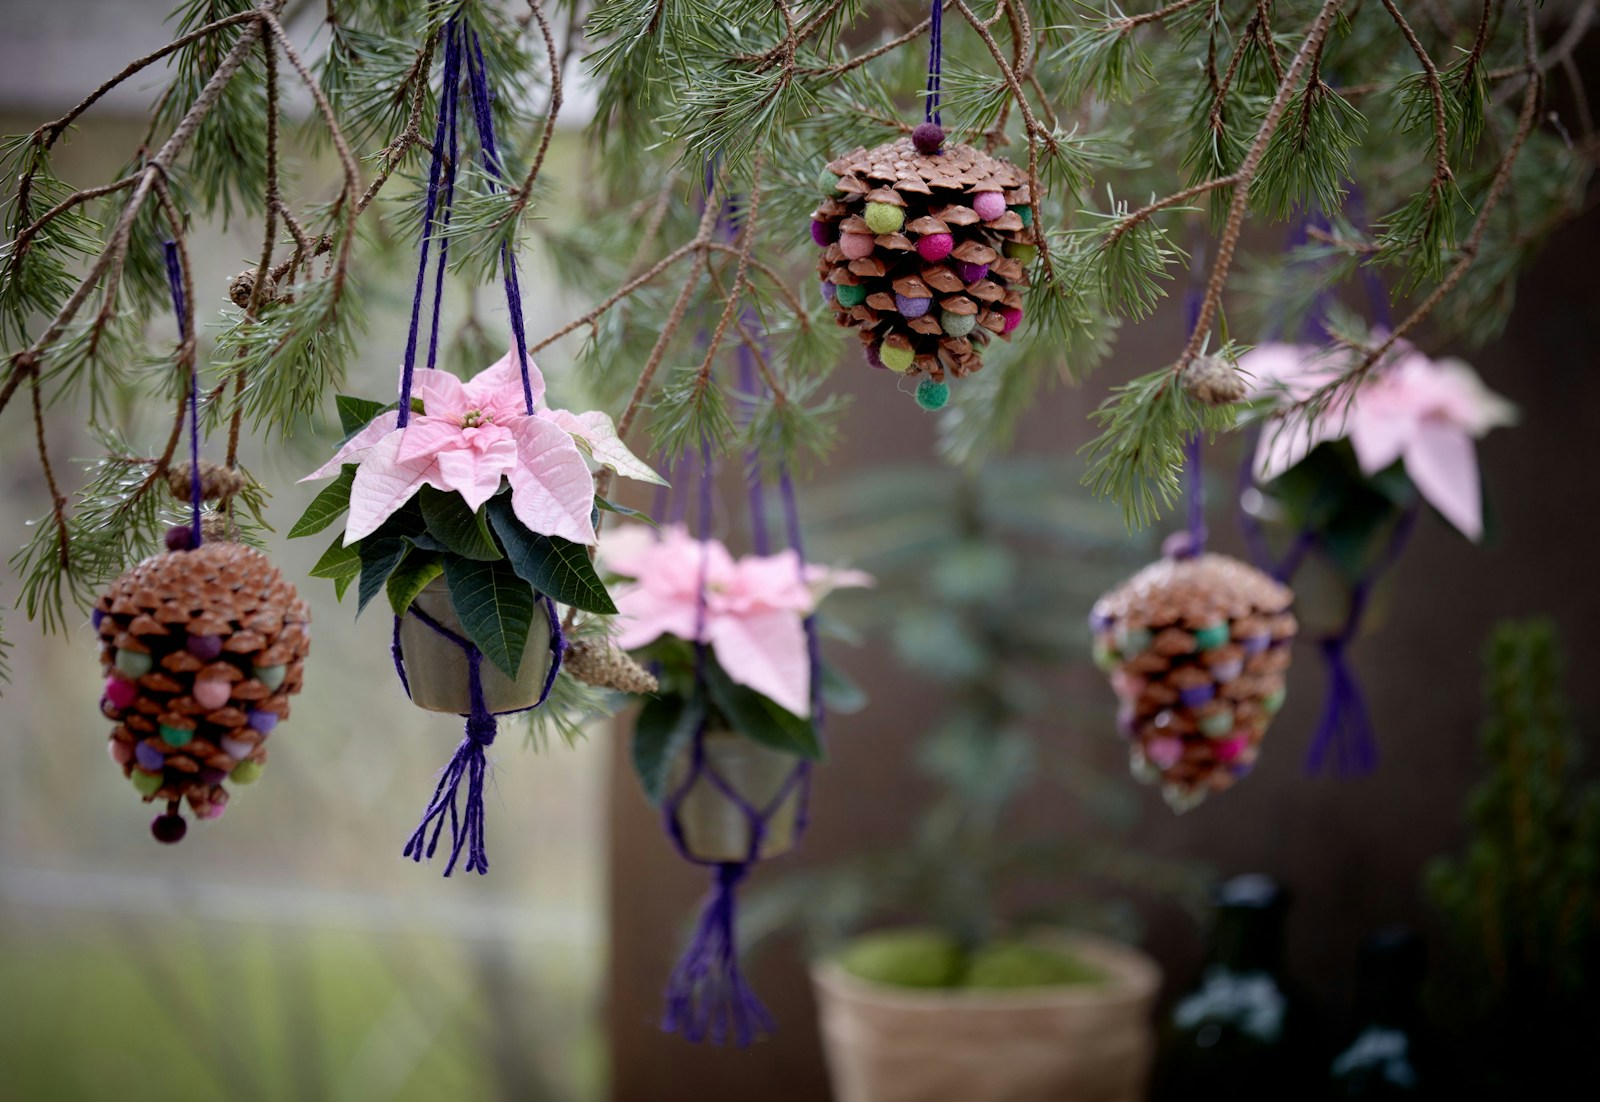
Hang pine cones and faux flowers on ribbons at different lengths and you get a pretty swag for a window, a mantel or a doorway. Pink poinsettias look soft and modern, while red ones feel classic. Tie the ribbons to a branch, a curtain rod or a length of twine. The cones twist slowly in the air and catch the light. It is a gentle, natural look that fits any style. Where would you hang yours?
You will need: Pine cones, faux poinsettias or other faux flowers, ribbon, a branch or curtain rod, scissors, floral wire.
How to make it: 1. Wire a ribbon to the top of each cone and flower. 2. Cut the ribbons to different lengths. 3. Tie them along a branch or curtain rod. 4. Step back and adjust until the heights look balanced.
Pine Cone Christmas Crafts for the Birds
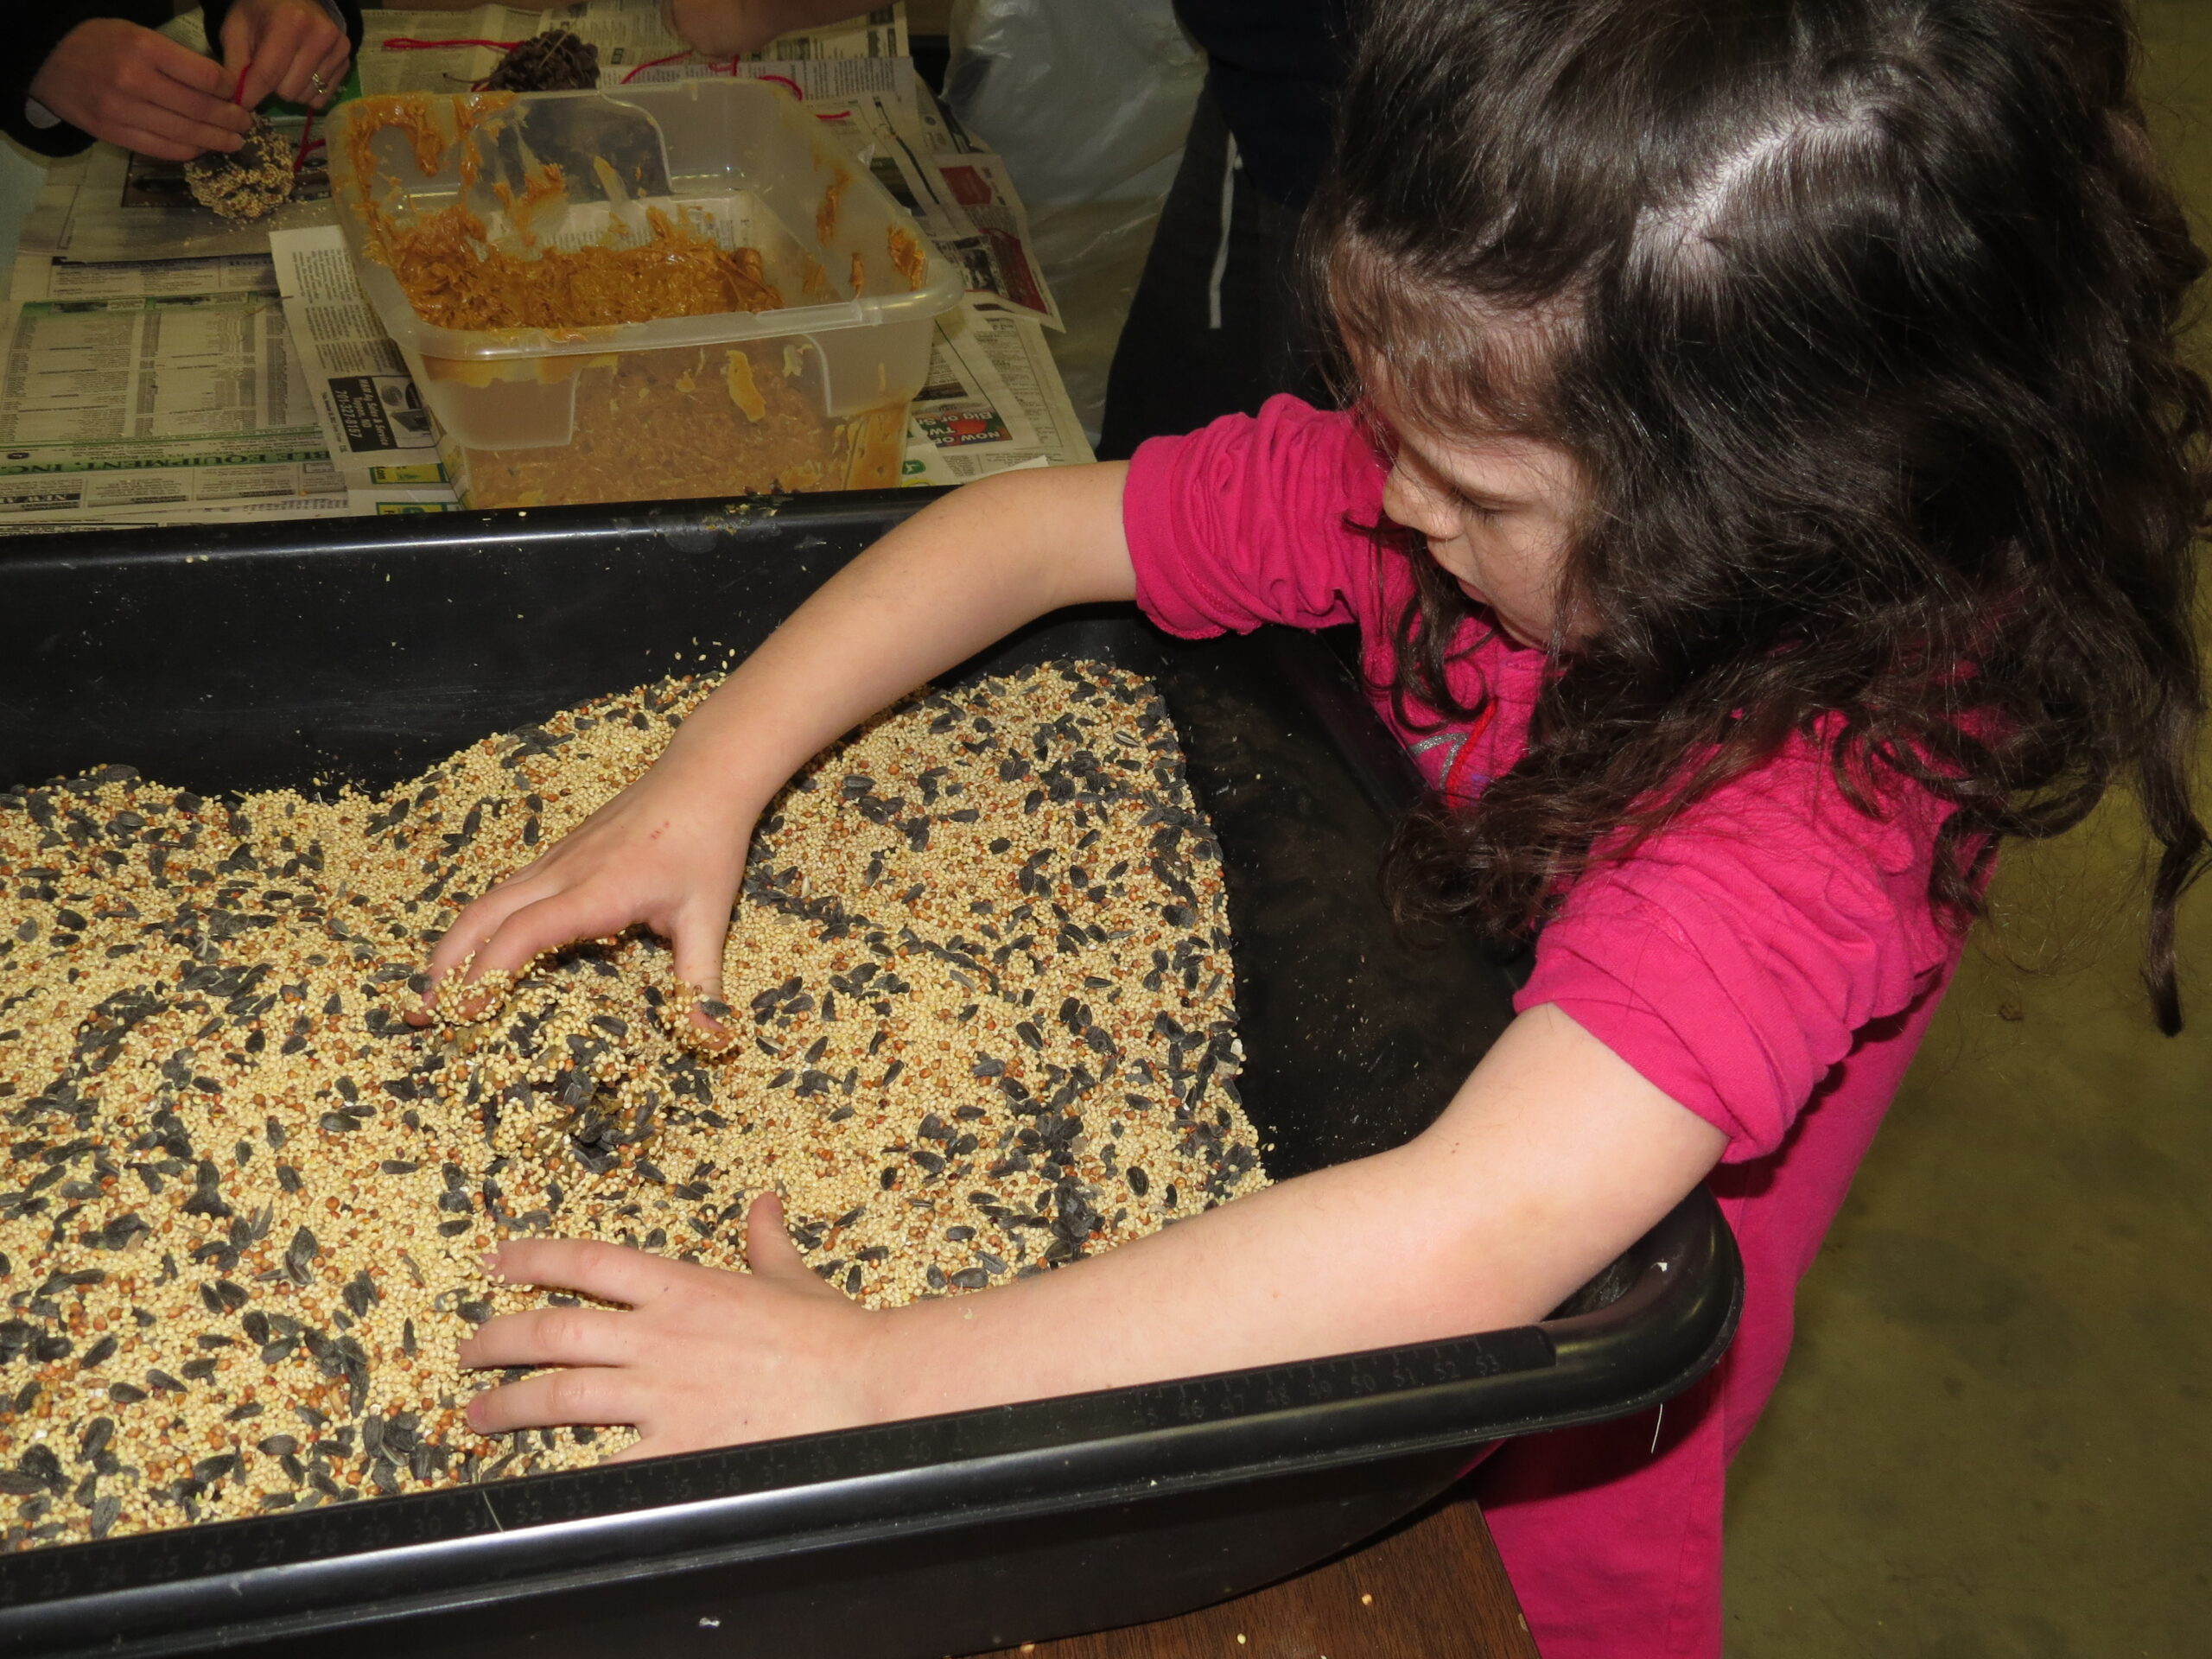
This classic project gives back to the birds in your yard. Spread a pine cone with peanut butter, or vegetable shortening if anyone has a nut allergy, then roll it in birdseed. Hang it from a tree branch with twine and watch the visitors arrive. Kids love this one because it is messy, simple and they get to see the results. Make a few for neighbors too. It is a lovely way to end a list of pine cone Christmas crafts. Which birds visit your yard?
You will need: Large open pine cones, peanut butter or vegetable shortening, birdseed, a butter knife, a tray, twine.
How to make it: 1. Tie a loop of twine around the top of the cone. 2. Spread peanut butter or shortening into the scales with a butter knife. 3. Roll the cone in a tray of birdseed until it is covered. 4. Hang it from a branch outside.