Clay Christmas Ornaments: 14 Air Dry Clay Ideas That Look Like Expensive Heirlooms
Clay Christmas Ornaments are the cozy night in craft everyone is searching for this season, and it is easy to see why. A brick of air dry clay costs a few dollars, it needs no kiln and no oven, and the finished pieces look like the pricey handmade ones you see in boutique shops. You roll, you cut, you press in a little lace or a pine sprig, and the next morning you have heirlooms. I made my first batch at the kitchen table with a mug of cocoa and an old cookie cutter, and I have not stopped since. Below are the prettiest ideas to try, from lace stars to tiny clay houses, plus simple steps for each one. Put on some music, clear the table and let us make something you will hang for years..
Clay Christmas Ornaments That Look Like Heirlooms
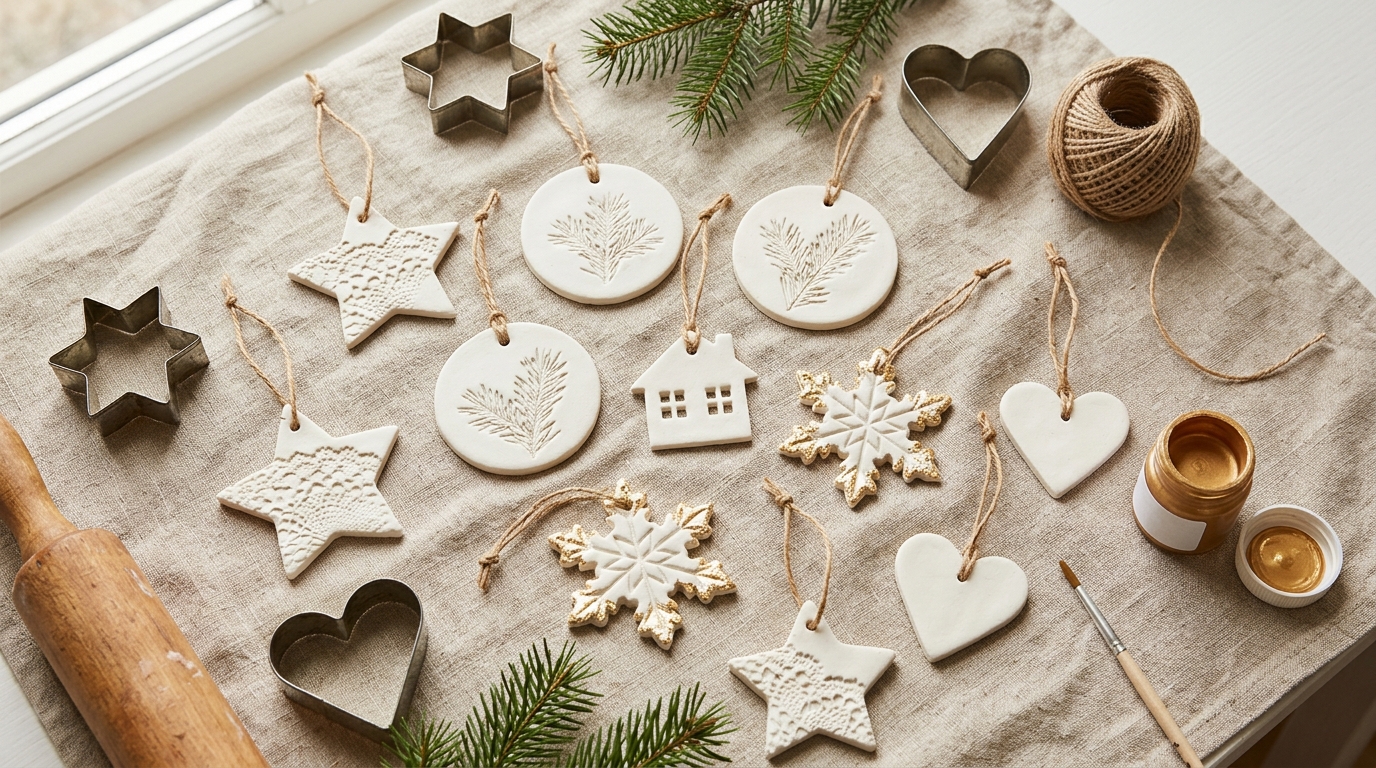
Here is the whole collection in one happy pile: lace stars, pine print rounds, gold edged snowflakes, little hearts and a tiny clay house. The magic of Clay Christmas Ornaments is that they all start the same way, with one brick of white air dry clay rolled about a quarter inch thick. What changes is the texture you press in and the little touches you add after it dries. Keep everything white and gold for a calm, expensive look. Which shape will you cut first..
You will need: 1 pound white air dry clay, a rolling pin, cookie cutters, a straw for holes, fine sandpaper, gold paint, twine.
How to make it: 1. Roll the clay a quarter inch thick on parchment. 2. Press in texture, then cut shapes with cookie cutters. 3. Poke a hanging hole with a straw. 4. Dry flat for 24 to 48 hours, flipping once, then sand the edges and add gold.
Lace Pressed Clay Christmas Ornaments
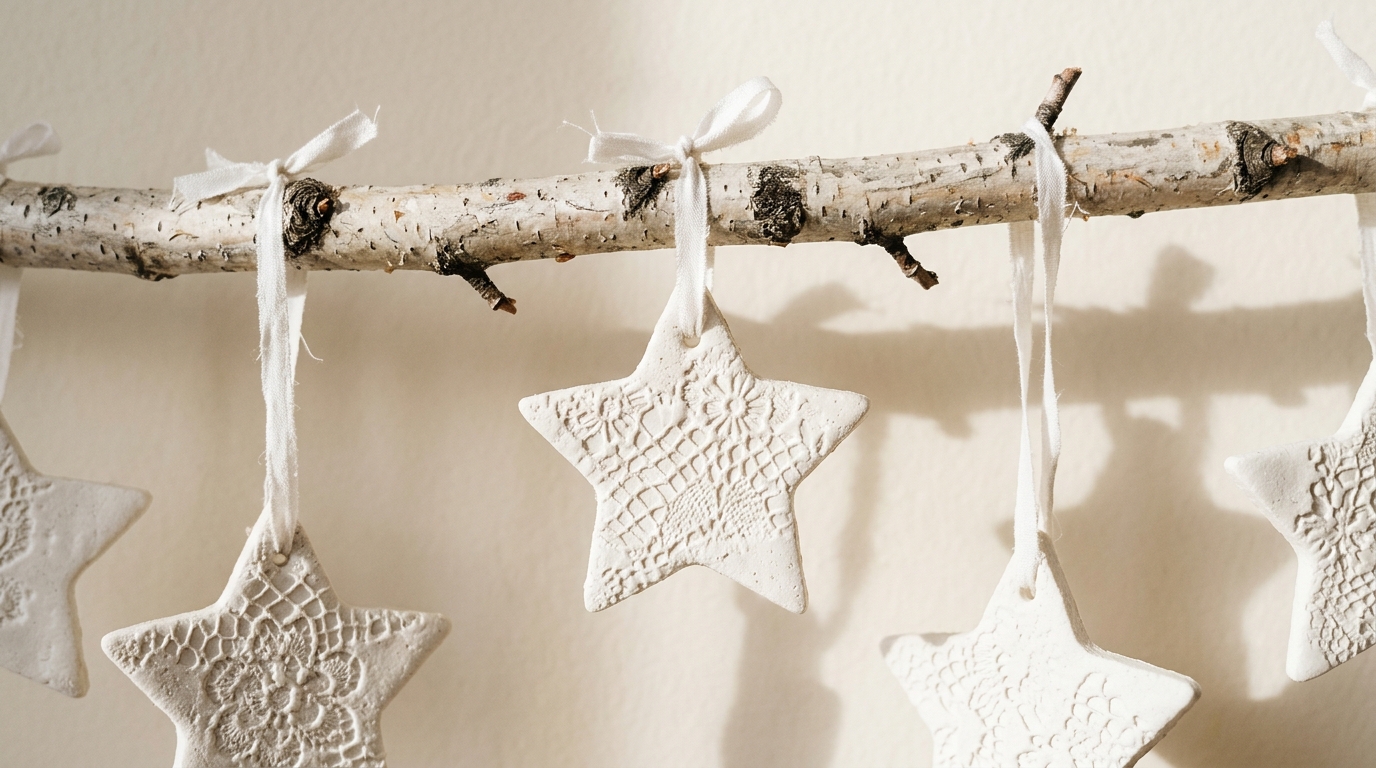
This is the one that makes people gasp. Lay a scrap of old lace or a paper doily on rolled clay, roll over it once with firm pressure and peel it away. The pattern stays behind in perfect detail. Cut stars right through the pattern and let them dry. Hung on thin white ribbon from a birch branch, they look like expensive porcelain. Thrift store lace works beautifully, and every piece gives a different design. Do you have an old lace tablecloth in a drawer somewhere?
You will need: Air dry clay, a piece of lace or a paper doily, a rolling pin, a star cookie cutter, white ribbon.
How to make it: 1. Roll the clay smooth. 2. Lay the lace on top and roll once firmly. 3. Peel off the lace and cut stars. 4. Make a hole, dry fully and thread with ribbon.
Pine Sprig Nature Prints
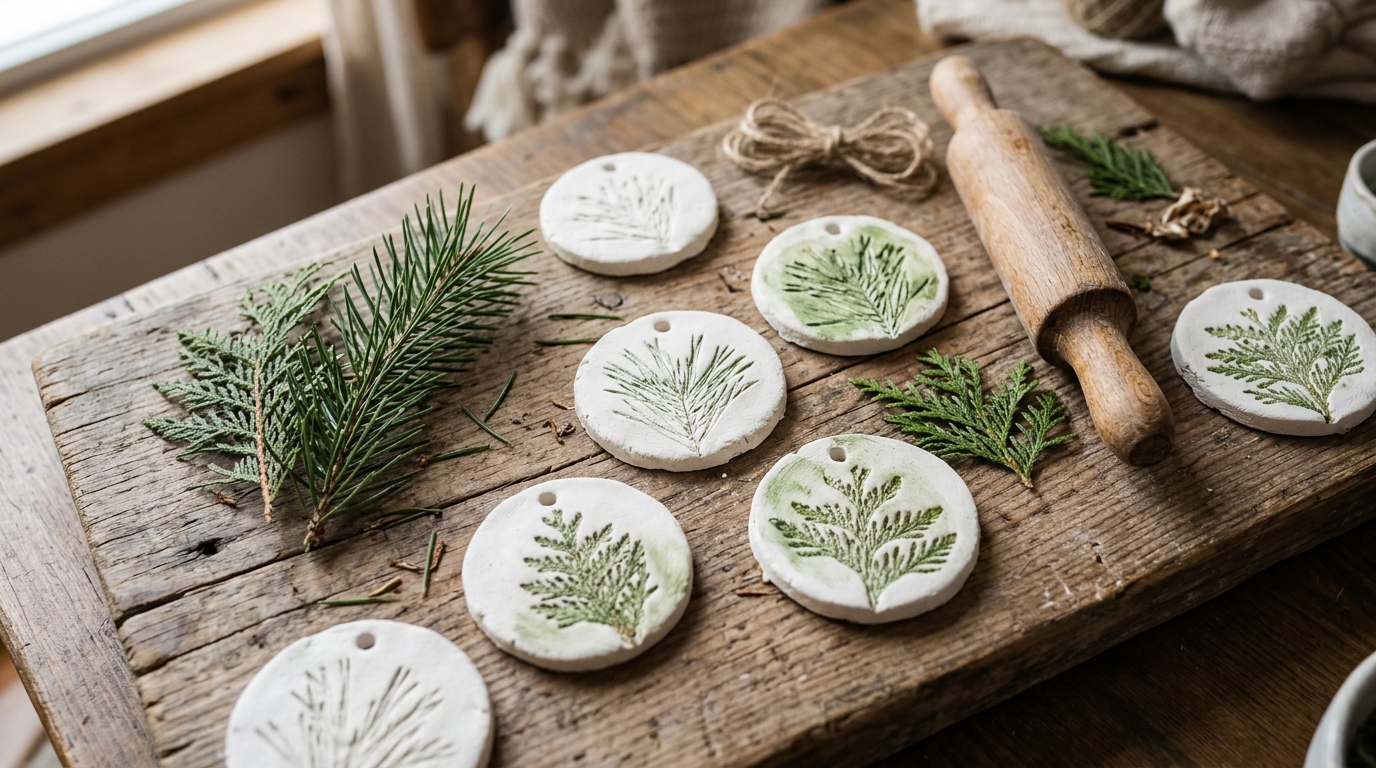
Nature prints are one of the most watched clay crafts online, with one short video passing 24 million views on YouTube. Snip a few sprigs of pine, cedar or fern from the yard and press them into rolled clay, then cut circles around the print with a jar lid. Brush a little watered down green paint into the grooves and wipe the top so only the lines stay colored. They look like little botanical fossils. Which tree in your yard would you use?
You will need: Air dry clay, fresh evergreen sprigs, a round cutter or jar lid, green acrylic paint, a soft cloth.
How to make it: 1. Roll the clay and press a sprig in firmly with the rolling pin. 2. Lift the sprig away carefully. 3. Cut a circle and make a hole. 4. When dry, brush thin paint into the print and wipe the surface.
Clay Christmas Ornaments With Gold Leaf Edges
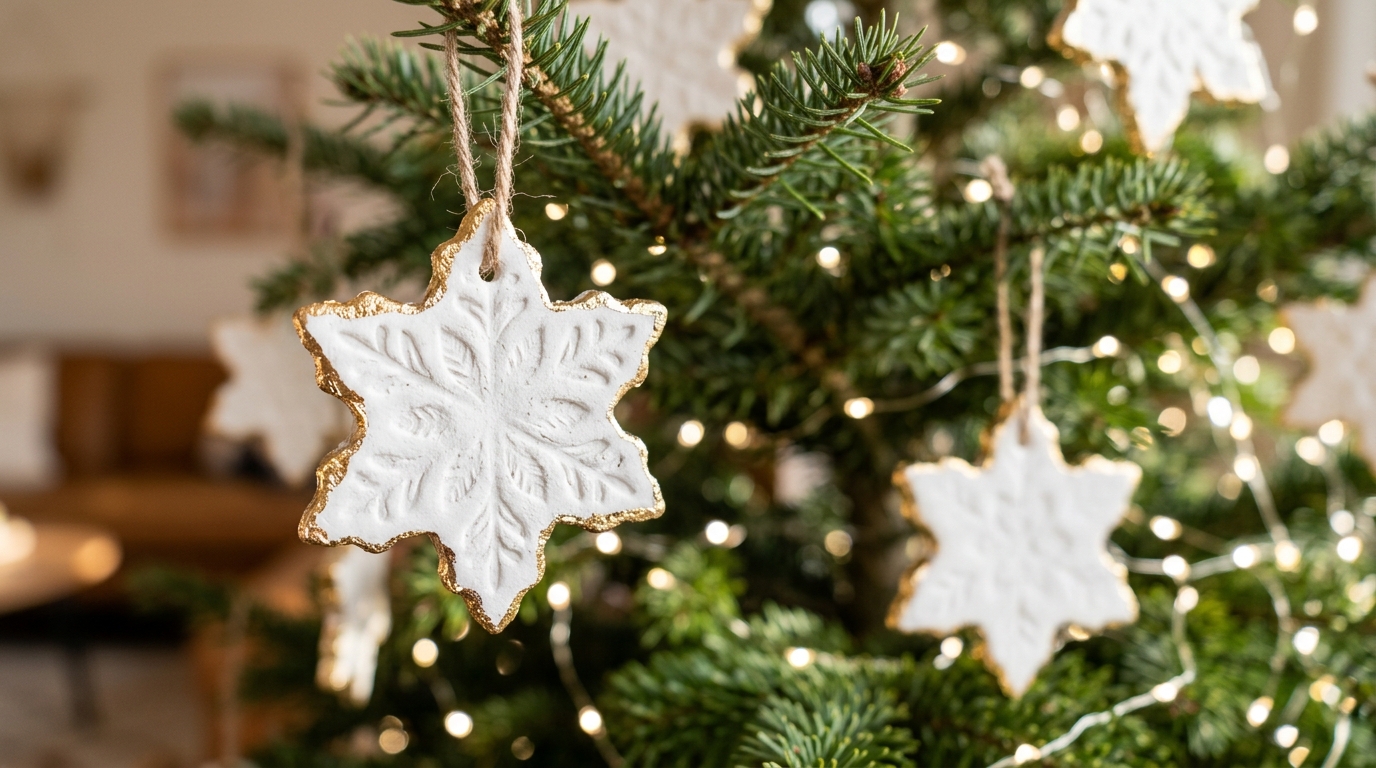
A thin line of gold around the edge turns a simple snowflake into a shop worthy ornament. Once your clay snowflakes are dry and sanded, brush a little gilding glue along the edges and press on imitation gold leaf, or simply run a gold paint pen around them. On a tree with warm white lights they shimmer like jewelry. These Clay Christmas Ornaments also make lovely gift toppers. Gold or silver, which would you pick?
You will need: Snowflake cookie cutter, air dry clay, gilding glue and imitation gold leaf or a gold paint pen, a soft brush.
How to make it: 1. Cut and dry the snowflakes. 2. Sand the edges smooth. 3. Brush glue on the edges, wait until tacky and press on gold leaf. 4. Brush away the loose flakes.
Hand Painted Mini Mittens
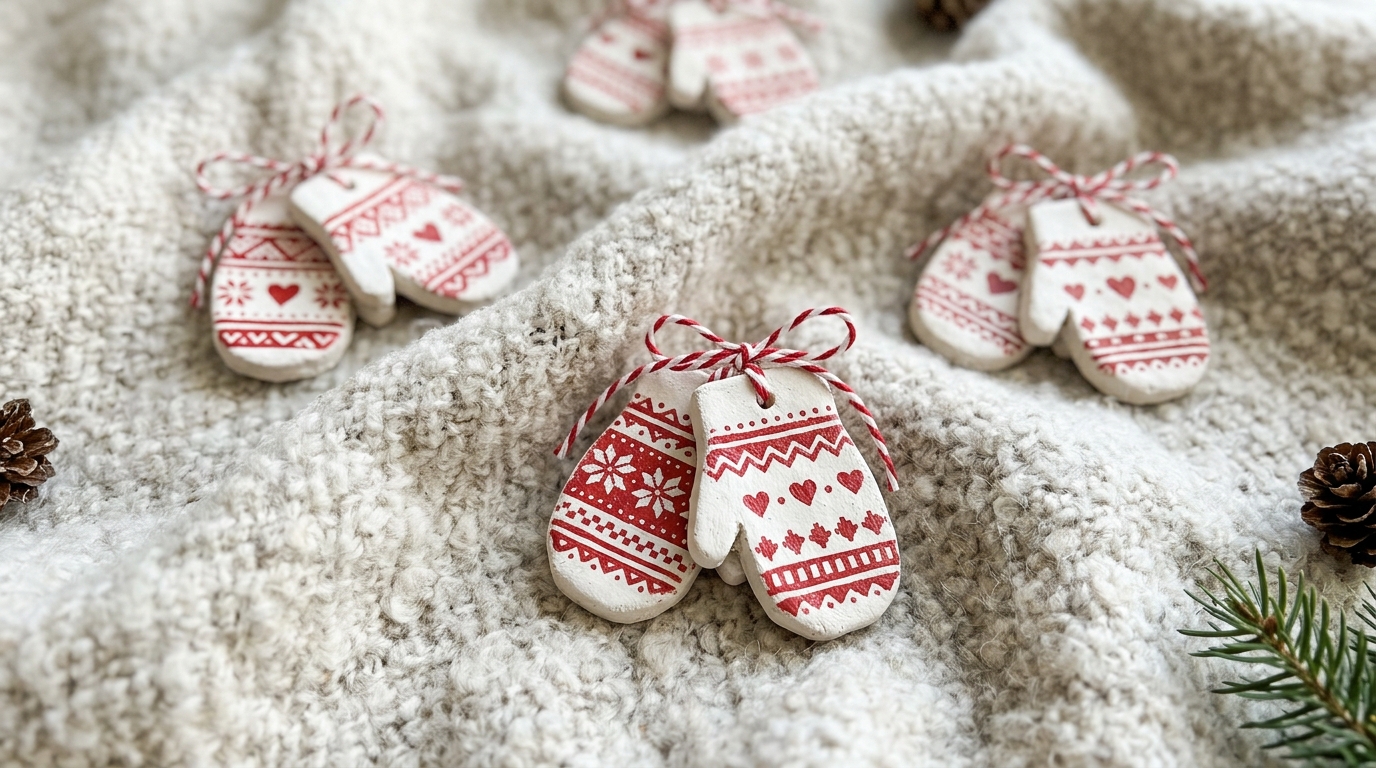
Little clay mittens are pure grandma charm, especially tied in pairs like real ones. Cut a mitten shape from paper, trace it onto the clay and cut with a craft knife (adults only). Once dry, paint them red and add white hearts, snowflakes and little knit stitches with a fine brush or paint pen. Tie each pair with baker’s twine. They are lovely for a family tree, with one pair for every person. How many pairs would your family need?
You will need: Air dry clay, a paper mitten template, a craft knife (adult use), red and white acrylic paint, a fine brush, baker’s twine.
How to make it: 1. Trace and cut mitten shapes in pairs, flipping one. 2. Make a hole in each cuff. 3. Dry, then paint red and add white patterns. 4. Tie each pair together with twine.
Painted Tree Tags With Names
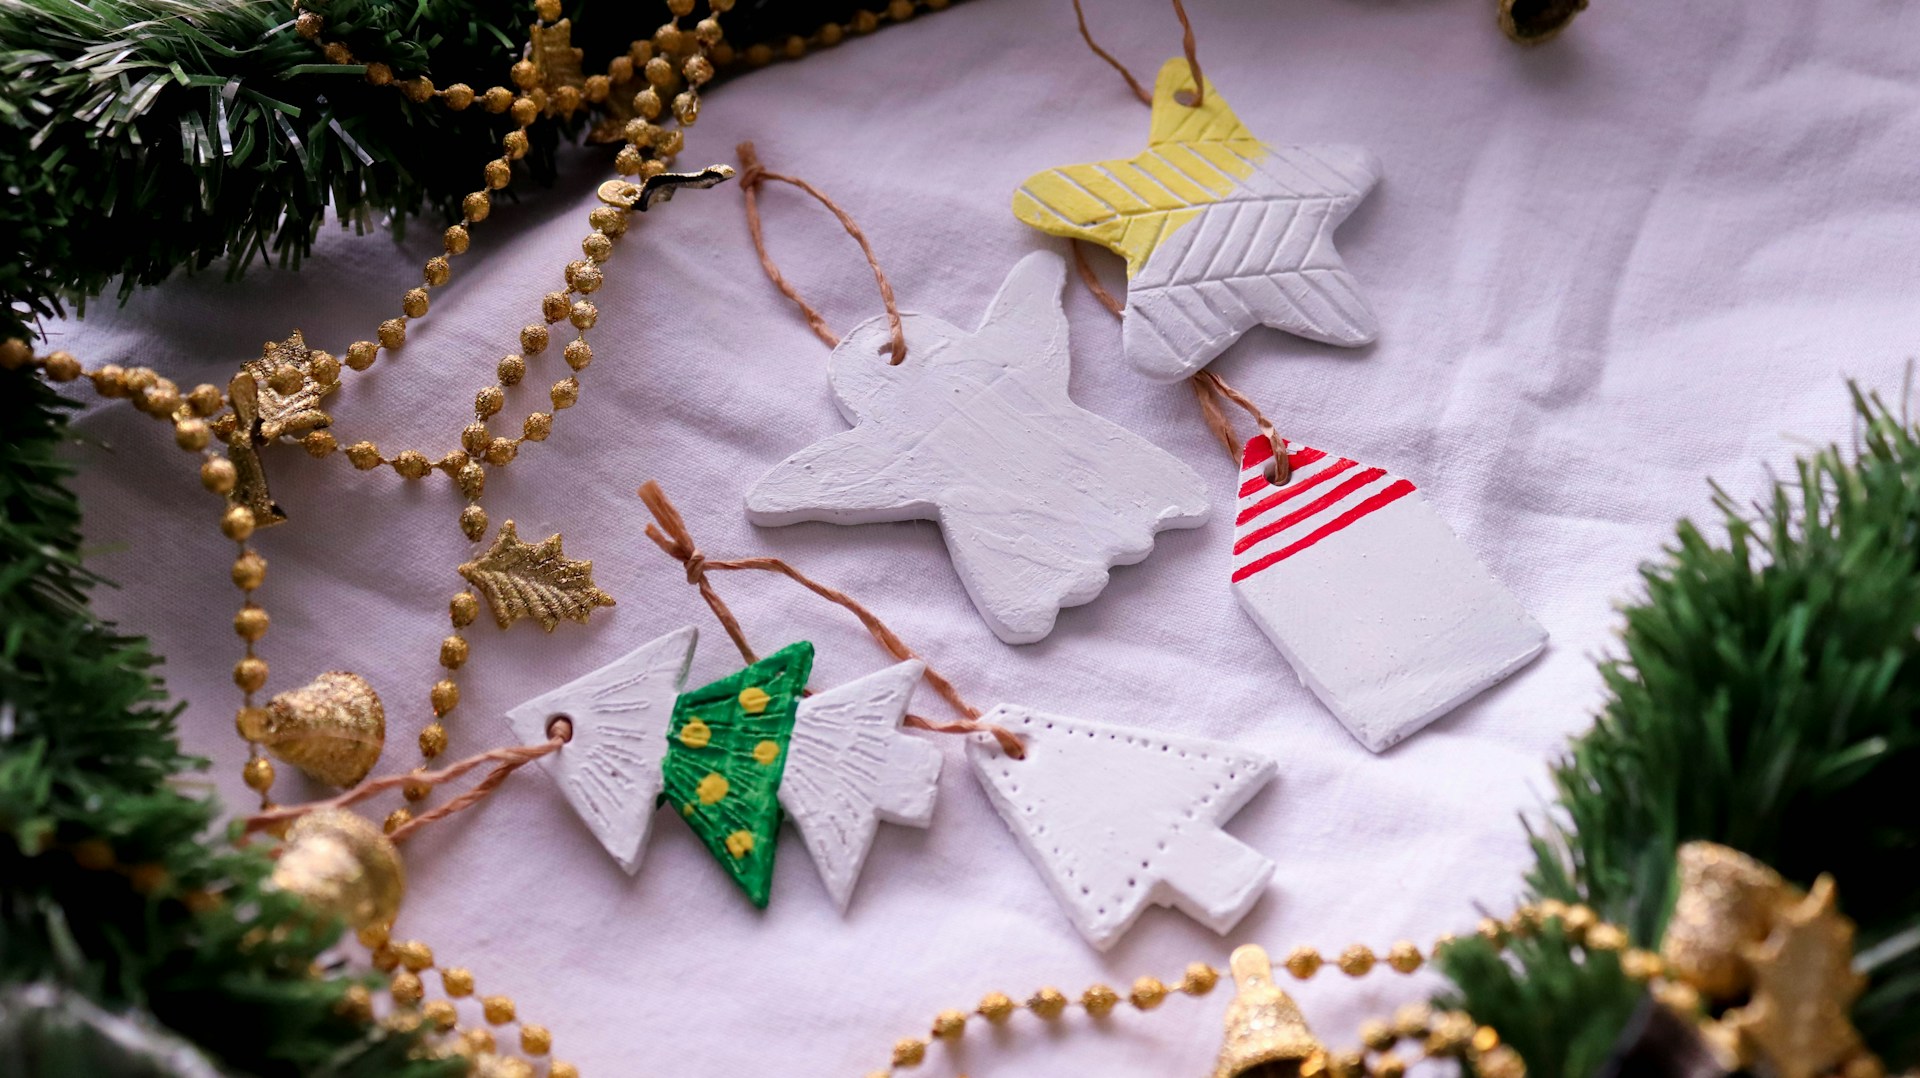
Clay tree and star cutouts make perfect name ornaments for each person in the family. Before the clay dries, press letters in with alphabet stamps, or paint names on afterward with a fine brush. Add a bright painted band or a striped corner for a pop of color, like the ones here. They double as gift tags, then go straight onto the tree. Grandparents especially love a set with every grandchild’s name. Whose name goes on the first one?
You will need: Air dry clay, tree and star cutters, alphabet stamps or a fine paint pen, acrylic paints, twine.
How to make it: 1. Cut trees and stars and make holes. 2. Stamp names gently into the soft clay. 3. Let dry completely. 4. Paint a colored band or stripes and tie on twine.
Clay Gingerbread Men You Will Not Eat
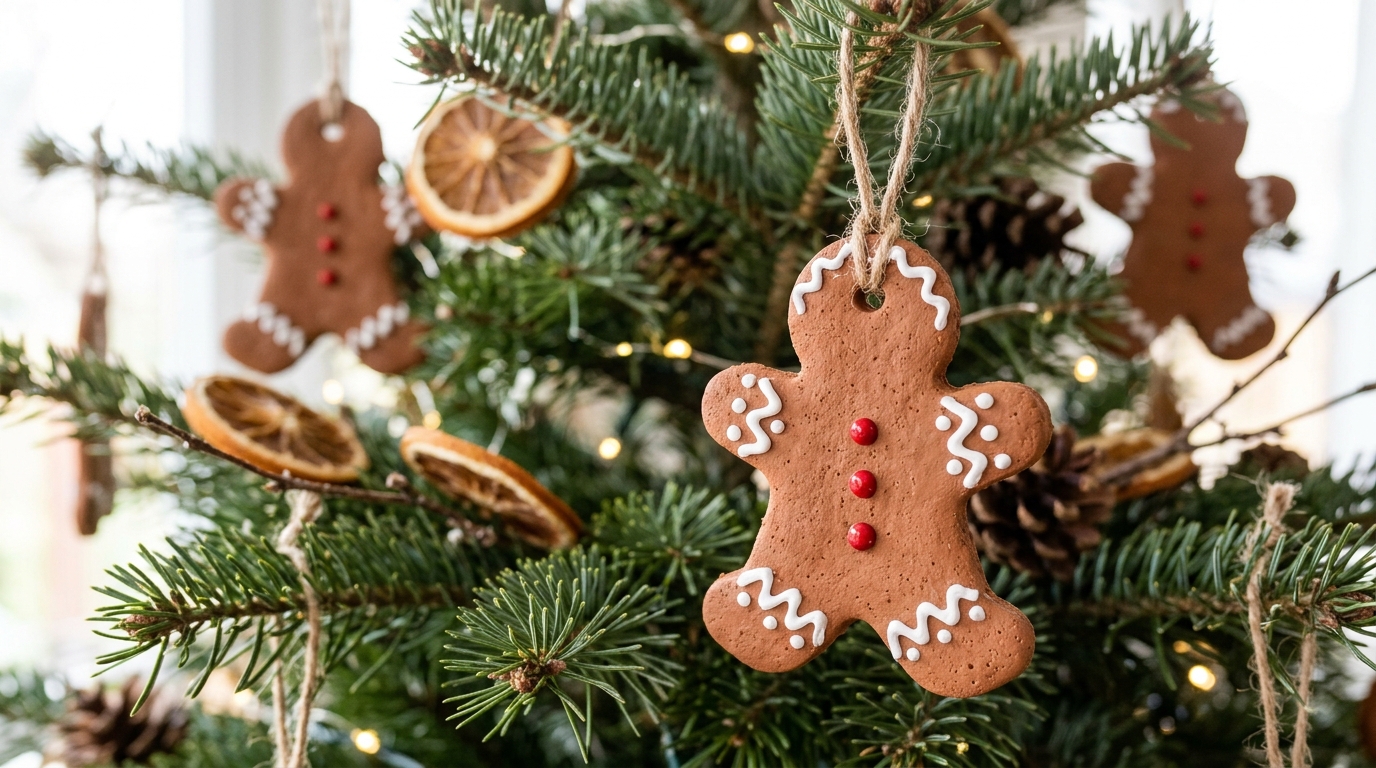
These look good enough to eat, but these Clay Christmas Ornaments are just for the tree. Cut gingerbread men from clay, let them dry and paint them a warm cookie brown. Then pipe on icing details with white dimensional paint, the puffy kind that dries raised. Add tiny red dots for buttons. They hold up for years, so no crumbs and no ants. Keep them high on the tree if you have a dog who likes cookies. Would you add little faces or keep them simple?
You will need: Air dry clay, a gingerbread man cutter, brown acrylic paint, white dimensional fabric paint, red paint, ribbon.
How to make it: 1. Cut shapes and make a hole in each head. 2. Dry and sand. 3. Paint brown and let dry. 4. Pipe white icing lines and add red buttons.
Marbled Green and Gold Baubles
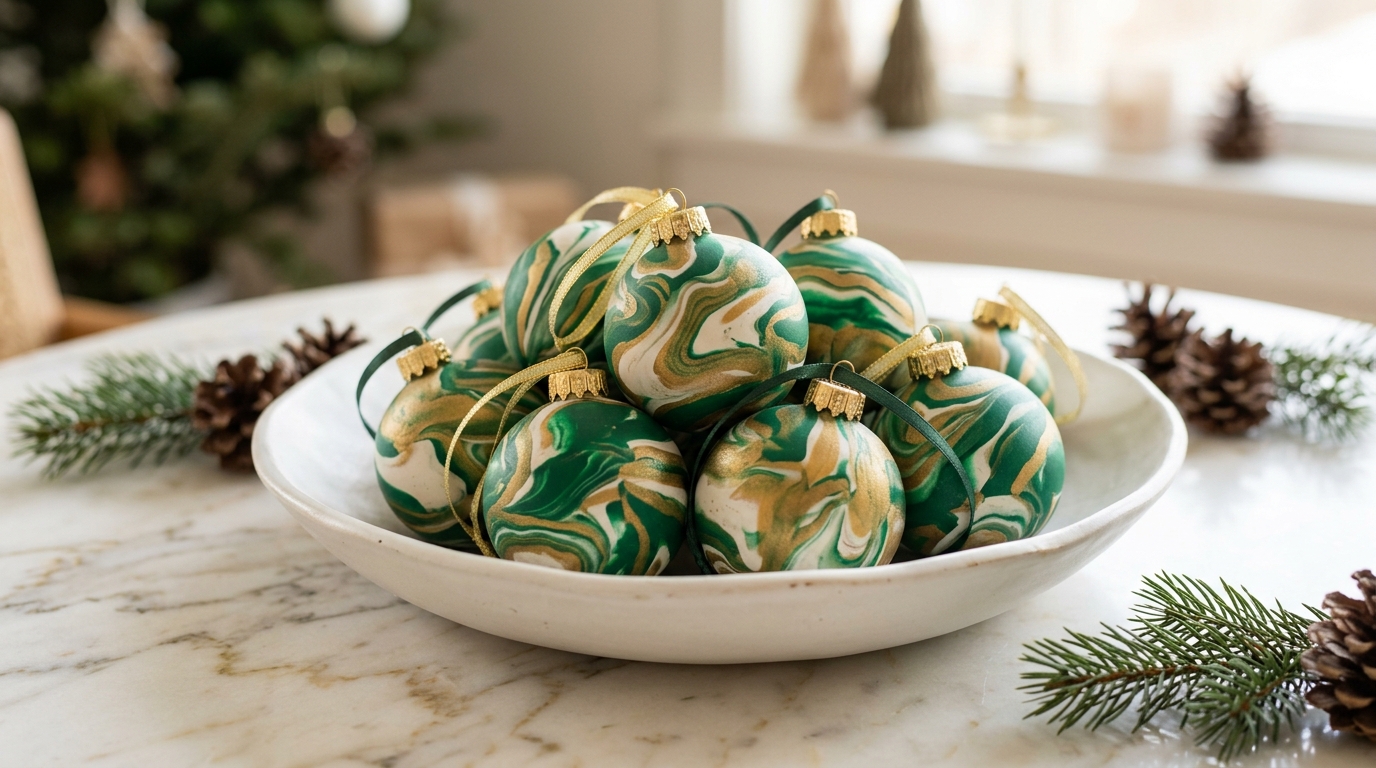
Marbled baubles look like they came from a designer boutique. Twist a log of white clay with a log of tinted green clay and a little gold, roll it into a ball and keep rolling until the swirls look like stone. Polymer clay works best for this one and bakes in a home oven, so have an adult follow the package directions. Add a small cap and ribbon and pile them in a dish. Would you go green, red or blue?
You will need: White and green polymer clay, a little gold clay or gold mica powder, ornament caps, ribbon, a baking tray (adult help).
How to make it: 1. Roll thin logs of each color. 2. Twist them together and fold a few times. 3. Roll into smooth balls and push in a cap loop. 4. Bake as the package says, with an adult, then cool.
Clay Christmas Ornaments Shaped Like Tiny Houses
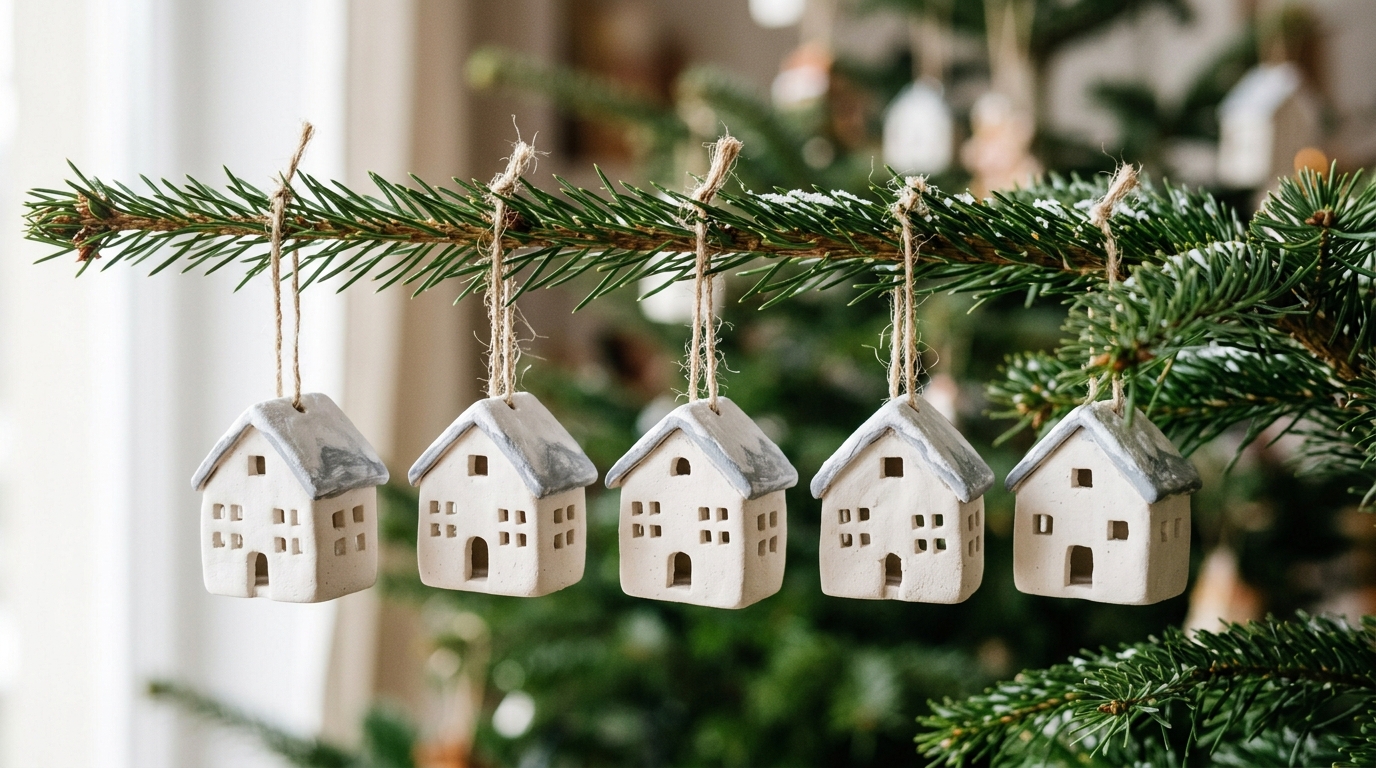
A row of little clay houses on the tree looks like a snowy village. Cut a house shape with a pointed roof, then use a straw or a tiny square cutter to punch windows and a door. Dry them, paint the roofs soft gray or leave everything white. If you use a battery tea light behind one on a shelf, the windows glow. These Clay Christmas Ornaments are also lovely tied on gifts. Would you make your own house?
You will need: Air dry clay, a house cookie cutter or paper template, a straw and small cutters, gray paint, twine.
How to make it: 1. Cut house shapes. 2. Punch windows and a door. 3. Make a hole in the roof and dry flat. 4. Paint roofs and add twine.
Start With Your Cookie Cutter Drawer
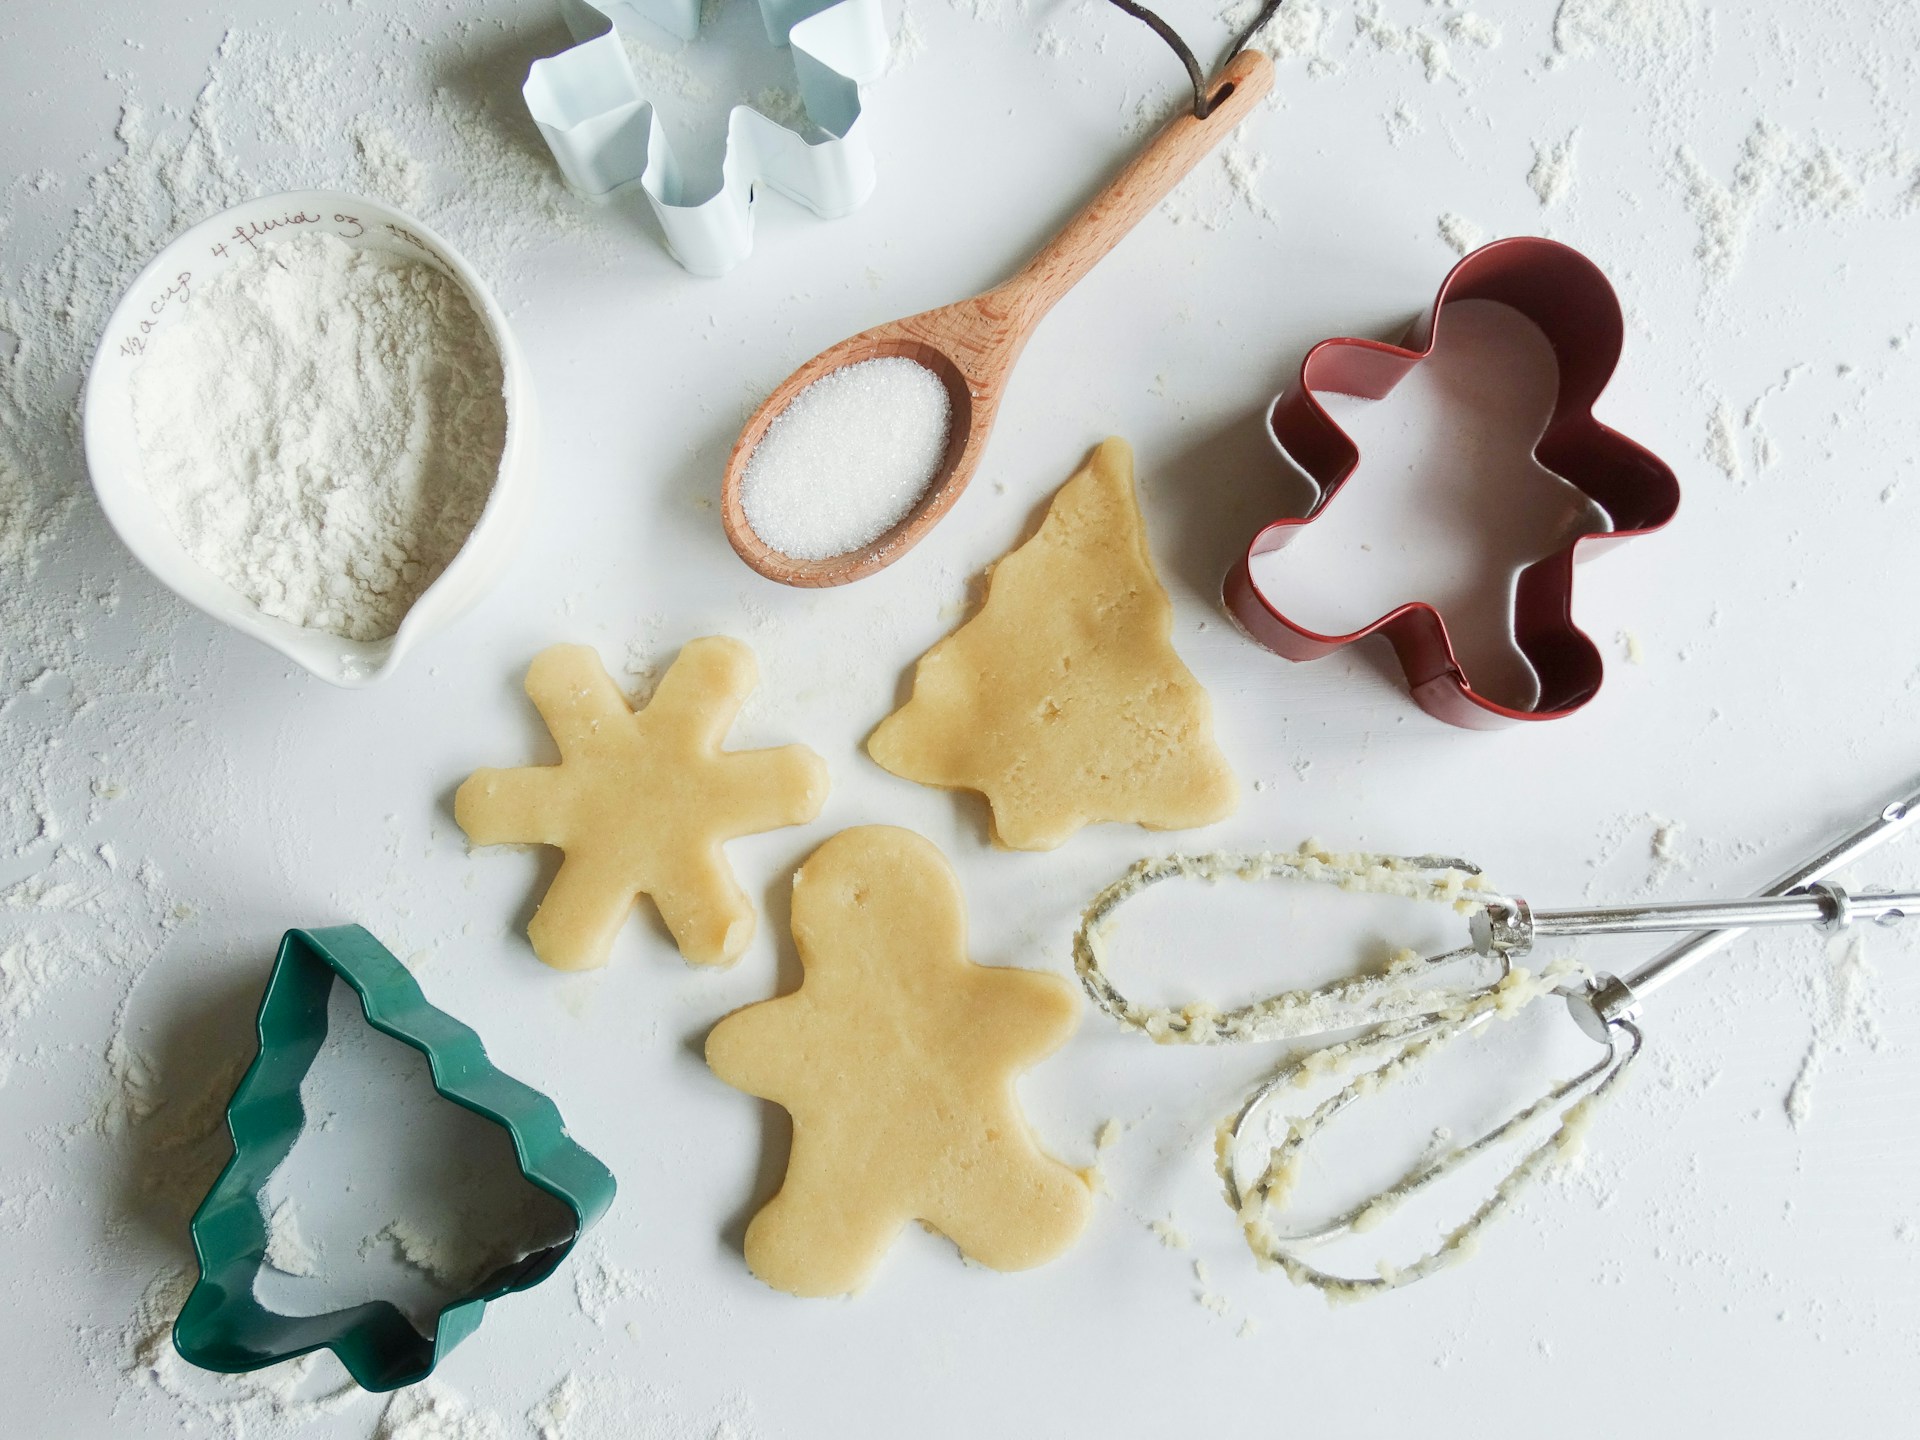
You do not need special tools for clay. The cookie cutters already in your kitchen work perfectly, from stars and trees to snowflakes and gingerbread men. Dust the table lightly with cornstarch so nothing sticks, and wash the cutters well afterward. For more ideas, see our old-fashioned handmade Christmas ornaments. A set of metal cutters from the thrift store adds lots of new shapes for a dollar or two. Which cutter do you reach for first?
You will need: Cookie cutters, cornstarch for dusting, air dry clay, a rolling pin, parchment paper.
How to make it: 1. Dust the work surface with cornstarch. 2. Roll the clay evenly. 3. Press cutters straight down and wiggle gently. 4. Lift shapes onto parchment to dry.
Paw Print Clay Christmas Ornaments
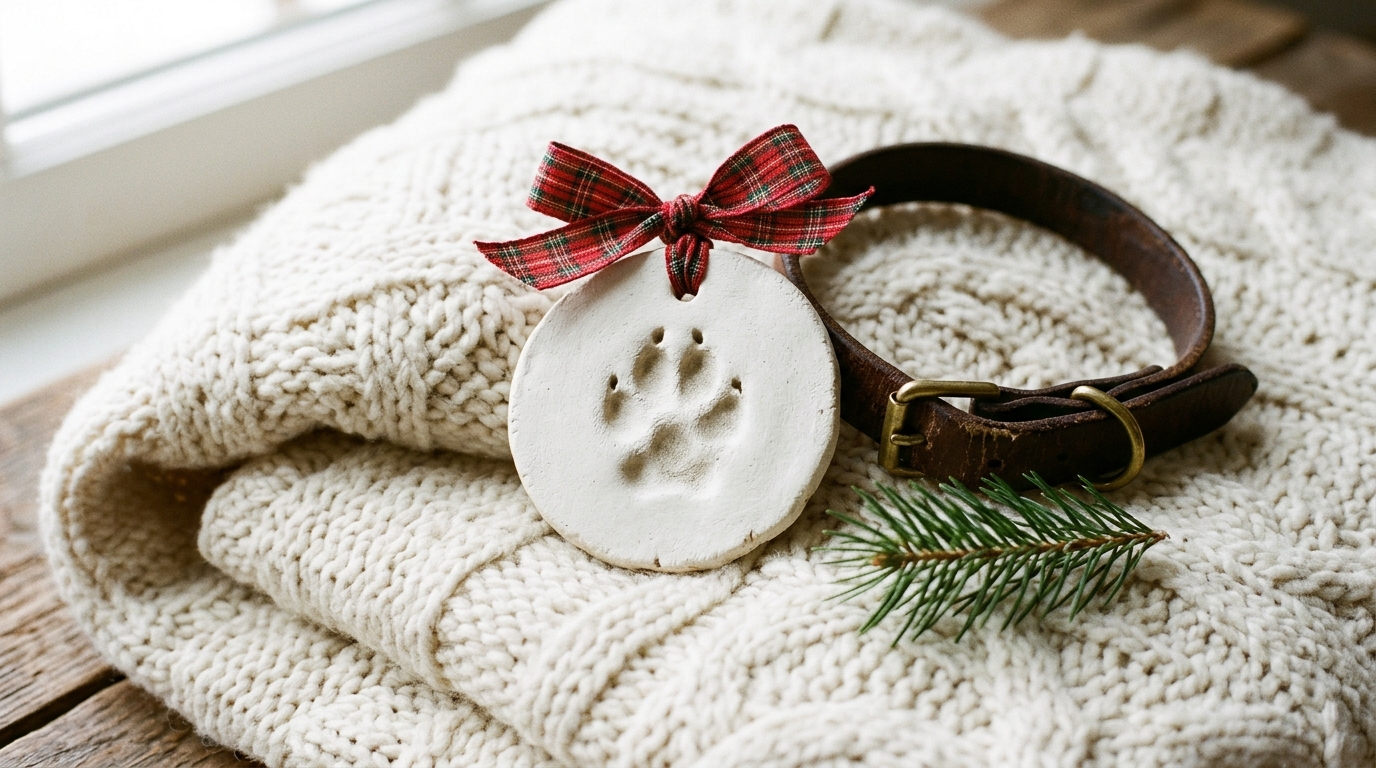
This one makes people tear up. Roll a thick circle of clay and gently press your dog or cat’s paw into it, then cut around it with a round cutter. Write the year on the back with a pencil while it is soft. Once dry, tie on a plaid ribbon. It is the most treasured gift you can give a pet lover, and it costs almost nothing. Wipe the paw with a damp cloth right after. Would your pet sit still for this?
You will need: Air dry clay rolled half an inch thick, a round cutter or bowl, a pencil, ribbon, a damp cloth.
How to make it: 1. Roll a thick circle of clay. 2. Press the paw in gently and evenly. 3. Cut around it and make a hole. 4. Dry for two days and tie on ribbon.
Rustic Red Painted Trio

Simple shapes painted barn red with tiny white dots feel like old country decorations. Cut a heart, a star and an angel or gingerbread shape, dry them, and paint two in red and one left natural. Add little white dot borders with the end of a toothpick. Hang them as a trio on red string over a door or a cabinet knob. It is a sweet way to use leftover clay scraps. Which shape is your favorite?
You will need: Clay scraps, heart, star and angel cutters, red and white acrylic paint, a toothpick, red string.
How to make it: 1. Cut three shapes and make holes. 2. Dry fully and sand. 3. Paint and let dry. 4. Dot on white borders with a toothpick and string them up.
Terrazzo Confetti Hearts
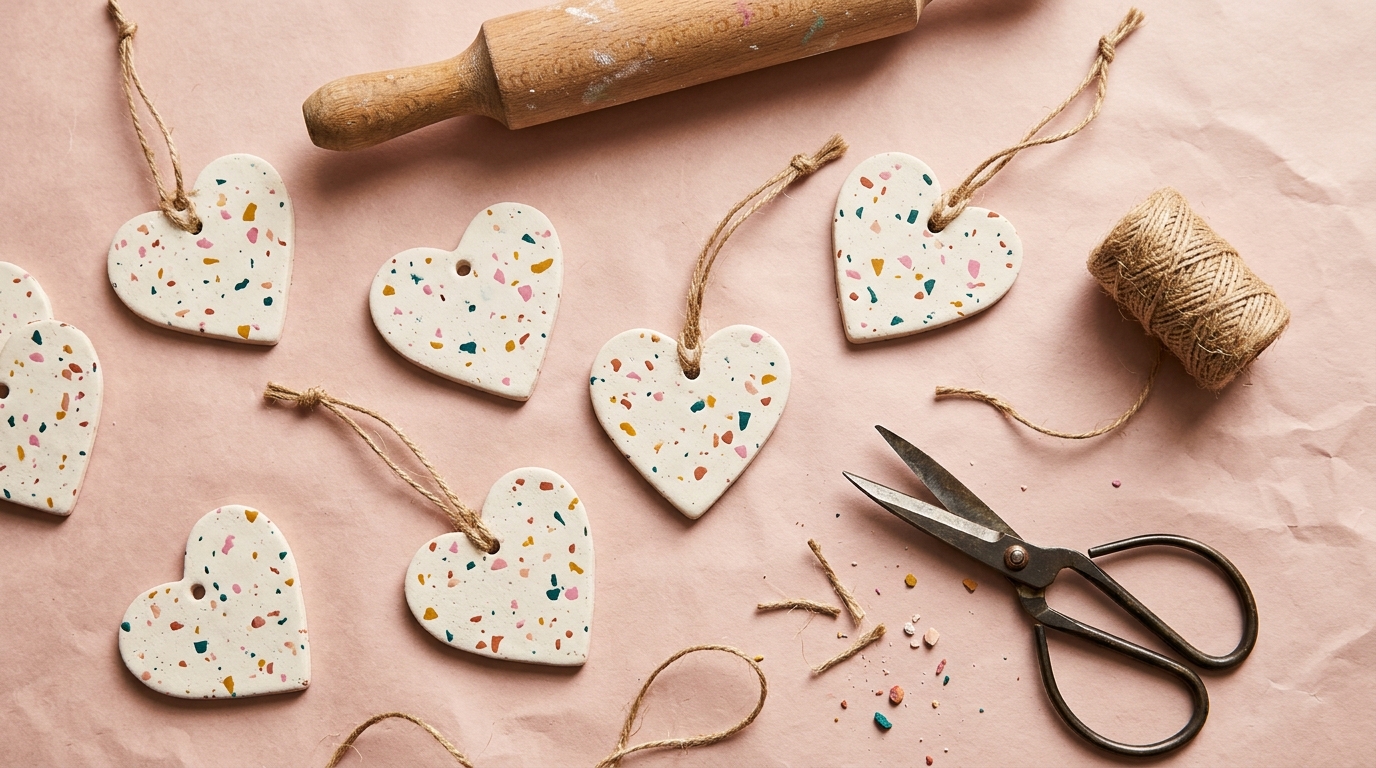
Terrazzo hearts are fun, modern and some of the best Clay Christmas Ornaments to sell at a craft fair. Tint small bits of clay with acrylic paint, let them dry, then crumble them into tiny chips. Press the chips into white clay, roll it smooth and cut hearts. The speckles look just like stone floors in fancy cafes. Sand them after drying to make the colors pop. Bundle three in a little bag and they make a sweet teacher gift. What colors would you mix in?
You will need: White air dry clay, acrylic paints in three or four colors, a heart cutter, fine sandpaper, jute string.
How to make it: 1. Tint small balls of clay and let them dry. 2. Crumble into chips. 3. Press chips into rolled white clay and roll smooth. 4. Cut hearts, dry, sand and string.
Clay Christmas Ornaments Moon and Star Mobile

End with something calm and dreamy. Cut crescent moons and stars, dot them with tiny gold paint dots, and hang them at different lengths from a piece of driftwood. It works as a Christmas mobile in a nursery, over a reading chair or in a window all winter long. These Clay Christmas Ornaments stay pretty well past the holidays, so they earn their keep. Make a few extras because guests will ask for one. Where would you hang yours?
You will need: Air dry clay, moon and star cutters, gold paint, a dotting tool or toothpick, fishing line or thread, a driftwood branch.
How to make it: 1. Cut moons and stars and make holes. 2. Dry and sand. 3. Add tiny gold dots. 4. Tie on thread at different lengths and hang from the branch.