DIY Christmas Centerpieces: 15 Dollar Store Ideas That Look Like a Designer Made Them
DIY Christmas centerpieces are the easiest way to make a holiday table look like a designer styled it, and most of the ones below start with dollar store glass, greenery and a few cheap ornaments. One dollar store centerpiece reel on Facebook passed 672,000 reactions this season, so you are clearly not the only one hunting for a pretty table that does not cost a fortune. We picked fifteen ideas that look expensive but come together in an evening, from snowy glass vases and a tiny carousel to glowing jar lights and velvet ribbon bud vases. Every glowing idea uses battery LED fairy lights instead of candles, which is safer around dry greenery and curious kids. Pour a cup of cocoa, clear the kitchen table and pick your favorite before the guests arrive..
Snowy Glass Vase Trees for DIY Christmas Centerpieces
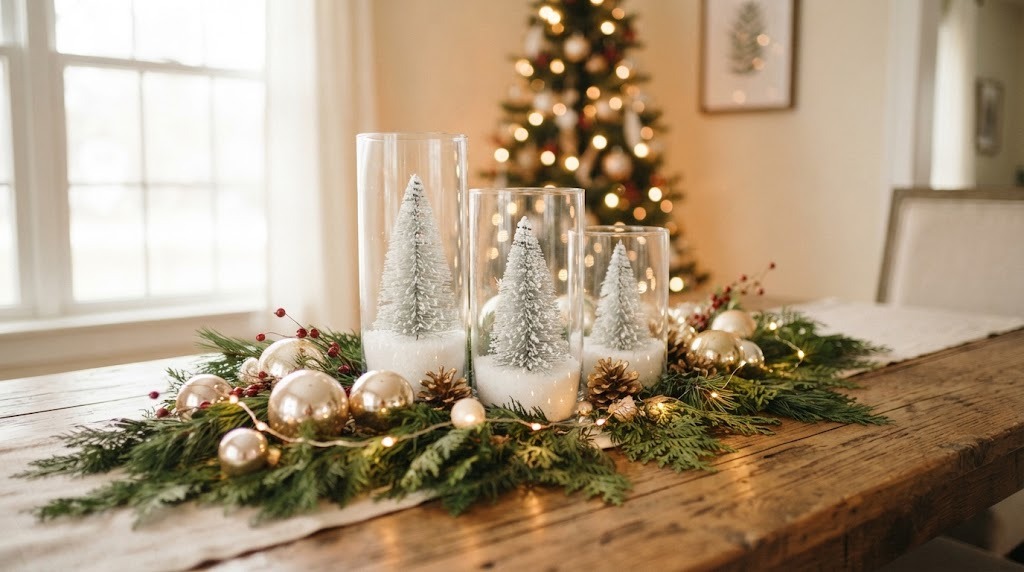
This is the look that stops guests in the doorway, and it starts with three plain glass cylinders from the dollar store. Pour a little faux snow into each one, set a flocked bottle brush tree inside, and you have three tiny snow globes in a row. Lay fresh pine or cedar clippings around the base, tuck in shiny gold ornaments and a few red berry sprigs, then weave a strand of battery fairy lights through the greenery. Varying the vase heights is the designer trick that makes it look planned and expensive..
You will need: Three glass cylinder vases in different heights, faux snow, three small flocked bottle brush trees, pine or cedar clippings, gold and champagne ornaments, red berry picks, battery fairy lights.
How to make it: 1. Add two inches of faux snow to each vase and press a tree into the center. 2. Line the vases up from tall to short in the middle of the table. 3. Build a low greenery ring around them, tuck in ornaments and berries, and weave the fairy lights through.
Ornament Filled Lantern
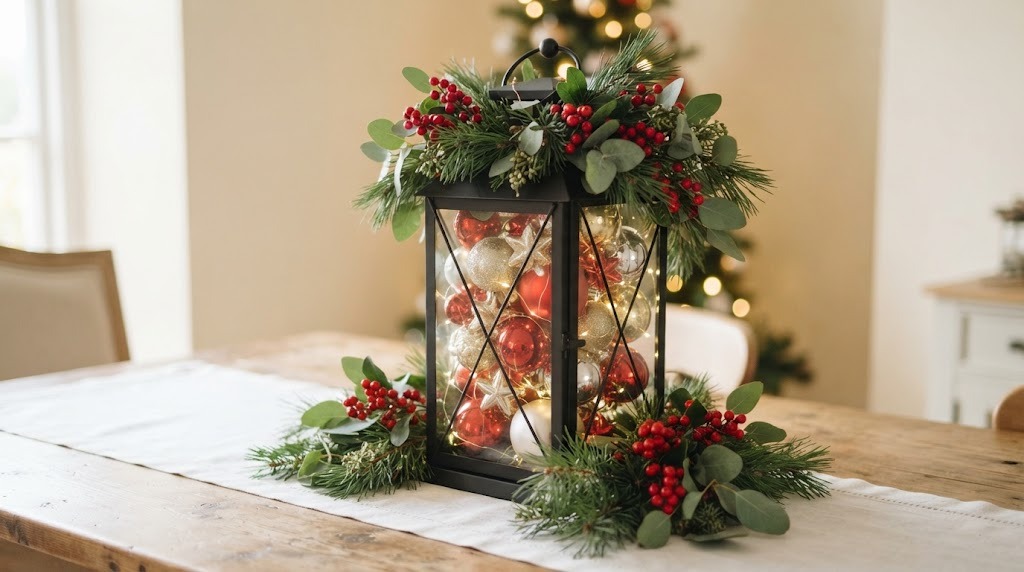
Some of the best DIY Christmas centerpieces start with a lantern. A simple metal one becomes a showpiece when you fill it to the brim with shiny ornaments. Mix red, silver and gold in a few sizes so it looks abundant, then add a small coil of battery fairy lights inside for a soft glow after dark. Tuck pine, eucalyptus and berry sprigs around the base and let a few spill over the top. Dollar store and thrift store lanterns work perfectly, and you can reuse them for a spring display later. Would you go classic red or all silver?
You will need: A metal or wooden lantern with glass panels, assorted shatterproof ornaments, a small strand of battery fairy lights, pine sprigs, eucalyptus, red berry picks.
How to make it: 1. Coil the fairy lights loosely in the bottom of the lantern. 2. Fill the lantern with ornaments, larger ones first and small ones in the gaps. 3. Arrange greenery and berries around the base and on top of the lantern.
Mini Carousel Centerpiece From Dollar Store Parts
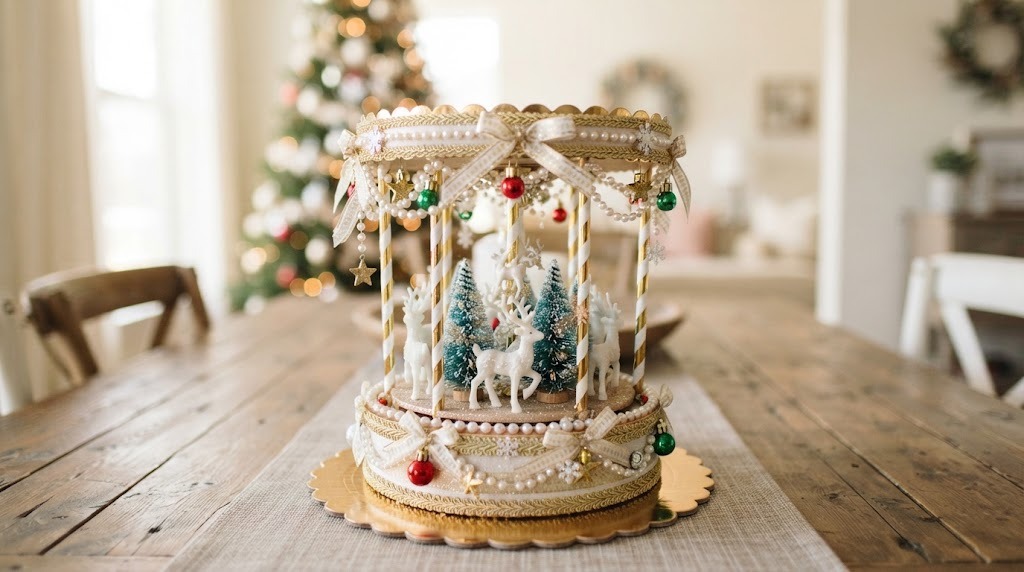
A Facebook carousel centerpiece made with dollar store parts pulled more than 52,000 reactions and almost 10,000 shares, and it is easy to see why. Two round cake boards make the base and the roof, striped paper straws become the poles, and tiny plastic reindeer and bottle brush trees ride around the middle. Pearls, gold ribbon and mini ornaments add the fancy carnival finish. It is one of those DIY Christmas centerpieces that kids love helping with, so let them place the animals. Which little riders would you put on yours?
You will need: Two round gold cake boards, a paper cone for the roof, striped paper straws, a cardboard tube for the center pole, tiny reindeer or animal figures, mini bottle brush trees, pearl trim, gold ribbon, mini ornaments, glue (adult help with hot glue).
How to make it: 1. Glue the center tube between the two cake boards and add straws around the edge as poles. 2. Cover the roof with a paper cone and trim it with pearls and ribbon. 3. Glue the reindeer and trees around the base and hang mini ornaments from the roof edge.
Wood Slice With Fairy Light Jars for DIY Christmas Centerpieces
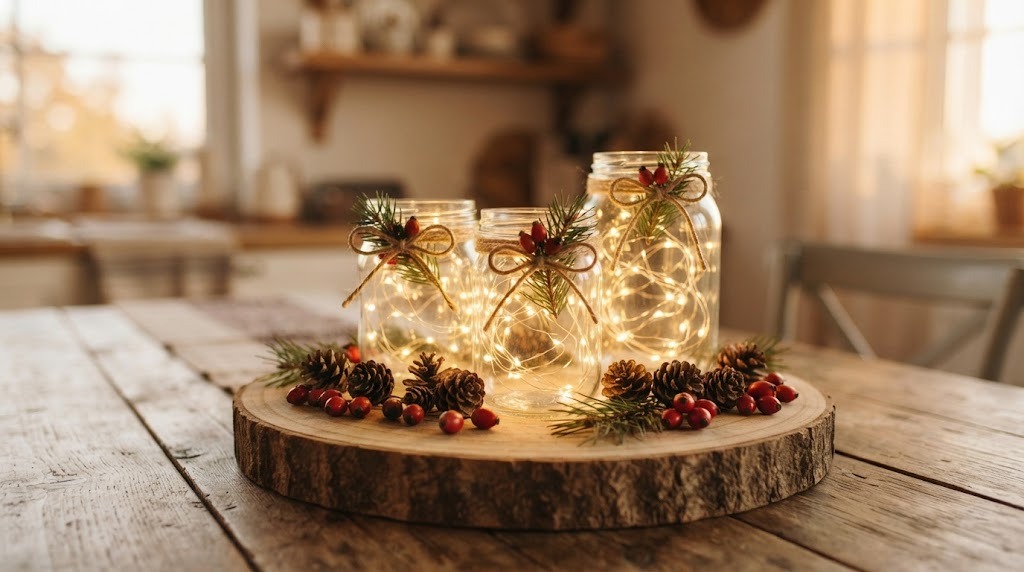
Few things feel cozier than jars full of tiny glowing lights, and this one takes about ten minutes. Set a thick wood slice in the middle of the table, then fill three clear jars of different heights with coiled battery fairy lights. Tie each jar with twine and a little pine sprig, and scatter mini pine cones and red berries over the wood. It looks like a cabin in the snow and costs just a few dollars. Leave it out all winter, not just for Christmas. Where would you put yours?
You will need: A round wood slice, three clear glass jars, three strands of battery fairy lights, jute twine, pine sprigs, mini pine cones, red berry picks.
How to make it: 1. Coil one strand of lights inside each jar, keeping the battery box hidden at the back. 2. Tie twine and a pine sprig around each jar neck. 3. Group the jars on the wood slice and scatter cones and berries around them.
Pine Cone and Cinnamon Stick Bowl
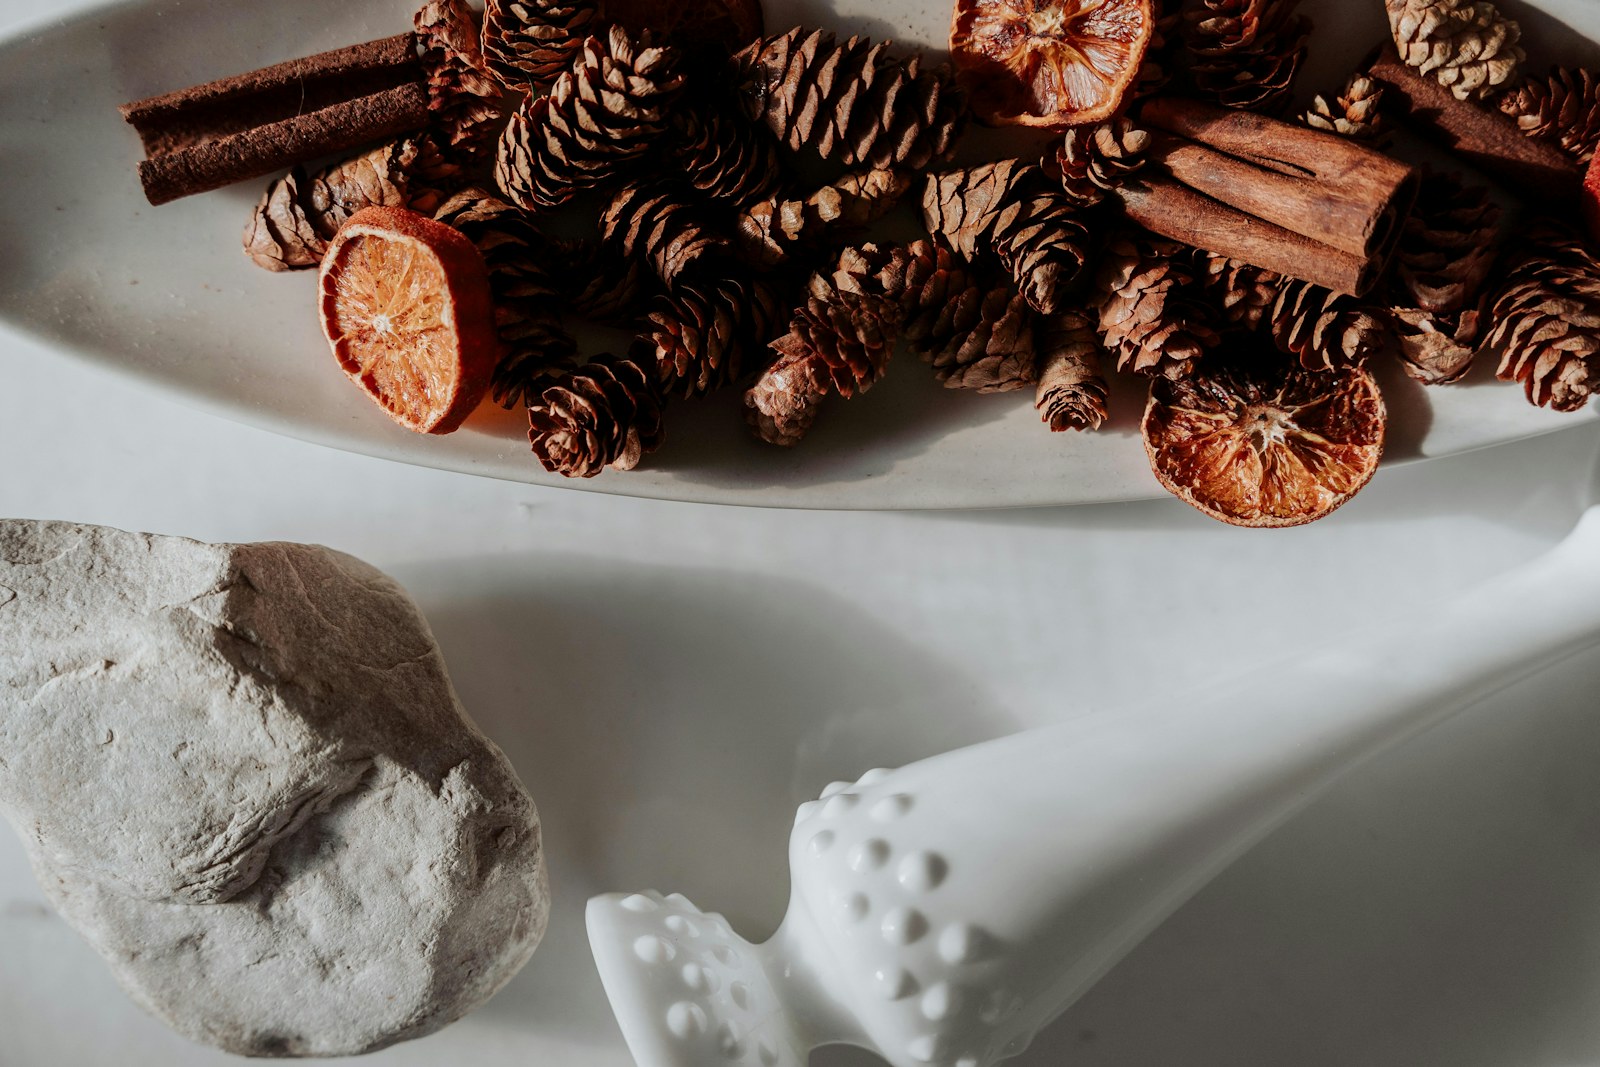
Sometimes the prettiest DIY Christmas centerpieces are a big bowl of free things from the yard. Fill a wide white bowl with pine cones you gathered on a walk, then tuck in cinnamon sticks and a few dried orange slices. It smells like the holidays, costs almost nothing and never needs water. Bake the pine cones on low heat for a short time first to clean them, with an adult watching the oven. Swap in fresh oranges or walnuts if you want more color. What would you gather from your yard?
You will need: A wide shallow bowl, clean pine cones, cinnamon sticks, dried orange slices, optional walnuts or star anise.
How to make it: 1. Clean the pine cones and let them dry completely. 2. Fill the bowl with the largest cones first. 3. Tuck cinnamon sticks and orange slices into the gaps so they show from every side.
Cake Stand Winter Village
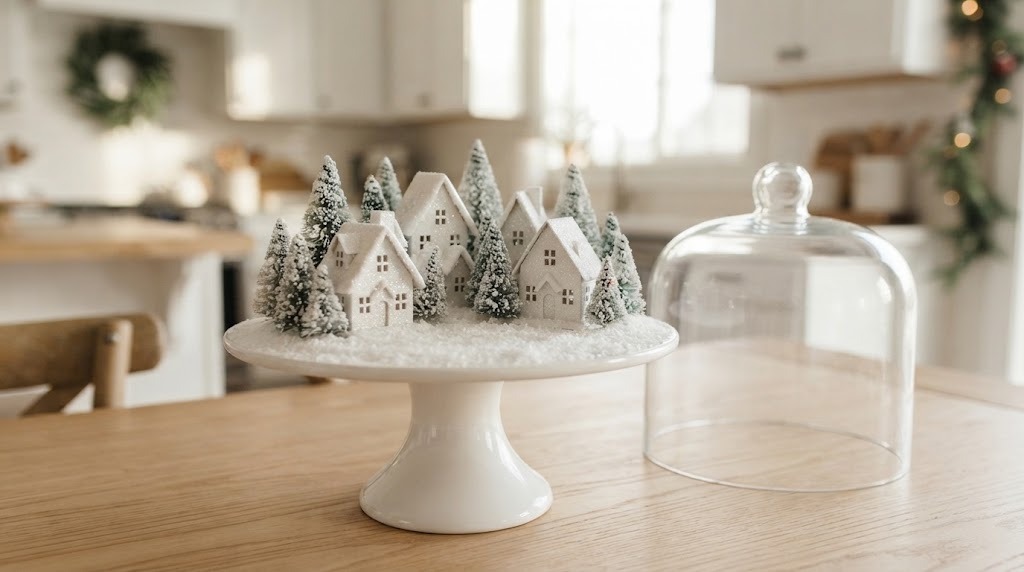
Turn a plain cake stand into a tiny snowy town that people will want to lean in and look at. Paper putz style houses from the dollar store or printed templates sit on a bed of faux snow, surrounded by little flocked trees. Add a glass cloche over the top if you have one, which keeps dust off and makes it feel like a museum piece. Of all the DIY Christmas centerpieces here, this is the one kids remember. Use a taller stand for a dramatic table and a short one for a coffee table. Would you paint your houses white or bright colors?
You will need: A cake stand, small paper or wooden houses, mini flocked bottle brush trees, faux snow, an optional glass cloche.
How to make it: 1. Spread a thick layer of faux snow on the cake stand. 2. Place the houses in a loose circle with the tallest in the back. 3. Fill the gaps with trees and sprinkle more snow on the roofs.
Gold Painted Pine Cone DIY Christmas Centerpieces
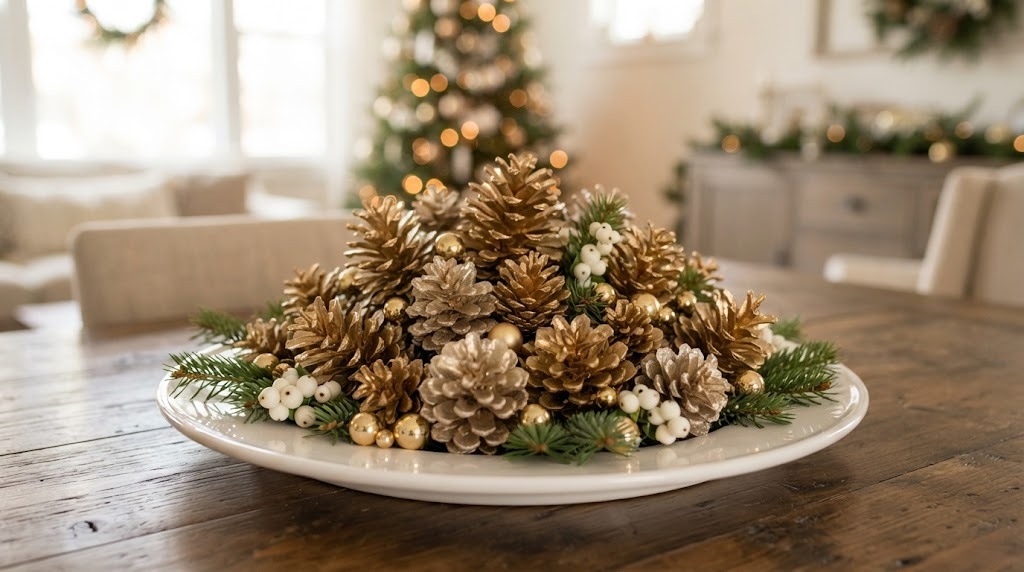
A pile of pine cones looks rustic, but paint them gold and suddenly they look like they came from a high end boutique. Use metallic craft paint, or spray paint outside with an adult, and only paint the tips if you want a frosted look. Pile them on a white platter with sprigs of fir, a few white berries and small gold ornaments. A mix of big and small cones gives the cluster depth. Our pine cone Christmas crafts gallery has even more ideas if you have a big bag to use up. Gold or silver?
You will need: Pine cones in mixed sizes, metallic gold and champagne craft paint, a foam brush, a white platter, fir sprigs, white berry picks, small gold ornaments.
How to make it: 1. Paint the cones and let them dry overnight on newspaper. 2. Pile the largest cones in the center of the platter. 3. Add the smaller cones, fir sprigs, berries and ornaments around the edges.
Dried Orange Slice Runner
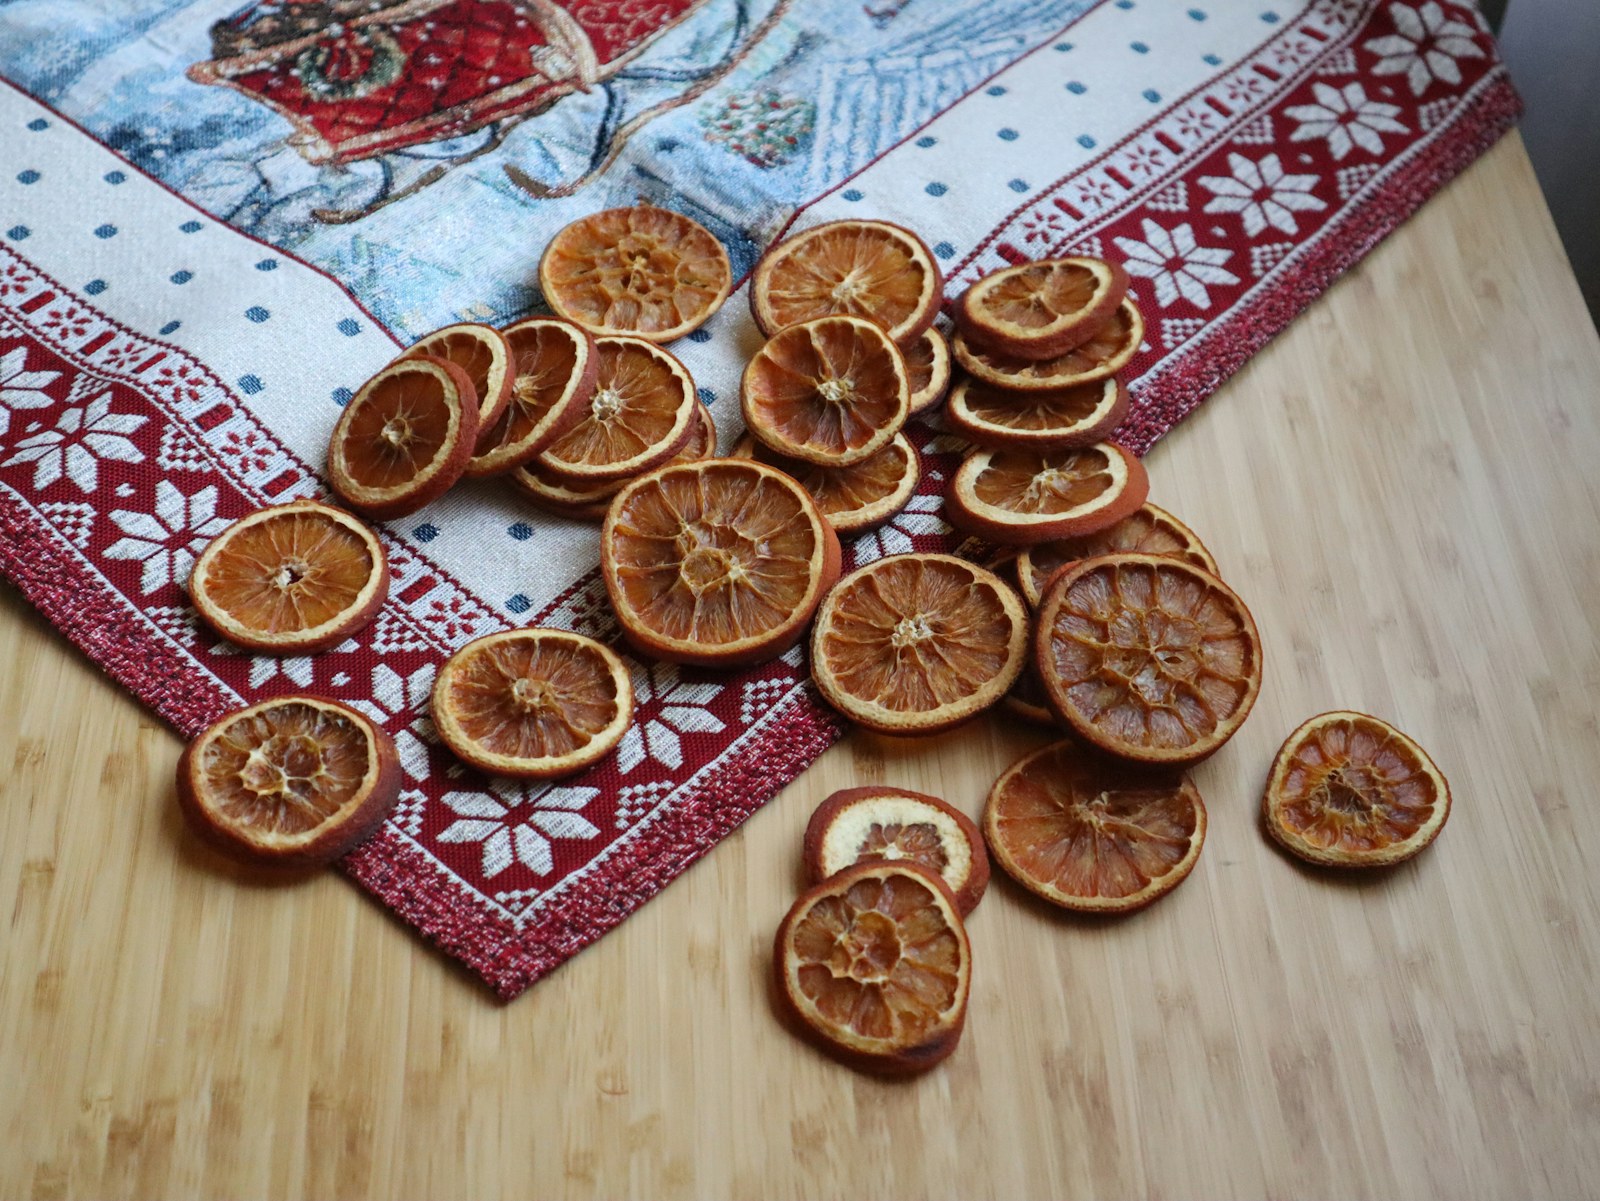
Dried orange slices glow like stained glass when the light hits them, and they are almost free to make. Slice oranges thin, dry them on low heat in the oven with an adult, and lay them down a red or plaid runner in a long scattered line. Add a few sprigs of greenery and cinnamon sticks between them for a warm old fashioned look. The scent alone makes the room feel like a holiday market. Have you ever dried your own oranges?
You will need: Four or five oranges, a sharp knife (adult only), baking sheets, parchment paper, a red or plaid table runner, greenery sprigs, cinnamon sticks.
How to make it: 1. An adult slices the oranges thin and pats them dry. 2. Dry them on parchment in a low oven for a few hours, turning once. 3. Scatter the slices down the runner with greenery and cinnamon sticks between them.
Apothecary Jars Filled With Holiday Treats

Apothecary jars are a favorite of designers because they look elegant and do double duty as dessert. Fill one or two glass jars with cookies, wrapped candies or peppermints and set them on a tray with pine sprigs and a strand of fairy lights. Guests can help themselves after dinner, and the table still looks full and festive. Edible DIY Christmas centerpieces always get attention, and dollar store glass jars with lids work just as well as fancy ones. Tie a ribbon around the neck for an extra touch. What treat would you fill yours with?
You will need: Glass jars with lids, cookies or wrapped candy, a tray, pine sprigs, battery fairy lights, ribbon.
How to make it: 1. Wash and dry the jars well. 2. Fill each jar with one kind of treat for a clean look. 3. Group the jars on a tray with greenery and lights and tie a ribbon on each lid.
Upside Down Wine Glass DIY Christmas Centerpieces
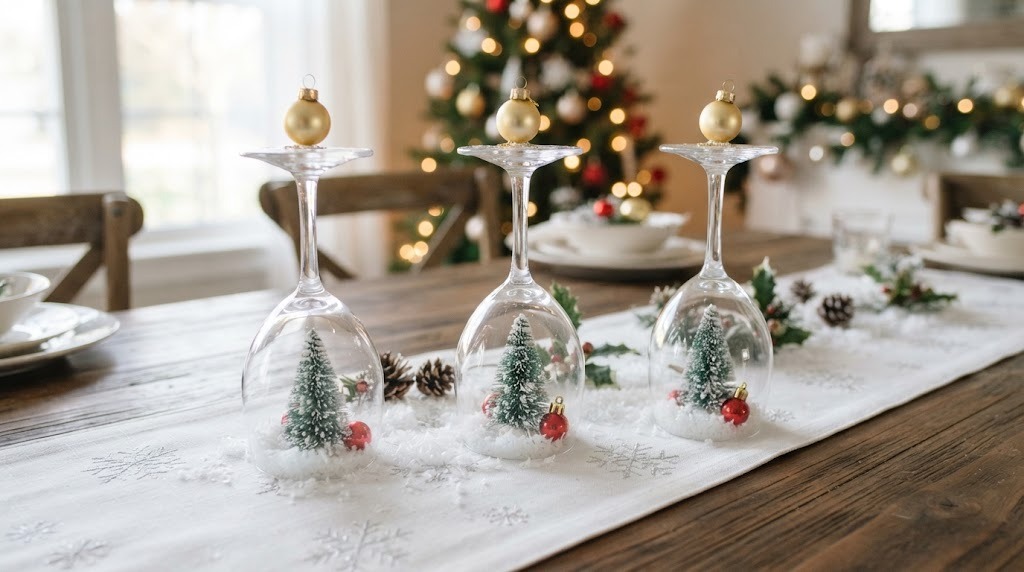
This might be the most clever trick on the list. Flip a wine glass upside down over a tiny scene of faux snow, a mini tree and a little ornament, and it becomes a snow globe on a stem. Set a small gold ornament on the upturned base and it looks like a tree topper. Line three or five of them down the runner for an elegant pattern. When the holidays end, the glasses go right back in the cabinet. Which mini scene would you build?
You will need: Clear wine glasses, faux snow, mini bottle brush trees, tiny ornaments, small gold ornaments, removable putty.
How to make it: 1. Make a small mound of snow on the table and press a mini tree into it. 2. Add a tiny ornament and set the glass upside down over the scene. 3. Attach a gold ornament to the glass base with putty.
Red Berry and Pine Jar Arrangements
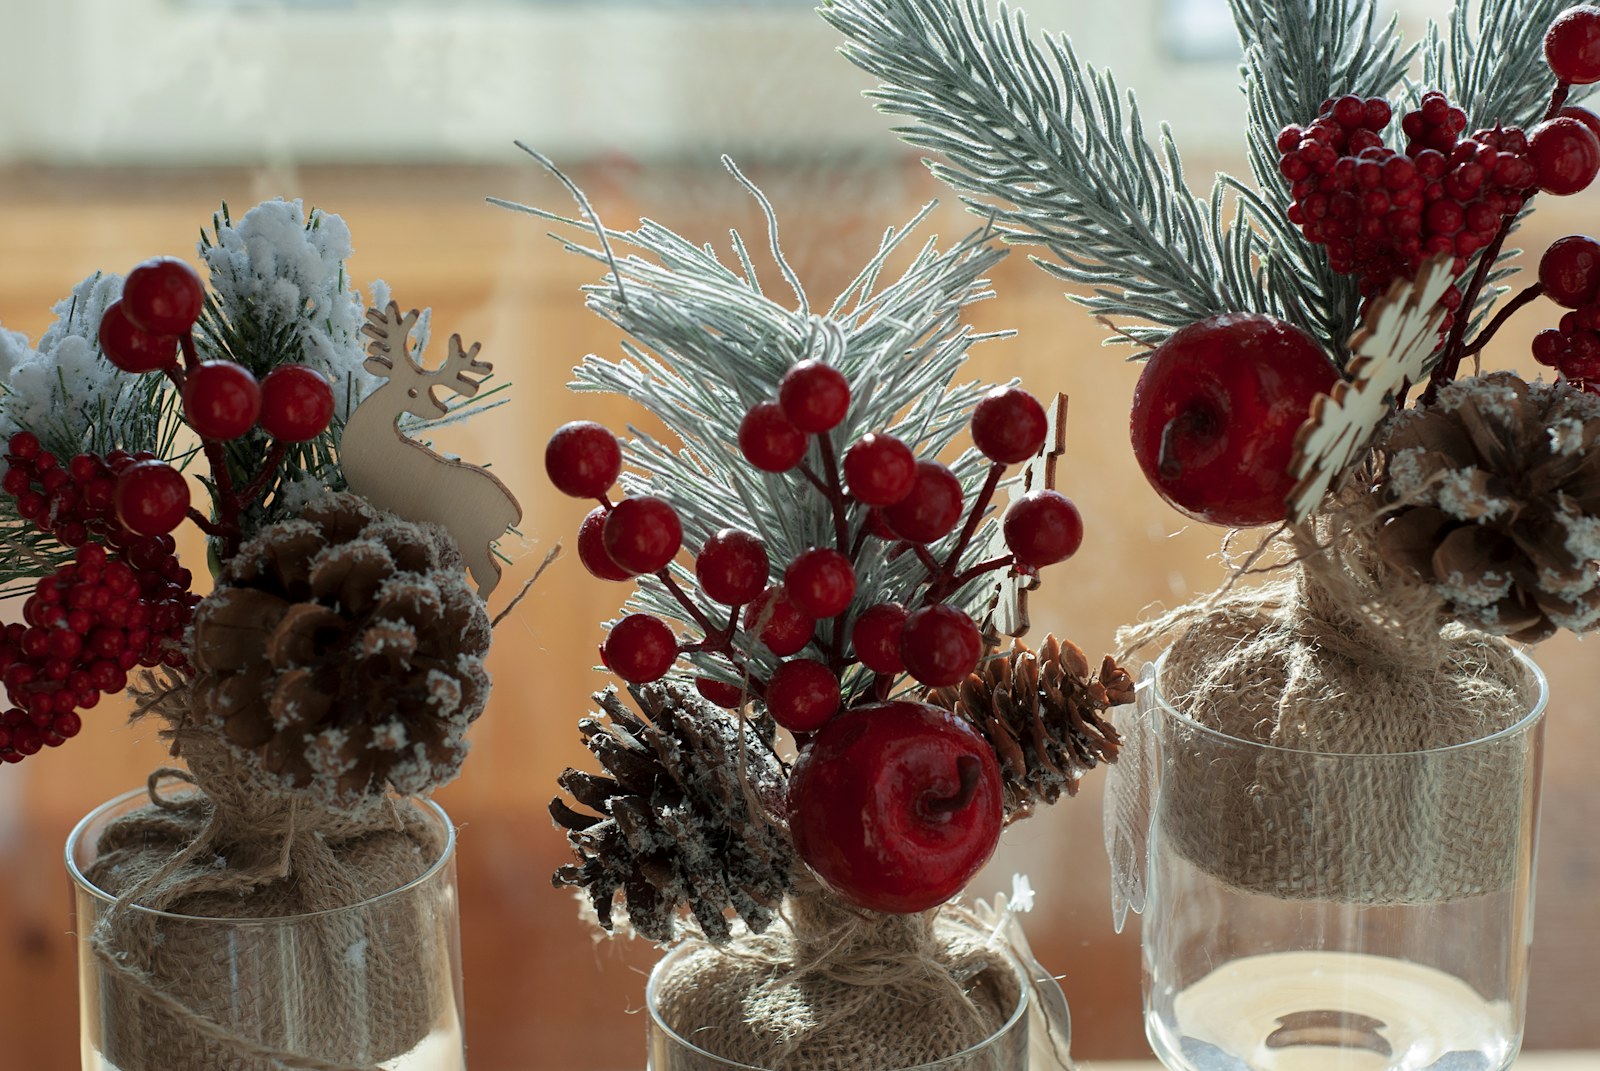
Low arrangements are perfect for dinner because nobody has to talk around them. Fill a few small jars with pine sprigs, a pine cone or two and bright red berry picks, then line them down the table or cluster them in the middle. The red and green pop against a white tablecloth and look like they came from a florist. Faux berries last the whole season, so you can make these in November and forget about them. Would you use jars or tiny vases?
You will need: Small glass jars or vases, pine sprigs, small pine cones, red berry picks, twine or ribbon.
How to make it: 1. Trim pine sprigs to about twice the height of the jar. 2. Add the greenery first, then push in berry picks and a cone. 3. Tie twine around each jar and arrange them in a line or cluster.
Silver Tray With Mercury Glass Ornaments
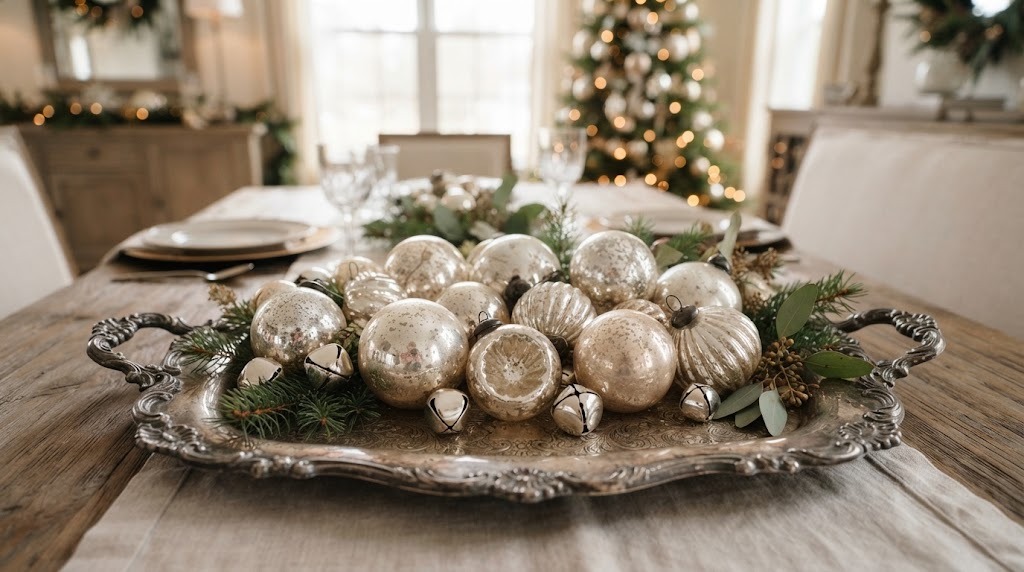
A thrift store silver tray is one of the best finds for holiday decorating. Fill it with mercury glass ornaments, a few silver bells and a little greenery, and you get an old Hollywood look in minutes. This MSN video on faking high end Christmas decor shows how far cheap ornaments can go. Mix sizes and finishes so the light bounces around. Do you have a silver tray hiding in a cabinet?
You will need: A silver tray, mercury glass or mirror finish ornaments, small silver bells, sprigs of fir or eucalyptus.
How to make it: 1. Polish the tray so it shines. 2. Pile the largest ornaments in the center. 3. Fill in with smaller ornaments, bells and short sprigs of greenery.
Evergreen Runner With Mini Trees
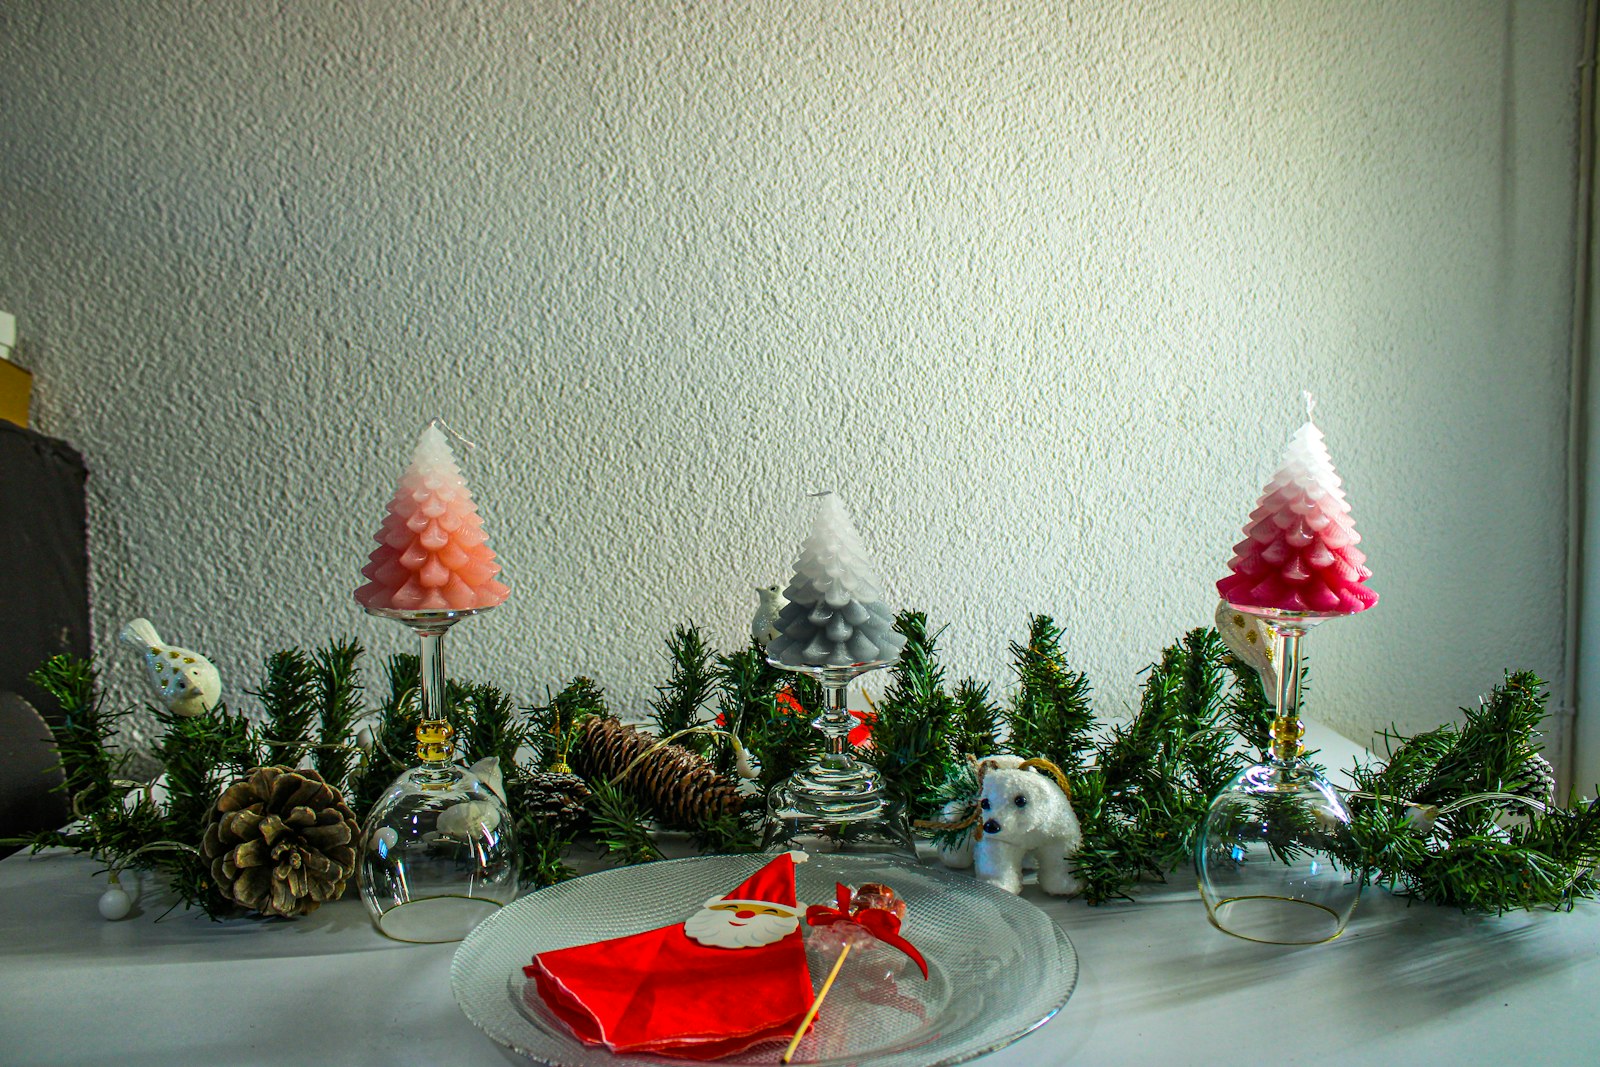
A garland runner makes a long table feel finished from end to end, and it is one of the simplest DIY Christmas centerpieces to set up. Lay a faux or fresh evergreen garland down the middle, then tuck in pine cones and a few little trees made from beads or cones. Keep everything low so it does not block faces. If you use a fresh garland, mist it each morning to keep it green. You can also wrap it with battery lights for extra sparkle at night. Would you go fresh or faux?
You will need: A faux or fresh evergreen garland, pine cones, small decorative trees, optional battery fairy lights.
How to make it: 1. Lay the garland down the center of the table and fluff the branches. 2. Tuck pine cones every few inches. 3. Set the mini trees along the garland in a loose pattern.
Rustic Crate DIY Christmas Centerpieces With Fairy Lights
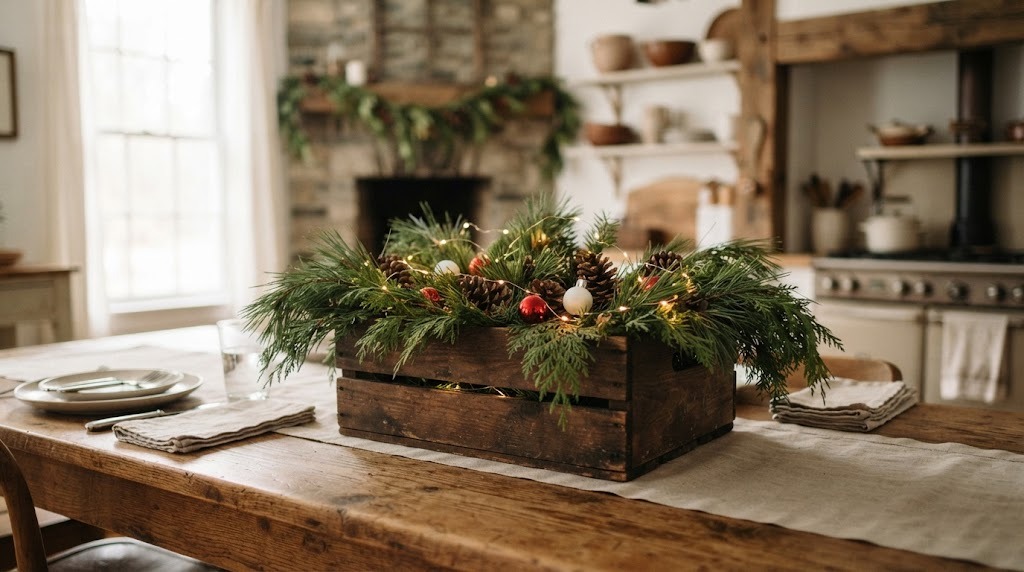
A small wooden crate gives your table that farmhouse look everyone is copying this year. Craft stores and dollar stores sell little crates for a couple of dollars, and you can stain them darker with a wipe of brewed coffee or wood stain. Fill the crate with greenery, pine cones, a couple of ornaments and a strand of battery fairy lights. It is low, sturdy and easy to move when the food arrives. Want to stencil your family name on the side?
You will need: A small wooden crate, wood stain or brewed coffee, greenery, pine cones, a few ornaments, battery fairy lights.
How to make it: 1. Stain the crate and let it dry. 2. Fill it with greenery so branches spill over the sides. 3. Add pine cones and ornaments, then weave the fairy lights through.
Velvet Ribbon Wrapped Bud Vases
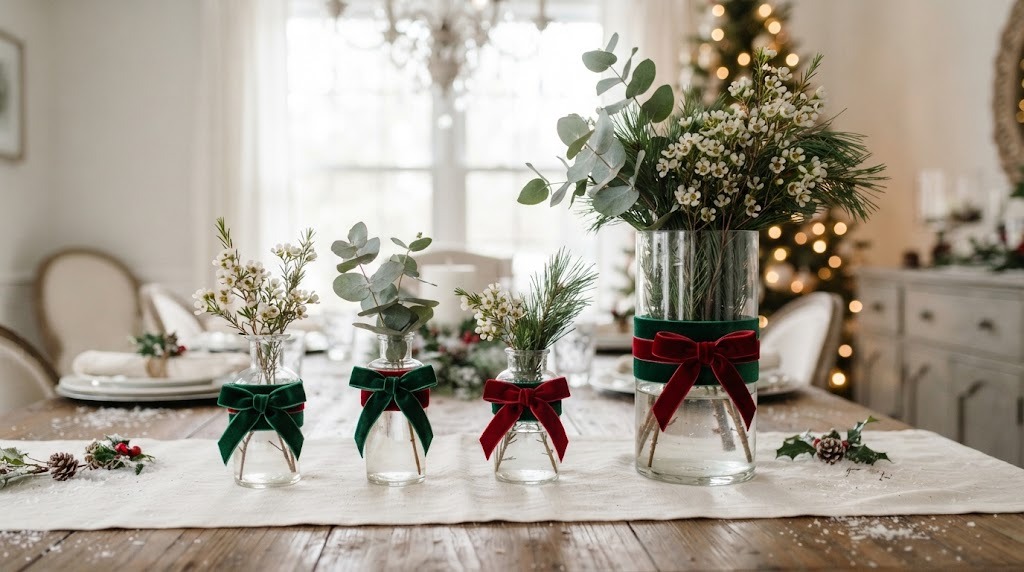
Velvet ribbon is having a big moment, and it is the fastest way to make plain glass look luxe. Wrap a few bud vases and one tall cylinder with emerald and deep red velvet bows, then add white waxflower, eucalyptus or pine. Group them in odd numbers for a natural look. Dollar store vases and a single roll of ribbon can dress a whole table, which is why this is our favorite of all the DIY Christmas centerpieces here. Which colors would you choose for your table this year?
You will need: Glass bud vases, a tall cylinder vase, velvet ribbon in green and red, white waxflower or baby breath, eucalyptus, pine sprigs, scissors.
How to make it: 1. Tie a velvet bow around the middle of each vase and trim the ends at an angle. 2. Fill each vase with water and a few stems. 3. Group them in odd numbers down the center of the table.