Vintage Kitchen Features: 15 Clever Old Ideas People Want Back in Their Homes
Vintage kitchen features are suddenly the talk of the internet. A short film from 1949 about a step saving kitchen started making the rounds again this week, and viewers keep saying the same thing: old kitchens worked better. Grandma did not have fancy gadgets, but she had a slide out board, a bread drawer, a bin for potatoes and a place for every pot. Those simple ideas saved steps, space and money. Many of them are easy to add today with a few boards, hinges and an afternoon of work. Here are 15 clever old kitchen ideas worth bringing back, each with a simple way to do it in your own home..
Vintage Kitchen Features That Worked Better Than Ours
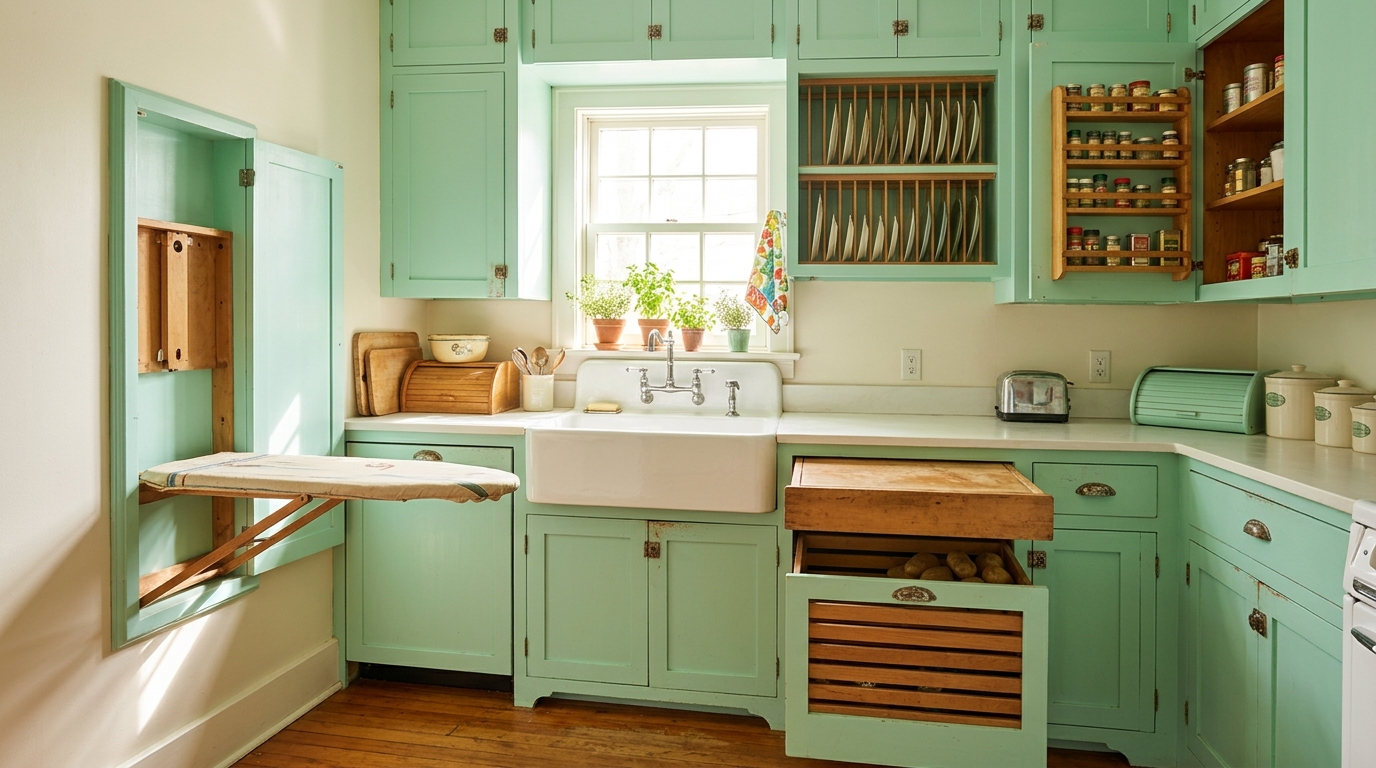
A short government film from 1949 about a step saving kitchen is going around again, and this story about a 1949 kitchen film shows how many people now say old kitchens simply worked better. Everything had a place, and the cook barely had to walk. Grandma had a board that slid out from under the counter, bins that tilted out for flour and a rack above the sink for drying plates. These vintage kitchen features were built for real daily cooking, not for show. The good news is that you can add most of them yourself with simple wood projects. Which one do you remember from your grandparents’ house..
You will need: A tape measure, a notebook and a walk around your kitchen to spot wasted space.
How to make it: 1. Stand at your sink, stove and fridge and notice how many steps you take. 2. Write down what you reach for most. 3. Pick one idea below that saves steps. 4. Start with the cheapest and easiest.
A Pull Out Cutting Board Under the Counter
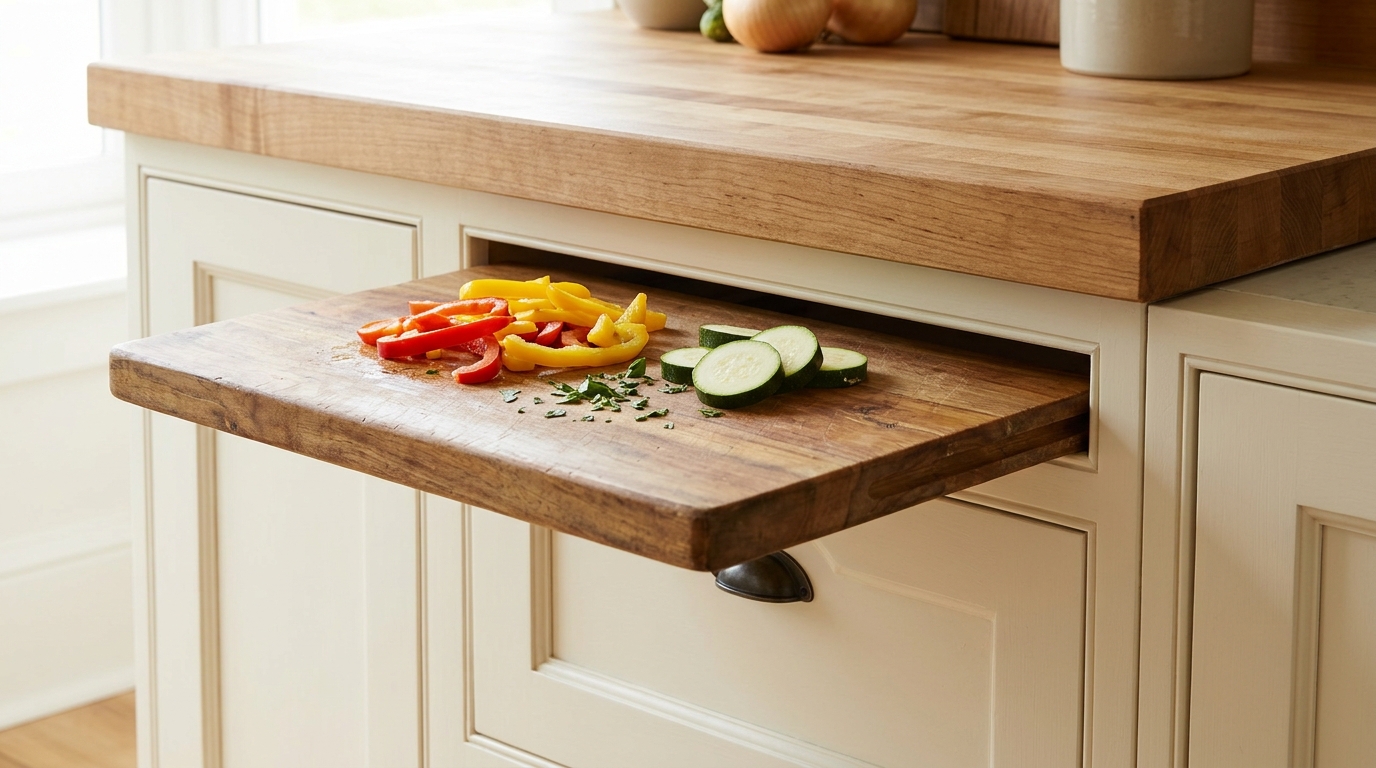
Old kitchens often had a wide wooden board that slid out from just below the counter. It gave the cook extra work space in seconds and then disappeared again. Today it is perfect for small kitchens where counter space is tight. You can add one by fitting a board onto simple drawer slides inside a top drawer opening. It also makes a handy spot for kids to help with chopping and baking. Where in your kitchen could you use a little more counter?
You will need: A hardwood cutting board, a pair of drawer slides, screws, a drill and a tape measure (adult help).
How to make it: 1. Remove a shallow top drawer or use an empty cabinet opening. 2. Mount drawer slides on each side. 3. Screw the slides to the edges of the cutting board. 4. Slide it in and test that it pulls out smoothly.
Vented Potato and Onion Bins
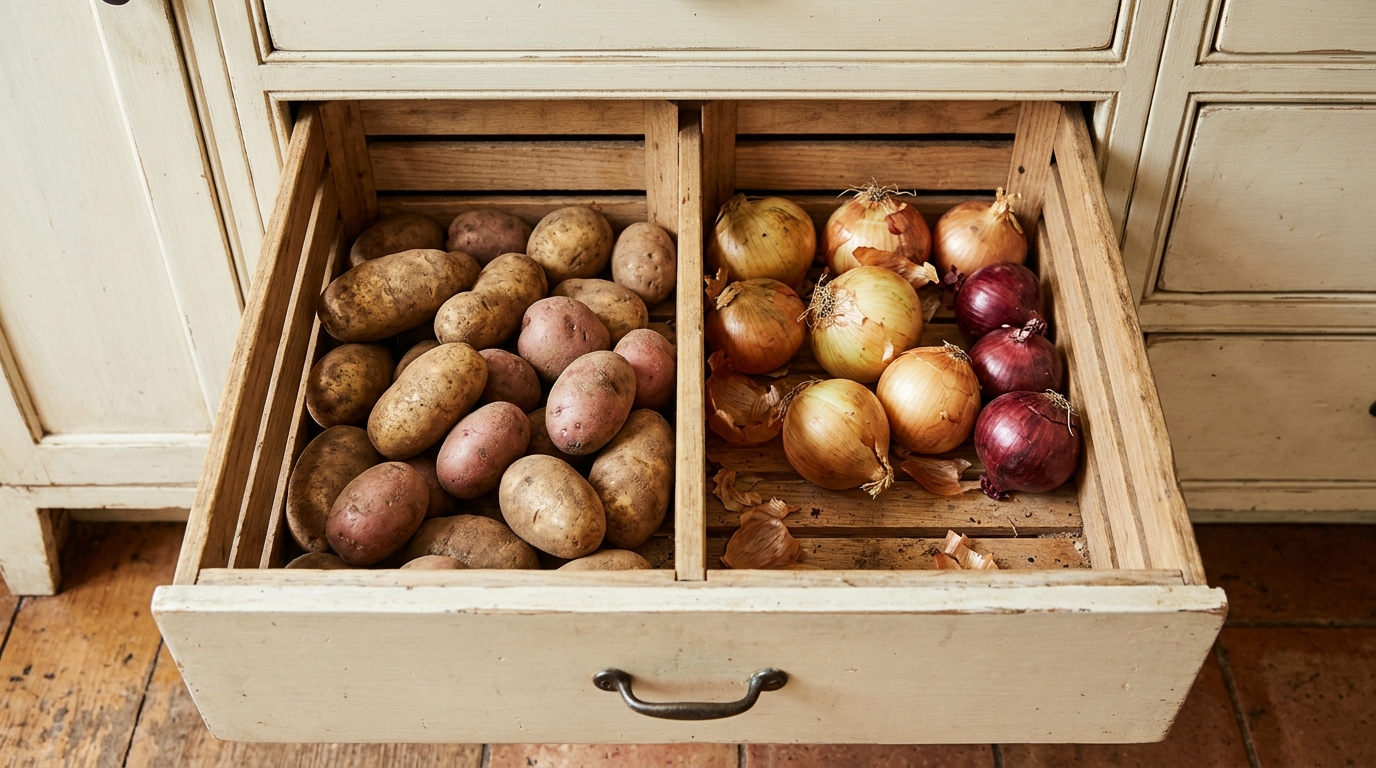
Grandma never kept potatoes in a plastic bag. They lived in a dark, airy bin with slats so air could move around them. Many vintage kitchens had a drawer just for potatoes and onions, often with a divider to keep them apart. You can make your own from a wooden crate or by swapping a drawer front for slats. It keeps them fresh longer and frees up the pantry. Of all the vintage kitchen features on this list, this one may save you the most money. Do you store your potatoes in the dark?
You will need: A wooden crate or a deep drawer, thin wooden slats, wood glue, small nails and a divider board.
How to make it: 1. Measure your drawer or crate. 2. Replace a solid side or bottom with slats spaced a finger apart. 3. Add a divider in the middle. 4. Keep potatoes on one side and onions on the other.
Tilt Out Flour and Sugar Bins
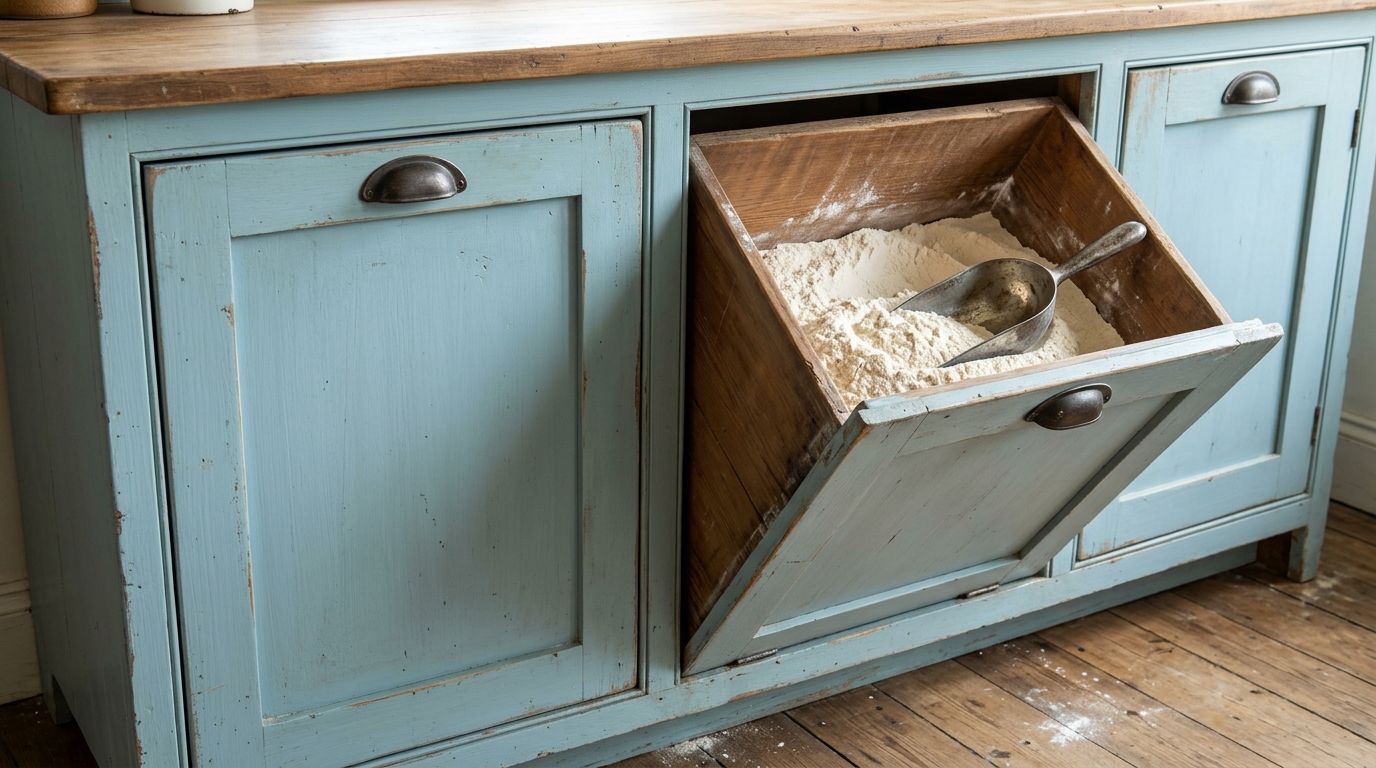
Before big plastic canisters, many kitchens had flour and sugar bins built right into the lower cabinets. You tipped the bin forward, scooped what you needed and pushed it closed. Bakers loved it because there was no heavy bag to lift. Today you can make a tilt out bin with a simple wooden box on hinges inside a cabinet. With holiday baking coming up, this one will get a lot of use. How much flour do you go through in December?
You will need: A wooden box that fits your cabinet, two hinges, a small chain or stop, a food safe liner and a scoop.
How to make it: 1. Build or buy a wooden box that fits inside a lower cabinet. 2. Attach it to the cabinet floor with hinges along the bottom front edge. 3. Add a short chain so it only tips partway. 4. Line it with a food safe bin and fill it.
Vintage Kitchen Features for Bakers: A Bread Drawer
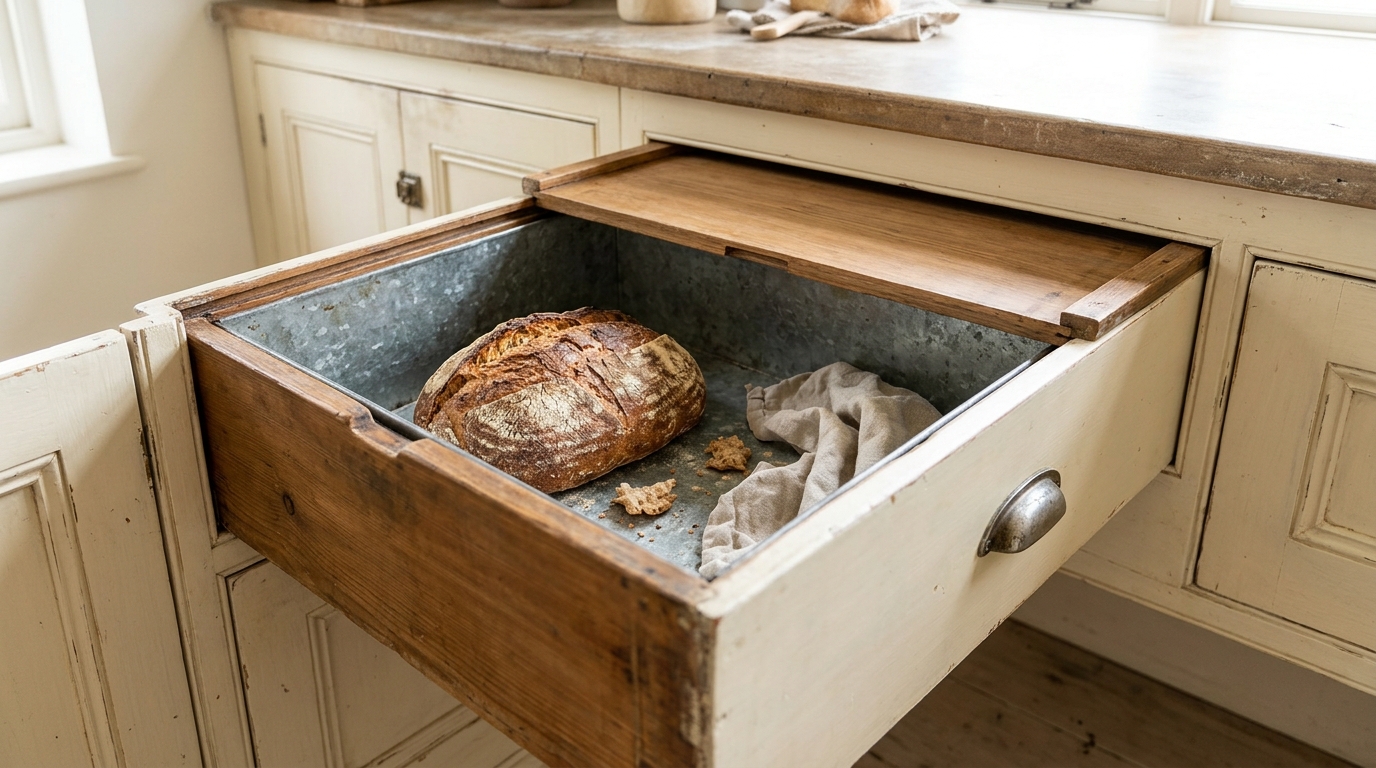
A bread drawer was a deep drawer lined with metal and topped with a sliding lid that kept bread fresh and away from pests. It is one of those vintage kitchen features people forgot about, yet it makes perfect sense. You can turn a deep drawer into one by adding a thin sliding board on top and a removable liner inside. Your counter stays clear, and the loaf stays soft for days. Do you bake bread at home or buy it fresh each week?
You will need: A deep drawer, a thin wooden board cut to size, two small wooden strips and a metal or food safe liner.
How to make it: 1. Glue two thin strips along the inside top edges of the drawer. 2. Cut a board to slide along the strips as a lid. 3. Drill a finger hole in the board. 4. Add a liner and store your bread inside.
A Fold Down Ironing Board in the Wall
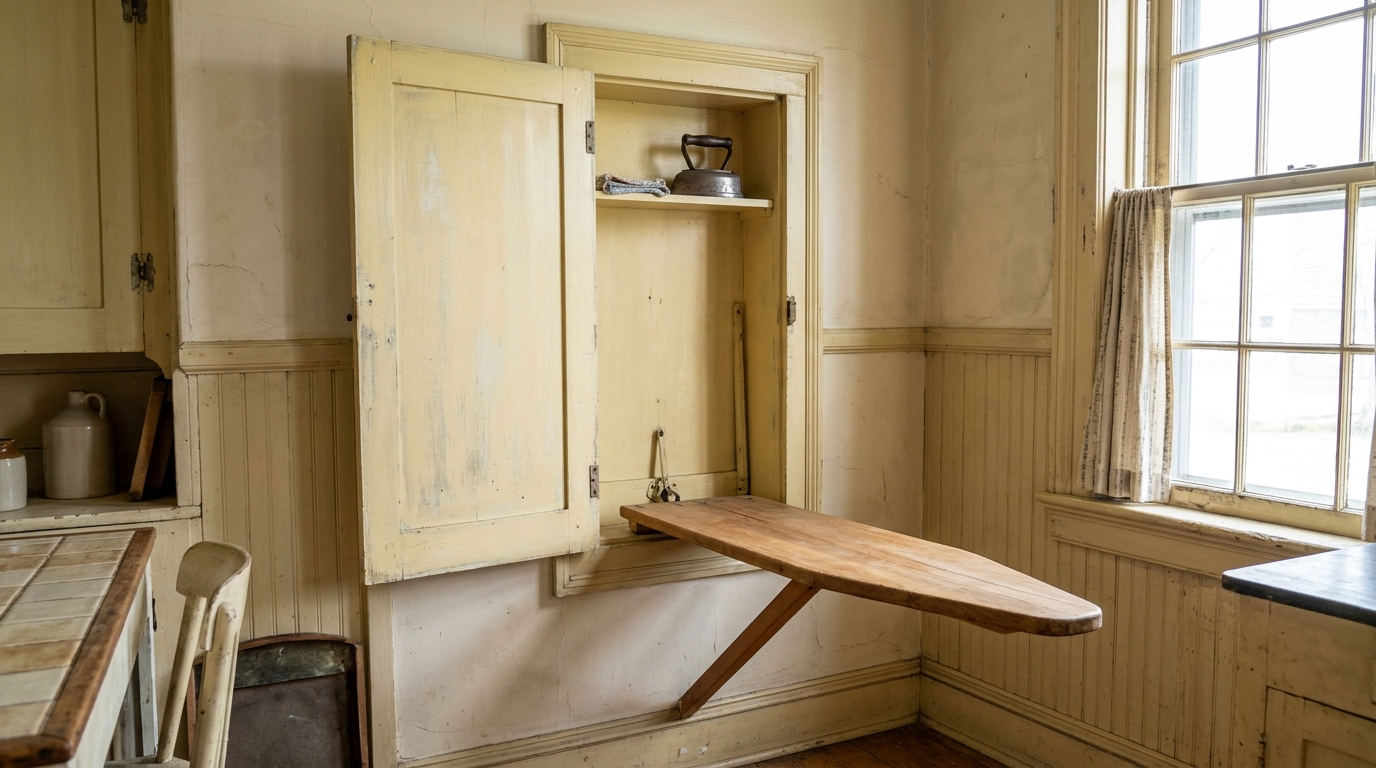
Many homes built in the 1930s and 1940s had a narrow cabinet in the kitchen wall that hid an ironing board. You opened the door, folded the board down and ironed right there. People now hunt for old houses with these, and they are easy to recreate. A shallow cabinet on the wall with a hinged board inside saves you from wrestling a bulky board out of the closet. It also works for a laundry room. Would you use one in your home?
You will need: A shallow wall cabinet or a small built in box, a hinged board or wall mount ironing board kit and screws (adult help).
How to make it: 1. Find a stud and mount a shallow cabinet on the wall. 2. Fit the ironing board kit inside following its directions. 3. Add a small shelf for spray starch. 4. Close the door when you are done.
A Step Stool Hidden in the Toe Kick
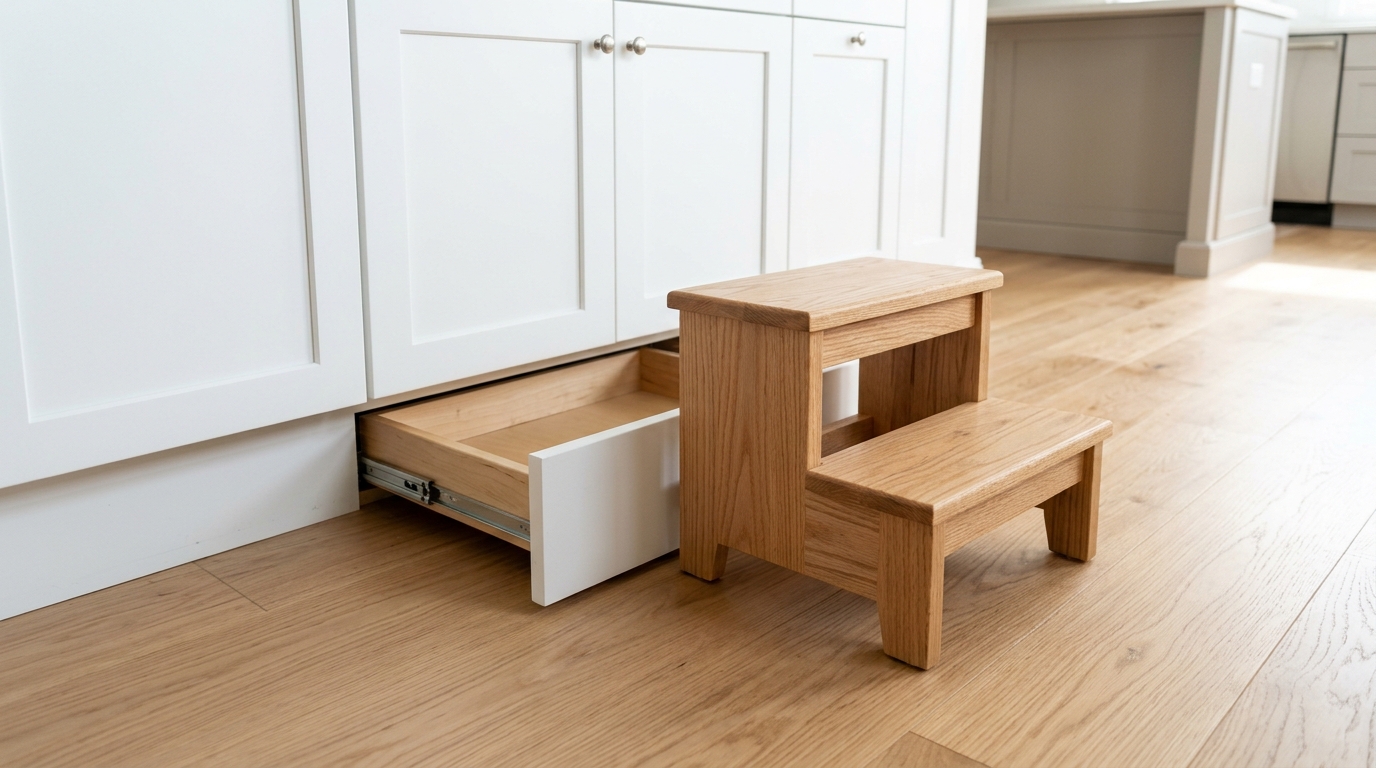
The space under your lower cabinets is wasted in most kitchens. Some older and custom kitchens tucked a little step stool or a flat drawer into that toe kick. It is perfect for kids who want to reach the counter or for grabbing things from top shelves. You can buy toe kick drawer kits, or keep a slim folding stool tucked against the cabinet. Small ideas like this make a kitchen feel thoughtfully planned. Who in your house would use it most?
You will need: A toe kick drawer kit or a slim folding step stool, a tape measure and a screwdriver (adult help).
How to make it: 1. Measure the height and depth of your toe kick space. 2. An adult removes the toe kick panel. 3. Install the drawer kit following its directions. 4. Store a flat step stool or baking sheets inside.
Spice Shelves Inside the Cabinet Doors
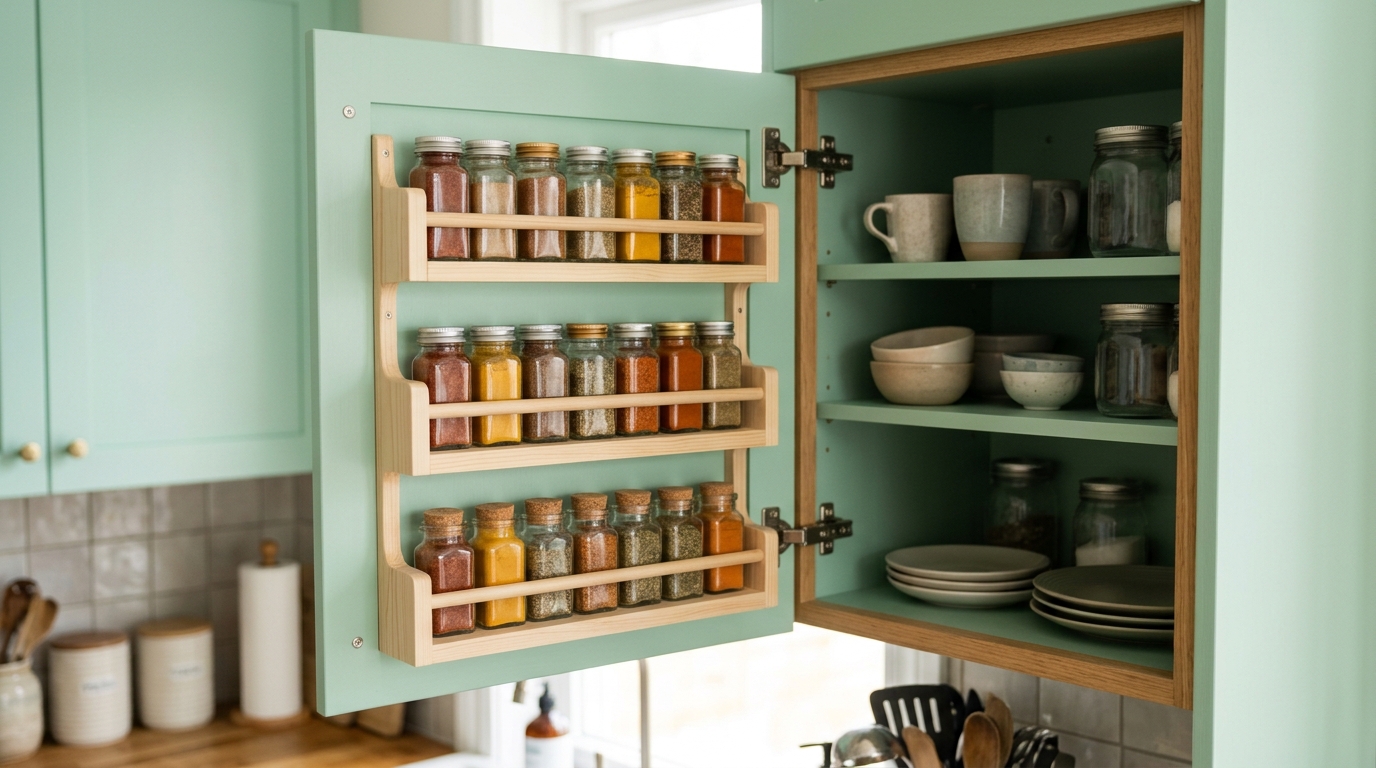
Old kitchen cabinets often had narrow shelves on the inside of the doors for spices and small jars. It uses space that would otherwise be empty, and you can see every jar at a glance. Make sure the shelves are shallow enough for the door to close. Little rails across the front keep the jars from tipping. It is one of the easiest vintage kitchen features to add in an afternoon. How many spice jars are hiding in your cupboards right now?
You will need: Thin wooden strips, small wood screws, wood glue, a drill and small glass spice jars (adult help).
How to make it: 1. Measure the inside of the cabinet door and the space behind it. 2. Build two or three shallow shelves from thin wood. 3. Add a thin rail across the front of each shelf. 4. Screw the shelves to the door and fill them with jars.
Vintage Kitchen Features From the Farm: A Pegboard Wall
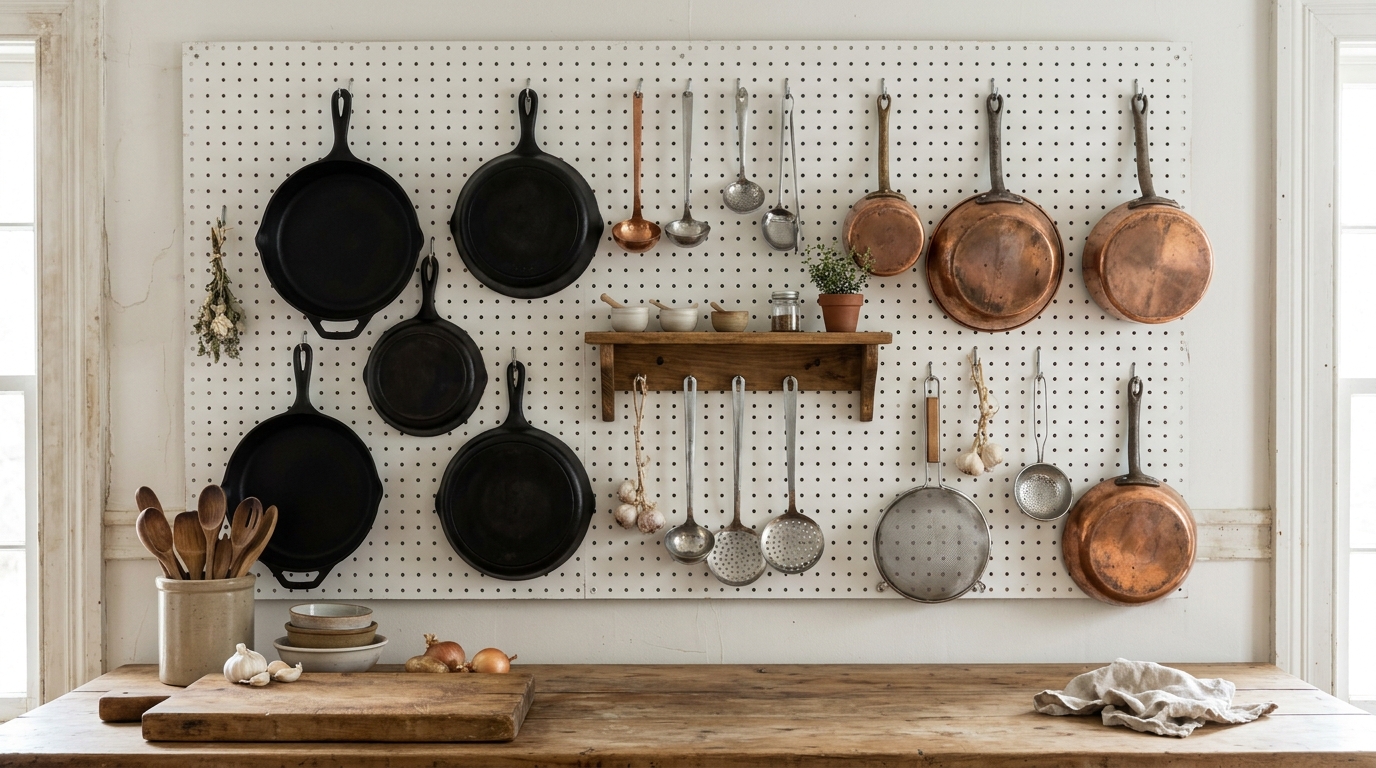
Old farm kitchens hung their pots and pans right on the wall, where they were easy to grab. A pegboard brings that look back and frees up crowded cabinets. Paint it white or a soft color, add hooks and arrange your pans so the ones you use most are at arm’s height. It looks charming, and you will never dig through a stack of pans again. Our grandma kitchen decor gallery has more ideas for that cozy old fashioned feel. Which pans would you hang first?
You will need: A pegboard sheet, wall spacers, screws, paint and pegboard hooks (adult help).
How to make it: 1. Paint the pegboard and let it dry. 2. Screw it to the wall with spacers behind so the hooks fit. 3. Add hooks in a loose grid. 4. Hang pans with heavy ones at the bottom.
Vintage Kitchen Features for Trays: Upright Slots
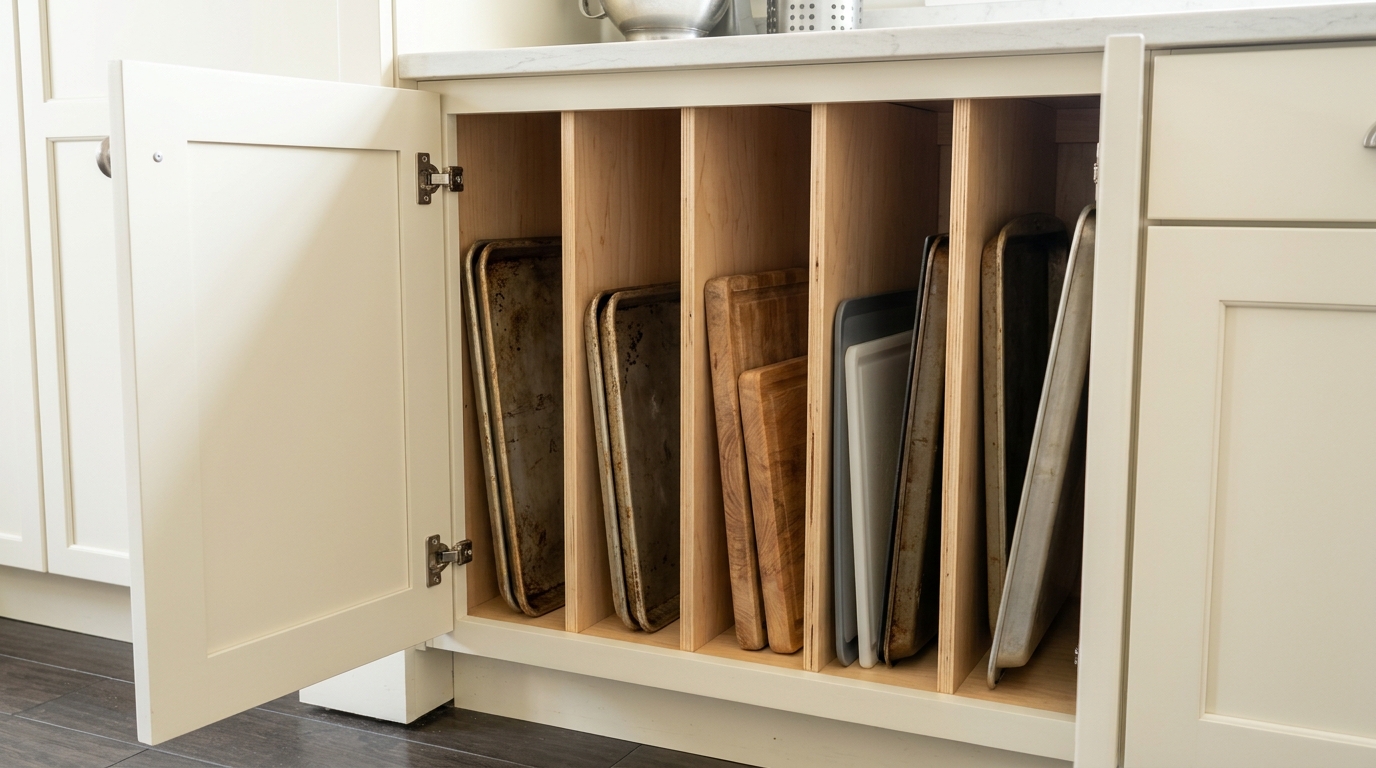
Baking sheets and trays are a pain to stack. Vintage kitchens often had a narrow cabinet with upright slots so each tray stood on its edge. You can add this to any lower cabinet with a few thin plywood dividers. Suddenly you can slide out exactly the tray you need without a crash. This is one of the vintage kitchen features that pays off every single time you bake. How many trays are fighting for space in your oven drawer?
You will need: Thin plywood panels, wood glue, small wooden strips, a saw and a drill (adult help).
How to make it: 1. Measure the cabinet height and depth. 2. Cut three or four plywood dividers to size. 3. Glue thin strips to the cabinet top and floor to hold each divider. 4. Slide the dividers in and stand your trays upright.
An Open Plate Rack Above the Sink
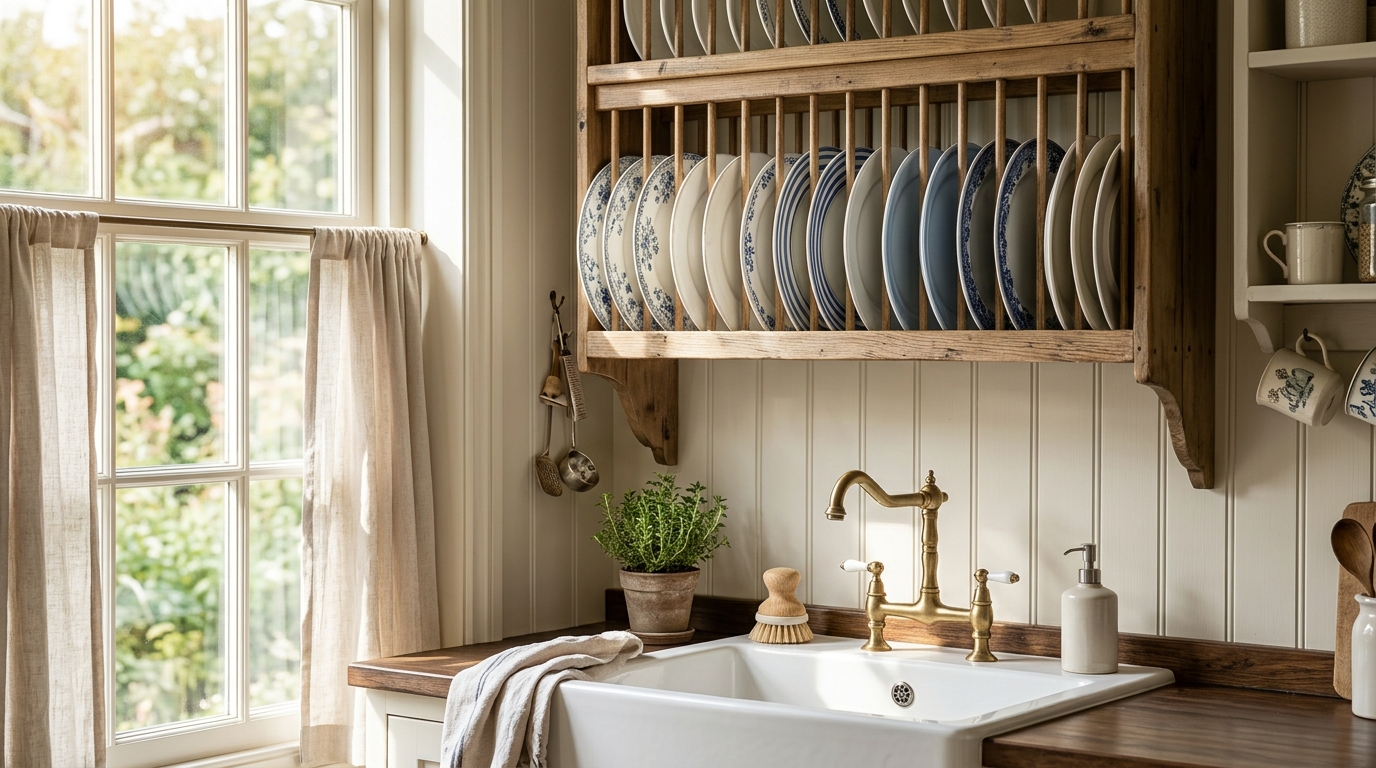
In many old European and farmhouse kitchens, plates went straight from washing into a rack above the sink to drip dry. No dish rack on the counter and no towel drying. The plates look pretty on display too. You can build a simple rack with two side boards and rows of wooden dowels. Hang it on the wall above the sink so drips fall into the basin. Would you use one for daily dishes or for your prettiest plates?
You will need: Two side boards, wooden dowels, wood glue, a drill, sealer and strong wall anchors (adult help).
How to make it: 1. Drill matching rows of holes in the two side boards. 2. Glue dowels between them to form slots. 3. Seal the wood against moisture. 4. Mount it firmly on the wall above the sink.
Glass Front Upper Cabinets
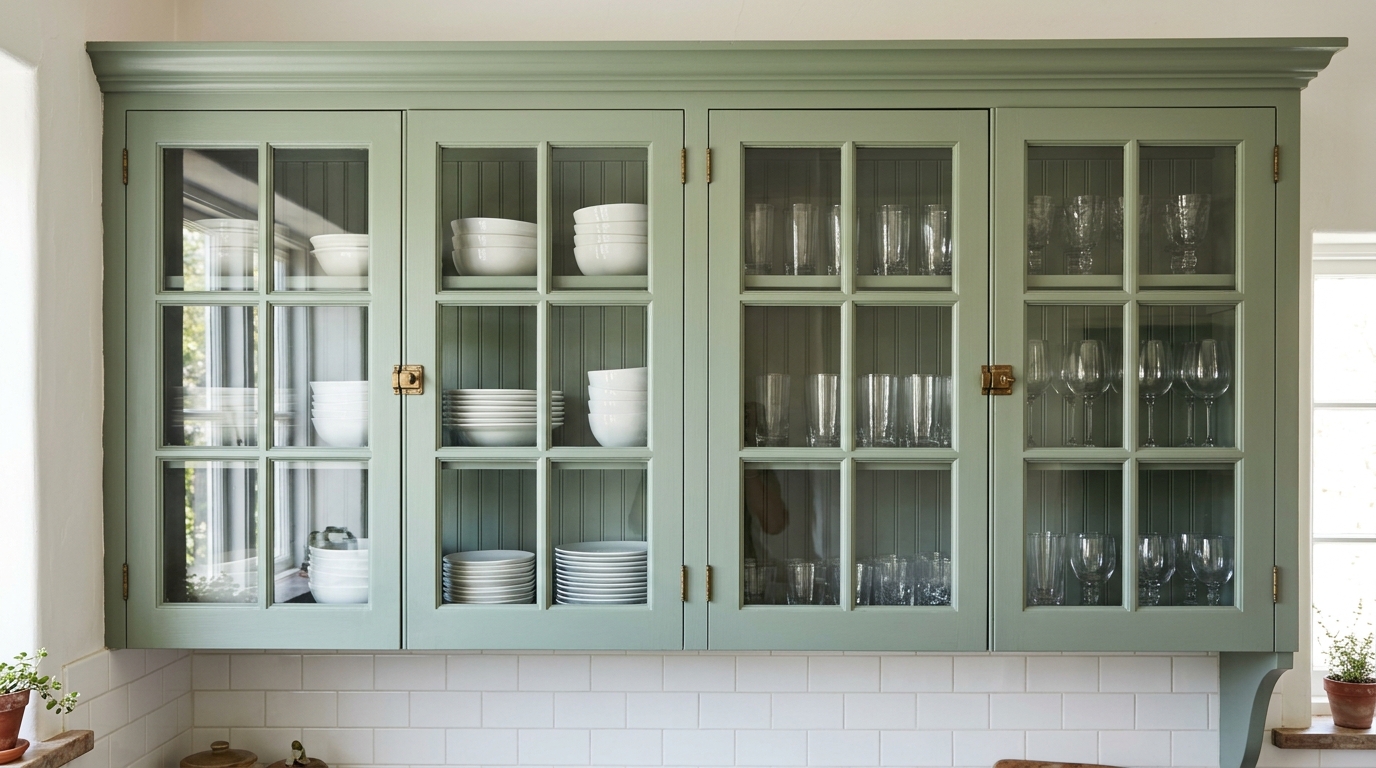
Glass front cabinets were common in old kitchens, and they are back in style. They make a kitchen feel lighter and let your favorite dishes show, which is why so many people list them among their favorite vintage kitchen features. You do not need new cabinets to get the look. Remove the center panel of a cabinet door and replace it with clear acrylic or have a glass shop fit a pane. Keep the dishes inside neat and stacked by color. Which cabinet would you open up first?
You will need: A cabinet door, clear acrylic or glass cut to size, glazing clips or small trim strips and a screwdriver (adult help).
How to make it: 1. Take the cabinet door off its hinges. 2. An adult carefully removes the flat center panel. 3. Fit the acrylic or glass and hold it with clips or trim. 4. Rehang the door and arrange the dishes.
Vintage Kitchen Features in the Corner: A Turntable Shelf
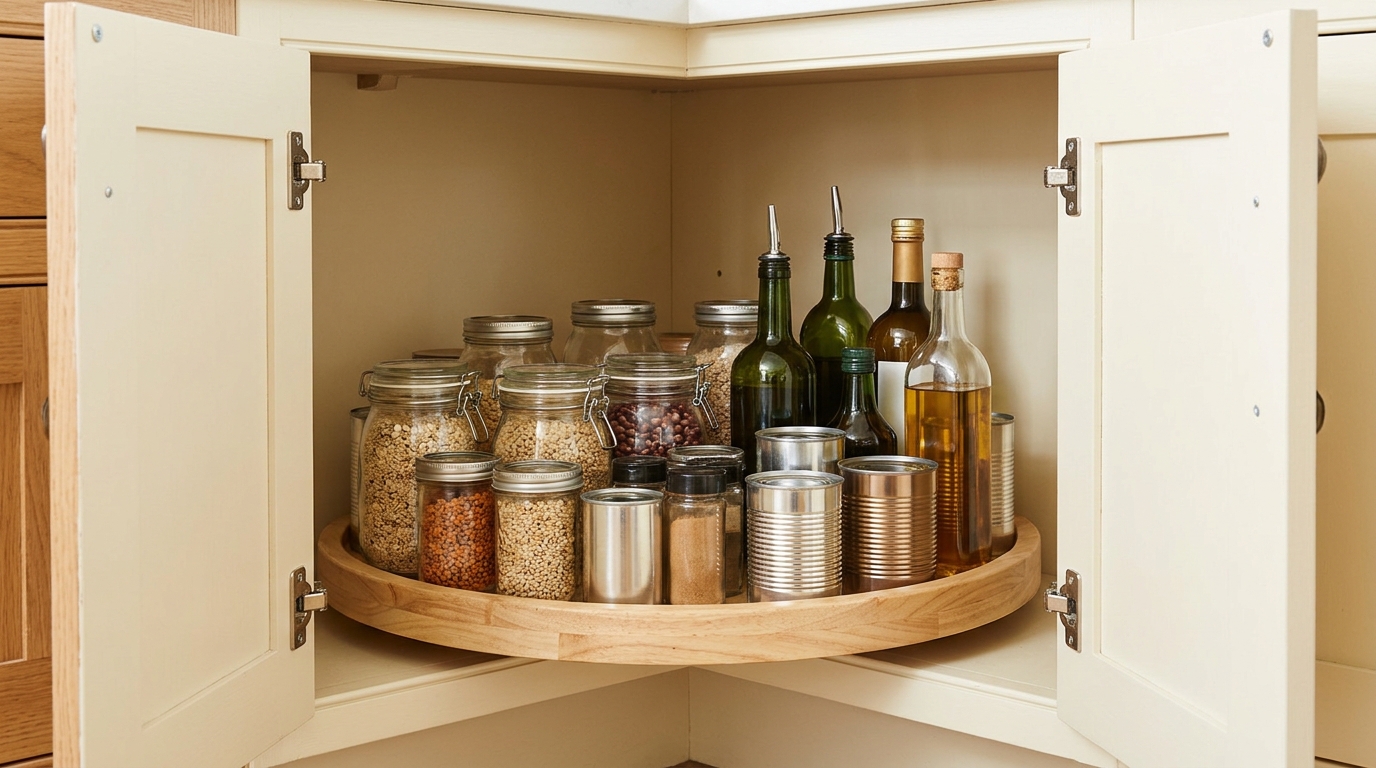
Corner cabinets swallow things forever. Mid century kitchens solved it with a round shelf that spins, so the back of the cabinet comes to you. You can add one with a round wooden board and a simple turntable bearing. It works for jars, cans, oils and spices. These vintage kitchen features turn the hardest spot in the kitchen into the easiest. What is hiding at the back of your corner cabinet right now?
You will need: A round wooden board, a turntable bearing, short screws and a small lip of wood or trim (adult help).
How to make it: 1. Measure the corner cabinet and cut a round board to fit. 2. Screw the turntable bearing under the board. 3. Add a small lip around the edge. 4. Set it in the cabinet and fill it.
A Breakfast Nook Bench With Hidden Storage
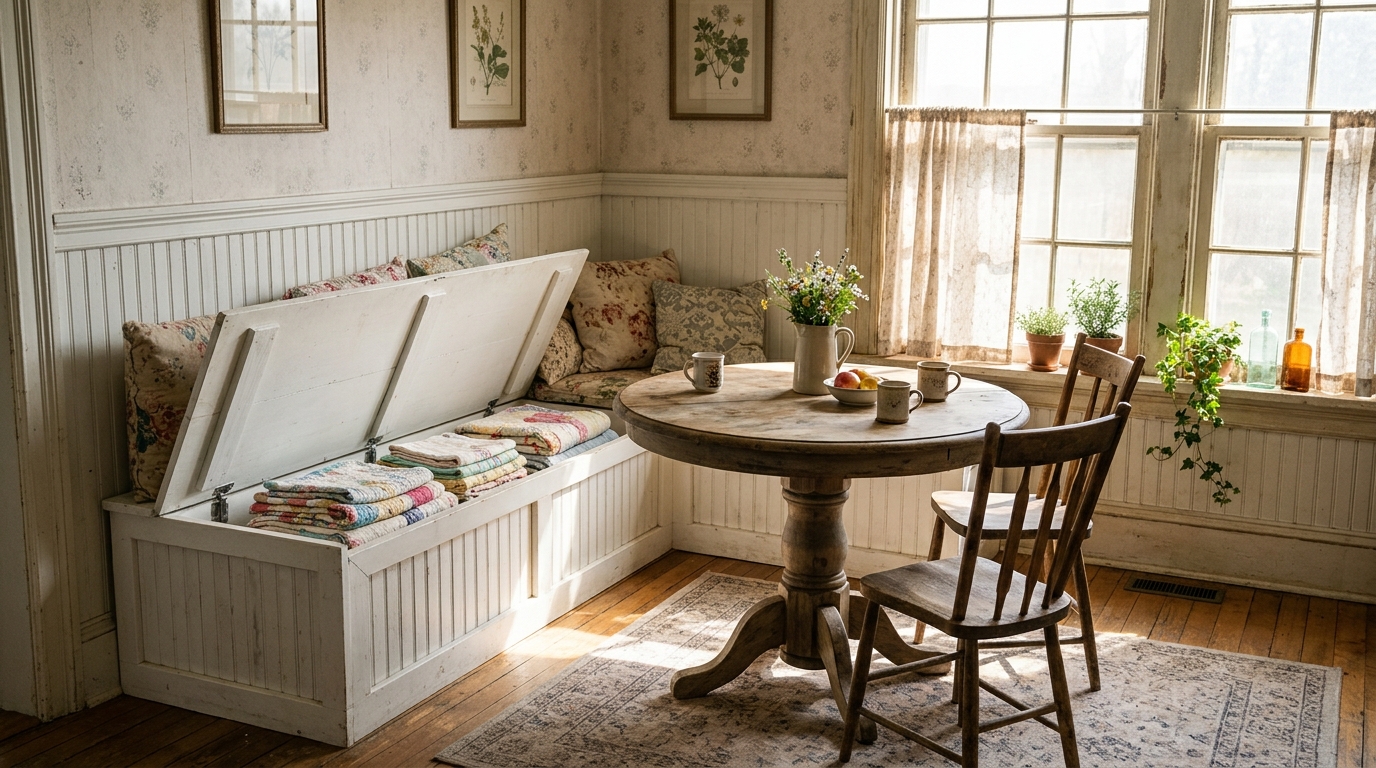
The breakfast nook was the heart of many old homes, a cozy corner for coffee, homework and long talks. Many of those built in benches had lift up seats with storage inside for linens, games or seasonal dishes. You can build a simple box bench with a hinged lid and add a cushion on top. It gives you seating and storage in one, and the hidden space is perfect for the big serving platters you only use at Thanksgiving. Wouldn’t a cozy nook be the perfect spot for your morning coffee?
You will need: Plywood, wood screws, a piano hinge, paint, a seat cushion and a drill (adult help).
How to make it: 1. Build a long plywood box to fit your wall. 2. Attach the top with a piano hinge. 3. Paint it and add a cushion. 4. Store table linens or holiday dishes inside.
A Chalkboard Grocery List on the Pantry Door
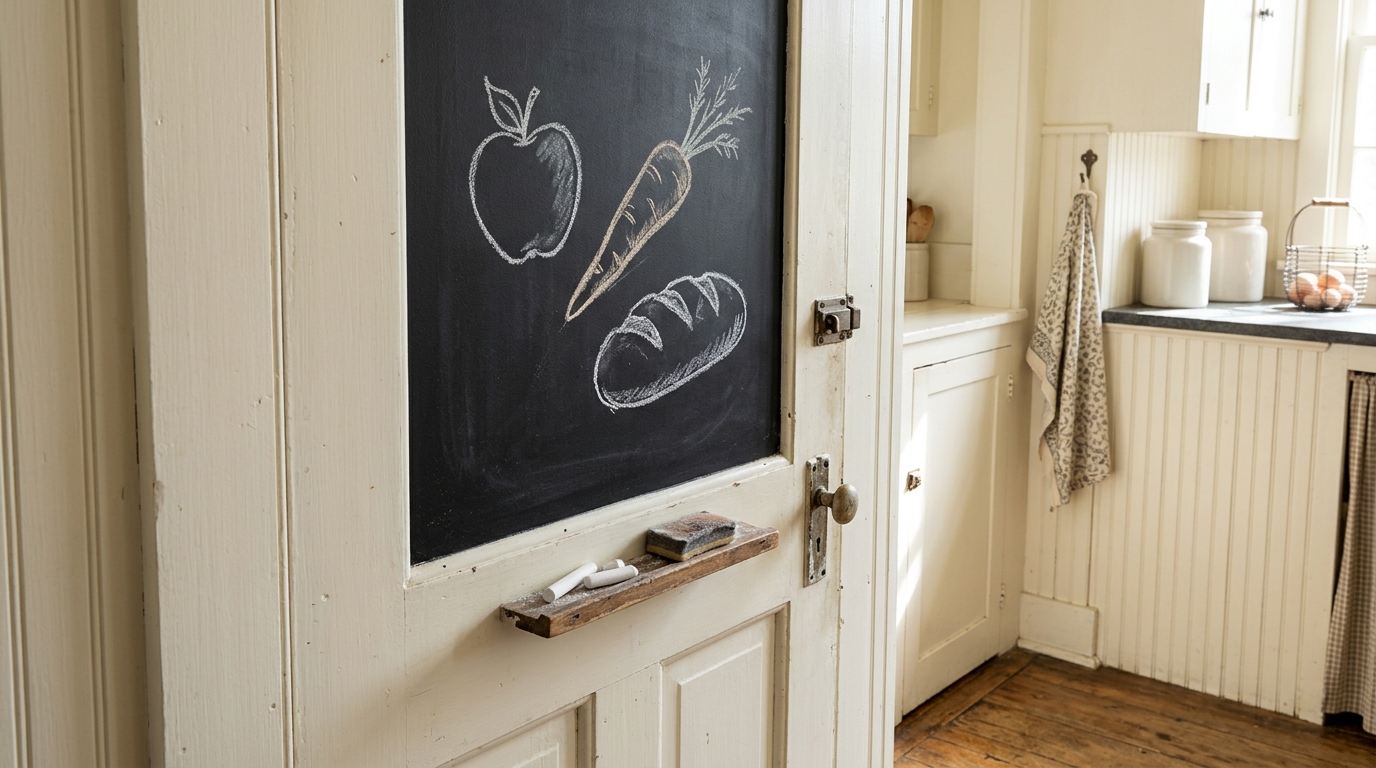
Grandma kept a little slate or chalkboard by the pantry for the grocery list, and everyone added to it as things ran out. Chalkboard paint makes it easy to bring back. Paint a panel of your pantry door, add a small ledge for chalk and you have a family list that never gets lost. Kids love drawing on it too. It is a small, sweet touch that makes the kitchen feel lived in, and it costs less than any other of these vintage kitchen features. What is always first on your grocery list?
You will need: Chalkboard paint, painter’s tape, a small roller, a thin wooden ledge, chalk and a damp cloth.
How to make it: 1. Tape off a rectangle on the pantry door. 2. Roll on two or three coats of chalkboard paint. 3. Screw a small ledge under it for chalk. 4. Rub chalk over it once and wipe it before first use.