Wood Slice Christmas Crafts: 15 Rustic Ideas That Look Expensive but Cost Pennies
Wood Slice Christmas Crafts are the cheapest way to fill your home with that warm farmhouse look you see in pricey holiday boutiques. A bag of birch rounds costs a few dollars, and every slice already has a pretty bark edge and natural rings, so half the beauty is done before you even start. With a little paint, a paper napkin, some twine and a bottle of decoupage glue, those plain circles turn into ornaments, coasters, signs and even a cake stand. They also make lovely gifts and sell well at holiday craft fairs, because everyone loves something handmade and natural. Below are 15 cozy ideas with simple supply lists and easy steps. Grab a mug of cocoa, clear the kitchen table and let’s start crafting..
Wood Slice Christmas Crafts Start With an Ornament Bundle
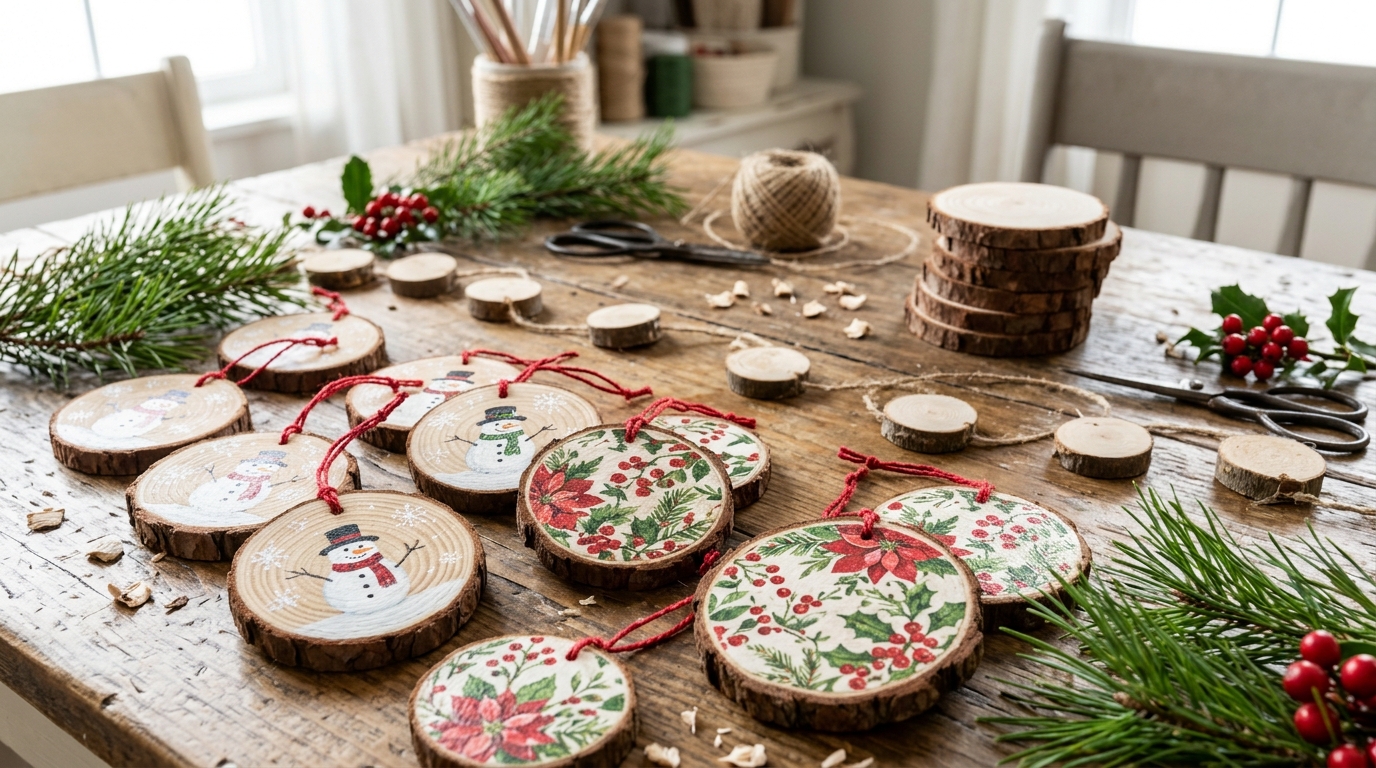
If you only try one of these Wood Slice Christmas Crafts, make a big bundle of mixed ornaments in one afternoon. Paint a few with snowmen, decoupage a few with pretty holiday napkins and tie them all with red twine. Laid out together on a farmhouse table, they look like something from a pricey boutique, yet the whole batch costs less than one store bought ornament. Tie six in a bundle with a sprig of pine and you have a gift or a craft fair best seller. How many would you make for your own tree..
You will need: A bag of 2.5 to 3 inch birch wood slices with holes, white and red acrylic paint, holiday paper napkins, decoupage glue, a foam brush, red twine and fine sandpaper.
How to make it: 1. Lightly sand the face of each slice and wipe off the dust. 2. Paint half of them with simple snowmen and decoupage the rest with napkin prints. 3. Seal everything with a thin coat of decoupage glue, let it dry and thread a twine loop through each hole.
Napkin Decoupage Ornaments
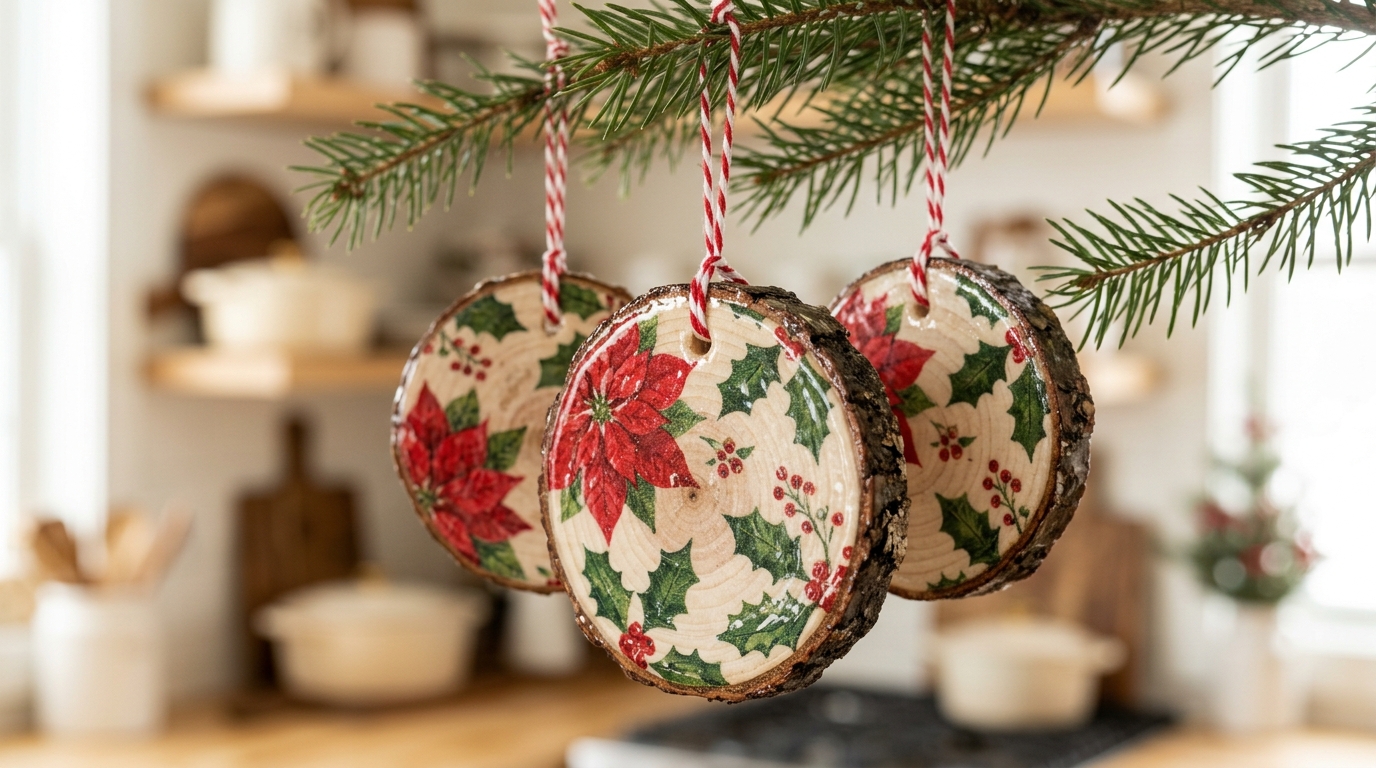
This is the idea that racked up hundreds of thousands of views on craft channels, and once you try it you will see why. A pretty paper napkin turns a plain round into a painted looking ornament in about ten minutes. Peel off the thin top layer of the napkin, smooth it on with decoupage glue and trim the edges along the bark. The wood grain peeks through and makes each one look hand painted. Which napkin print would you use first?
You will need: Wood slices, holiday paper napkins, decoupage glue in gloss or matte, a soft flat brush, small scissors, sandpaper and baker’s twine.
How to make it: 1. Separate the napkin and keep only the printed top layer. 2. Brush glue on the slice, lay the napkin on top and smooth it gently from the center out. 3. Trim the edges, add a top coat of glue and sand the rim lightly once dry for a clean edge.
Hand Painted Snowman Faces
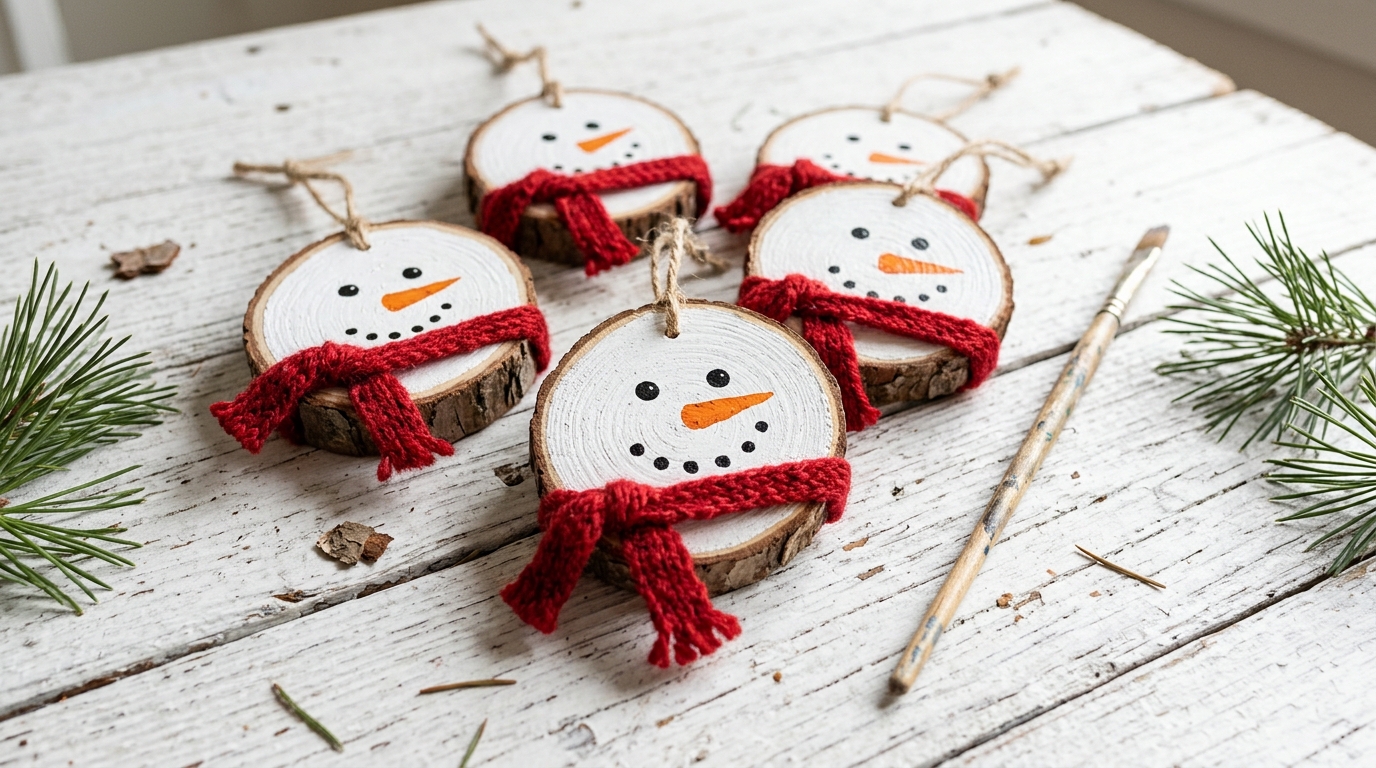
Snowmen are the easiest faces anyone can paint, which makes this a perfect craft for a cozy night in with friends or grandkids. Paint the face white, add two black dots for eyes, a little orange carrot nose and a dotted smile. The magic touch is a tiny scarf tied from red yarn, which makes each one look full of personality. No two come out the same, and that is the charm. Would you give yours a scarf or a little top hat?
You will need: Wood slices, white, black and orange acrylic paint, a small round brush, a toothpick or dotting tool, red yarn and craft glue.
How to make it: 1. Paint the face of each slice white and let it dry, then add a second coat. 2. Dot on the eyes and smile with a toothpick and paint a small orange nose. 3. Tie a short piece of red yarn into a scarf and glue it under the face.
Wood Slice Christmas Crafts With Pet Photos

Photo ornaments are some of the most loved Wood Slice Christmas Crafts, and a picture of the family dog or cat is the one everybody reaches for. A photo transfer medium lets the printed picture soak into the wood so the grain shows through, giving it a soft vintage look. Laser printed copies work best. These make wonderful gifts for grandparents and pet lovers, and they sell fast too. Whose furry face would you put on the tree this year?
You will need: Wood slices with a smooth face, a laser printed photo trimmed to size and printed in reverse, photo transfer medium, a foam brush, a damp sponge and a clear sealer.
How to make it: 1. Brush transfer medium over the slice and press the photo face down, smoothing out bubbles. 2. Let it dry overnight. 3. Rub the paper away with a damp sponge until the picture shows, then seal it.
Snowflake and Pine Coaster Sets
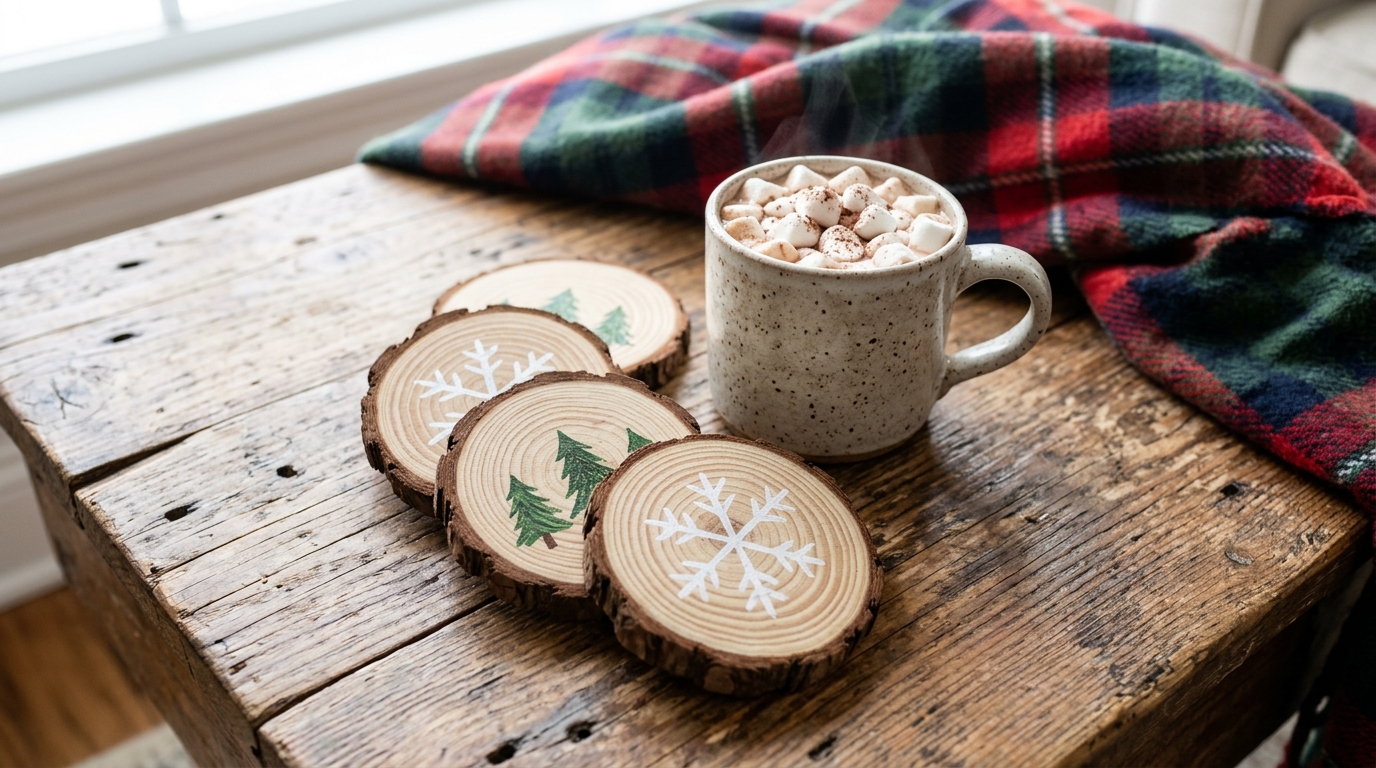
A set of four painted coasters is a gift that people actually use every day of winter. Thicker slices about half an inch deep work best, and a simple white snowflake or a little green pine tree is all you need. Seal the tops with a few coats of clear water based sealer so hot mugs and cold drinks will not leave rings. Tie a stack with twine and a sprig of pine and it is ready to give. Who on your list would love a cozy coaster set?
You will need: Four thick wood slices about 4 inches across, white and green acrylic paint, a fine brush, stencils if you like, clear water based sealer and felt pads.
How to make it: 1. Sand the tops smooth and wipe off the dust. 2. Paint a snowflake or pine tree on each and let it dry. 3. Add three thin coats of sealer and stick felt pads to the bottoms.
Wood Slice Advent Countdown Board
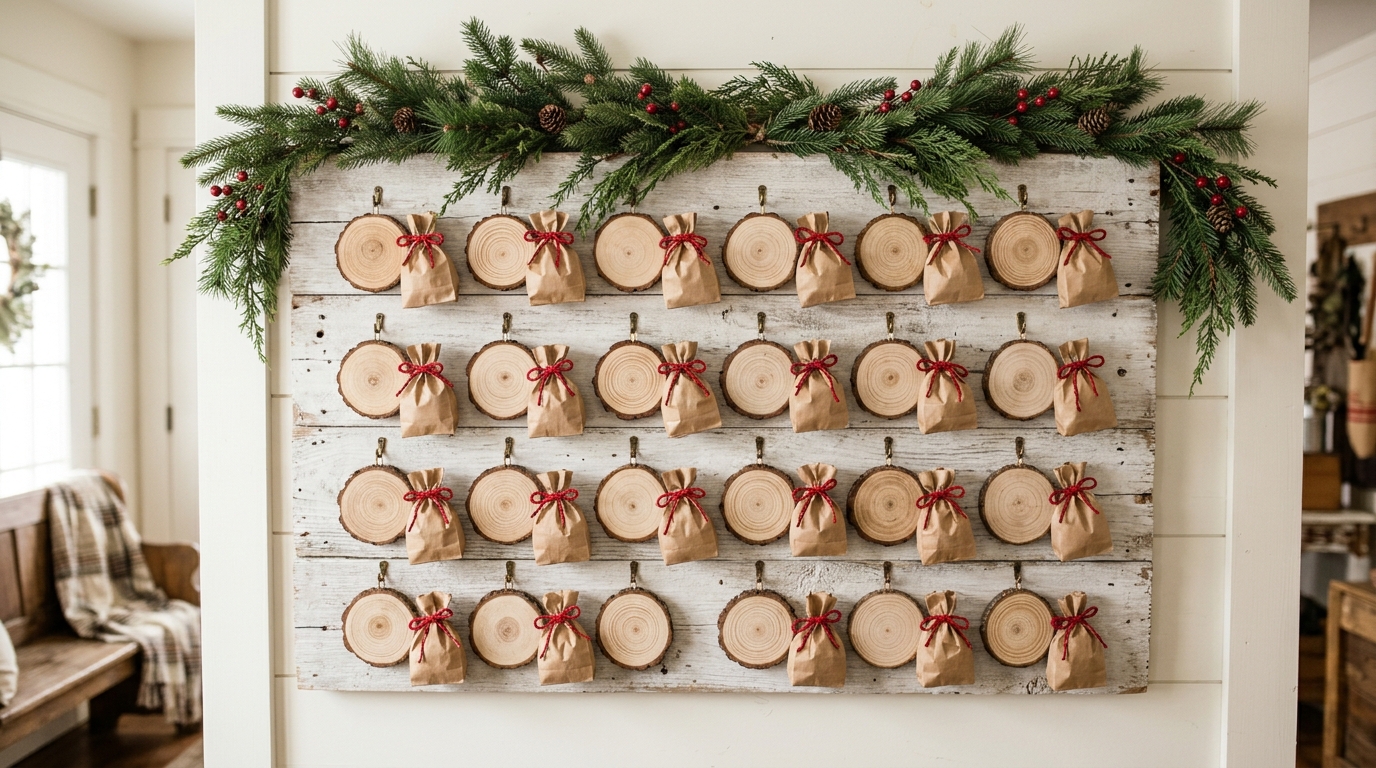
Counting down the days to Christmas becomes a family ritual with this rustic board. Screw 24 tiny brass hooks into a whitewashed plank, hang a small round on each one, and tie a little kraft paper treat bag under it. Number the slices with a paint pen or little stamps. Each morning someone gets to open a bag with a tiny treat, a joke or a kind note inside. It can come out every year for decades. What would you tuck into the first bag?
You will need: A whitewashed board or plank, 24 small wood slices with holes, 24 small brass cup hooks, a white paint pen, 24 kraft paper treat bags, red twine and a sawtooth hanger.
How to make it: 1. Mark a grid of 24 spots on the board and screw in the cup hooks. 2. Number the slices with the paint pen and hang one on each hook. 3. Fill the bags, tie them under the slices and hang the board at kid height.
Wood Slice Christmas Crafts as Mini Mantel Signs
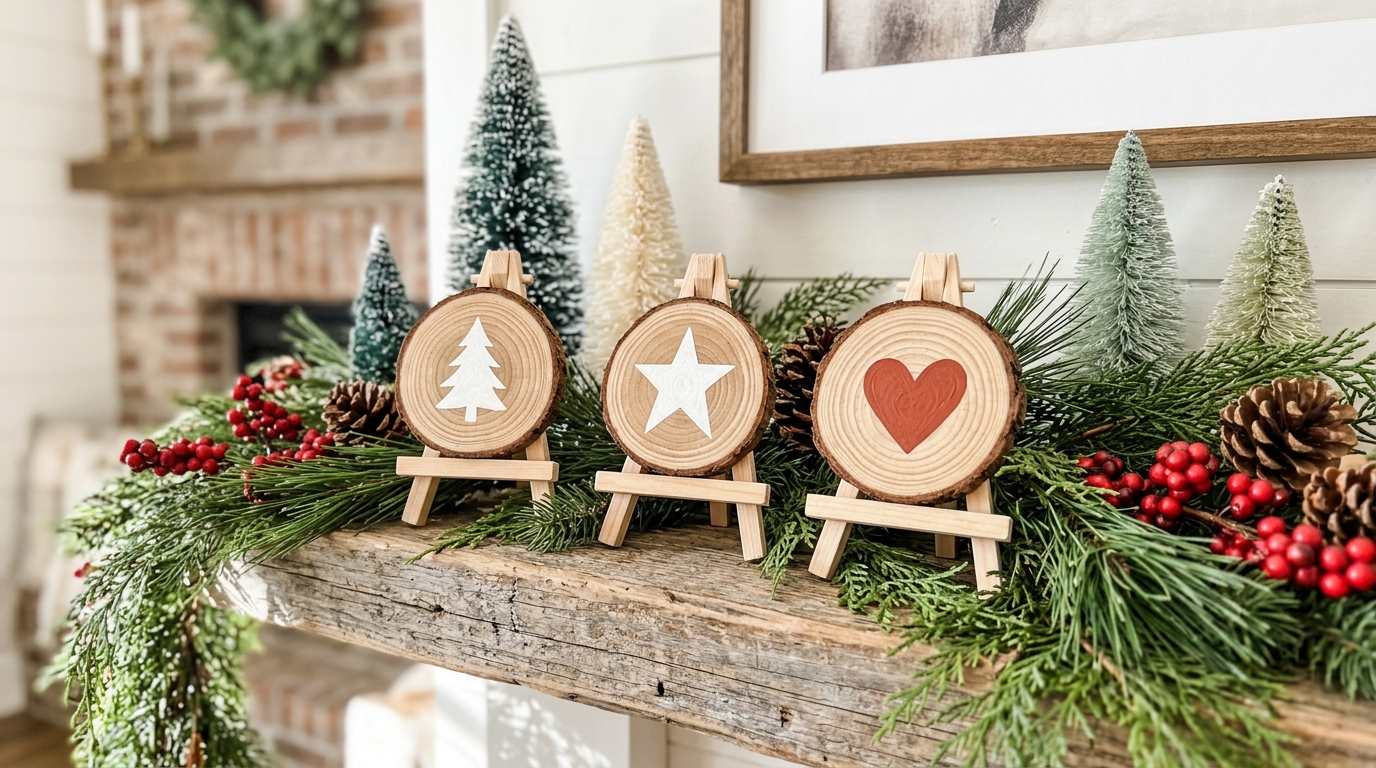
Little painted signs are among the fastest Wood Slice Christmas Crafts you can make, and they look adorable lined up on a mantel or shelf. Paint a simple white tree, a star and a red heart, or add a short word like joy or noel. Set each one on a tiny wooden easel from the craft store and tuck them into your pine garland. They also make sweet teacher gifts and sell well in sets of three. Which three symbols would you paint?
You will need: Three large wood slices, mini wooden easels, white and red acrylic paint, a small flat brush, a pencil and simple stencils if you like.
How to make it: 1. Sketch the shapes lightly with a pencil or use a stencil. 2. Paint them in white and red with two thin coats. 3. Seal the fronts, set the rounds on the easels and style them with greenery.
Rustic Mantel Garland
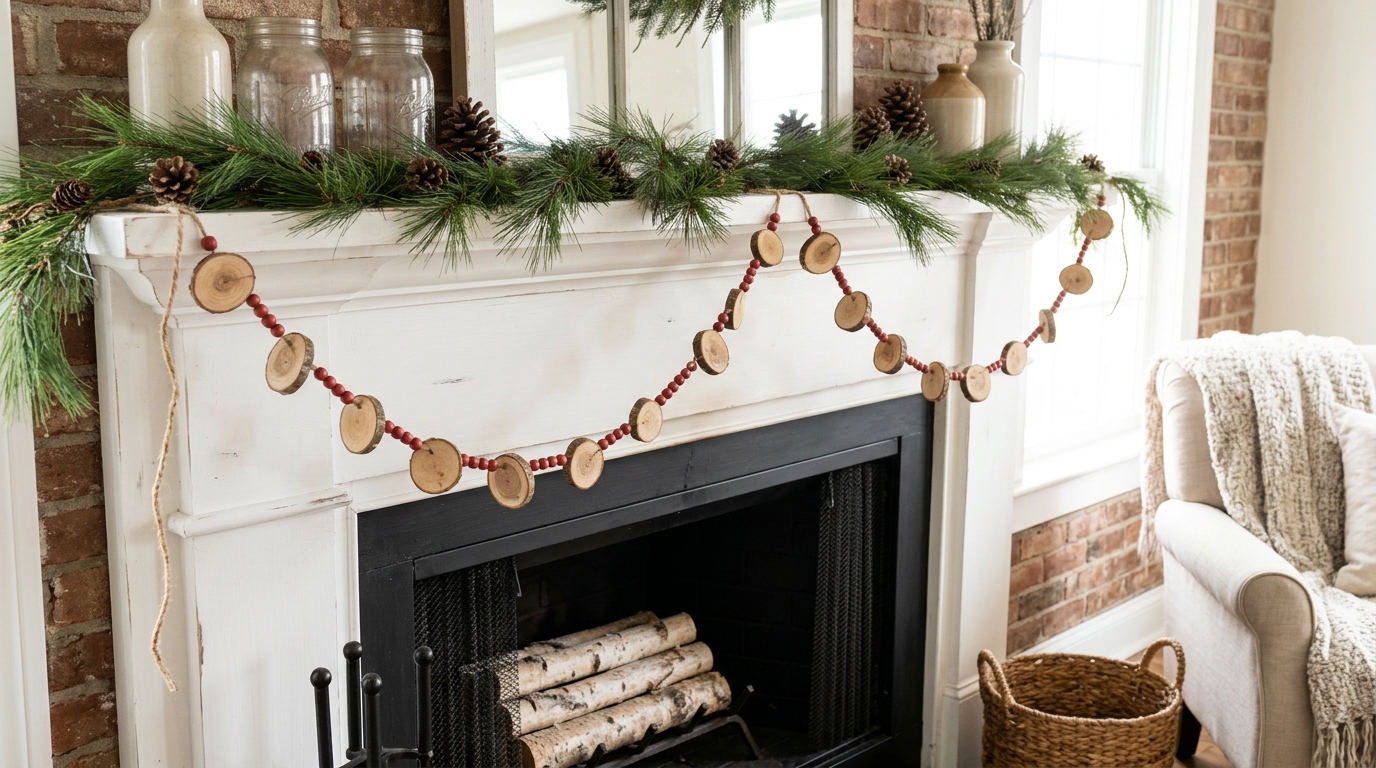
A garland of small rounds draped across the mantel instantly gives a room that cabin feeling. Drill a small hole near the top of each piece, or buy the ones that come pre drilled, and string them on jute twine with a red wooden bead between each one. It looks simple, but the repeating rings and bark edges catch the eye from across the room. The same idea works on a staircase or a doorway. Where in your home would you hang it?
You will need: About 40 small wood slices with holes, a large ball of jute twine, 40 red wooden beads and a large blunt needle.
How to make it: 1. Cut a length of twine about two feet longer than your mantel. 2. Thread on a slice, then a bead, and repeat until the garland is full. 3. Knot each end into a loop and drape it over the pine garland.
Wood Slice Christmas Crafts for the Front Door
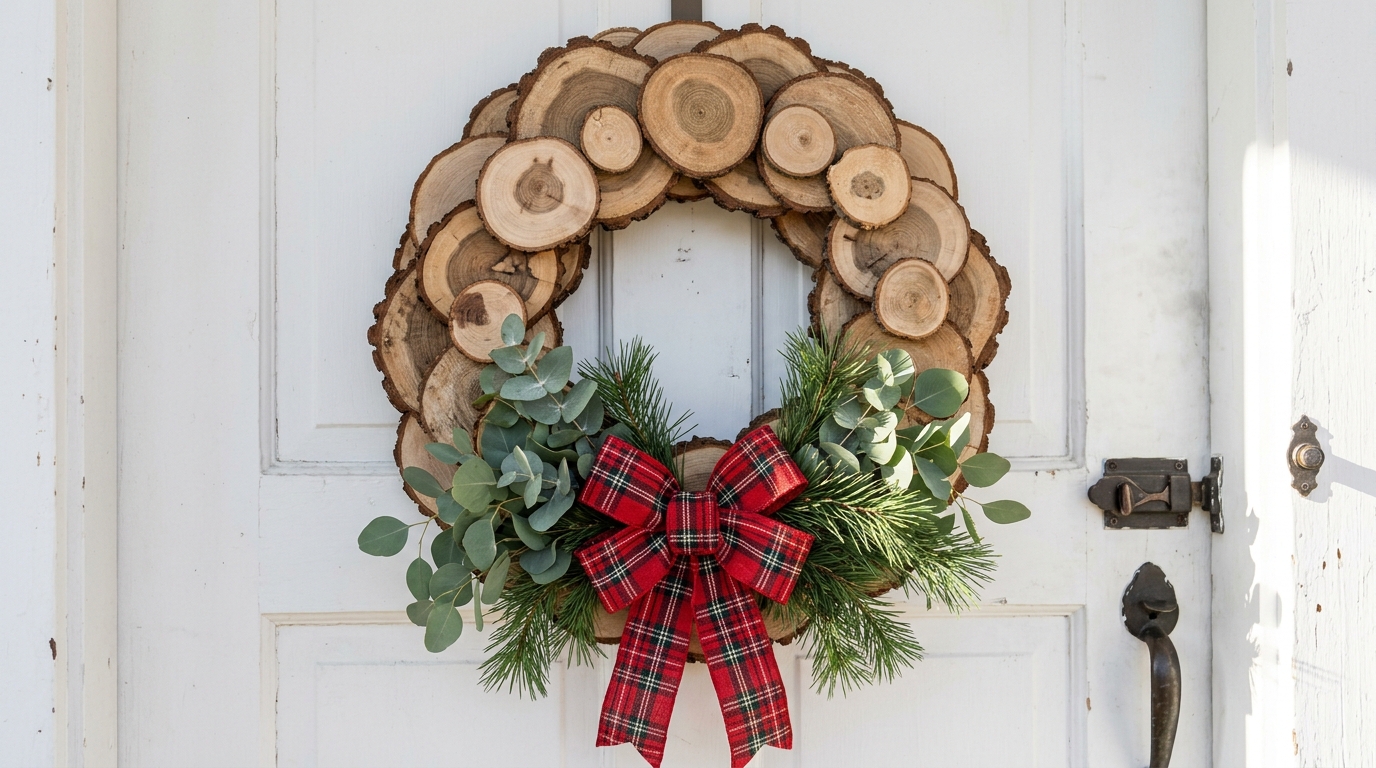
A wreath built from overlapping rounds is one of those Wood Slice Christmas Crafts that makes neighbors stop on the sidewalk. Mix big and small slices so the circles overlap like fish scales, then add a bundle of eucalyptus and pine and a big red plaid bow at the bottom. It holds up beautifully outside under a covered porch and can stay up through winter if you swap the bow. Adults should handle the hot glue. Would you go with plaid or velvet for the bow?
You will need: A 14 inch wooden or foam wreath ring, 30 to 40 wood slices in mixed sizes, a hot glue gun for adults, eucalyptus and pine sprigs, wired red plaid ribbon and floral wire.
How to make it: 1. Glue the largest slices around the ring first, overlapping them slightly. 2. Fill the gaps with smaller slices until the ring is covered. 3. Wire on the greenery and the bow at the bottom and add a loop of wire on the back for hanging.
Stamped Gift Tags

Plain kraft paper gifts look completely different with a little wooden tag tied on top. Stamp each tiny round with a star, a snowflake or the first letter of the person’s name, then thread it on red twine. The tag becomes a little ornament they can hang on their own tree, so it is like giving two gifts in one. A pack of small rounds makes dozens of tags. Would you stamp initials or holiday shapes?
You will need: Small wood slices about 2 inches across with holes, small rubber stamps, a black ink pad, red twine, kraft paper and scissors.
How to make it: 1. Press the stamp firmly into the ink and then onto the center of each slice. 2. Let the ink dry for a few minutes. 3. Thread twine through the hole and tie the tag onto the bow of each gift.
Lantern Base With Battery Lights
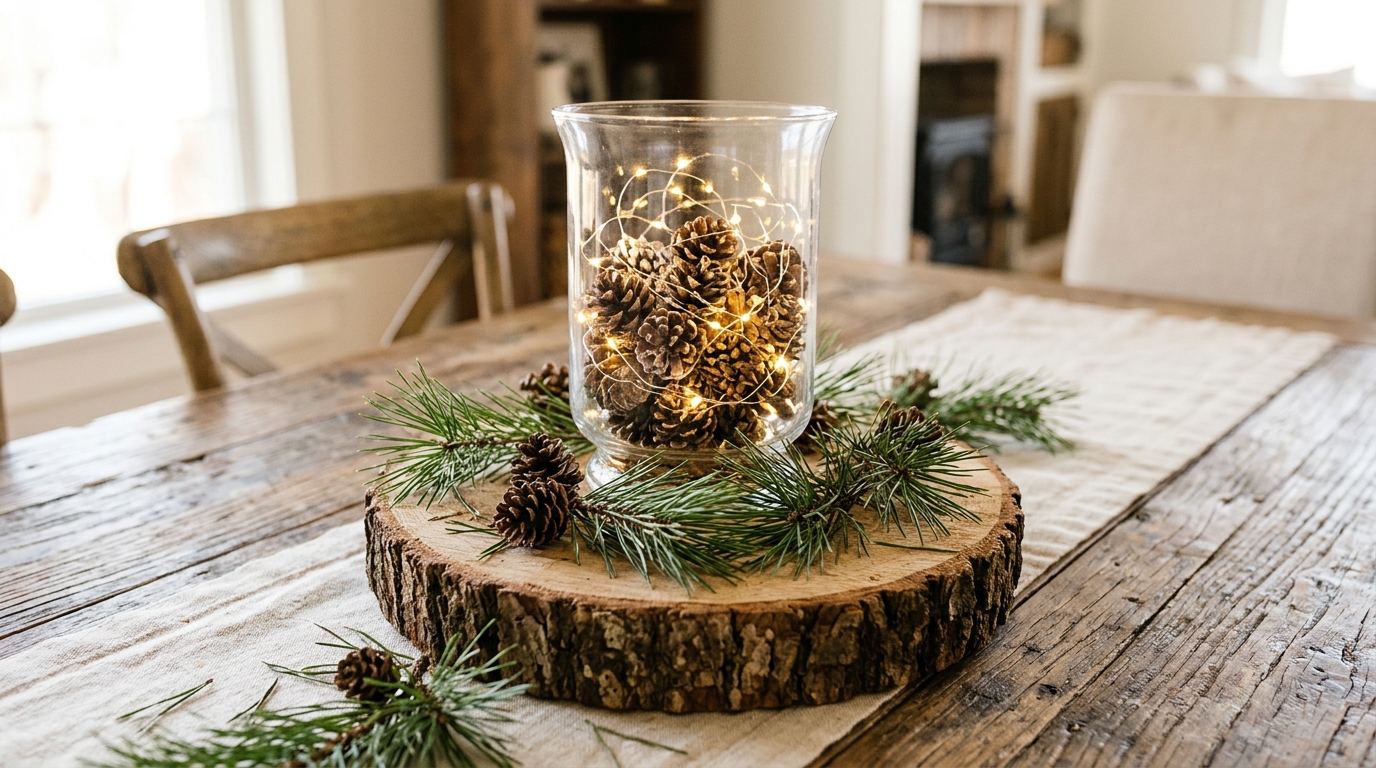
A thick round makes a perfect base for a glowing table centerpiece. Set a glass hurricane jar on top, fill it with small pine cones and a string of warm battery fairy lights, and ring the base with fresh pine sprigs. It gives you all the glow of candlelight with no open flame, which is much safer around kids, pets and greenery. If you love natural decor, our pine cone Christmas crafts are a lovely match. Where would you put this centerpiece?
You will need: One thick wood slice about 10 inches across, a glass hurricane jar, a strand of battery fairy lights with a timer, small pine cones and fresh pine sprigs.
How to make it: 1. Sand the top of the slice and add felt pads underneath. 2. Set the jar in the center, drop in the fairy lights and fill around them with pine cones. 3. Tuck pine sprigs around the base and switch on the timer.
Wood Slice Christmas Crafts With Painted Snowflakes

For a calm winter look, try one of the prettiest Wood Slice Christmas Crafts: snowflake ornaments in white and pale blue. Paint the face of each slice white, then draw a simple snowflake with a fine brush or a paint pen. The bark edge frames each one like a little picture. They look stunning on a flocked tree with silver baubles, and they can stay up into January. Put on some music and paint one flake at a time. Big flakes or tiny ones?
You will need: Wood slices with holes, white and pale blue acrylic paint, a fine detail brush or paint pens, a pencil and white ribbon or twine.
How to make it: 1. Paint the faces white with two thin coats. 2. Sketch a snowflake with a pencil and trace it in pale blue. 3. Add tiny white dots at the tips and hang each one with a ribbon loop.
Rustic Cake Stand
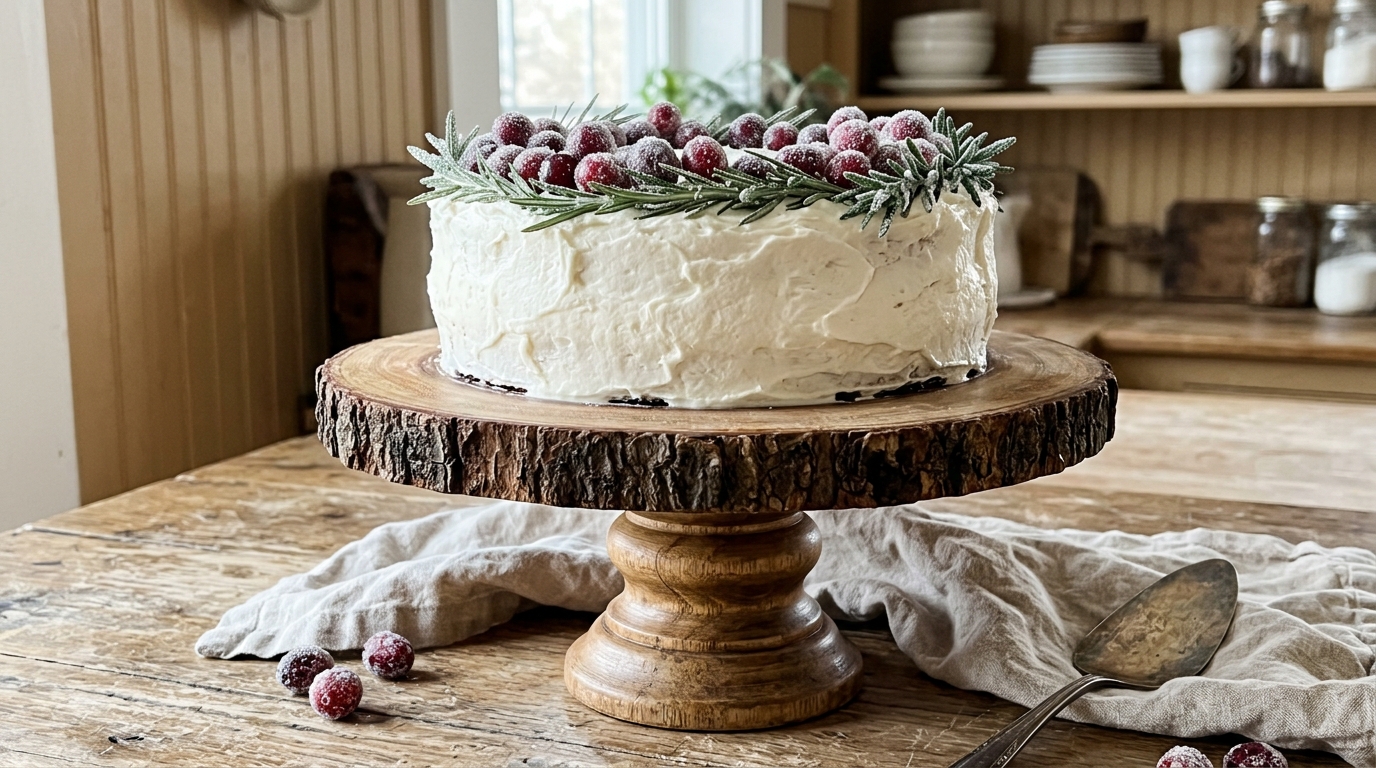
A rustic cake stand turns any holiday dessert into a showstopper. Attach a thick, smooth slice to a short turned wooden leg or pedestal from the hardware store and seal the top with a food safe finish. Set a white frosted cake on it, add sugared cranberries and rosemary, and it looks like the cover of a baking magazine. Put a round of parchment under the cake so the wood stays clean. What would you bake first for your new stand?
You will need: One thick wood slice about 12 inches across, a short turned wooden leg or pedestal, a wood screw and drill for adults, wood glue, food safe board oil and parchment paper.
How to make it: 1. Sand the slice smooth and mark the center on the underside. 2. Glue and screw the pedestal to the center, with adult help for the drill. 3. Rub in two coats of food safe oil and let it dry before use.
Wood Slice Christmas Crafts as a Tiered Tray
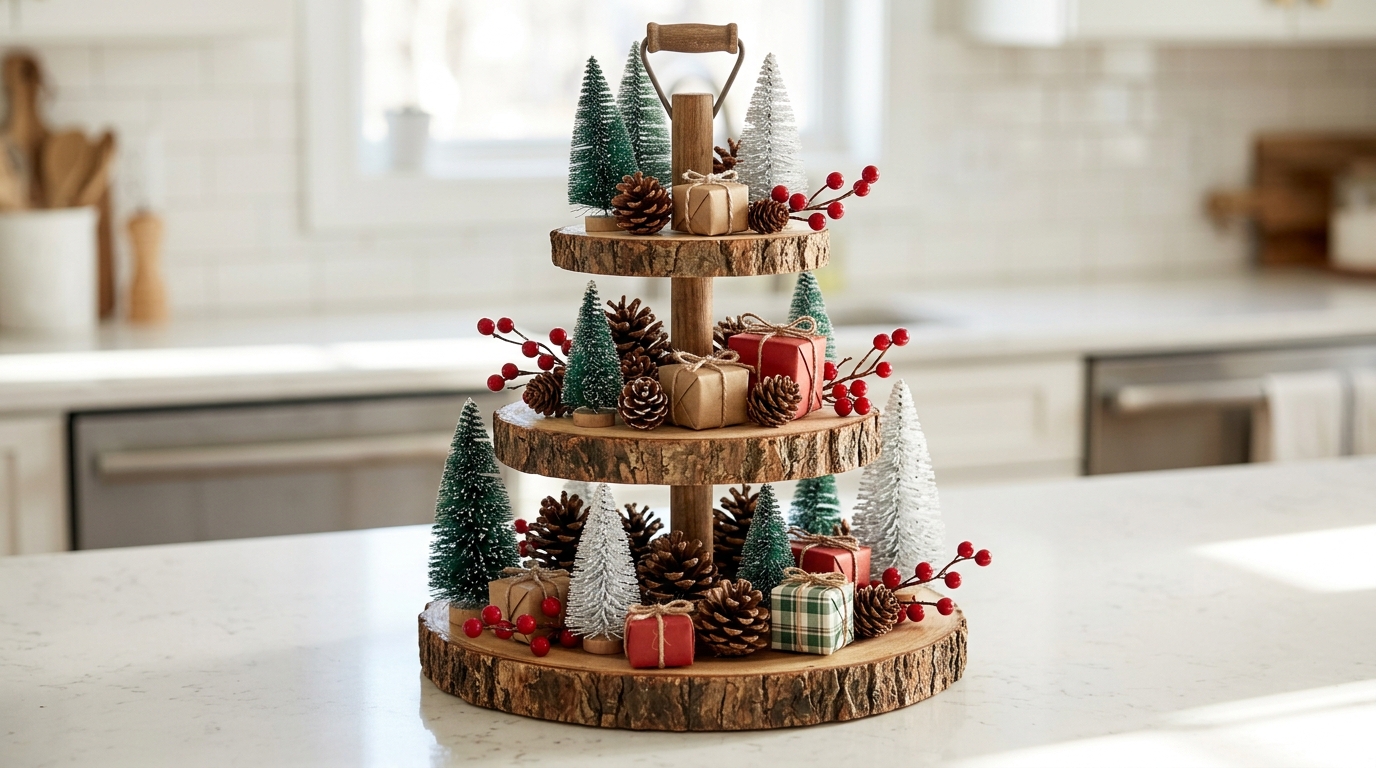
Tiered trays cost a lot in home stores, but this is one of the Wood Slice Christmas Crafts that costs only a few dollars. Stack three rounds from large to small on a wooden dowel, and you have a farmhouse display piece for the kitchen counter or coffee table. Style it with mini bottle brush trees, pine cones, red berries and tiny wrapped boxes. After Christmas, swap in winter or Valentine decor. Thousands of people are watching wood slice ornament videos on YouTube for ideas like this. What would you put on the top tier?
You will need: Three wood slices about 12, 9 and 6 inches across, a 1 inch wooden dowel about 16 inches long, a drill with a spade bit for adults, wood glue and a round wooden knob for the top.
How to make it: 1. Drill a hole through the center of each slice the size of the dowel. 2. Slide the slices onto the dowel from large to small, gluing them about 5 inches apart. 3. Glue the knob on top and let it set overnight before styling.
Place Card Holders for the Holiday Table
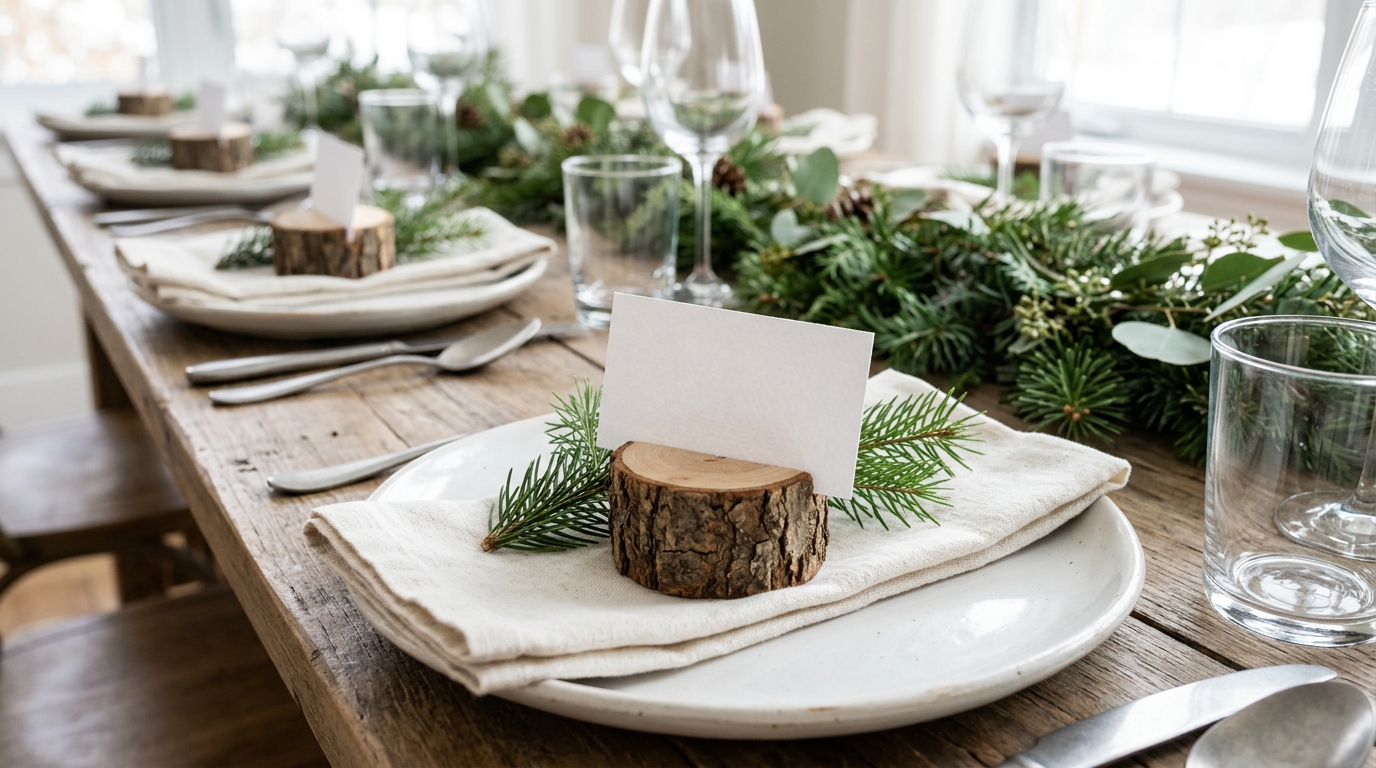
Little round place card holders make a holiday table look carefully planned, and guests often take them home as a keepsake. Use thick small rounds and cut a shallow slit across the top so a card stands up straight. Write each name by hand, tuck in a pine sprig and set one on every plate. They work for Thanksgiving too, and a set of eight makes a lovely hostess gift. Whose name would be on the first card at your table?
You will need: Eight thick small wood slices about 2 inches across, a fine saw for adults, white card stock, a black pen and small pine sprigs.
How to make it: 1. Stand each slice on its edge and saw a shallow slit across the top, with adult help. 2. Sand off any rough bits. 3. Write the names on cards, slide them into the slits and add a pine sprig to each place setting.