DIY Snow Globes: 15 Cozy Jar and Dollar Store Ideas That Look Way More Expensive Than They Are
DIY snow globes might be the coziest little craft of the whole holiday season. Shake one and you are seven years old again, nose pressed to a shop window, watching the snow swirl around a tiny house. The best part is that you do not need a fancy kit. A clean jam jar, a few bottle brush trees, some faux snow and a pinch of glitter will get you a keepsake that looks like it came from a boutique. Snow globes are one of the fastest rising Christmas craft searches this month, and it is easy to see why: they are cheap, nostalgic and perfect for gifting. Below are fifteen ideas, from waterless ornaments to a giant cookie jar centerpiece, that you can make at the kitchen table on a quiet winter evening..
A Jam Jar Village Trio of DIY Snow Globes
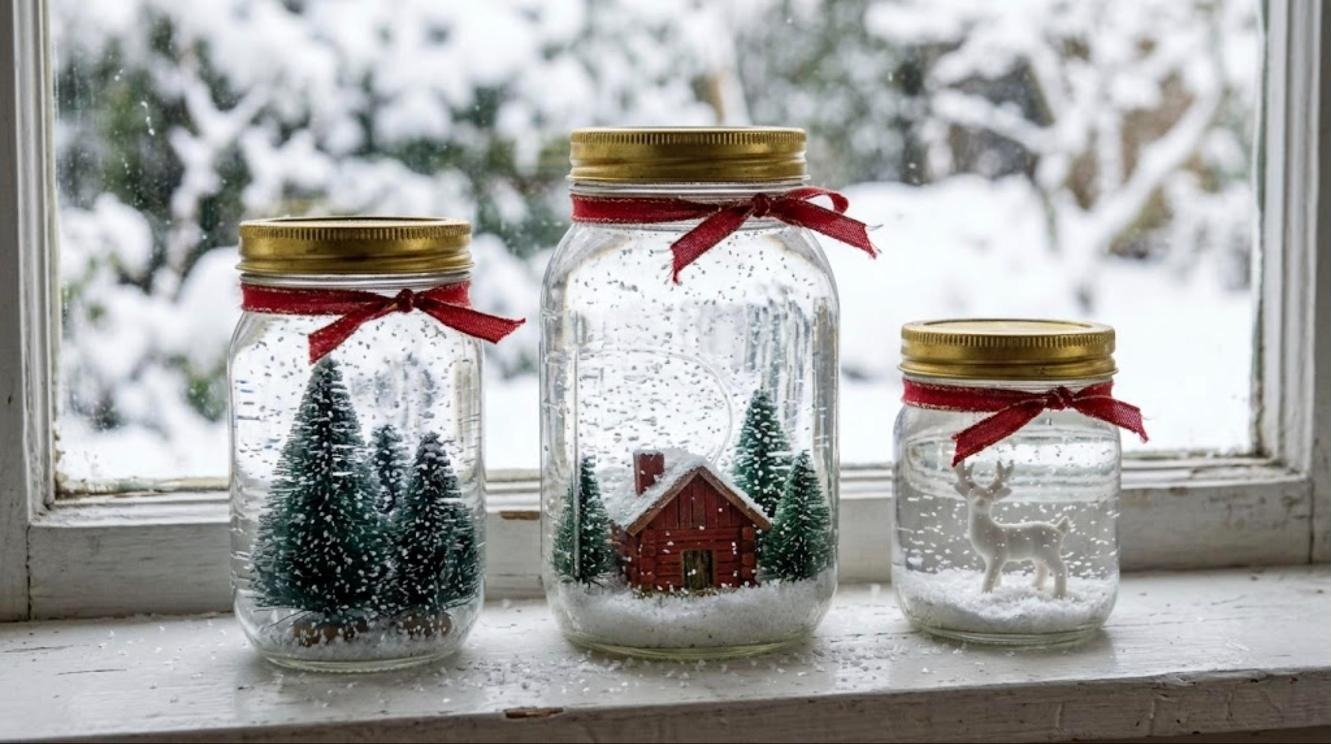
Start with the classic. Three jars of different heights, each with its own little scene, look charming lined up on a windowsill. One holds a red cabin, one a forest of tiny trees, one a white deer, and together they tell a winter story. Thrift stores and dollar stores are full of small figurines that fit perfectly, so hunt around before you buy anything new. This is also the easiest set to give away one jar at a time. Which scene would you put in yours first..
You will need: 3 clean glass jars with lids, bottle brush trees, small figurines, faux snow, fine glitter, waterproof glue, distilled water, glycerin.
How to make it: 1. Glue trees and figurines to the inside of each lid and let them dry overnight. 2. Fill the jar with distilled water, a teaspoon of glycerin and a pinch of glitter. 3. Screw the lid on tight, seal the rim with glue and flip it over.
Bottle Brush Tree Forest in a Big Apothecary Jar
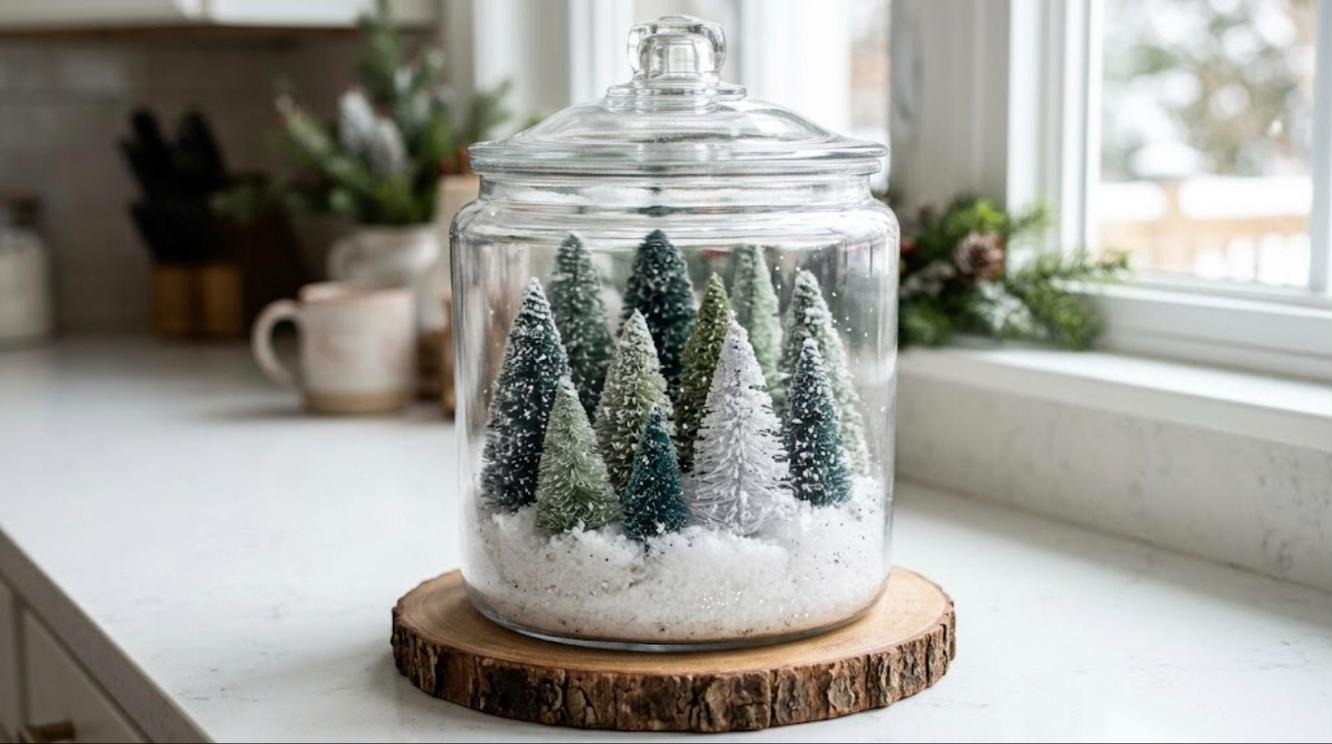
If you only make one big piece this year, make a forest. Big DIY snow globes like this one steal the show. A wide apothecary jar packed with bottle brush trees in mixed greens and frosted white looks like a winter woods you could walk into. This one is waterless, so it is light, safe to move and lasts for years. Set it on a wood slice and it becomes the kind of kitchen counter decor people ask about. Want a more modern look? Use only white and silver trees for a frosty Scandinavian feel.
You will need: Large glass apothecary jar with lid, 12 to 20 bottle brush trees in mixed sizes, faux snow, iridescent glitter, wood slice.
How to make it: 1. Pour 5 cm of faux snow into the jar. 2. Push the tallest trees in at the back and the small ones in front. 3. Sprinkle glitter over the top, add the lid and set the jar on a wood slice.
Waterless DIY Snow Globes in Clear Ornaments
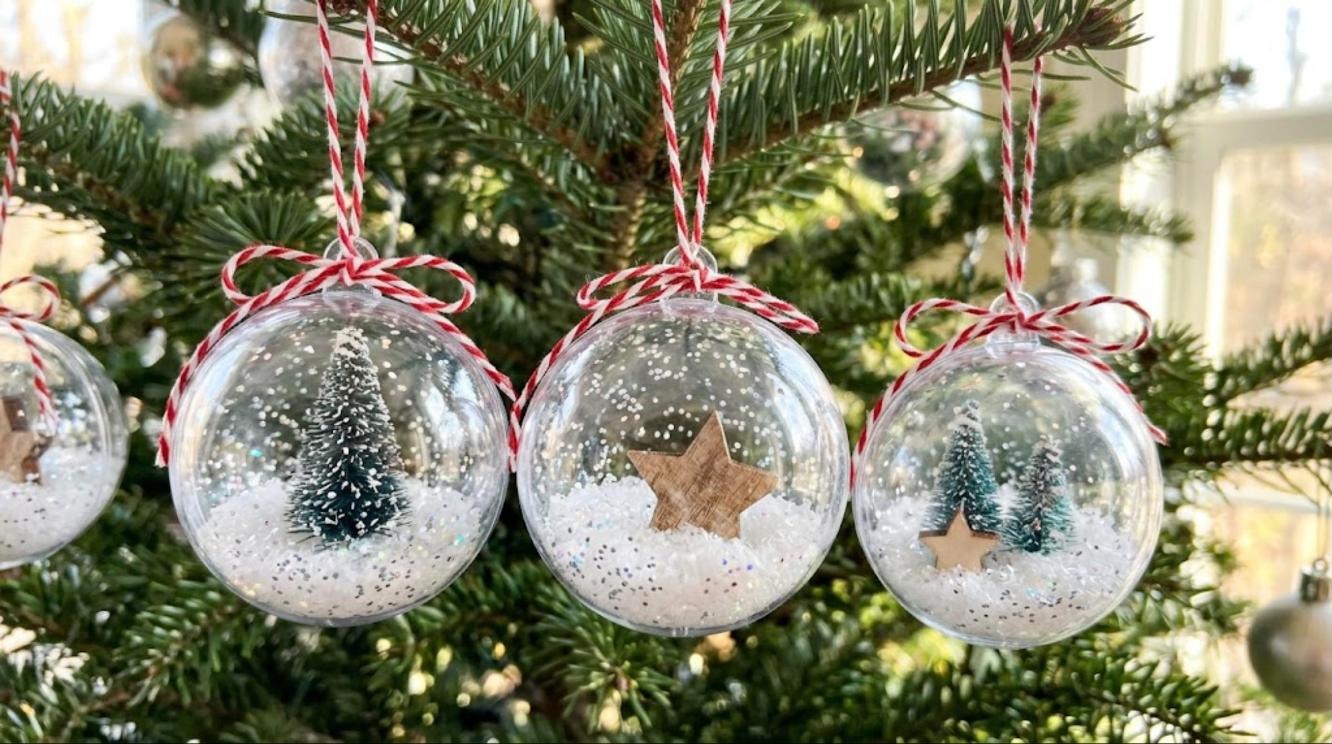
Clear plastic fillable ornaments are the secret to the cheapest DIY snow globes you can make. Drop in a bit of faux snow, a mini tree or a tiny wooden star, and you have a globe that hangs on the tree with no water and no risk of leaks. Kids can help with this one, and a pack of ten ornaments costs about the same as one store bought globe. Tie them with red and white baker twine for that candy cane look. How many could you fill tonight?
You will need: Clear plastic fillable ornaments, faux snow, mini bottle brush trees, small wooden stars, glitter, baker twine, glue dots.
How to make it: 1. Open the ornament and add a spoon of faux snow. 2. Stick a mini tree or star to the bottom with a glue dot. 3. Add a pinch of glitter, close the ornament and hang it with a twine bow.
Upside Down Wine Glass Snow Globes
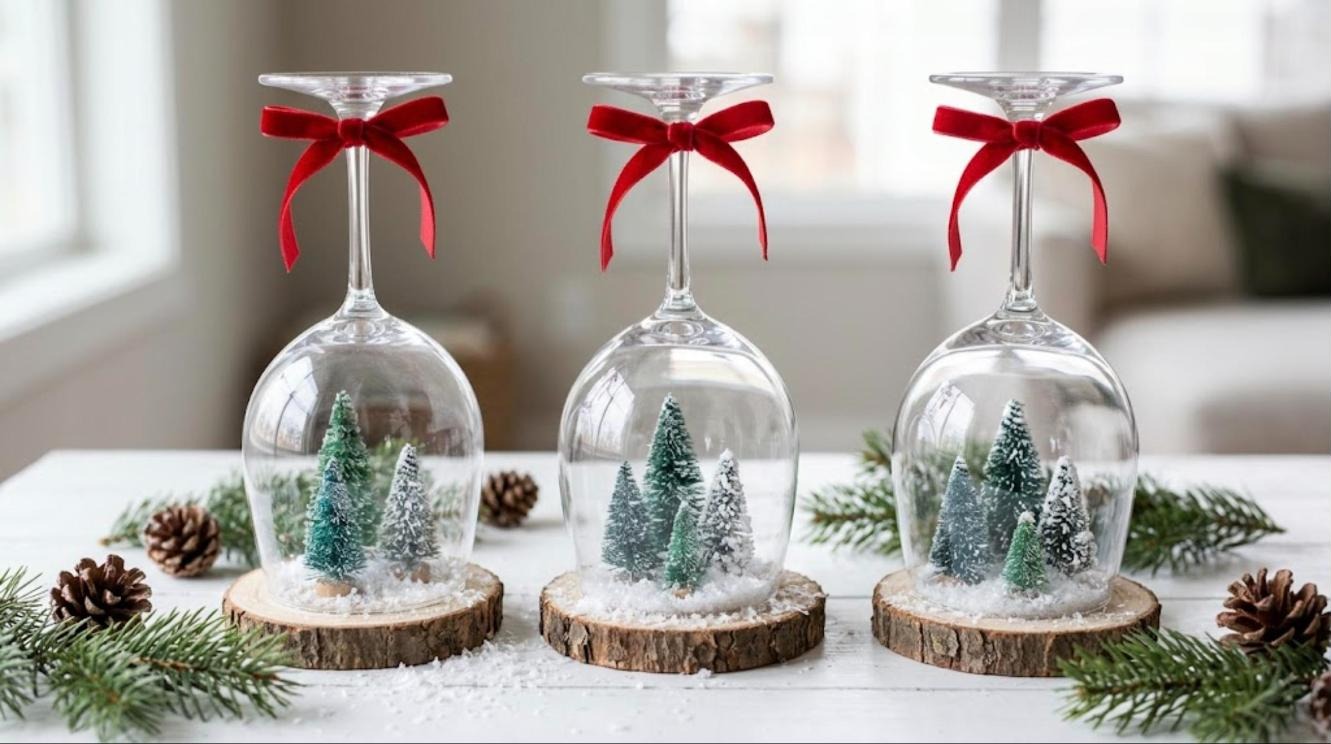
Wine glasses from the thrift store make the most elegant DIY snow globes on this list. Glue a tiny tree to a round of wood or cardboard, set the glass over it, and the stem becomes a handle on top. A red velvet bow around the stem finishes it off. Line three or four along a mantel or a buffet and they look like something from a high end holiday shop. This is a great one for using up single glasses that lost their partners. Who knew a lonely glass could be this pretty?
You will need: Stemmed wine glasses, wood slices or thick card circles, bottle brush trees, faux snow, glitter, velvet ribbon, strong craft glue.
How to make it: 1. Glue a tree to the center of each wood slice and add faux snow around it. 2. Run glue around the rim of the glass and press it down over the scene. 3. Tie a velvet bow around the stem once dry.
Baby Food Jar DIY Snow Globes for the Tree
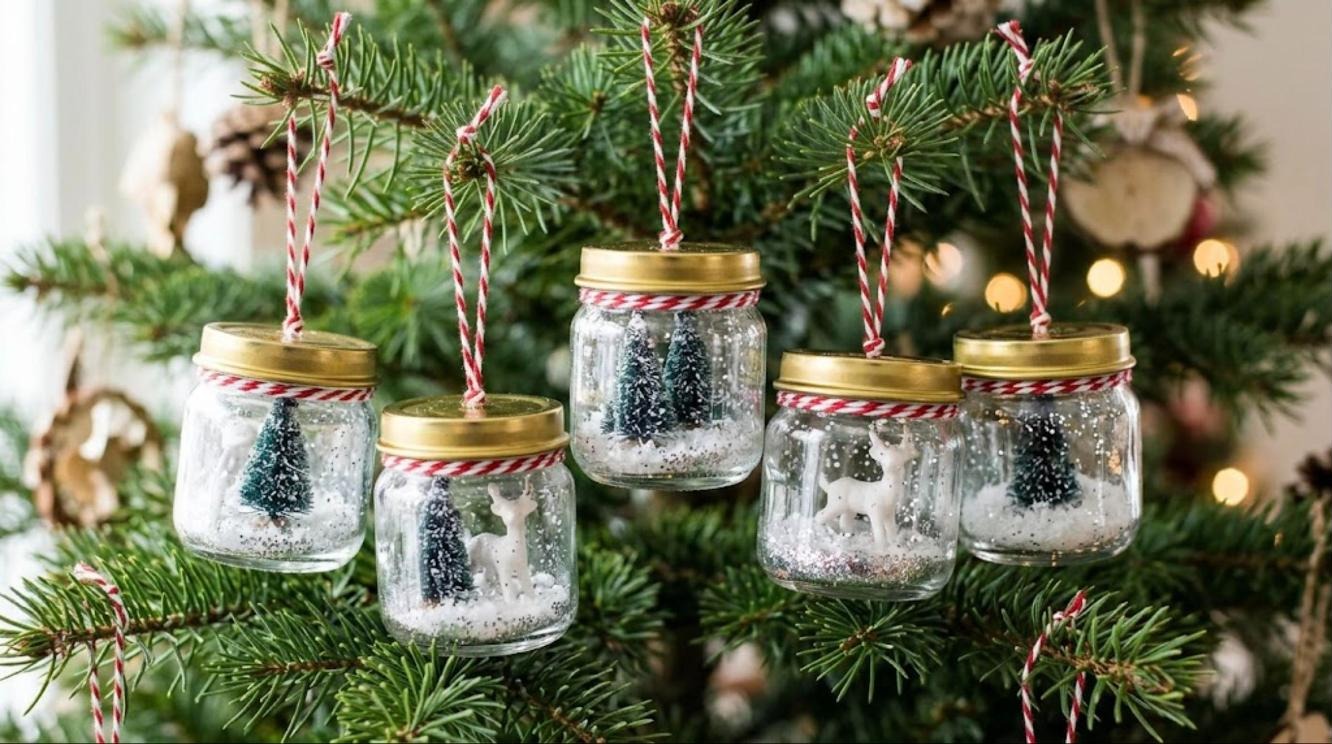
Tiny jars make tiny treasures. Baby food jars are the perfect size for mini snow globe ornaments, and if you do not have any, small spice jars work too. Paint the lids gold, add one little tree or a white deer inside, and hang them with twine. A set of five of these on a branch looks magical in the morning light. They also make sweet tags on top of wrapped gifts. Ask friends with little ones to save their jars for you; most are happy to hand them over.
You will need: Small baby food or spice jars, gold acrylic or spray paint, mini trees or deer figurines, faux snow, glitter, baker twine, glue.
How to make it: 1. Paint the lids gold and let them dry. 2. Glue a figurine inside each lid and add faux snow and glitter to the jar. 3. Close the jar and tie twine around the neck to make a hanging loop.
Clay Snowman DIY Snow Globes
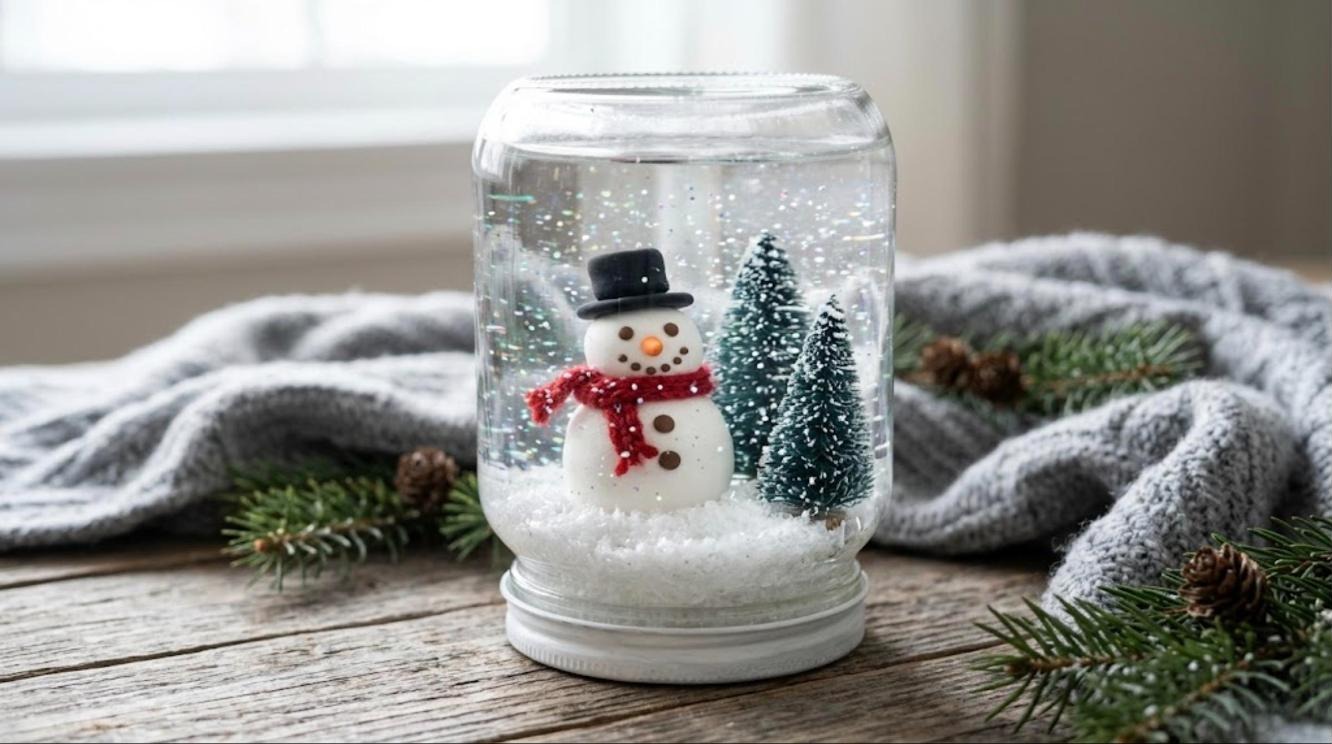
Making your own figure for DIY snow globes is easier than it looks. Roll three balls of white air dry or polymer clay, press them together, and add a little hat and a carrot nose. A scrap of red yarn becomes a knitted scarf. Once he is sealed with a waterproof varnish, your snowman can live in a jar of glitter water for years. Every one turns out a little different, which is exactly the charm. Make one for each person in the family and let everyone design their own hat color.
You will need: White polymer clay, small bits of black and orange clay, red yarn, waterproof varnish, a wide jar, faux snow, glitter, glycerin, waterproof glue.
How to make it: 1. Shape and bake or dry the snowman, then seal him with waterproof varnish. 2. Glue him and two mini trees to the jar lid. 3. Fill the jar with water, glycerin and glitter, then seal and flip.
Little Red Truck With a Christmas Tree
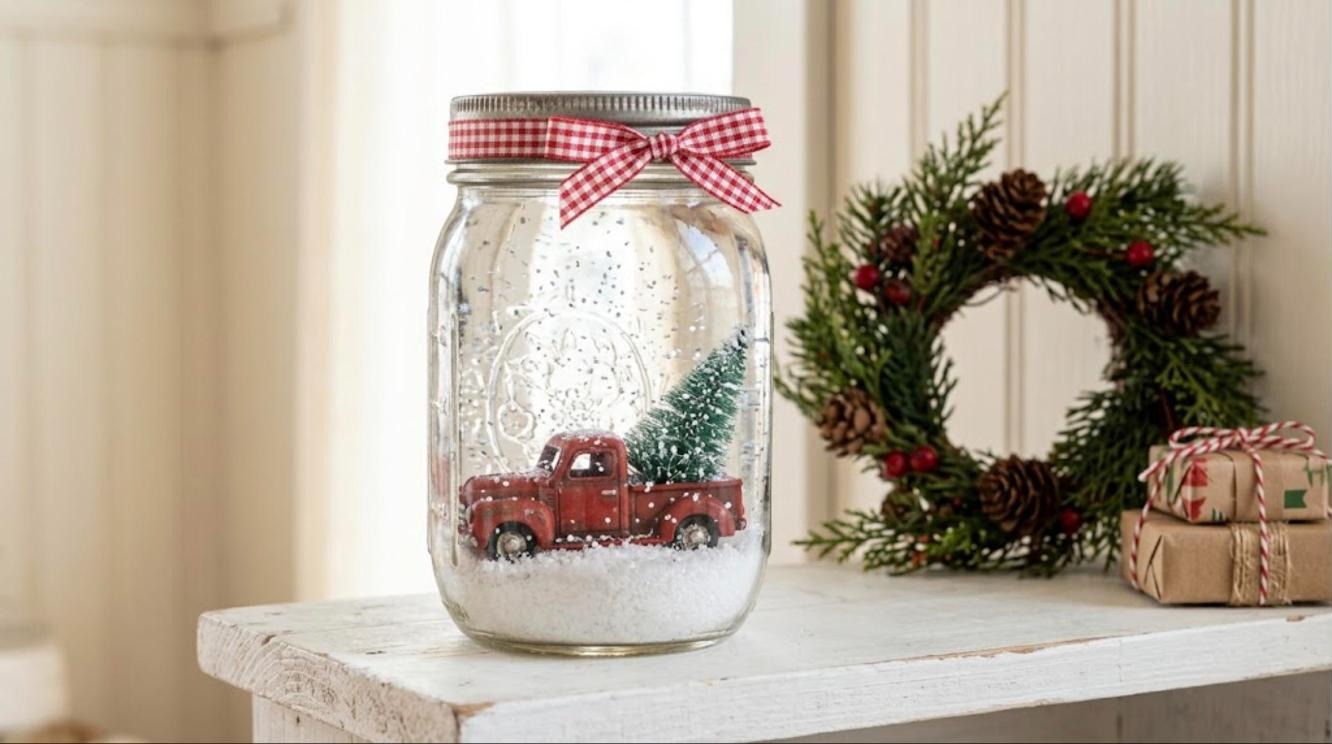
The little red truck hauling a tree home is the farmhouse Christmas symbol everyone loves, and it fits beautifully inside a pint jar. Look for small die cast or plastic trucks in the toy aisle, and pick one without big logos. Glue a mini tree in the back, nestle it in faux snow, and tie a red gingham bow on the lid. Of all the DIY snow globes here, this one sells fastest at craft fairs, so make a few extra if you have a table booked. Would you keep this one or give it away?
You will need: Pint glass jar with lid, small red toy truck, mini bottle brush tree, faux snow, glitter, gingham ribbon, strong craft glue.
How to make it: 1. Glue the tree into the truck bed and the truck onto a bed of faux snow in the jar. 2. Add a little glitter on top. 3. Close the lid and tie a gingham bow around the rim.
Log Cabin in the Woods DIY Snow Globes
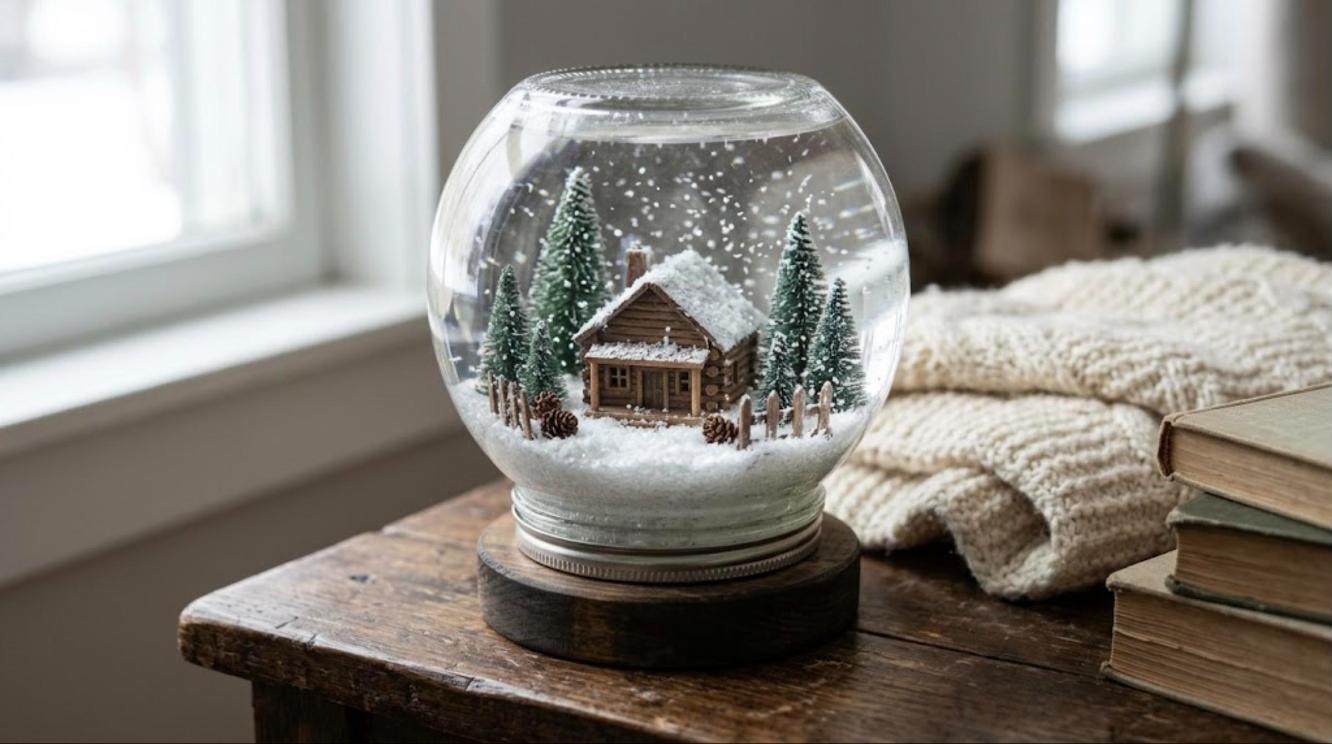
There is something about a tiny log cabin that makes you want a blanket and a mug of cocoa. Model railroad shops and craft stores sell small cabins, or you can build one from craft sticks. Surround it with mini pines, a few real tiny pine cones and a little fence, and set the whole jar on a dark wood base. These DIY snow globes look lovely on a bookshelf all winter long, not just at Christmas. Picture this on your side table on a snowy January afternoon.
You will need: Large round jar, small cabin model or craft sticks, mini pine trees, tiny pine cones, toothpick fence, faux snow, dark wood base, glue.
How to make it: 1. Build or paint the cabin and glue it to the base with the trees and fence. 2. Scatter faux snow and tiny pine cones around it. 3. Set the jar over the scene and glue it to the base.
Pet Photo Keepsake Snow Globe
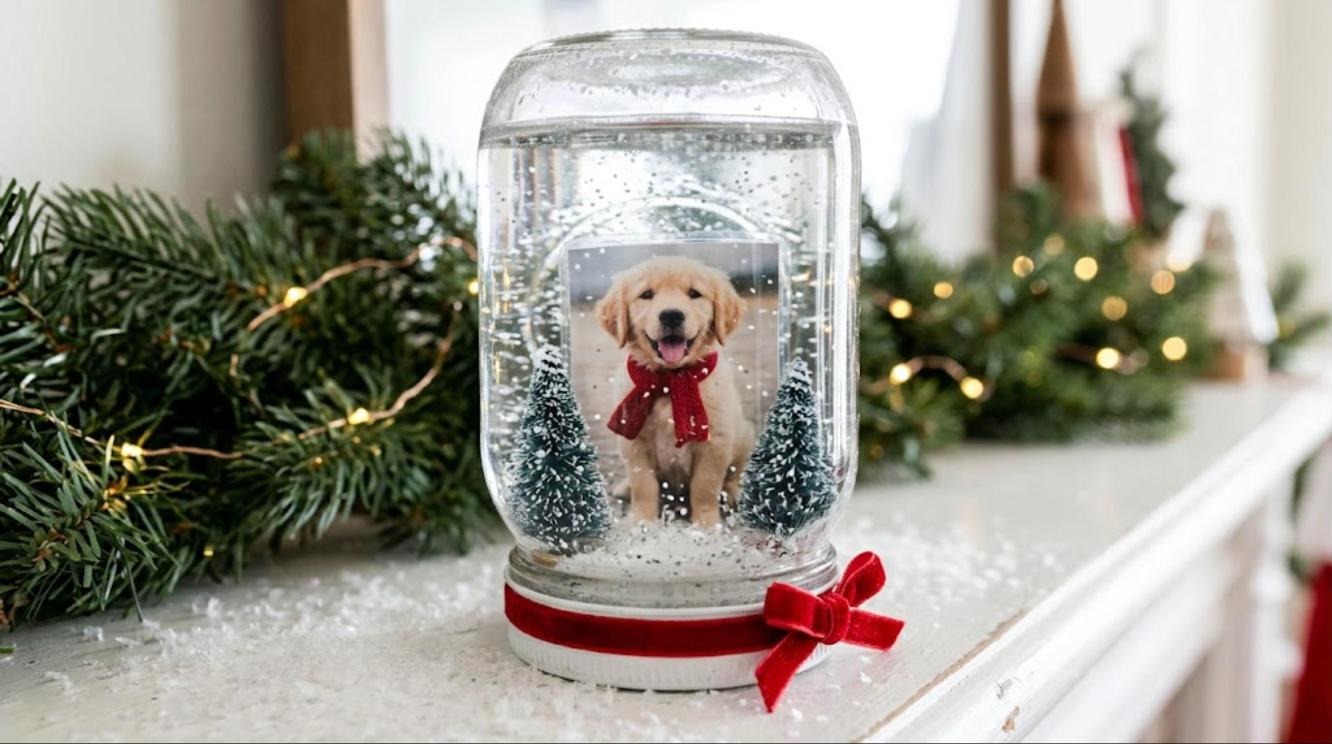
A photo globe is the gift that makes people tear up. Print a favorite picture of the family dog or cat, laminate it or seal it in clear packing tape, and stand it between two little trees. Pet photos are a sweet choice because every pet lover will want one, and they make a lovely memorial gift too. Keep the photo small so it sits right in the middle of the jar. A red velvet bow on the lid makes it feel extra special. Whose picture would you choose?
You will need: Wide glass jar, small printed photo, laminating sheet or clear packing tape, mini trees, faux snow, glitter, velvet ribbon, waterproof glue.
How to make it: 1. Seal the photo on both sides so no water can get in. 2. Glue it upright to the lid between two trees. 3. Fill with water, glycerin and glitter, seal the lid and flip it over.
Craft Gingerbread House Under a Glass Cloche
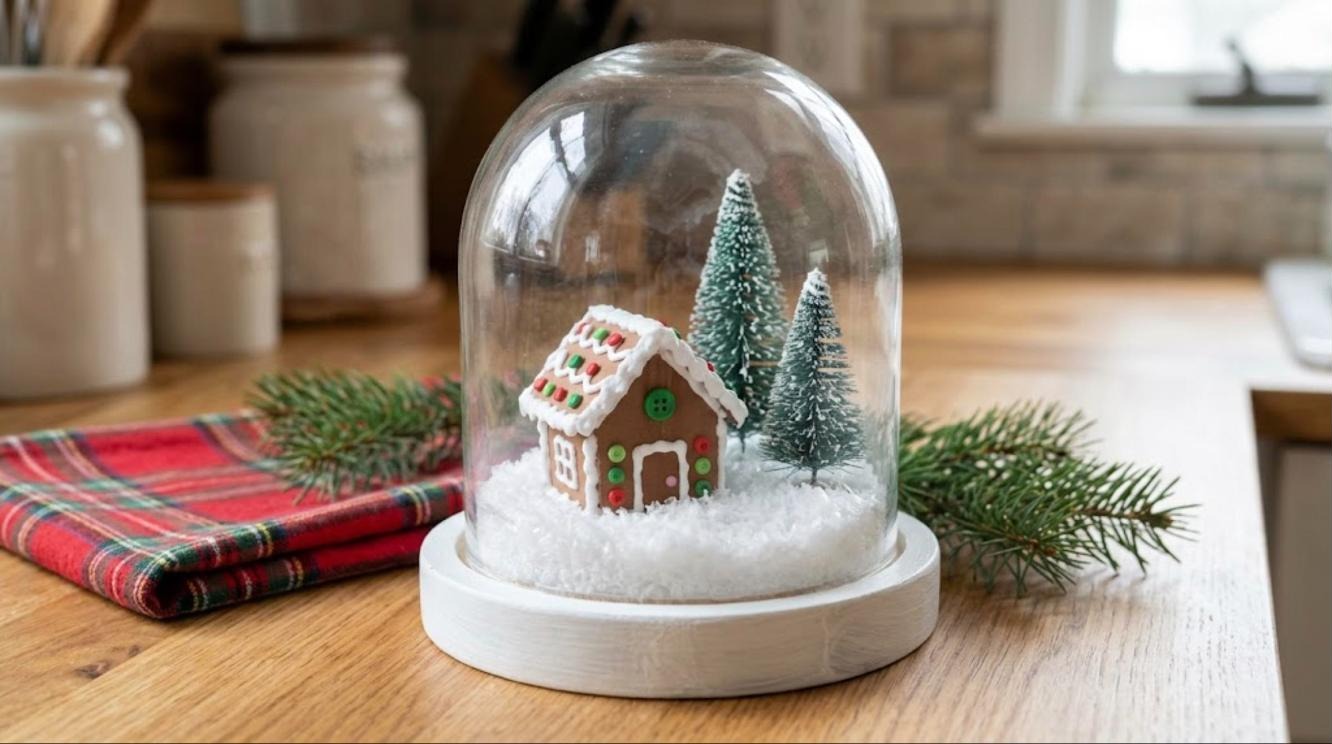
This gingerbread house is not edible, and that is the point: it lasts. Cut little walls from brown foam board, pipe white puffy paint along the roof like icing, and press tiny buttons on for candy. Set it under a glass cloche with faux snow and two frosted trees, and you have a centerpiece that looks straight out of a bakery window. It is a fun one to make with grandkids, and it comes out of the box looking perfect every year. Ready to pipe some icing?
You will need: Brown foam board, craft knife (adult use), white puffy paint, tiny red and green buttons, glass cloche with base, faux snow, mini trees, glue.
How to make it: 1. An adult cuts four walls and two roof pieces from foam board and glues them together. 2. Pipe puffy paint trim and press on buttons. 3. Set the house on the base with snow and trees, then cover with the cloche.
Snow Globe Gift Card Holder
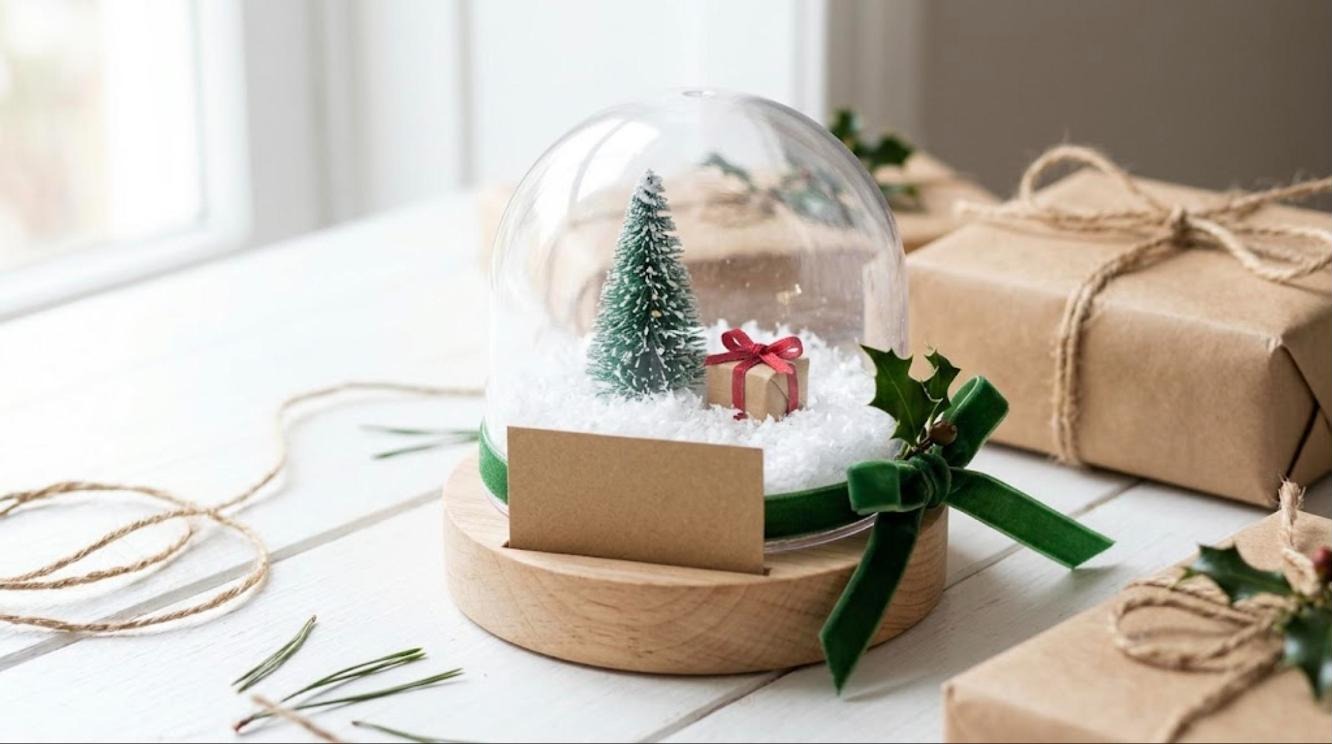
Gift cards are practical, but they are hard to make exciting. DIY snow globes fix that. A plastic dome on a wooden base holds a tiny tree and a wrapped present, and a slot cut into the base holds the card in front. Your teacher, mail carrier or teenage nephew gets a gift card plus a keepsake they will keep. It is a smart way to make a small gift look like you went to a lot of trouble. Who on your list would love one of these?
You will need: Clear plastic dome with a wooden base, small saw or craft knife (adult use), mini tree, tiny wrapped box, faux snow, velvet ribbon, holly sprig, glue.
How to make it: 1. An adult cuts a shallow slot across the front of the wooden base. 2. Glue the tree and tiny box inside the dome with faux snow. 3. Tie a ribbon around the base and slide in the gift card.
Giant Cookie Jar Snow Globe Centerpiece
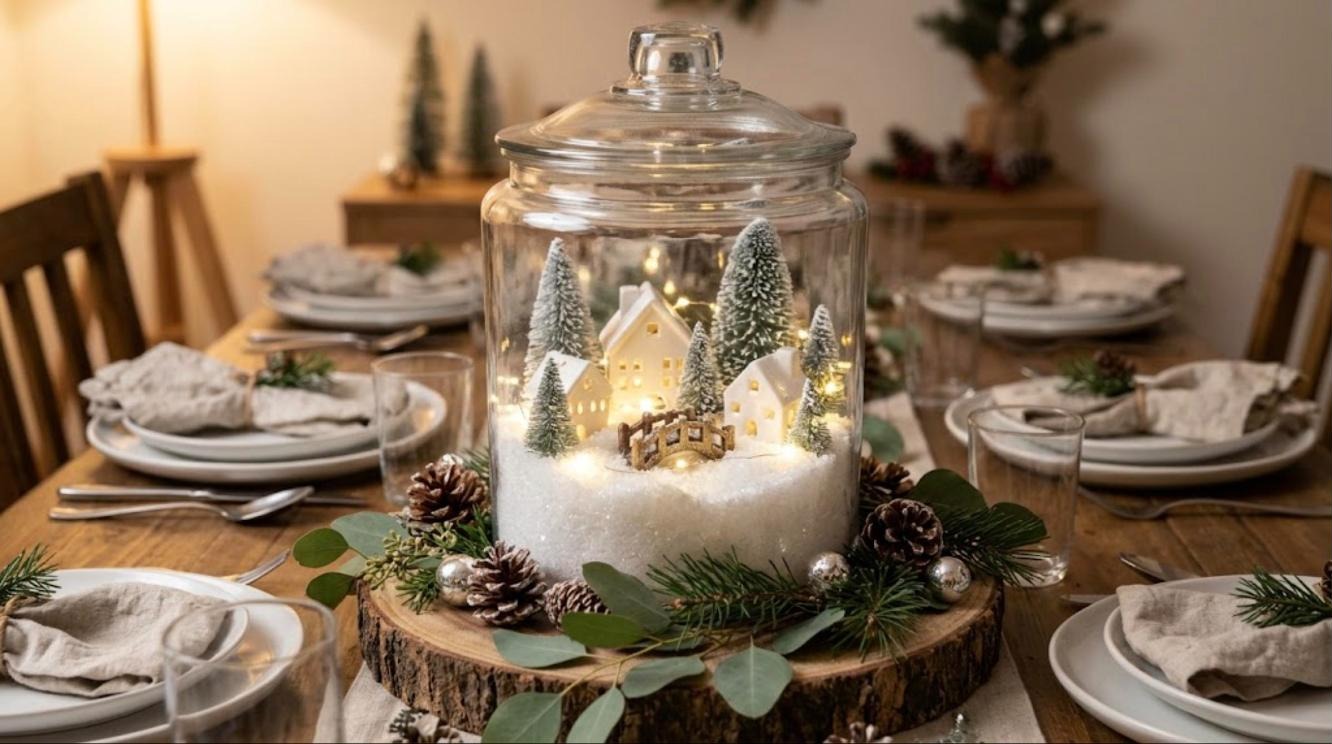
Go big for the holiday table. A large glass cookie jar becomes a snowy village centerpiece with small ceramic houses, frosted trees and a tiny bridge. Tuck in a string of battery LED fairy lights, which stay cool to the touch, and the whole jar glows when you dim the room. Set it on a wood slice with eucalyptus and pine cones and your table is done. If you want more table ideas, our easy DIY Christmas gifts list has a few more jar projects that pair well with this one.
You will need: Large glass cookie jar, small ceramic houses, frosted bottle brush trees, mini bridge, faux snow, battery LED fairy lights, wood slice, greenery.
How to make it: 1. Pour a deep layer of faux snow into the jar. 2. Arrange the houses, bridge and trees, then weave the LED lights between them with the battery pack outside the lid. 3. Set the jar on a wood slice and add greenery.
Tiny Village Globe You Can Hold in One Hand

Small DIY snow globes have a special magic. Hold one up to a winter window and the light pours through the glitter like real snow. Mini globe kits with screw bases are sold cheaply online and in craft stores, and they are perfect for a single tiny house or church. Make a few and tuck them into stockings. Millions of people have watched a simple dollar store snow globe idea this season, so you are in good company. Who gets the first one?
You will need: Small snow globe kit with a screw base, tiny house figurine, distilled water, glycerin, fine glitter, waterproof glue.
How to make it: 1. Glue the house to the base and let it cure for a full day. 2. Fill the globe with water, a few drops of glycerin and glitter. 3. Screw the base on firmly and turn it right side up.
Golden Reindeer Globe With Fairy Lights

For a touch of glamour, spray paint a plastic reindeer gold and set it on a stack of wooden discs painted gold too. The globe on top catches every bit of light. Wrap battery LED fairy lights loosely around the base, and the whole thing sparkles on a dark shelf. These DIY snow globes look like a luxury buy but cost a few dollars in paint and parts. It is the one guests will pick up and shake first. Do you lean gold or silver?
You will need: Glass or plastic globe with a base, small plastic reindeer, gold spray paint (adult use, outdoors), round wooden discs, battery LED fairy lights, glue.
How to make it: 1. An adult spray paints the reindeer and wooden discs gold outdoors and lets them dry. 2. Glue the reindeer inside the globe and stack the discs as a stand. 3. Wrap the LED lights loosely around the stand.
Reindeer Silhouette DIY Snow Globes to Sell
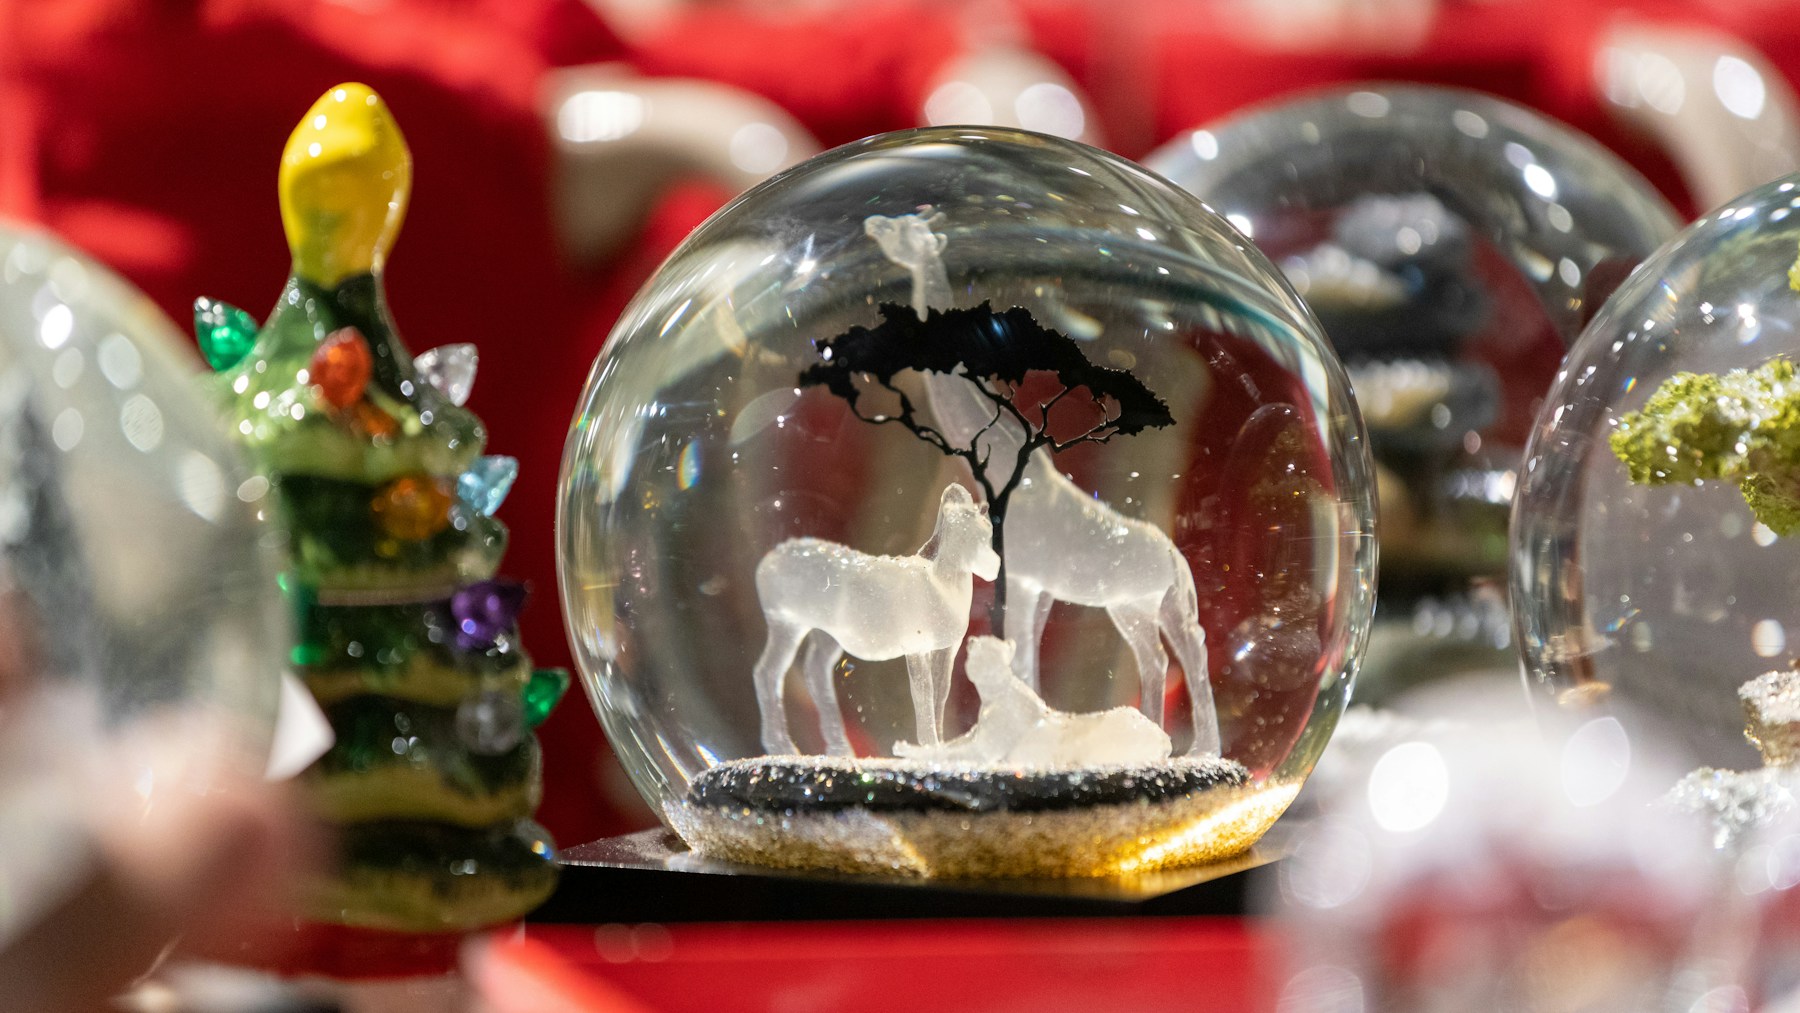
Silhouettes are simple, graphic and very easy to repeat, which makes them perfect if you sell at craft fairs. Cut reindeer and tree shapes from white craft foam or buy small cutouts, glue them inside clear globes, and finish the bases in gold. A table of these lined up looks like a little herd in a snowstorm. Price them as a set of three and watch them go. Would you make yours white on clear or black on gold?
You will need: Clear globes with bases, white craft foam or plastic cutouts, scissors, gold paint for the bases, faux snow, glitter, glue.
How to make it: 1. Cut reindeer and tree shapes from foam using a simple template. 2. Glue them upright inside each globe and add snow and glitter. 3. Paint the bases gold and display them in groups of three.