Thomas Nast Santa: 14 Old-World Santa Decorations Inspired by the Artist Who Drew Him First
The Thomas Nast Santa is the reason most of us picture a round, jolly man with a long white beard when we think of Christmas. Nast was a German born artist who drew for Harper’s Weekly, and his 1863 picture of Santa Claus is generally recognized as the first drawing of the modern Santa. Before him, Santa looked different in almost every book. After him, the cheerful old fellow with a pack of toys stuck. That old-world look is having a big moment again, with deep reds, cream wool, gold trim and soft fur beards showing up on mantels everywhere. The good news is that you can make these heirloom style Santas at your kitchen table with clay, wood, felt and paint. Here are fourteen ideas to bring a little 1800s magic home this Christmas..
The Thomas Nast Santa Look Starts on Your Mantel
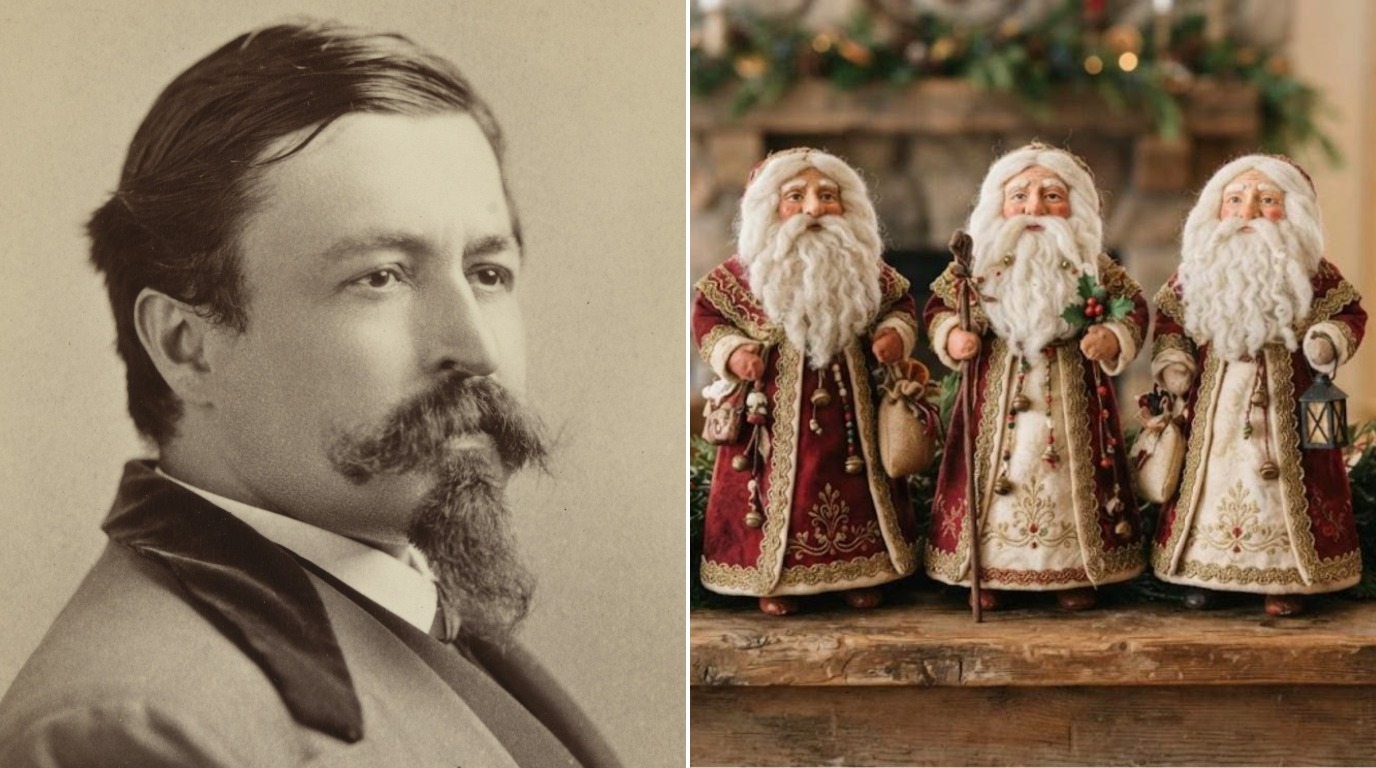
Nast spent more than twenty years drawing Santa for the magazine’s Christmas issues, and each year his Santa grew a little jollier. A row of handmade Thomas Nast Santa figures on a mantel is the easiest way to bring that feeling home. Mix tall and short figures, keep the colors to deep red, cream and gold, and tuck a little greenery between them. Even three simple Santas look like a collection you found at an antique shop. Which spot in your home would hold your Santa row..
You will need: Three to five handmade Santa figures, fresh or faux greenery and a small piece of burlap or linen.
How to make it: 1. Clear the shelf and lay a strip of linen along it. 2. Place the tallest Santa in the middle and the shorter ones at the sides. 3. Tuck greenery between the figures for a cozy finish.
Clay Belsnickel Style Santa

A belsnickel is the old German style Santa with a long robe and a stern but kind face, the kind of figure that shaped the Thomas Nast Santa and that Nast would have known from his childhood. Shape one from air dry clay around a foil cone, then paint the robe in rich red and dry brush the beard in cream. Rub a little brown paint over it and wipe it off so it looks a hundred years old. No kiln needed. Would you make yours tall and thin or short and round?
You will need: Air dry clay, aluminum foil, acrylic paints, a small brush and a soft cloth.
How to make it: 1. Crumple foil into a 6 inch cone and wrap it in clay. 2. Shape a hood, a face and a long beard, then let it dry for two days. 3. Paint, then rub on brown paint and wipe it back for an aged look.
Thomas Nast Santa Wood Slice Ornament

Wood slices are cheap, sturdy and take paint beautifully. Paint a simple Thomas Nast Santa face with a big white beard and rosy cheeks, then seal it and add a loop of twine. You do not need to be an artist. A circle for the face, a curved hat and a cloud shaped beard are all it takes. Make a dozen in one evening and tie them onto gifts as a little extra present. Who on your list would love one?
You will need: Wood slices with holes, acrylic paints, a fine brush, clear sealer and jute twine.
How to make it: 1. Paint a red hat across the top of the slice and a peach circle for the face. 2. Add a white beard, eyes and pink cheeks. 3. Seal it, let it dry and thread twine through the hole.
Old-World Santa From a Cardboard Cone
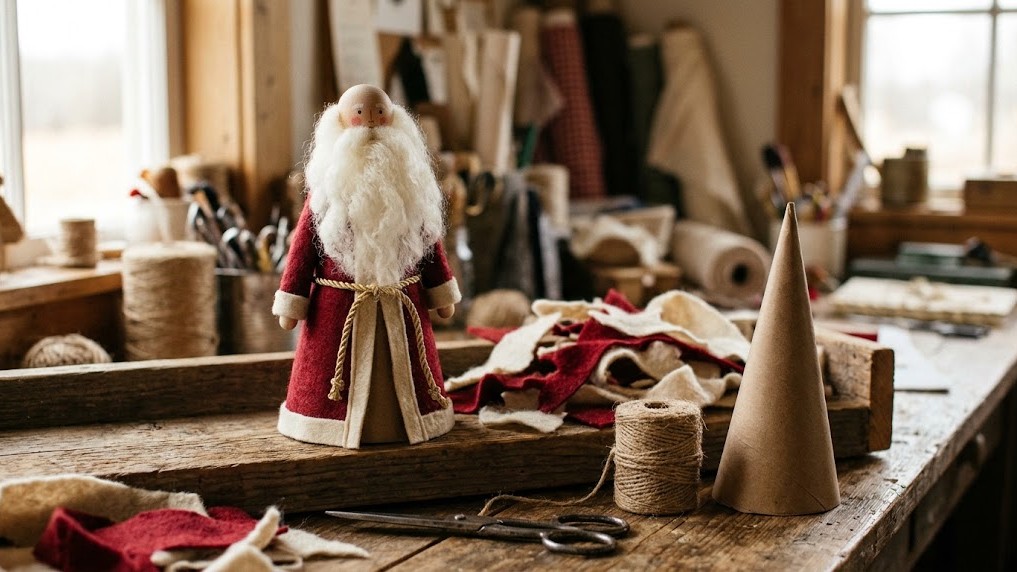
This one costs almost nothing. Roll a cone from a cereal box, wrap it in a scrap of red wool or felt, and glue on a wool roving beard that falls nearly to the floor. A wooden bead makes the head. Trim the robe with a strip of gold ribbon and add a tiny bundle of twigs in his arm. It looks like a treasure from a European Christmas market. Ask an adult to help with the hot glue. How many will you line up?
You will need: Thin cardboard, red wool or felt, white wool roving, a wooden bead, gold ribbon, twigs and a glue gun.
How to make it: 1. Roll and glue the cardboard into a cone. 2. Wrap it in fabric and glue the bead on top as the head. 3. Add the beard, a felt hood, gold trim and a few twigs.
Thomas Nast Santa Paper Garland
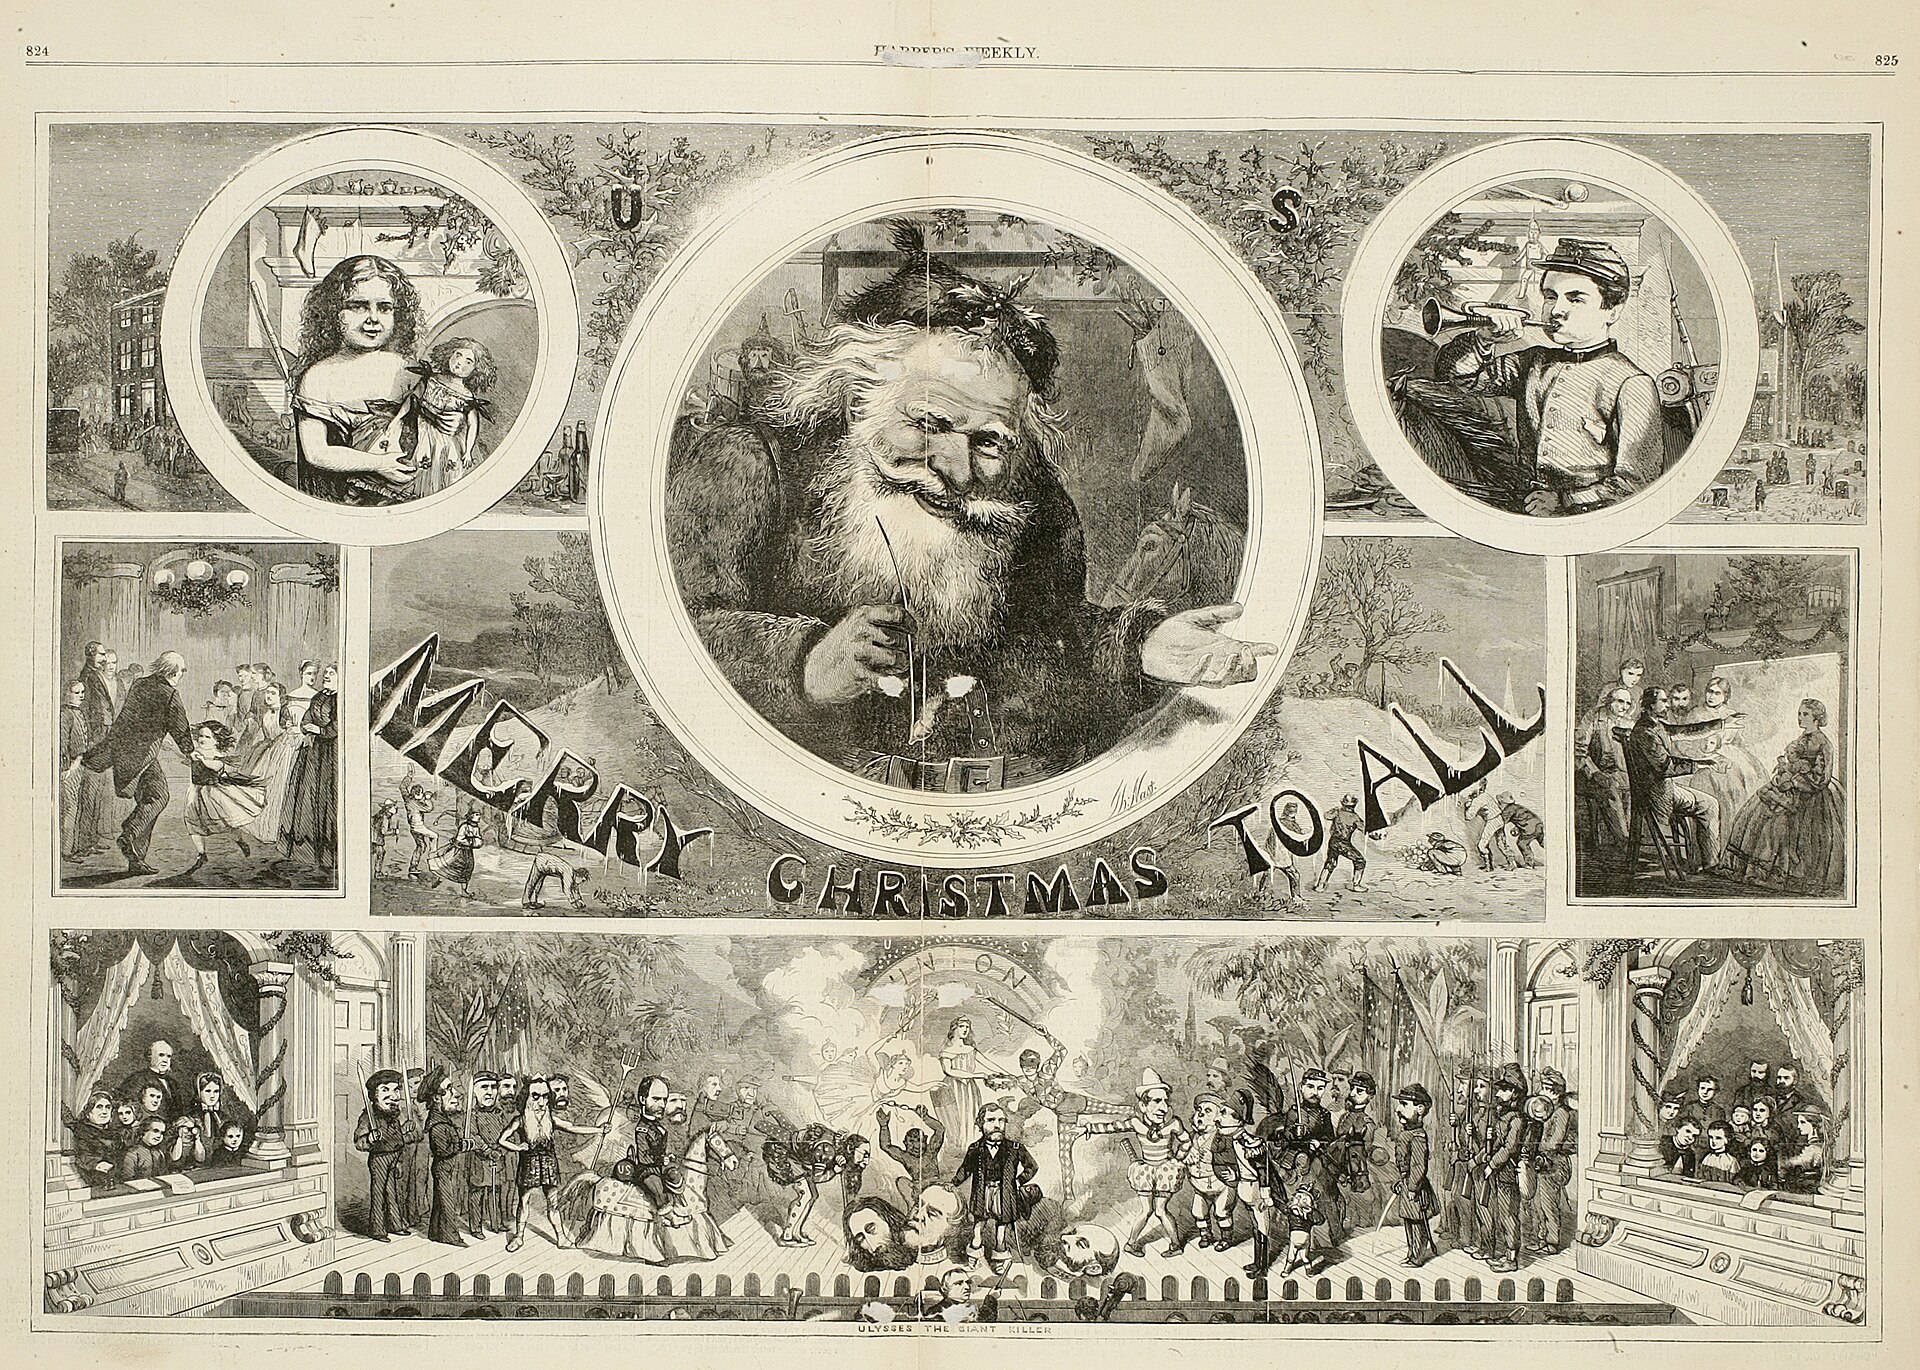
Nast’s Christmas pages are now in the public domain, which means you can print them for your own crafts. This full page from 1865 is packed with little scenes of Santa and happy families. Print a few favorite scenes on cream cardstock, cut them into circles and string them on red baker twine. You can read more about the artist on his Wikipedia page. Which scene would hang in the middle of your garland?
You will need: Printed copies of public domain Nast drawings, cream cardstock, a round punch or scissors, tea for staining and baker twine.
How to make it: 1. Print the drawings and cut them into circles. 2. Brush them lightly with cold tea and let them dry for an aged look. 3. Punch two holes in each and thread them onto the twine.
Paper Mache Santa Trio

Three Thomas Nast Santa figures in three sizes always looks charming. Make them from paper mache over plastic bottles of different heights, then paint each robe a slightly different red with gold trim. Old paper mache Santas from the 1800s were often used as candy containers, so leave a hollow base and hide a few chocolates inside for a surprise. Kids love the messy paper mache step. Which of your helpers will paint the beards?
You will need: Three plastic bottles, newspaper strips, flour and water paste, acrylic paints and gold paint.
How to make it: 1. Cover each bottle in three layers of paper mache and let it dry. 2. Build up a round face and a beard with more paper. 3. Paint the robes, faces and gold trim.
Felt Santa With a Fur Beard

A soft felt Santa with a faux fur beard looks lovely on the tree and is safe for little hands. Cut a simple body shape from red felt, stitch two layers together and stuff them lightly. A small piece of faux fur glued on as a beard makes it look instantly old-world. Add a gold thread loop and he is ready to hang. Use leftover felt from other projects. Could you sew a whole family of them this weekend?
You will need: Red felt, cream felt, faux fur scraps, stuffing, a needle and thread, fabric glue and gold thread.
How to make it: 1. Cut two body shapes and a face circle from felt. 2. Stitch the edges, leaving a gap, then stuff and close. 3. Glue on the face and fur beard and add a hanging loop.
Fabric Santa Doll From a Sock

A single red sock and a handful of rice turn into a sweet Santa doll that sits on a shelf. Fill the sock, tie it off, and the toe becomes his floppy hat. Glue on a fluffy beard and a round nose bead, and add tiny glasses bent from craft wire if you want him to look extra wise. No sewing needed. These make wonderful gifts for grandparents. Who would you give the first one to?
You will need: A red sock, rice, rubber bands, white faux fur or cotton, a wooden bead, craft wire and glue.
How to make it: 1. Fill the bottom of the sock with rice and tie it with a rubber band. 2. Fold the toe over as the hat and glue on a pompom. 3. Glue on the beard, nose and wire glasses.
Thomas Nast Santa Peg Doll Set

Painted wooden Santas fill whole shelves at Christmas markets in Europe, and you can make your own set from plain wooden peg dolls. Give each one the round, jolly Thomas Nast Santa look and paint each robe a different color, like red, deep blue and forest green, and add gold dots for trim. Display them in a row on a windowsill or tuck one into each stocking. Peg dolls are inexpensive at craft stores in packs of ten. Which colors will your Santa family wear?
You will need: Wooden peg dolls, acrylic paints, fine brushes, a gold paint pen and clear sealer.
How to make it: 1. Paint the robe and hood on each peg doll and let it dry. 2. Paint the face and a big white beard. 3. Add gold dots and swirls, then seal.
Rustic Santa Door Hanger
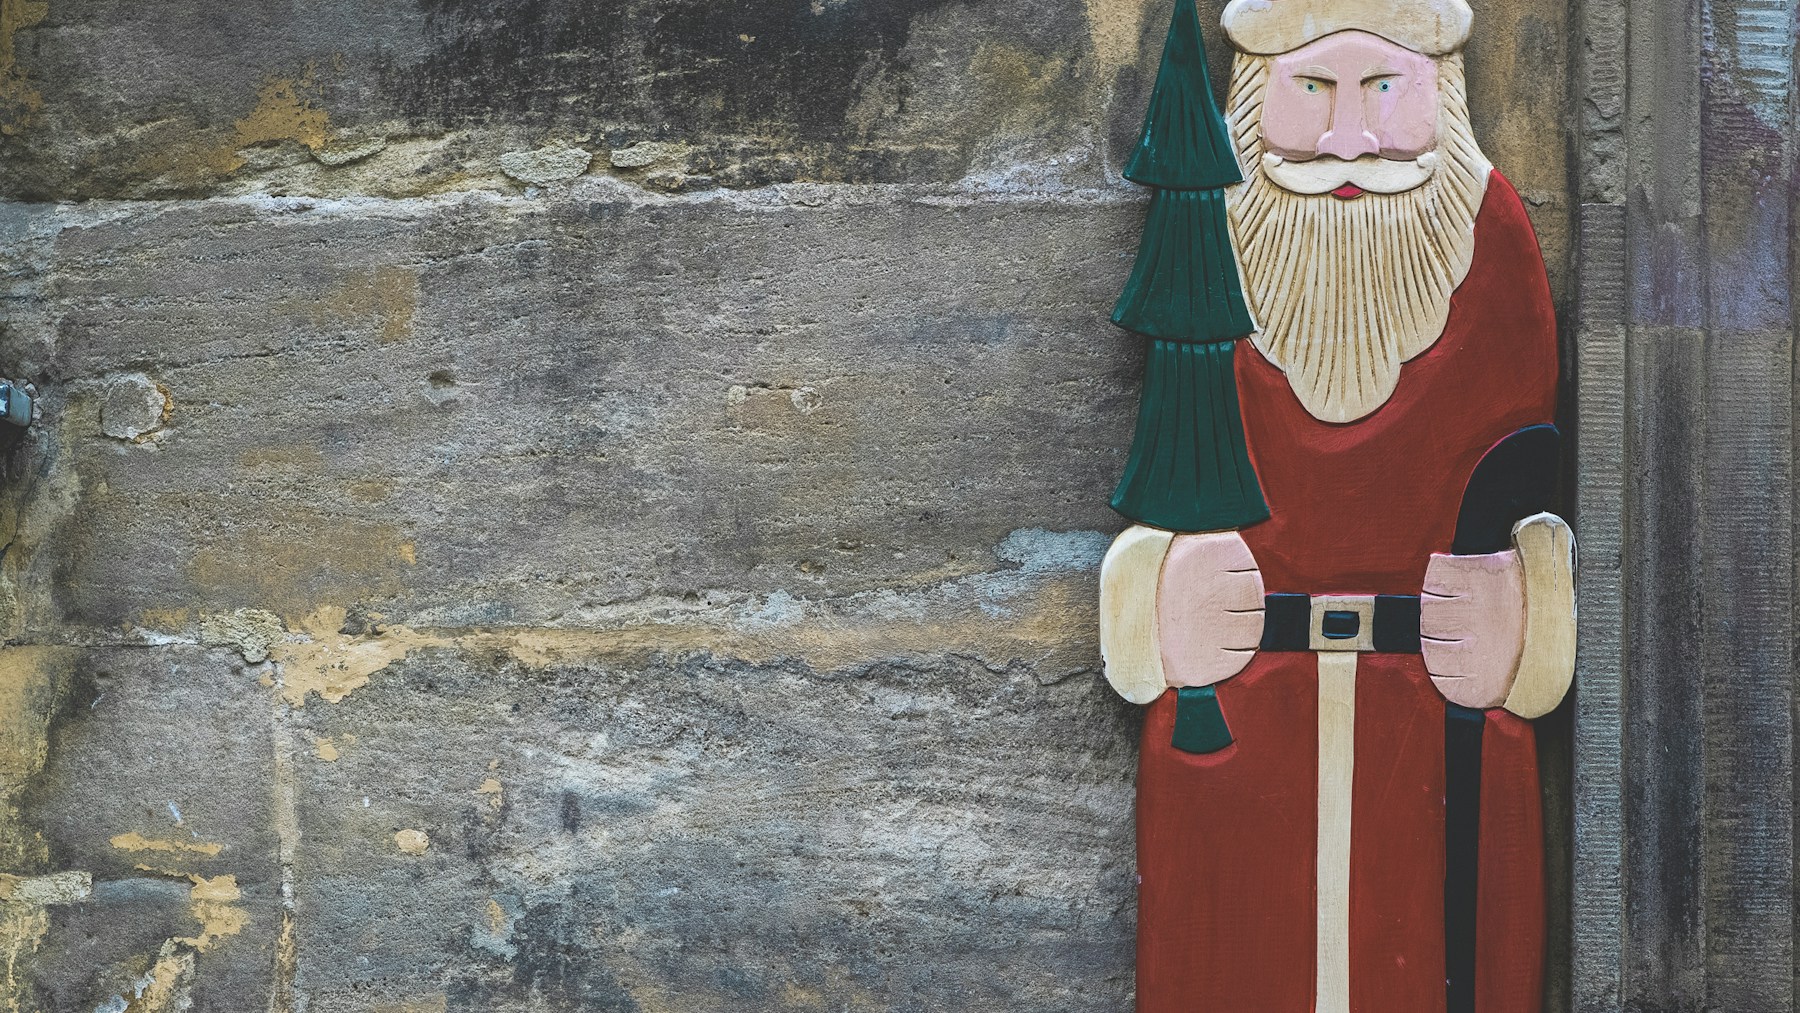
A tall, skinny Santa cut from a fence board looks perfect by the front door or on a porch. Trace a simple shape with a hat, a beard and a long coat, then let an adult cut it out with a jigsaw. Paint it in soft red and cream, sand the edges for a worn look, and add a little painted tree in his hand. It will greet guests all season. Would you put yours inside or out on the porch?
You will need: A fence board or pine board, a jigsaw, sandpaper, outdoor acrylic paints and a sealer.
How to make it: 1. Draw a tall Santa shape on the board and have an adult cut it out. 2. Paint the coat, face, beard and tree. 3. Sand the edges lightly and seal for outdoor use.
Trace a Thomas Nast Santa Onto a Cutting Board
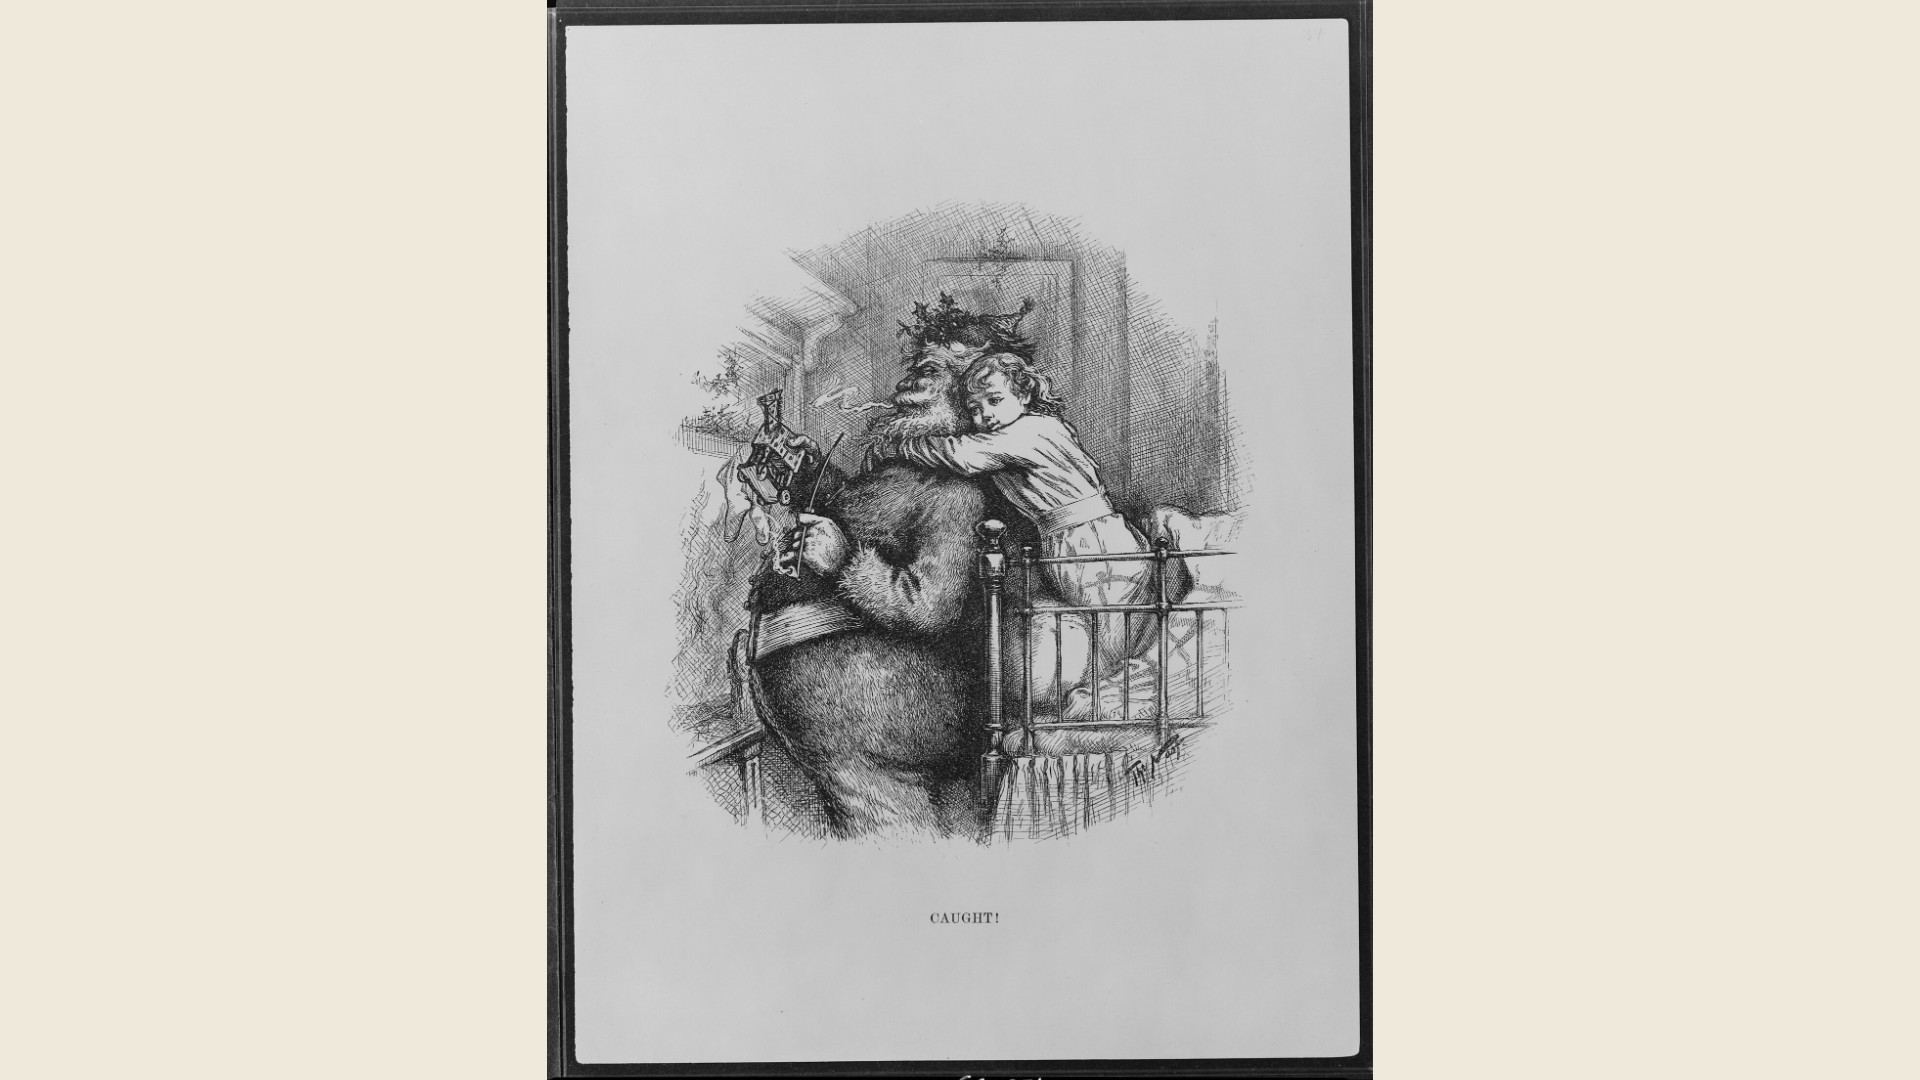
Nast’s pen drawings have such lovely lines that they look wonderful traced onto wood. In this Thomas Nast Santa sketch, two children catch Santa with a big hug. Print the outline, transfer it to a wooden cutting board with graphite paper, and go over the lines with a black paint pen. Use the board for decor only, not for chopping. It makes a striking gift for anyone who loves history. Which of his drawings would you trace first?
You will need: A wooden cutting board, a printed Nast drawing, graphite transfer paper, a black paint pen and clear sealer.
How to make it: 1. Tape the printed drawing and the graphite paper onto the board. 2. Trace the main lines with a pencil. 3. Go over the lines with the paint pen and seal it.
Hand Painted Santa Face Ornament

Old-world Santa ornaments often show just his smiling face peeking out from a red hood. You can copy that look with a plain plastic ball ornament and a bit of air dry clay. Press a thin clay face onto the front, add a fluffy beard and a hood rim, then paint it after it dries. Hang it low on the tree so guests can see the details. Would you give your Santa a wink or a smile?
You will need: Plain plastic ball ornaments, air dry clay, acrylic paints, a fine brush and glossy sealer.
How to make it: 1. Press a thin oval of clay onto the ornament and shape a nose and cheeks. 2. Add a clay beard and hood rim and let it dry. 3. Paint the details and finish with sealer.
Gilded Old-World Santa Wall Hanging
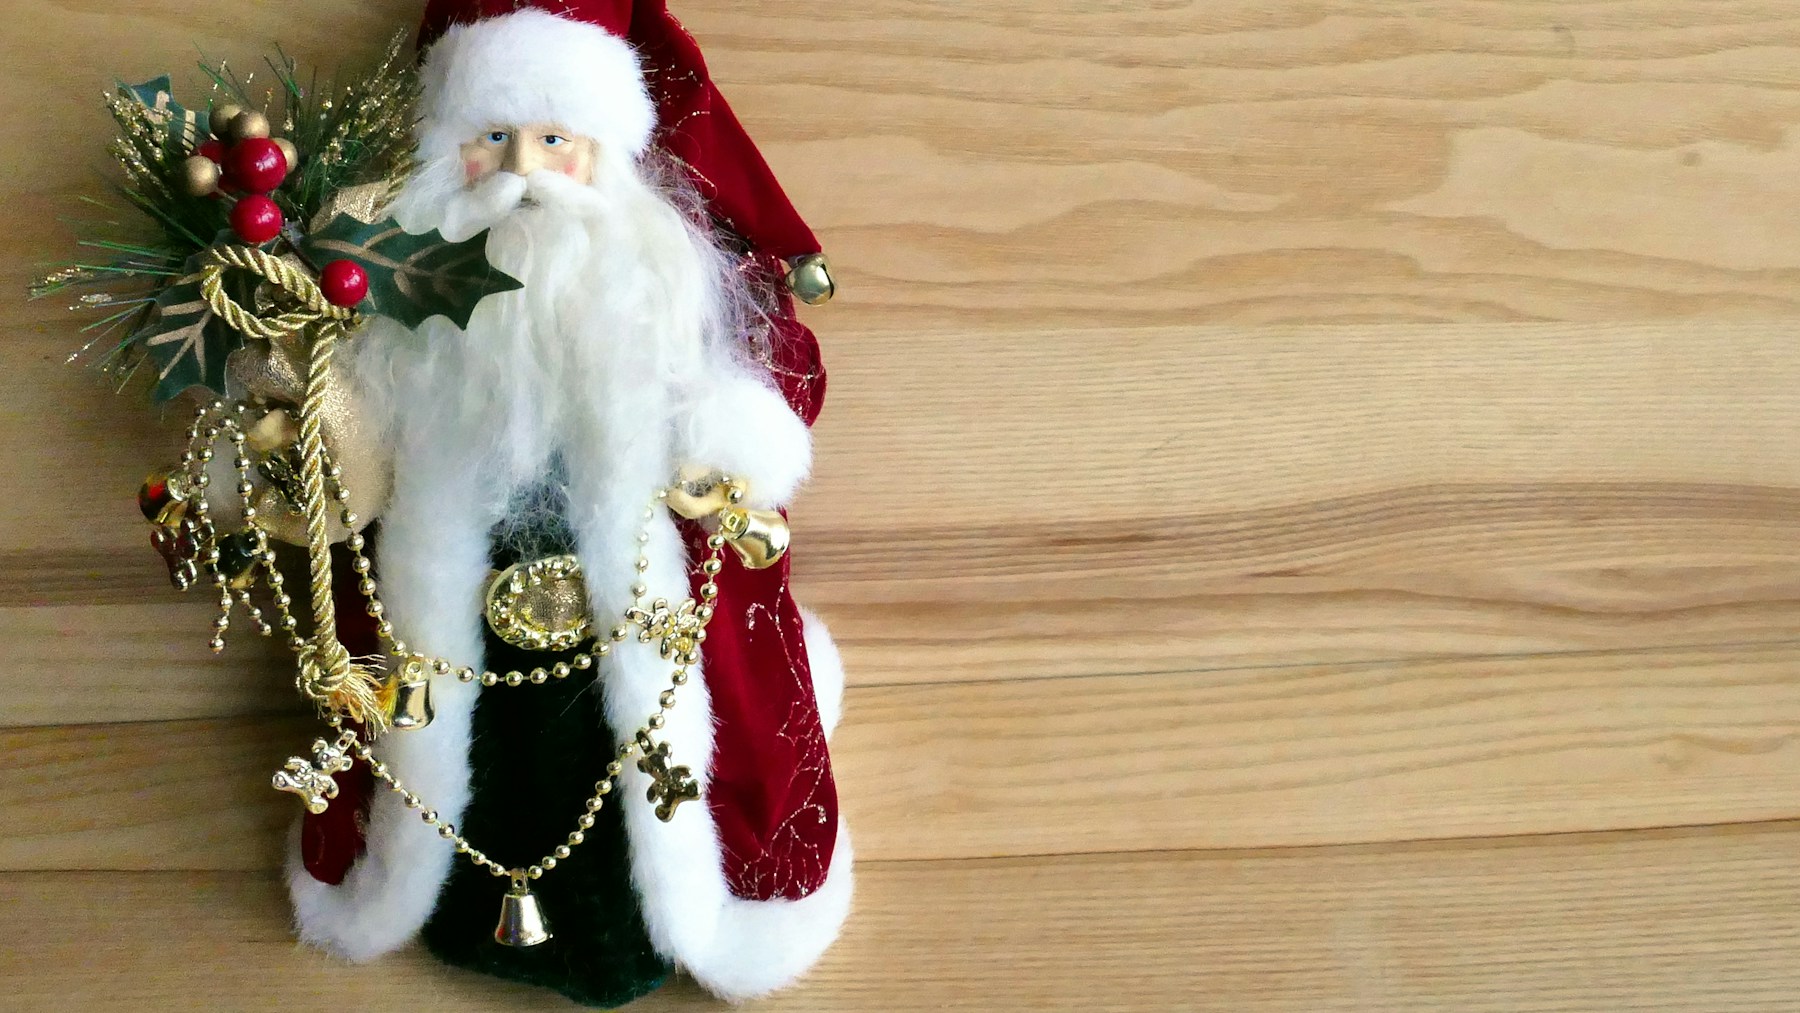
For a showstopper, make a large Thomas Nast Santa that hangs on the wall with a long robe, gold trim, pine sprigs and a lantern in his hand. Use a foam cone or a stuffed fabric body, then add a heavy velvet robe and plenty of gold ribbon. A long white beard made of wool roving finishes the look. Keep any lantern battery powered. It looks like an heirloom from an old European home. Where would yours hang?
You will need: A foam cone, red velvet, gold ribbon, wool roving, faux pine sprigs, a small battery lantern and a glue gun.
How to make it: 1. Wrap the cone in velvet and glue on the gold ribbon trim. 2. Add a head, a hood and a long roving beard. 3. Glue on pine sprigs and the little lantern, then add a hanging loop.
Mini Santa Toy Sack Gift Bags
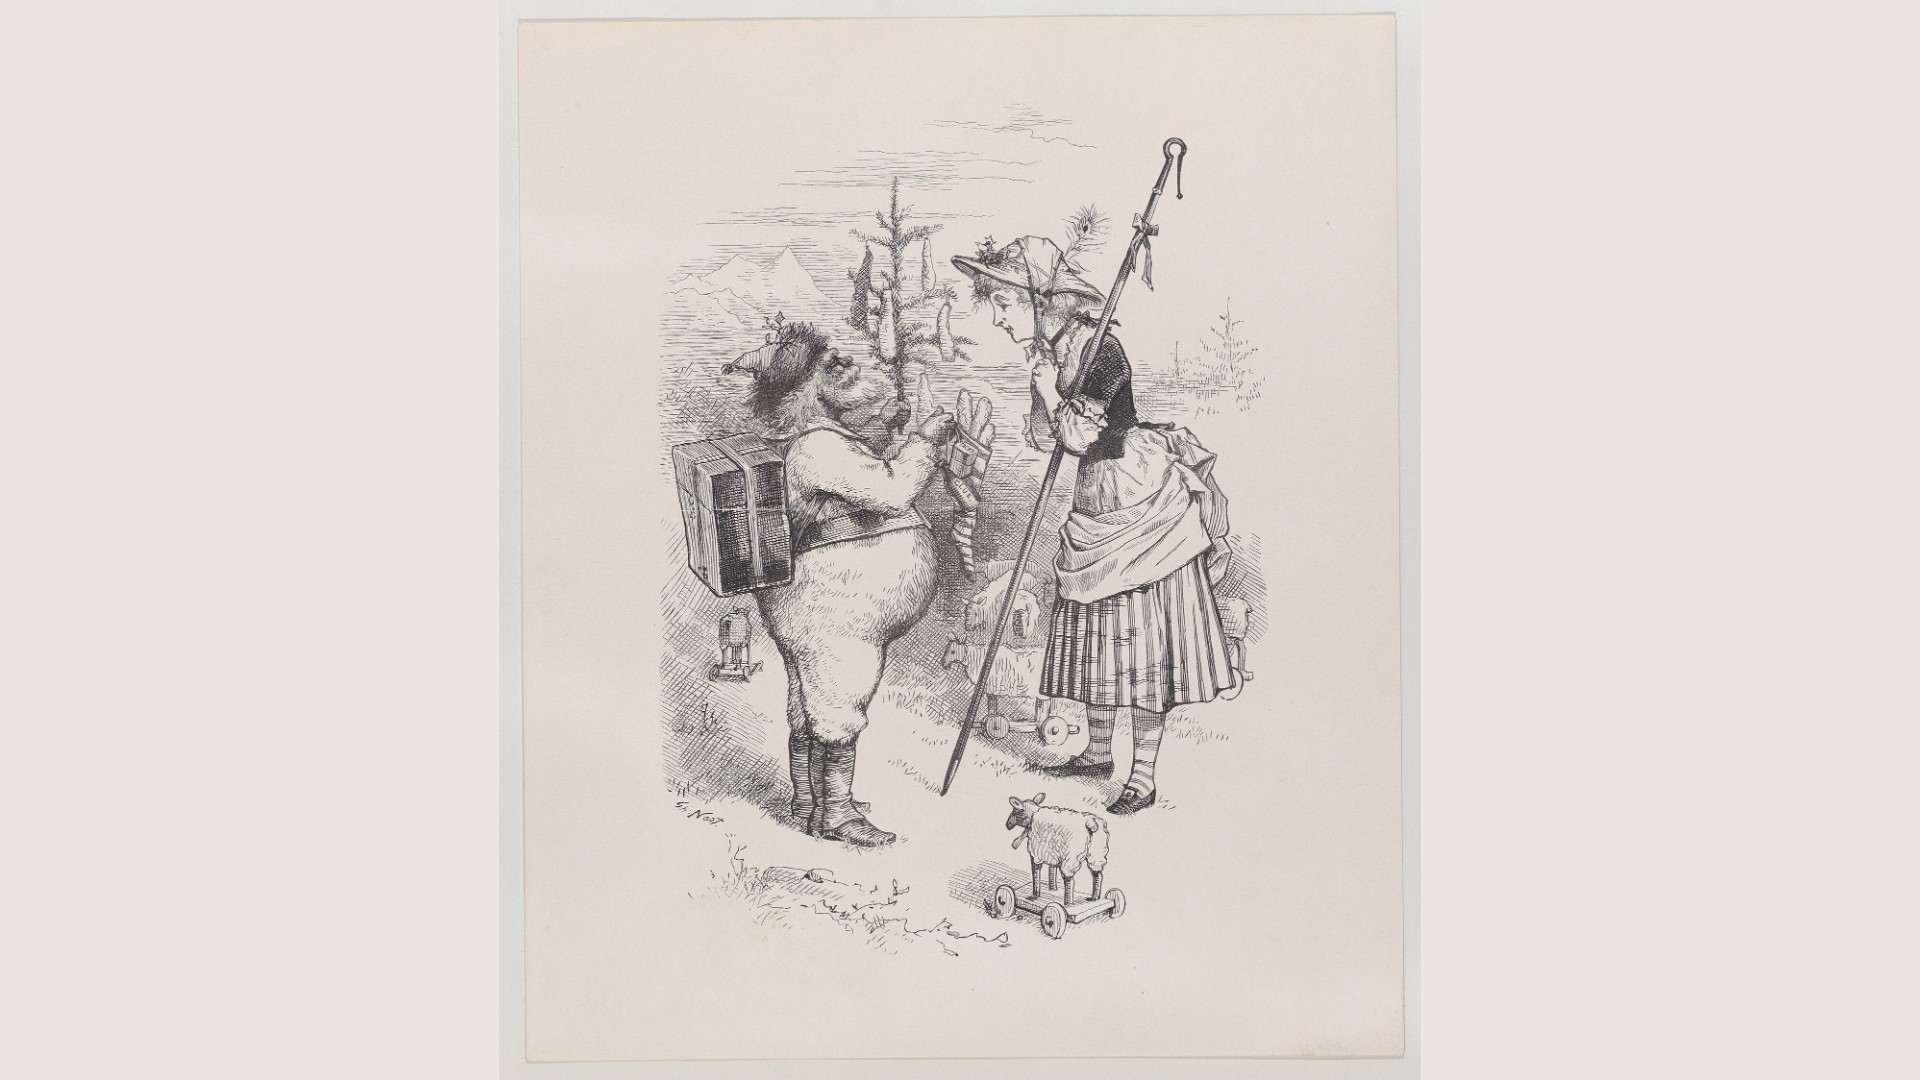
In nearly every Thomas Nast Santa drawing, he carries a pack stuffed with toys, just like in this sweet scene with Little Bo Peep. Small burlap sacks tied with red twine make the perfect nod to that pack. Fill them with homemade cookies or tiny gifts and stamp a little Santa on the front. They double as place settings on the Christmas table. For more vintage style ideas, see our old-fashioned handmade ornaments. What would you tuck inside yours?
You will need: Small burlap or muslin bags, red twine, a Santa rubber stamp or stencil, red paint and small treats.
How to make it: 1. Stamp or stencil a Santa onto the front of each bag. 2. Let the paint dry fully. 3. Fill the bags, tie them with twine and add a name tag.