Hand Embroidery Tricks: 13 Easy Ideas That Turn Plain Clothes Into Boutique Pieces
Hand embroidery tricks have a way of making plain clothes feel brand new. A few fluffy wool roses on a denim jacket, a row of tiny daisies on a shirt collar, a little bee peeking from a cardigan, and suddenly that basic piece looks like it came from a boutique. Some of the most watched craft videos online are simple tricks like wrapping yarn around a fork or a pencil to make a perfect flower, with millions of views each. You do not need to be an expert, and you do not need a sewing machine. A needle, some thread and an hour on the sofa are enough. Here are easy ideas to bring your wardrobe back to life..
Hand Embroidery Tricks for a Boutique Look
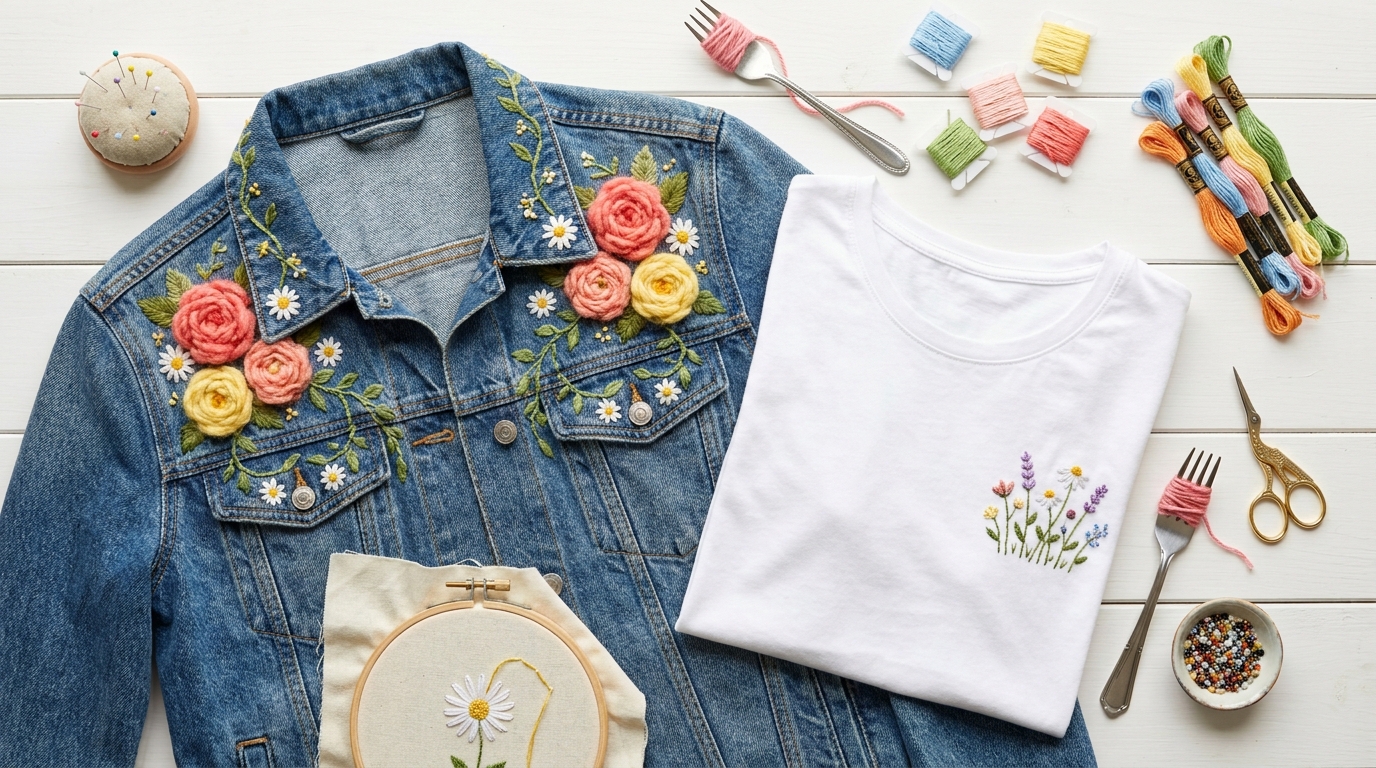
Look at this denim jacket and plain white tee. A few hours ago they were ordinary. Now they are covered in fluffy roses, tiny daisies and trailing vines, and they look like something you would pay a lot for in a little boutique. That is the joy of embroidery: it is slow, calming and completely personal. Every stitch is yours. The best part is that most of these looks use just a handful of easy stitches you can learn tonight. Which piece in your closet is begging for a makeover..
You will need: Embroidery floss or wool yarn in several colors, embroidery needles, a small hoop, sharp scissors, a water soluble marking pen, the garment you want to decorate.
How to make it: 1. Wash and iron the garment, then draw your design lightly with a washable pen. 2. Place the area in a hoop so the fabric is tight. 3. Stitch your design, keeping the back neat, and remove the marks with a damp cloth.
The Fork Wool Rose Trick
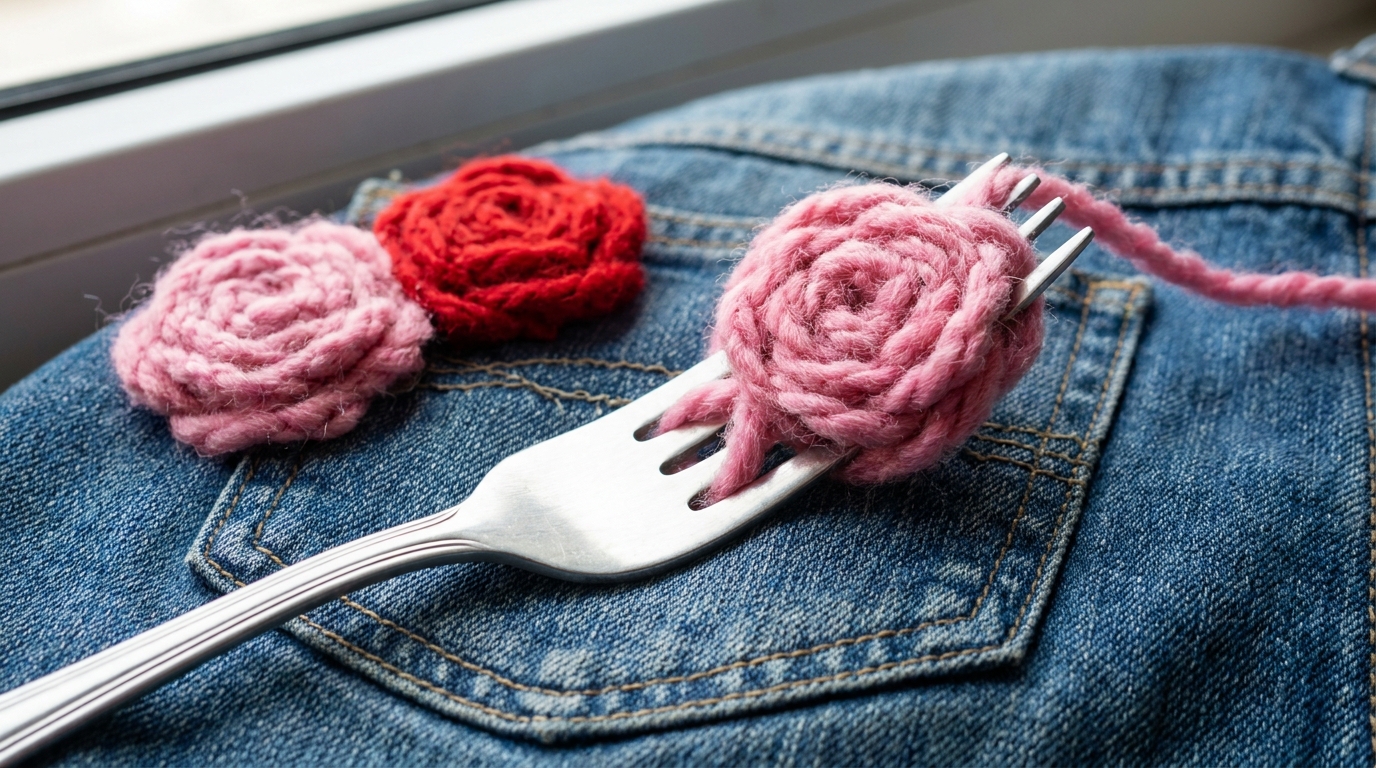
This is one of the most famous hand embroidery tricks online, with one fork rose video passing 8.8 million views on YouTube. You weave yarn over and under the tines of an ordinary dinner fork, slide it off, and the bundle puffs up into a rose. Stitch it onto a jacket pocket, a bag or a hat, and it looks like a tiny bouquet. It is quick, cheap and so satisfying. Would you have guessed a kitchen fork could do that?
You will need: A dinner fork, soft wool or acrylic yarn, a large eye needle, scissors, the garment.
How to make it: 1. Tie a length of yarn around the middle of the fork tines. 2. Weave a long strand over and under the tines, round and round, until it is full. 3. Tie the center tight, slide it off, fluff it into a rose and stitch it onto your fabric.
Pencil Wrapped Woolen Flower
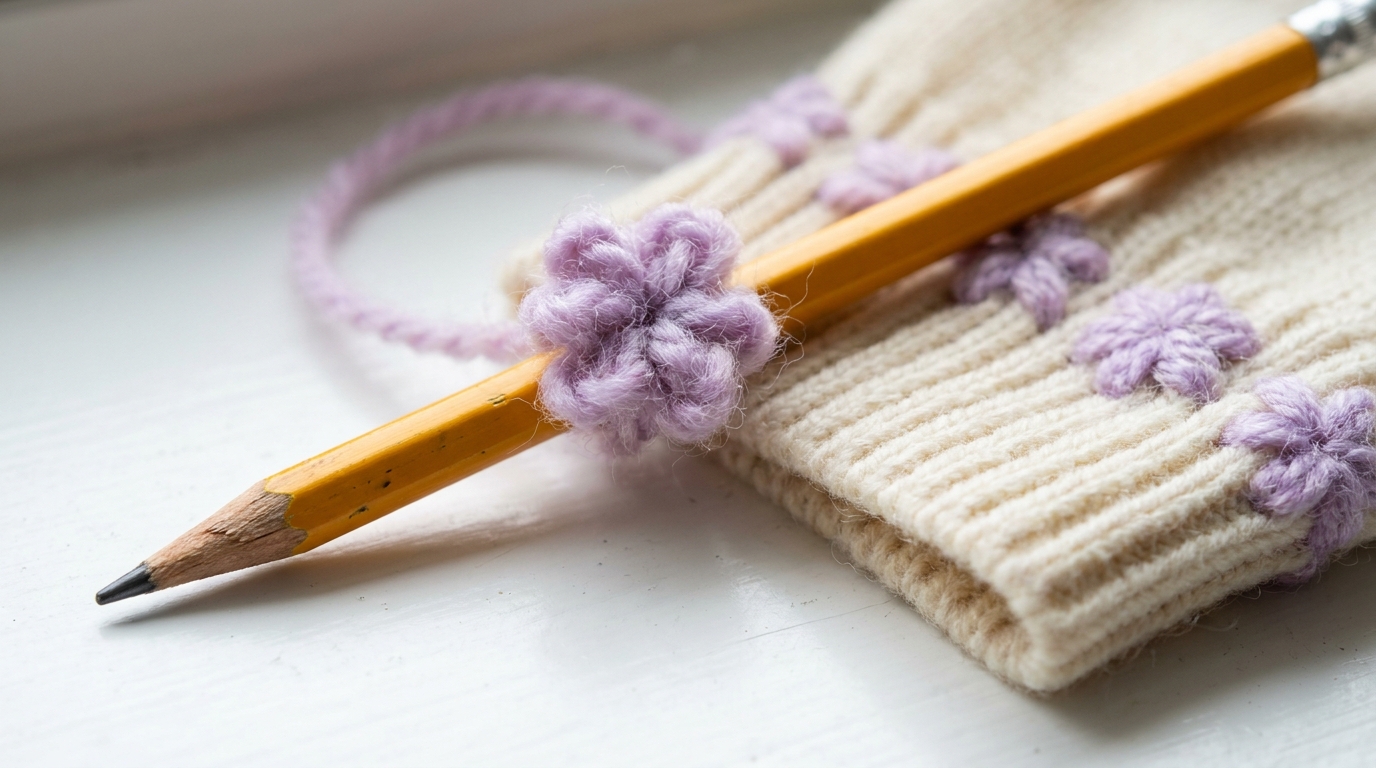
If the fork trick makes roses, the pencil trick makes sweet little blossoms. A pencil flower video on YouTube has more than 8 million views, and it is easy to see why. You wind yarn around a pencil in loops, stitch through the loops, and pull them into a round flower. Tiny pencil flowers look adorable scattered along a sweater cuff or a baby cardigan. Make a few in pastel colors and you have a spring garden on your sleeve. Which color would you start with?
You will need: A pencil, soft yarn, a large eye needle, thread to match, scissors.
How to make it: 1. Wrap the yarn around the pencil about twenty times. 2. Run a needle and thread through all the loops along one side and slide them off. 3. Pull the thread tight to form a circle, knot it and stitch the flower onto the garment.
Silk Ribbon Roses
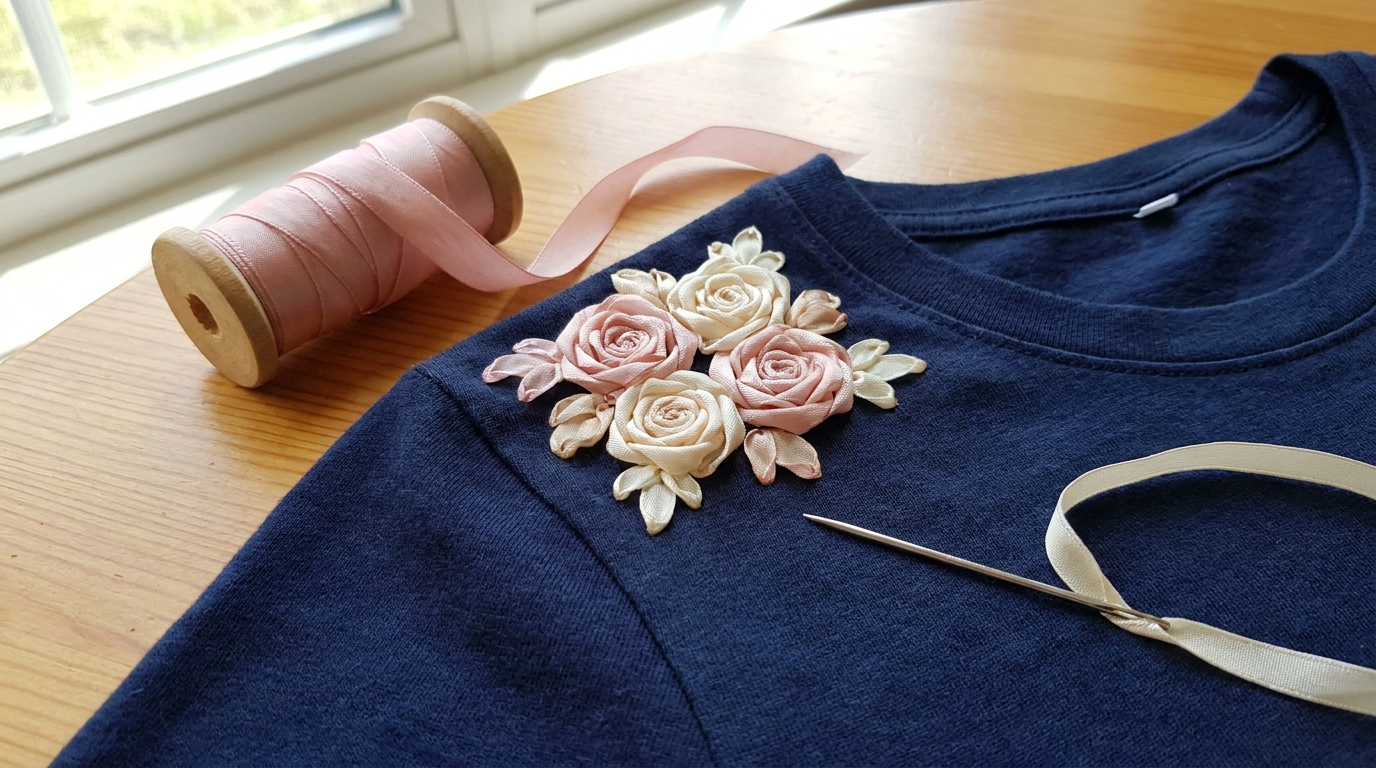
Silk ribbon embroidery creates soft, three dimensional roses that catch the light beautifully. A ribbon flower trick using a simple ruler or scale on YouTube has nearly 7 million views. The method is easy: you make a small spider web of thread, then weave the ribbon over and under the spokes until a rose blooms. On the shoulder of a plain navy tee, a cluster of three roses looks elegant and grown up. Would you wear roses on your shoulder?
You will need: Silk or satin ribbon about 4 mm wide, a chenille needle with a large eye, embroidery floss, a hoop, the garment.
How to make it: 1. Stitch five straight spokes from a center point like a star with floss. 2. Bring the ribbon up in the center and weave it over and under the spokes, letting it twist. 3. Keep going until the spokes are covered, then take the ribbon to the back and secure it.
Hand Embroidery Tricks for Collars: Lazy Daisies
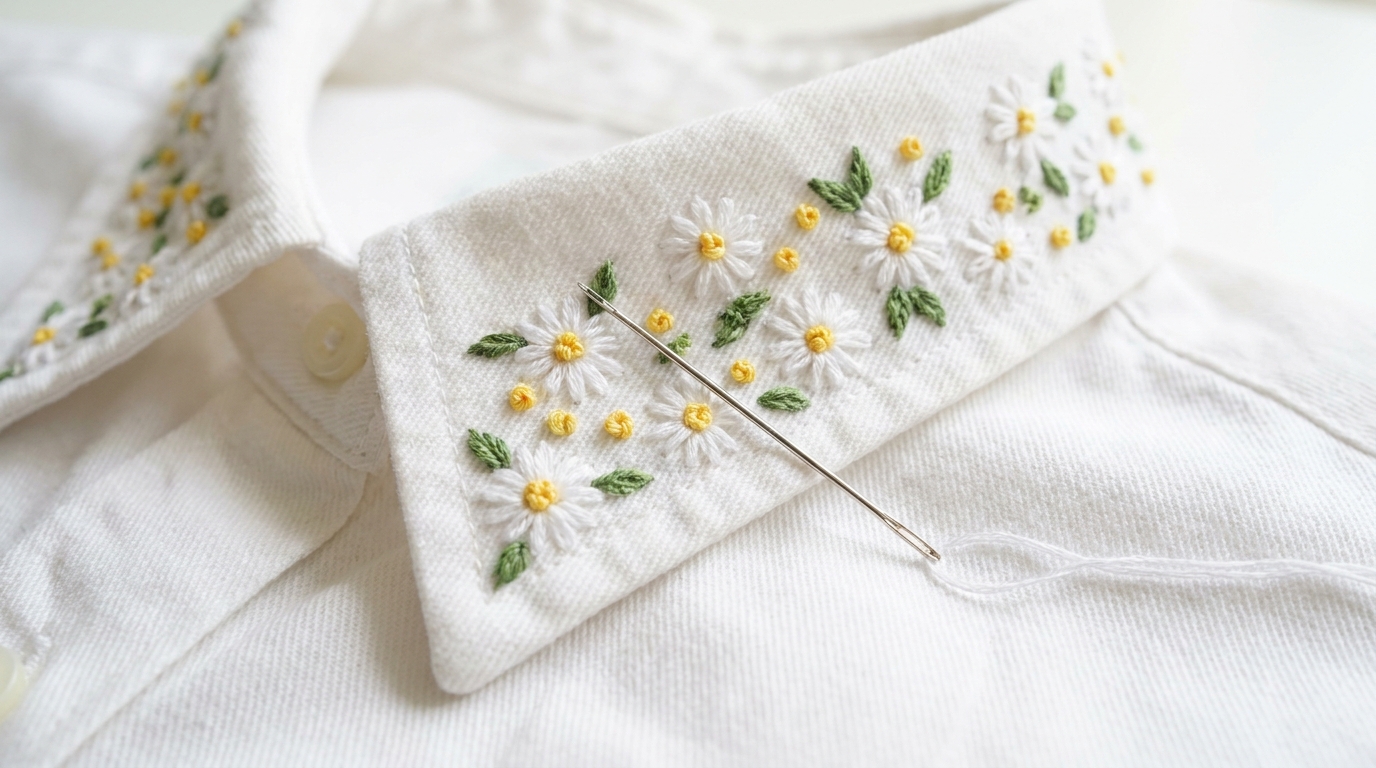
The lazy daisy is the friendliest stitch in the world. Each petal is just a small loop held down with a tiny stitch at the tip, and five or six petals make a daisy. Scatter them along a white shirt collar with yellow French knot centers, and a plain shirt becomes a cottage style favorite. It is one of the best hand embroidery tricks for beginners because mistakes hide easily among the petals. Which shirt in your closet needs a daisy chain?
You will need: White and yellow embroidery floss, green floss for leaves, an embroidery needle, a small hoop, a washable marking pen.
How to make it: 1. Mark small dots where each daisy center will go. 2. For each petal, bring the needle up at the center, form a loop and anchor the tip with a tiny stitch. 3. Fill the centers with yellow French knots and add a few green leaf stitches.
Beaded Neckline Sparkle
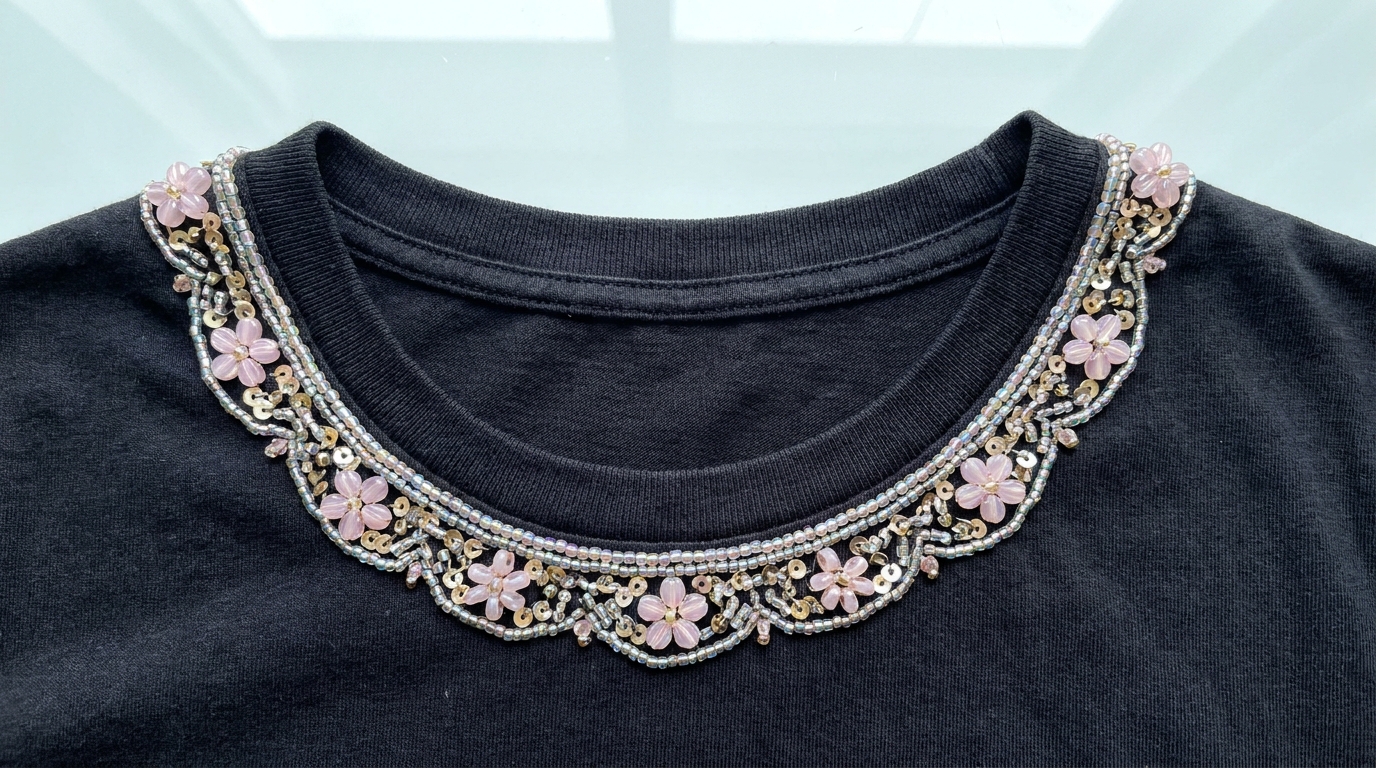
A beaded neckline turns a basic black tee into something you could wear to dinner. One beaded hand embroidery neckline video on YouTube has passed 23 million views, proof that people love this glow up. Seed beads and small sequins are stitched one by one along the collar in a simple floral or scalloped pattern. It takes patience, but the sparkle is worth every minute. Work a small section each evening and it will be done by the weekend. Where would you wear it first?
You will need: A plain t shirt, seed beads and small sequins, beading needle, strong thread to match, a hoop, a washable pen.
How to make it: 1. Draw a simple border pattern along the neckline. 2. Stitch beads on one or two at a time with a backstitch so they sit flat. 3. Add sequins as flower centers, knot the thread securely on the back after every few inches.
Hand Embroidery Tricks With French Knot Polka Dots
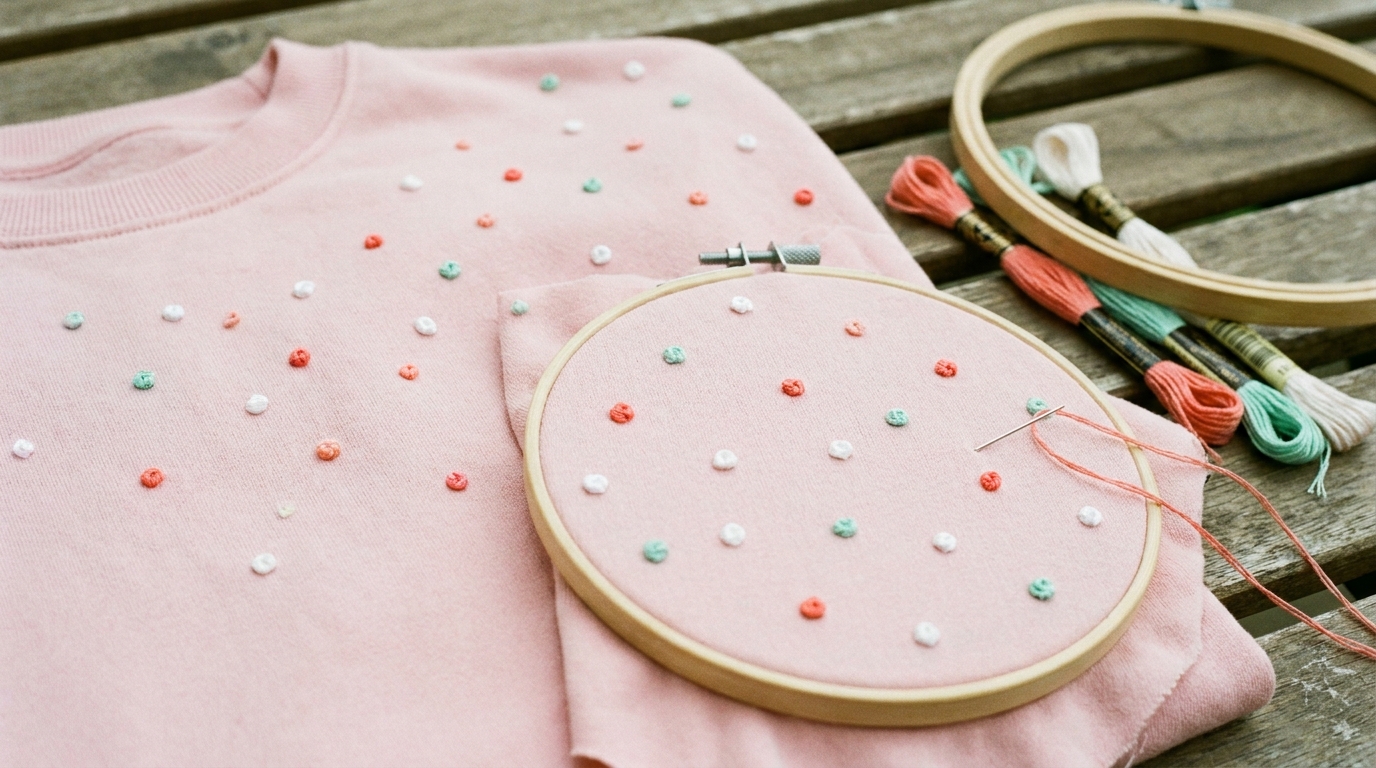
French knots are tiny, round and textured, and when you scatter them across a sweatshirt they look like playful polka dots. Mix three colors like white, coral and mint for a fresh, modern look. The knot is simple once you get the feel of it: wrap the thread around the needle twice and push it back in right next to where it came out. It is one of those hand embroidery tricks that looks fancy but is really just repetition. How many dots will your sweatshirt get?
You will need: A sweatshirt, embroidery floss in three colors, an embroidery needle, a hoop.
How to make it: 1. Bring the needle up where you want a dot. 2. Wrap the floss around the needle twice and hold it snug. 3. Insert the needle back next to where it came up and pull through slowly to form the knot.
Wildflowers on Denim
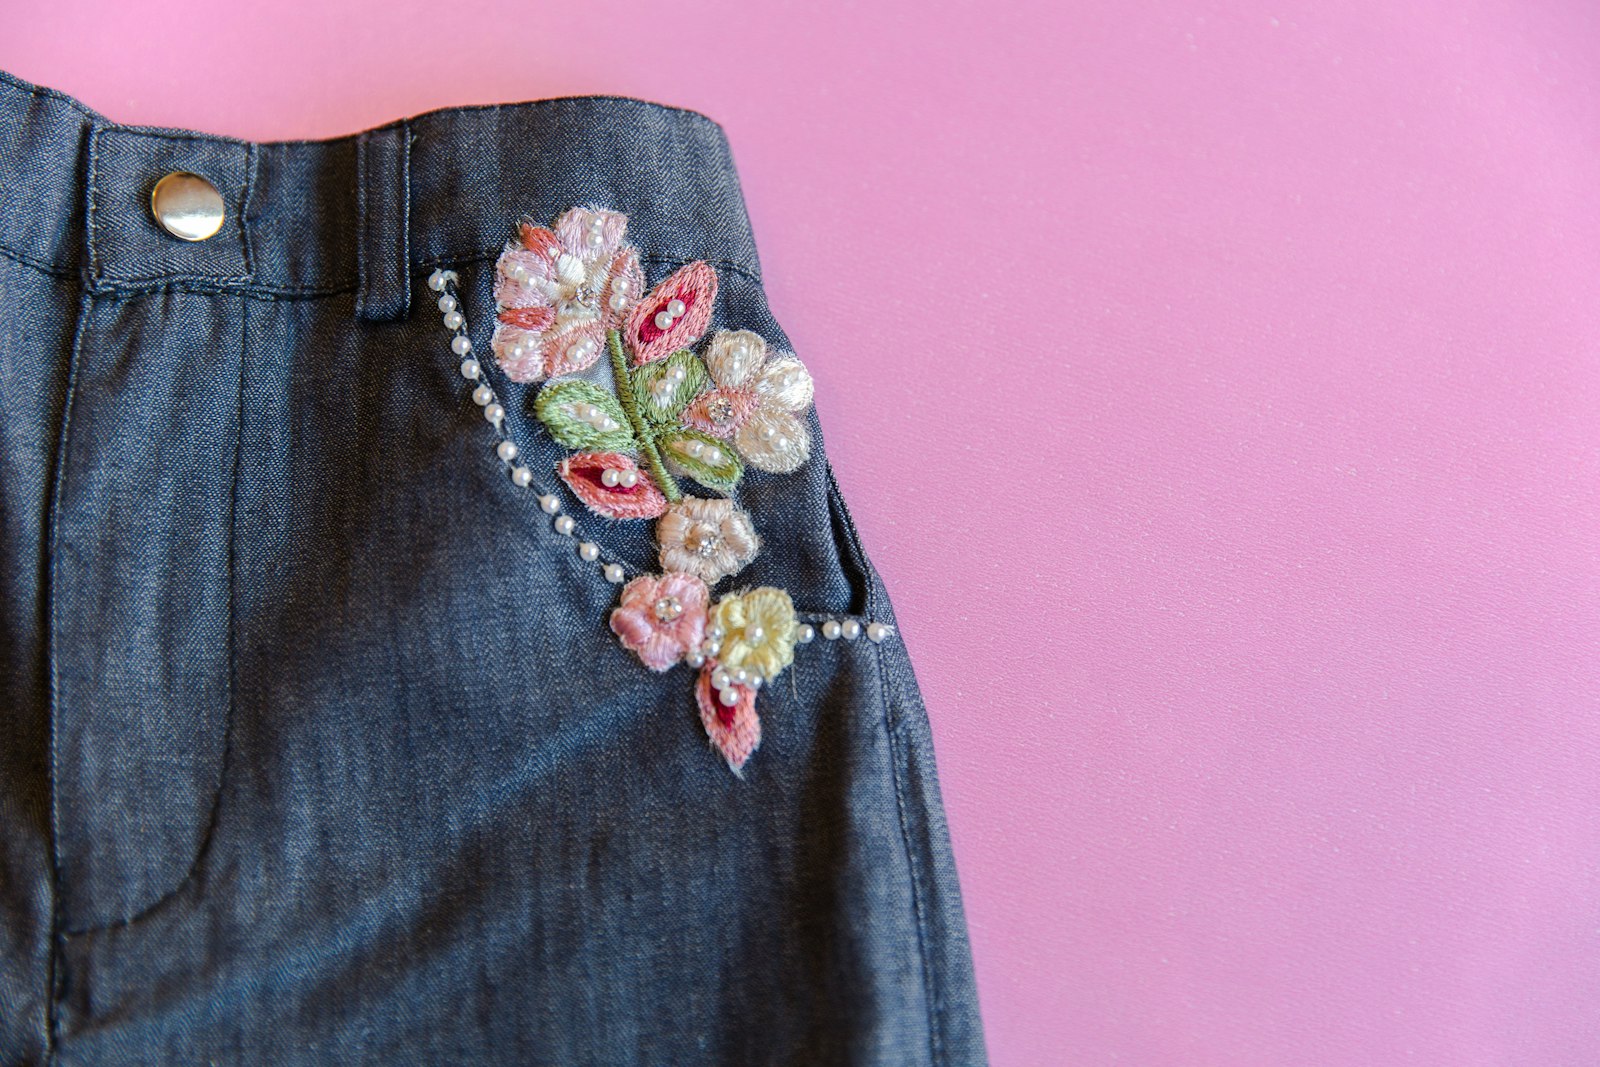
Denim is the perfect canvas for hand embroidery tricks because it is sturdy and the blue makes every color pop. A sprig of wildflowers on a pocket, the hem of shorts or the back of a jacket instantly adds charm. Use simple stitches: straight stitches for stems, lazy daisies for petals and French knots for centers. Kids love choosing the colors for their own clothes, and older children can help stitch. Which pair of jeans will you bloom first?
You will need: Denim jeans, shorts or jacket, embroidery floss, a sharp embroidery needle, a hoop, a washable pen.
How to make it: 1. Draw a few stems and flower shapes on the denim. 2. Backstitch the stems in green and add leaves with lazy daisy stitches. 3. Fill the flowers with petals and knots, keeping the stitches short so they hold up in the wash.
Stars and Planets on Jeans
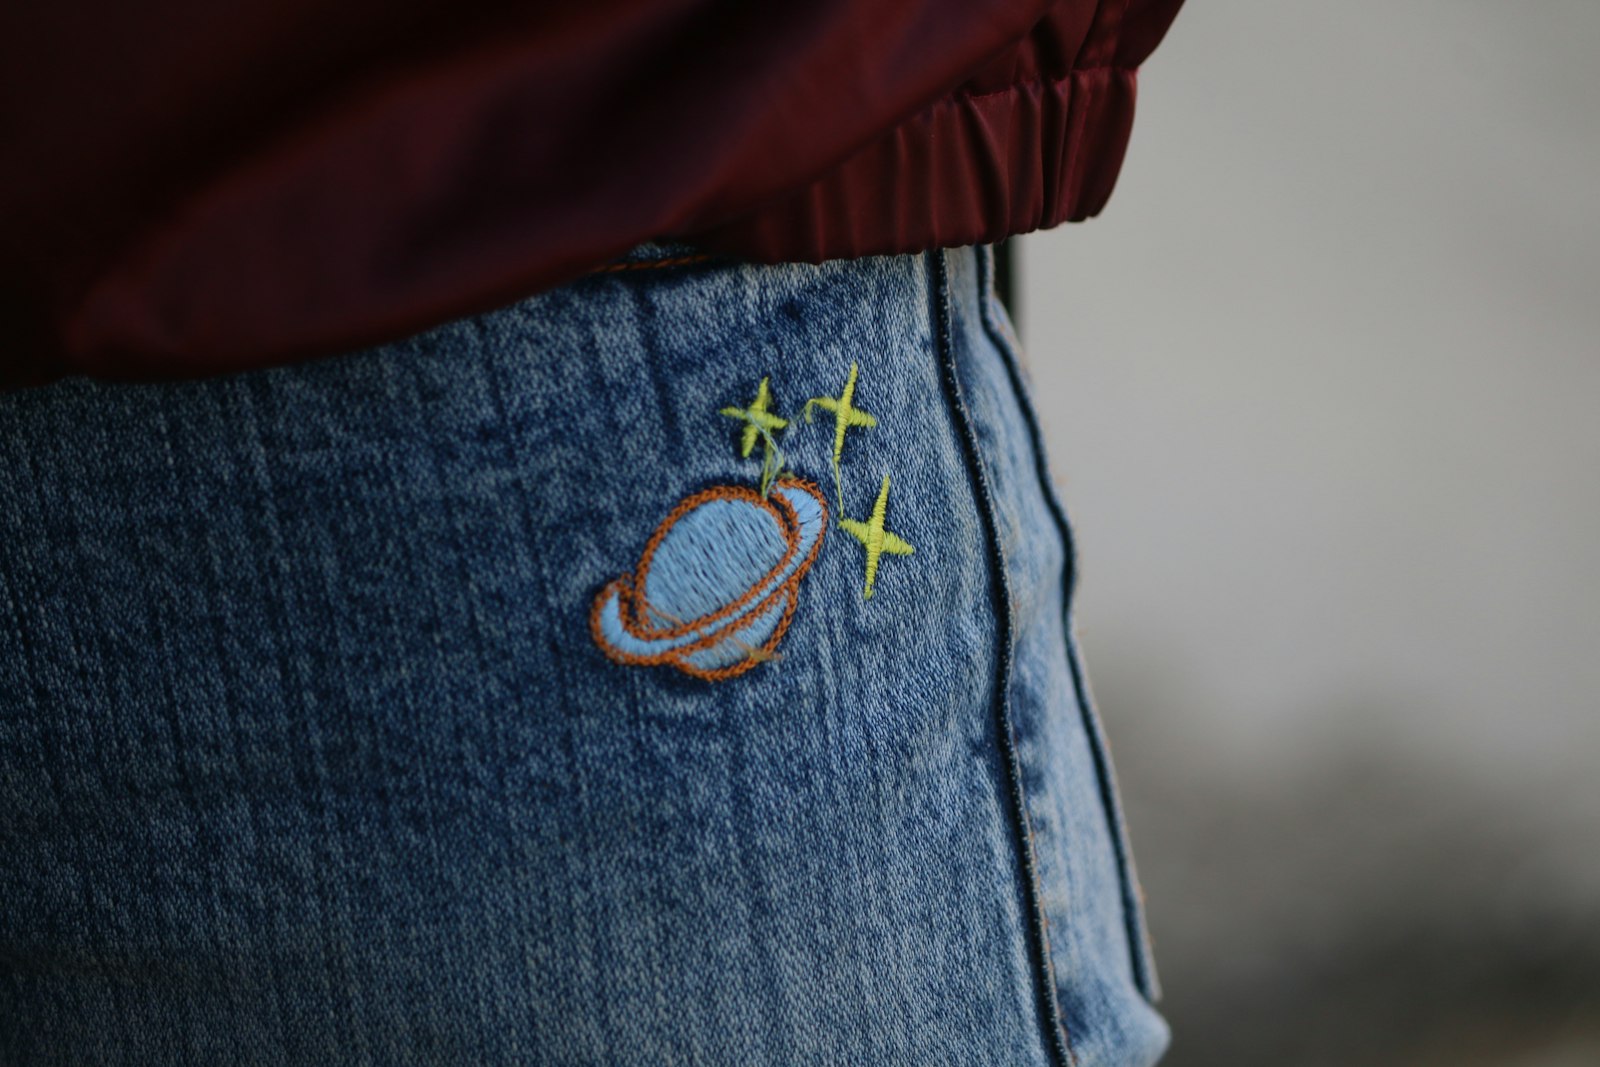
Not every design has to be floral. A little planet with a ring and a few stars stitched on jeans looks playful and cool, especially for teens. Simple satin stitch fills the planet, and a few straight stitches make each star sparkle. You can add a moon, a comet or a tiny rocket too. This is a great way to cover a small stain or a worn spot. For more ways to personalize clothes, try our painted clothes ideas. What would your galaxy look like?
You will need: Jeans, embroidery floss in gold, white and bright colors, an embroidery needle, a hoop, a washable pen.
How to make it: 1. Draw a circle for the planet with a ring across it and mark a few stars. 2. Fill the planet with satin stitch and outline the ring with backstitch. 3. Make each star with four or five straight stitches crossing in the middle.
A Vine Around a Hat Brim
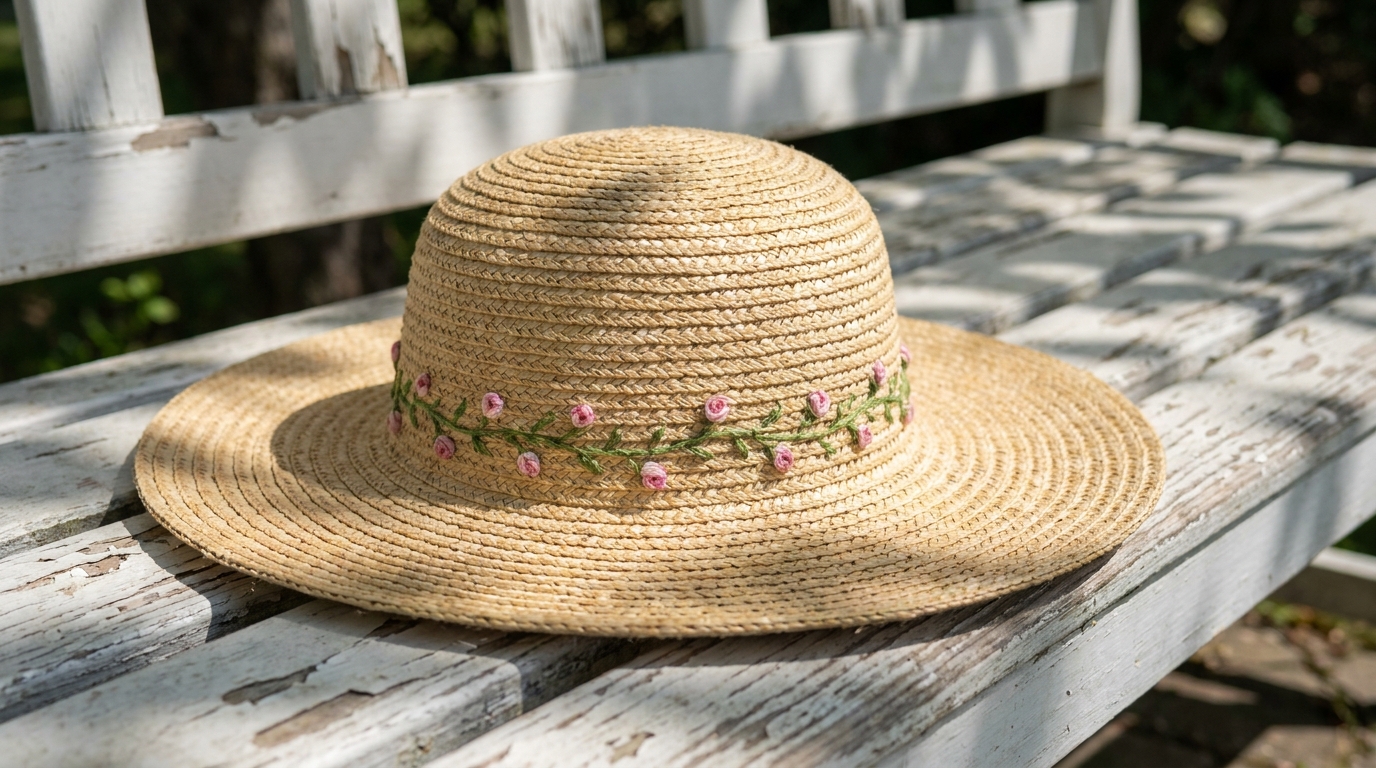
A plain straw hat becomes a garden party showstopper with a delicate vine stitched around the band. Use a running or stem stitch for the vine, then dot tiny pink flowers along it. On canvas or cotton hats, it works the same way. It is one of the prettiest hand embroidery tricks for summer, a lovely project for warm evenings and makes a sweet gift for anyone who loves to garden. The vine can wrap all the way around or just trail across the front. Who would you make a hat for?
You will need: A straw or cotton hat, embroidery floss in green and pink, a sharp needle, a thimble.
How to make it: 1. Stitch a wavy vine around the band with stem stitch. 2. Add small leaves with lazy daisy stitches along the vine. 3. Finish with tiny pink French knot or lazy daisy flowers spaced along it.
A Tiny Bee on a Cardigan
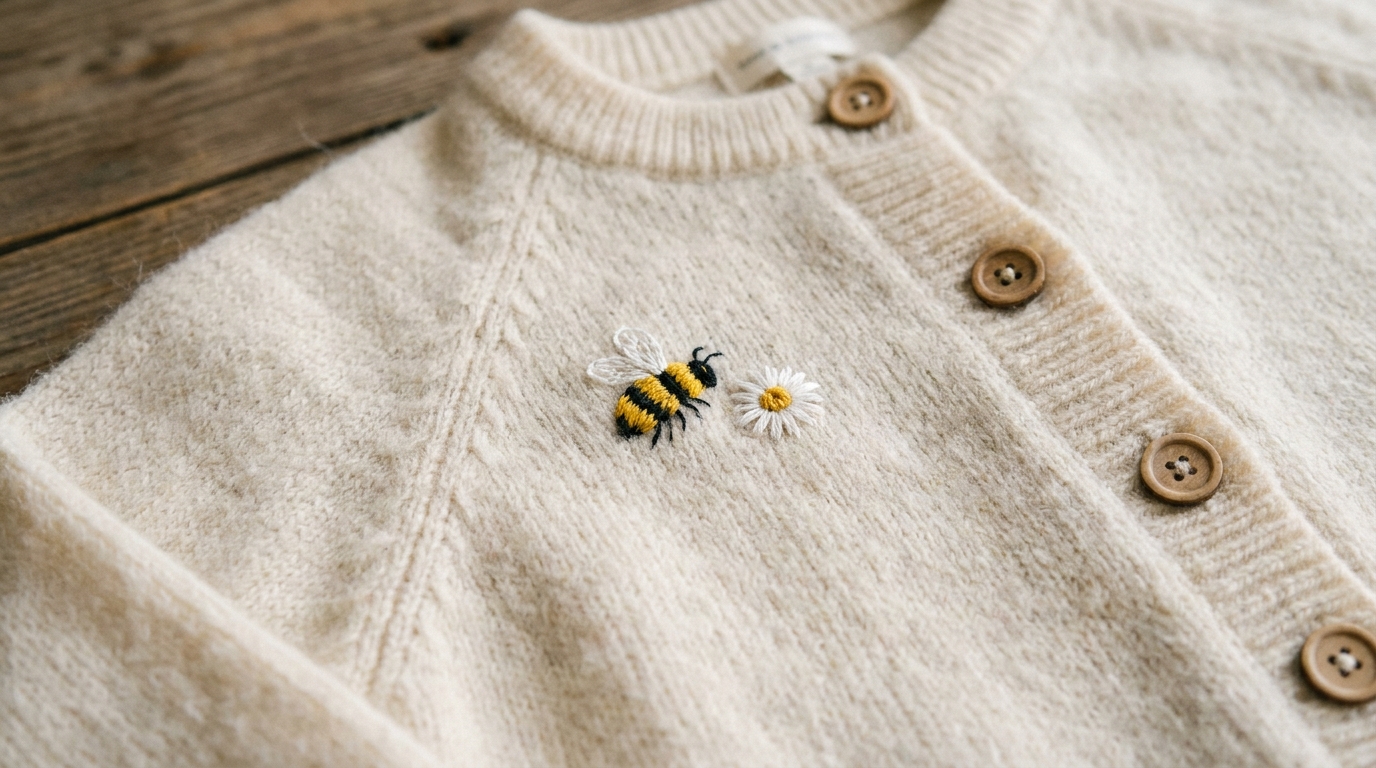
Sometimes the smallest detail makes the biggest smile. A single tiny bee stitched near the buttons of a cream cardigan is subtle, sweet and makes people look twice. The body is a few satin stitches in yellow and black, and the wings are two little loops of white. It is one of the quickest hand embroidery tricks in this list, often done in under twenty minutes. Add a tiny flower beside it so the bee has somewhere to land. Where would your bee buzz?
You will need: A knit cardigan or sweater, yellow, black and white wool or floss, a blunt tapestry needle for knits.
How to make it: 1. Stitch a small oval body in yellow satin stitch. 2. Add two or three black stripes across the body. 3. Make two small white loops above the body for wings and a tiny flower nearby.
Sashiko Hand Embroidery Tricks for Worn Spots
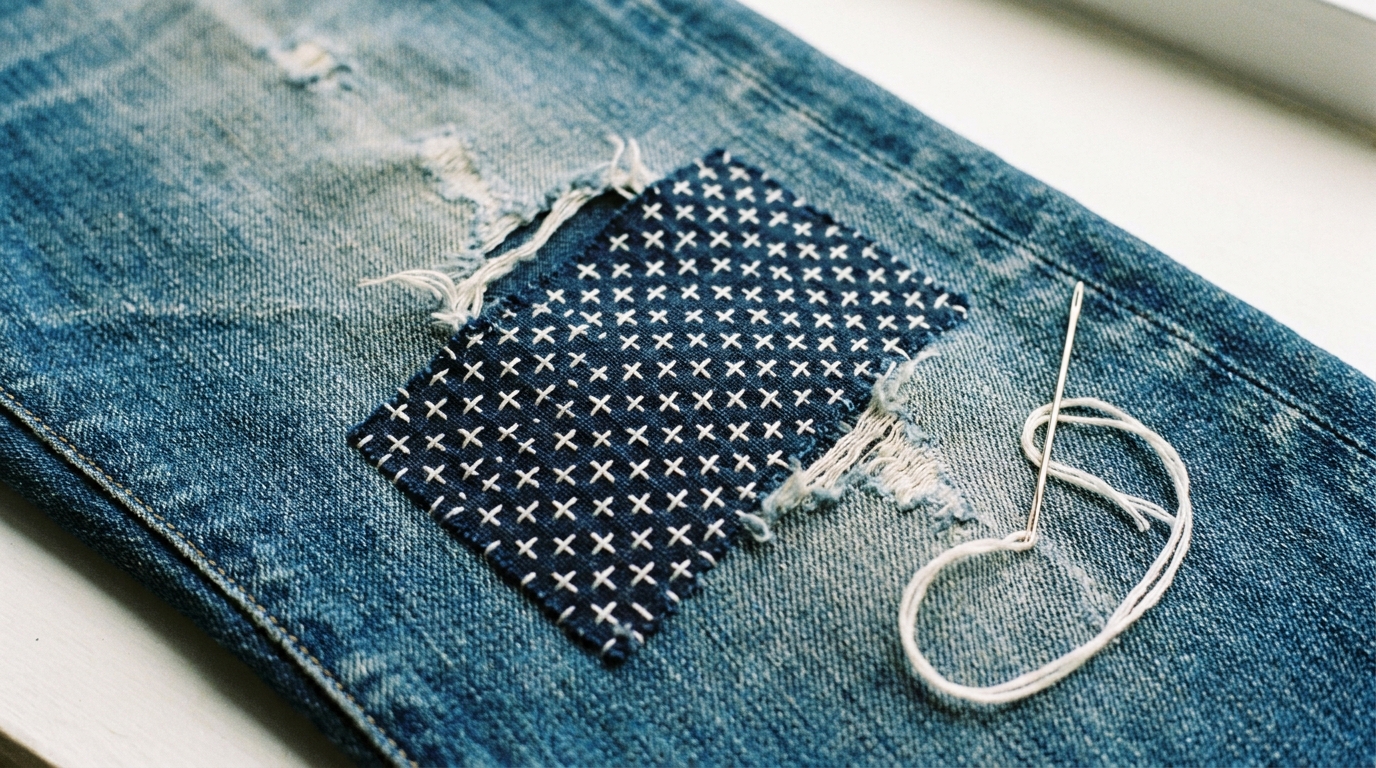
Visible mending turns a worn hole into a feature. Sashiko style stitching comes from Japan and uses simple rows of running stitches to strengthen fabric, often in white thread on indigo cloth. Put a patch behind a worn knee, then stitch through both layers in a grid or wave pattern. The result is tough and beautiful at the same time. It is one of the most practical hand embroidery tricks, and it saves favorite jeans from the bin. Do you have a pair that needs rescuing?
You will need: A fabric patch slightly larger than the hole, sashiko or thick cotton thread, a long needle, pins, a washable pen, a ruler.
How to make it: 1. Pin the patch behind the worn area. 2. Draw evenly spaced lines in a grid or wave pattern over it. 3. Stitch along the lines with even running stitches through both layers, keeping a little slack.
Practice Hand Embroidery Tricks on a Hoop First
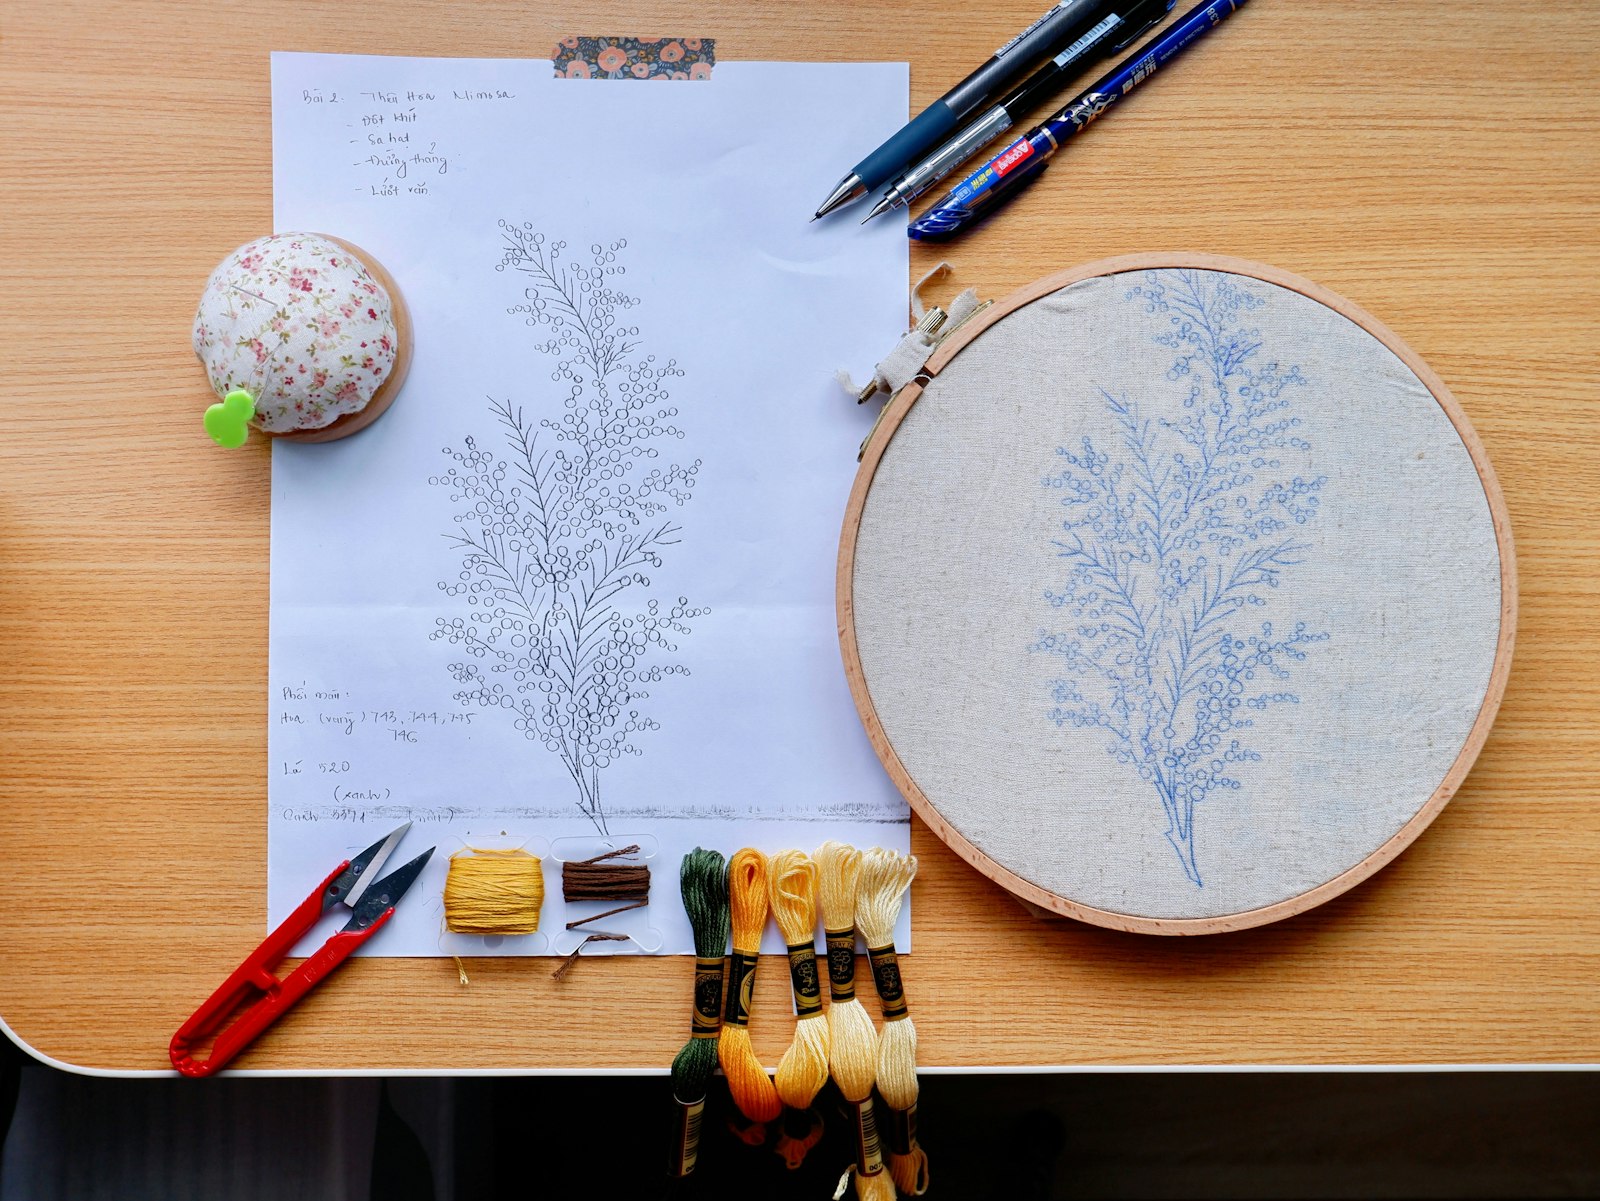
Here is the last idea, and maybe the best place to begin. Before stitching on your favorite clothes, practice on a scrap of cotton in a hoop. A video showing 20 basic hand embroidery stitches has more than 17 million views on YouTube, and many of the most watched embroidery videos teach just a few stitches at a time. Try backstitch, satin stitch, lazy daisy and French knots on one sampler. Hang it on the wall when you are done. Which stitch will you try first?
You will need: A 6 inch hoop, plain cotton fabric, embroidery floss in several colors, an embroidery needle, scissors, a pencil.
How to make it: 1. Stretch the fabric tightly in the hoop. 2. Draw a few simple lines, circles and flowers. 3. Practice one stitch on each shape, then trim the fabric and hang your sampler.