Wall Christmas Trees: 15 No Floor Space Ideas That Look Designer Made for Pennies
Wall Christmas trees are the smartest holiday trick for anyone short on floor space, from studio renters to families with a curious puppy or a toddler who loves to pull on branches. Instead of a bulky tree that eats half the living room, you build the shape right on the wall with garland, branches, ribbon, wreaths or even old window frames. Most of these ideas cost very little, go up in an afternoon and come down without a mess. Many use command style hooks or pushpins, so renters can join in too. Below are 15 wall Christmas trees we love, each with a supply list and simple steps, plus the viral corner tree that started the craze..
Wall Christmas Trees Start With the Viral Corner Garland

The idea that sent wall Christmas trees viral is wonderfully simple. Creator Beamish shared a corner tree short on YouTube that has passed 10 million views, showing a garland zigzagged across the spot where two walls meet. The corner gives the tree real depth, so it looks full from the couch. It is a perfect fit for small space Christmas decor, and gifts still tuck neatly underneath..
You will need: one 18 foot faux pine garland, 12 clear adhesive hooks, a pencil, ornaments, a wooden star, floral wire.
How to make it: 1. Mark a tall triangle on both walls with light pencil dots, about 6 feet high. 2. Stick hooks on the dots, alternating walls as you go down. 3. Drape the garland back and forth across the corner, wire it to each hook, then add ornaments and the star on top.
Floating Ornament Drop Tree

If you love the look of glass ornaments but have zero room for branches, let them float. Hang ornaments on clear thread from a row of hooks near the ceiling, cutting each strand a little longer as you move toward the center so the bottom edge forms a soft triangle. Mixing shiny and frosted finishes adds sparkle without a single light. It is a lovely way to show off vintage glass ornaments that are too pretty to hide in a box.
You will need: 15 to 25 shatterproof or glass ornaments, clear fishing line, small adhesive hooks, scissors, a tape measure.
How to make it: 1. Place hooks in a straight row about 4 inches apart. 2. Tie ornaments on lines that get longer toward the middle, building a triangle shape. 3. Step back, adjust lengths, and add a small star ornament on the shortest center line.
Wall Christmas Trees From Fresh Fir Branches

Ask a tree lot for their trimmed lower branches and you can make one of the most natural wall Christmas trees for free. Lay the branches on the floor, longest at the bottom, and tie them to a simple wooden triangle frame with jute. Hung flat on the wall, it smells like a real tree and drops very few needles. A loose wooden bead garland softens the look. You will find more cozy ideas in our branch Christmas decor roundup.
You will need: 8 to 10 fir branches, three thin wood slats, jute twine, a wood bead garland, white ornaments, one sturdy picture hook.
How to make it: 1. Nail or glue three slats into a tall triangle. 2. Tie branches across the frame, long ones low and short ones high. 3. Hang it on a sturdy hook, then drape the bead garland and add a few ornaments.
Cutout Board Tree With Ornament Windows

This one feels like a piece of modern art. A fir silhouette cut from thin hardboard, painted a warm rust brown, gets round openings where single ornaments sit like little jewels. Since it hangs flat, it suits narrow hallways and stair landings. Paint it any color that matches your room, then swap ornaments each year. If you enjoy the look, our list of clever tree alternatives has more no floor ideas to try.
You will need: a 2 by 4 foot hardboard panel, a jigsaw, a drill with a 3 inch round cutter bit, rust brown craft paint, small cup hooks, green ornaments.
How to make it: 1. Draw a branchy fir outline and cut it out with a jigsaw. 2. Drill four to six round openings and sand the edges. 3. Paint, add a cup hook above each opening, and hang one ornament in every window.
Wall Christmas Trees Made From Driftwood
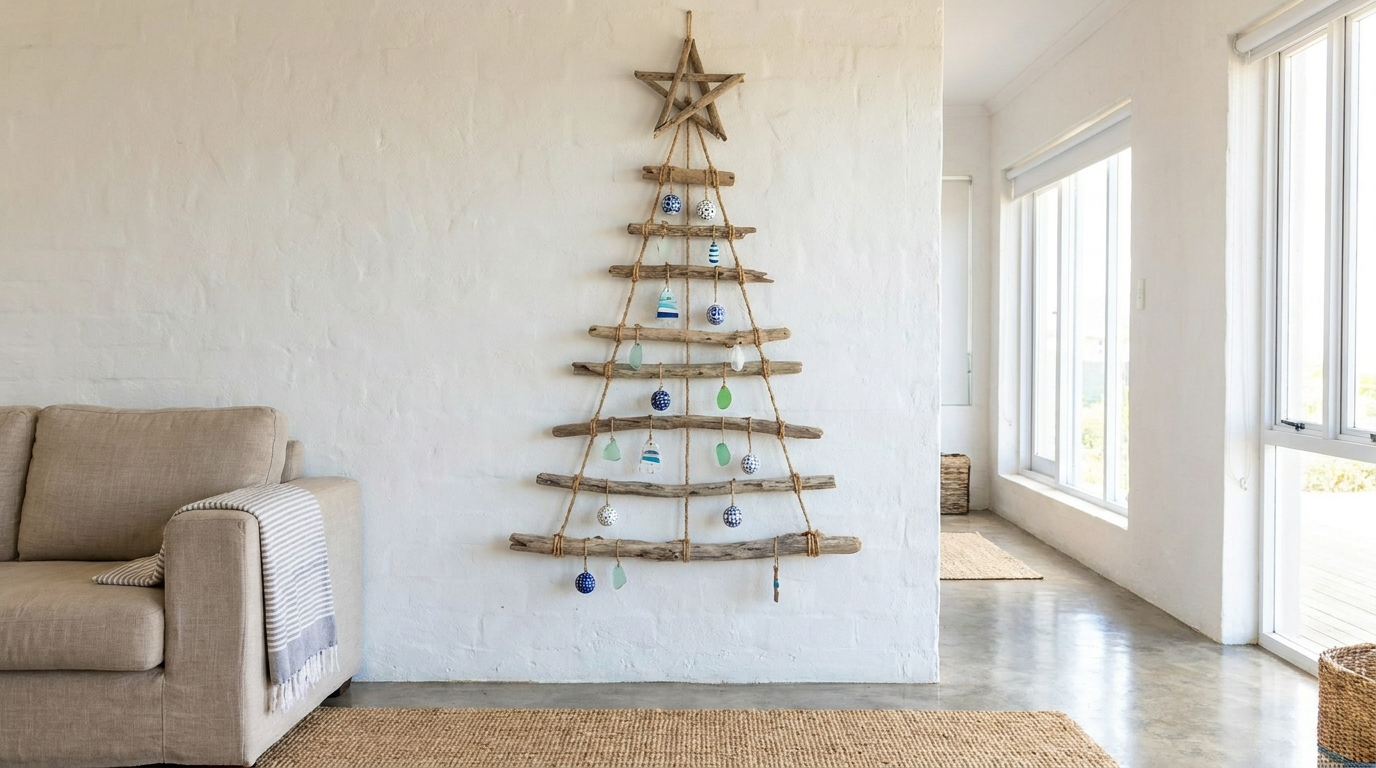
Beach lovers, this is your tree. Sticks of driftwood in shrinking lengths, tied ladder style with rope, make wall Christmas trees with a calm coastal feel. Blue, white and sea glass ornaments look right at home here. If you do not live near the shore, craft stores sell bundles of weathered sticks, or you can use bare garden branches and a quick whitewash. Pick up more ideas from our easy woodworking ideas if you want to go bigger.
You will need: 8 driftwood sticks from 8 to 30 inches, thick jute rope, blue and white ornaments, a small driftwood star, a picture hook.
How to make it: 1. Lay sticks on the floor from longest to shortest with 4 inch gaps. 2. Knot a rope down each side, wrapping every stick twice. 3. Leave a loop at the top, hang it, and add ornaments and the star.
Felt Bead Drop Garland Tree

Colorful felt beads on cotton cords make a soft, cheerful tree that is safe around little hands and swishing tails. Hang cords from a slim dowel or a strip of hooks, each one longer than the last toward the center, and the drops form a playful triangle. Kids can help thread the beads, which makes it a sweet family project. Our felt Christmas crafts collection has even more cozy ideas for felt lovers.
You will need: about 120 wool felt beads, white cotton cord, a large needle, a 30 inch wood dowel, two small wall hooks.
How to make it: 1. Thread 6 to 10 felt beads on each cord, knotting under every bead. 2. Tie cords along the dowel, longest in the middle. 3. Rest the dowel on two hooks and trim the cords into a neat point.
Wall Christmas Trees From Three Stacked Wreaths

Here is a quick trick for entryways. Hang three wreaths in growing sizes, small on top and large at the bottom, then run a wide velvet ribbon down the center to tie them together. From across the room it reads as one of those dreamy wall Christmas trees you see in magazine spreads. A gold star above the top wreath finishes it. Need wreath inspiration? Browse our favorite Christmas wreaths first.
You will need: three evergreen wreaths (12, 16 and 20 inch), 3 yards of wide red velvet ribbon, three adhesive wreath hooks, a gold star.
How to make it: 1. Stick the hooks in a straight vertical line, spacing them to fit each wreath. 2. Hang the wreaths smallest to largest. 3. Pin the ribbon at the top, weave it behind each wreath, and add the star.
Pine and Berry Garland Tree

A thick garland studded with red berries and silver ornaments can carry an entire wall tree by itself. Instead of swagging it across a mantel, pin it in horizontal rows that get wider as they go down, like a tiered tree. The berries add color without any lights, and white planks or a light wall behind make it pop. You can buy garland or make your own with our homemade garland guide.
You will need: two 9 foot pine garlands, red berry picks, silver and red ornaments, 10 adhesive hooks, floral wire.
How to make it: 1. Place hooks in four rows, each row wider than the one above. 2. Wire the garland across each row, cutting pieces to fit. 3. Tuck in berry picks and hang ornaments where the rows overlap.
Wall Christmas Trees With Embroidery Hoops
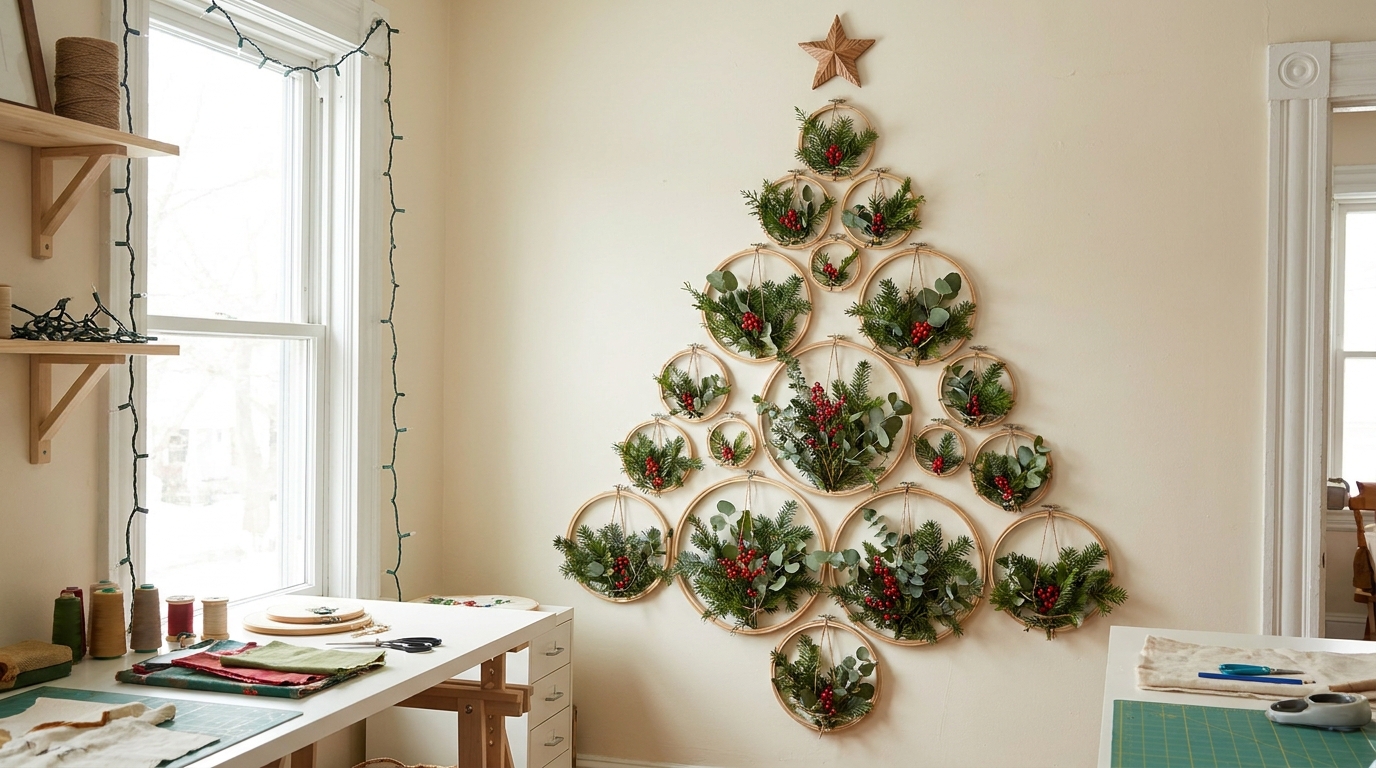
Wooden embroidery hoops are cheap, light and perfect for wall Christmas trees. Fill each hoop with sprigs of greenery and berries, then arrange them in a triangle, big hoops at the bottom and small ones on top. The result looks like a botanical piece of art and works in craft rooms, bedrooms and kitchens. Hoops also make lovely wreaths on their own, as shown in our fabric wreath ideas.
You will need: 12 to 15 wooden embroidery hoops in mixed sizes, faux greenery sprigs, red berry picks, hot glue, small nails or adhesive strips, a wooden star.
How to make it: 1. Glue greenery and berries along the lower half of each hoop. 2. Lay the hoops on the floor in a triangle to plan spacing. 3. Hang them from the bottom row up and finish with the star.
Decoupaged Wood Shape Tree

Plain wooden hearts, stars and little fir shapes from the craft aisle are just waiting for decoupage. Brush on glue, smooth on pretty paper napkins or old sheet music, and seal. Then hang them on ribbon in a tree shape on the wall, with the most shapes at the bottom. Each piece doubles as an ornament you can reuse for years. It pairs nicely with our wood slice crafts if you love natural wood.
You will need: 20 to 30 unfinished wood shapes, decoupage medium, a foam brush, paper napkins or printed paper, a craft knife, thin ribbon, small pushpins.
How to make it: 1. Trace each shape on paper, cut it out, and decoupage it onto the wood. 2. Seal with a top coat and let it dry. 3. Tie on ribbons and pin the shapes in rows that shrink toward the top.
Vintage Window Frame Tree

An old window frame from a salvage shop brings instant farmhouse charm. Tuck evergreen sprigs and a few small pine cones across the panes in a tree shape, then top the frame with a gingham bow. It hangs flat over a dining table or sideboard, so it never crowds the room. If you love this style, our farmhouse Christmas decor ideas will give you plenty more to try.
You will need: one old window frame with glass or open panes, faux evergreen sprigs, small pine cones, floral wire, a red gingham ribbon, two heavy duty picture hooks.
How to make it: 1. Clean the frame and seal any loose paint with clear coat. 2. Wire sprigs in a triangle shape across the panes and add pine cones. 3. Tie the bow at the top and hang the frame on two hooks.
Paper Cutout Silhouette Tree

This minimal idea costs almost nothing. Cut a fir silhouette from black or kraft cardstock, tape a real pine sprig behind it, and the needles peek through for a fun pop of texture. Make one large silhouette for the wall or a row of small ones down a hallway. It looks crisp in modern rooms and is easy to store flat. Love paper? See our paper Christmas trees for more folds and shapes.
You will need: black or kraft cardstock, a craft knife, a cutting mat, fresh or faux pine sprigs, washi tape, removable mounting putty.
How to make it: 1. Draw a fir outline and cut the inside out with a craft knife, leaving a thin border. 2. Tape a pine sprig behind the opening. 3. Press mounting putty on the back and stick it to the wall.
Wall Christmas Trees in Plaid Ribbon
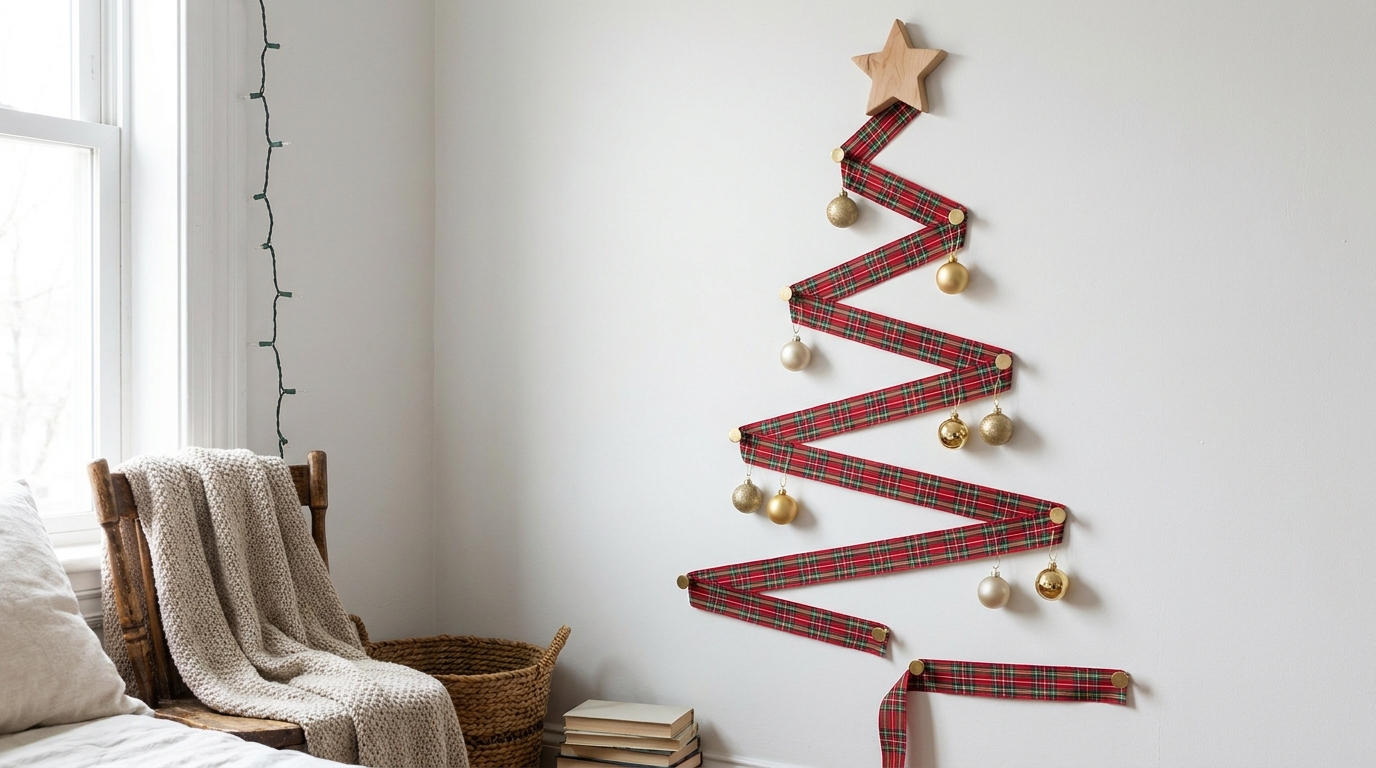
Got a spool of plaid ribbon? You can make one of the fastest wall Christmas trees in under 20 minutes. Zigzag the ribbon between small brass pins, wider at the bottom and narrow at the top, then add a few gold ornaments along the folds. It is lightweight, so it leaves almost no marks. For more cozy patterns, see our plaid Christmas decor favorites.
You will need: 6 yards of wired plaid ribbon, 9 brass pushpins, 8 small gold ornaments, a wooden star, a tape measure.
How to make it: 1. Mark a 4 foot triangle with tiny pencil dots. 2. Push pins along both edges and zigzag the ribbon from the top down. 3. Hang ornaments along the folds and pin the star on top.
Wooden Star Topper for Any Wall Tree

Every wall tree needs a finishing touch, and a rustic wooden star works with almost every idea on this list. Cut one from thin plywood, give it a light whitewash or a dry brushed silver finish, and add a small white star in the center. A loop of gingham ribbon makes it easy to hang. Pinecones and walnuts around it make a sweet mantel display after the holidays. Find more ideas in our tree topper ideas.
You will need: 1/4 inch plywood, a jigsaw, sandpaper, white and silver craft paint, a small wooden star, wood glue, gingham ribbon.
How to make it: 1. Trace a 10 inch star on plywood and cut it out. 2. Sand, paint and dry brush the edges with silver. 3. Glue the small star in the center and add a ribbon loop for hanging.
Christmas Card Clip Tree
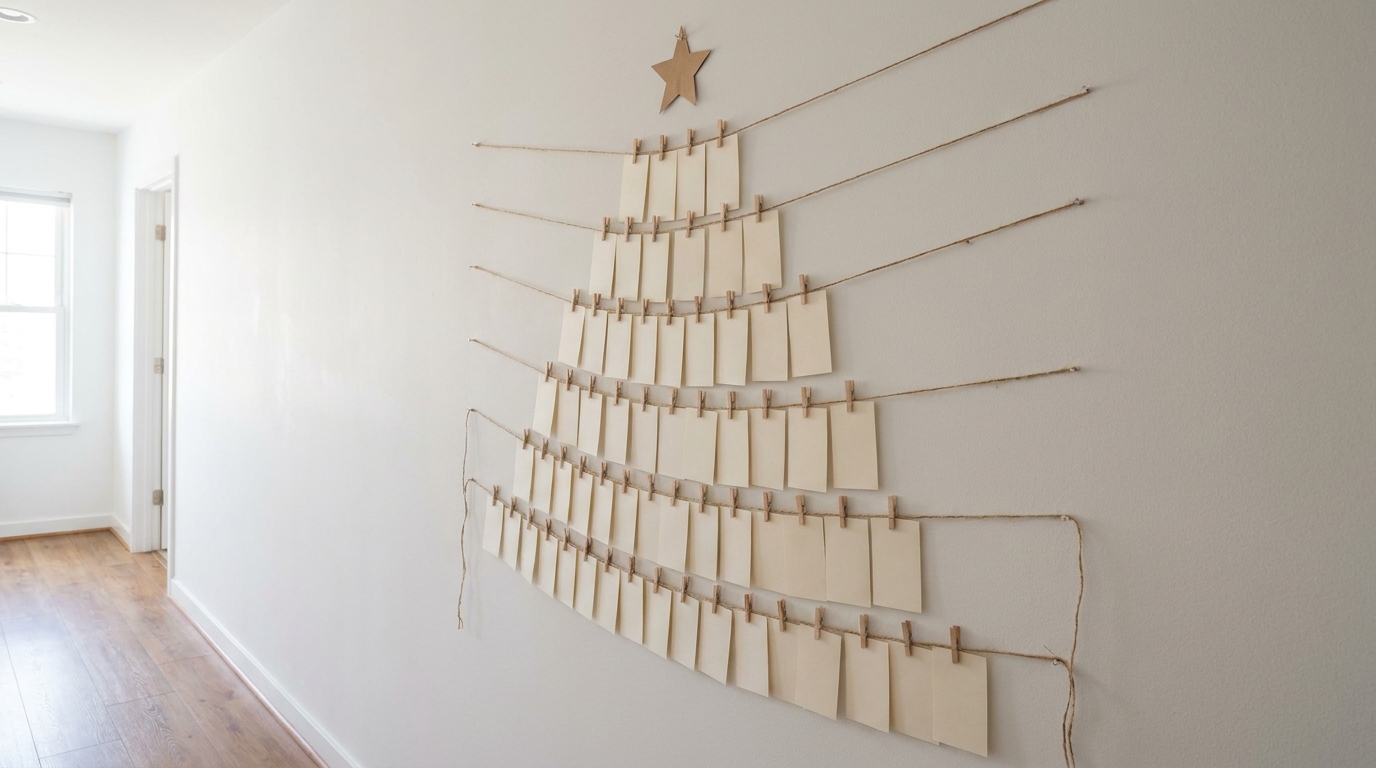
Where do all those holiday cards go? Onto the wall, in the shape of a tree. String rows of twine across the wall, each row wider than the one above, and clip cards on with mini wooden clothespins. It fills in as the mail arrives, so the tree grows all month long. It is renter safe when you use removable hooks, just like the ideas in our renter friendly upgrades guide.
You will need: jute twine, 10 removable hooks, 50 mini wooden clothespins, a kraft paper star, a level.
How to make it: 1. Place hooks in pairs to make five rows that widen as they go down. 2. Tie twine tightly between each pair. 3. Clip on cards as they arrive and add the star at the top.