Giant Christmas Ornaments: 15 Huge DIY Baubles That Look Like a Luxury Store Display
Giant Christmas ornaments are the easiest way to make your home feel like a fancy hotel lobby, and you can build them from things that cost almost nothing. Think plastic bowls, an old exercise ball, a clay pot from the garden shed or a roll of twine. Every year, people walk past those huge shiny baubles in store windows and city plazas and wish they could have one at home. The good news is you can. A little paint, a big bow and a cheap cap turn plain shapes into decor that makes guests stop and stare. Below are 15 easy ideas, from glowing glass bowls to velvet wrapped balls, plus a few real displays for inspiration. Pick one for the porch, two for the hearth, or go big and fill a whole corner..
Giant Christmas Ornaments Piled Next to the Sofa
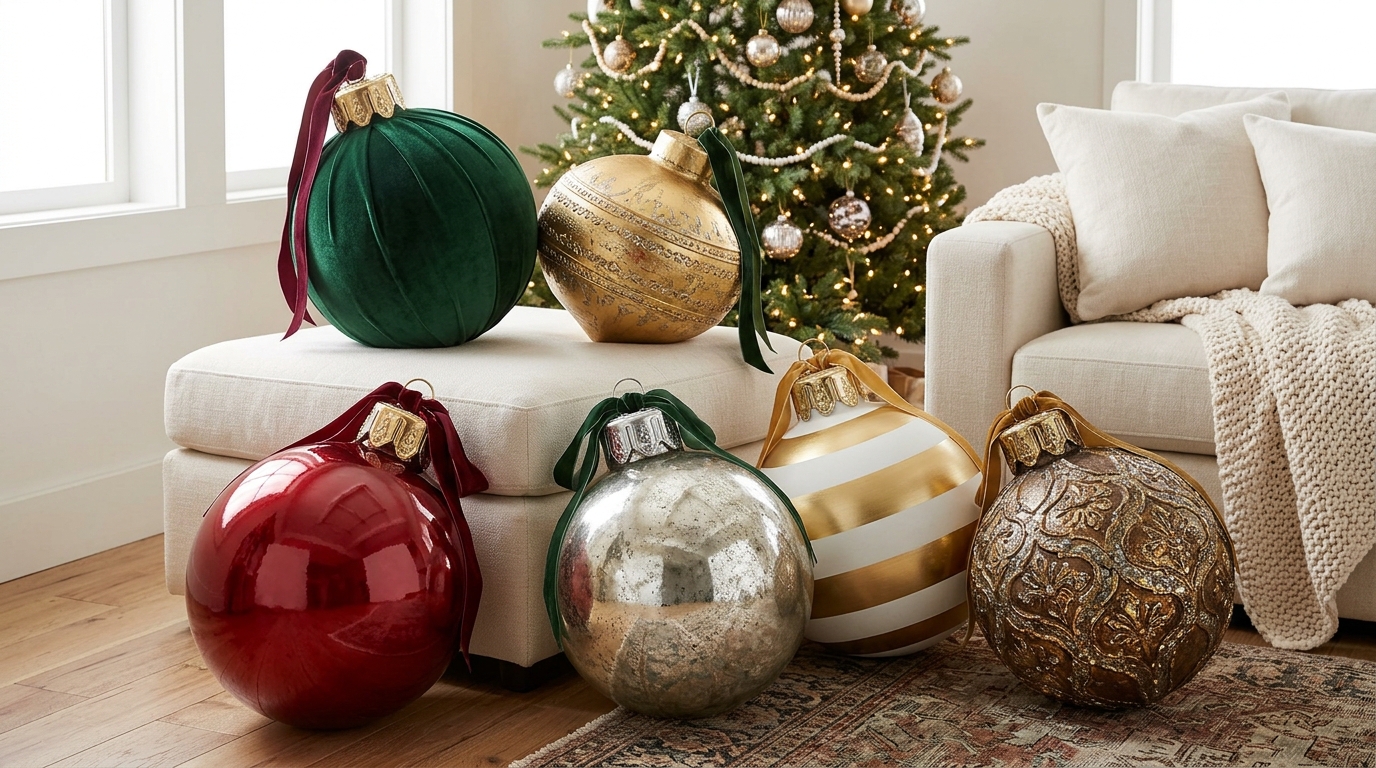
Start with the look that stops everyone in the doorway. A loose pile of giant Christmas ornaments in mixed finishes makes a bare corner feel rich and full in minutes. Mix one glossy red, one gold, one velvet and one speckled silver so nothing looks matchy. Set two on the floor, one on an ottoman and let the rest lean on each other. It works in small rooms too, because it fills empty floor space you were never going to use. Which corner of your home is begging for a little drama..
You will need: 4 to 6 large plastic or foam balls, spray paint or velvet fabric, plastic cups or small pots for caps, wide ribbon, hot glue.
How to make it: 1. Paint or wrap each ball in a different finish and let it dry. 2. Paint a cup or small pot gold or silver and glue it on top as the cap (adult help with hot glue). 3. Loop wide ribbon through the cap and pile the ornaments by size, biggest at the back.
Two Glass Bowl Jumbo Ornament

This one went viral for a reason. Two clear salad bowls joined rim to rim make a big glass sphere you can fill with anything. Mini red and gold ornaments look like a candy shop window, and a string of battery LED fairy lights makes the whole thing glow at night. It sits beautifully on a kitchen island or dining table with a few pine sprigs around the base. When the season ends, you take it apart and use the bowls again. Would you fill yours with ornaments or pine cones?
You will need: 2 matching clear bowls, clear museum putty or removable glue dots, mini ornaments, battery LED fairy lights, a small gold cap or painted cup, velvet ribbon.
How to make it: 1. Fill one bowl with mini ornaments and tuck in the LED lights with the battery pack on top. 2. Press the second bowl on top, rim to rim, and seal with putty or glue dots. 3. Add the cap and a velvet bow, and keep the battery pack hidden behind the bow.
Exercise Ball Porch Ornament
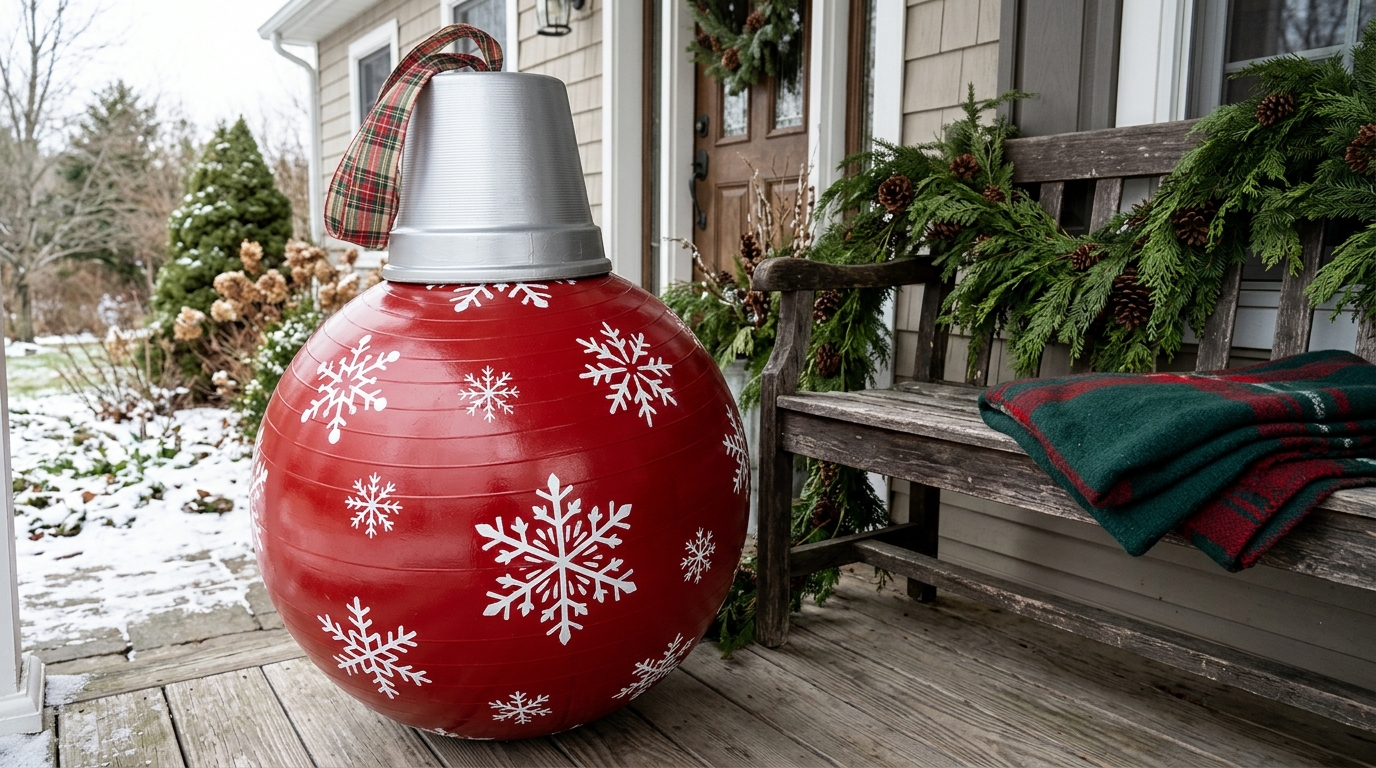
That exercise ball gathering dust in the closet is the perfect size for a porch ornament. A coat of glossy red paint and a few white snowflake stencils turn it into something that looks store bought. The cap is just a plastic flower pot painted silver, and a plaid ribbon loop finishes it off. Set it beside a bench or at the top of the steps so neighbors see it from the street. If it gets a scuff, a quick touch up fixes it in seconds. Is there an exercise ball hiding in your house right now?
You will need: 1 inflated exercise ball, outdoor spray paint or acrylic paint, snowflake stencil, white paint pen, a plastic flower pot, silver paint, plaid ribbon, strong glue.
How to make it: 1. Wipe the ball clean and paint it red outdoors, two thin coats. 2. Stencil white snowflakes all over. 3. Paint the pot silver, glue it upside down on top and thread a plaid ribbon through the drainage hole for the loop.
Gold Bowl Giant Christmas Ornaments
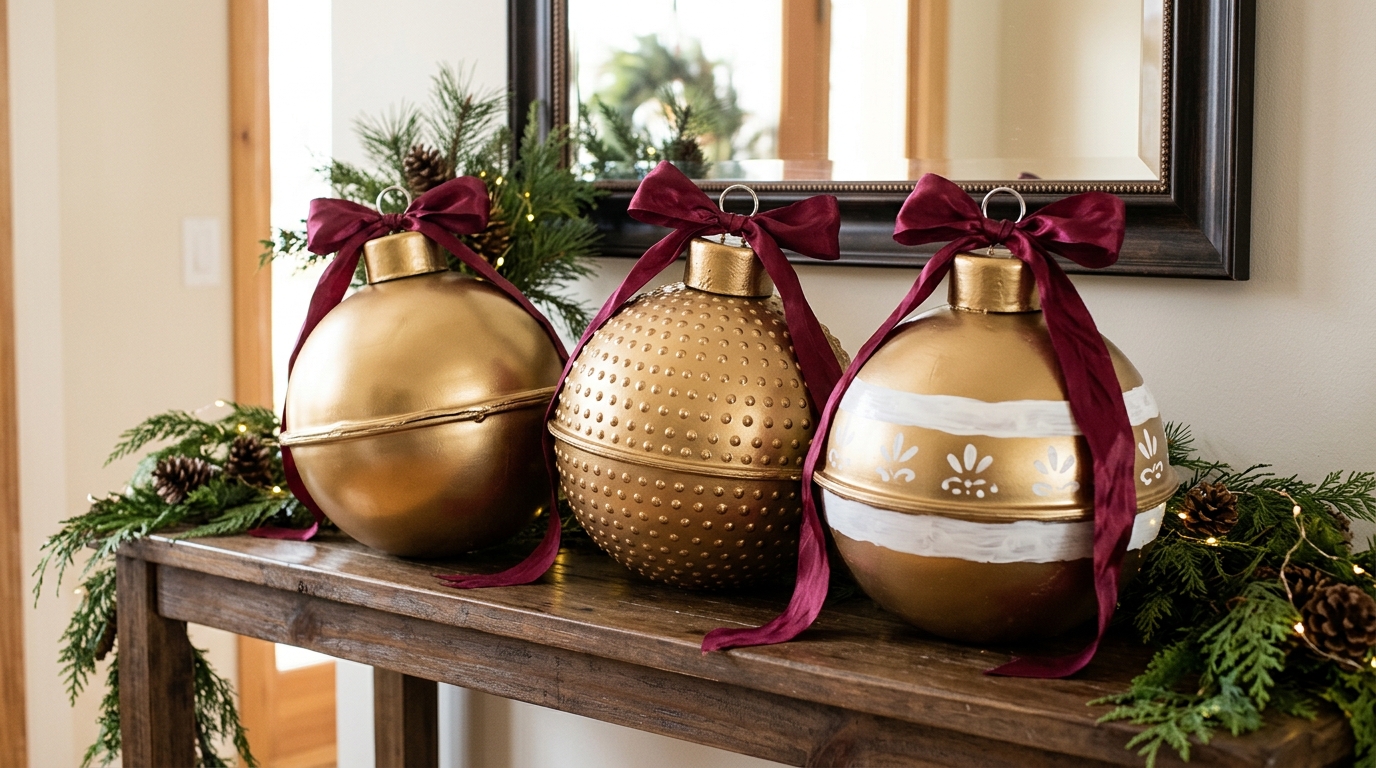
Cheap plastic mixing bowls are the secret behind many of the giant Christmas ornaments you see online. Glue two together, spray them metallic gold, and they suddenly look like heavy brass decor. Make three at once and give each its own style: one plain, one dotted with puffy paint, one with a painted white band. Lined up on an entryway table with burgundy ribbon, they look like a designer staging job. Nobody needs to know they came from the kitchen aisle. Which of the three styles would you try first?
You will need: 6 plastic bowls, strong glue or tape, metallic gold spray paint, puffy paint, white acrylic paint, painters tape, 3 small caps, burgundy ribbon.
How to make it: 1. Glue bowls in pairs rim to rim and let them set overnight. 2. Spray paint gold outdoors, then add puffy paint dots or a taped white stripe. 3. Glue on the caps and tie a burgundy ribbon loop on each.
Twine Balloon Giant Ornament
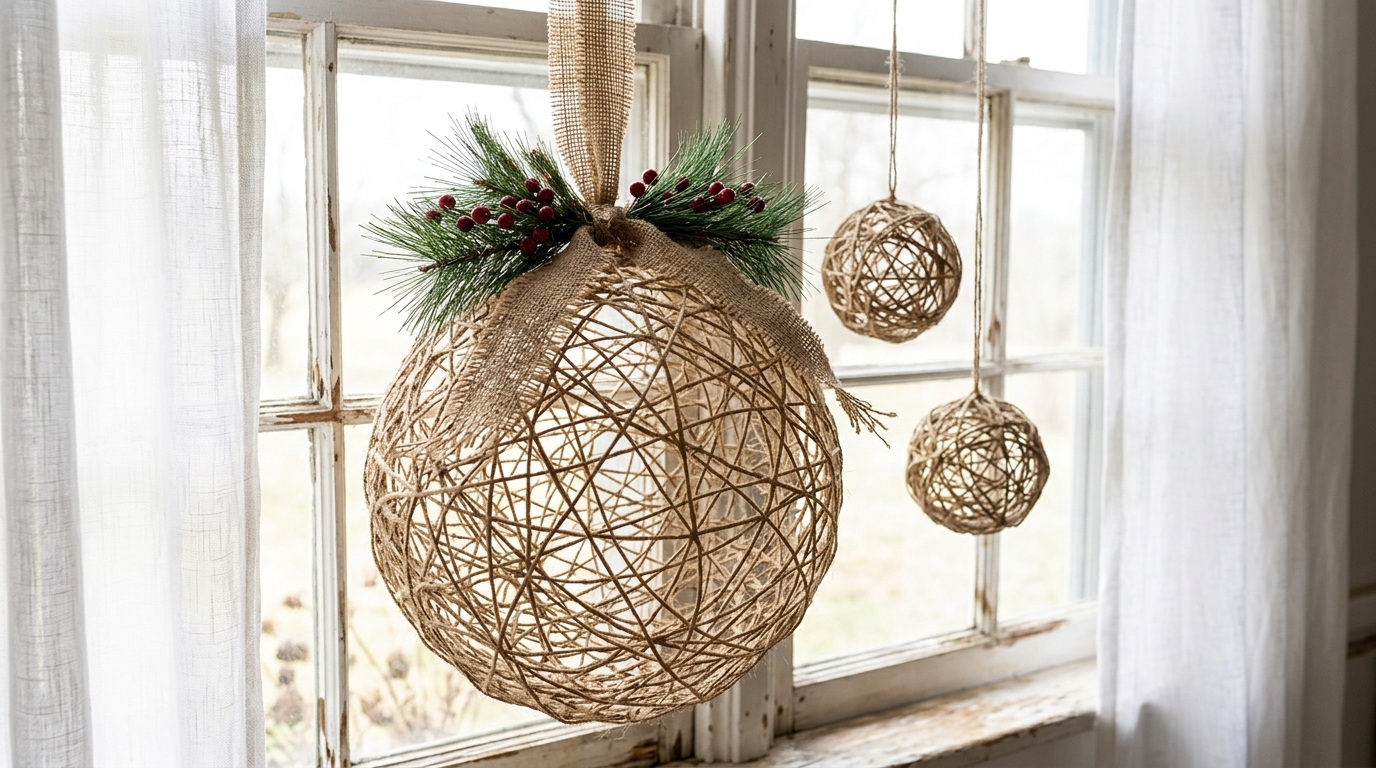
If you love a rustic farmhouse look, this one costs about a dollar. Twine soaked in watered down glue is wrapped around a big balloon and left to dry. Pop the balloon and you get a light, airy ball that looks like woven art. Hang it in a window with a small cluster of pine and red berries on top, and add two smaller ones beside it for a set. It is a messy craft, so cover the table and enjoy it. Would you try one big twine ball or a whole family of them?
You will need: 1 large round balloon, a roll of jute twine, white school glue, water, a bowl, faux pine and berry picks, burlap ribbon.
How to make it: 1. Mix glue with a little water and soak the twine in it. 2. Wrap the twine around the blown up balloon in every direction and let it dry for a full day. 3. Pop the balloon, pull it out, then tie on the berries and a burlap hanger.
Upside Down Planter Pot Ornament
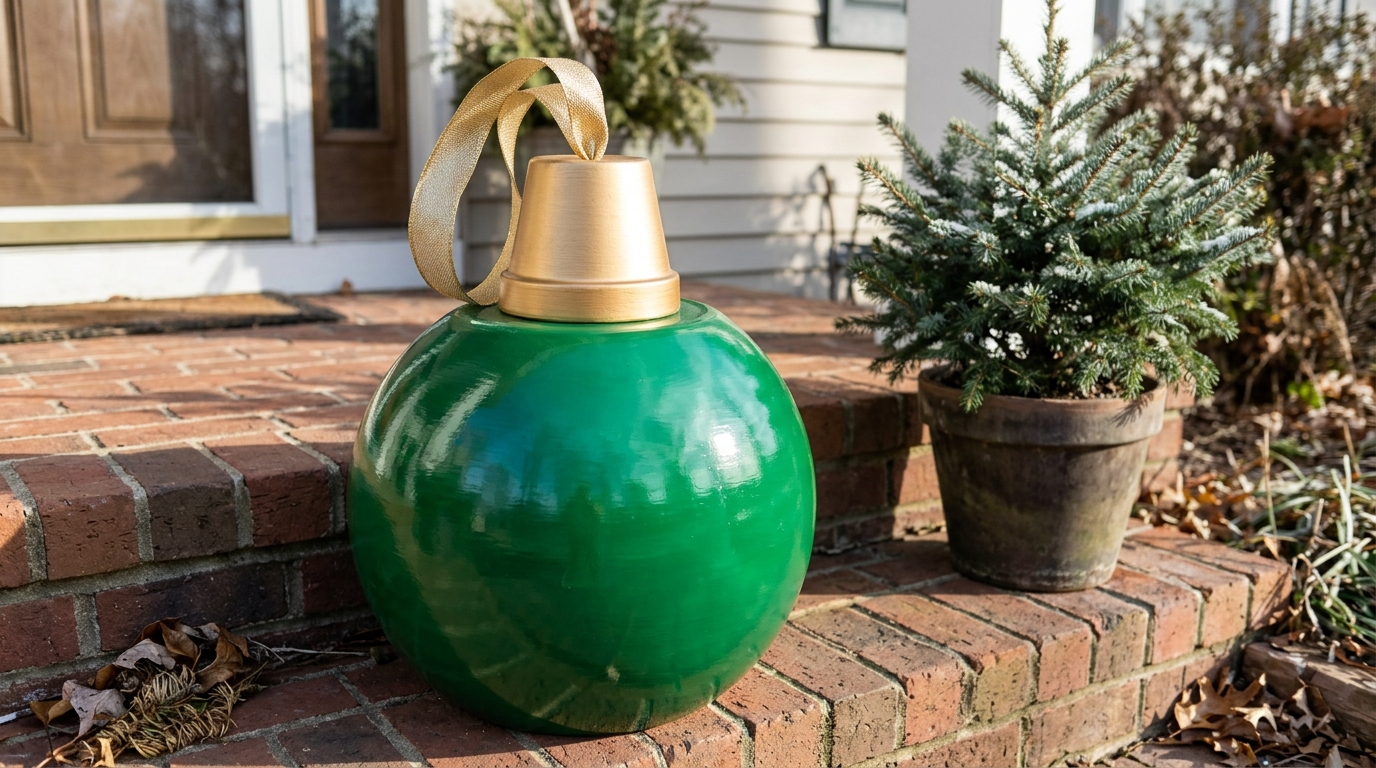
Look around the garden shed before you buy anything. A round planter pot turned upside down already has that perfect ornament curve. Paint it a glossy emerald green and stack a small gold pot on top as the cap, and you have a sturdy porch ornament that wind will not blow away. It looks great on brick steps next to a little evergreen. After the holidays, scrub off the paint or just leave it for next year. Do you have a round pot that could use a holiday job?
You will need: 1 large round planter pot, 1 small pot for the cap, outdoor primer, glossy green and gold spray paint, gold ribbon, strong outdoor glue.
How to make it: 1. Clean both pots and prime them outdoors. 2. Paint the big pot green and the small pot gold with two light coats. 3. Glue the small pot on top and thread a gold ribbon through the hole for a loop.
Giant Christmas Ornaments Filled With Garland

Clear fillable globes are one of the easiest giant Christmas ornaments to make. Stuff one with fluffy faux pine garland, a few tiny pine cones and red berries, then weave in battery LED fairy lights. In daylight it looks fresh and green, and at night it glows like a little forest in a bubble. Put it in the middle of the dining table on a linen runner and you have a centerpiece too. Hiding the battery pack under the cap keeps it neat. What would you tuck inside yours?
You will need: 1 large clear fillable ball, faux pine garland, mini pine cones, berry picks, battery LED fairy lights, a silver cap, red ribbon.
How to make it: 1. Open the globe and coil the garland inside. 2. Push in berries and pine cones, then weave the LED string through. 3. Close the globe, tuck the battery pack under the cap and tie a red bow.
Crushed Velvet Jumbo Baubles
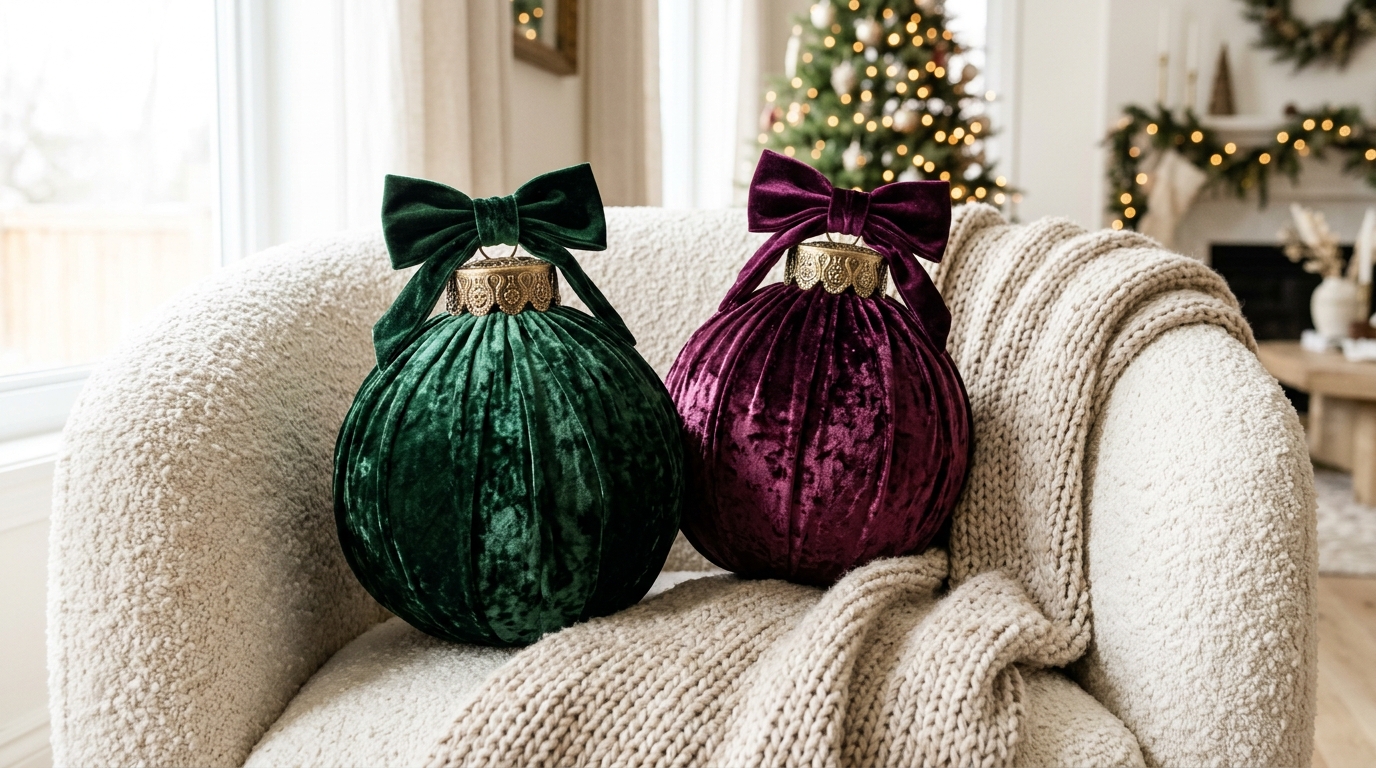
Velvet makes anything look expensive, and these jumbo baubles prove it. Wrap a big foam ball in a square of crushed velvet, gather the fabric at the top and hide the gathers under an antique gold cap. Deep green and plum together feel cozy and grown up. They are soft and safe, so you can toss them on an armchair or in a basket where pets and kids can bump them. A yard of fabric covers several. Would you go with jewel tones or soft blush and cream?
You will need: Large foam balls, crushed velvet fabric, rubber bands, scissors, antique gold caps, velvet ribbon, hot glue.
How to make it: 1. Cut a square of velvet big enough to cover the ball with extra at the top. 2. Gather the fabric tight at the top and hold it with a rubber band. 3. Trim the extra, glue on the cap over the gathers and add a velvet bow loop (adult help with hot glue).
Mercury Glass Look Giant Ornament
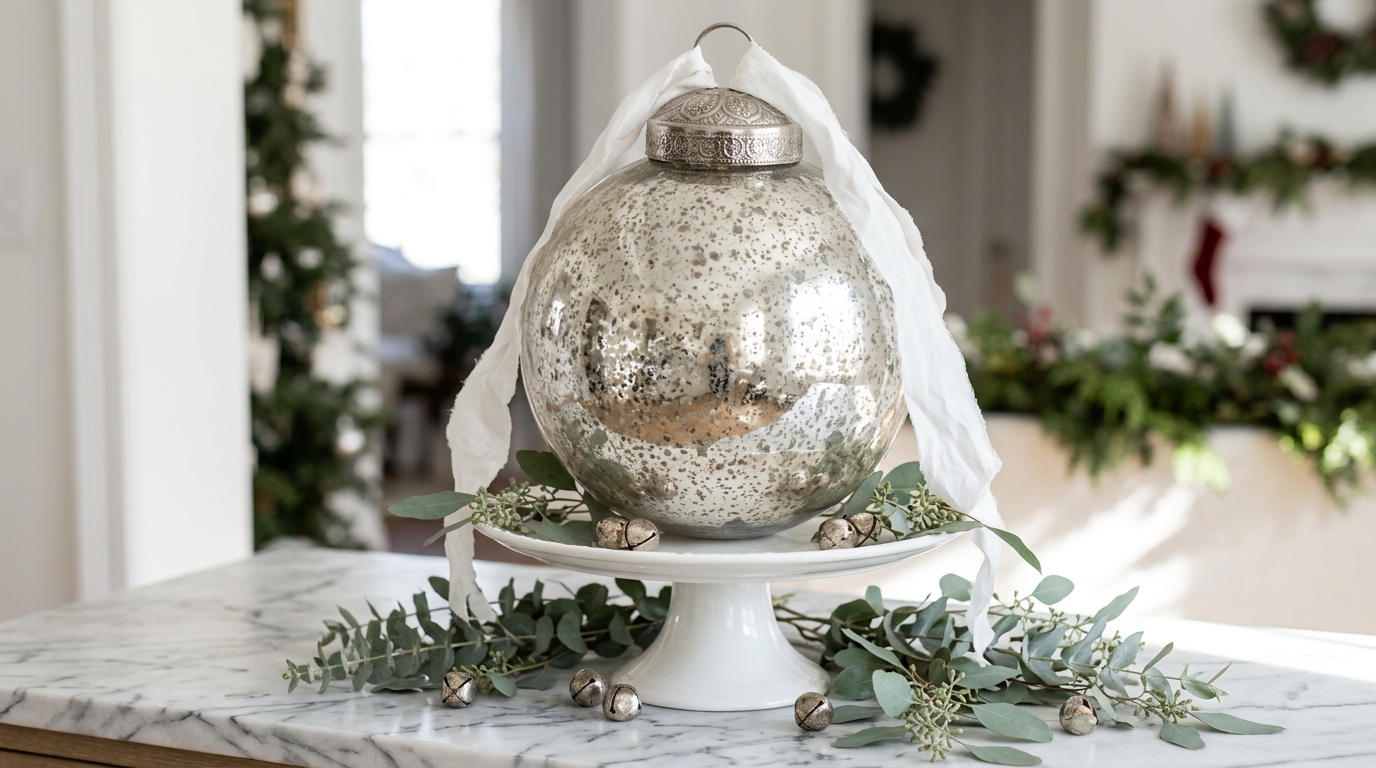
Real antique mercury glass costs a fortune, but this trick gets you close for a few dollars. Mist the inside of a large clear plastic ball with water, spray a mirror finish paint inside, then dab some away while it is wet. You get that speckled, old silver look people love. Set it on a white cake stand with eucalyptus and a few tiny bells and it looks like a family heirloom. Each one turns out a little different, which is part of the charm. Ready to try the spray and dab trick?
You will need: 1 large clear plastic fillable ball, a spray bottle with water and a splash of vinegar, mirror effect spray paint, paper towel, a silver cap, white ribbon.
How to make it: 1. Open the ball and mist the inside lightly with the water mix. 2. Spray a thin coat of mirror paint inside, wait a minute, then dab spots with a paper towel. 3. Let it dry fully, close it, add the cap and tie on a silk ribbon.
Hula Hoop Ornament Ring Over the Table
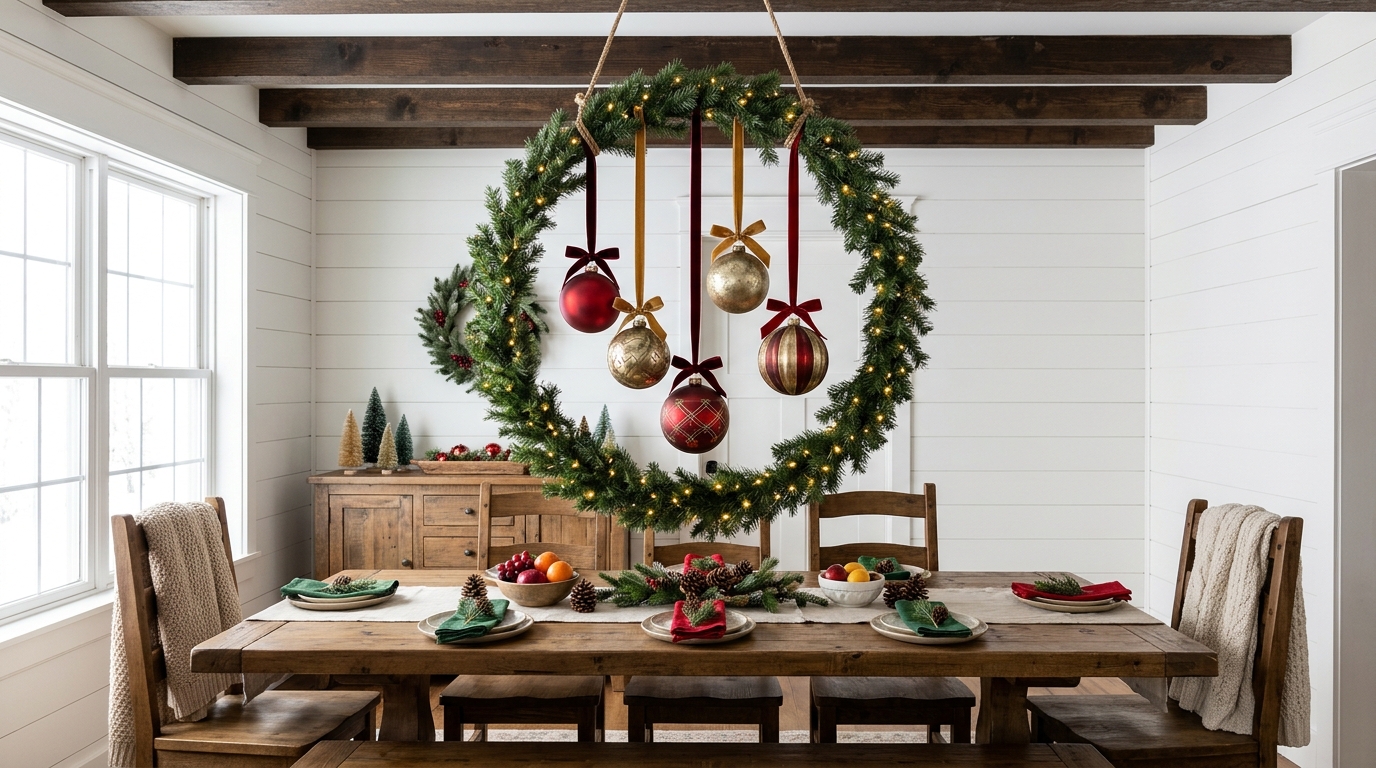
Want something people see the moment they walk in? Hang it. A plain hula hoop wrapped in faux garland and LED lights becomes a floating ring above the dining table. Tie five large red and gold ornaments inside on velvet ribbons at different lengths so they sway a little. It feels like a chandelier from a fancy restaurant, but it is mostly a kids toy and a few dollars of greenery. Use a sturdy ceiling hook and keep it high enough to clear heads. Where would you hang yours?
You will need: 1 hula hoop, faux garland, floral wire, battery LED string lights, 5 large shatterproof ornaments, velvet ribbon, fishing line, a ceiling hook.
How to make it: 1. Wrap the garland around the hoop and secure it with floral wire. 2. Wind the LED lights through and tape the battery pack on top. 3. Tie ornaments inside at different lengths, then hang the ring from a ceiling hook with three strands of fishing line.
Hand Painted Plaid Ornaments
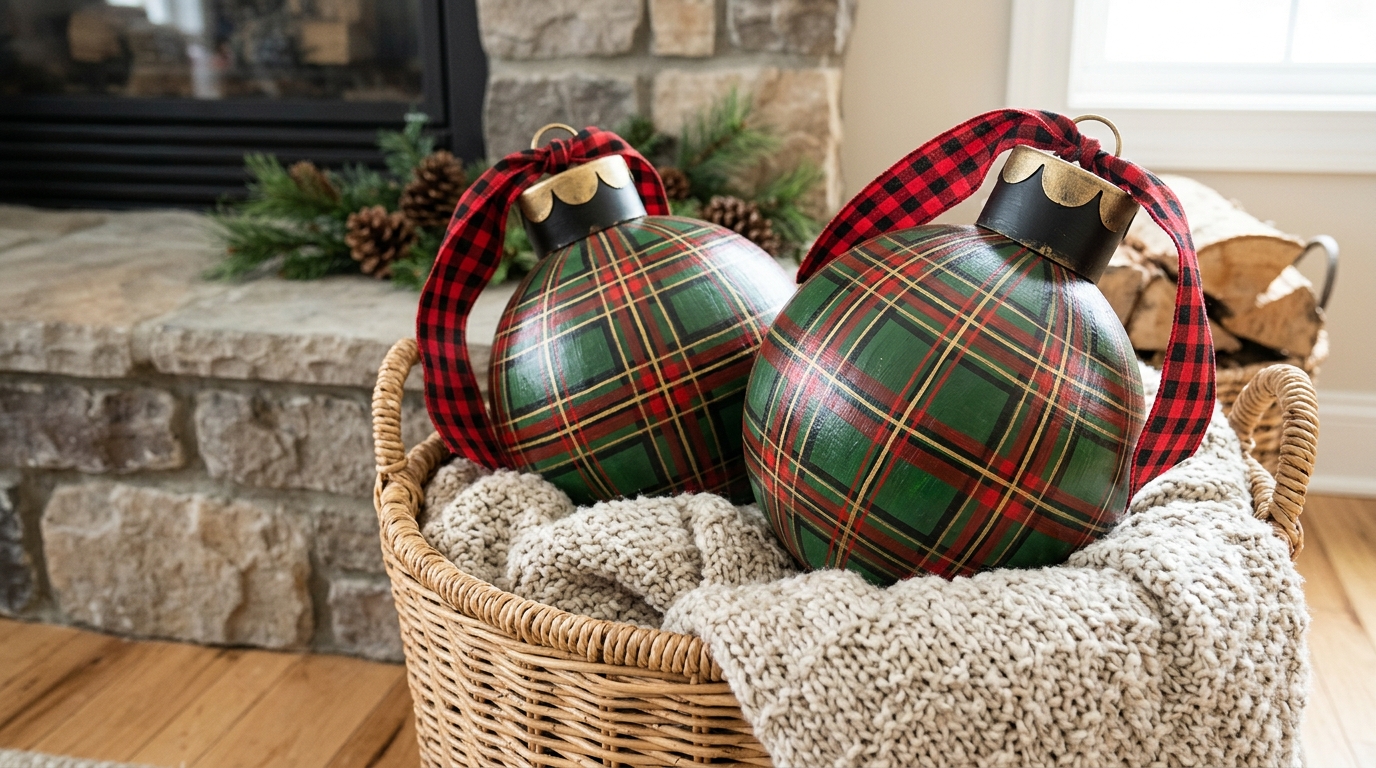
Plaid is the coziest pattern of the season, and you can paint it yourself. Start with a red base, then use painters tape to mark straight lines in green and thin lines in gold or cream. Take your time, put on some Christmas music and enjoy the slow process. Two of them in a woven basket by the hearth with a chunky knit throw look like they came from a cabin lodge. Shatterproof foam means no worries if they roll. Would you paint classic red tartan or a cream and black check?
You will need: 2 large foam balls, red, green, gold and black acrylic paint, thin painters tape, small flat brush, caps, buffalo check ribbon.
How to make it: 1. Paint each ball red and let it dry. 2. Tape off wide stripes in both directions and fill them with green, then add thin gold lines. 3. Seal with clear coat, glue on the caps and loop the ribbon through.
Giant Christmas Ornaments Stacked in a Pyramid
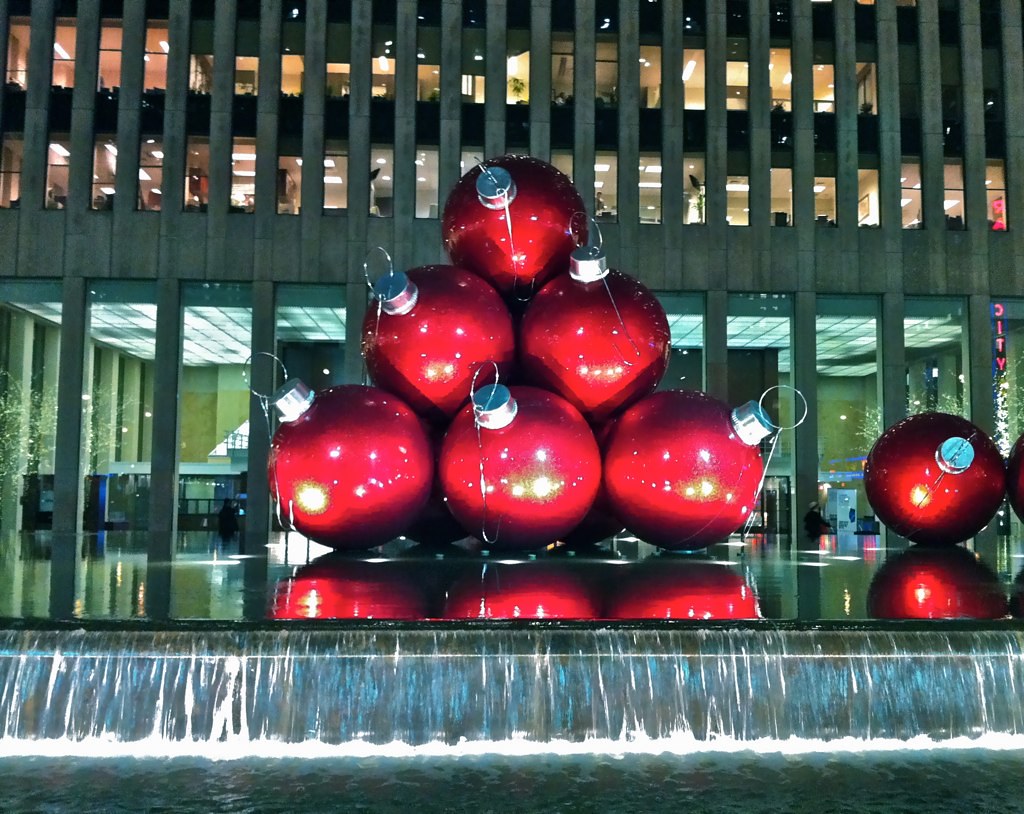
Every December, giant Christmas ornaments stacked in red pyramids draw huge crowds in Midtown Manhattan. You can copy that famous look at home on a much smaller scale. Stack shatterproof red balls in a little pyramid on a tray or on porch steps, using clear putty to keep them in place. Repeat the same color for real impact. Shoppers have loved these jumbo ornament makeovers online, and for more budget looks see our dollar store Christmas decor ideas. How tall would your pyramid go?
You will need: 6 to 10 red shatterproof ornaments in two sizes, clear museum putty, a large tray or flat step, silver caps.
How to make it: 1. Lay a base row of the biggest ornaments in a triangle. 2. Add putty where they touch and set the next row on top. 3. Finish with one ornament on the peak and turn every cap the same way.
Hang Them High Like a Market Hall

Old covered markets in Europe hang enormous baubles and bells from the ceiling, and the effect is pure magic. At home, a high entry or stairwell is the perfect spot to borrow this idea. Use lightweight foam or plastic ornaments so nothing heavy hangs over anyone, and mix round baubles with a few bell shapes for variety. Hang them at different heights so the eye travels up. Even three in a stairwell feel grand. Do you have a high spot that could use some sparkle?
You will need: 3 to 7 lightweight jumbo ornaments, bell shaped ornaments, clear fishing line, removable ceiling hooks, ribbon.
How to make it: 1. Choose a high spot away from walkways and doors. 2. Tie fishing line through each cap with a ribbon bow to hide the knot. 3. Hang them at staggered heights and check that each hook holds before you let go.
Light Up Giant Christmas Ornaments With LED Strings
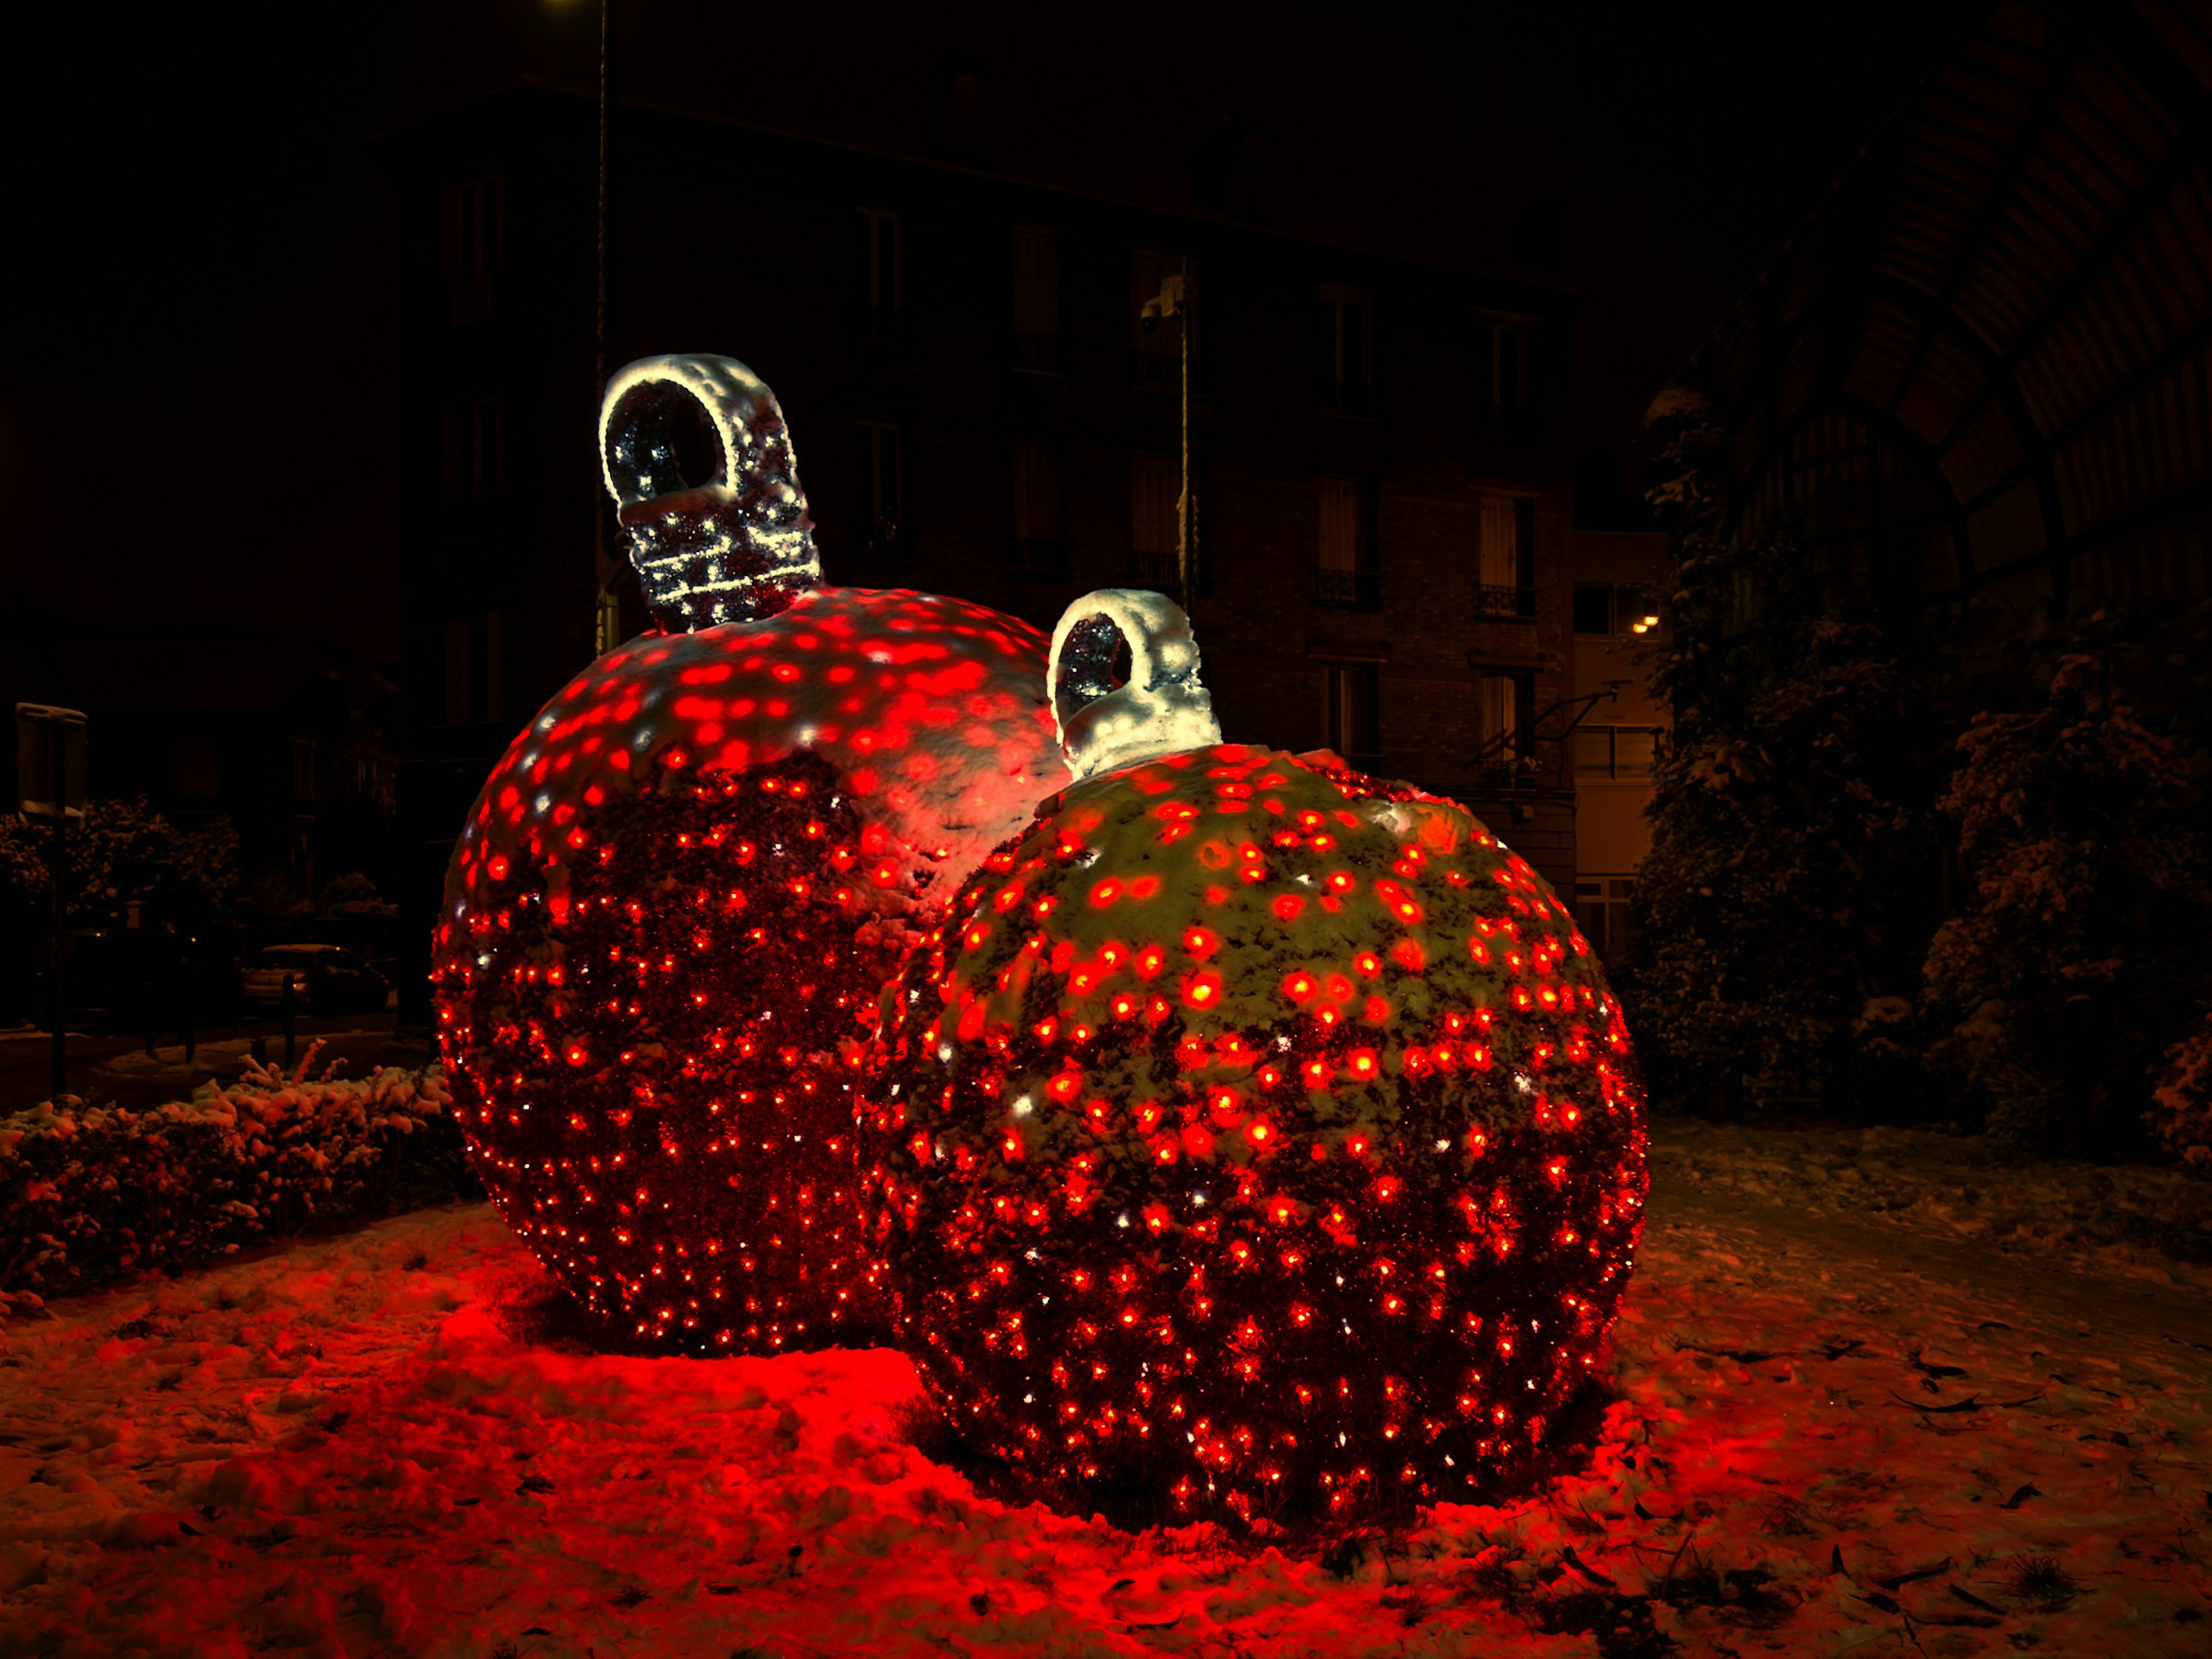
Want your giant Christmas ornaments to shine after dark? Wrap them in light. Tiny battery or outdoor rated LED strings wound tightly around a big ball make it glow from every side, just like the displays in town squares. Red lights on a red ball look rich, while warm white looks classic. Use a timer so they come on at dusk without you thinking about it. Add a light to your porch pair and it will glow all season. Which color lights would you pick?
You will need: Large shatterproof balls, outdoor rated LED string lights with a timer, clear tape, zip ties, a cap.
How to make it: 1. Tape the start of the light string under the cap. 2. Wrap the lights around the ball in tight rows, taping every few turns. 3. Hide the battery box or plug behind the ornament and set the timer for dusk.
Silver Giant Christmas Ornaments for a Winter White Look
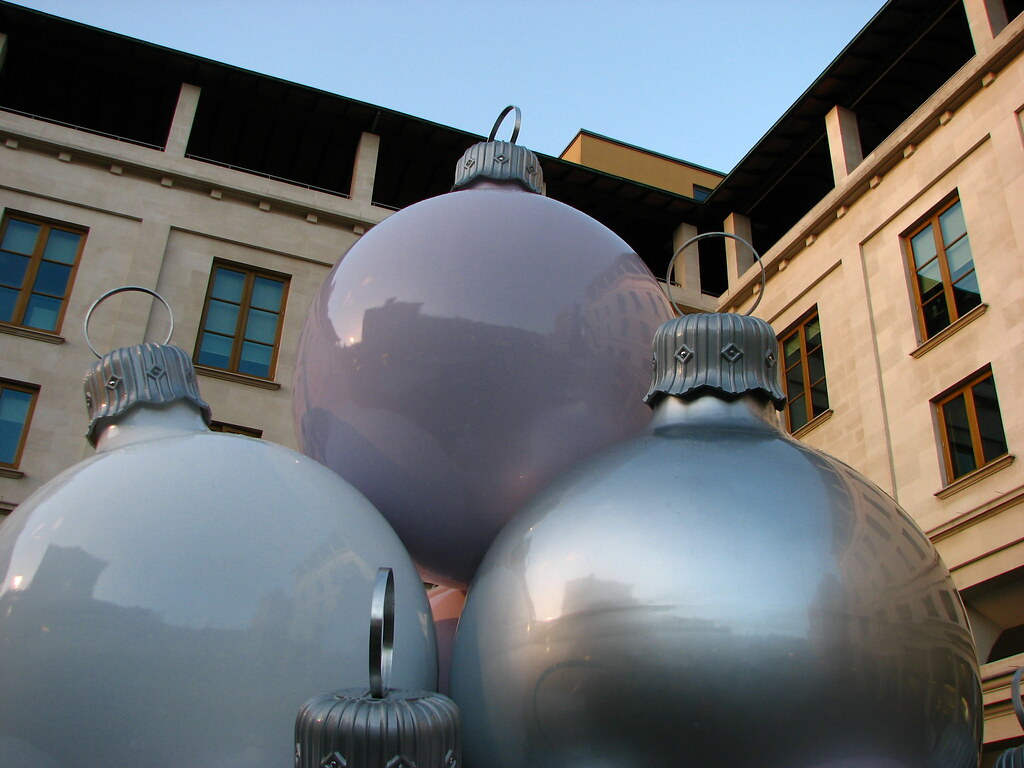
Not every room wants red and green. A trio of silver and pearly white ornaments feels calm, wintry and elegant, and it stays pretty well into January. Group three in different sizes so they look like they belong together, the way designers do in hotel lobbies. Satin silver, shiny silver and a soft pearl white are enough variety. Set them by the front door or under a white tree. It is the easiest way to make a small budget look like a big one. Would a winter white trio suit your home?
You will need: 3 large balls in different sizes, satin silver, shiny silver and pearl white spray paint, 3 silver caps, white ribbon.
How to make it: 1. Paint each ball a different finish outdoors and let it dry. 2. Glue on the silver caps. 3. Group them in a tight triangle, tallest at the back, and add a ribbon loop to each.