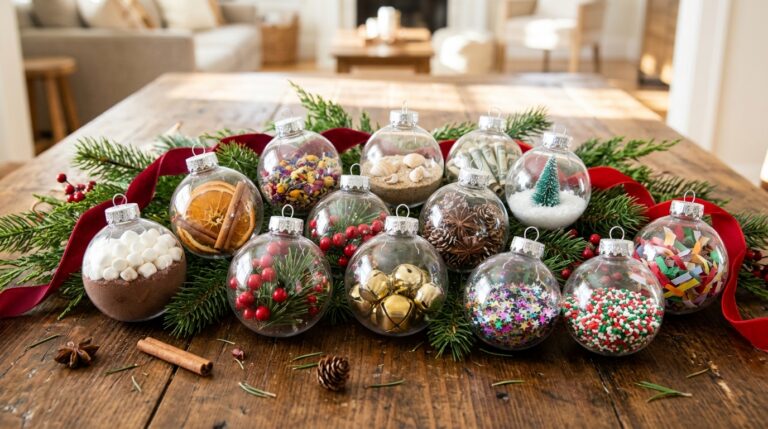
Japanese Fabric Art: 14 No-Sew Kinusaiga Ideas Taking Over Your Feed
Japanese fabric art called kinusaiga is the calmest craft trend online this month, and it needs no sewing at all. Tiny scraps of fabric are tucked into lines scored on a board, so the finished picture looks like a quilt without a single stitch. One maker’s sausage dog piece passed 6.6 million views in mid October, her pink puffin hit 1 million views two days later, and another reel on the trend reached 7.6 million views and 422,000 likes. People love it because it uses up old scraps, it is quiet and slow, and the results look like real art on the wall. It also makes beautiful handmade Christmas gifts. Here are 14 kinusaiga ideas, from your very first heart to framed gifts for the whole family..
Japanese Fabric Art That Looks Like a Quilt
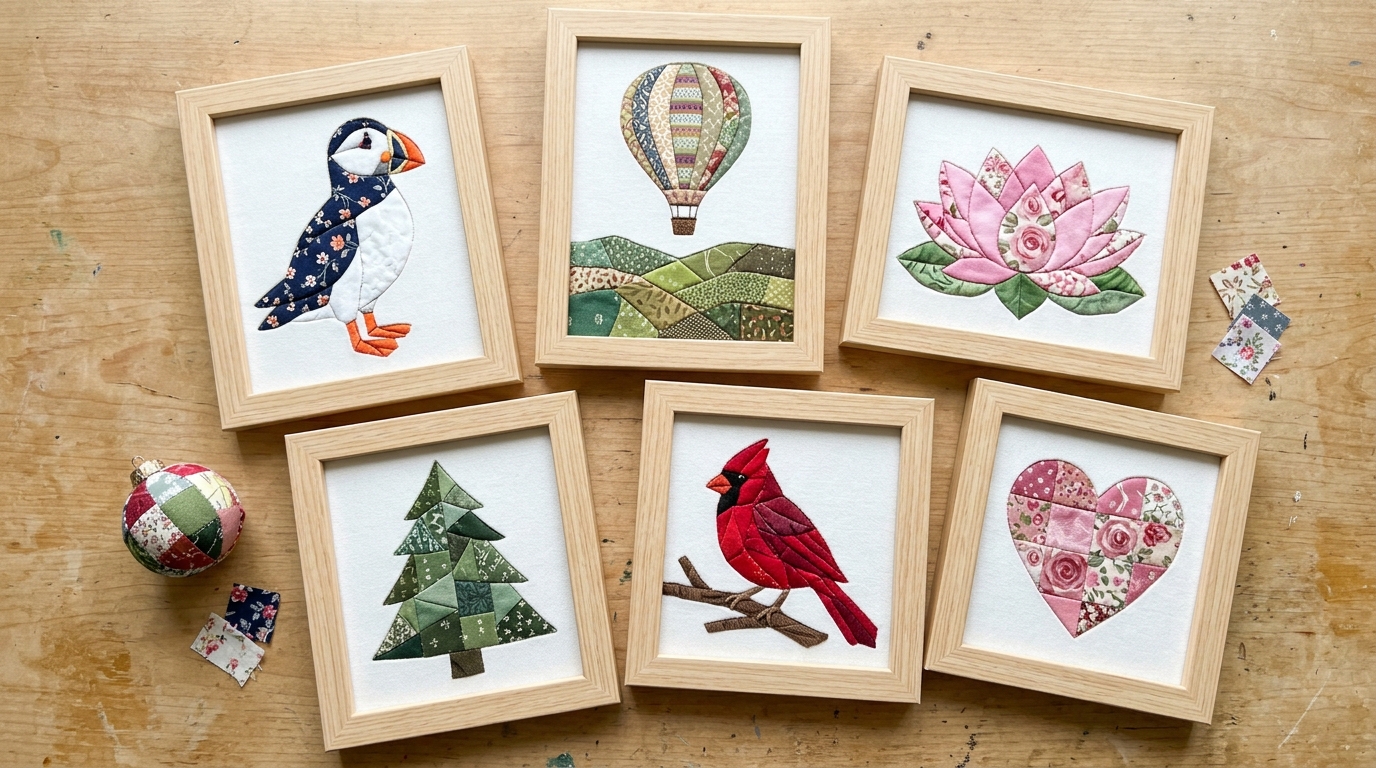
Here is what all the buzz is about. Each of these pictures is made from small scraps of fabric pressed into grooves on a board, with no needle and no thread. A puffin, a balloon, a lotus, a little tree, a cardinal and a heart, all from scraps that might have ended up in the trash. Once you try one, it is hard to stop. Pick the design that makes you smile and start small. Which one would you hang first..
You will need: A sheet of foam board or a craft foam block, a pencil, a blunt tucking tool, small scissors and cotton fabric scraps.
How to make it: 1. Draw a simple design on the board. 2. An adult scores the lines with a craft knife, not cutting all the way through. 3. Tuck small fabric pieces into the lines to fill each section.
What Kinusaiga Is, in One Close Look
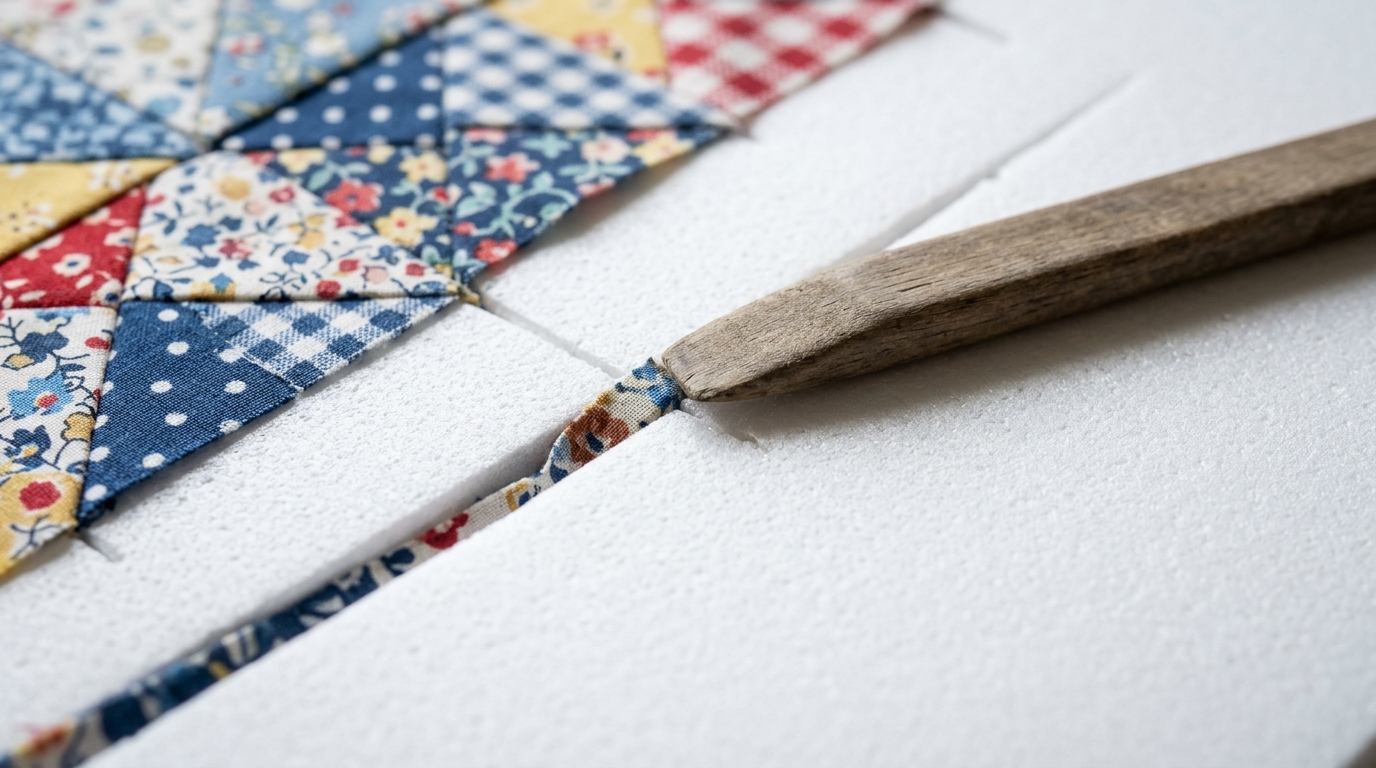
This close look shows the whole secret. Lines are scored into the board, and the edge of each fabric piece is pushed into the line with a blunt tool. The fabric stays put on its own, and the line becomes a crisp seam, just like on a quilt. The craft started in Japan as a way to reuse old silk kimono fabric. It is slow and soothing, almost like coloring with cloth. Does it remind you of a quilt your family once had?
You will need: A scrap of foam board, a pencil, a ruler, a blunt tool such as a butter knife or a clay spatula and one fabric scrap.
How to make it: 1. Draw one straight line on the board. 2. An adult scores it about a third of the way into the foam. 3. Lay fabric over the area and push the edge into the line.
The Starter Kit for Japanese Fabric Art
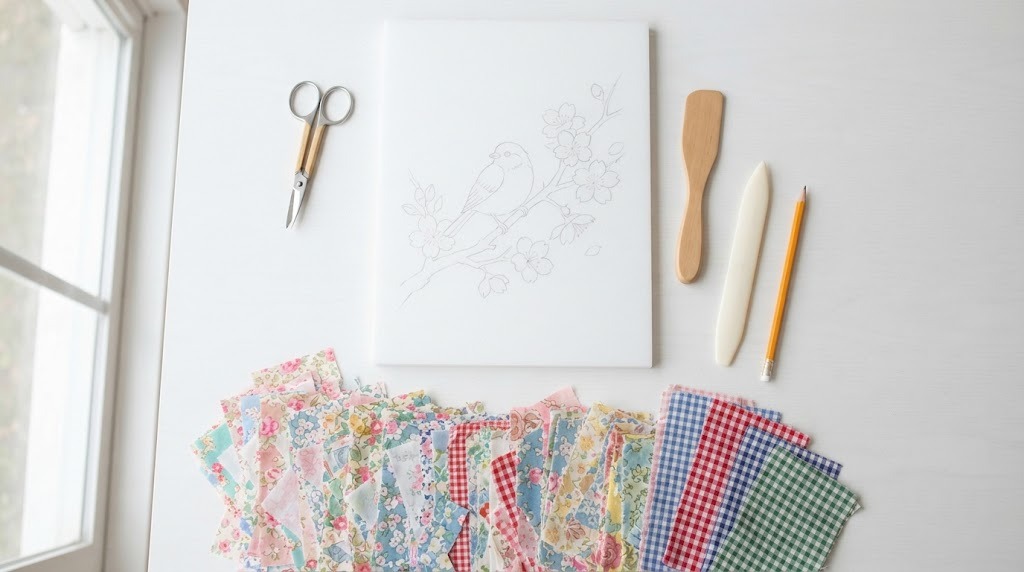
You probably have most of this at home already. A sheet of foam board, a pencil, small scissors, a blunt tool for tucking and a pile of cotton scraps are enough. An adult handles the craft knife to score the lines, and that is the only sharp part. Cotton works best for beginners because it holds a crease, and silk from an old scarf gives a lovely shine later on. Old shirts, napkins and quilting scraps are perfect. What fabric scraps are hiding in your closet?
You will need: Foam board, a pencil, a craft knife for an adult, small scissors, a blunt tool and cotton fabric scraps.
How to make it: 1. Gather all supplies on a clear table. 2. Sort your scraps by color. 3. Choose a simple design to start.
A Puffin in Navy Floral Scraps
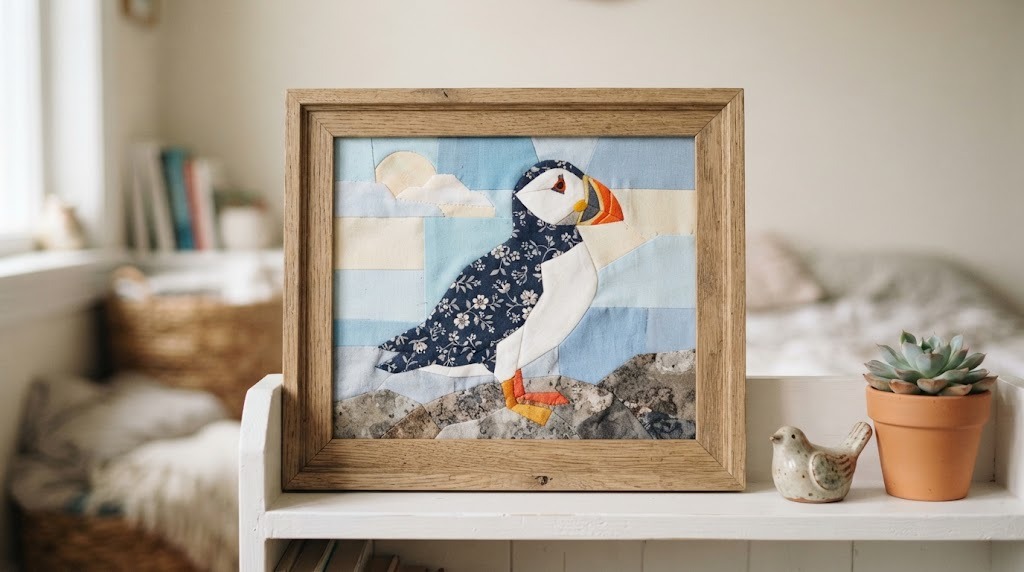
A pink puffin by one creator passed 1 million views in just a few days this month, and puffins are now one of the most copied designs. The round body and big beak are simple shapes, so they are easy to score. Navy floral fabric makes a lovely body, with a bright orange scrap for the beak. A soft blue sky behind it finishes the scene. Would you choose navy or pink for your puffin?
You will need: Foam board, navy floral, white, orange and pale blue fabric scraps and a blunt tool.
How to make it: 1. Draw the puffin with a round body, head and big beak. 2. Score the lines and fill the body with navy floral first. 3. Add white for the face, orange for the beak and blue for the sky.
A Hot Air Balloon Over Patchwork Hills
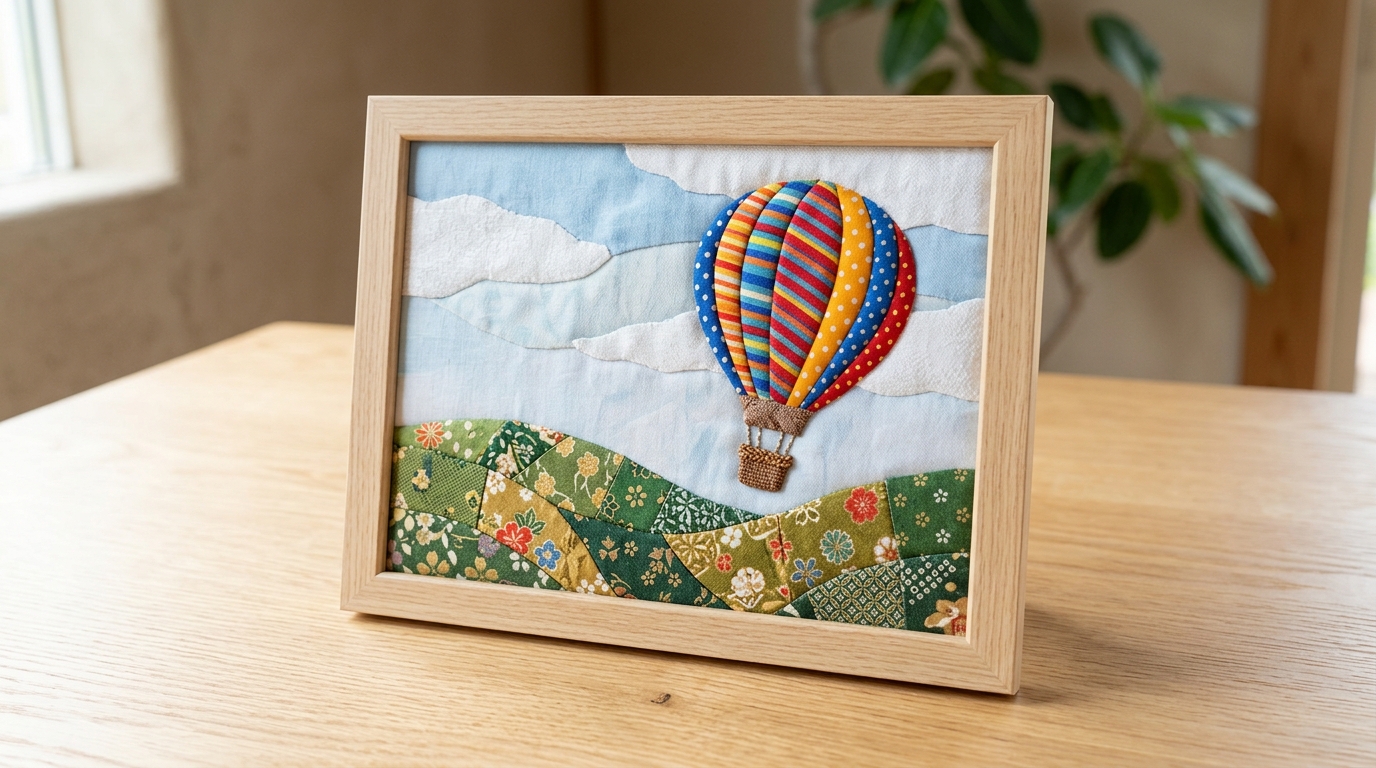
This one is cheerful and great for using up lots of small scraps. Each stripe of the balloon is a different fabric, and the hills below are made from greens and golds like a country quilt. It looks lovely in a child’s room or a sunny kitchen. Japanese fabric art like this rewards a busy scrap bag, so the more prints the better. Which fabric would you put in the biggest stripe?
You will need: Foam board, striped and dotted fabric scraps for the balloon, green and gold prints for the hills and a blunt tool.
How to make it: 1. Draw a balloon shape with five stripes and wavy hills below. 2. Score all the lines. 3. Fill the balloon stripes first, then the hills, then the sky.
A Pink Lotus on a Dotted Background
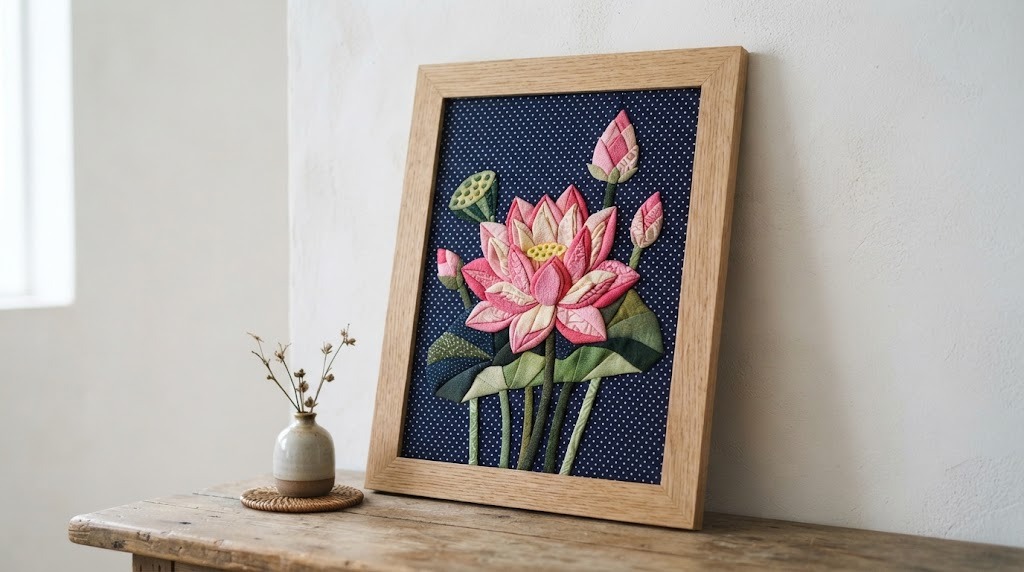
A lotus is a peaceful design and fits the calm feeling of this craft. Each petal is its own section, so you can use three or four shades of pink for depth. A dotted navy background makes the petals glow. Hang it in a bedroom or a reading corner where you want things quiet. Japanese fabric art in soft pinks feels gentle and calm. This is a great second project once you have done a simple heart. Which shades of pink do you have in your scrap bag?
You will need: Foam board, pink and cream cotton scraps in a few shades, a dotted navy scrap and a blunt tool.
How to make it: 1. Draw a lotus with five or six petals and a few leaves. 2. Score the lines and fill each petal with a different pink. 3. Fill the background with the dotted navy fabric.
The Viral Sausage Dog in Japanese Fabric Art
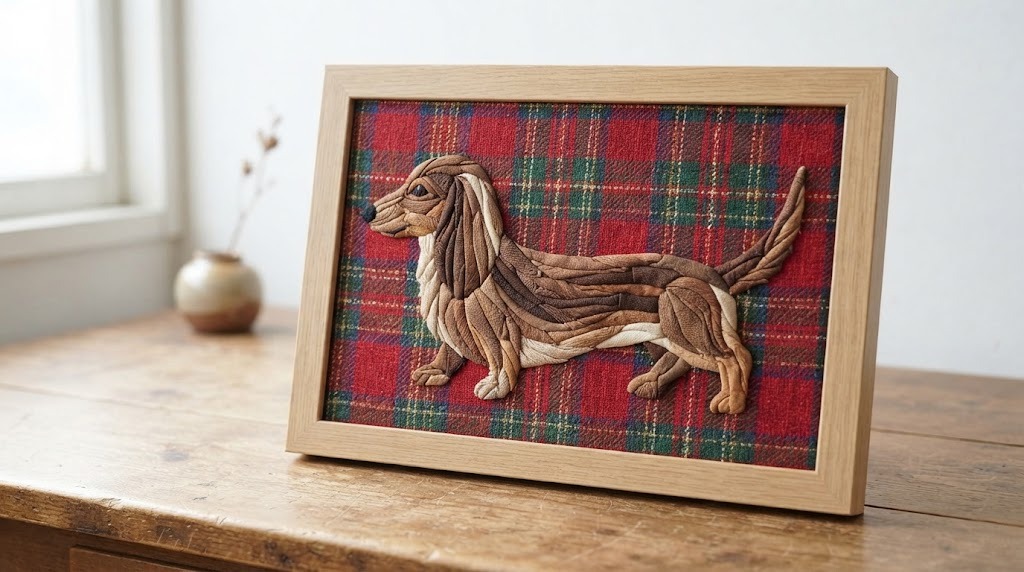
This is the design that made millions stop scrolling. A sausage dog by one maker passed 6.6 million views in mid October, and people adored its long little body against a plaid background. Pets are a sweet subject because everyone has a favorite. You can match the colors to your own dog for a gift that means a lot. A red and green plaid makes it perfect for the holidays. Whose dog would you make?
You will need: Foam board, brown and tan fabric scraps, a red and green plaid scrap and a blunt tool.
How to make it: 1. Draw a long dog shape with short legs and floppy ears. 2. Score the lines and fill the body with brown. 3. Add tan for the ears and plaid for the background.
Japanese Fabric Art Christmas Ornaments
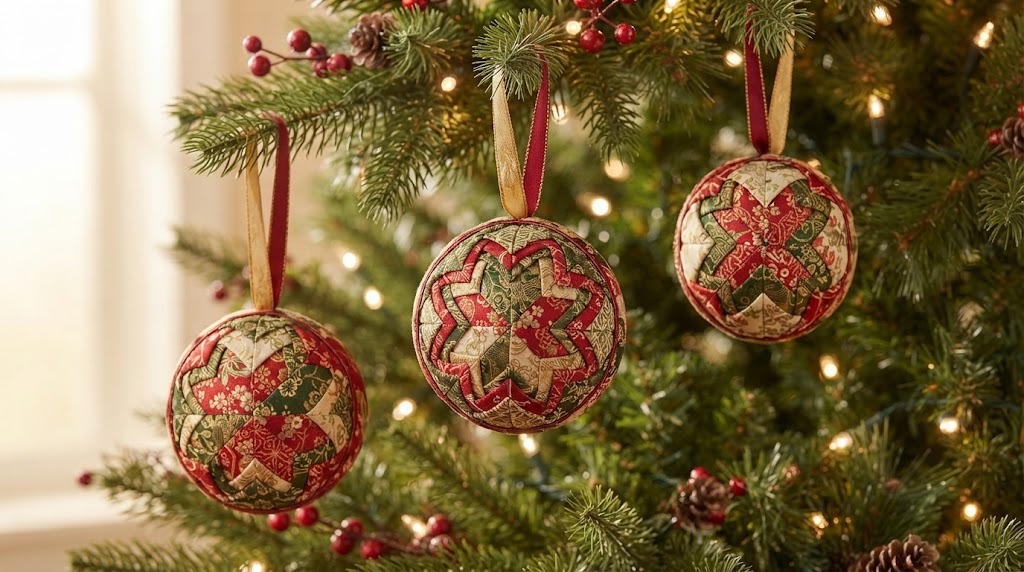
The same idea works on a foam ball, and this style is called kimekomi. Score lines around a foam ball like the seams of a beach ball, then tuck fabric into each section. In red, green and gold prints they make heirloom ornaments that will not break. They are perfect gifts for teachers and grandparents. Japanese fabric art ornaments look store bought but cost almost nothing. How many will you make for your tree?
You will need: Foam balls, a pencil, a craft knife for an adult, red, green and gold fabric scraps, ribbon and a pin.
How to make it: 1. Draw six lines from top to bottom around the ball. 2. An adult scores them and you tuck fabric into each section. 3. Pin a ribbon loop at the top.
A Patchwork Christmas Tree Panel
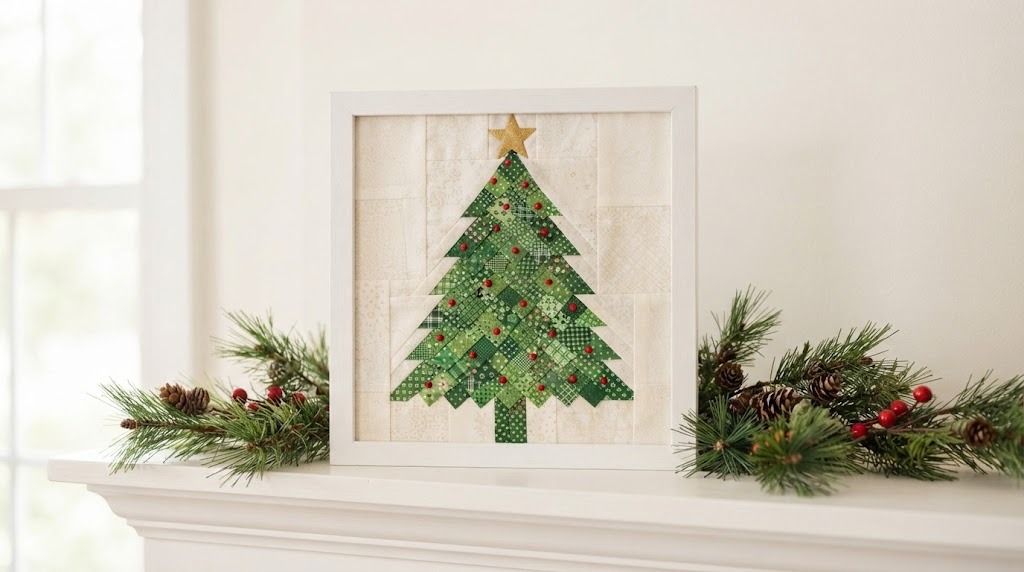
A simple triangle tree made from many green scraps is perfect for the mantel this season. Divide the tree into small diamond shapes and use a different green print in each one. A gold scrap makes the star, and tiny red bits become ornaments. Frame it in white wood and it looks like a little vintage quilt. Christmas is now less than two months away, so it is a good time to start. Would you hang it or stand it on a shelf?
You will need: Foam board, many green print scraps, a gold scrap, tiny red scraps, a frame and a blunt tool.
How to make it: 1. Draw a triangle tree and divide it into small diamond sections. 2. Score the lines and fill each section with a different green. 3. Add the gold star and red dots, then frame it.
A Snowy Village in Blue and White
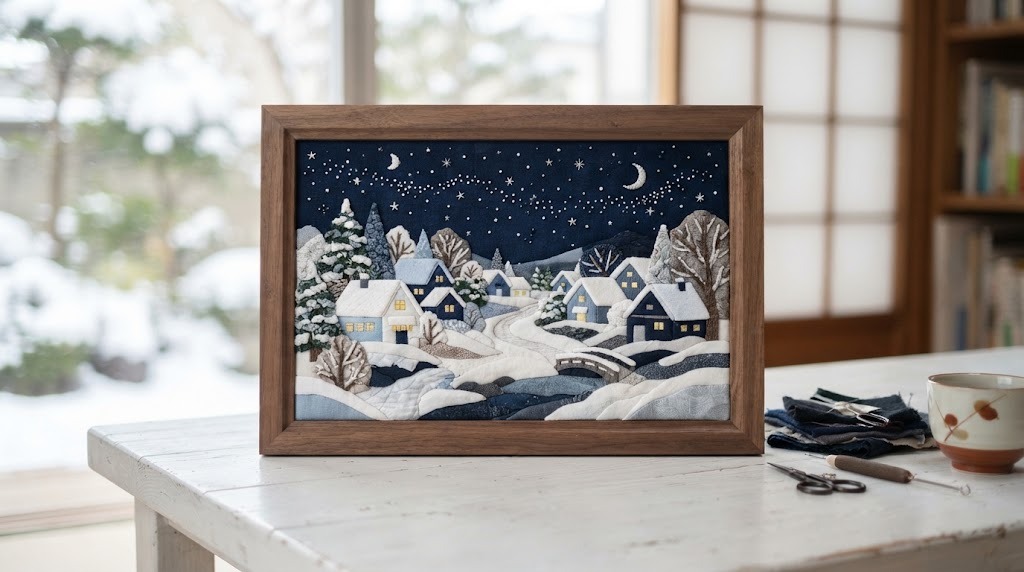
A row of little houses under a starry sky is one of the most loved winter designs. Use white and pale blue for the snowy roofs and walls, and a dark navy print with tiny stars for the sky. It looks peaceful and cozy and works all winter long, not just at Christmas. Keep the houses simple, just boxes with pointed roofs. Japanese fabric art loves simple shapes, because the fabric does the work. How many houses will your village have?
You will need: Foam board, white, pale blue and navy fabric scraps, a starry print for the sky and a blunt tool.
How to make it: 1. Draw three or four simple houses along the bottom. 2. Score the lines and fill the houses with white and pale blue. 3. Fill the sky with the starry navy fabric.
A Red Cardinal on a Branch
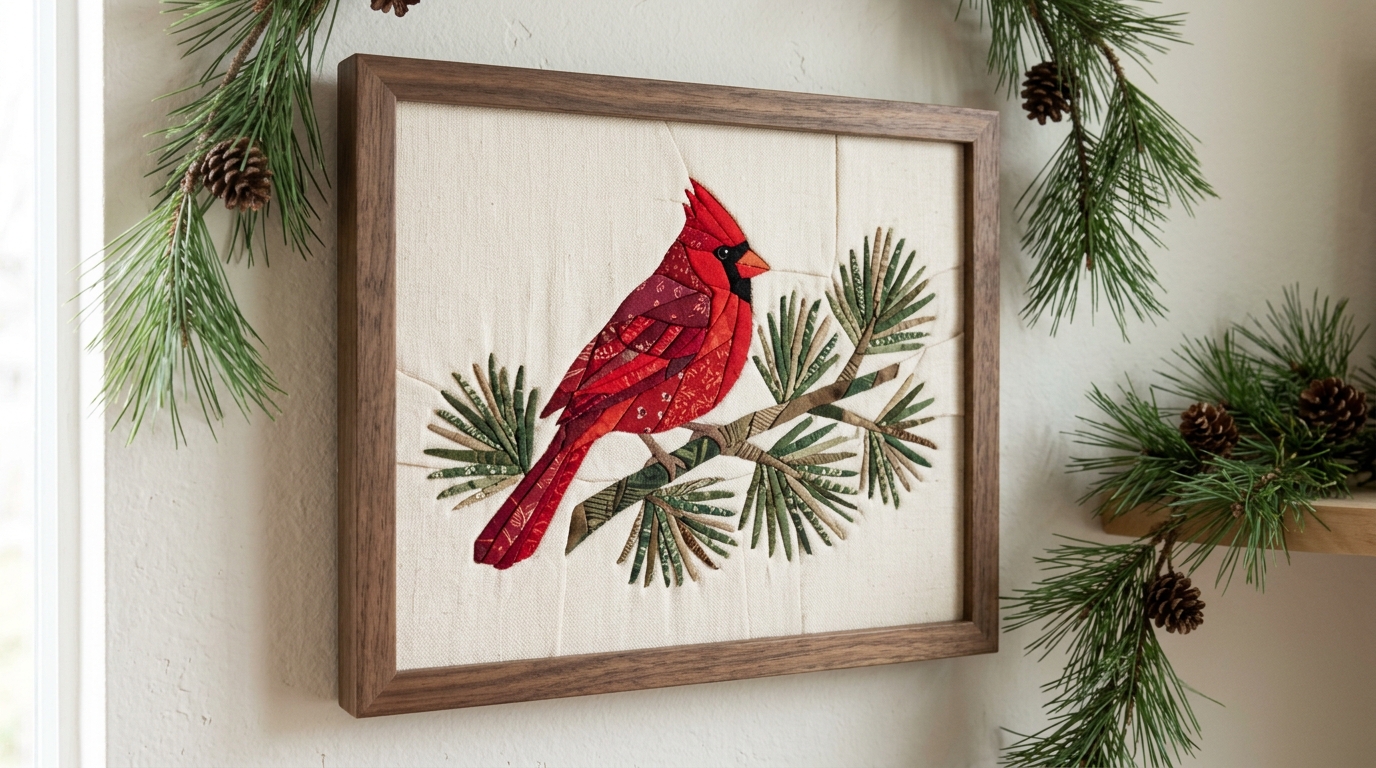
Cardinals are a favorite winter bird, and many people see them as a sign of a loved one nearby. In bright red prints on a cream background, this design makes a meaningful gift. Add a branch in brown and a few green pine needles to finish the scene. It is one of the most giftable pieces of Japanese fabric art you can make. It is a lovely piece to hang near the window where real birds visit. Who would you give this one to?
You will need: Foam board, red, brown, green and cream fabric scraps and a blunt tool.
How to make it: 1. Draw a cardinal sitting on a branch. 2. Score the lines and fill the bird with red prints. 3. Add the branch, a few needles and the cream background.
Your First Japanese Fabric Art Project: A Heart
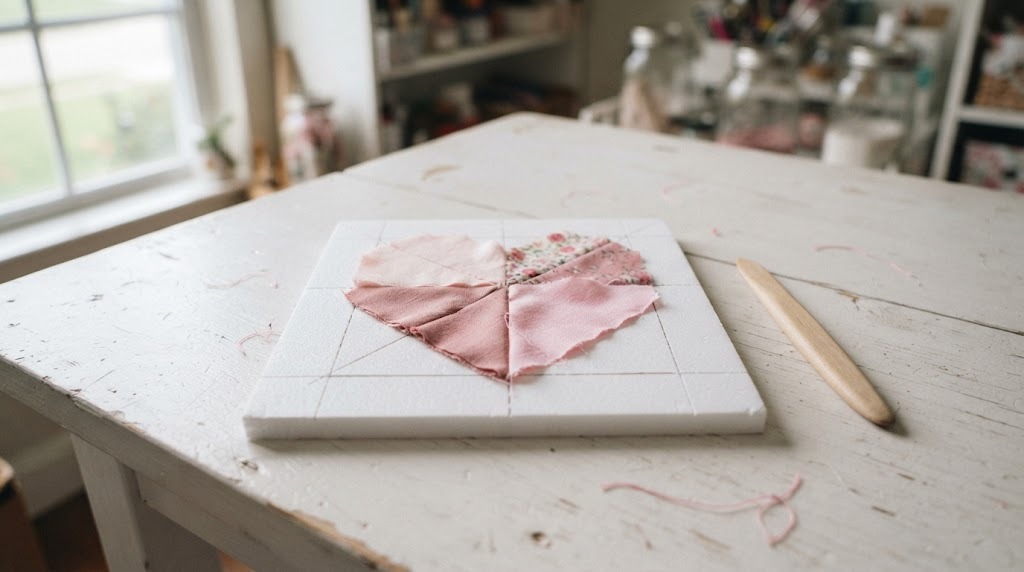
If you are new to this, start here. A heart split into four sections is the easiest Japanese fabric art project there is. You only score a few lines and need four pink scraps. In twenty minutes you will understand exactly how the tucking works. Many people make a few hearts as small gifts before moving on to birds and houses. For more scrap projects with a quilt feel, see our patchwork ideas. Who will get your first heart?
You will need: A small piece of foam board, four pink cotton scraps, a pencil and a blunt tool.
How to make it: 1. Draw a heart and divide it into four sections. 2. An adult scores the lines. 3. Tuck one pink scrap into each section and trim the extra.
Coaster Size Panels as Stocking Stuffers
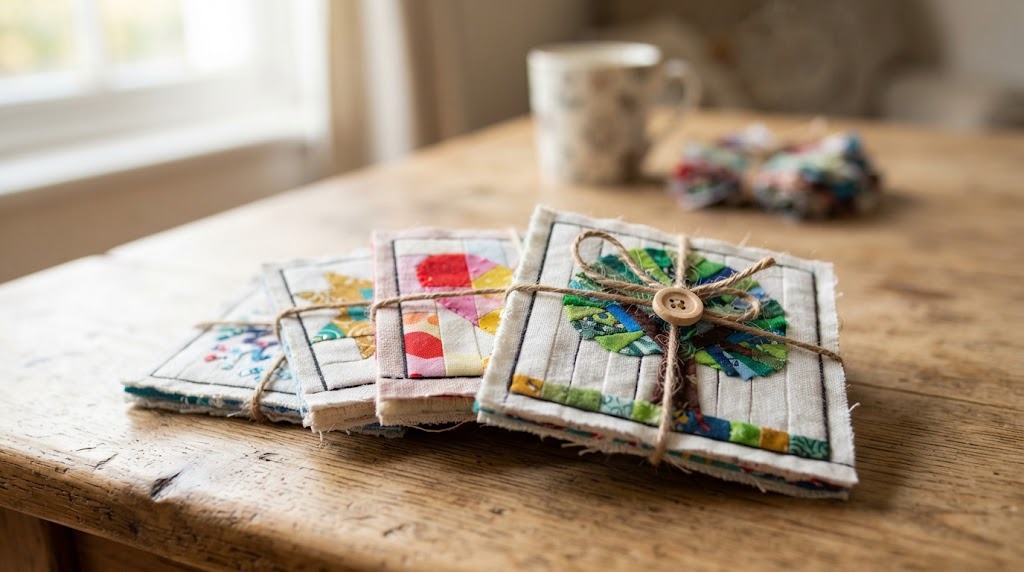
Small square panels the size of a coaster make fast and sweet stocking stuffers. Choose four simple shapes, like a star, a snowflake, a heart and a tree, and make one on each square. Tie them together with twine for a little gift set. They can sit on a shelf, hang on the tree or be glued to a card. Japanese fabric art in mini size is also great for kids to try. Which four shapes would you pick?
You will need: Four small squares of foam board, colorful fabric scraps, twine and a blunt tool.
How to make it: 1. Draw one simple shape on each square. 2. Score and fill each design with scraps. 3. Stack them and tie with twine.
Finishing: Frame It and Add a Ribbon Hanger
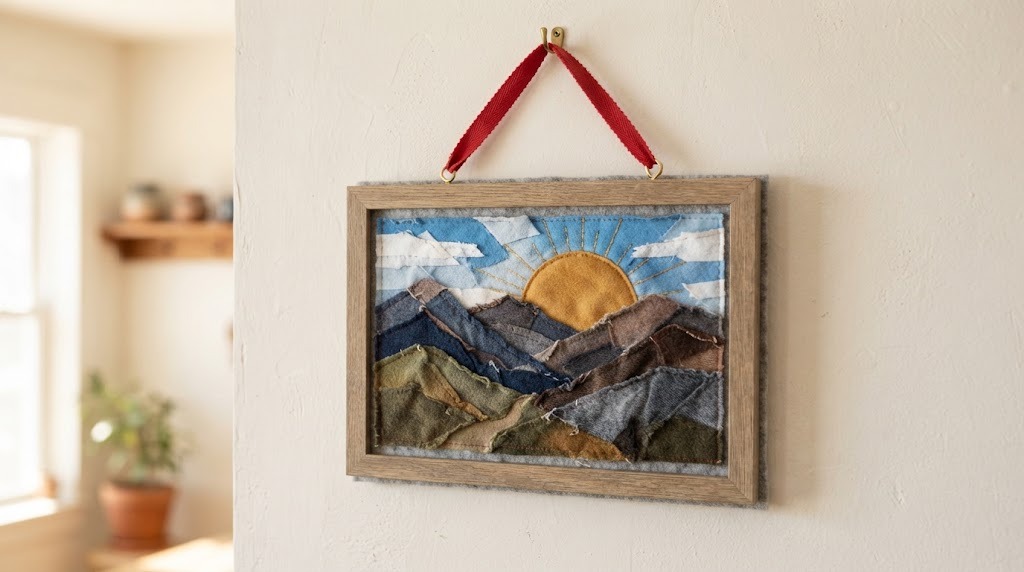
The last step makes your work look like real art. Slip the finished panel into a simple frame, or glue felt on the back and add a ribbon hanger at the top. Soft flannel scraps make a cozy mountain and sun landscape that is perfect for winter. Signing and dating the back turns it into a keepsake. To see hundreds of finished pieces for ideas, browse the kinusaiga tag on Instagram. Where will yours hang?
You will need: Your finished panel, a frame or a piece of felt, craft glue and a length of ribbon.
How to make it: 1. Trim any loose fabric threads at the edges. 2. Frame the panel, or glue felt to the back. 3. Glue or pin a ribbon loop to the top and hang it.