Kitchen Backsplash Ideas: 13 Cheap Weekend Upgrades That Make Your Kitchen Look Custom Before the Holidays
These kitchen backsplash ideas can make your whole kitchen look custom in a single weekend, and most of them cost less than a nice dinner out. Think about it. The backsplash is the one wall everyone stares at while you cook, so a small change there feels huge. DIY backsplash makeovers are taking over social media right now. One easy and affordable DIY backsplash post on Instagram pulled about 12,000 likes and more than 2,600 comments, mostly people asking where to buy the tile. Many of these looks are renter friendly too. Below are 13 upgrades to finish before Thanksgiving and Christmas guests arrive. Which one is calling your name..
Faux Zellige Tile: Kitchen Backsplash Ideas That Fool Everyone
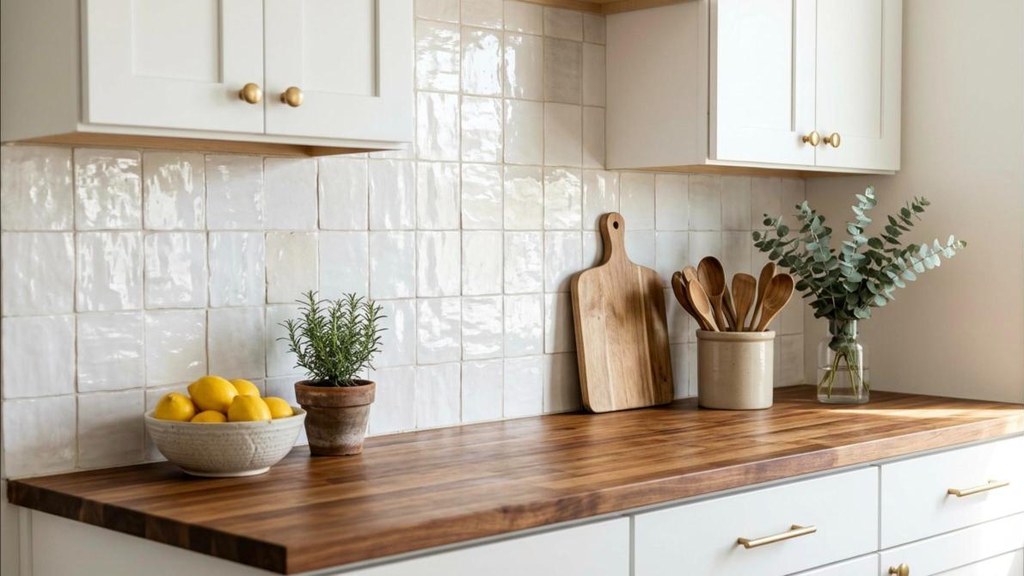
Zellige is the wavy, glossy handmade tile you see in every designer kitchen, and the real thing can cost a small fortune. The peel and stick version gives you that same soft, uneven shine for a fraction of the price, and there is no grout, no mortar and no mess. Start by cleaning the wall really well with a degreaser, because kitchen walls hold more grease than you think. Draw a level line as your starting point, then work from the center out so the edges match on both sides. Press each sheet down firmly with your hand and overlap the edges as the package shows. Guests will run their fingers over it and ask who your tile guy is. You can just smile and say it took one Saturday..
You will need: Faux zellige peel and stick sheets, degreaser, a level, a pencil, and a sharp utility knife.
How to make it: 1. Clean the wall with degreaser and let it dry. 2. Mark a level line and start in the center. 3. Press each sheet down firmly and trim the edges with the utility knife.
Classic White Subway Peel and Stick
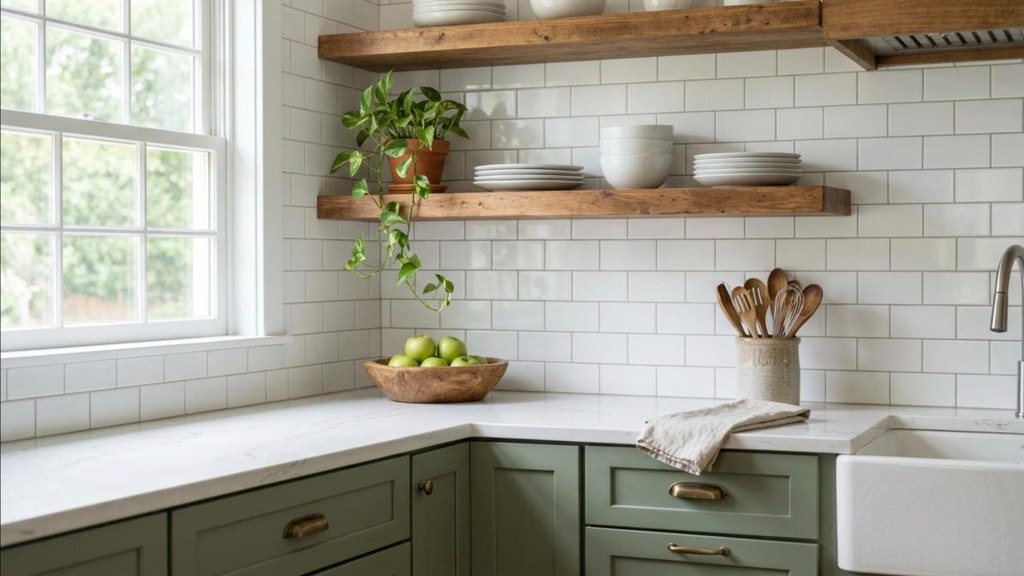
Of all the kitchen backsplash ideas out there, white subway tile is the one that never goes out of style. It works in a farmhouse kitchen, a modern one and everything in between. The peel and stick kind has come a long way, and the good ones even have a little depth so the grout lines look real. This is also the best pick for renters, since most brands come off without hurting the paint underneath. Always test a small piece in a hidden corner first. The key to a pro finish is keeping your rows straight, so use a level on the very first row and check it again every few rows. A plastic smoothing tool helps push out air bubbles. Is there anything more classic than crisp white tile and a bowl of fresh fruit on the counter?
You will need: White subway peel and stick tiles, a level, a straight edge, a smoothing tool, and a utility knife.
How to make it: 1. Test a small piece in a hidden spot. 2. Lay the first row perfectly level. 3. Stack each row on top and smooth out any bubbles as you go.
Paint Your Dated Tile Instead of Ripping It Out
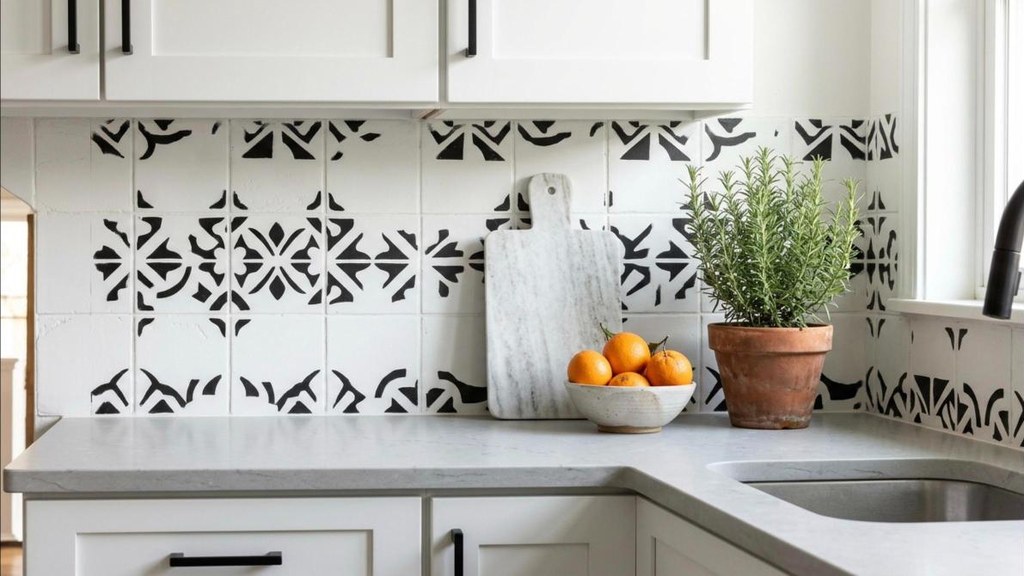
Do you have tired beige tile from the nineties? Before you grab a hammer, grab a paintbrush. Tile paint is made to grip glossy surfaces, and it can turn an ugly backsplash into something you actually love. The prep is everything here. Scrub the tile and grout with degreaser, sand lightly so the primer can bite, and wipe away the dust. Roll on a bonding primer, then two thin coats of tile paint in white or soft cream. For a real wow, add a patterned stencil on top in charcoal or navy. Tape the stencil in place and dab the paint on with a nearly dry foam brush so it does not bleed. It looks like expensive cement tile, but it is the same old wall you had last week. Pretty clever, right?
You will need: Degreaser, fine sandpaper, bonding primer, tile paint, a pattern stencil, painter’s tape, a foam roller and a stencil brush.
How to make it: 1. Clean and lightly sand the old tile. 2. Prime, then roll on two thin coats of tile paint. 3. Tape the stencil and dab on the pattern with a nearly dry brush.
Kitchen Backsplash Ideas With Cottage Beadboard
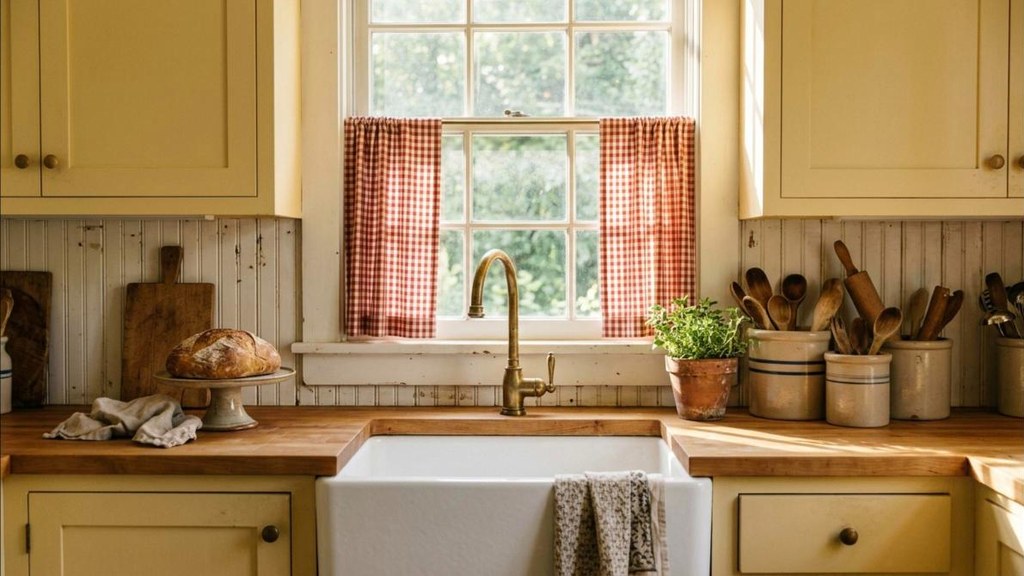
Beadboard brings instant cottage charm, and it might be one of the cheapest kitchen backsplash ideas on this list. A single sheet of beadboard paneling costs very little at the home store, and the staff can often cut it to size for you. Measure the space between your counter and the upper cabinets, cut the panel to fit, and attach it with construction adhesive. Add a slim piece of trim along the top and sides for a finished look. Then paint it in a semi gloss so splashes wipe right off. Soft white, creamy butter yellow or a gentle sage all look lovely. Pair it with open shelves and a few vintage crocks, and your kitchen will feel like a sweet country cottage. Does it get any cozier than that?
You will need: Beadboard panel, construction adhesive, thin wood trim, semi gloss paint, a brush and a small roller.
How to make it: 1. Measure and cut the beadboard to fit. 2. Glue it to the wall and add trim around the edges. 3. Paint with two coats of semi gloss paint.
Stenciled Spanish Tile Look on a Plain Wall
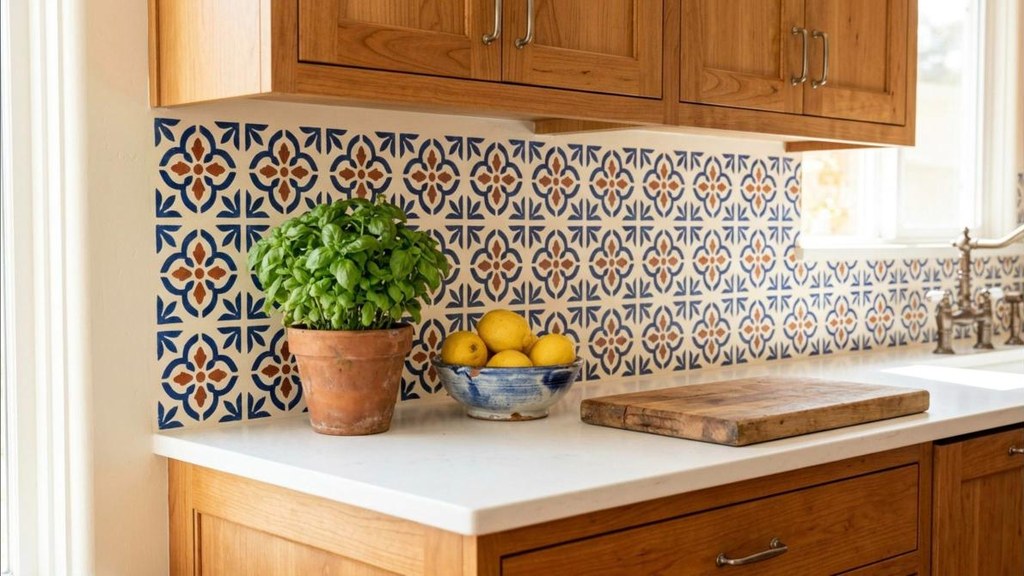
What if you have no tile at all, just a plain painted wall? You can still get that colorful Spanish tile look with a stencil and a few sample pots of paint. Start with a base coat in white or cream and let it dry overnight. Then draw a light grid so each stencil lands in the right spot. Tape the stencil up, dab on blue, terracotta or green with a stencil brush, and move to the next square. Do every other square first, then come back for the rest so you do not smudge wet paint. When it is all done, roll on a clear water based sealer so it can handle splashes. It takes patience, but it costs about the same as a pizza. People will swear you went to Spain for it.
You will need: A tile pattern wall stencil, base paint, two or three sample pots of paint, a stencil brush, painter’s tape, and clear water based sealer.
How to make it: 1. Paint a base coat and mark a light grid. 2. Stencil every other square, then fill in the rest. 3. Finish with two coats of clear sealer.
Marble Look Contact Paper for Small Spaces
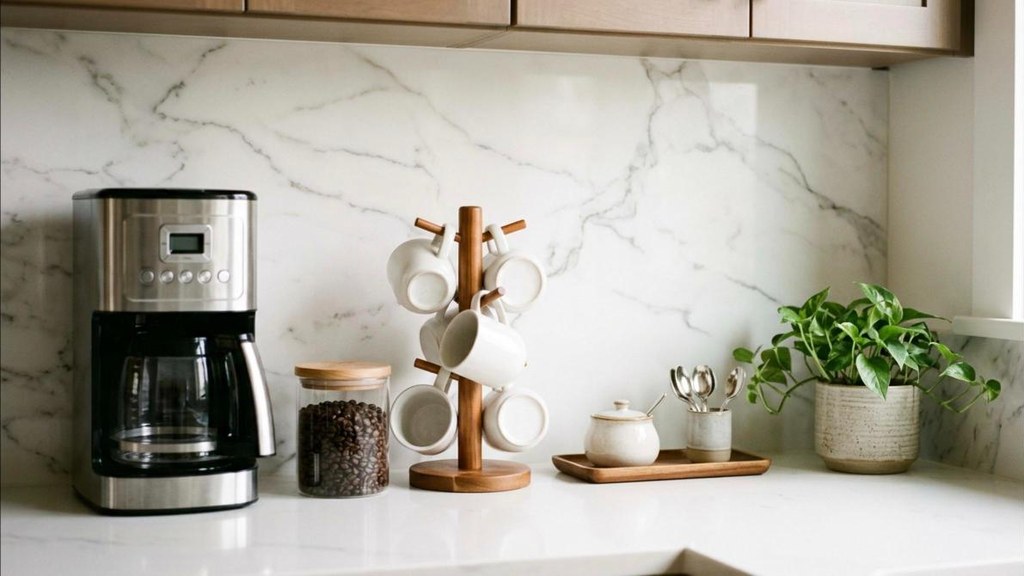
Real marble is gorgeous, but it is also expensive and stains if you look at it wrong. Marble look contact paper is a smart cheat, especially for small areas like a coffee bar or the short wall beside the fridge. Choose a roll with soft gray veins that look natural, not loud. Clean the wall, peel back just a few inches of the backing, and smooth it down with a squeegee as you go. Line up the veins at the seams so it looks like one big slab. A hair dryer on low helps soften the paper so it hugs any bumps. It wipes clean with a damp cloth and peels off when you move. It is a small project with a big payoff, and you can finish it during one afternoon.
You will need: Marble look contact paper, a squeegee or plastic card, a hair dryer, a utility knife and a damp cloth.
How to make it: 1. Clean the wall and peel back a few inches of backing. 2. Smooth it on with a squeegee, matching the veins. 3. Warm any bubbles with a hair dryer and trim the edges.
Kitchen Backsplash Ideas With Vertical Stacked Tile
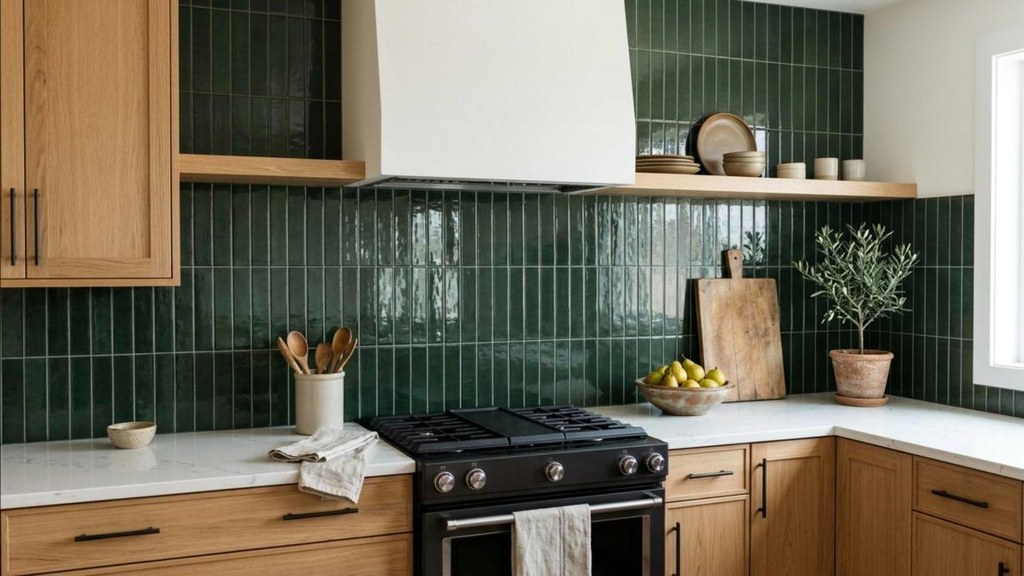
Here is a simple trick that makes a kitchen feel fresh and modern: turn your tile on its side. Long skinny tiles stacked straight up in neat columns look tall, clean and very current. It is one of the easiest kitchen backsplash ideas to make look expensive, because the pattern itself does the work. A deep green, soft clay or creamy white tile looks especially rich this way. You can do it with peel and stick or with real tile if you feel brave. Use spacers and a level so every column stays perfectly straight, since any lean shows up fast with this layout. Does your kitchen have low ceilings? Vertical lines trick the eye and make the room feel taller. It is a little design magic that costs nothing extra.
You will need: Long rectangular tile or peel and stick strips, tile spacers, a level, and a pencil.
How to make it: 1. Mark a straight vertical line in the center of the wall. 2. Stack the tiles in straight columns using spacers. 3. Check each column with the level as you work.
Herringbone Peel and Stick for a High End Look
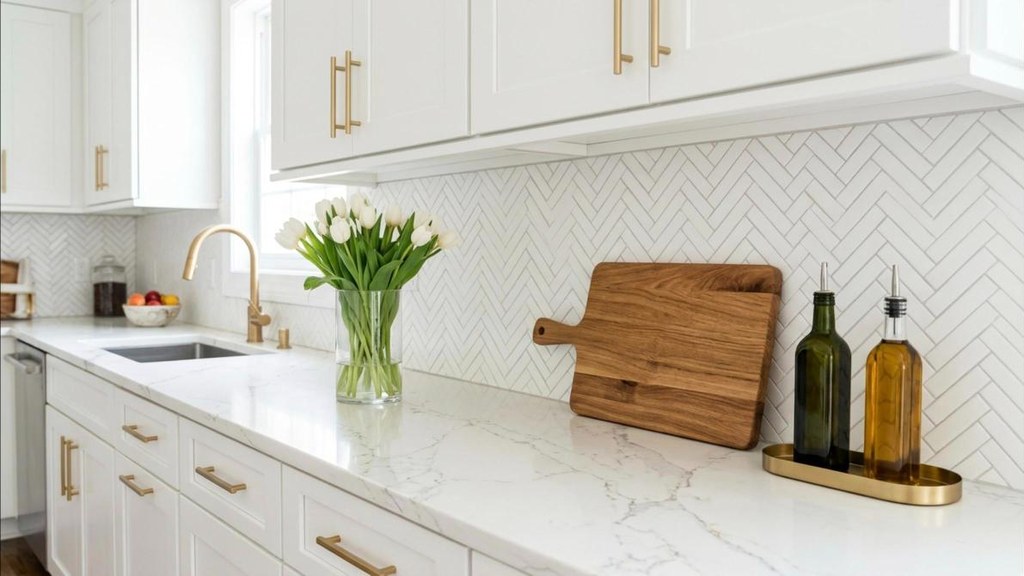
Herringbone is the pattern designers use when they want a kitchen to look custom and expensive. Laying real tile in a herringbone pattern takes skill and a lot of cutting. The peel and stick version comes with the zigzag already built into each sheet, so you just line them up. That makes it one of the most impressive kitchen backsplash ideas you can do without any tile experience. Start in the middle of your wall and work outward so the pattern looks balanced. The sheets lock together like puzzle pieces, so take your time matching each edge. White or soft gray looks timeless, while a pale blush or green feels fun and fresh. Add gold cabinet pulls nearby and you have a kitchen that looks like it came from a magazine.
You will need: Herringbone peel and stick sheets, a level, a utility knife and a smoothing tool.
How to make it: 1. Find the center of the wall and mark it. 2. Place the first sheet and lock the next ones into the pattern. 3. Smooth each sheet and trim the edges neatly.
Faux Brick Panels for Farmhouse Charm
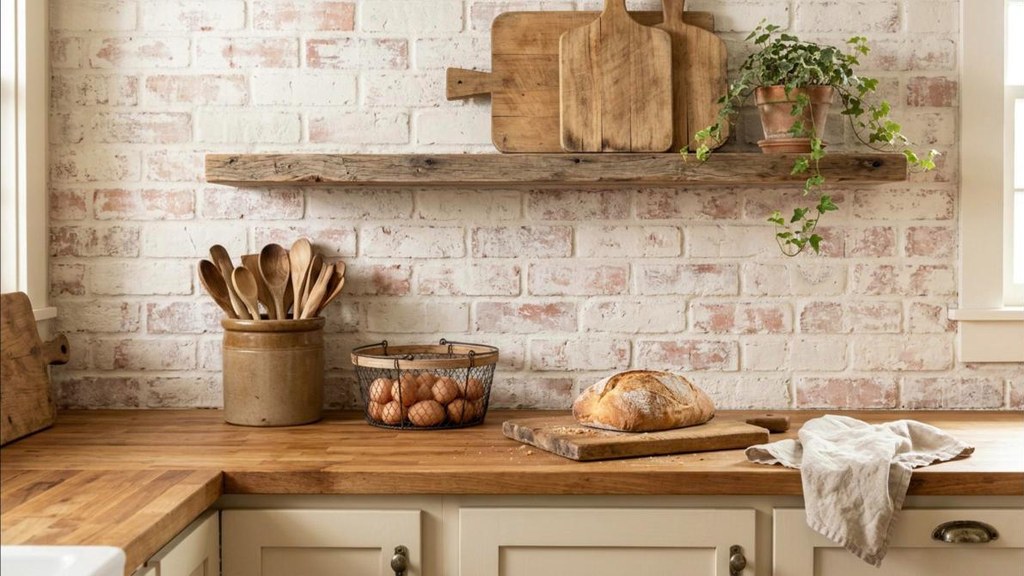
Exposed brick gives a kitchen that warm, lived in feel you see in old farmhouses and city lofts. You do not need real brick to get it. Thin faux brick panels are light, easy to cut and go up with simple adhesive. On their own they can look a little too orange, so the trick is a whitewash. Mix white paint with water, brush it on, and wipe some away with a rag so the brick color peeks through. It instantly looks older and softer. Hang a wooden shelf on top with a few cutting boards and a little greenery, and it feels like a farmhouse that has been standing for a hundred years. Can you picture your holiday cookie trays lined up right in front of it?
You will need: Faux brick panels, panel adhesive, a fine tooth saw, white paint, water, a brush and a soft rag.
How to make it: 1. Cut the panels to fit and glue them to the wall. 2. Mix white paint with water and brush it on. 3. Wipe some off with a rag for an aged look.
Kitchen Backsplash Ideas With Warm Wood Planks
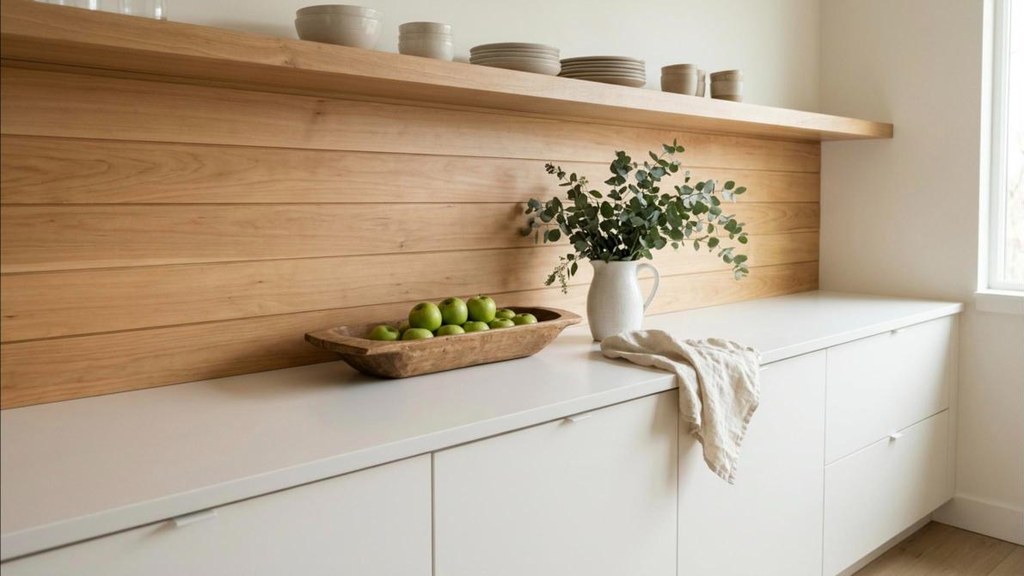
White kitchens are beautiful, but they can feel cold, especially in winter. Wood planks fix that right away. Thin pine boards or shiplap running sideways across the backsplash bring warmth and texture that tile cannot match. This is one of those kitchen backsplash ideas that works in a modern home, a cabin or a beach cottage. Sand the boards smooth, then pick a light natural stain or leave them raw for a Scandinavian feel. Attach them with construction adhesive and a few small finish nails. The most important step is sealing them well. Brush on two or three coats of water based polyurethane so splashes and steam do not soak in. Then style the counter with a wooden bowl and fresh greens. It feels like a hug in kitchen form.
You will need: Thin wood planks or shiplap boards, sandpaper, wood stain if you like, construction adhesive, finish nails, and water based polyurethane.
How to make it: 1. Sand and stain the boards. 2. Attach them in horizontal rows with adhesive and small nails. 3. Seal with two or three coats of polyurethane.
Pressed Tin Look Panels With Vintage Style
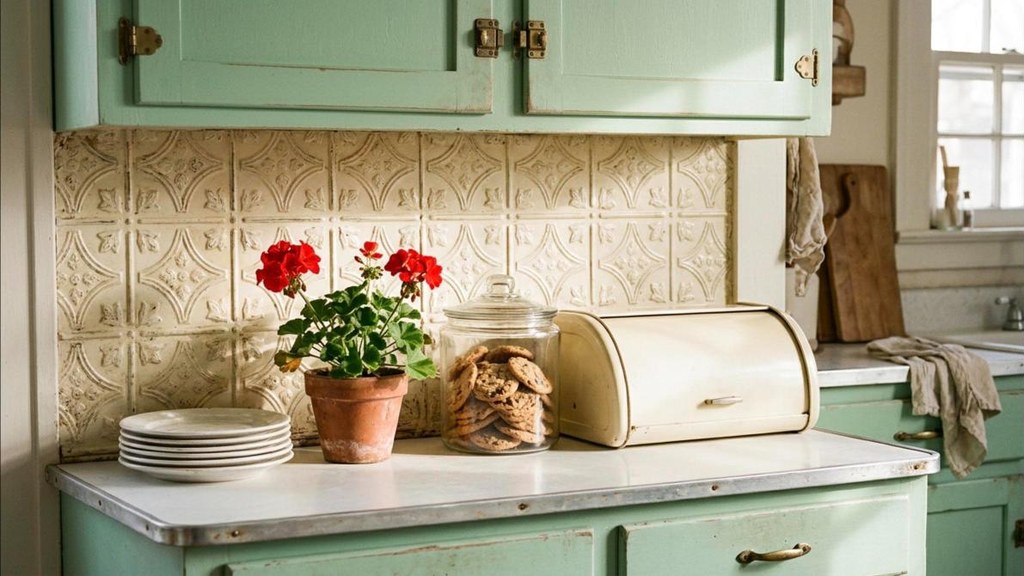
Pressed tin ceilings were everywhere in old general stores and diners, and those pretty raised patterns look amazing as a backsplash too. Real tin is pricey, but faux tin panels are made from light plastic or thin metal and cost much less. They go up with adhesive and cut with simple shears. You can leave them silver for a diner look, or paint them cream, white or antique copper for a farmhouse feel. A light rub of dark glaze in the grooves makes the pattern really pop and adds age. This look feels so right around the holidays, like grandma’s kitchen in an old Christmas movie. Add a vintage bread box and a jar of cookies on the counter. Would anyone guess it cost under a hundred dollars?
You will need: Faux pressed tin panels, panel adhesive, tin snips or heavy shears, paint, and a little dark glaze if you like.
How to make it: 1. Cut the panels to fit with snips. 2. Glue them to the wall and overlap the edges neatly. 3. Paint them and rub glaze into the grooves for an aged look.
Kitchen Backsplash Ideas Just Behind the Stove
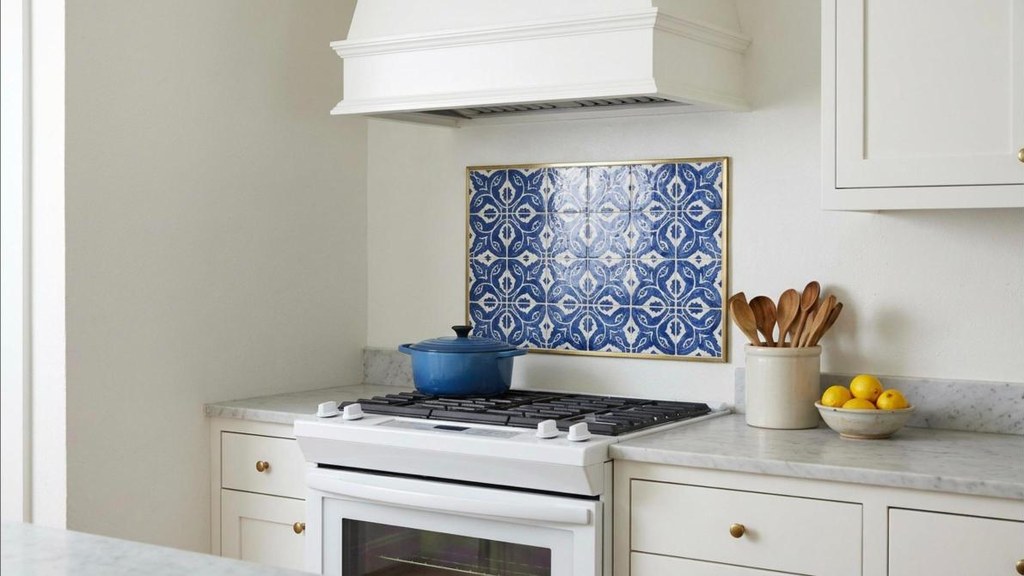
Not ready to do a whole wall? Start small. A single statement panel right behind the stove gives you a big designer moment for very little money. Since it is such a small area, you can splurge on a few pretty tiles you love, or use one sheet of patterned peel and stick. Frame it with a slim metal edge trim so it looks planned and finished. This is a smart pick for busy people, because it takes about an hour. It is also the area that gets the most splatter, so it does double duty. Choose a bold pattern, a deep color or even a sweet vintage design. Keep the rest of the wall plain so the accent really shines. Sometimes the smallest kitchen backsplash ideas make the biggest difference.
You will need: A few decorative tiles or one patterned peel and stick sheet, slim metal edge trim, adhesive and a level.
How to make it: 1. Mark a neat rectangle behind the stove. 2. Apply the tile or sheet inside the lines. 3. Frame it with edge trim for a finished look.
Easy Finishing Touches Before Guests Arrive
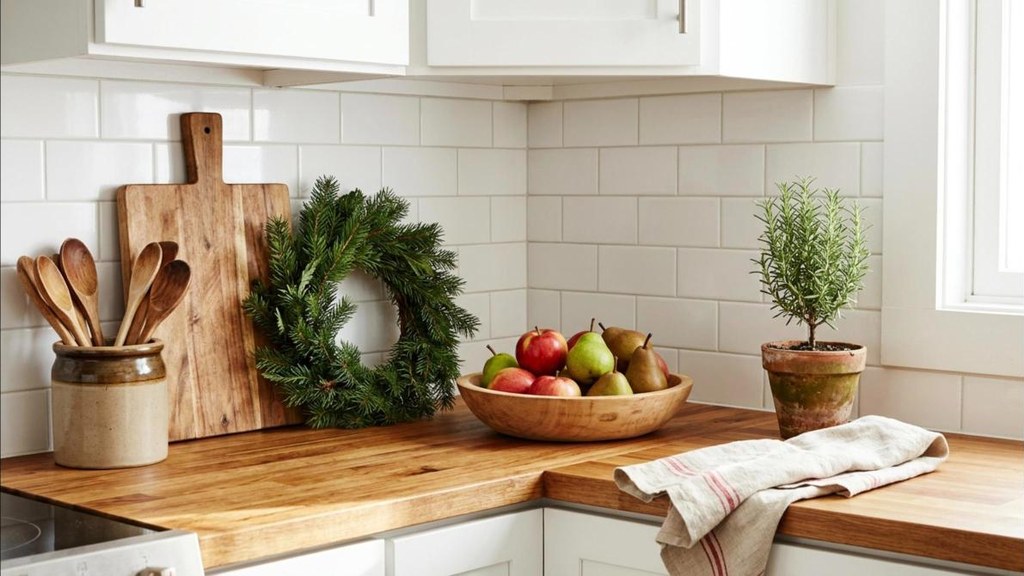
The last ten percent is what makes a DIY job look professional. Run a bead of paintable caulk along the line where the backsplash meets the counter, then smooth it with a wet finger for a clean seam. Add slim edge trim on any open side so you do not see raw edges. Wipe every tile with a soft cloth. Now style it. Lean two wooden cutting boards against the wall, add a small potted herb, a crock of spoons and a bowl of seasonal fruit. Around the holidays, tuck in a sprig of fresh greenery or a small wreath. Step back and look at your work. That brand new backsplash is ready for the Thanksgiving crowd and every Christmas cookie you plan to bake. Of these kitchen backsplash ideas, which one are you starting with first?
You will need: Paintable caulk, a caulk gun, slim edge trim, wooden cutting boards, a small potted herb, and a bowl of fruit.
How to make it: 1. Caulk the seam where the backsplash meets the counter. 2. Add edge trim to any open sides. 3. Clean the surface and style the counter for guests.