Painted Wall Designs: 15 Taped Patterns That Turn a Plain Wall Into Art
Painted wall designs are having a huge moment right now, and all you really need is a roll of painter’s tape and a quart of paint. One simple taped diamond wall in green and brown pulled more than 613,000 reactions and 15,000 shares in under three weeks this month, and another easy wall painting reel passed 734,000 reactions. People love the big reveal when the tape comes off and those crisp lines appear. It is also the cheapest way to make a room feel brand new before holiday guests arrive in a few weeks. We gathered 15 patterns, from easy half walls to bold triangle mosaics, with simple steps for each. Pick one wall, put on some music and give yourself a weekend..
The Diamond Lattice That Made Painted Wall Designs Go Viral
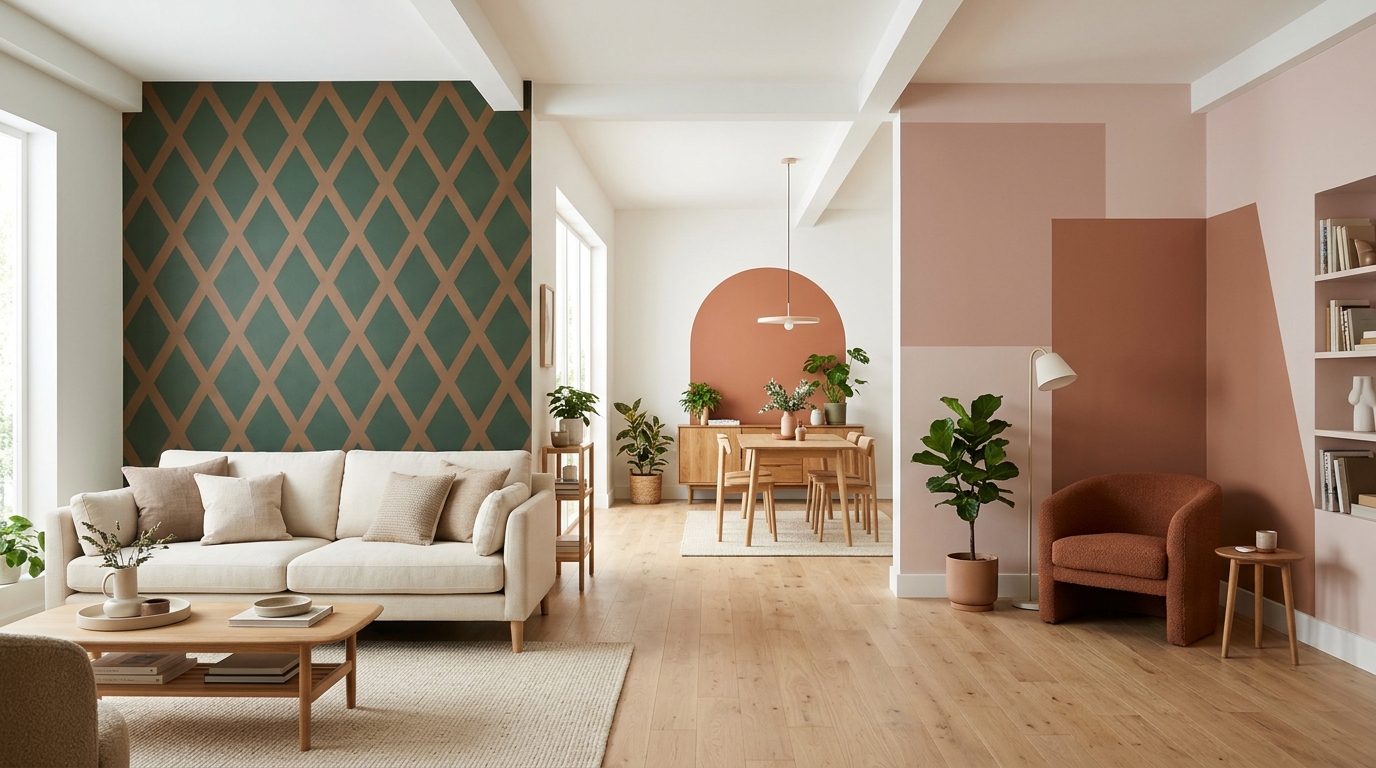
This is the pattern that started the craze. A dark forest green and warm brown diamond lattice turns a plain living room wall into something that looks like custom wallpaper. The taped geometric wall reel for this look passed 613,000 reactions this month, and the comments are full of people saying they are trying it this weekend. The trick is thin strips of tape left between the diamonds, so a crisp line of the old wall color shows through. It looks hard, but it is really just straight lines. Which two colors would you choose..
You will need: Painter’s tape, a long level, a pencil, two paint colors, a small roller and an angled brush.
How to make it: 1. Mark a grid of dots on the wall and connect them with diagonal tape lines. 2. Paint every other diamond in color one, then the rest in color two. 3. Peel the tape while the paint is still a little wet for the cleanest lines.
A Half Painted Wall With One Clean Line
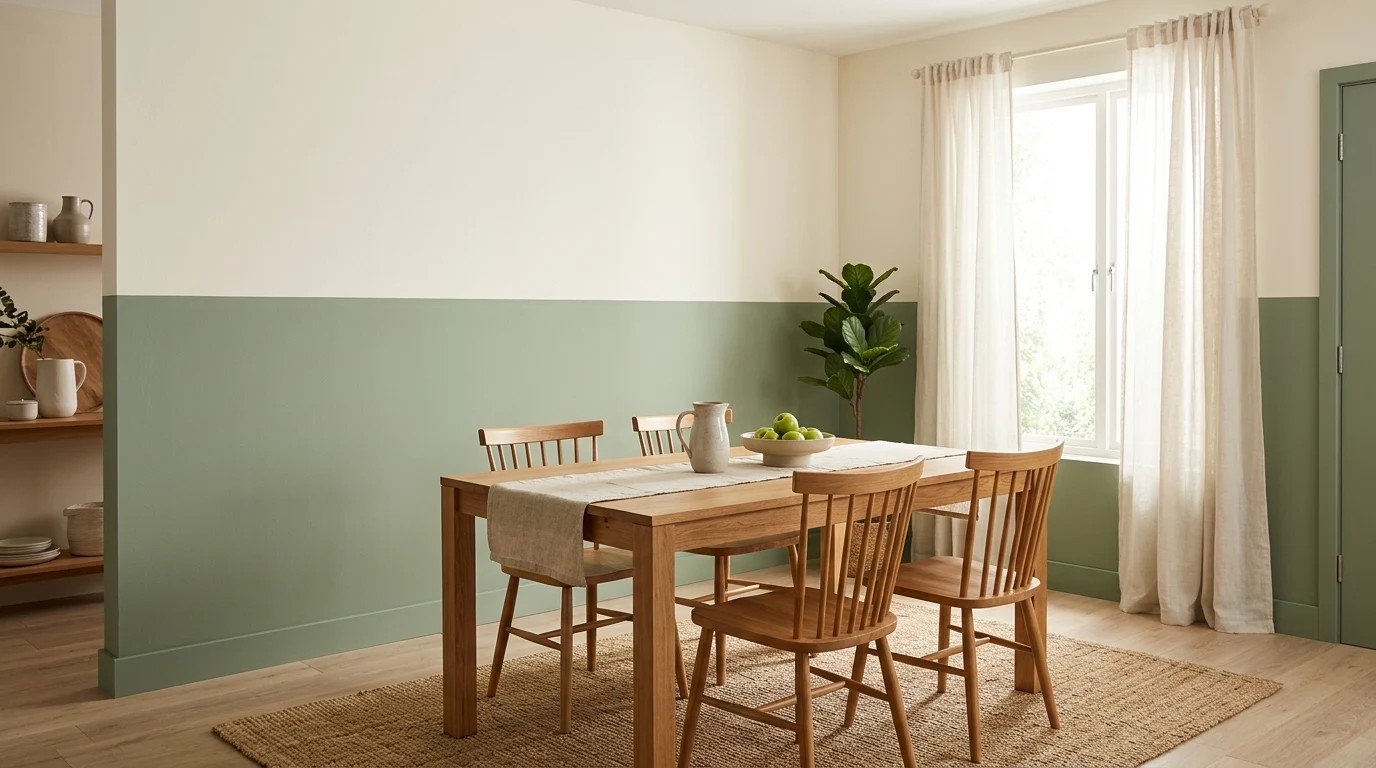
If you are new to painted wall designs, start here. Paint the bottom half of the wall in a soft sage green and leave the top warm white. That one straight line makes a dining room feel cozy and finished, like it has old fashioned paneling without any wood. It also hides scuffs from chairs and little feet. Most people finish this in one afternoon. The secret is a level and good tape pressed down firmly. Would this calm look suit your dining space?
You will need: Painter’s tape, a level, a pencil, one quart of paint, a roller and a tray.
How to make it: 1. Measure about 36 to 40 inches up and draw a level line around the room. 2. Tape just above the line and press the edge down with a card. 3. Roll the bottom half in two coats and peel the tape while the last coat is slightly wet.
A Painted Arch as a Headboard
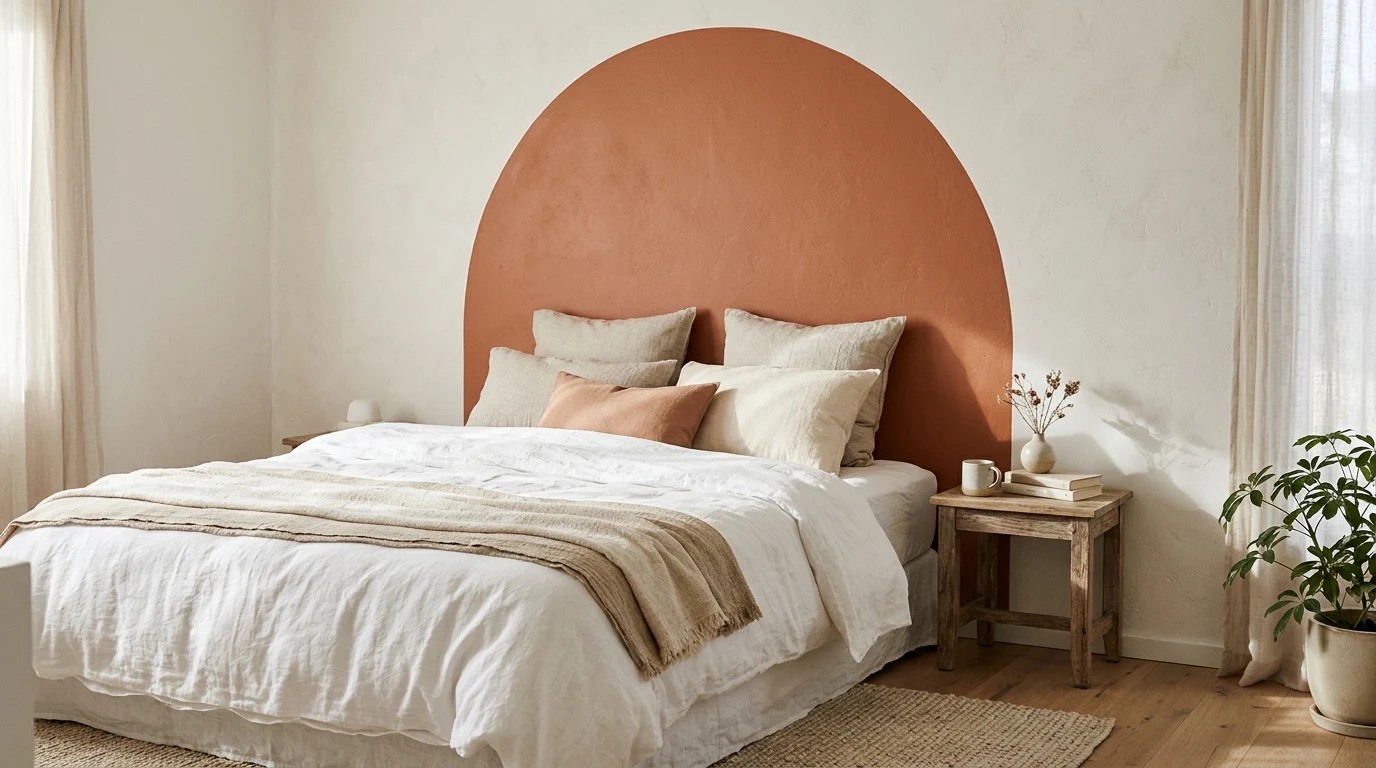
No headboard? Paint one. A big terracotta arch behind the bed frames it beautifully and makes a simple bedroom feel warm and designed. It costs a fraction of a real headboard and takes about two hours. Arches are one of the most loved painted wall designs right now because the soft curve feels calm and welcoming. You can make it as tall or wide as you like. What color would make your bedroom feel like a hug?
You will need: A pencil, string, a push pin, painter’s tape, one sample pot of paint and an angled brush.
How to make it: 1. Pin a string at the center of your arch top and trace a half circle with a pencil tied to the end. 2. Tape straight lines down from each side of the curve to the floor or the bed height. 3. Brush along the curve slowly, then fill in with a small roller.
A Two Tone Color Block Corner
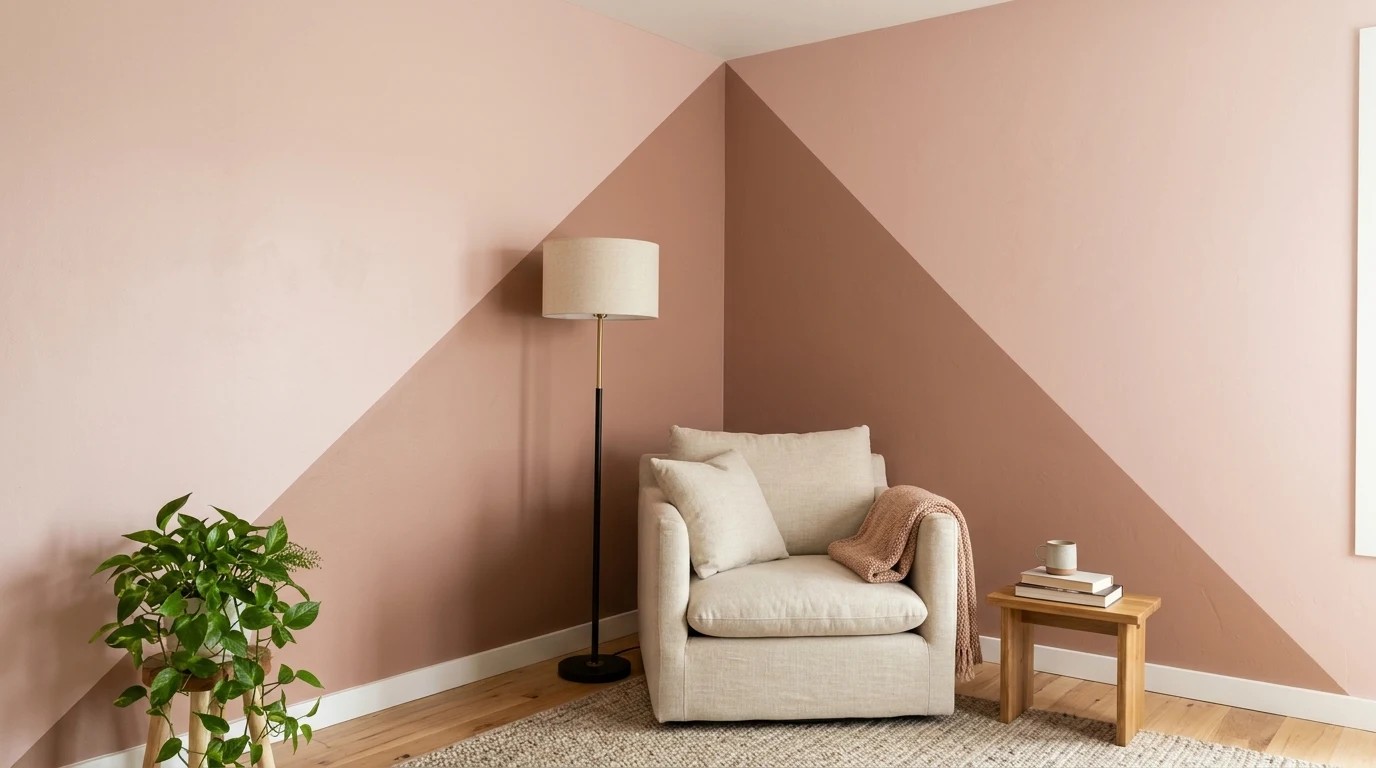
Color blocking is a simple way to make a reading corner feel special. Two soft tones, like blush and muted clay, meet at a clean diagonal line and wrap around the corner. It draws the eye to your favorite chair and makes a small spot feel like its own little room. You do not need to be good at art for this one. Just tape your shape and roll. Where in your home would a cozy corner like this fit best?
You will need: Painter’s tape, a level, two sample pots in soft tones, a mini roller and a brush.
How to make it: 1. Tape a long diagonal line across both walls so it meets in the corner. 2. Paint the top section in the lighter tone and the bottom in the deeper one. 3. Remove the tape gently and touch up any spots with a small brush.
Painted Wall Designs for Kids: Mountain Range
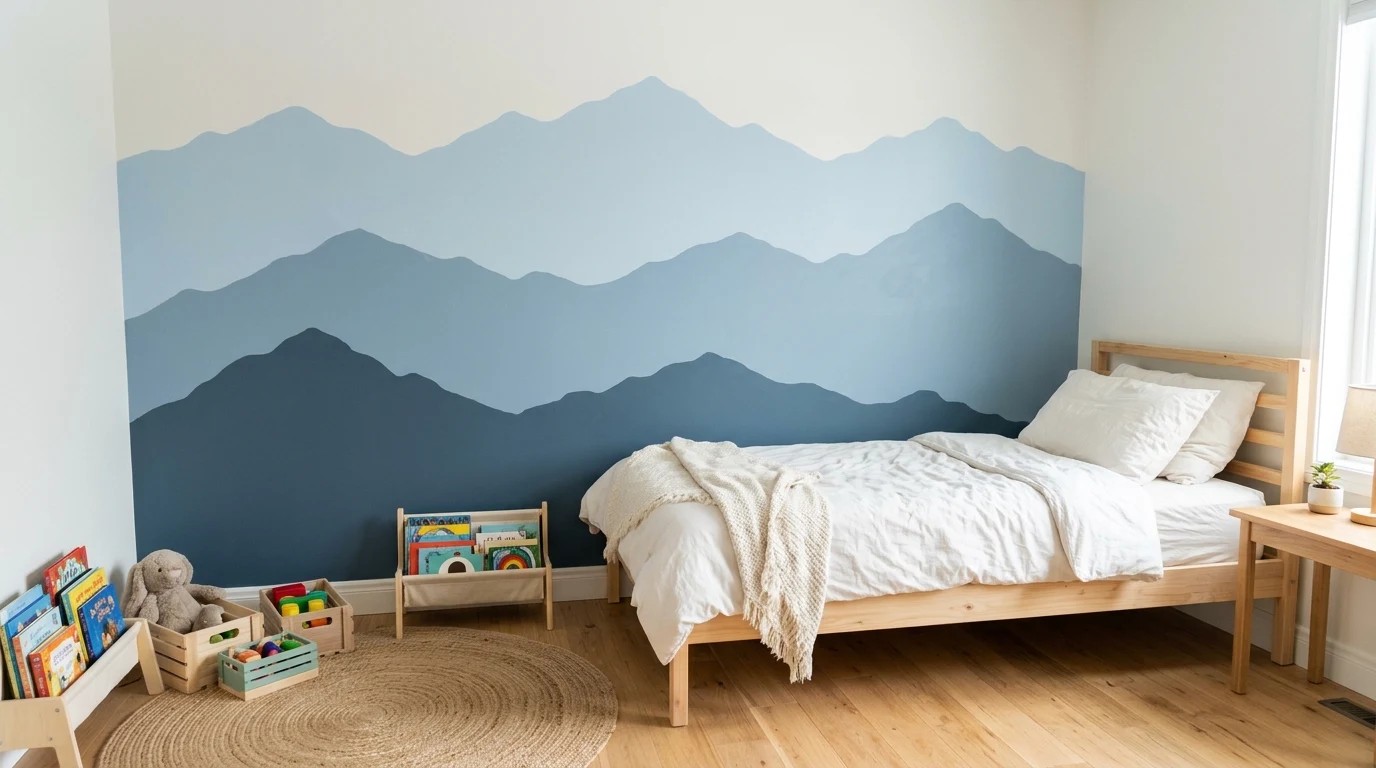
Kids love waking up to mountains. Three shades of soft blue layered from light to dark make a peaceful mountain range that turns a plain bedroom into an adventure. The layers are what make it look so good, since each row sits a little lower and darker than the one before. It is a forgiving design, because mountain peaks do not need to be perfect. Let your child help pick the shades. Would your little explorer love this above their bed?
You will need: Painter’s tape, a pencil, three shades of one paint color, a small roller and a brush.
How to make it: 1. Draw the back mountain line with peaks and tape under it, then paint the lightest shade. 2. Once dry, tape a lower line and paint the middle shade. 3. Repeat with the darkest shade at the bottom.
A Painted Sun Behind a Reading Chair
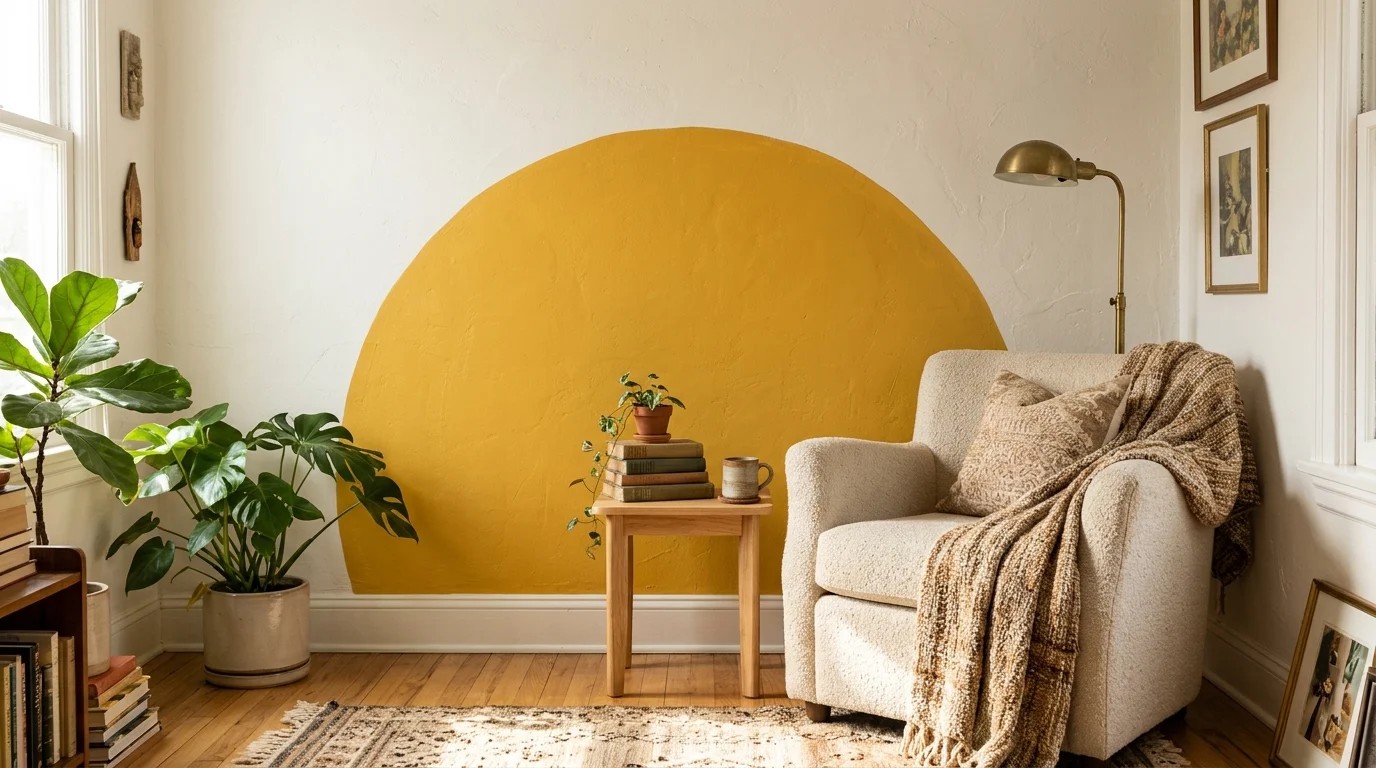
A big mustard yellow half circle behind an armchair feels like sunshine every day, even in the middle of winter. It is one of the easiest painted wall designs to do, since you only need one curve and one color. The warm color glows in lamp light and makes a corner feel cheerful and bright. It is lovely in a living room, a nursery or a home office. Which corner of your home needs a little sunshine?
You will need: String, a push pin, a pencil, one sample pot of mustard paint and an angled brush.
How to make it: 1. Pin the string at floor level behind the chair and trace a big half circle. 2. Edge the curve carefully with the angled brush. 3. Fill in with a small roller and add a second coat once dry.
Painted Wall Designs for Hallways: Vertical Stripes
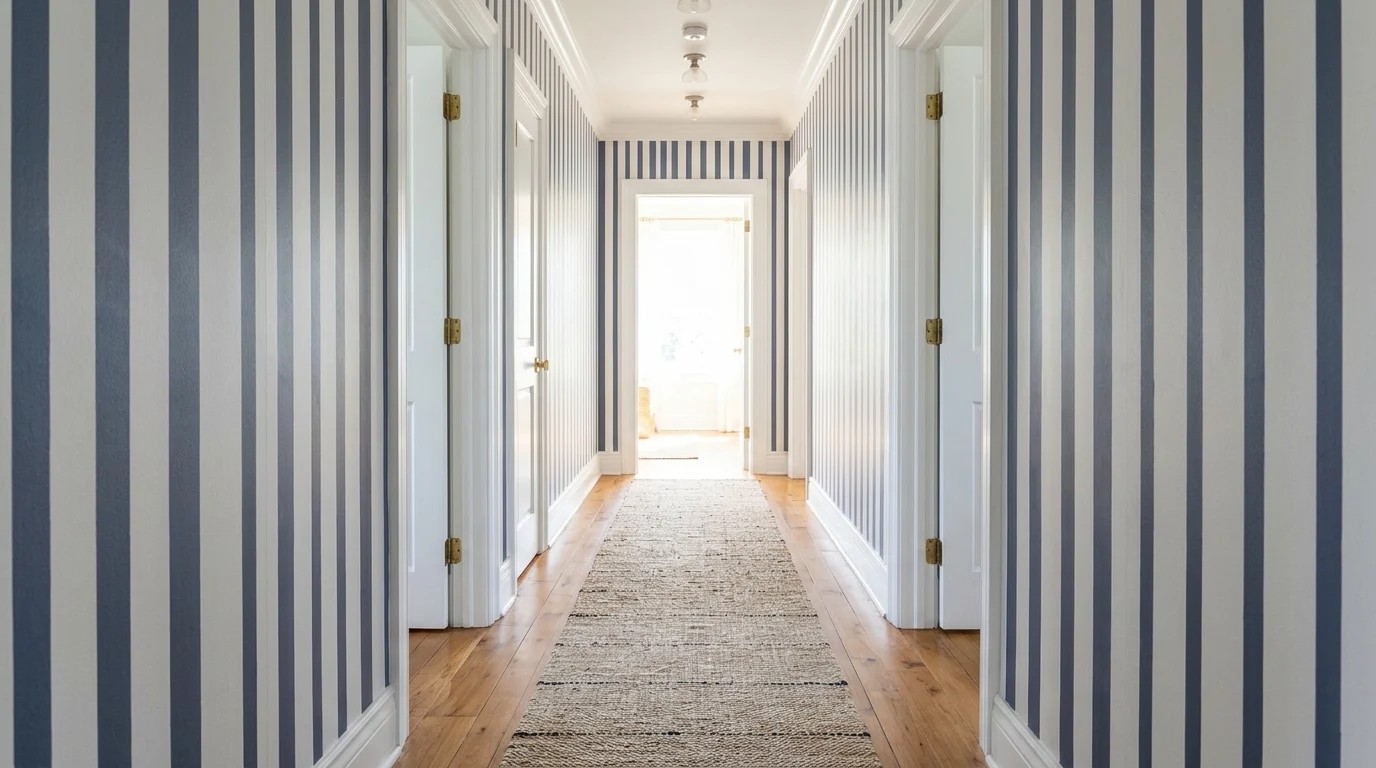
Hallways are often the most boring walls in a house, but crisp vertical stripes change that fast. Soft navy and white stripes make the ceiling feel taller and give the space a fresh, coastal feel. Wide stripes are easier than thin ones, so start with stripes about eight inches across. This is a great weekend job, and the result greets everyone who walks through the door. Would you go bold with navy or soft with grey?
You will need: Painter’s tape, a long level, a tape measure, a pencil, one paint color and a small roller.
How to make it: 1. Measure and mark equal stripe widths along the top and bottom of the wall. 2. Tape straight vertical lines using the level. 3. Paint every other stripe and peel the tape while wet.
Faux Wainscoting With Painted Panels
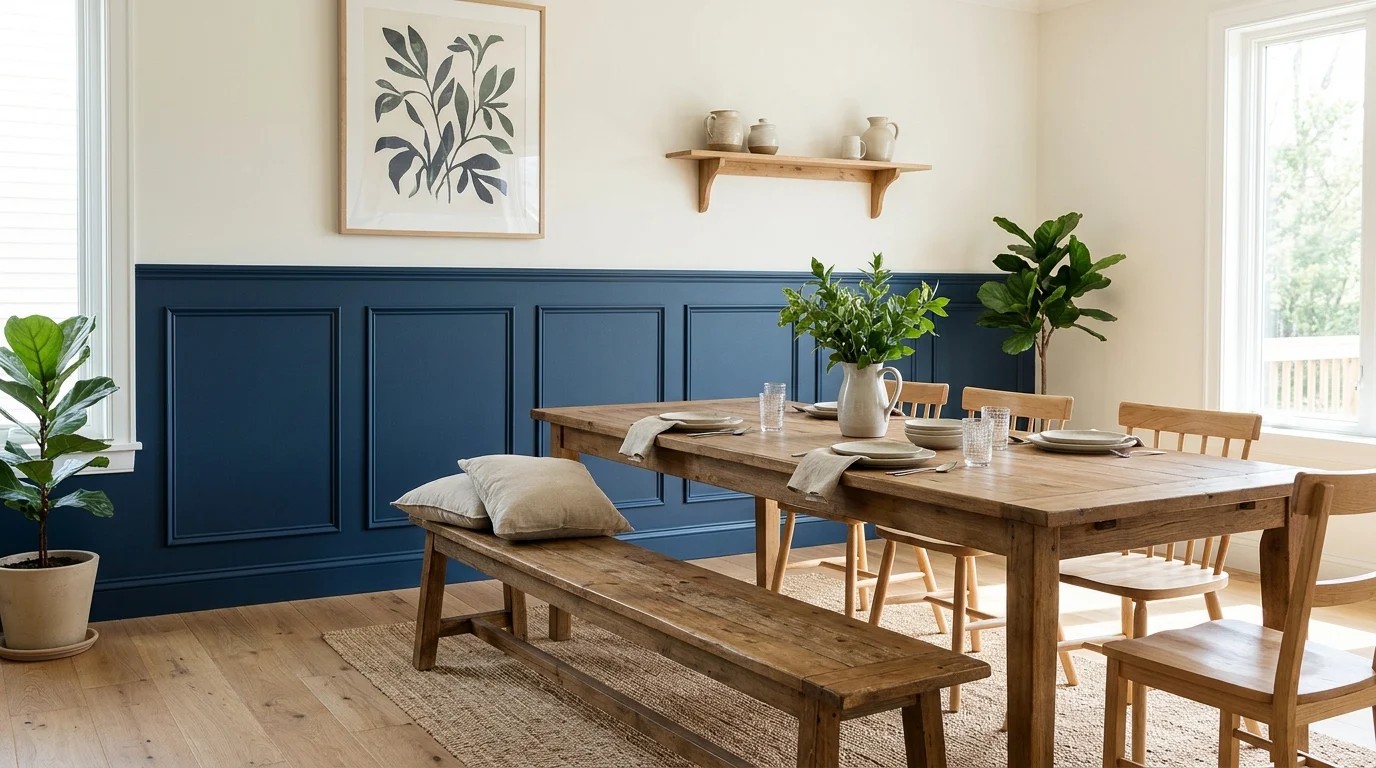
Want the look of real wood panels without the cost? Paint them. Deep blue rectangles with thin painted trim lines on the lower half of a dining room wall look surprisingly real, especially from across the room. Taped painted wall designs like this are perfect for older homes that need character. It is a little slower, but it is just rectangles inside rectangles. Could this make your dining room feel grand for the holidays?
You will need: Painter’s tape, a level, a tape measure, a pencil, one deep paint color and a small brush.
How to make it: 1. Paint the lower wall in your deep color and let it dry. 2. Tape out evenly spaced rectangles inside it, leaving thin gaps for trim lines. 3. Paint the trim lines in a slightly lighter or darker shade and peel the tape.
A Soft Checkerboard Accent Wall
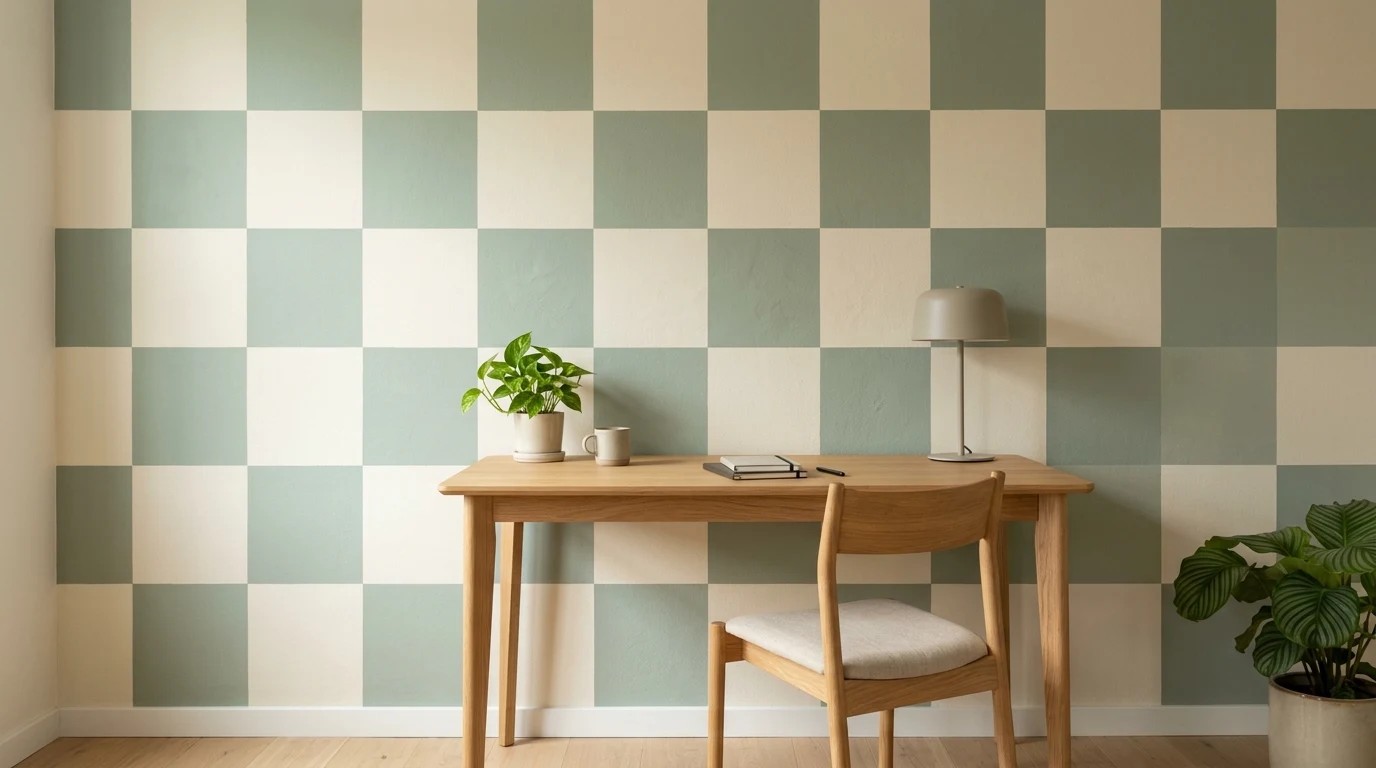
Checkerboard painted wall designs are everywhere this year, and a soft sage and cream version feels fun without being loud. Big squares, about a foot wide, work best on walls, because small squares can feel busy. It is a perfect backdrop for a desk or a craft corner. This one takes some patience, but it is simple math. Many people say measuring is harder than painting. Are you brave enough for a checkerboard wall?
You will need: Painter’s tape, a level, a tape measure, a pencil, one paint color and a small roller.
How to make it: 1. Mark a grid of equal squares across the wall in pencil. 2. Tape around every other square, pressing the edges down. 3. Paint those squares, let them dry, then repeat for any you missed.
A Herringbone Tape Pattern
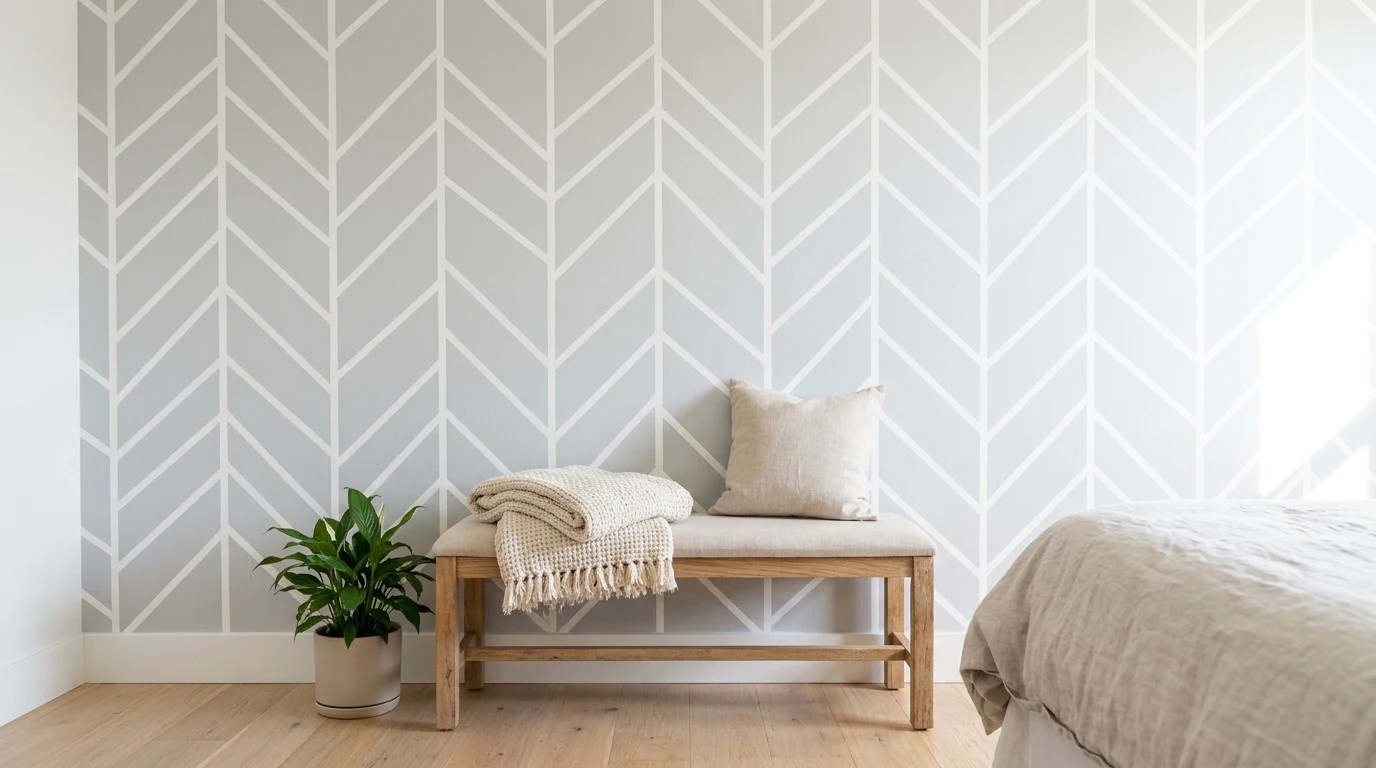
Herringbone looks fancy, but painted wall designs like this are really just rows of slanted lines. In pale grey and white, it feels calm and elegant behind a bed or bench. A paper template cut from cardboard keeps every slant the same. It is a great project for someone who loves careful work and a big reveal. Turn on a podcast and let it be relaxing. Would you try it on one wall or a whole room?
You will need: Painter’s tape, a cardboard template, a pencil, one paint color and a small roller.
How to make it: 1. Cut a slanted rectangle template from cardboard. 2. Trace rows of slants, flipping the template each row to make the zigzag. 3. Tape the lines, paint and peel.
A Bold Painted Door Frame
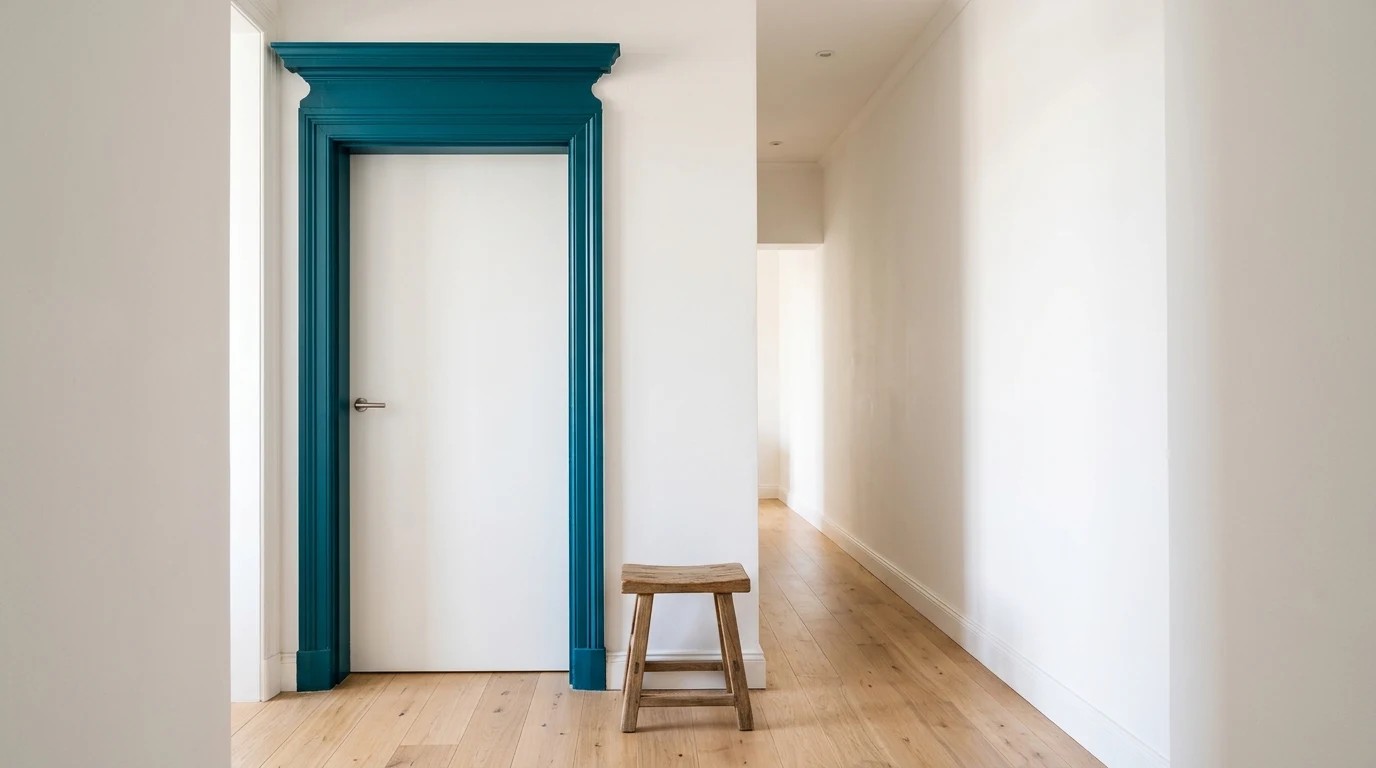
Sometimes the smallest change makes the biggest difference. Painting just one door frame and its trim in a bold deep teal turns a plain white hallway into something memorable. It takes about an hour and only a sample pot of paint. It is one of the smallest painted wall designs, and a great way to try a bold color without painting a whole wall. If you love it, you can do more doors later. Which doorway in your home would you start with?
You will need: A sample pot of paint, an angled brush, painter’s tape, a sanding sponge and a damp cloth.
How to make it: 1. Lightly sand the trim and wipe off the dust. 2. Tape the wall edge next to the trim. 3. Brush on two thin coats with the angled brush.
An Ombre Wall From Dark to Light
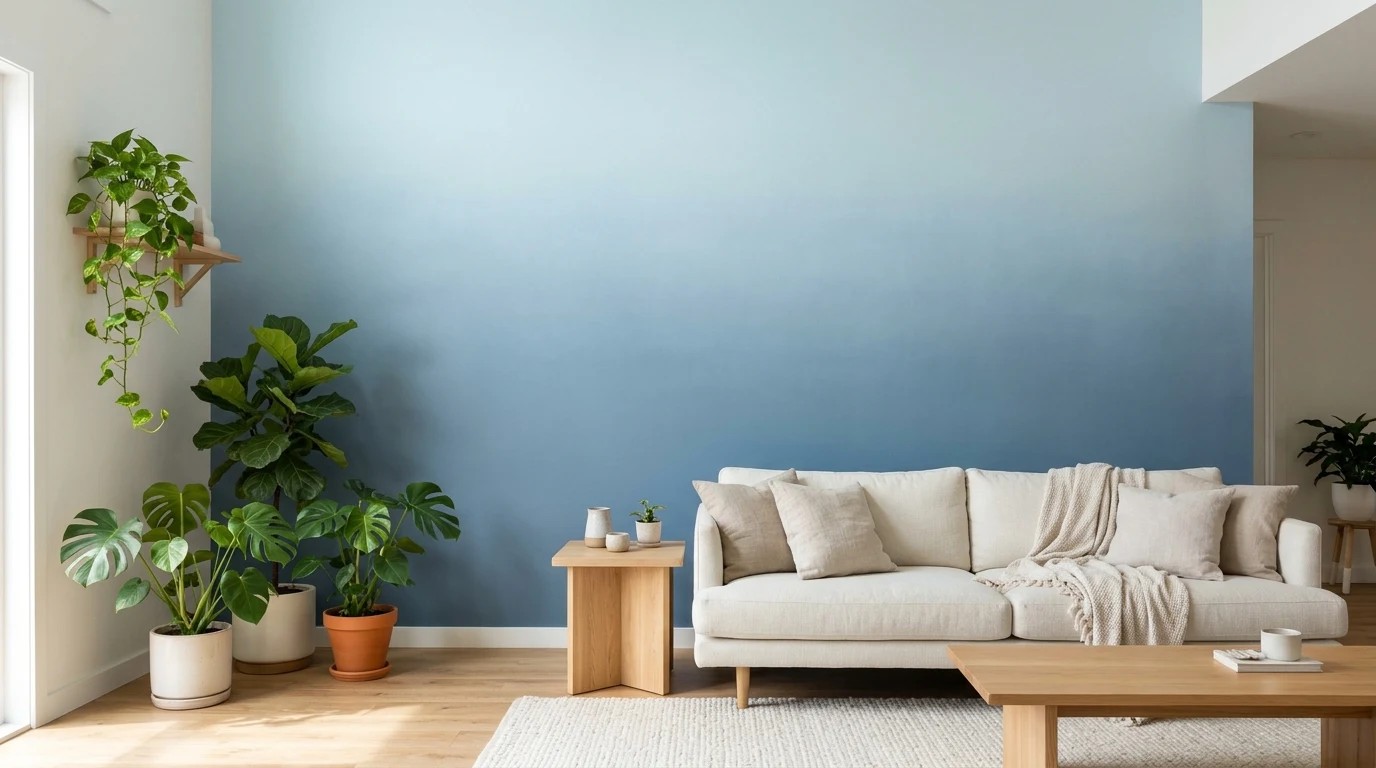
An ombre wall fades from deep dusty blue at the bottom to pale sky blue at the top, like the sky at dusk. There are no tape lines here at all, which makes it a nice change from other painted wall designs. The blending is done while the paint is wet, so work in small sections. It looks dreamy behind a sofa or in a bedroom. Have you ever tried blending paint on a wall?
You will need: Three shades of one paint color, three rollers, a dry wide brush and a tray.
How to make it: 1. Paint the bottom third dark, the middle medium and the top light. 2. While wet, blend the edges where colors meet with the dry brush in X strokes. 3. Step back often and add more blending where you see lines.
Painted Wall Designs With Triangle Mosaic
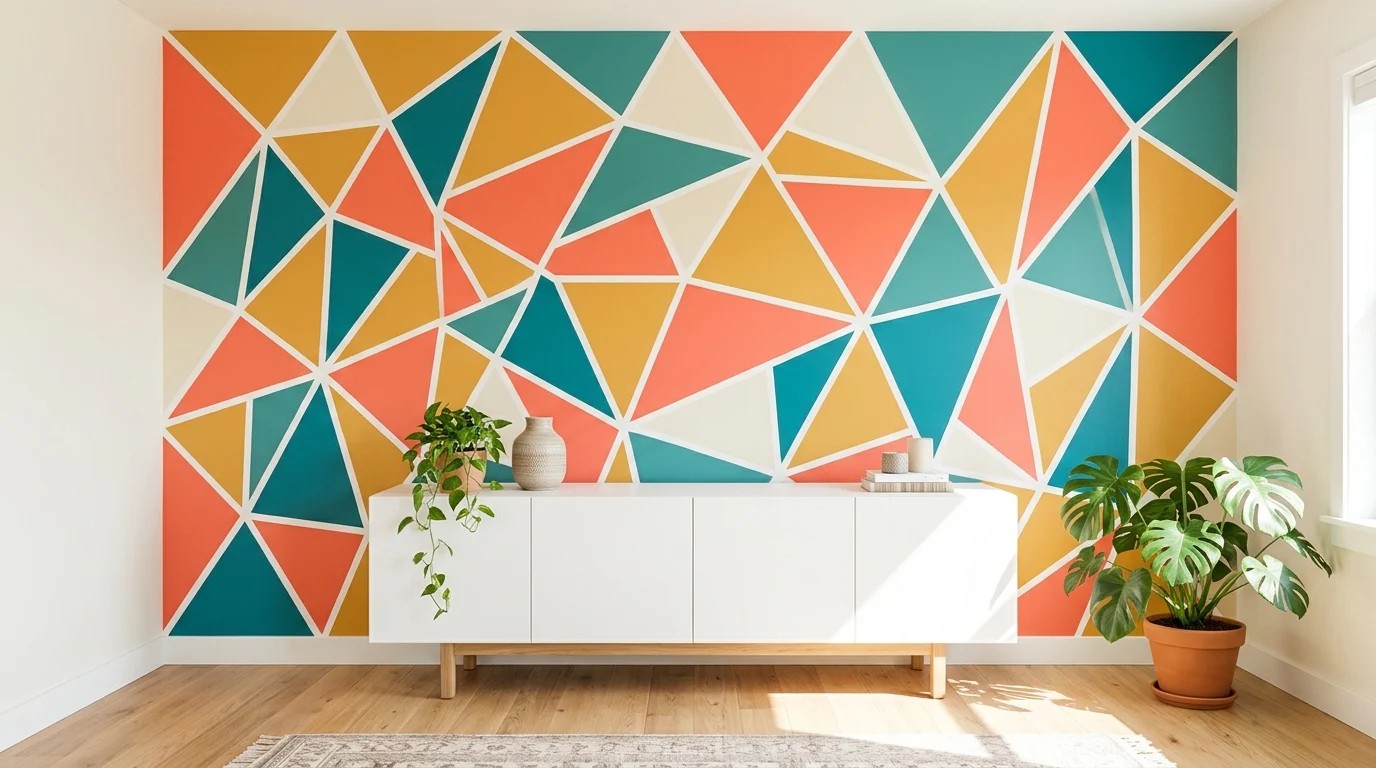
This one is pure fun. A triangle mosaic in coral, mustard, teal and cream looks like stained glass on a wall. Thin tape lines left between the shapes keep it clean and modern. It is a great way to use up leftover sample pots, and every wall turns out different. Kids love helping pick which triangle gets which color. Which color would you put in the biggest triangle?
You will need: Painter’s tape, four sample pots of paint, small foam brushes and a pencil.
How to make it: 1. Run tape lines across the wall at random angles to make triangles. 2. Paint each triangle a different color, making sure no two touching ones match. 3. Peel the tape slowly to reveal the white lines.
A Painted Backdrop Behind Open Shelves
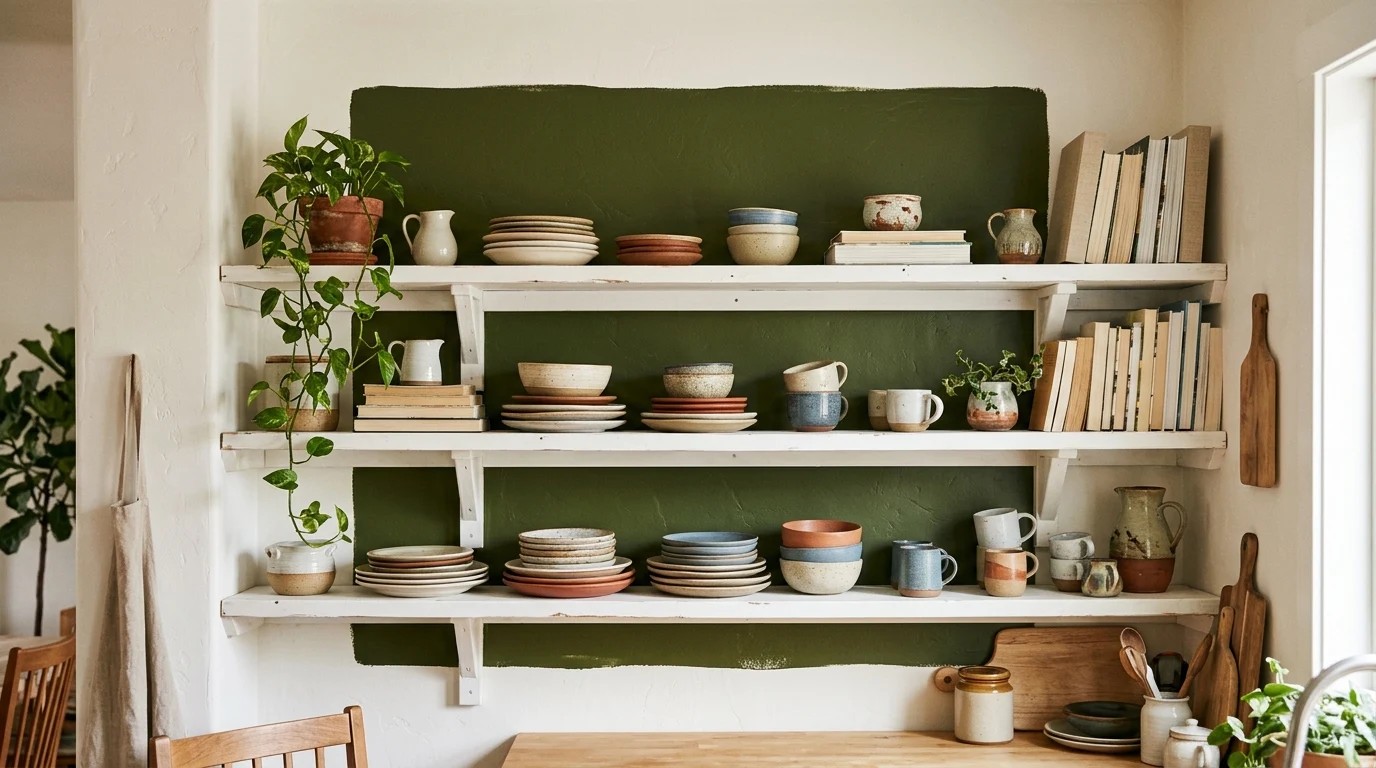
Open shelves look extra special when you paint a rectangle of color behind them. A deep olive green makes white plates and wooden boards pop and turns a plain kitchen corner into a feature. It also makes the shelves look like one built in piece. You only paint the area behind the shelves, so it is quick and cheap. For more ways to dress up a wall, see our mirror and wall decor ideas. What would you show off on your shelves?
You will need: Painter’s tape, a level, a sample pot of paint, a small roller and a brush.
How to make it: 1. Take everything off the shelves. 2. Tape a rectangle a little wider than the shelves. 3. Paint two coats, peel the tape and style the shelves again.
Easy Painted Wall Designs: Soft Waves in a Playroom
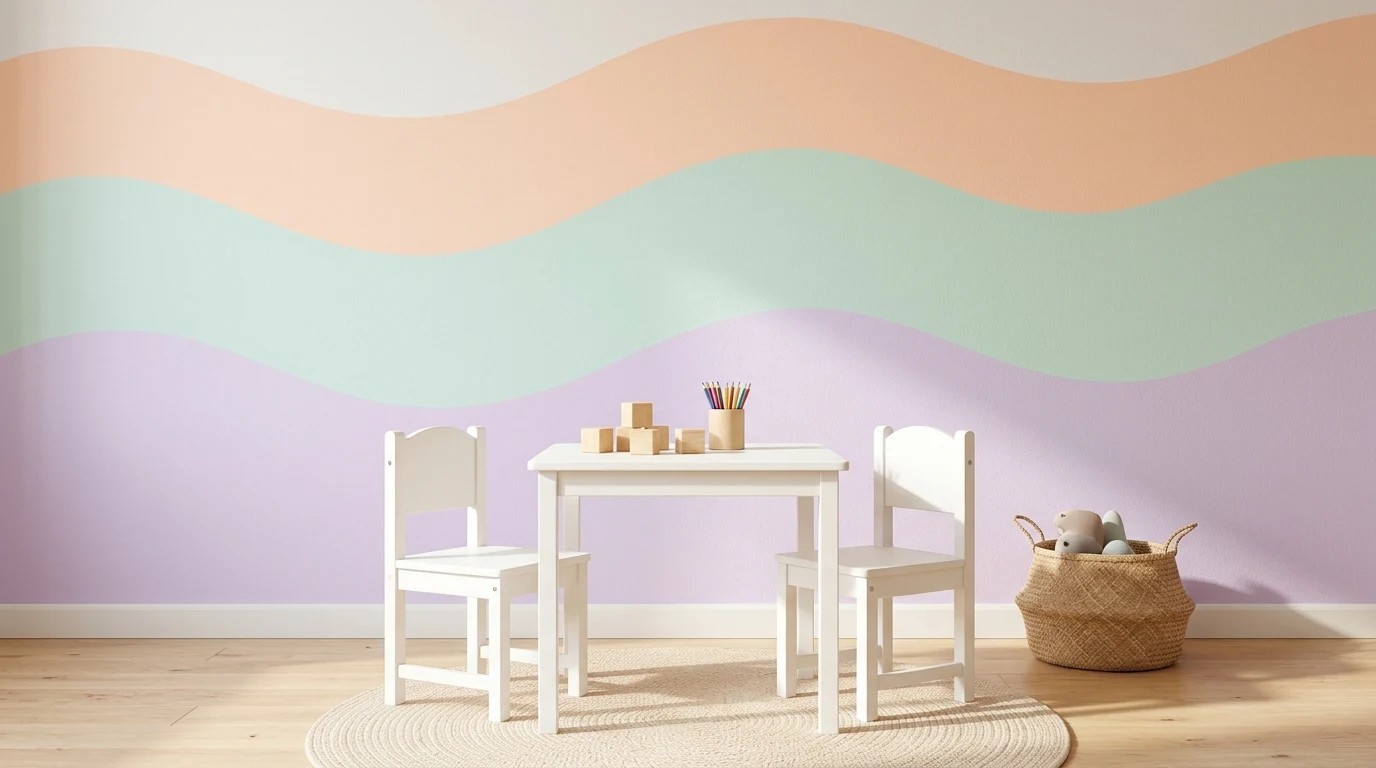
Wavy lines are a cheerful pattern for kids rooms and playrooms. Pastel peach, mint and lavender waves feel happy and calm at the same time. The best part is that waves do not have to be perfect, so this is a great first project for a beginner. Freehand the curves with a pencil, then paint. Little ones love seeing their room change in a day. What colors would your kids pick for their waves?
You will need: A pencil, three pastel sample pots, a small roller and an angled brush.
How to make it: 1. Lightly draw wavy lines across the wall in pencil. 2. Paint the bottom wave first and work up. 3. Clean up the edges with the angled brush.