Midcentury Christmas Decor: 15 Retro 1960s Ideas That Bring Back Grandma’s Holidays
Midcentury Christmas Decor has a way of pulling you straight back to grandma’s living room, with a silver tree twinkling in the corner and a bowl of shiny ornaments on the coffee table. Those 1960s holidays felt bright, playful and full of color, and so many of us still remember the felt elves sitting on the shelf. The best part is that you can bring that happy look home again without hunting for pricey antiques. Most of these ideas use felt, foil, pipe cleaners, paper and thrift store finds. Below are 15 easy projects and styling tricks, each with a short supply list and simple steps, so you can mix a little retro sparkle into your own Christmas this year..
The Full Midcentury Christmas Decor Look
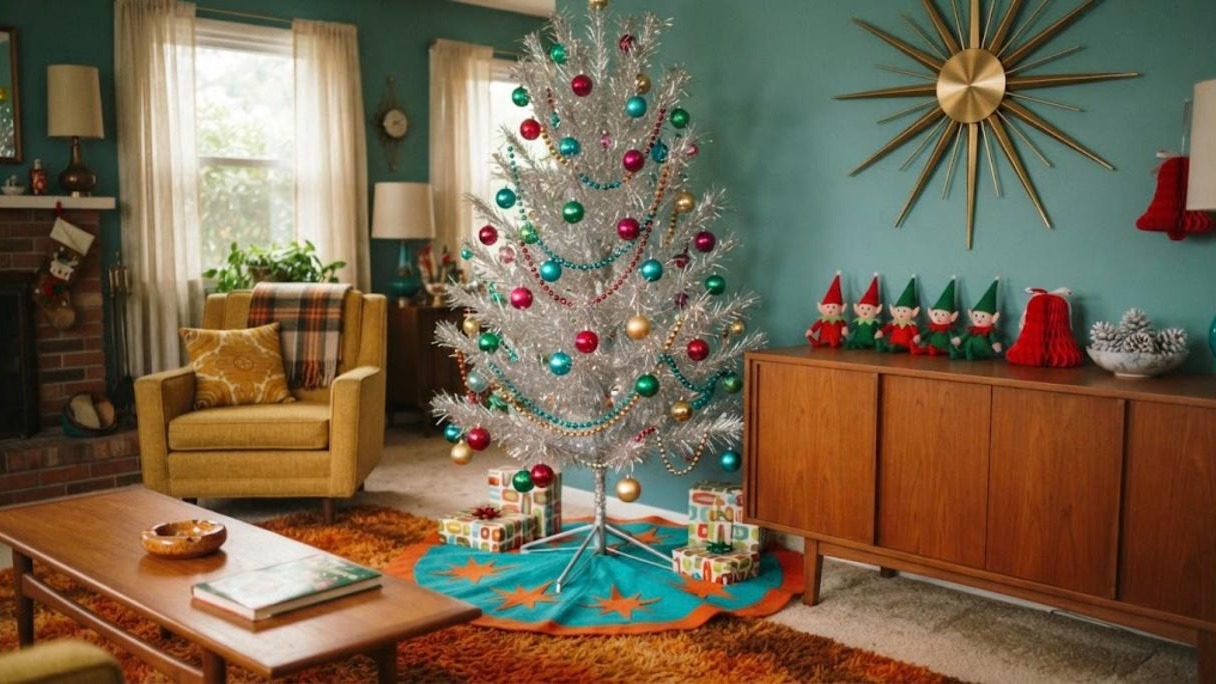
The classic 1960s holiday room was all about shine and color. Picture a silver tinsel tree with jewel tone ornaments, a gold starburst on the wall, felt elves lined up on a teak cabinet and a bright felt tree skirt on the floor. You do not need every piece at once. Pick one star, like the tree or the starburst, then add two or three smaller touches around it. Keep the palette to red, green, turquoise and gold so it all feels like one happy room..
You will need: A tinsel or green tree, jewel tone ornaments, bead garland, a starburst wall piece, felt elves, a felt tree skirt, paper bells.
How to make it: 1. Set up the tree first as the main focal point. 2. Hang the starburst on the nearest wall. 3. Fill a low cabinet or shelf with elves, bells and a bowl of pinecones.
Style a Silver Tinsel Tree in One Color
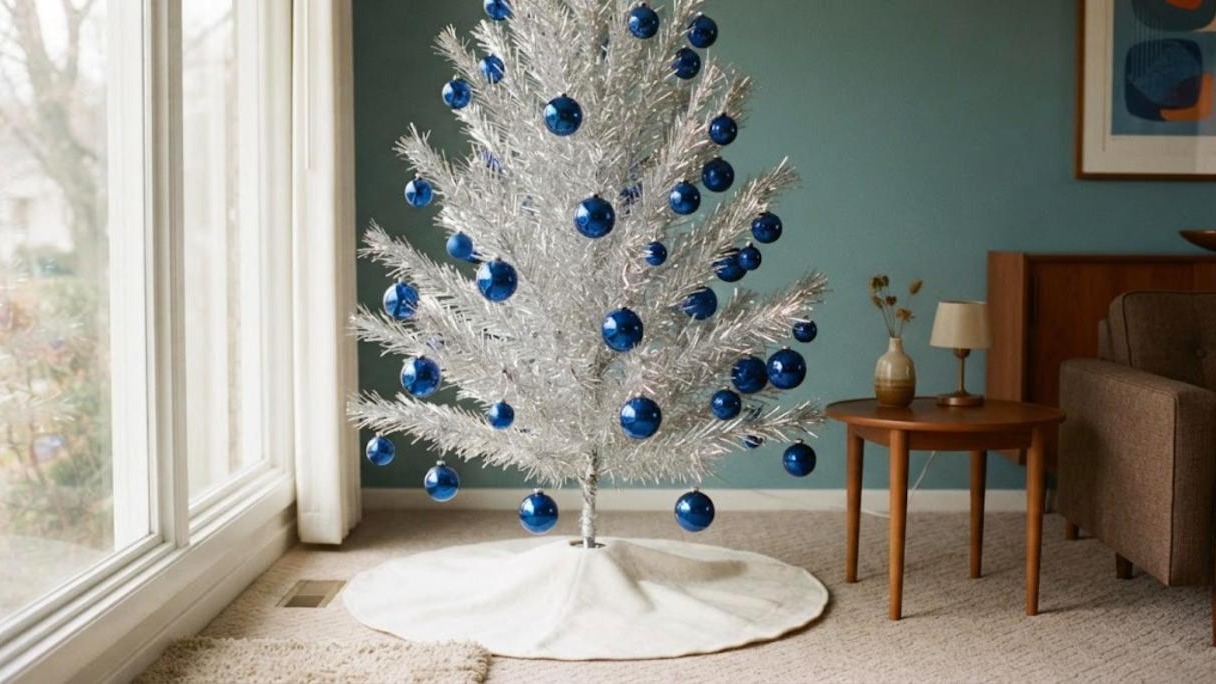
Silver aluminum trees were the star of midcentury Christmas decor and filled many 1960s living rooms, and the trick back then was simple: one color of ornaments only. Cobalt blue, red or hot pink all look amazing against the silver. You can find these trees at estate sales, or buy a new tinsel tree for a similar look. One important safety rule: never wrap an old metal tree with plug in string lights. Light it from the side with a spotlight instead. Which single color would you choose for yours?
You will need: A silver tinsel tree, 30 to 40 glass or plastic ball ornaments in one color, ornament hooks, a plain white tree skirt.
How to make it: 1. Fluff each branch so the tinsel fans out evenly. 2. Hang the biggest ornaments deep inside and the smaller ones at the tips. 3. Finish with a simple white skirt so the color pops.
Midcentury Christmas Decor With Satin Ball Ornaments
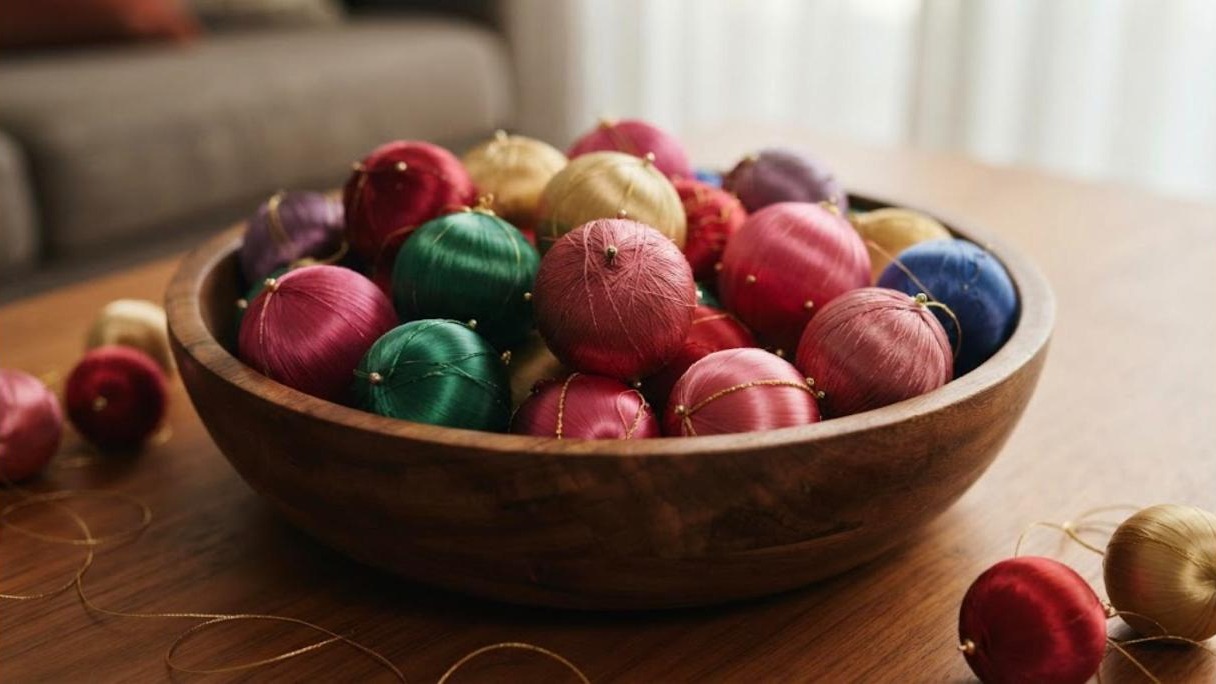
Those soft, silky satin ornaments from grandma’s box are easy to make yourself. They start as plain foam balls wrapped round and round with shiny embroidery floss or satin thread. Choose jewel tones like ruby, emerald, gold and pink for a true midcentury feel. Once you have a dozen, pile them in a wooden bowl or hang them from a tree. They are light, they never break and they make a lovely rainy afternoon project. Would you mix colors or keep each bowl to one shade?
You will need: 2 to 3 inch foam balls, satin embroidery floss in jewel tones, craft glue, straight pins, thin gold cord.
How to make it: 1. Dab glue on the top of a foam ball and pin the thread end in place. 2. Wrap the thread around the ball, turning it a little each pass until it is covered. 3. Pin a gold cord loop on top for hanging.
Get the Retro Bubble Light Look With LEDs
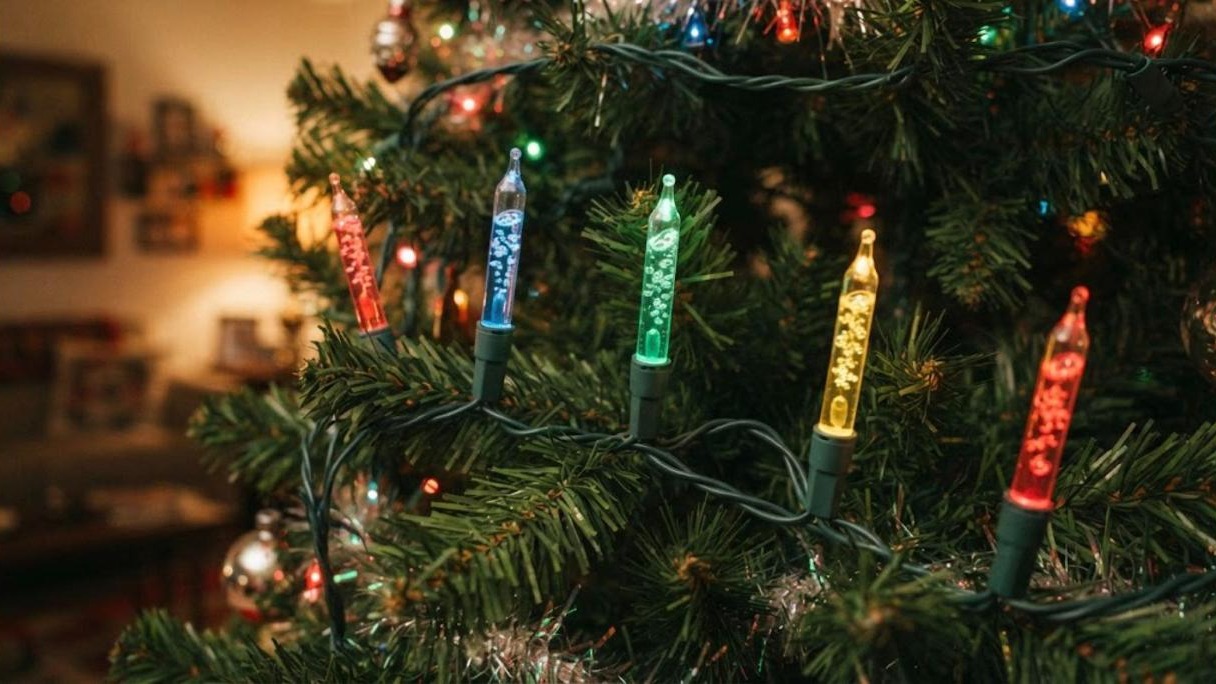
Bubble lights were pure magic for kids in the 1960s, with little bubbles rising up in colored tubes. Today you can get the same look with LED bubble light strands that stay cool to the touch. Clip them on the outer branches so each tube stands upright, because the bubbles only move when the light points up. Mix them with a plain warm white strand underneath to fill in the tree. Did your family have bubble lights when you were little?
You will need: An LED bubble light strand, a warm white LED strand, a green tree, a few clear light clips.
How to make it: 1. Wrap the warm white LED strand through the inner branches first. 2. Clip each bubble light upright near the branch tips. 3. Turn them on and give them a few minutes to start bubbling.
Make an Atomic Starburst Wall Piece
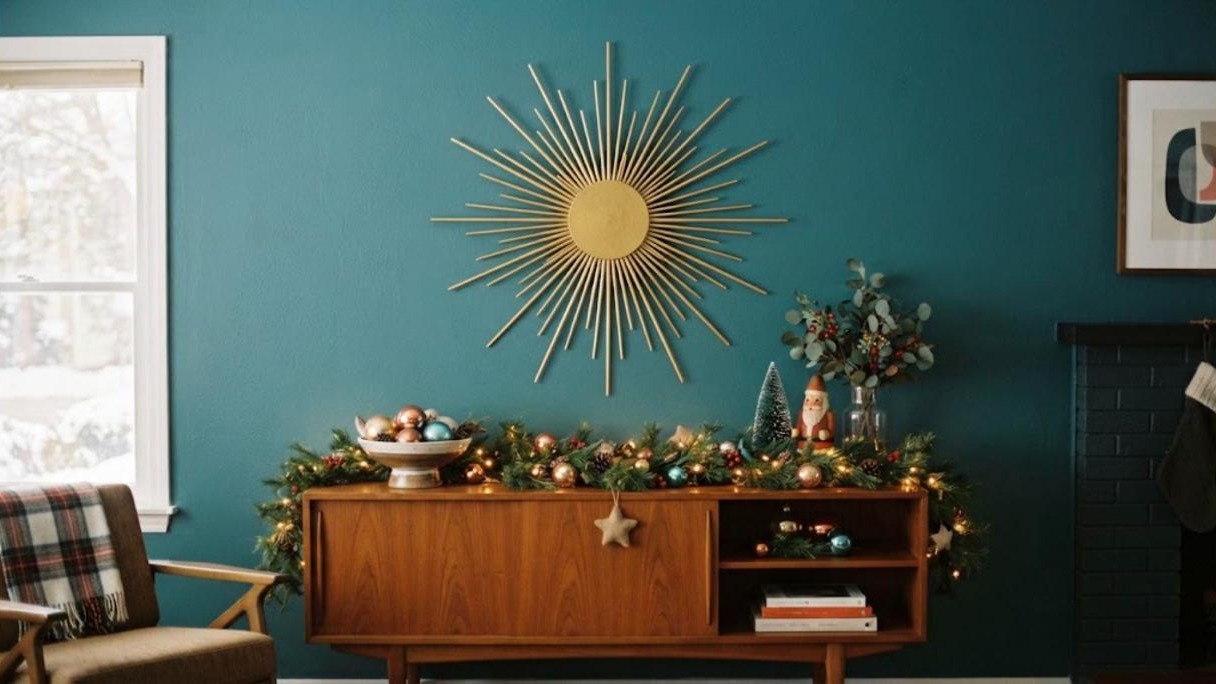
Nothing says 1960s like a gold starburst on the wall, and it is one of the easiest pieces of midcentury Christmas decor to make. You can make a big one with wooden skewers and a cardboard or wood circle in about an hour. Hang it above a teak cabinet or a mantel, then add a little garland and a few ornaments below to make it feel like Christmas. Ask an adult to help trim the skewers with snips, and use craft glue or a low temp glue gun with adult help. Where in your home would a starburst shine the most?
You will need: A 6 inch wood or thick cardboard circle, 40 to 60 wooden skewers, gold spray paint or acrylic paint, craft glue, a sawtooth hanger.
How to make it: 1. Glue skewers around the back of the circle, alternating long and short ones. 2. Let it dry fully, then paint the whole piece gold in a ventilated space. 3. Attach a hanger on the back and hang it centered on the wall.
Make Felt Elf Shelf Sitters

Those long legged felt elves that sat on grandma’s bookshelf are back in a big way, and they might be the cutest midcentury Christmas decor of all. You can make a whole row from a few sheets of red and green felt and some wooden bead heads. Their legs dangle over a shelf edge, which is half the fun. Make one for each person in the family and let the kids help pick the colors. Line them up on a bookcase, a mantel or a window ledge. How many elves would fit on your shelf?
You will need: Red and green felt, wooden beads about 1 inch wide, pipe cleaners, fabric glue, small jingle bells, scissors.
How to make it: 1. Bend pipe cleaners into a body with arms and long legs, and glue a bead on top for the head. 2. Wrap the body and legs with felt strips and glue them in place. 3. Glue on a pointy felt hat with a tiny bell and a zigzag collar.
Midcentury Christmas Decor With Mushroom Ornaments
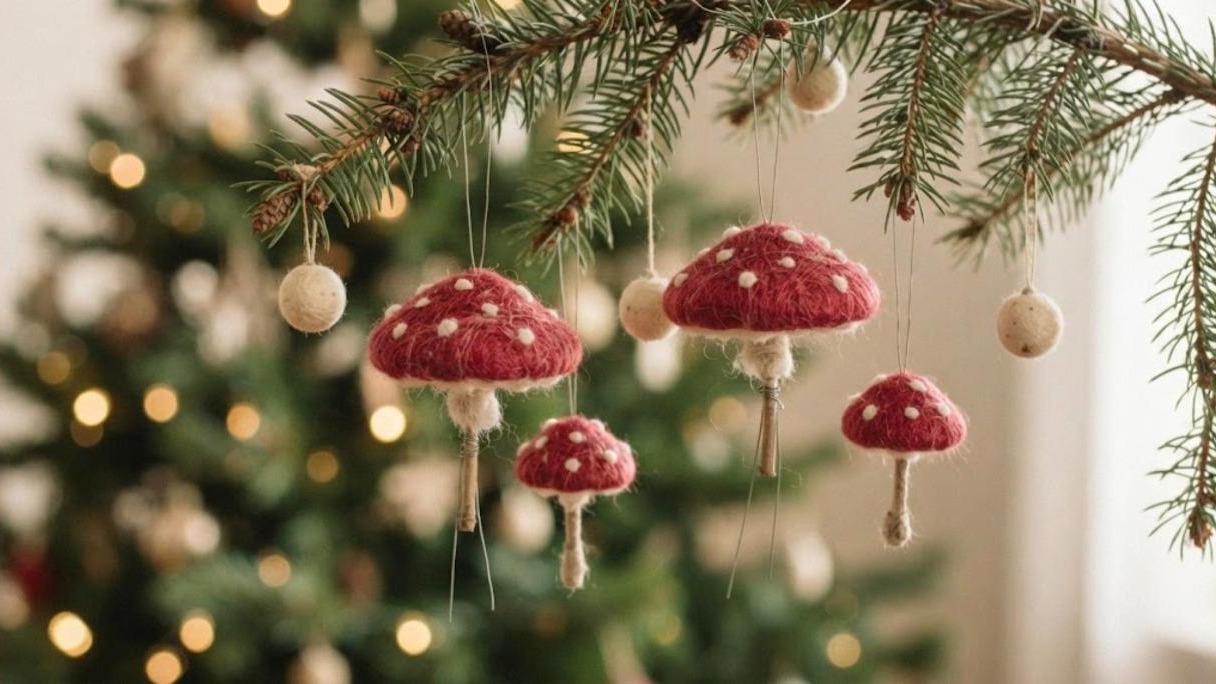
Little red and white mushroom ornaments were a big hit in the 1960s, especially in homes that loved a touch of European charm. Old versions were made from spun cotton, and you can get the same soft look with cotton balls, glue and a little paint. Hang them in small groups on an evergreen branch or tuck them into a wreath. They look sweet with a few plain wool balls mixed in. Would you hang these on your tree or on a branch by the window?
You will need: Cotton balls, white craft glue mixed with a little water, red acrylic paint, white paint, toothpicks or short dowels, thread.
How to make it: 1. Dip cotton in the glue mix and shape a round cap and a short stem around a toothpick, then let it dry hard. 2. Paint the cap red and add white dots with the back of a brush. 3. Tie thread around the stem for hanging.
Make an Atomic Style Felt Tree Skirt
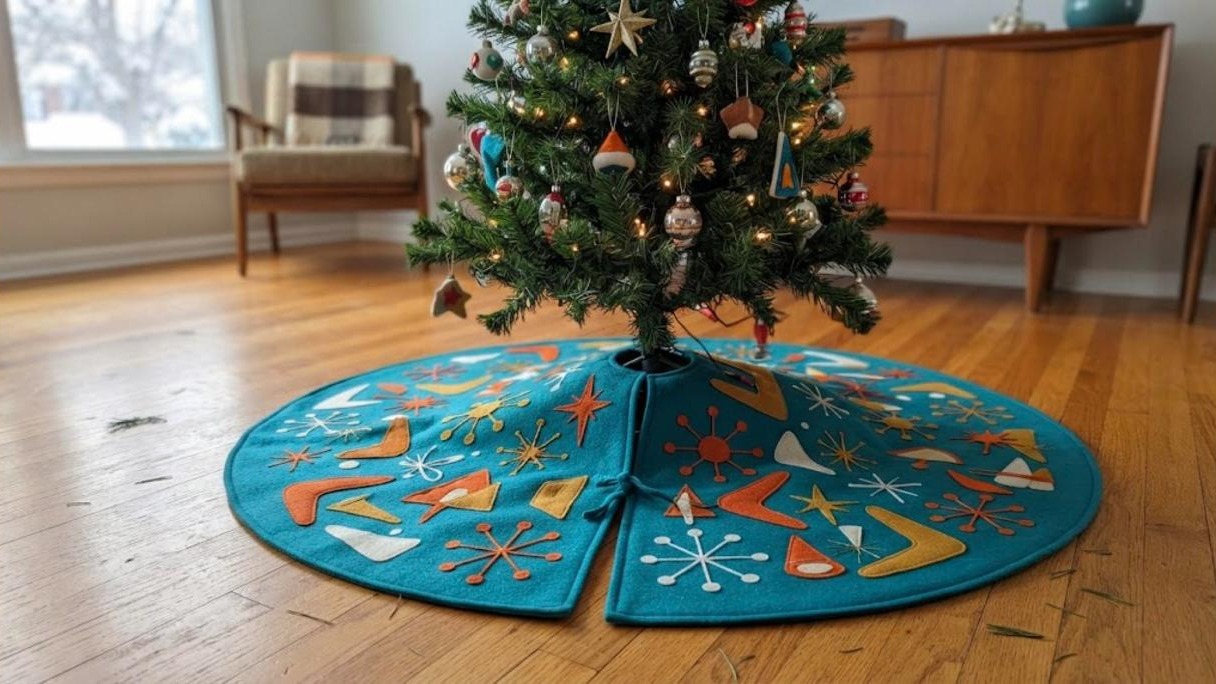
A plain tree skirt is easy to turn into a midcentury showpiece. Start with a big circle of turquoise felt and add boomerangs and starbursts cut from orange, gold and white felt. No sewing machine is needed if you use fabric glue. It looks wonderful under a green tree or a silver one, and it folds flat for storage. Lay it out and play with the shapes before you glue anything down. Which colors would you pick for your shapes?
You will need: A 1 1/2 yard square of turquoise felt, orange, gold and white felt sheets, fabric glue, scissors, a ribbon tie.
How to make it: 1. Fold the felt into quarters and cut a large circle with a small center hole and a slit to one side. 2. Cut boomerang and starburst shapes from the colored felt. 3. Arrange them around the skirt, glue them down and add ribbon ties at the slit.
Midcentury Christmas Decor Lighting With a Color Wheel
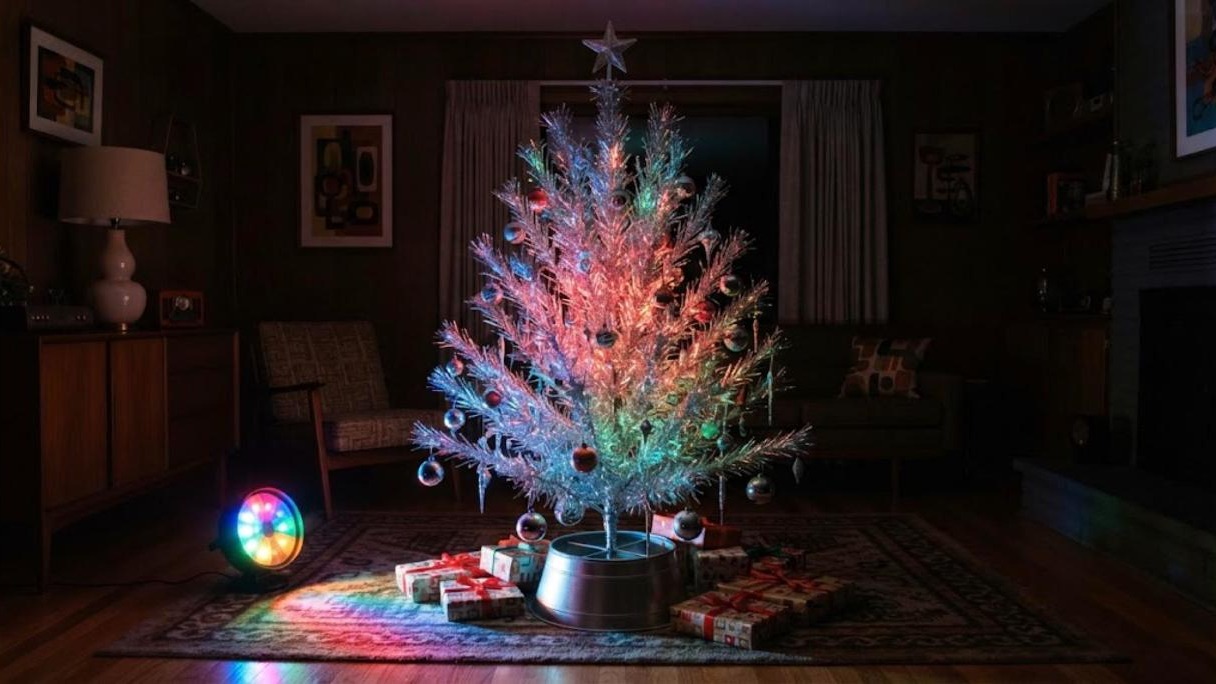
In the 1960s, families lit their silver trees with a rotating color wheel that washed them in red, blue, green and amber. It is still the safest way to light a metal tree, because no wires touch the branches. Look for an LED color wheel spotlight or a small LED floodlight with changing colors. Set it on the floor a few feet away and dim the room. Watching the tree change color is pure nostalgia. Have you ever seen a tree glow like this?
You will need: A silver tinsel tree, an LED color wheel or color changing LED spotlight, a safe spot on the floor nearby.
How to make it: 1. Place the spotlight on the floor about 3 to 4 feet from the tree. 2. Angle it up so the light covers the whole tree. 3. Turn off the other lamps in the room and let the colors roll.
Craft a Foil Starburst Tree Topper
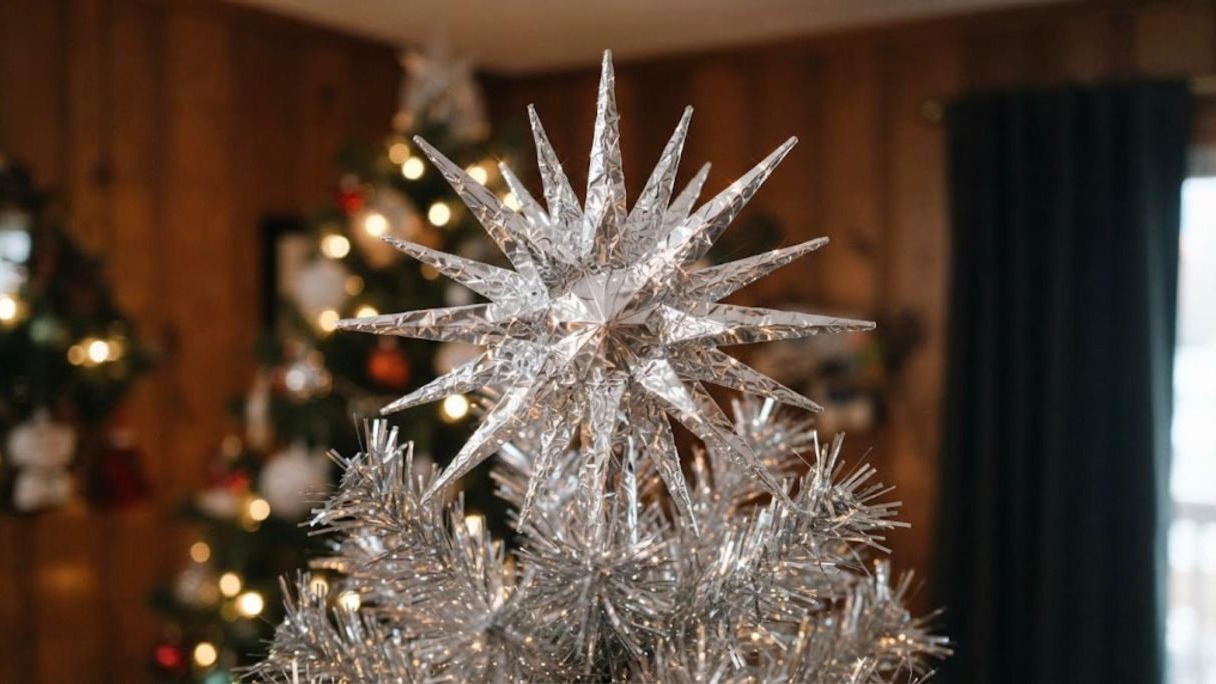
A spiky silver star was the perfect topper for a 1960s tinsel tree, and this bit of midcentury Christmas decor only needs cardboard and kitchen foil. Cut long, thin points and layer them so the star looks full from every side. The foil catches every bit of light in the room. It is light enough to sit on a thin tree top without bending it. Ask an adult to help cut the cardboard. Would you keep yours silver or try gold foil?
You will need: Thin cardboard, aluminum foil, a glue stick, clear tape, a toilet paper tube for the base, scissors.
How to make it: 1. Cut 12 to 16 long thin triangle points from cardboard and cover each with foil. 2. Glue the points around a small cardboard circle in two layers. 3. Tape a short paper tube to the back so it slides onto the tree top.
Twist Pipe Cleaner Candy Canes
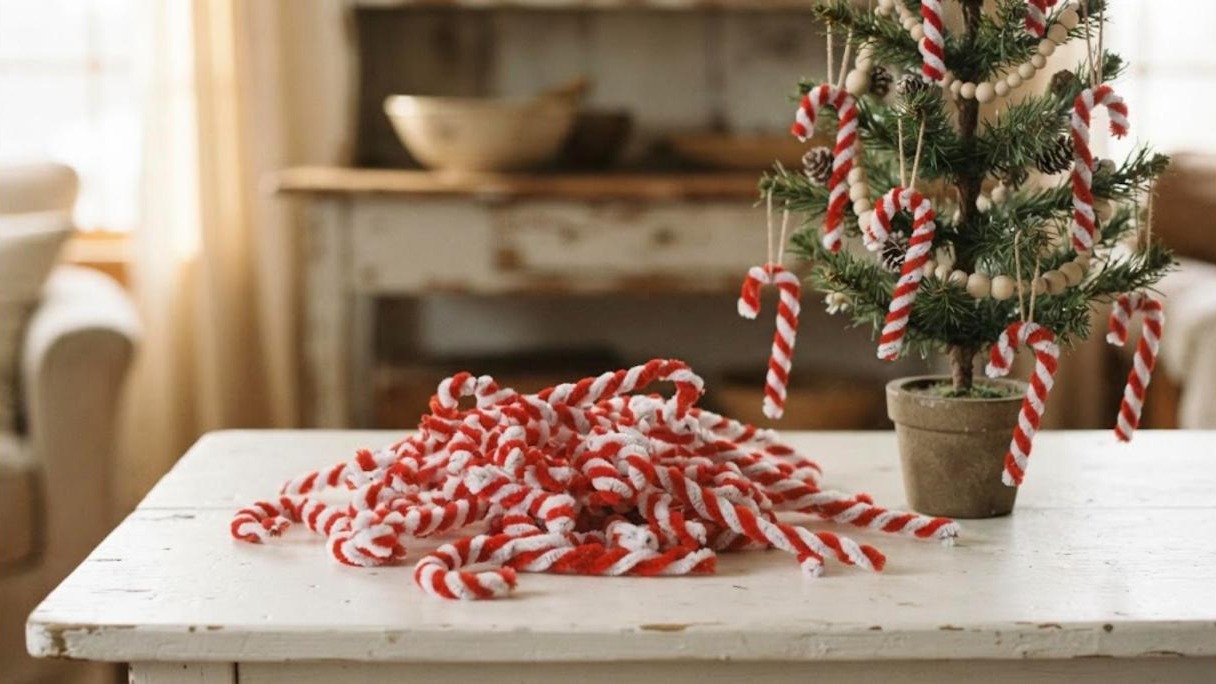
Pipe cleaner candy canes are one of the easiest midcentury Christmas decor crafts, and kids in the 1960s made them by the dozen. Twist one red and one white stem together, bend the top into a hook and you are done. Hang them on a small tabletop tree, tie them to gifts or pile them in a bowl. They are soft, cheap and safe for little hands. Set a timer and see how many your family can twist in ten minutes. Who in your house would win?
You will need: Red and white pipe cleaners, scissors, thin ribbon or thread for hanging.
How to make it: 1. Hold one red and one white pipe cleaner together and twist them along the full length. 2. Bend the top into a candy cane hook. 3. Trim any sharp wire ends and hang them on your tree.
Midcentury Christmas Decor With a Vintage Card Display
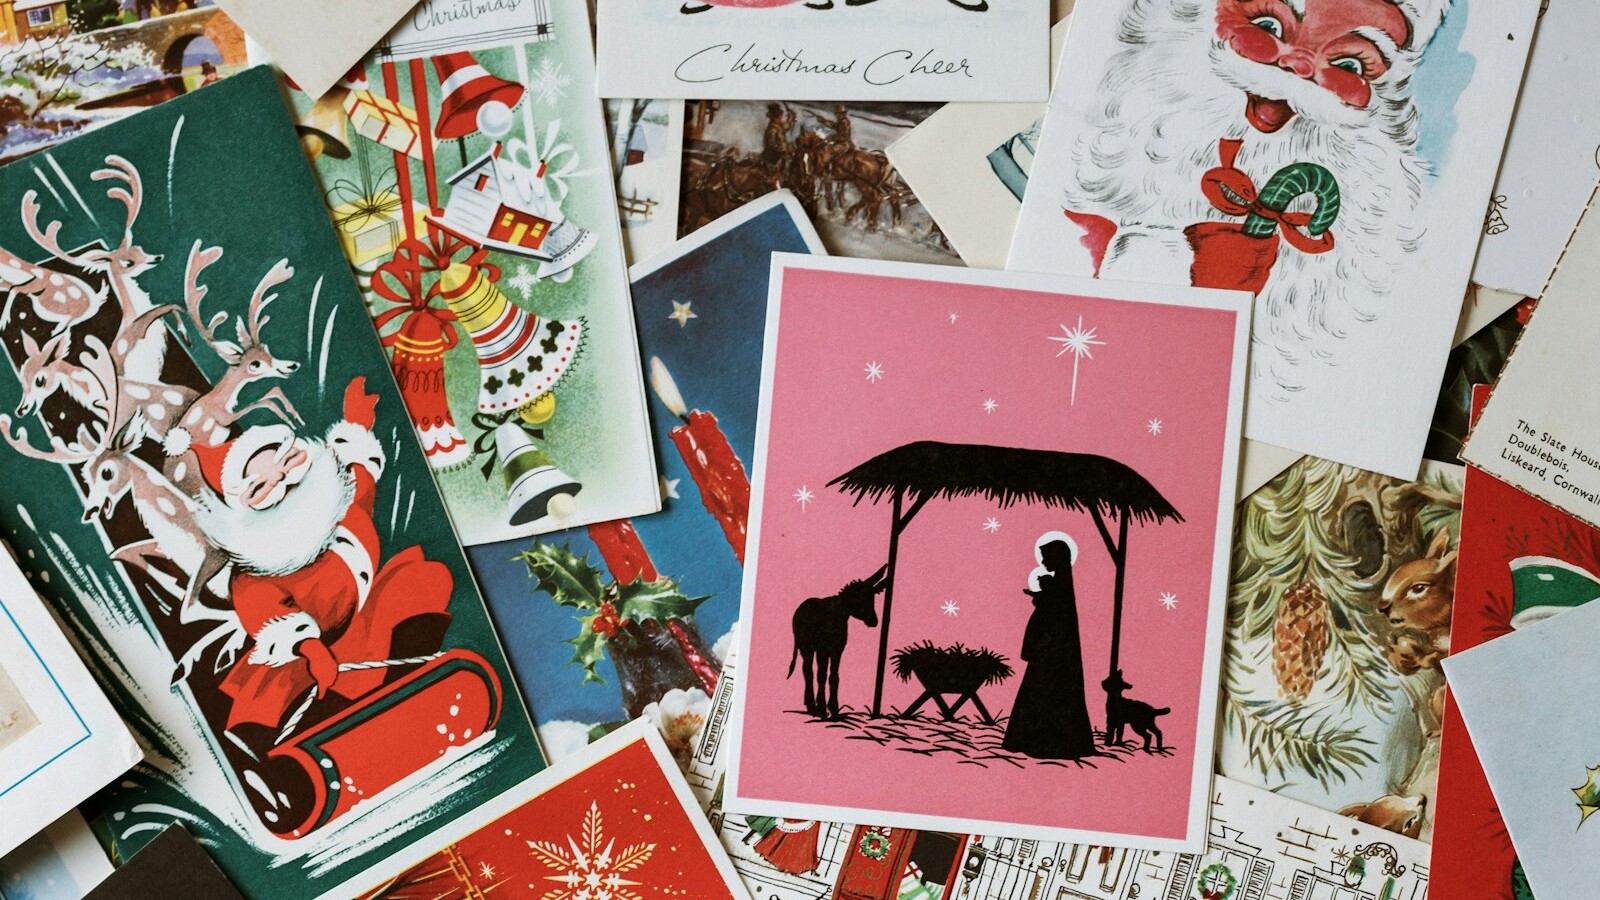
Old Christmas cards from the 1950s and 1960s are full of cheerful Santas, deer and snowy towns, and they cost very little at flea markets. Instead of keeping them in a drawer, hang them on a ribbon across a wall or doorway. Mix in your own cards from this year for a fun old and new look. The YouTube video 25 Christmas Decorations From the 1960s and 70s That Have Disappeared shows just how much these little details meant to families back then. Which old card would you hang first?
You will need: Vintage Christmas cards, a long red or green ribbon, small clothespins or mini clips, removable wall hooks.
How to make it: 1. Stick two removable hooks on the wall and tie the ribbon between them. 2. Clip the cards along the ribbon, leaving a little space between each one. 3. Swap in new cards as they arrive in the mail.
Drape Bead Garland in Jewel Tones
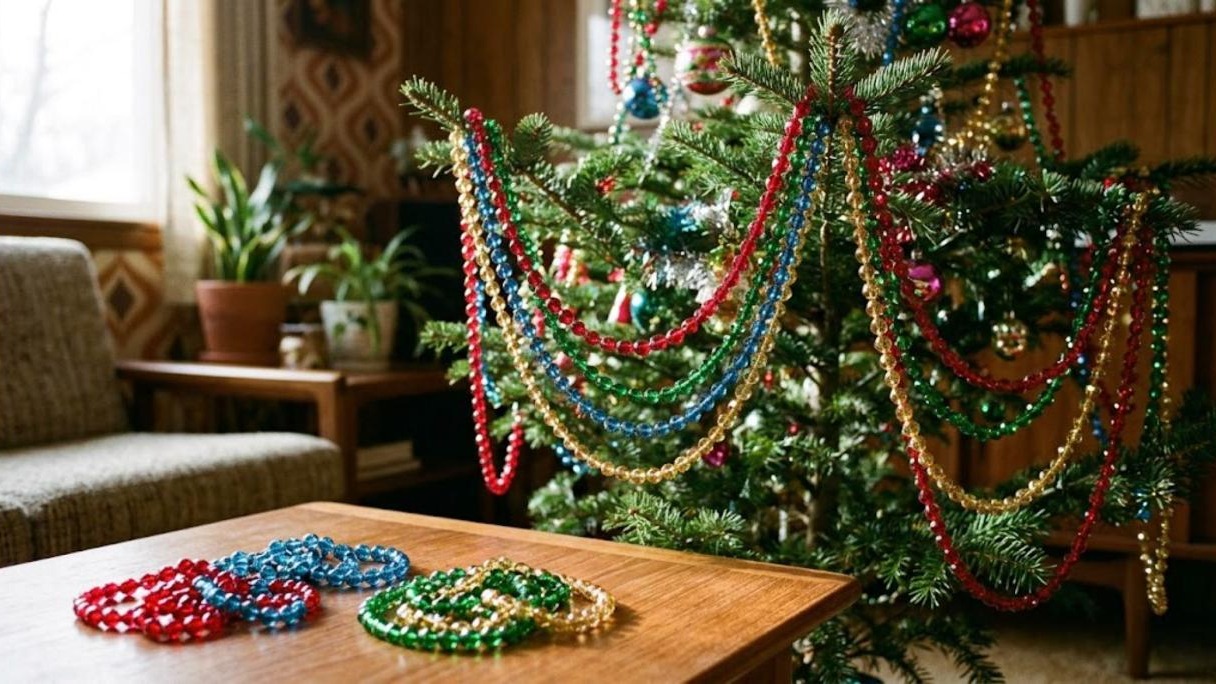
Shiny bead garland was everywhere in the 1960s, looped across trees in long, lazy swags. Look for strands in ruby, emerald, sapphire and gold, or string your own from plastic faceted beads. Hang it in loose swoops from branch to branch instead of wrapping it tight. It catches the light beautifully and adds instant retro color. If you love that decade and the one after it, our Retro 70s Decor ideas are full of groovy projects too. How many colors would you mix on your tree?
You will need: Bead garland in jewel tones, or plastic faceted beads and fishing line, a pair of scissors.
How to make it: 1. If making your own, string beads on fishing line in long 6 foot lengths and knot the ends. 2. Start at the top of the tree and swag the garland in loose curves. 3. Space each color evenly around the tree.
Hang Retro Paper Honeycomb Bells
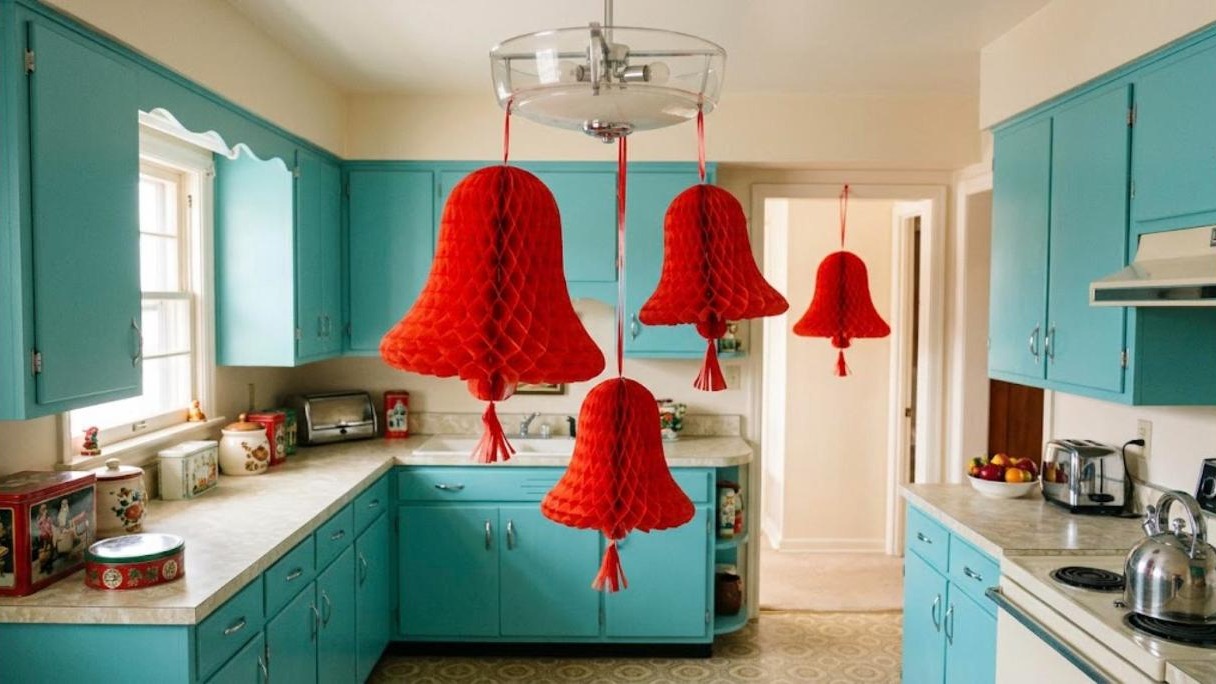
Red paper honeycomb bells were a simple and cheap piece of midcentury Christmas decor in so many 1960s kitchens and doorways. They fold flat and pop open into big puffy bells. Hang a few at different heights from a light fixture or doorframe for a fun pop of red. They are light enough to hang with tape and ribbon, and they pack away flat after the holidays. Look for them at party stores or make your own from red tissue paper. Where would you hang yours?
You will need: Red tissue paper honeycomb bells, thin red ribbon, removable hooks or tape.
How to make it: 1. Open each bell and clip the paper ends together so it stays round. 2. Tie a ribbon through the top. 3. Hang them in groups of three at different heights.
Snowy Flocked Pinecones for Midcentury Christmas Decor
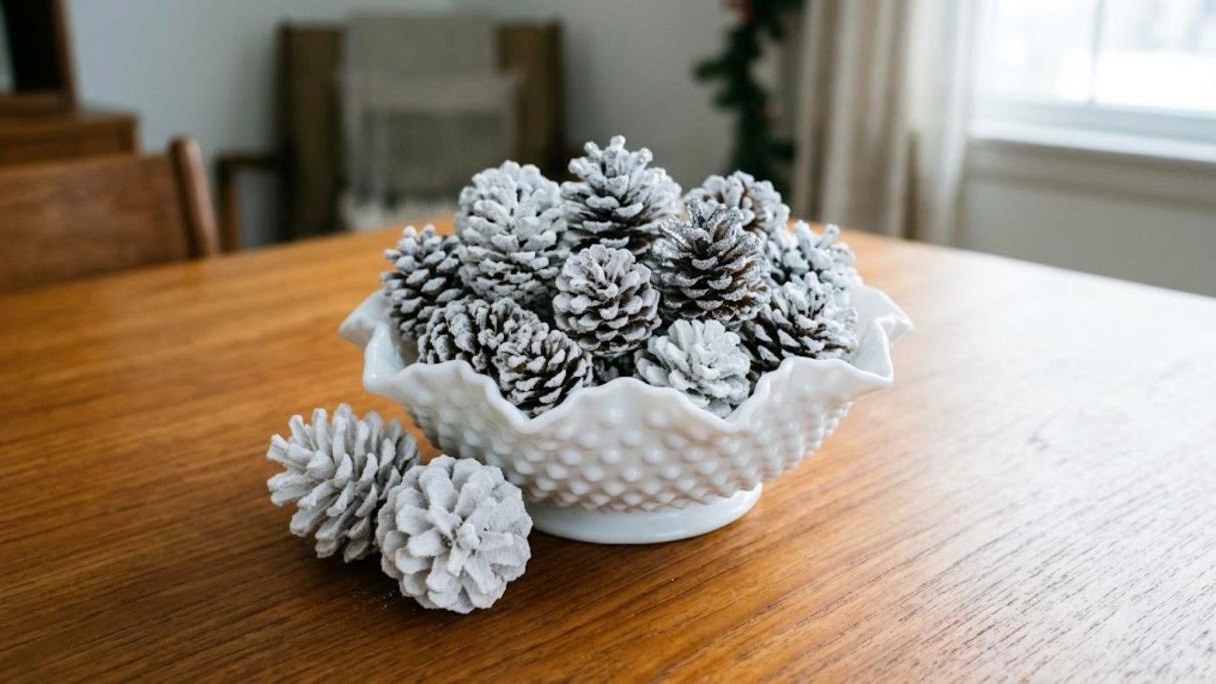
Flocked pinecones bring a soft snowy touch to any 1960s style room, and they cost almost nothing if you gather the cones yourself. Bake fresh pinecones on low heat first with adult help to dry them out. Then brush the tips with white paint and sprinkle on flocking powder or fine glitter. Pile them in a milk glass bowl or tuck them into garland. They will last for years in a box. Do you have a pine tree nearby to collect from?
You will need: Pinecones, white acrylic paint, a foam brush, snow flocking powder or fine white glitter, a milk glass or white bowl.
How to make it: 1. Dry the pinecones on a baking sheet at 200 degrees for about 30 minutes with adult help. 2. Brush white paint on the scale tips. 3. Sprinkle flocking powder on the wet paint and let it dry.