Christmas Card Display: 15 Cheap, Clever Ways to Show Off Every Card You Get This Year
Christmas Card Display ideas solve a happy little problem that shows up every December: the mail brings card after card, and soon they are piled on the counter or falling off the fridge. Those cards come from people who love you, and they deserve better than a messy stack. With some ribbon, clothespins, branches and a few thrift store finds, you can turn them into decor that makes your home feel warm and full of friends. None of these ideas cost much, and most take less than an hour. Some hang on a wall, some stand on a shelf, and a few even help you save the cards long after the tree comes down. Grab a cup of cocoa and pick the one that fits your space best..
Christmas Card Display on a Chicken Wire Board
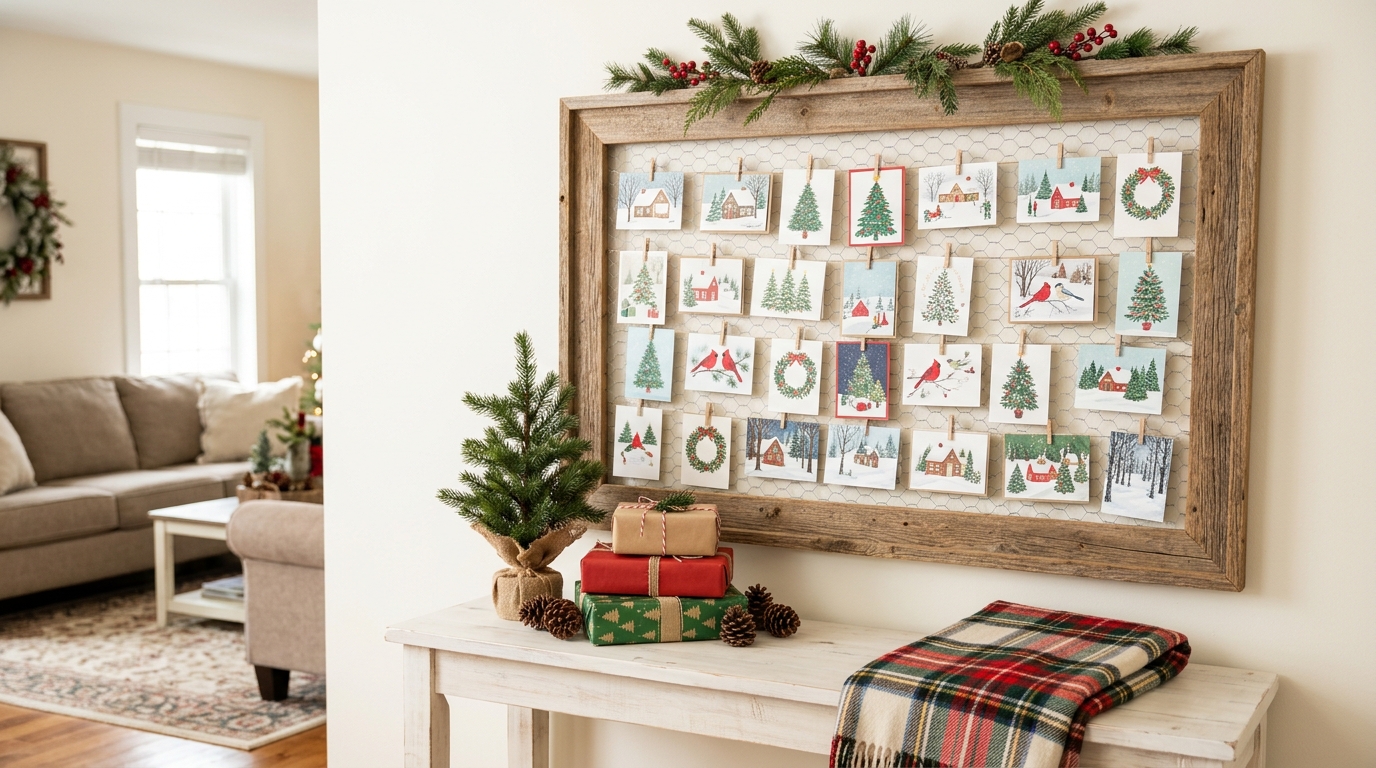
Christmas Card Display boards like this one hold every card in one pretty spot. A wood frame covered in chicken wire looks farmhouse and cozy, and tiny clothespins let you add new cards as the mail arrives. Tuck pine sprigs and red berries along the top so it looks finished even in early December. Hang it above a console or a hall table, and suddenly the cards feel like art. If you love this look, our chicken wire crafts list has more ideas for the same roll of wire. Every other idea below works for small spaces too, so read on and find your favorite..
You will need: An old picture frame or four boards, a piece of chicken wire, a staple gun (adult help), mini wooden clothespins, and pine sprigs.
How to make it: 1. Paint or stain the frame and let it dry. 2. Staple the chicken wire tight across the back, folding in any sharp edges. 3. Hang the board, clip on your cards and tuck pine sprigs along the top.
Line a Doorway With Ribbon Strips
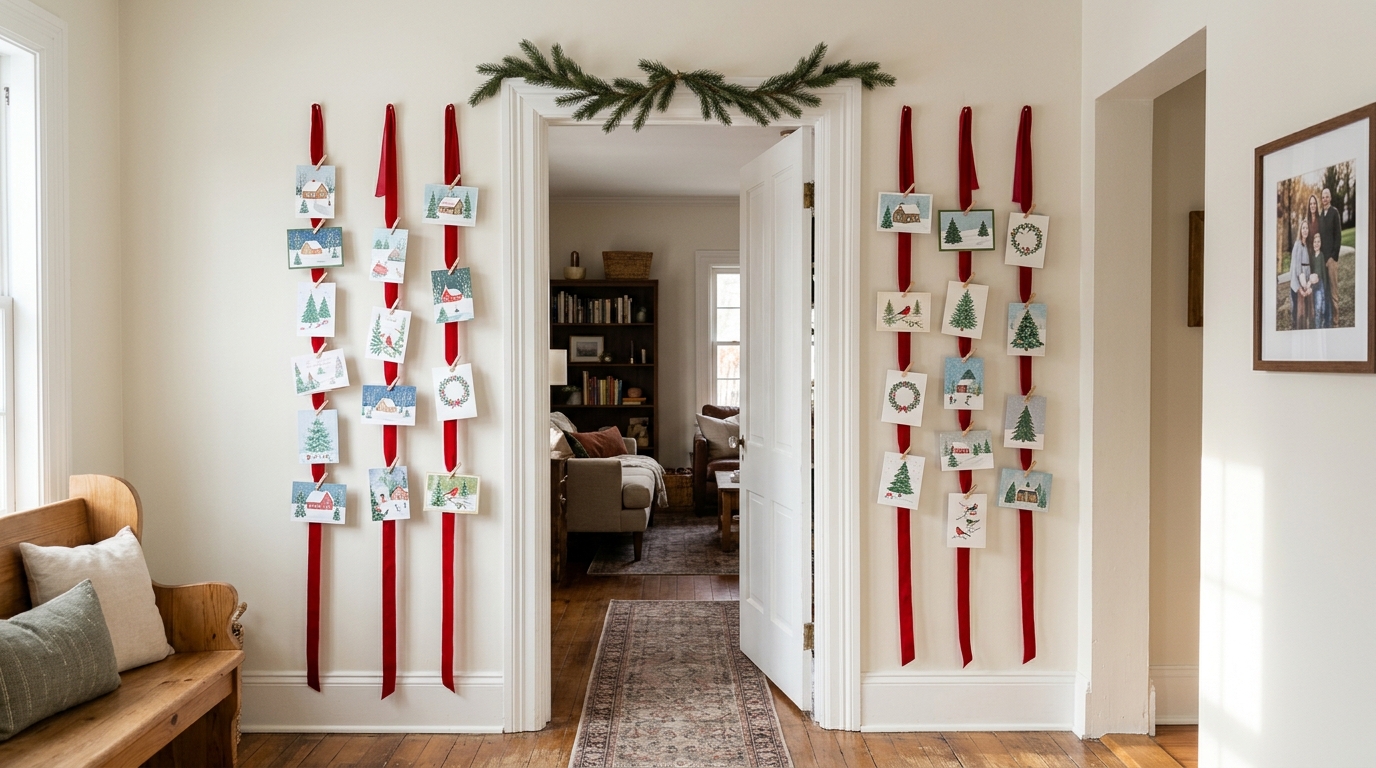
A doorway is a spot you walk through dozens of times a day, so it is perfect for showing off cards. Hang long red velvet ribbons down both sides of the frame with small removable hooks. Clip the cards on with clothespins as they arrive, and add a short pine garland across the top. It frames the room like a big holiday picture and takes no floor or table space at all. Removable hooks come off cleanly in January, so no paint gets damaged. Which doorway in your home gets the most traffic?
You will need: Two to six long pieces of wide velvet ribbon, small removable wall hooks, wooden clothespins, and a short pine garland.
How to make it: 1. Stick a removable hook at the top of each side of the frame. 2. Tie the ribbons onto the hooks so they hang to the floor. 3. Clip the cards on and lay the garland across the top.
Christmas Card Display on a Birch Branch Tree
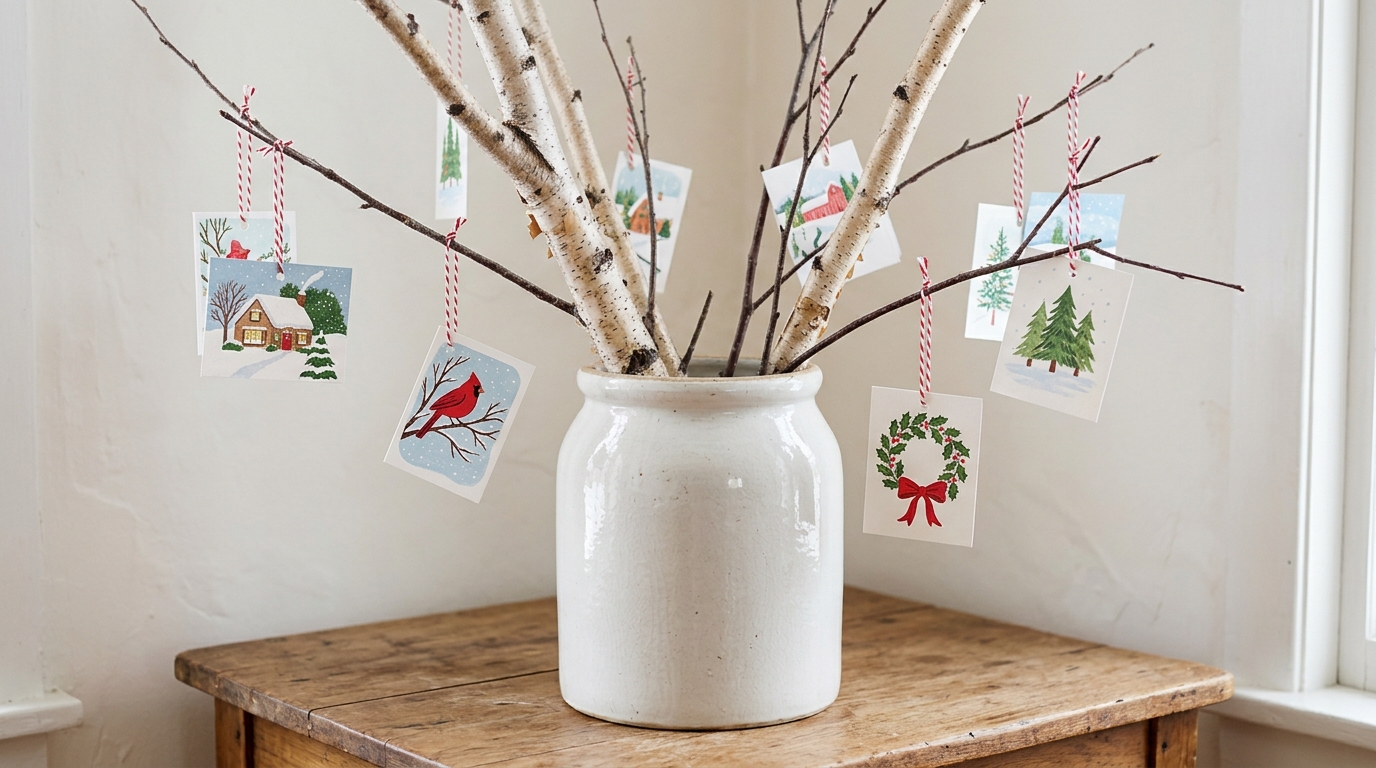
Christmas Card Display ideas do not get more natural than a little tree made from branches. Put a few bare birch or apple branches in a crock, add some stones for weight, and hang cards from the twigs with loops of baker’s twine. It looks like a tree full of ornaments, and every ornament has a story. Punch a small hole in the corner of each card so it hangs straight. Smaller cards work best on the top branches and bigger ones lower down. Would you use branches from your own yard?
You will need: Three to five bare branches, a tall crock or vase, small stones, a hole punch, and red and white baker’s twine.
How to make it: 1. Fill the crock halfway with stones and push the branches in. 2. Punch a hole in each card and thread a short loop of twine through it. 3. Hang the cards from the twigs, balancing them on all sides.
Clip Greetings Around a Wreath Frame
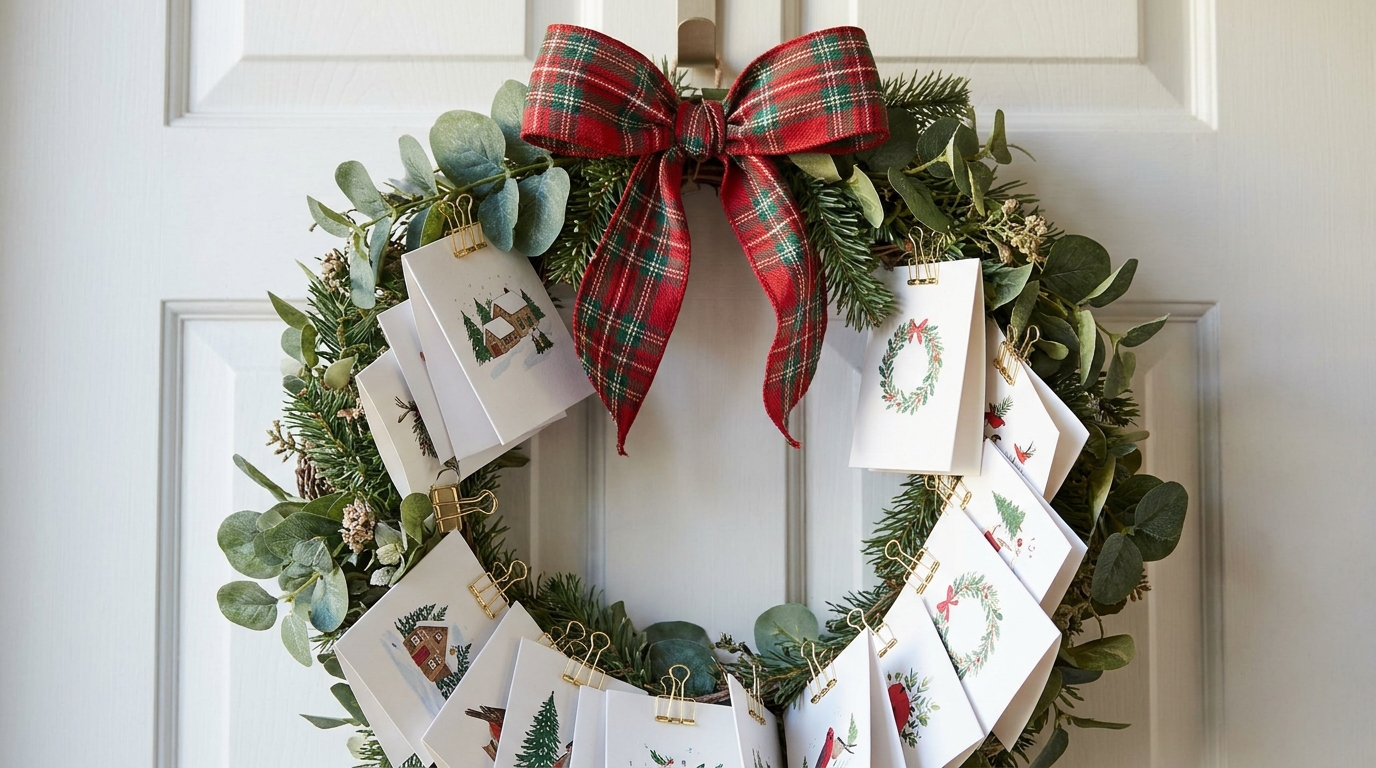
A wreath made of cards is one of the prettiest ways to greet guests at the door. Start with a plain metal wreath frame from the craft store and wrap it in faux eucalyptus and pine. Then clip folded cards all the way around the ring with small gold binder clips. A big plaid bow at the top finishes the look. Hang it on an inside door or above a mantel where the cards stay dry. You can swap cards in and out as new ones come in the mail. Would you put yours on a door or a wall?
You will need: A 14 to 18 inch metal wreath frame, faux greenery, floral wire, small gold binder clips, and a plaid bow.
How to make it: 1. Wire the greenery around the frame, overlapping the stems. 2. Clip the cards around the ring with binder clips. 3. Tie the bow at the top and hang the wreath.
Christmas Card Display on a Blanket Ladder
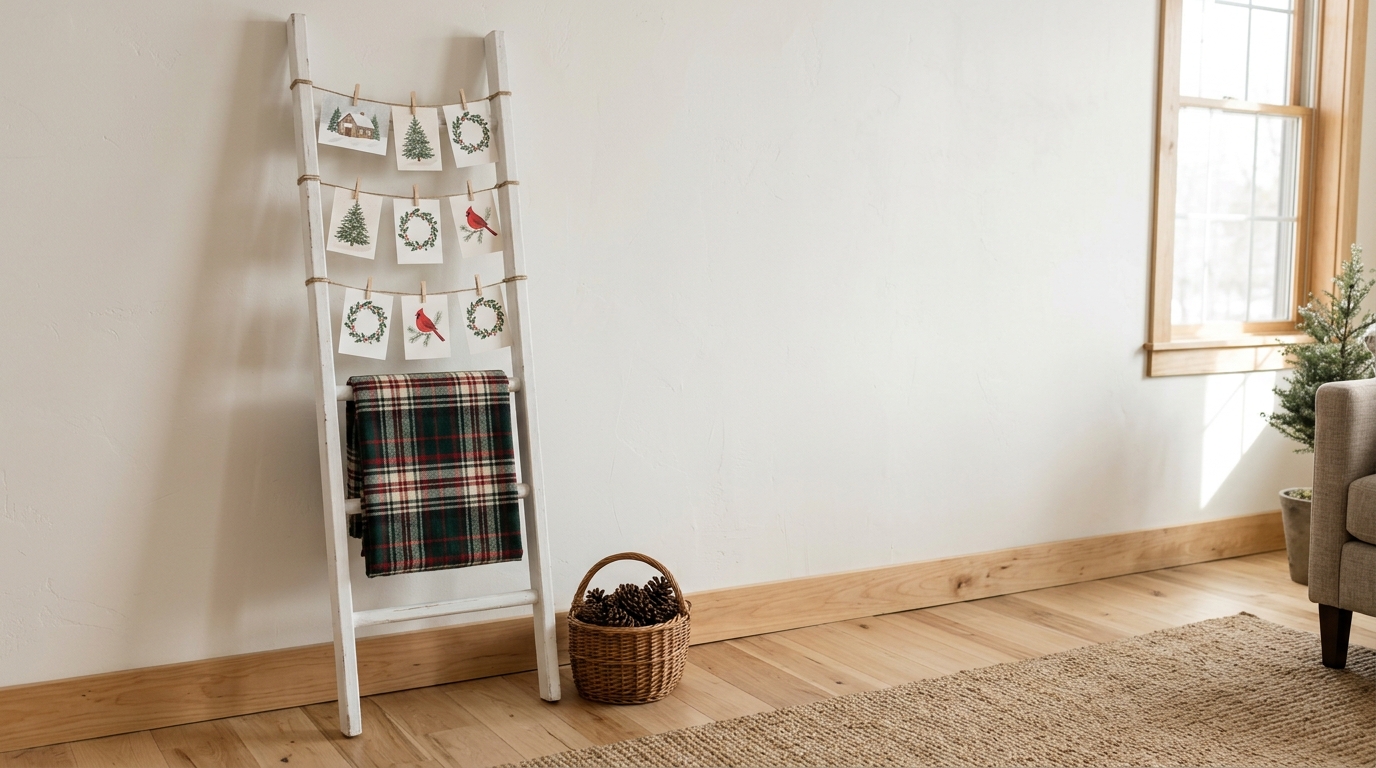
Christmas Card Display space is easy to find if you already own a blanket ladder. Drape the cards over each rung and clip them with clothespins so they do not slide off. Keep a cozy plaid throw on the lowest rung and set a basket of pine cones on the floor. It fills an empty corner and looks like it came from a farmhouse magazine. If you do not own a ladder, an old wooden one from a yard sale works great after a quick coat of paint. How many rungs would you fill by Christmas Eve?
You will need: A blanket ladder or a small wooden ladder, wooden clothespins, a throw blanket, and a basket of pine cones.
How to make it: 1. Lean the ladder safely against the wall. 2. Fold each card over a rung and clip it in place. 3. Add the throw and the basket to finish the corner.
Hang a Grid of Vintage Clipboards
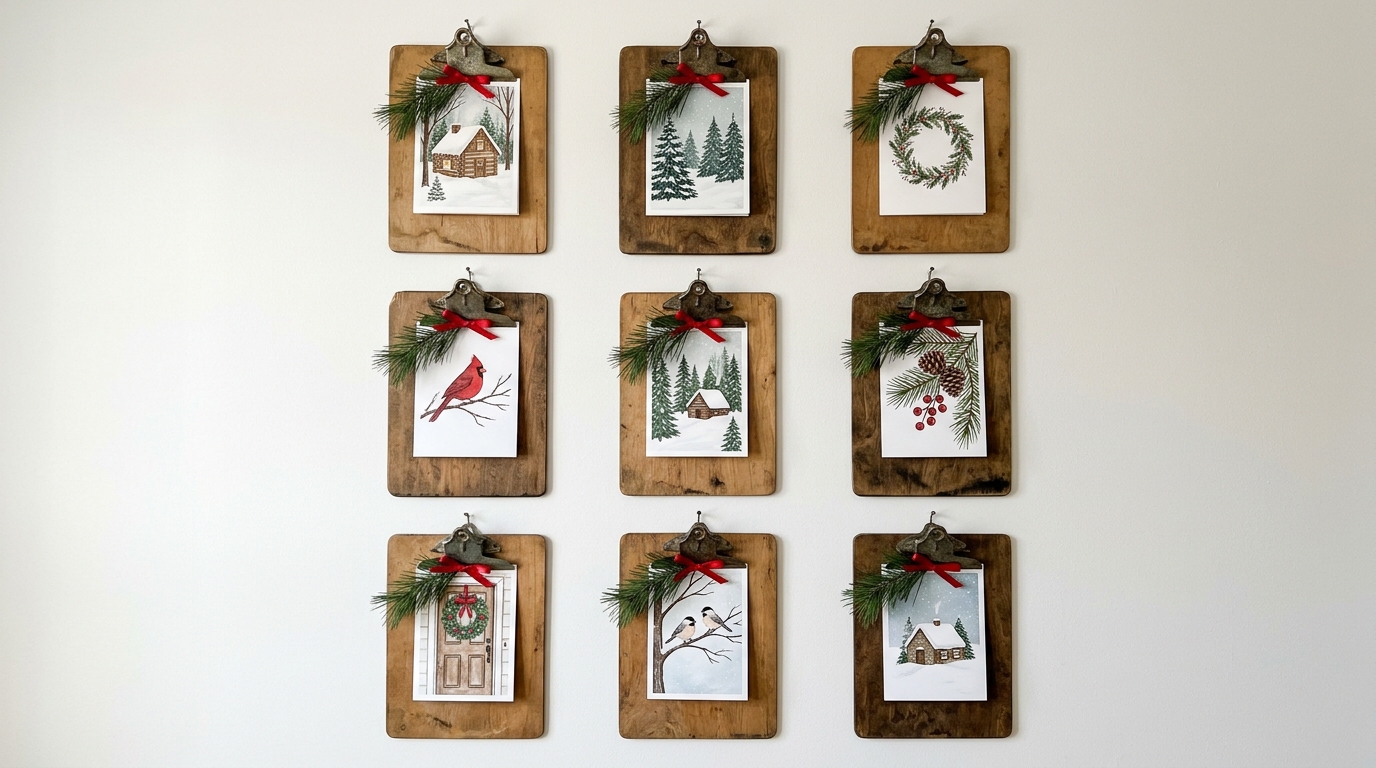
A clipboard wall looks neat, modern and still very cozy. Hang nine wooden clipboards in a tidy three by three grid and clip one card to each. Tie a tiny pine sprig and a red ribbon to the top of every board. The best part is how easy it is to swap cards, so you can show the newest ones each week. Clipboards are cheap at office and dollar stores, and you can use them for kids’ art the rest of the year. Would you pick plain wood or paint them red?
You will need: Nine wooden clipboards, small nails or removable strips, a level, pine sprigs, and thin red ribbon.
How to make it: 1. Lay the clipboards on the floor to plan the grid. 2. Hang them with even spaces using a level. 3. Clip on the cards and tie a sprig and ribbon to each clip.
Christmas Card Display You Can Flip Through
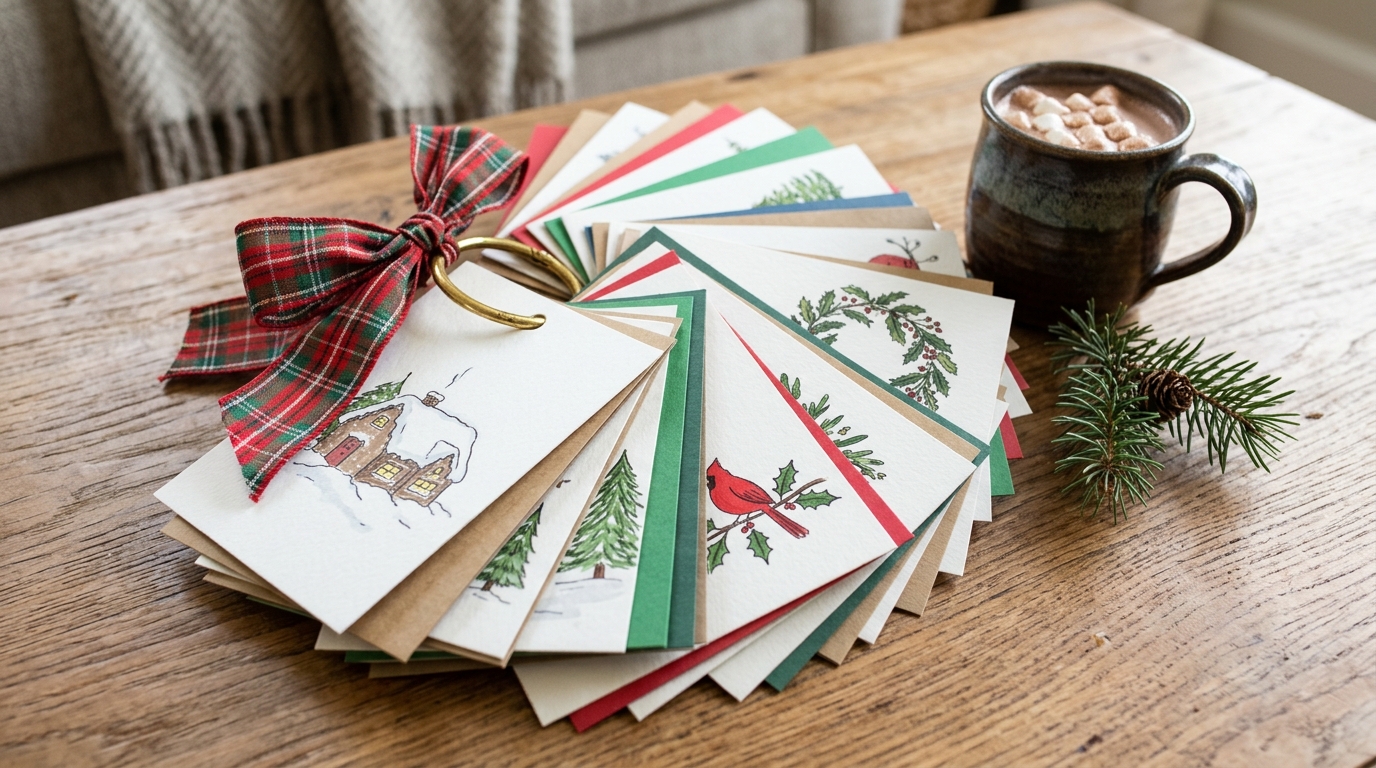
Christmas Card Display ideas can be cozy and hands on, too. Punch a hole in the top corner of each card and slide them all onto a big gold binder ring. Tie a plaid bow on the ring and leave the little book on the coffee table. Guests love to flip through it, and you can read the sweet notes again on a quiet night. Add new cards to the ring all through December. Next year, start a fresh ring and keep the old one as a memory. Who sends the first card in your family every year?
You will need: A hole punch, a large metal binder ring (2 to 3 inch), and a short piece of plaid ribbon.
How to make it: 1. Punch a hole in the same corner of every card. 2. Open the ring and slide the cards on in the order they arrived. 3. Close the ring and tie the bow.
Save Them in a Keepsake Album
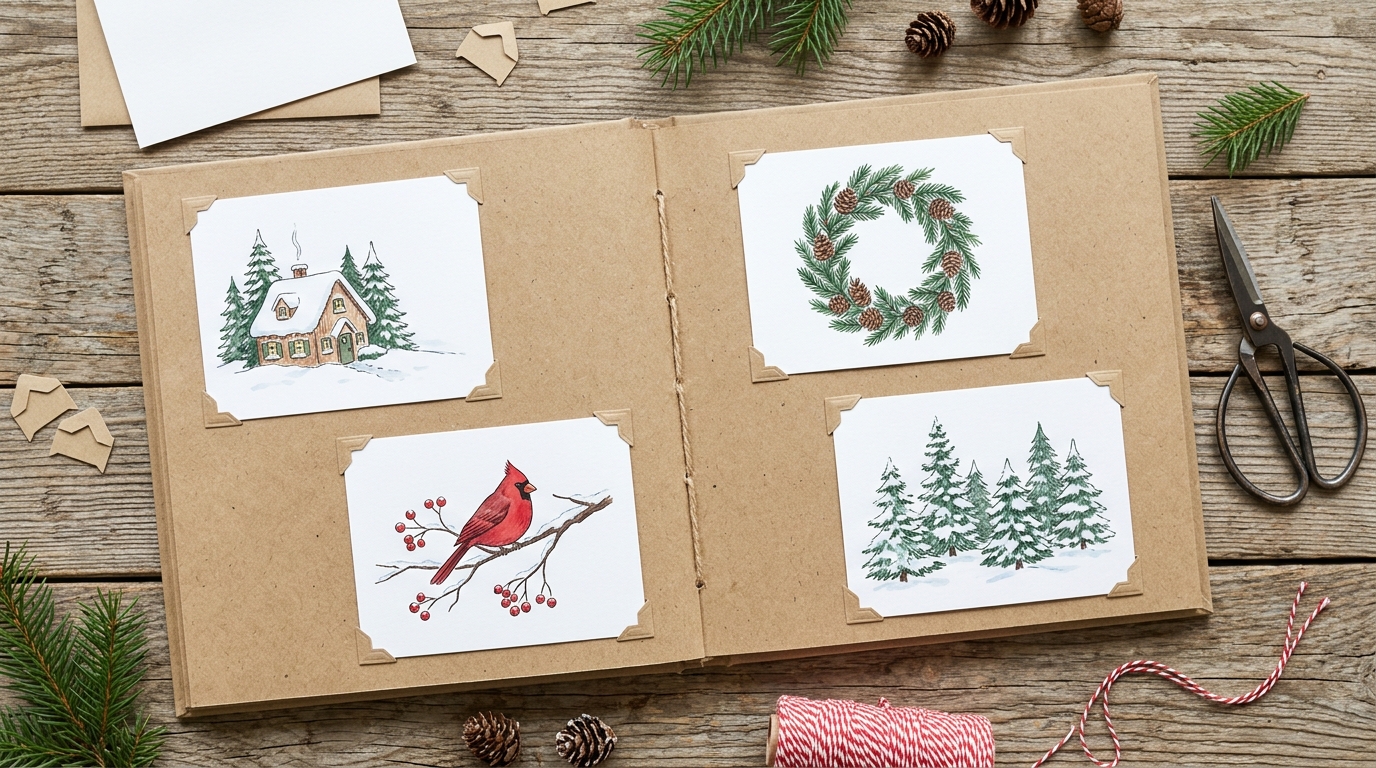
Some cards are too special to throw away, like the ones with family photos or a note from grandma. A keepsake album keeps them safe and makes a lovely book to look through every December. Mount each card on a kraft paper page with photo corners so nothing gets glued or damaged. Write the year and who sent it on a small tag beside each card. After a few years, it becomes a little family history book. Which card from this year would go on the first page?
You will need: A kraft paper scrapbook or a binder with page protectors, photo corners, small tags, and a pen.
How to make it: 1. Sort the cards by year or by family. 2. Put photo corners on each card and press it onto a page. 3. Add a tag with the name and year next to it.
Christmas Card Display in a Painted Crate
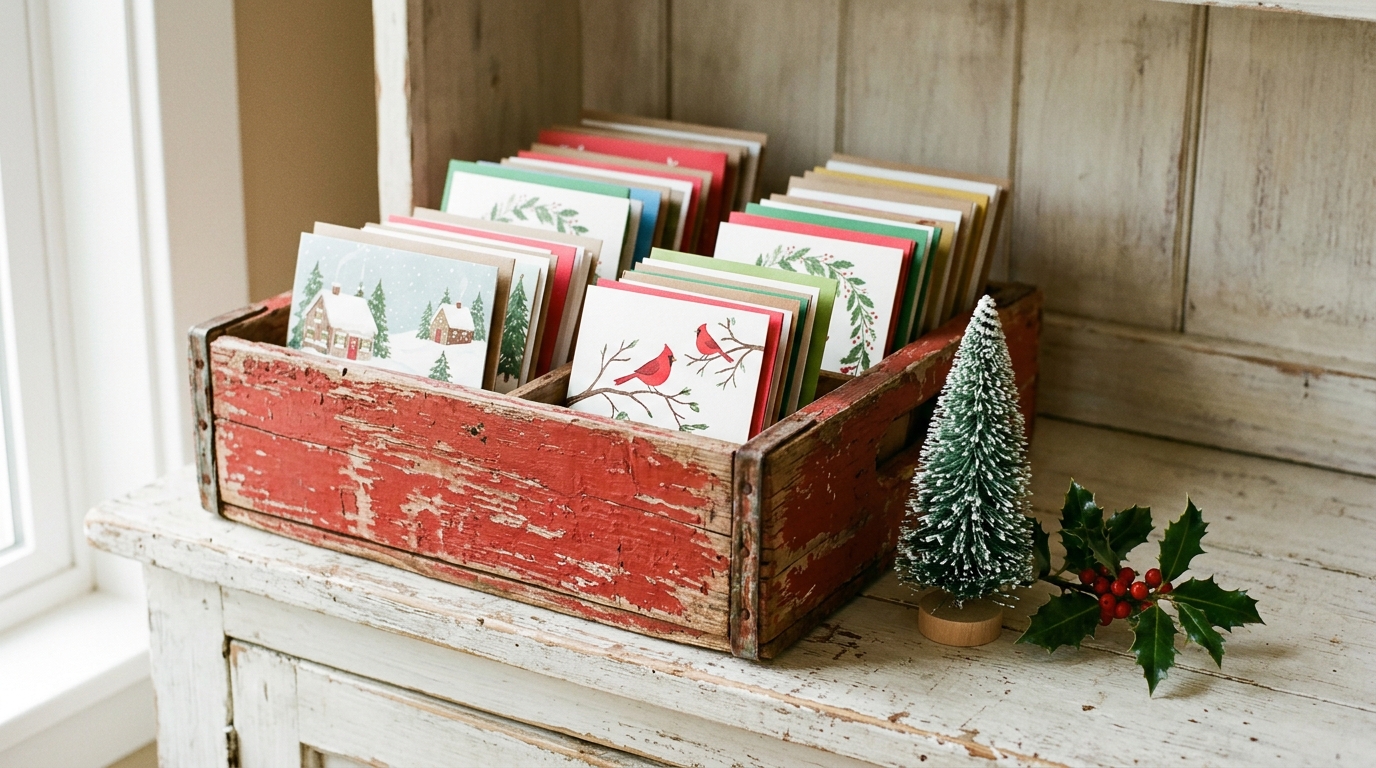
Christmas Card Display can be as simple as a pretty box on the hutch. Paint a small wooden crate a cheerful barn red and stand the cards upright inside, like an old recipe file. Set a little bottle brush tree and a sprig of holly beside it. Guests can pull out a card and look at it, and the box keeps the hutch tidy. Thrift stores often have small crates and wine boxes for a dollar or two. Would this look good on your hutch or your kitchen counter?
You will need: A small wooden crate or box, red chalk paint, a brush, sandpaper, and a bottle brush tree.
How to make it: 1. Paint the crate and let it dry. 2. Lightly sand the edges for a vintage look. 3. Stand the cards upright inside and style it on the hutch.
Tape Greetings Into a Wall Tree
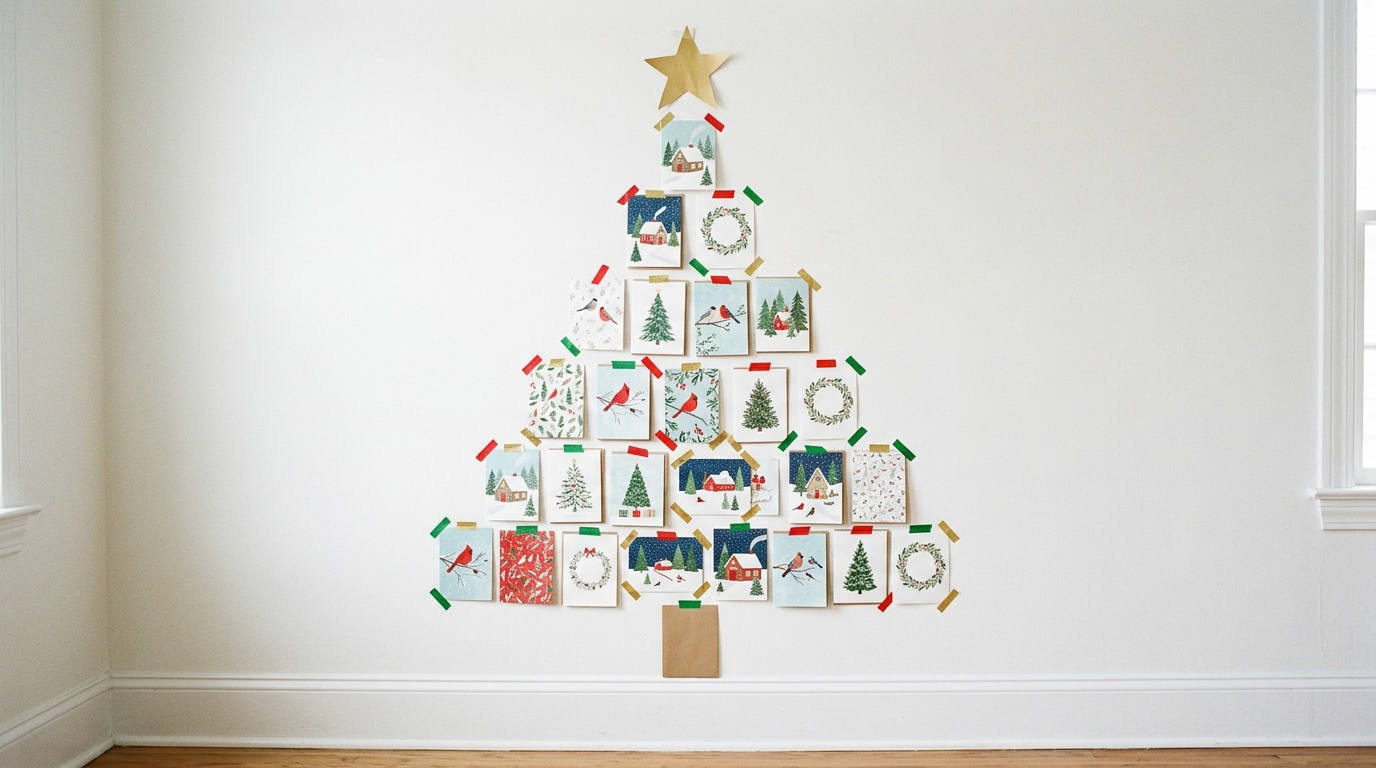
No room for another tree? Make one on the wall with the cards you get. Start with one card at the top and add more rows below it, each row a little wider, until you have a big triangle. Washi tape in red, green and gold holds them gently and peels off without hurting the paint. Add a brown card at the bottom for the trunk and a gold paper star on top. Kids love to help place each new card as it arrives. How many rows do you think your tree will have?
You will need: Washi tape in red, green and gold, a brown card or kraft paper, and gold paper for the star.
How to make it: 1. Tape the first card high on the wall as the top of the tree. 2. Add each new row one card wider than the last. 3. Tape on the trunk and the star.
Christmas Card Display Ideas That Become Gift Tags
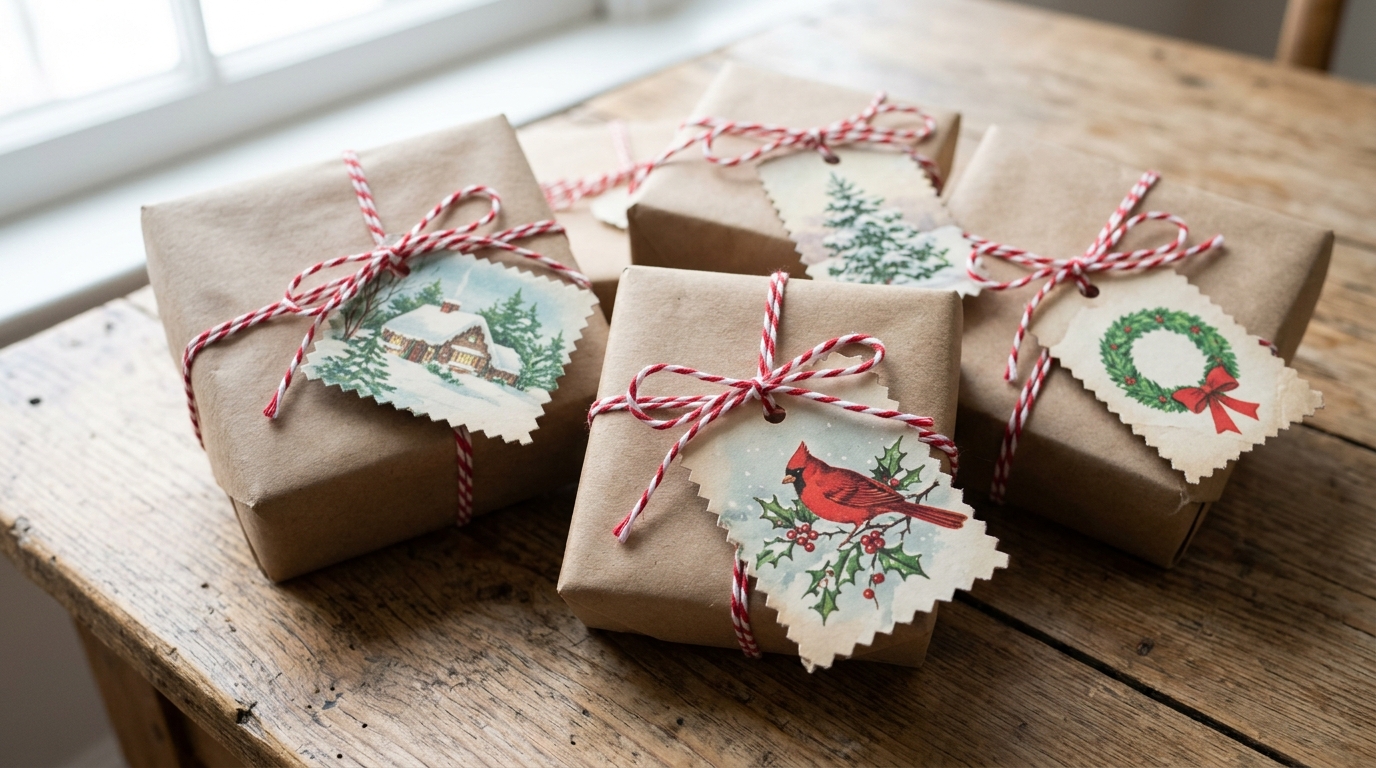
Christmas Card Display ideas do not have to end in January. When it is time to take the cards down, cut the prettiest pictures into gift tags with pinking shears. Punch a hole, add a loop of baker’s twine, and save them in a box for next year’s presents. The tags look sweet on brown kraft paper and cost nothing at all. Christmas cards have been sent for nearly two hundred years, so you are giving them one more happy job. Which picture would you save first?
You will need: Old cards, pinking shears, a hole punch, and baker’s twine.
How to make it: 1. Cut a tag shape around the best part of each picture. 2. Punch a hole at the top and thread a loop of twine. 3. Store the tags in a box with your wrapping supplies.
Turn a Baking Sheet Into a Magnet Board
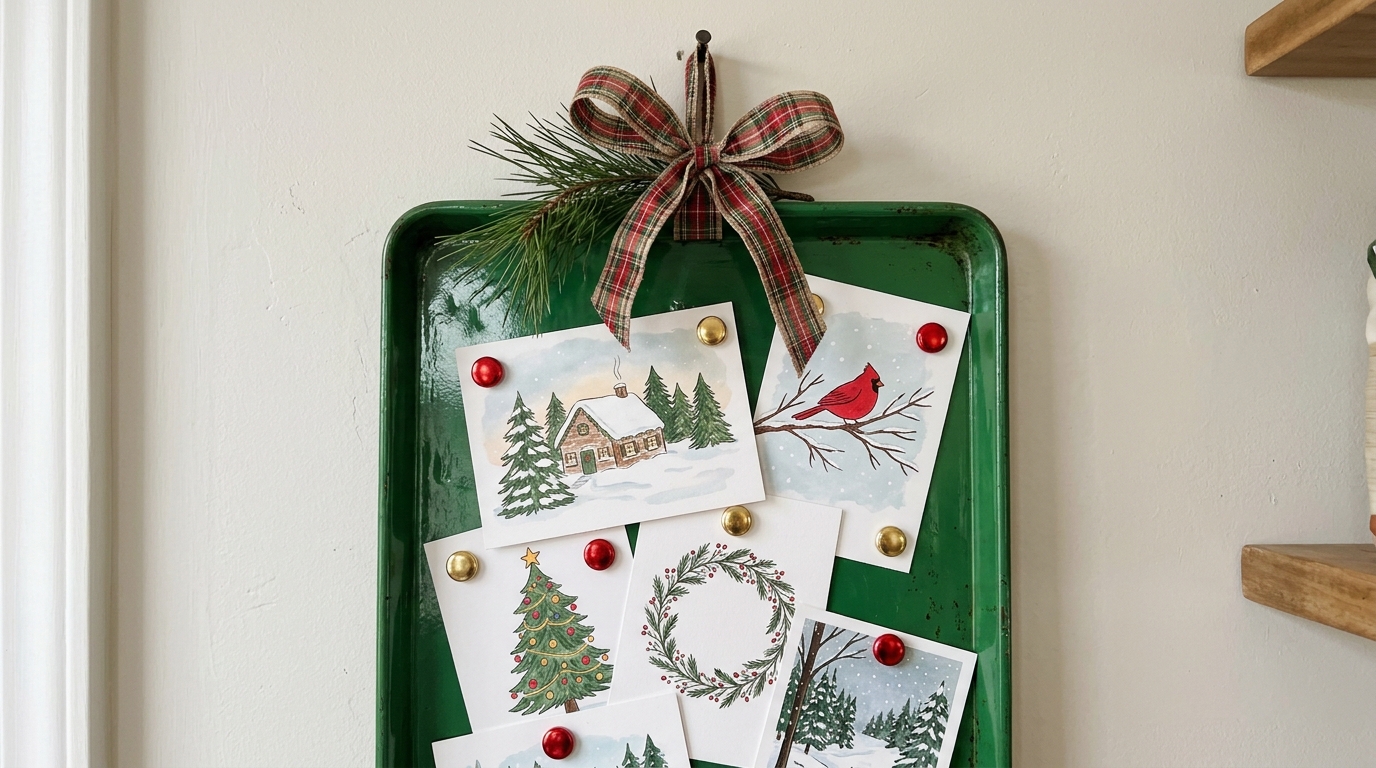
An old baking sheet makes a perfect magnet board for the kitchen. Paint it a glossy forest green or barn red and hang it with a plaid ribbon. Then stick the cards on with small red and gold magnets. It keeps the fridge clear and looks like a sweet bit of vintage kitchen decor. Thrift stores always have old metal sheets, so this one costs only a few dollars. Make sure it is a metal sheet that a magnet sticks to before you paint it. Would yours hang in the kitchen or by the back door?
You will need: An old metal baking sheet, spray primer and paint (outdoors, adult help), a drill or strong hooks, ribbon, and small magnets.
How to make it: 1. Clean the sheet, prime it and spray two light coats of paint outside. 2. Drill two small holes at the top or use strong hooks to hang it with ribbon. 3. Add the cards with magnets.
Christmas Card Display in a Gold Frame
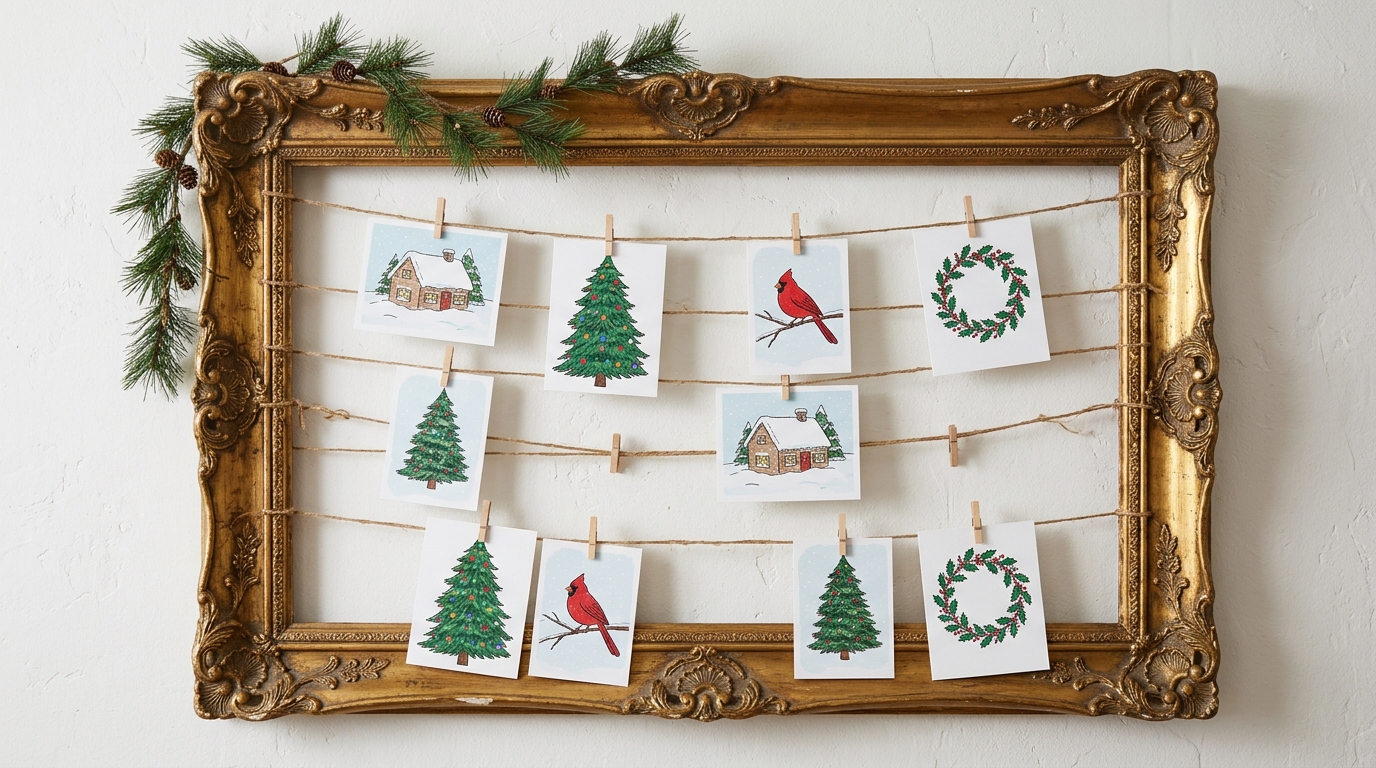
Christmas Card Display ideas look extra fancy inside a big gold frame. Find an ornate empty frame at the thrift store, then string lines of jute twine across the opening with small screws on the back. Clip the cards on with tiny clothespins and drape a short pine garland over one corner. It looks like something from an old manor house, but it costs very little. After Christmas, use the same frame for photos or kids’ drawings. Would you go gold, silver or white?
You will need: A large empty frame, small screw eyes, jute twine, tiny wooden clothespins, and a short pine garland.
How to make it: 1. Twist screw eyes into the back of the frame on both sides. 2. Tie rows of twine tight between them. 3. Hang the frame, clip on the cards and add the greenery.
Make a Ribbon Cascade on a Door
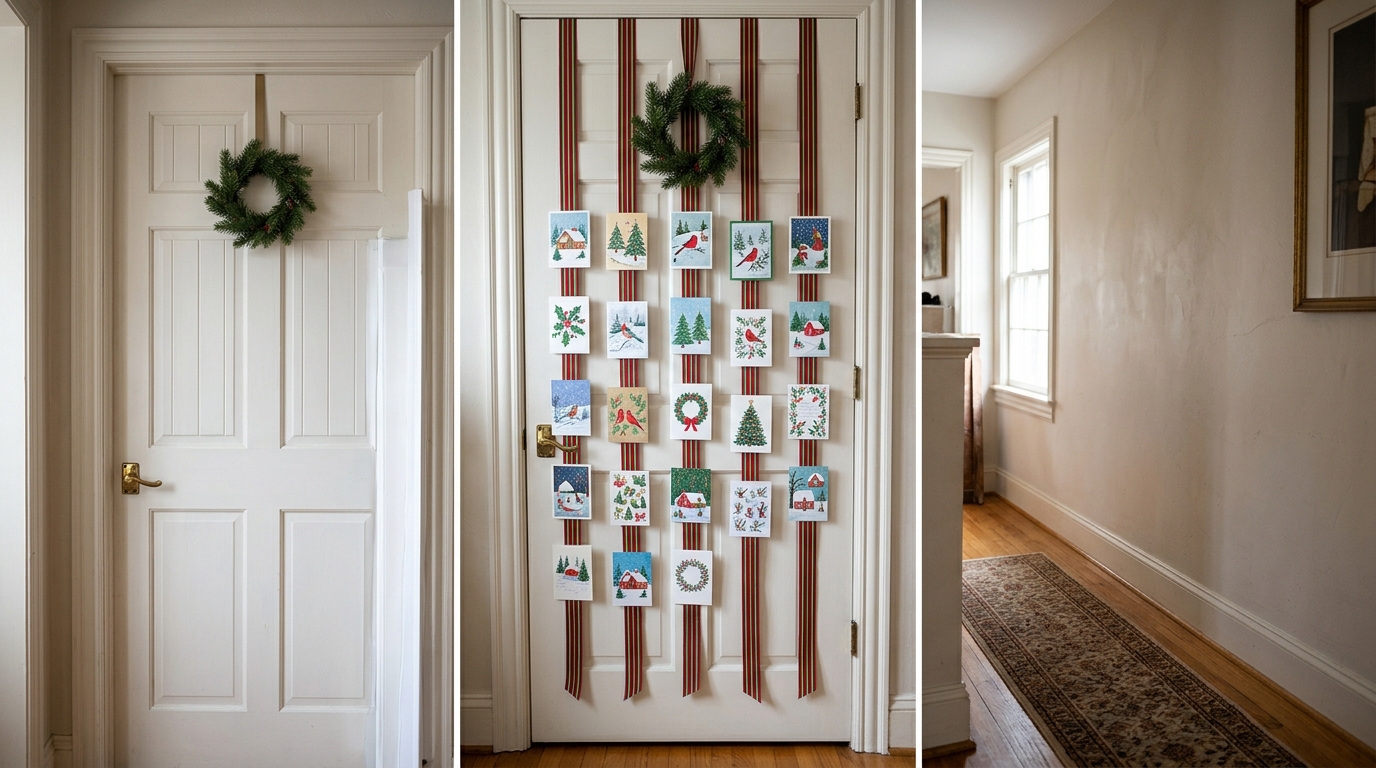
A plain closet door can hold a whole year of cards. Hang a small wreath at the top, then let five long striped ribbons fall down from it like streamers. Staple or clip the cards in a column down each ribbon. It fills the door with color and works in apartments where wall space is tight. Use a door hook for the wreath so you do not need a nail. When the season is over, just roll up the ribbons and save them. Which door in your home would you dress up?
You will need: A small wreath, an over the door hook, five long pieces of wide ribbon, a stapler or mini clips.
How to make it: 1. Hang the wreath on the door hook. 2. Tie the ribbons to the bottom of the wreath so they fall straight down. 3. Attach the cards in neat columns.
Christmas Card Display on the Bookshelf
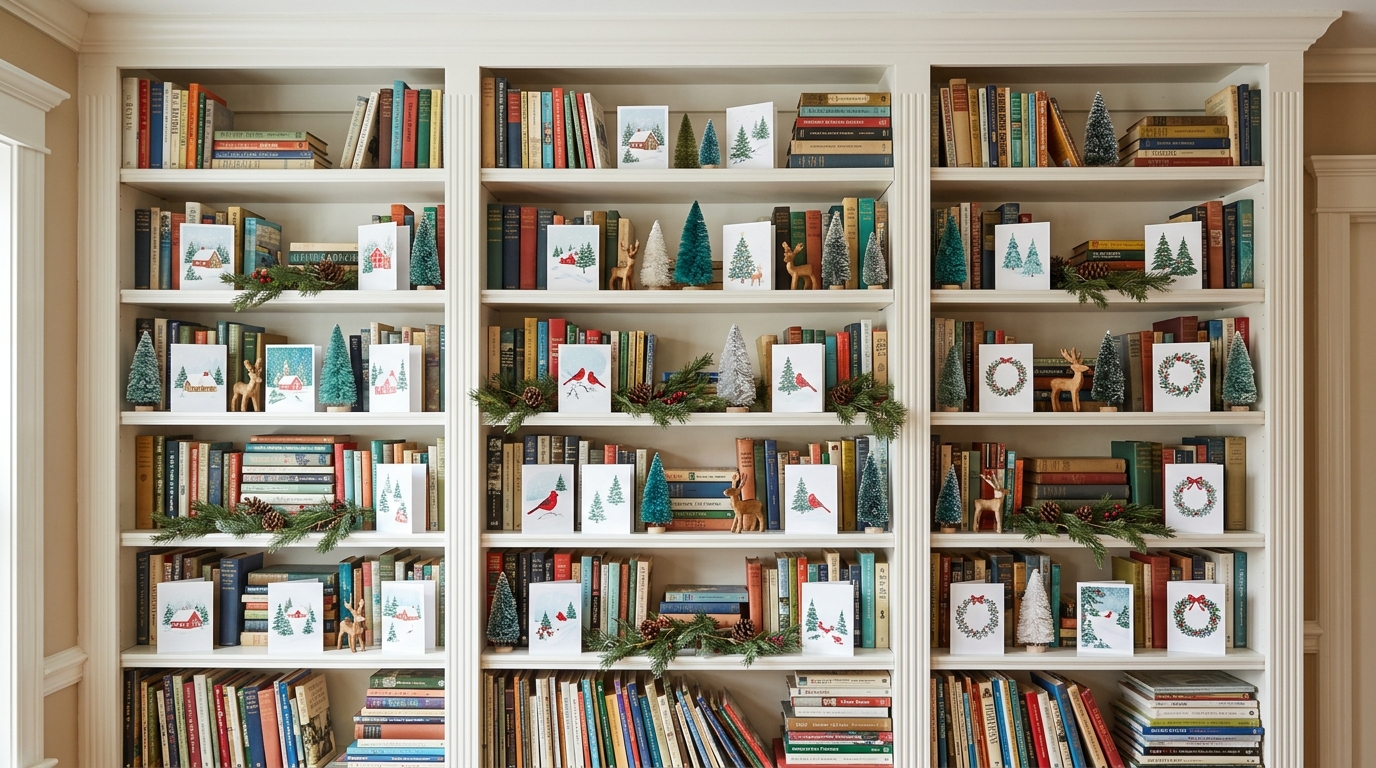
Christmas Card Display on a bookshelf is the easiest idea of all. Stand the cards open along the shelves between rows of books, and add little bottle brush trees, a wooden reindeer and short pine garlands. Mixing them with the books makes every shelf feel warm and full. It also means you see a new card every time you reach for a book. Keep the heavier decor on the lower shelves for safety. Pick one idea from this list today, and by the time the next card arrives, it will already have a happy home. Which one will you try first?
You will need: Your cards, a few bottle brush trees, small wooden figures, and short faux pine garlands.
How to make it: 1. Clear a little space on each shelf. 2. Stand the cards open in small groups between the books. 3. Fill the gaps with the trees, figures and greenery.