Popsicle Stick Crafts: 18 Clever Builds That Look Way Too Good for Craft Sticks
Popsicle stick crafts are having a huge moment, and you probably have a box of sticks in a drawer somewhere. One easy craft stick Short posted on October 16 has more than 3.9 million views, and a desk organizer made from colored sticks passed 2.7 million views in three days. Families are looking for cheap, cozy projects for cold afternoons before the holidays, and these fit perfectly. All you need is a bag of sticks, white glue and a little patience while things dry. The results look far better than you would expect from something so simple. Here are 18 clever builds, from useful desk helpers to sweet Christmas ornaments, that kids and grandkids can make with you..
Popsicle Stick Crafts Everyone Is Copying Right Now
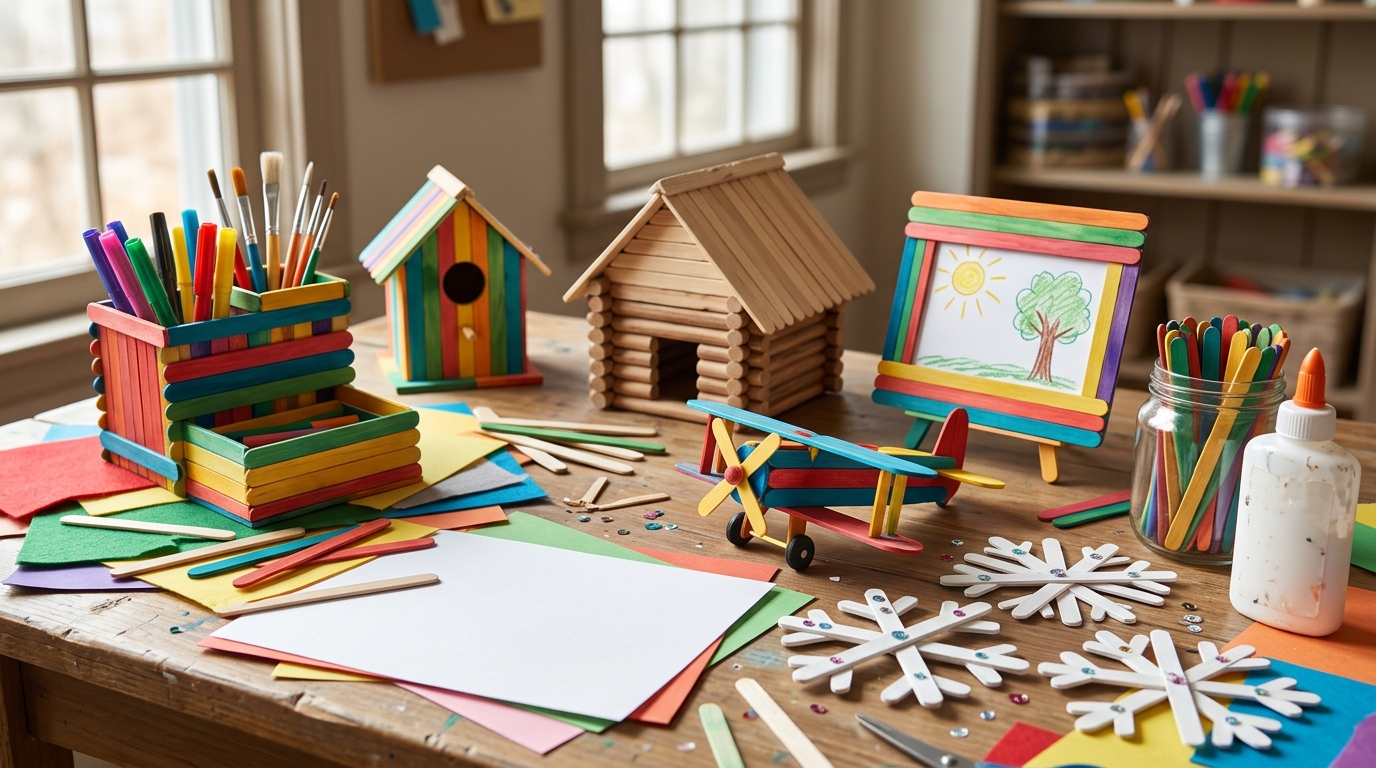
Before you start, a few simple tips make every project easier. White craft glue is safe for kids and holds well, but it needs time, so use clothespins to hold pieces while they dry. Jumbo sticks are easier for small hands, and colored sticks save painting time. Cover the table with newspaper and keep a damp cloth close. If you want to see how quick these can be, this easy craft stick Short shows a full build in under a minute. Ready to raid that drawer of sticks..
You will need: A bag of plain and colored craft sticks, white glue, clothespins, acrylic paint, brushes and newspaper.
How to make it: 1. Cover your work table. 2. Sort sticks by color and size. 3. Glue in small sections and clamp with clothespins. 4. Let each part dry before adding the next.
Popsicle Stick Crafts for Your Desk: A Table Organizer
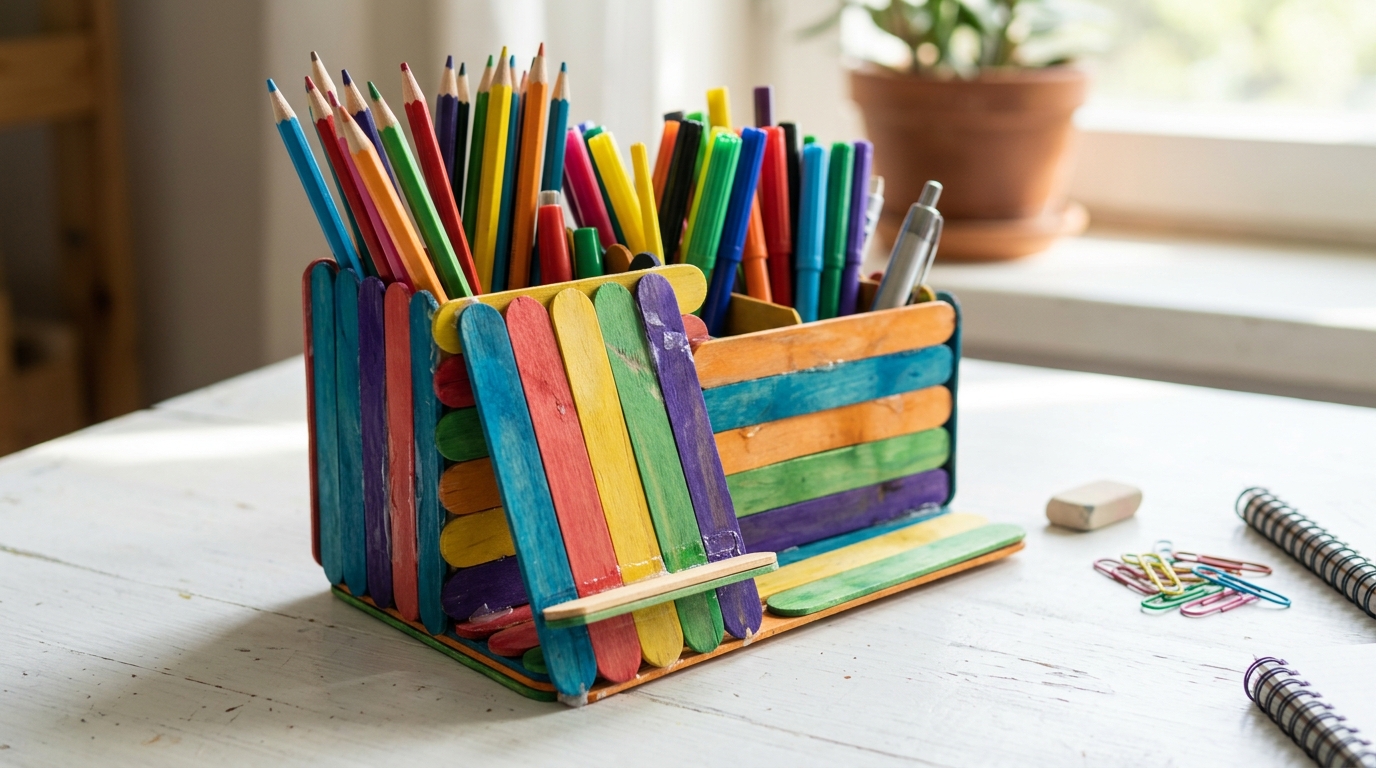
The craft that is blowing up right now is a simple table organizer made from ice cream sticks. One version posted on October 24 passed 2.7 million views in just three days. Glue colorful sticks into little boxes, add slots for pens and a slanted ledge for a phone, and your messy desk is suddenly neat. It is the perfect first project because it is useful from day one. Kids love seeing their pencils in something they built themselves. Which color will you start with?
You will need: About 60 colored craft sticks, white craft glue, a ruler, a pencil and clothespins to hold pieces while they dry.
How to make it: 1. Glue sticks side by side to make a flat base and four walls. 2. Build two or three small boxes of different heights. 3. Glue the boxes together on the base. 4. Add a slanted strip of sticks at the front as a phone rest.
A Little Log Cabin With a Pitched Roof
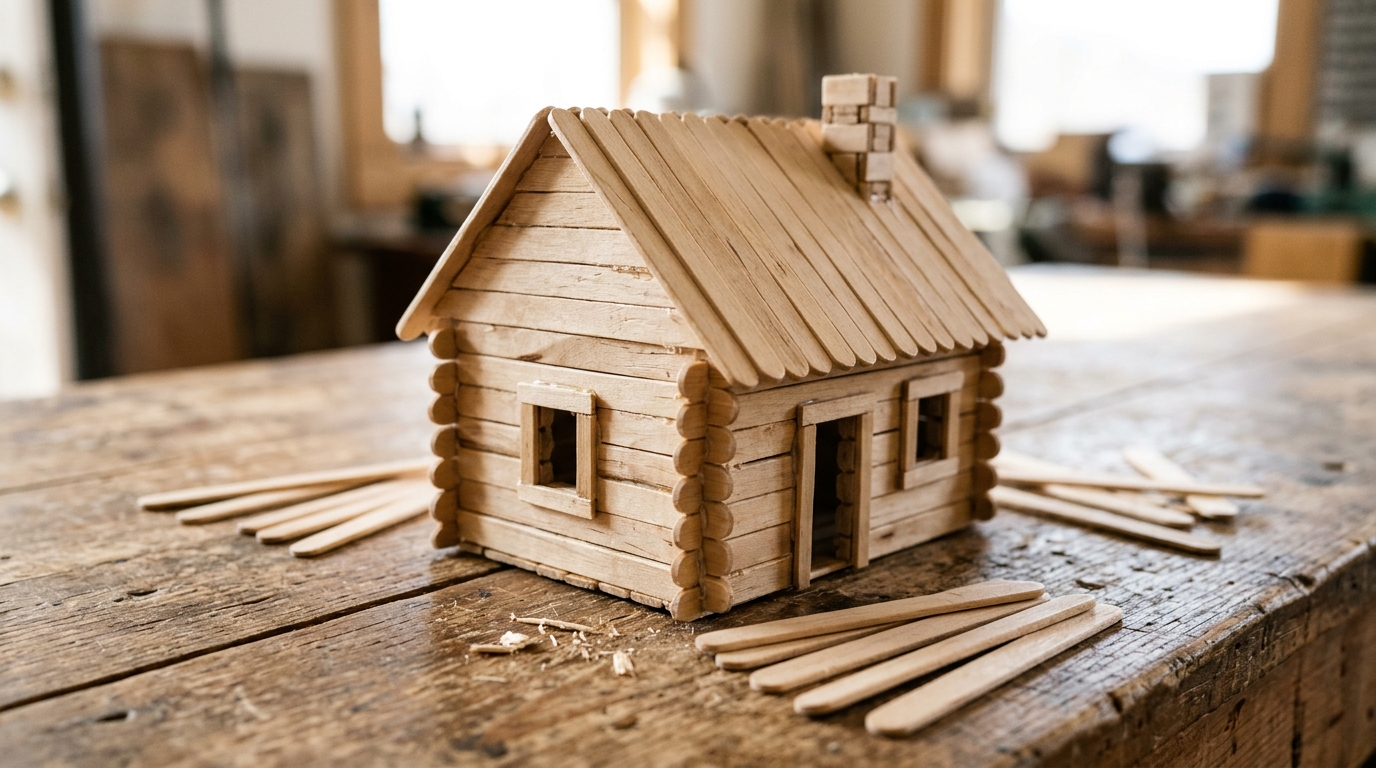
Stacking craft sticks like logs turns into a cozy little cabin faster than you would think. Lay two sticks parallel, cross two more on top, and keep going until the walls are tall enough. Leave gaps for a door and windows, then add a roof from sticks glued side by side. It makes a sweet winter decoration on a shelf with a little fake snow. A cabin like this is one of those popsicle stick crafts kids are proud to show off. Who would live in your tiny cabin?
You will need: About 80 natural craft sticks, wood glue or white glue, scissors for trimming (adult help) and cotton balls for snow.
How to make it: 1. Lay two sticks parallel and glue two more across the ends. 2. Keep stacking in a square until the walls are about 15 layers tall. 3. Glue sticks side by side into two roof panels and join them at the top. 4. Add a door and cotton snow.
A Toy Airplane With Button Wheels
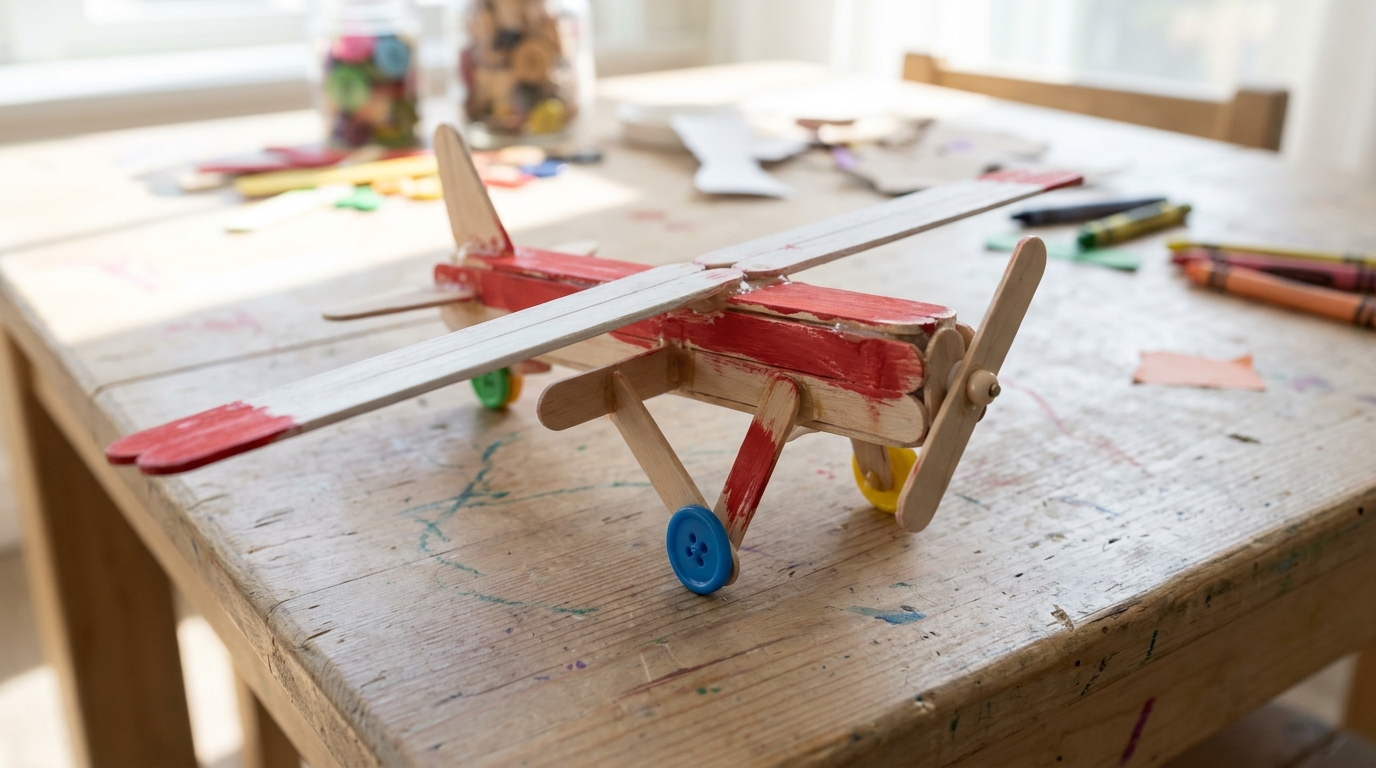
An airplane craft made from sticks has more than 562,000 views from just the last few weeks, and it is easy to see why. Two long sticks make the wings, one makes the body, and a short piece forms the tail. Buttons become wheels, and a coat of paint makes it fly. Kids can zoom it around the room as soon as the glue dries. Try making a little fleet in different colors. Where would your plane fly first?
You will need: Craft sticks, a clothespin for the body, white glue, two buttons, paint and a small brush.
How to make it: 1. Glue a stick across the top of a clothespin for the top wing. 2. Glue another across the bottom for a second wing. 3. Add a short stick at the back for the tail. 4. Glue on button wheels and paint it bright colors.
Popsicle Stick Crafts for Truck Fans: A Monster Truck
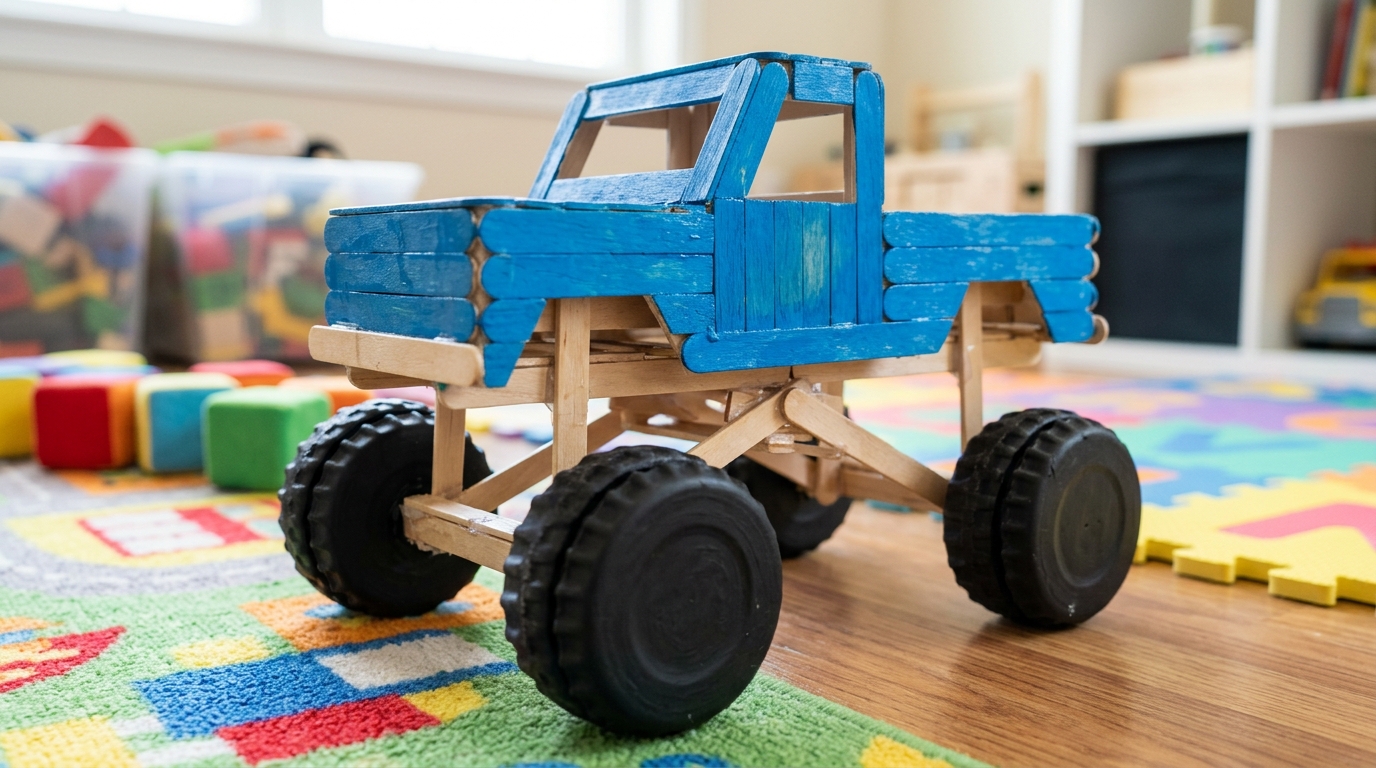
Big wheels, a tall body and loads of attitude. A monster truck made from ice cream sticks reached 346,000 views in 12 days, and kids want to build their own. Bottle caps painted black make chunky wheels, and wooden skewers become axles. It is one of the popsicle stick crafts that teaches a little engineering while being pure fun. Let the kids choose the paint colors and add racing stripes with markers. Would yours be a mud truck or a race truck?
You will need: Craft sticks, four large bottle caps, two wooden skewers, a drinking straw, white glue and paint.
How to make it: 1. Glue sticks into a flat base and a box shaped body. 2. Cut the straw into two pieces and glue them under the base. 3. Push skewers through the straws as axles. 4. Glue bottle caps on the ends and paint the truck.
A Hanging Wall Shelf for Tiny Plants
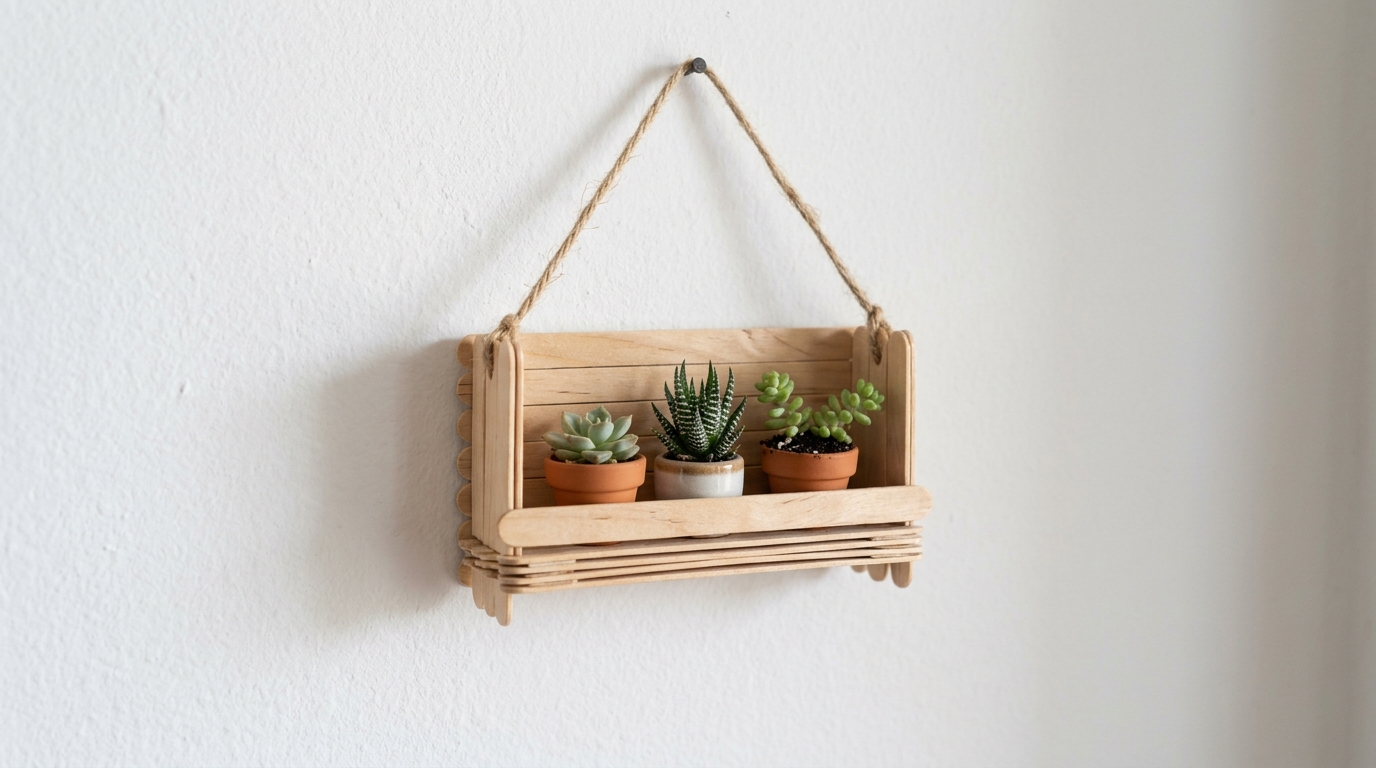
Tiny plants need a tiny shelf. Glue sticks into a small box with an open front, add a ledge and hang it with twine. It holds little succulents, air plants or small treasures. This is a lovely gift for a teacher or a grandparent, and it costs almost nothing to make. Use real plants with saucers or fake ones so water never touches the wood. A clear sealer helps it last longer. Which wall in your home could use a little green?
You will need: About 40 craft sticks, wood glue, twine, clear sealer and two or three tiny potted plants.
How to make it: 1. Glue sticks side by side into a back panel and a bottom shelf. 2. Add two short sides. 3. Seal the wood and let it dry. 4. Tie twine through the top corners and hang it.
Popsicle Stick Crafts for Christmas: Snowflake Ornaments
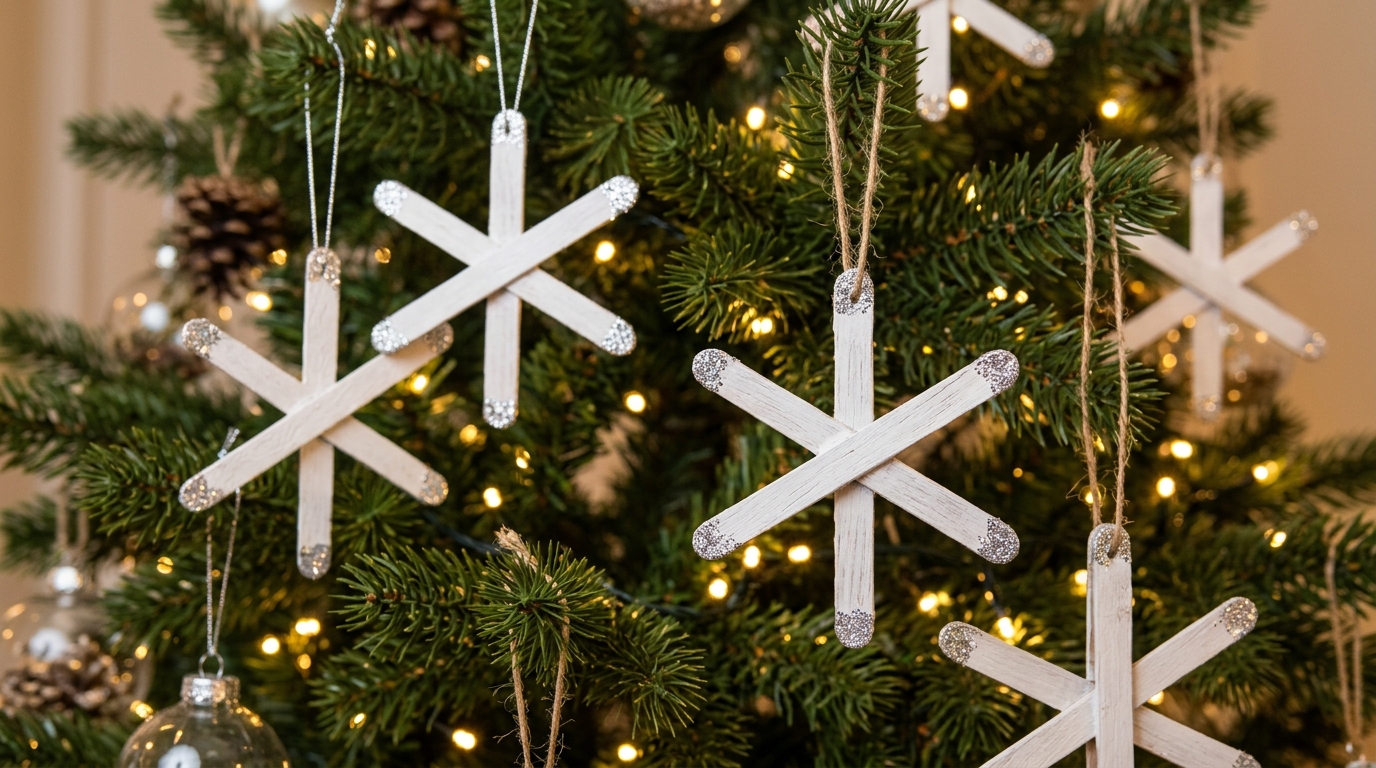
Christmas is only a couple of months away, and these snowflakes are the easiest holiday ornaments you will ever make. Glue three sticks in a star shape to make six points, paint them white and add a bit of glitter on the tips. Make a dozen in one afternoon and your tree is covered. They look beautiful in a window too. Of all the popsicle stick crafts on this list, this one makes the most kids smile at once. How many will your tree hold?
You will need: Craft sticks, white paint, glitter or silver paint, white glue and ribbon for hanging.
How to make it: 1. Glue three sticks crossed in the middle so they make six evenly spaced points. 2. Paint them white and let them dry. 3. Add glue and glitter on the tips. 4. Tie a ribbon loop on one point.
A Mini Picket Fence for a Fairy Garden
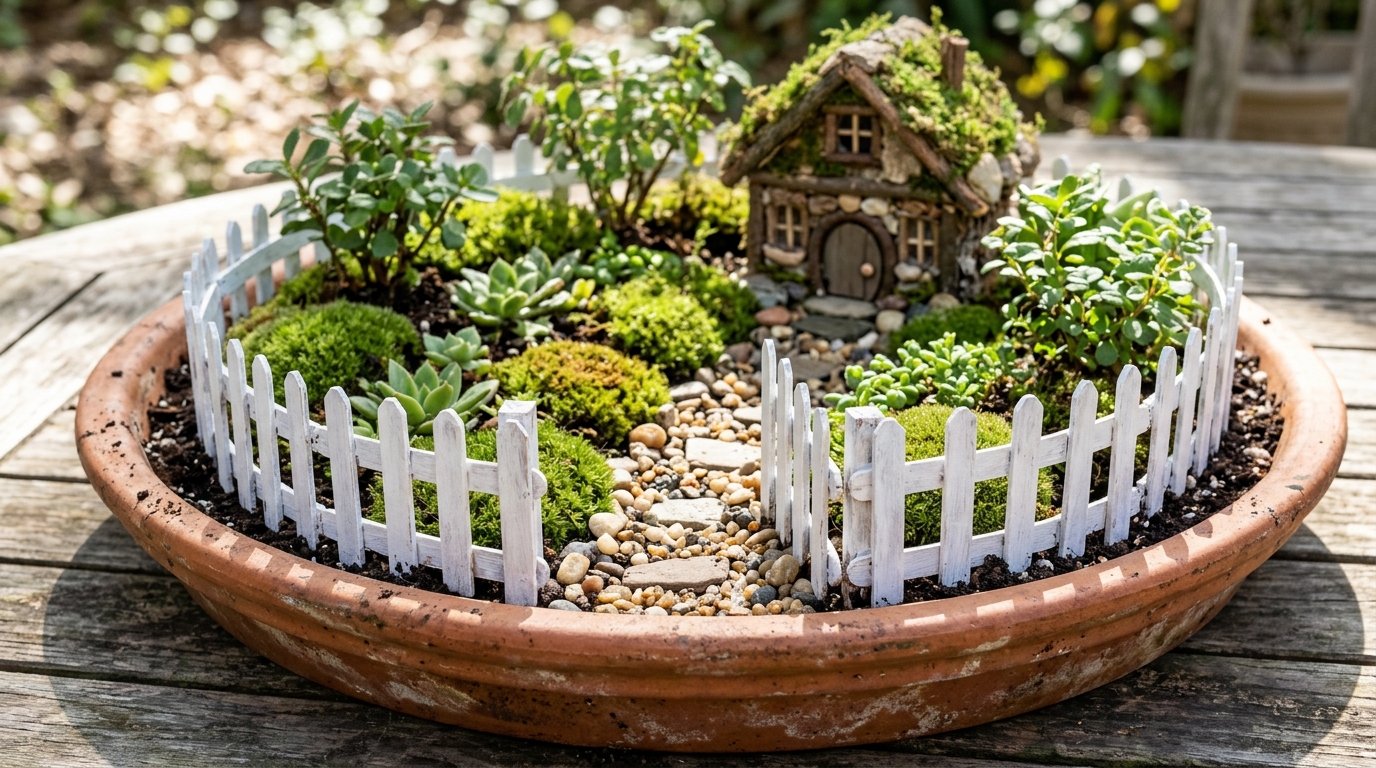
Fairy gardens are so much more charming with a tiny white fence. Cut craft sticks into short pieces, trim one end into a point and glue them onto two cross rails. Paint it white and tuck it around a pot of moss, little stones and a mini house. Kids can spend hours arranging the little world inside. If you have a bigger pot, make a gate that opens. A small dish garden like this lasts for months indoors. What would you put inside the fence?
You will need: Craft sticks, scissors or snips (adult help), white glue, white paint, a shallow pot, moss and small stones.
How to make it: 1. An adult cuts sticks into short pieces with one pointed end. 2. Glue them evenly onto two long sticks as rails. 3. Paint the fence white. 4. Bend it gently around the edge of the fairy garden.
Woven Craft Stick Coasters
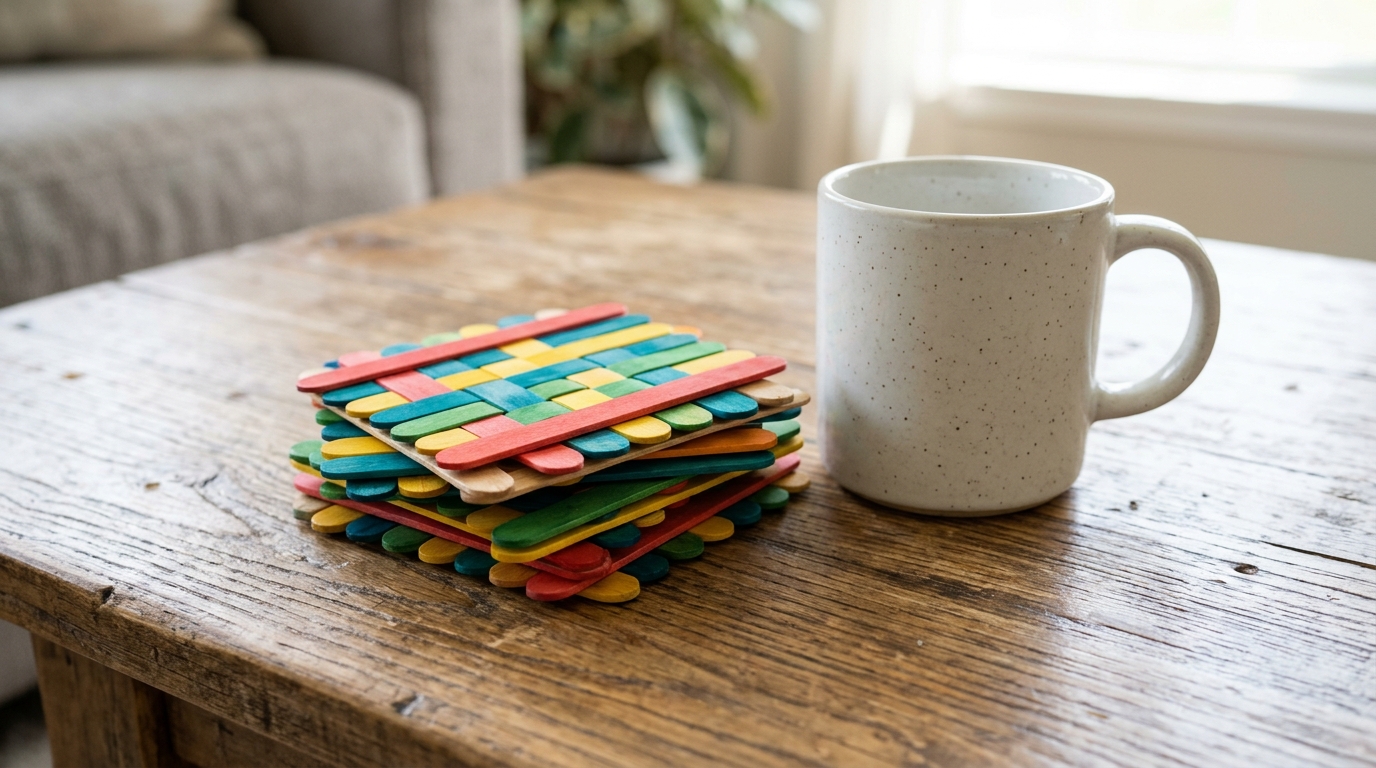
Colored craft sticks glued in a crisscross pattern make sturdy, cheerful coasters. Lay a row of sticks one way, then glue a second row across the top, and repeat for a third layer. The pattern looks woven even though it is simple stacking. Seal them with a clear coat so they can handle a damp mug. Make a set of four in matching colors as a hostess gift for Thanksgiving, since popsicle stick crafts that are useful always get used. Which colors would match your living room?
You will need: Colored craft sticks, white glue, scissors (adult help) and clear sealer.
How to make it: 1. Glue five sticks side by side to make a square. 2. Glue five more across them in the other direction. 3. Add a third layer the first way. 4. Trim the ends even and seal the coaster.
A Striped Photo Frame
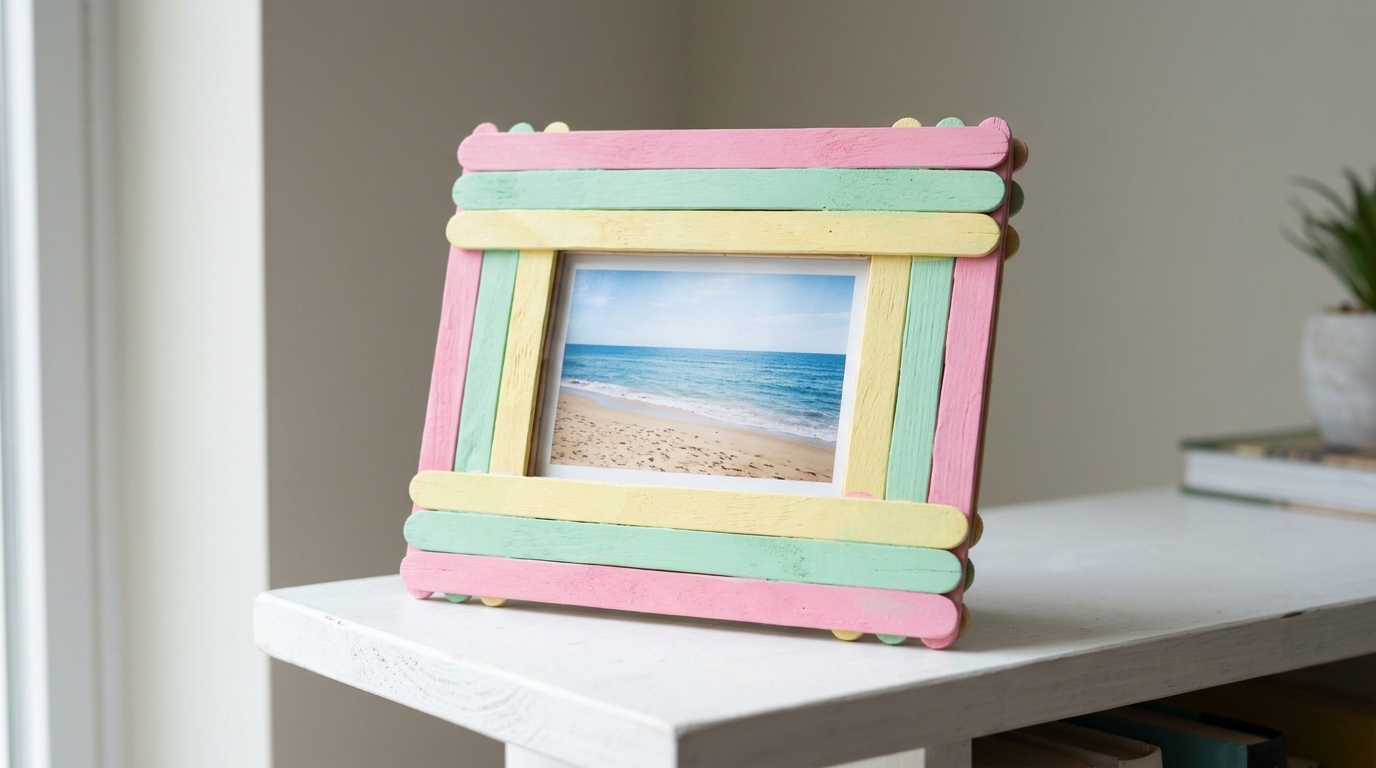
A craft stick frame is a classic for good reason: it is quick, cute and makes any photo feel special. Glue sticks into a square, layer more on top and paint them in stripes of your favorite colors. Pastels look soft and sweet, while bold colors feel fun for a kids room. Glue a stick on the back as a stand. It makes a great gift for grandparents with a school photo inside, and it is one of the first popsicle stick crafts many of us made in school. Whose photo will go in your frame?
You will need: About 12 craft sticks, white glue, acrylic paint in three colors, a photo and tape.
How to make it: 1. Glue four sticks into a square. 2. Glue a second layer on top to make it sturdy. 3. Paint each stick in a different color and let dry. 4. Tape the photo behind the opening.
A Trinket Box With a Fabric Hinge
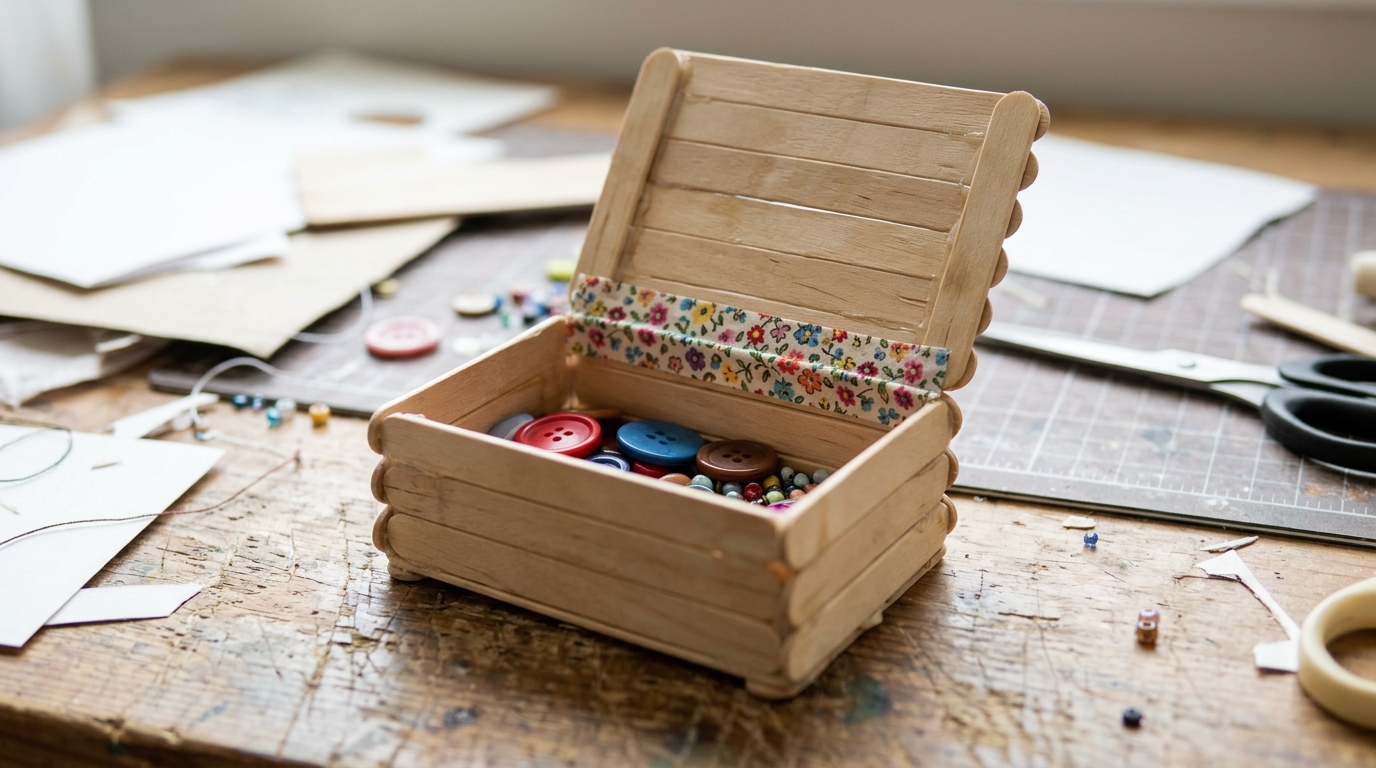
A box with a real opening lid feels like magic to kids. Build a square box from stacked sticks, make a flat lid and join them with a strip of pretty fabric tape as a hinge. It holds rings, buttons, beads or tiny treasures. Paint it, add a bead as a knob and it looks like a little jewelry box. Little hands will open and close it all day. What treasure would you keep inside?
You will need: About 50 craft sticks, white glue, a strip of fabric tape or ribbon, paint and a bead for a knob.
How to make it: 1. Glue sticks side by side for the base and lid. 2. Stack sticks around the base to build the walls. 3. Attach the lid with a strip of fabric tape along one side. 4. Paint the box and glue on a bead knob.
Popsicle Stick Crafts for Shelf Decor: A Birdhouse
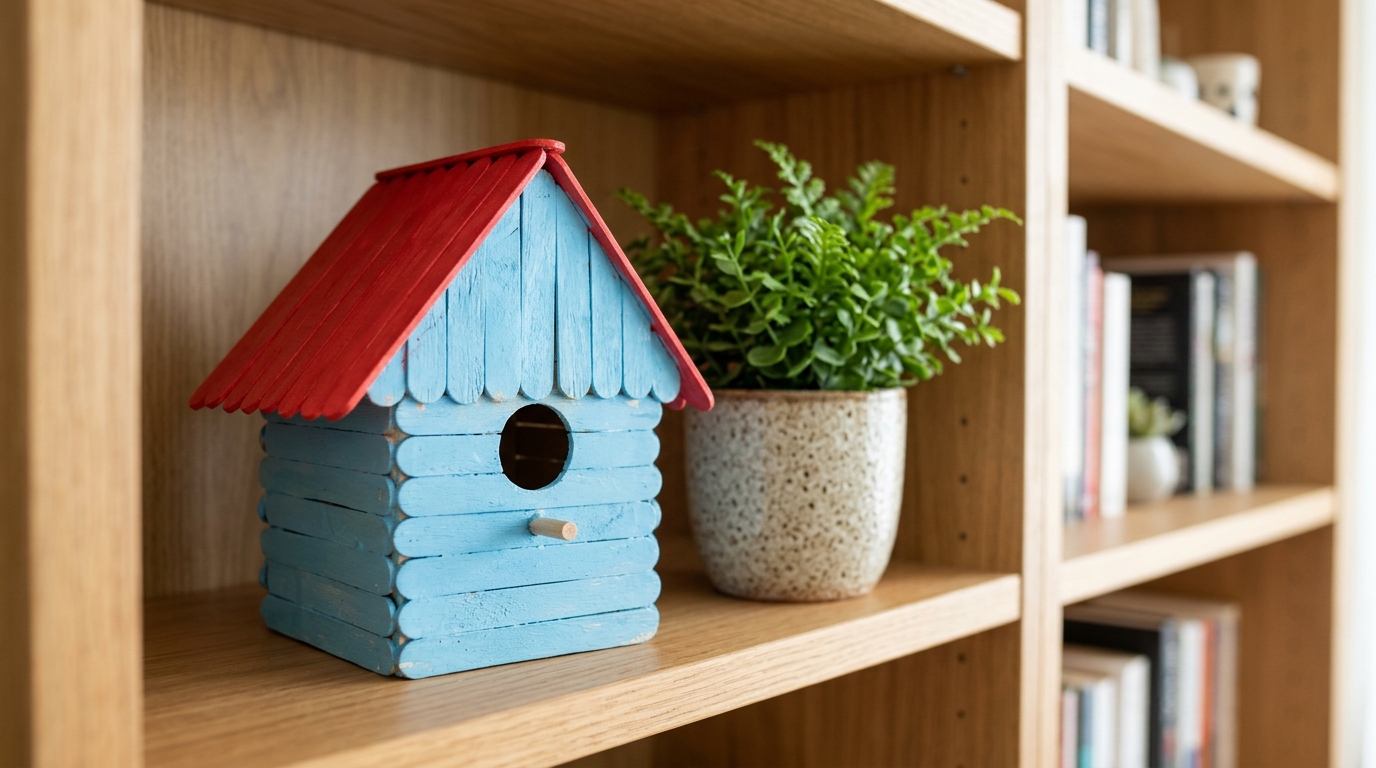
A tiny birdhouse made from sticks is pure charm on a bookshelf. Build the front and back with a pointed top, connect them with side walls and add a slanted roof. Paint it sky blue with a bright red roof and a round door. It is meant for decor indoors, but it might inspire a real birdhouse project next spring. These popsicle stick crafts make great spring and summer shelf decor too, so they never go out of style. What color would your birdhouse be?
You will need: About 60 craft sticks, white glue, paint, a small brush and a round sticker or paper circle for the door.
How to make it: 1. Glue sticks side by side into two house shapes with pointed tops. 2. Join them with short side walls. 3. Add two roof panels. 4. Paint the house and add a round door.
A Stacked Stick Christmas Tree Ornament
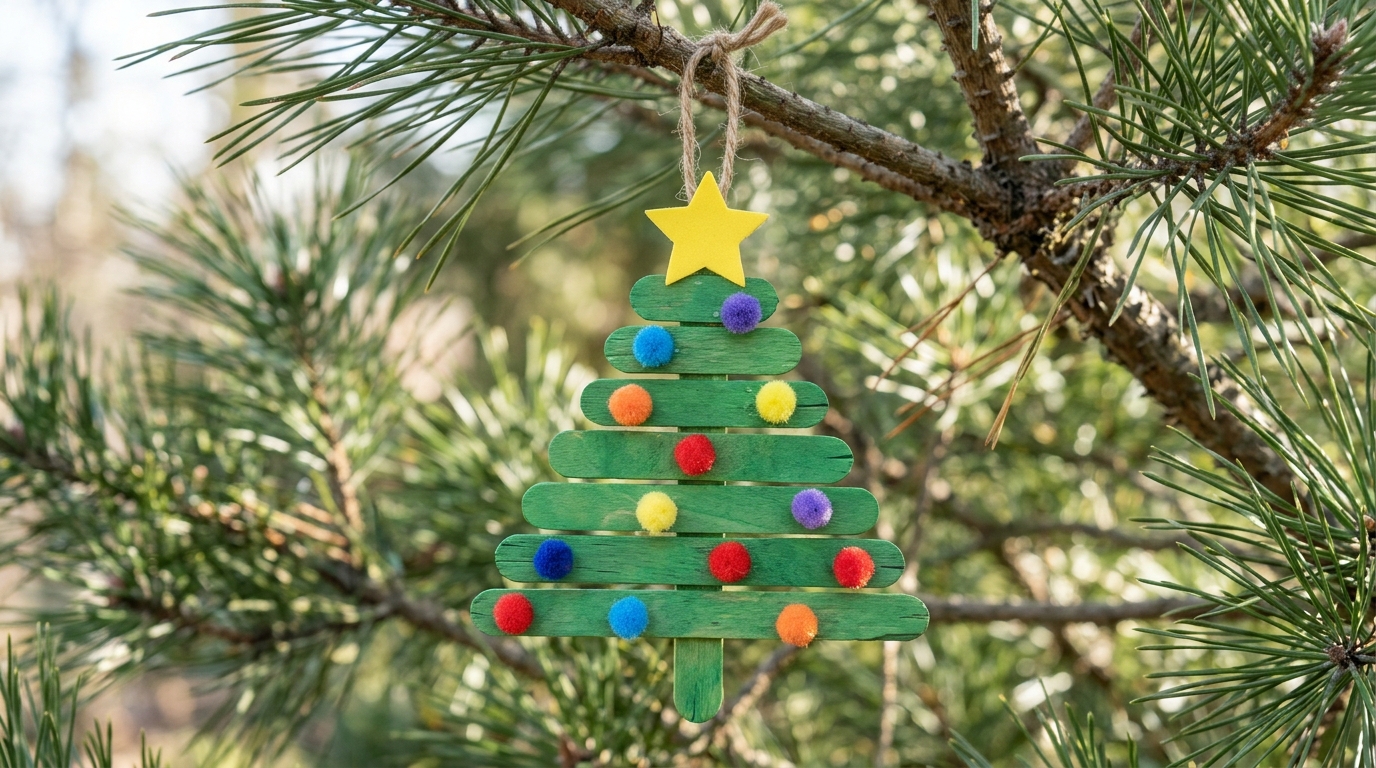
Cut sticks into different lengths, paint them green and glue them onto a center stick from long at the bottom to short at the top. Add tiny pom poms as ornaments and a little star on top. It is one of the most loved kids ornaments every December, and it looks adorable on a real tree. Make one for each child and write the year on the back. Years from now, these will be the ornaments everyone fights over. Isn’t that the best kind of decoration?
You will need: Craft sticks, scissors (adult help), green paint, tiny pom poms, a paper star, white glue and ribbon.
How to make it: 1. An adult cuts sticks into five lengths. 2. Paint them green and let dry. 3. Glue them across a center stick from longest to shortest. 4. Add pom poms, a star and a ribbon loop.
A Mini Sled Ornament
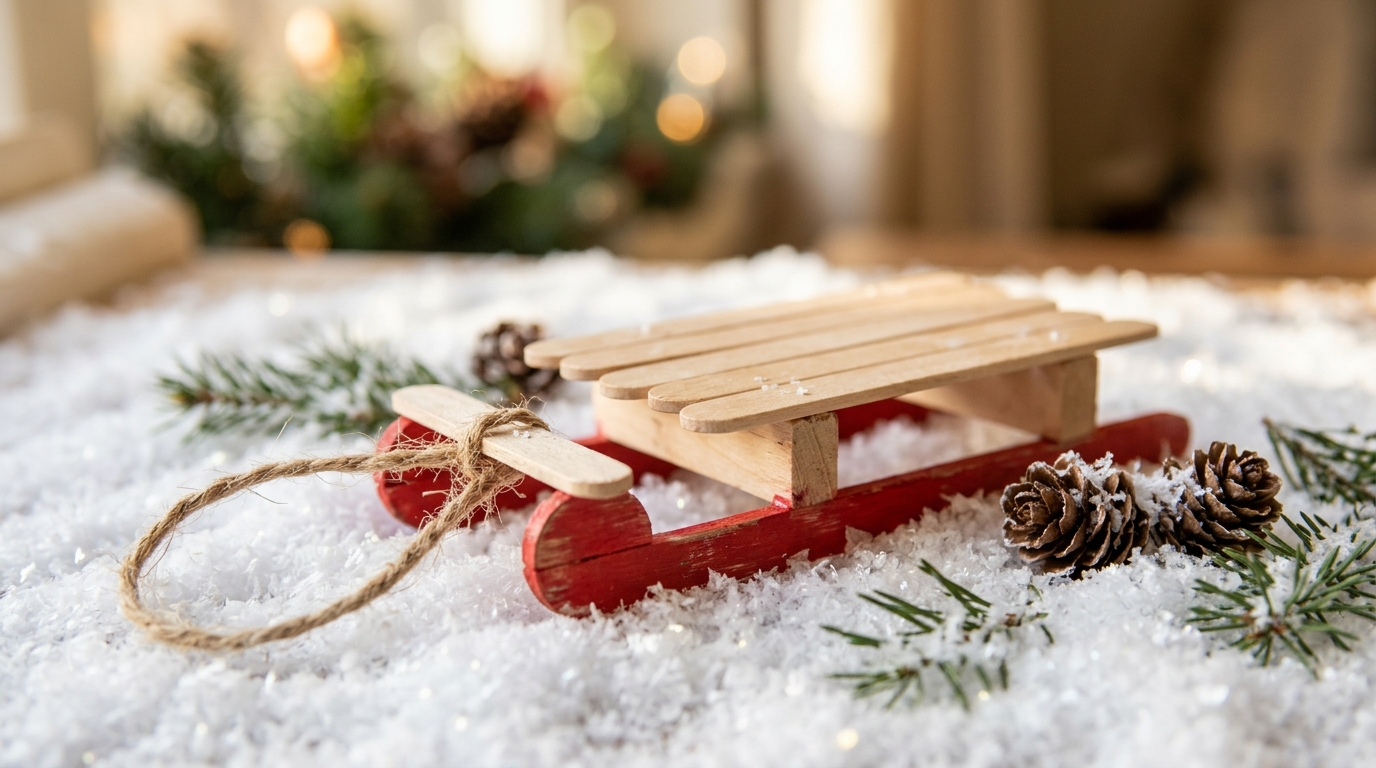
This little sled brings back memories of snowy days and hot cocoa. Glue a few sticks side by side for the seat, add two red painted runners underneath and tie on a twine pull rope. Hang it on the tree, tuck it into a gift or set it on a shelf with fake snow. It also makes a sweet place card for a holiday dinner. Popsicle stick crafts like this take ten minutes and look like store bought decor. Did you have a sled when you were little?
You will need: Craft sticks, white glue, red paint, twine and scissors (adult help).
How to make it: 1. Glue five sticks side by side for the seat. 2. An adult cuts two shorter pieces for runners. 3. Paint the runners red and glue them underneath. 4. Tie twine to the front as a pull rope and loop.
Animal Bookmarks Kids Will Actually Use
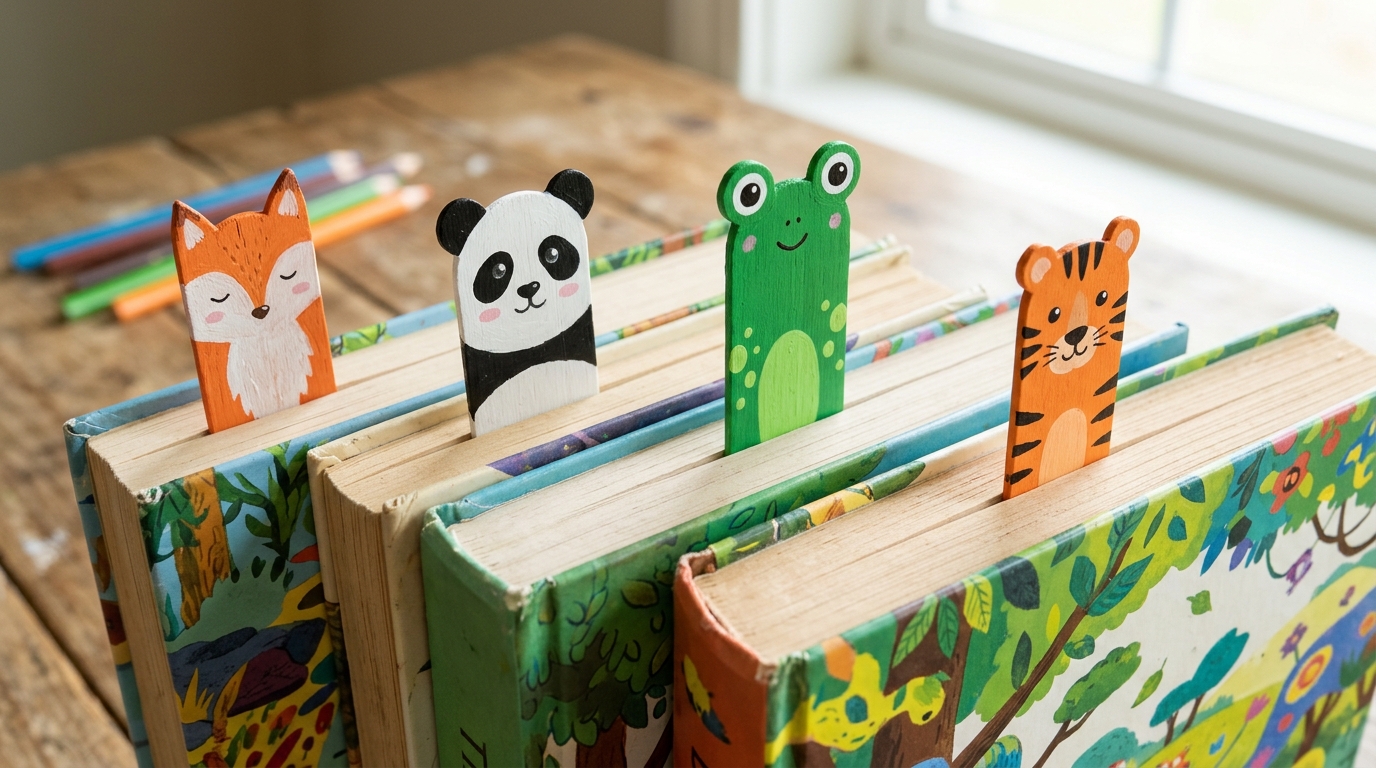
Getting kids to read is easier when the bookmark is a little panda peeking out of the pages. Paint the top of a stick like a fox, frog, tiger or any animal they love, and add paper ears. Jumbo sticks give more space for details. They make great party favors and classroom gifts too. If your family loves easy rainy day projects, try our paper bag crafts next. Which animal would your kids pick first?
You will need: Jumbo craft sticks, acrylic paint, a fine brush or paint pens, card stock and white glue.
How to make it: 1. Paint the top third of each stick in the animal’s main color. 2. Add eyes, a nose and stripes or spots. 3. Cut small ears from card stock and glue them on. 4. Let them dry before using.
A Glowing Lantern With Battery Fairy Lights
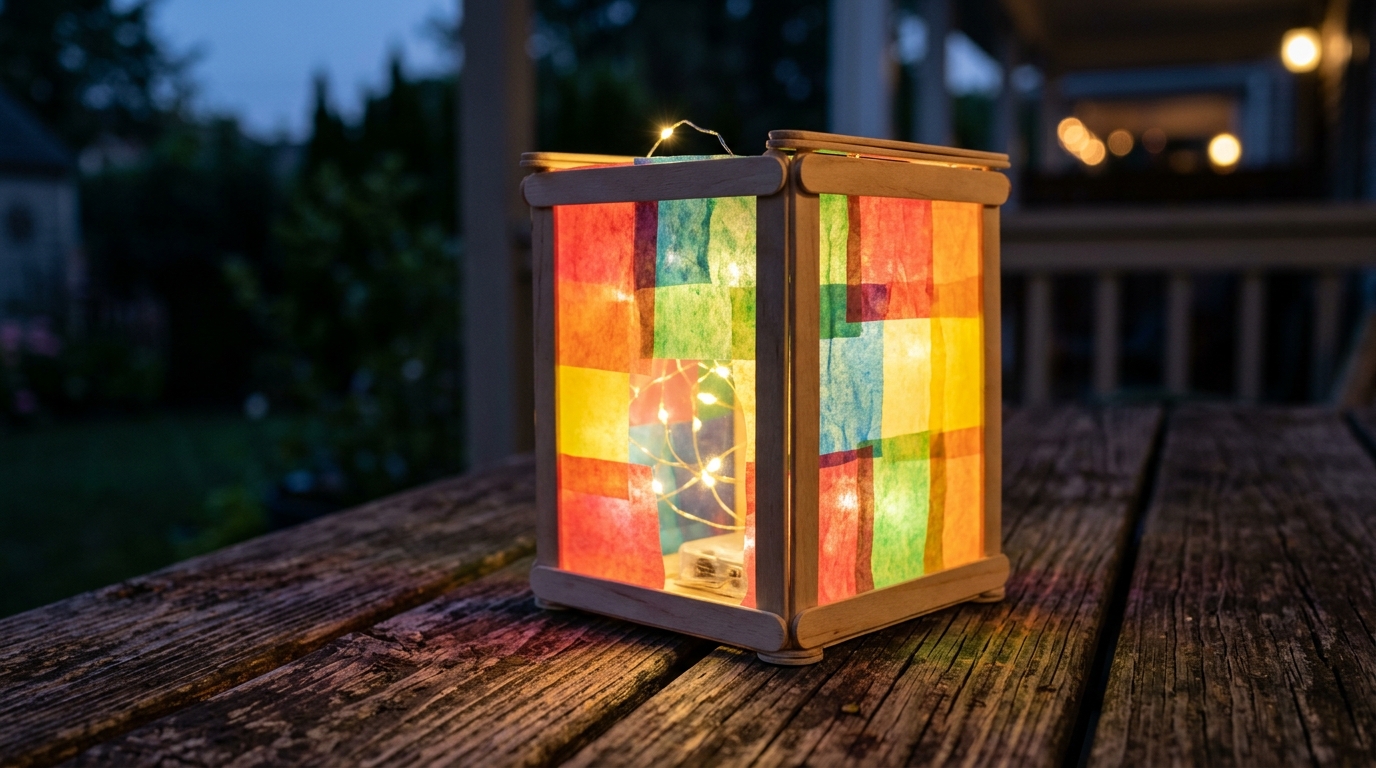
Glue sticks into a square frame, cover each side with colored tissue paper and drop a string of battery fairy lights inside. When the lights come on, the colors glow like stained glass. It looks magical on a nightstand or a holiday table. Never use real candles inside, since the paper and wood can burn, so battery lights only. Kids love switching them on at bedtime. What colors would you pick for your lantern?
You will need: About 40 craft sticks, white glue, colored tissue paper, scissors and a short string of battery fairy lights.
How to make it: 1. Glue sticks into four square frames. 2. Glue tissue paper over each frame and trim the edges. 3. Join the frames into a box and add a stick base. 4. Place the battery fairy lights inside.
A Craft Stick Bridge for Science Night
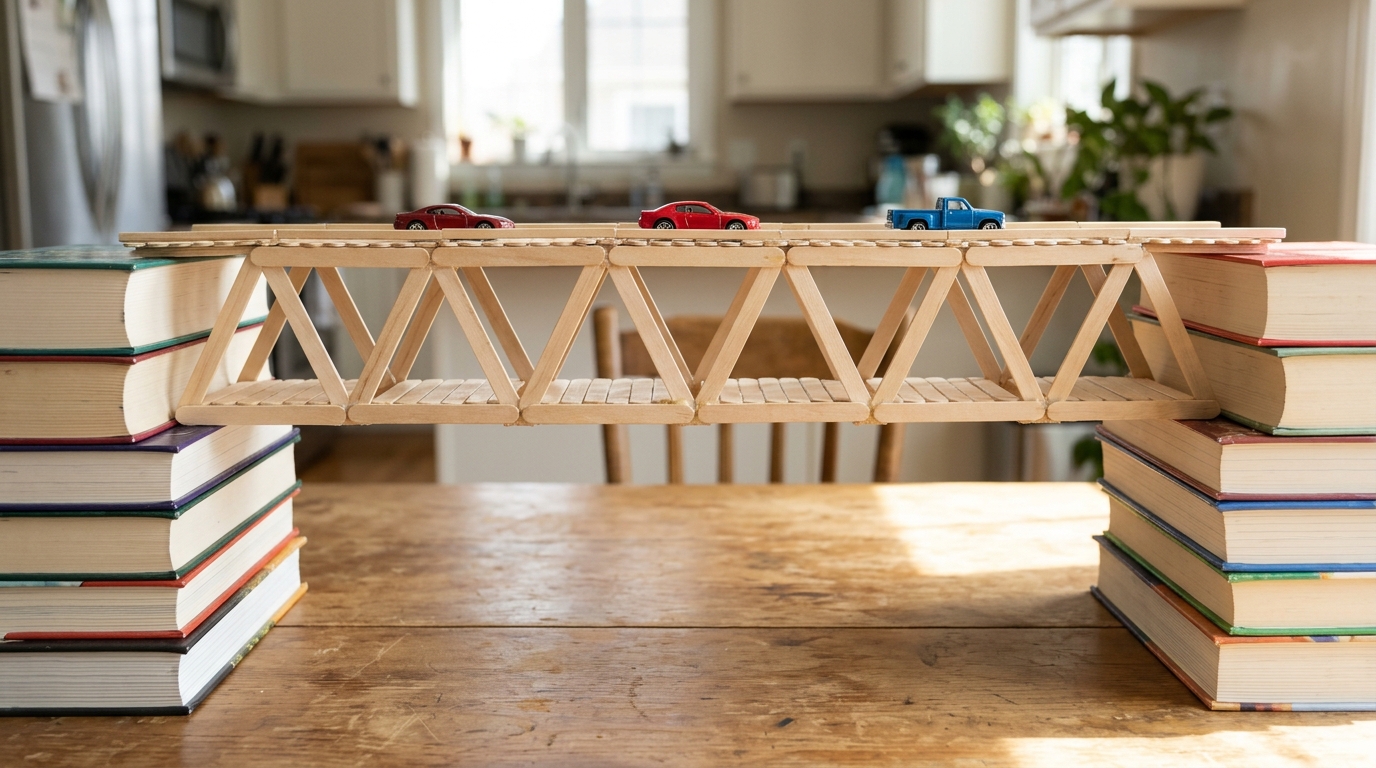
Here is a project that sneaks in a little science. Build a bridge from sticks using triangles, then test how many toy cars or books it can hold. Kids quickly learn why triangles make bridges strong. Make it a family contest and see whose bridge holds the most. It is cheap, a little messy and a great way to spend a cold evening together. Popsicle stick crafts like this have been school science favorites for decades. How much weight do you think yours will hold?
You will need: About 100 craft sticks, wood glue, clothespins and a few heavy books for testing.
How to make it: 1. Glue sticks into two long sides made of triangles. 2. Let them dry overnight. 3. Connect the two sides with sticks across the bottom and top. 4. Place it between two stacks of books and test it gently.
A Cutlery Holder for Picnics
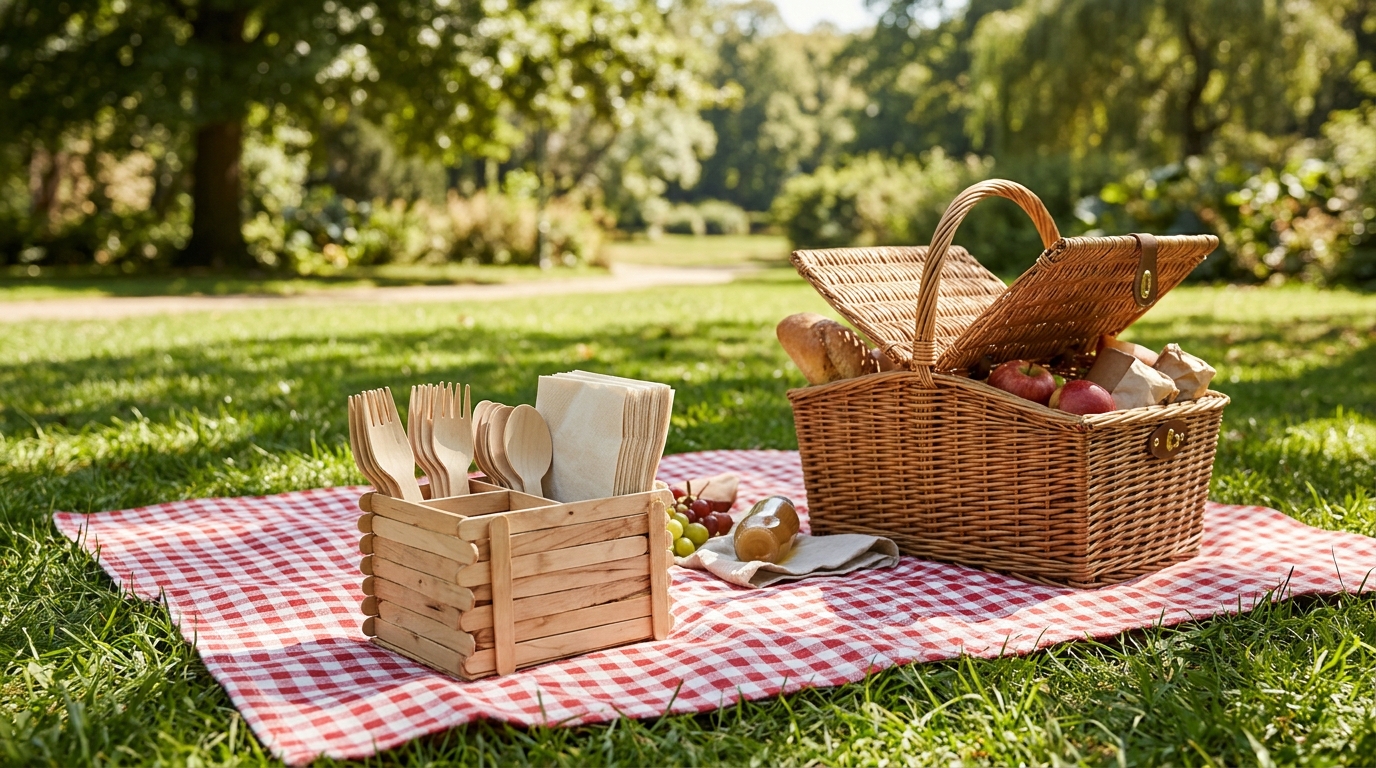
A small box with three sections keeps forks, spoons and napkins tidy for picnics, parties or the holiday buffet. Build it from craft sticks, divide it inside and add a tall handle in the middle. It also works on the kitchen counter for everyday use, which makes it one of the most practical popsicle stick crafts here. Paint it to match your table or leave it natural for a rustic look. Seal it so it can be wiped clean. Would you use it outside or on your holiday table?
You will need: About 70 craft sticks, wood glue, clear sealer and paint if you like.
How to make it: 1. Glue sticks into a flat base. 2. Stack sticks around it for the walls. 3. Add two dividers inside to make three sections. 4. Glue a tall handle across the middle and seal it.