Cookie Cutter Christmas Crafts: 15 Grandma Style Ideas That Turn Thrifted Cutters Into Holiday Magic
Cookie Cutter Christmas Crafts are the kind of sweet, old fashioned projects that make a whole house feel like Grandma’s kitchen in December. Almost every family has a drawer or a dusty tin full of metal cutters in stars, hearts, bells and gingerbread men, and thrift stores sell bags of them for a dollar or two. With a little ribbon, some greenery and a few minutes, those humble shapes become wreaths, ornaments, gift toppers, garlands and sweet neighbor gifts. They shine in the light, they cost almost nothing and they carry that warm, flour on the counter feeling we all miss. Below are 15 easy ideas with simple supply lists and steps, so you can start with what you already have. Grab your cutters and let’s make some holiday magic..
Cookie Cutter Christmas Crafts Start With a Shiny Wreath
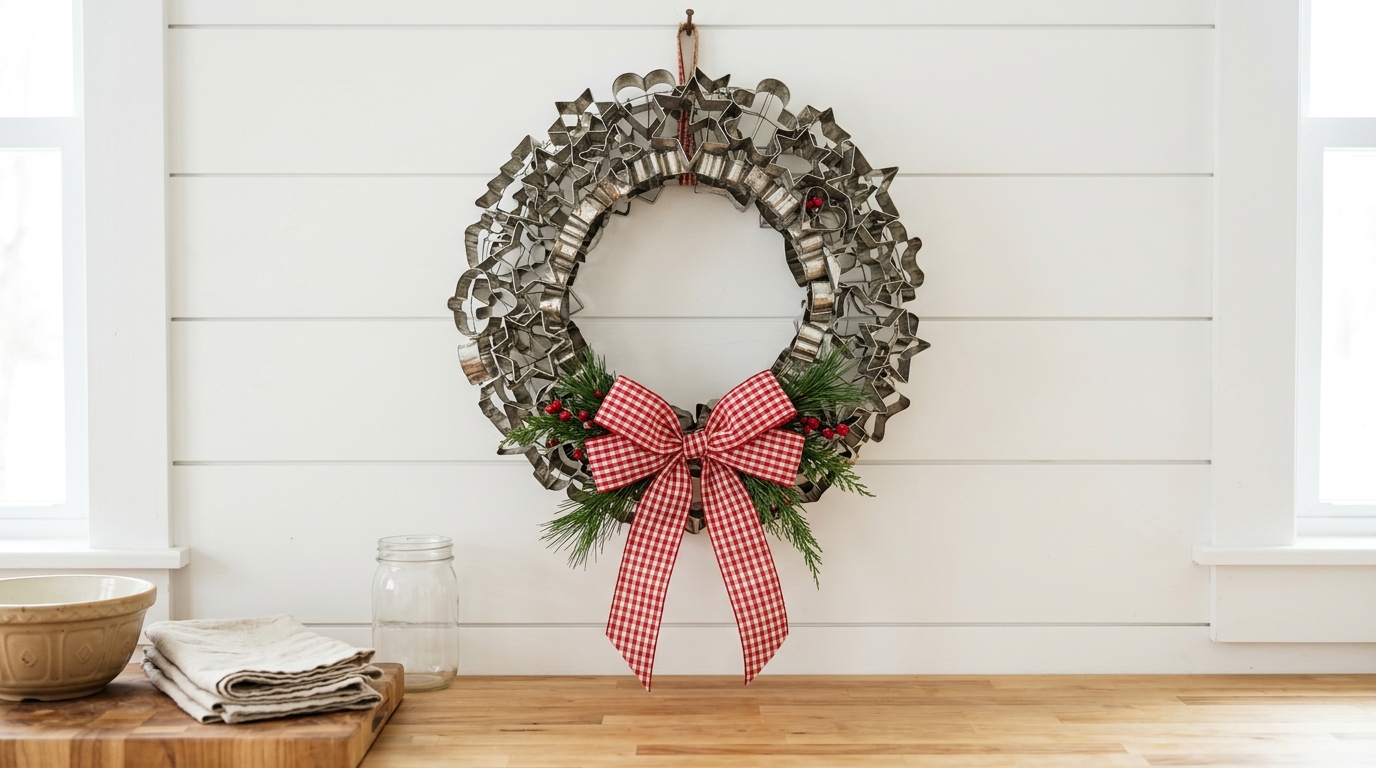
If you only make one of these Cookie Cutter Christmas Crafts, make the wreath. A full ring of shiny metal cutters catches the daylight like old silver and looks right at home on a farmhouse kitchen wall. Start with a cheap foam or wire wreath form, then wire the cutters on in layers, mixing stars, hearts, trees and little gingerbread men. A big red gingham bow and a few pine sprigs at the bottom finish it with pure Grandma charm. Guests always walk right up to it to spot their favorite shape. Which shape would you hang in the center..
You will need: A wire or foam wreath form about 14 inches across, 30 to 40 metal cookie cutters, thin floral wire, wire cutters, a wide gingham ribbon and a few pine sprigs.
How to make it: 1. Wrap floral wire around each cutter and twist it tightly onto the form, starting with the biggest shapes. 2. Fill the gaps with smaller cutters, layering them so no form shows. 3. Tie on a big bow, tuck in pine sprigs and hang it on a sturdy hook.
Heart Cutter Photo Frame Ornament

A heart cutter makes the sweetest little picture frame. Trace the inside of the shape on a favorite photo, trim it and glue it to a piece of card stock cut to the same shape, then press it into the back of the cutter. Hang it with velvet ribbon and every glance at the tree brings back a happy memory. Use old snapshots of grandparents, the first snow at your house or the family dog. They also make lovely gifts for anyone who lives far away. Whose photo would go on your tree first?
You will need: Metal heart or star cookie cutters, printed photos, card stock, scissors, a pencil, clear craft glue and thin velvet ribbon.
How to make it: 1. Trace the inside of the cutter on the photo and the card stock and cut both out. 2. Glue the photo onto the card stock and run a thin line of glue around the inside edge of the cutter. 3. Press the photo in from the back, let it dry and tie on a ribbon loop.
Cookie Cutter Christmas Crafts as Gift Toppers

Skip the store bows this year. A metal cutter tied on top of a plain kraft paper package looks charming and gives the person a little bonus gift they can bake with later. Add a sprig of pine and a cinnamon stick under the twine and the package smells like the holidays too. Match the shape to the person: a star for a teacher, a tree for a neighbor, a gingerbread man for the kids. Of all the Cookie Cutter Christmas Crafts here, this one takes the least time. Who on your list would love a little baking surprise?
You will need: Brown kraft wrapping paper, red and white baker’s twine, metal cookie cutters, fresh pine sprigs and cinnamon sticks.
How to make it: 1. Wrap each gift in kraft paper and tie it with twine, leaving long ends. 2. Slide a pine sprig and a cinnamon stick under the knot. 3. Thread the twine through a cutter and tie a neat bow on top.
Copper and Tin Cutter Garland for the Kitchen Shelf
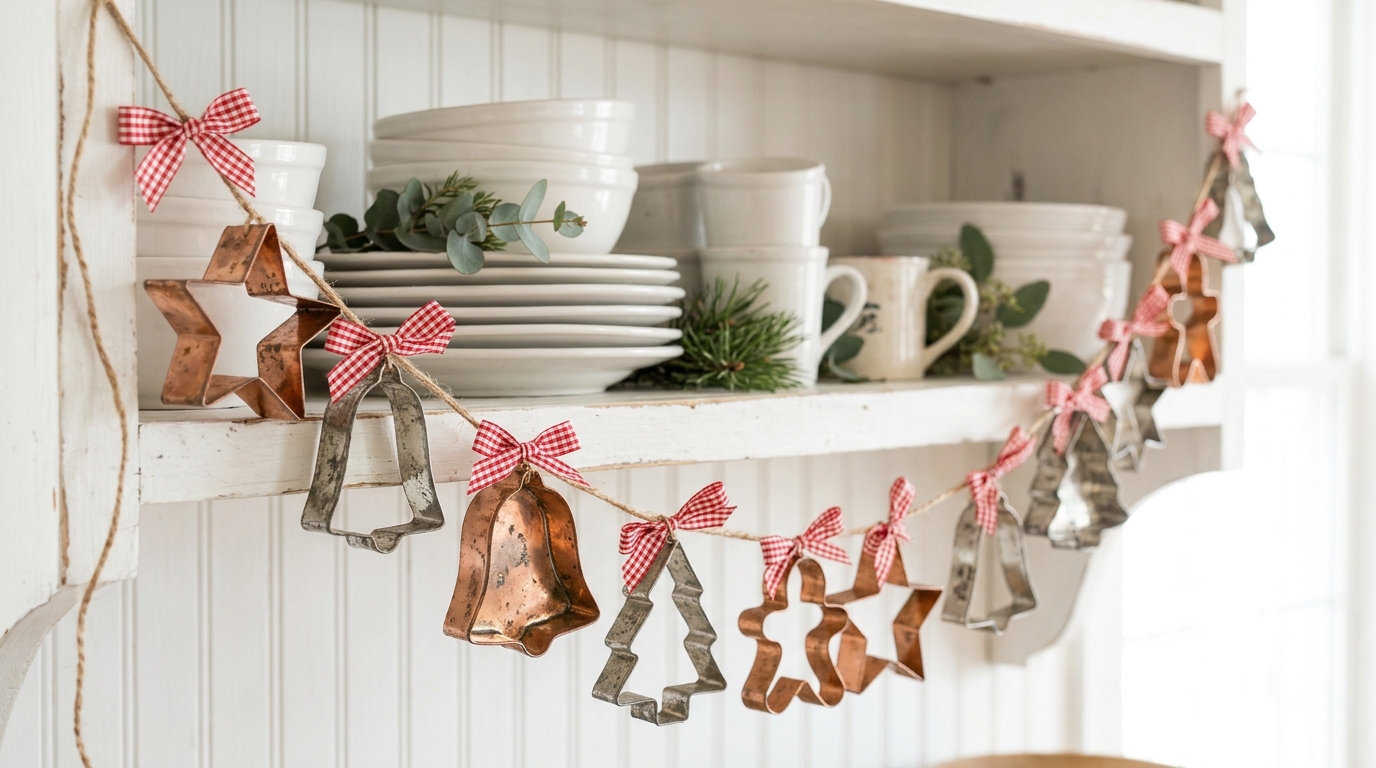
Copper and tin cutters strung on jute twine make a garland that looks straight out of a country store. Thread the twine through each shape, tie a tiny gingham bow between them and let it swag across an open shelf, a hutch or a kitchen window. The metal glints every time the light changes, and the bows add a pop of red. Mix old and new cutters; nobody will notice the difference once they hang together. It is a lovely way to show off a collection all season. Where would your garland hang?
You will need: 15 to 20 metal cutters, a long piece of jute twine, red gingham ribbon cut into short pieces and two small removable hooks.
How to make it: 1. Lay the cutters out in a pleasing order on the table. 2. Thread the twine through each one and tie a small knot to keep it in place. 3. Tie a short ribbon bow between each shape and hang the garland in loose swags.
Mini Succulent Planters in Star and Tree Shapes
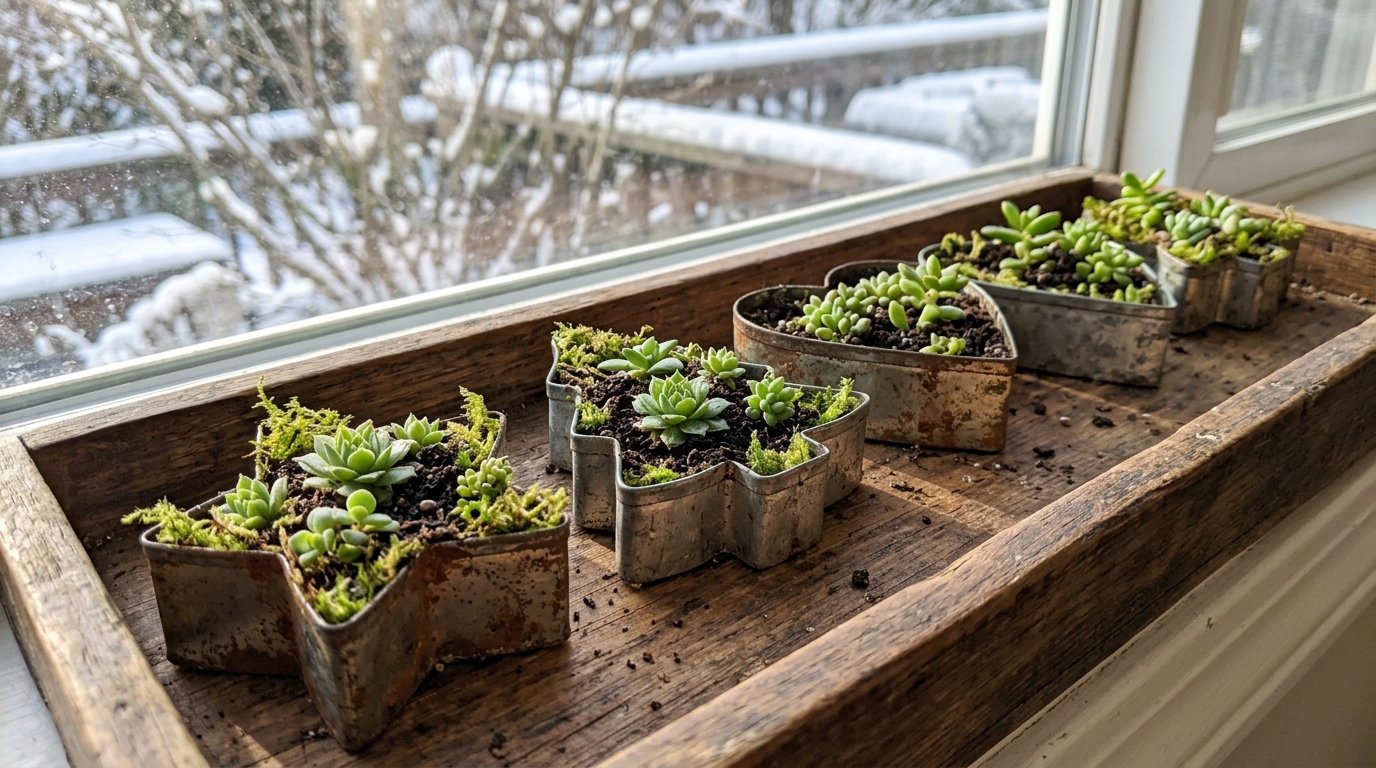
Deep vintage cutters make the cutest tiny planters for a winter windowsill. Set them on a tray, fill each shape with a little potting soil and press in baby succulents or moss. Because the cutters have no bottom, the tray holds everything in place and catches any water. The star and tree shapes look festive all December, and the little garden keeps growing long after the decorations come down. Mist them lightly once a week and they will stay happy. Would you keep these in the kitchen or give them away as gifts?
You will need: Deep metal cutters, a wooden or metal tray, cactus potting soil, small succulent cuttings, a little moss and a spray bottle.
How to make it: 1. Line the tray with a thin layer of soil and set the cutters on top. 2. Fill each cutter with soil and press in the succulents and moss. 3. Mist lightly and set the tray in a bright window.
Cookie Cutter Christmas Crafts for Stamped Gift Wrap
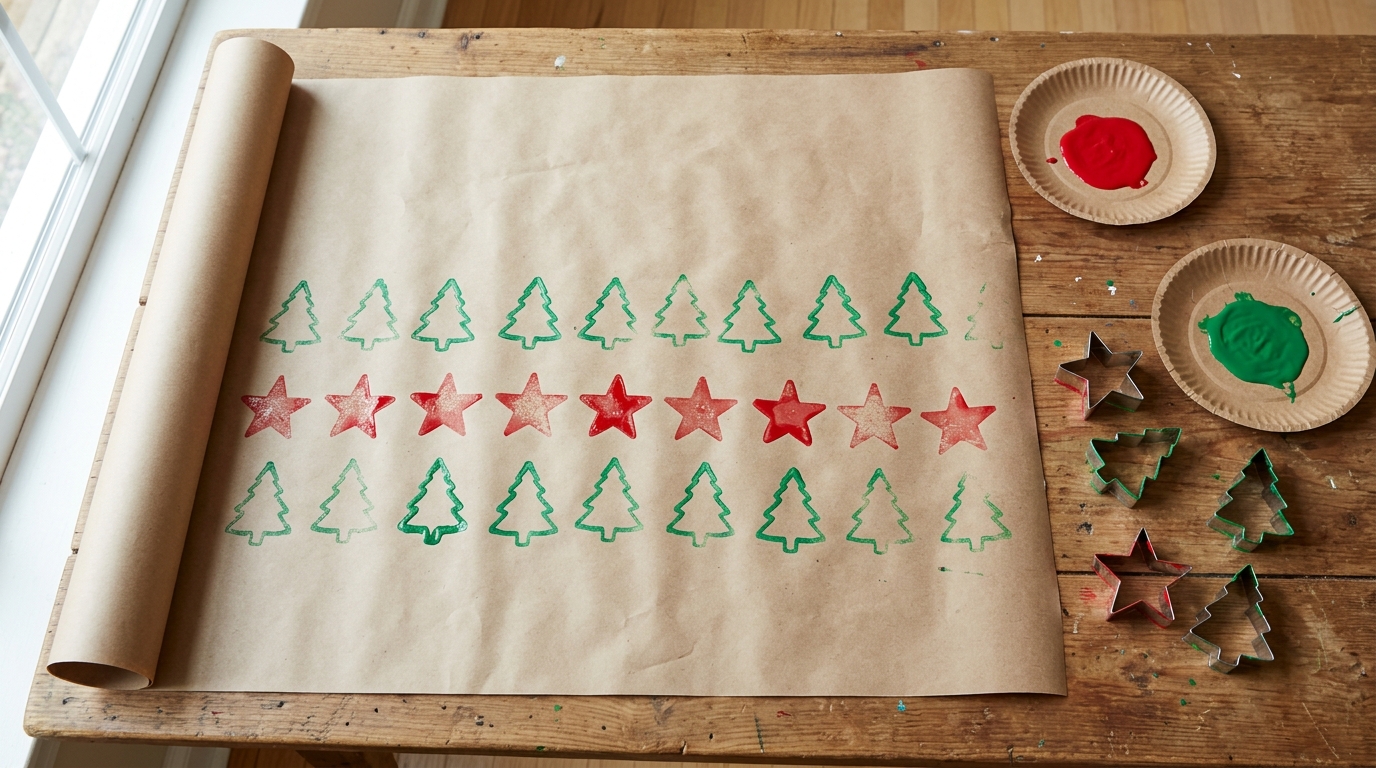
Turn a plain roll of kraft paper into custom gift wrap with nothing but cutters and paint. Pour a little red and green craft paint onto paper plates, dip the edge of a cutter and press it straight down onto the paper. Rows of outlined stars and trees look modern and handmade at the same time. It is one of those Cookie Cutter Christmas Crafts that grandkids love to help with, and every sheet turns out a little different. Let it dry flat overnight before wrapping. What colors would you choose for your paper?
You will need: A roll of kraft paper, washable red and green craft paint, paper plates, metal cutters with clean edges and paper towels.
How to make it: 1. Roll out the paper on a covered table and weigh down the corners. 2. Dip the cutter edge in paint, tap off the extra and press it straight down. 3. Repeat in rows and let the paper dry flat before using it.
Window Hangers on Long Red Ribbons
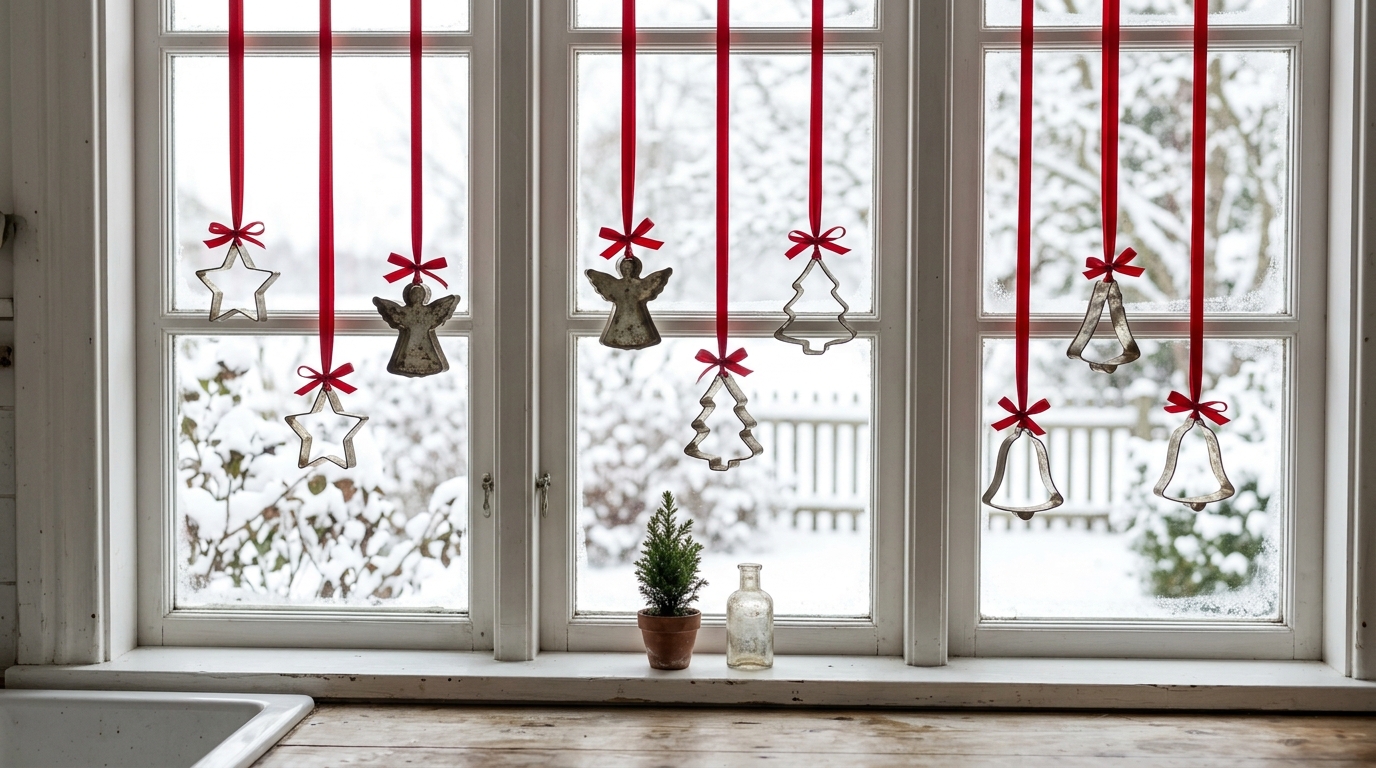
This might be the fastest way to make a kitchen window feel like Christmas. Tie long red satin ribbons to a curtain rod or a tension rod, then knot a cutter to the end of each one at different heights. When the sun comes through, the shapes shine and cast tiny shadows on the counter. Angels, bells and stars look especially pretty against a snowy view. Take them down in January and they go right back in the baking drawer. Which window in your home gets the best morning light?
You will need: Metal cutters with a hole or open shape, red satin ribbon, scissors and a tension rod or the curtain rod you already have.
How to make it: 1. Cut ribbons in several lengths from 10 to 20 inches. 2. Knot one end around each cutter and tie the other end to the rod. 3. Space them evenly and trim the ribbon ends at an angle.
A Big Glass Jar Full of Vintage Cutters
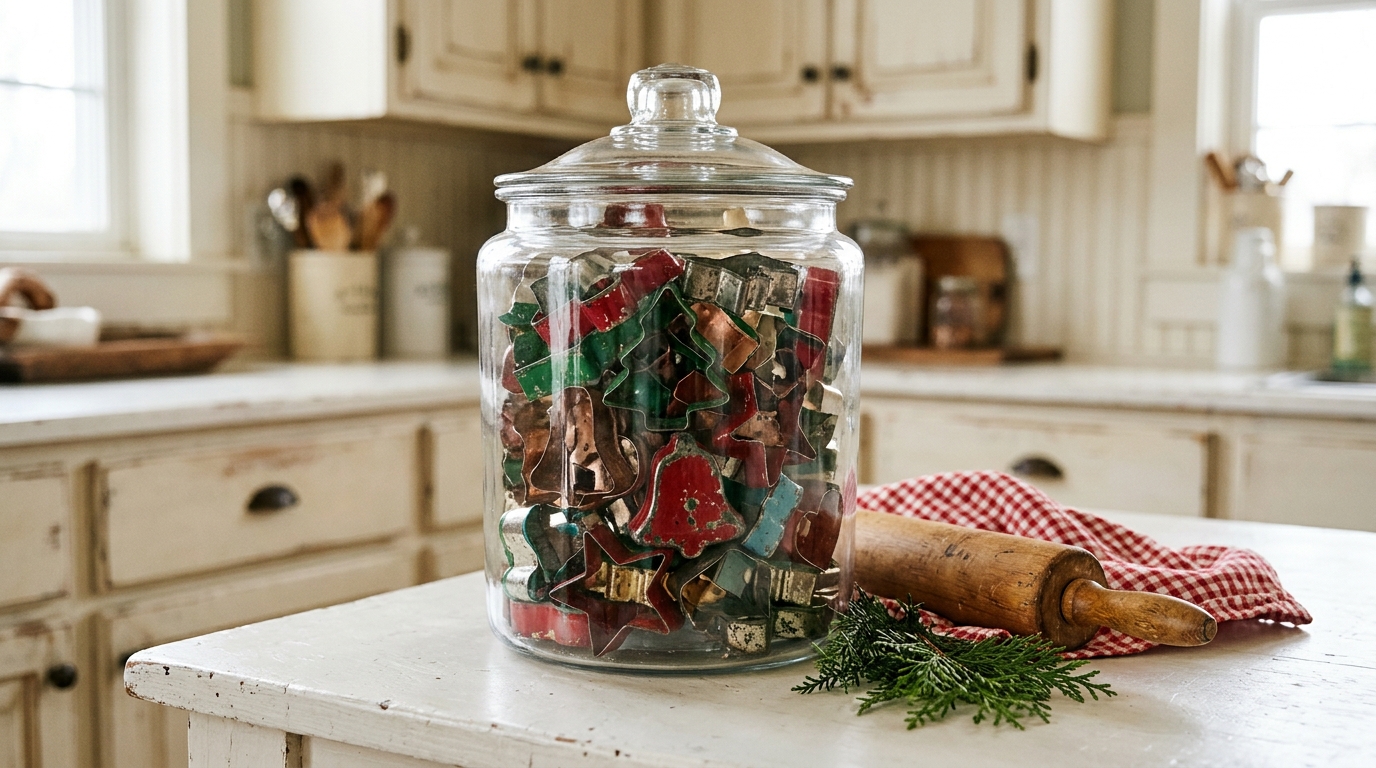
Some collections are too pretty to hide in a drawer. Pile a few dozen vintage cutters into a big glass apothecary jar and set it on the counter, and you have instant farmhouse decor that costs nothing. Painted handles in red and green add color, while plain tin and copper add sparkle. Tie a ribbon around the lid and set a wooden rolling pin and a gingham towel beside it for a full vignette. When it is time to bake, the cutters are right there. How many cutters are hiding in your kitchen right now?
You will need: A large clear glass jar with a lid, a collection of metal and painted cutters, a ribbon, a wooden rolling pin and a gingham towel.
How to make it: 1. Wash and dry the cutters so they shine. 2. Layer big and small shapes in the jar, turning a few so the colors show. 3. Tie a ribbon around the lid and style the jar with a rolling pin and towel.
Cookie Cutter Christmas Crafts for the Table: Napkin Rings

Small star or tree cutters slip around a rolled cloth napkin and become napkin rings in seconds. Add a sprig of rosemary and a tiny ribbon and each place setting looks thoughtful and festive. Guests can take their cutter home as a little favor. These Cookie Cutter Christmas Crafts also work for a kids table, where each child gets a different shape. Look for small cutters at thrift stores in mismatched sets; they look even sweeter when every place is a little different. Which shape would you give each guest?
You will need: Small metal cutters (2 to 3 inches), cloth napkins, thin ribbon and fresh rosemary sprigs.
How to make it: 1. Fold each napkin in half and roll it tightly. 2. Slide the napkin through the cutter so it sits in the middle. 3. Tuck in a rosemary sprig and tie a tiny ribbon bow on the cutter.
Evergreen Filled Cutter Ornaments

Fill a cutter with tiny evergreen tips, faux red berries and mini pinecones and it becomes a little wreath in a fun shape. They look beautiful hanging on the tree, tied to cabinet knobs or clipped onto a gift. Use a small piece of floral foam or a dab of glue to hold everything in. Fresh cedar and boxwood stay green for weeks, and faux greenery lasts for years. They are easy to make while chatting over coffee with a friend. Would you go fresh or faux?
You will need: Metal cutters, small evergreen tips (fresh or faux), faux red berries, mini pinecones, craft glue or floral foam and velvet ribbon.
How to make it: 1. Glue a thin backing of cardboard or foam inside the cutter. 2. Press greenery in tightly so it fills the whole shape, then add berries and pinecones. 3. Tie a velvet ribbon loop to the top and hang.
Tabletop Cutter Tree on a Dowel Stand
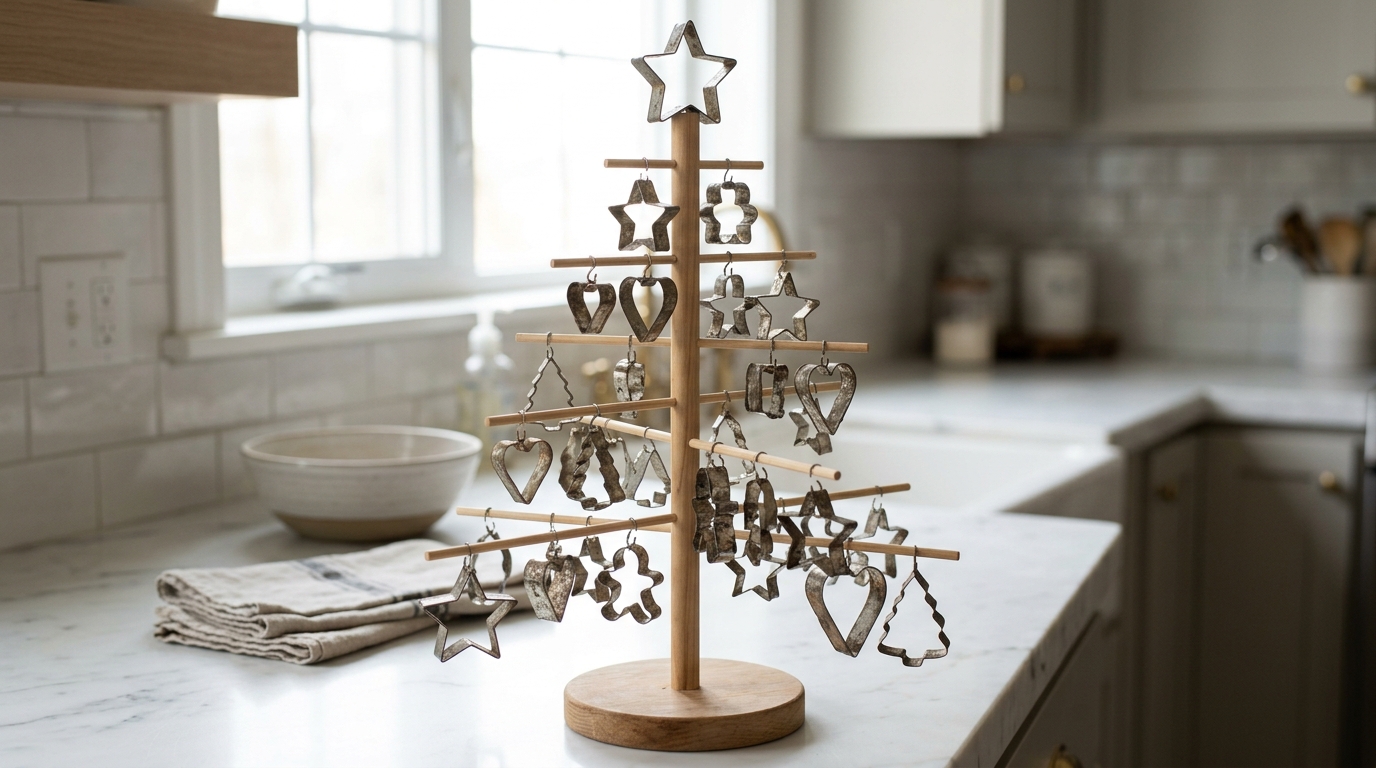
No room for a second tree? Build a little one just for your cutters. A center dowel in a round wooden base, with shorter dowels poking out in tiers, makes a simple tree shape. Hang cutters from small hooks on each branch and put a star cutter on top. It looks charming on a kitchen counter, a coffee bar or a bakery style table at a holiday party. Ask an adult helper to drill the holes if you are using a power drill. Where would your cutter tree stand?
You will need: A round wooden base, one tall and several short wooden dowels, wood glue, a drill (adult help), small cup hooks and metal cutters.
How to make it: 1. Drill a center hole in the base and glue in the tall dowel. 2. Drill small holes up the dowel and glue in shorter dowels, longest at the bottom. 3. Screw tiny hooks under each branch and hang the cutters.
Cookie Cutter Christmas Crafts for the Fridge: Magnets
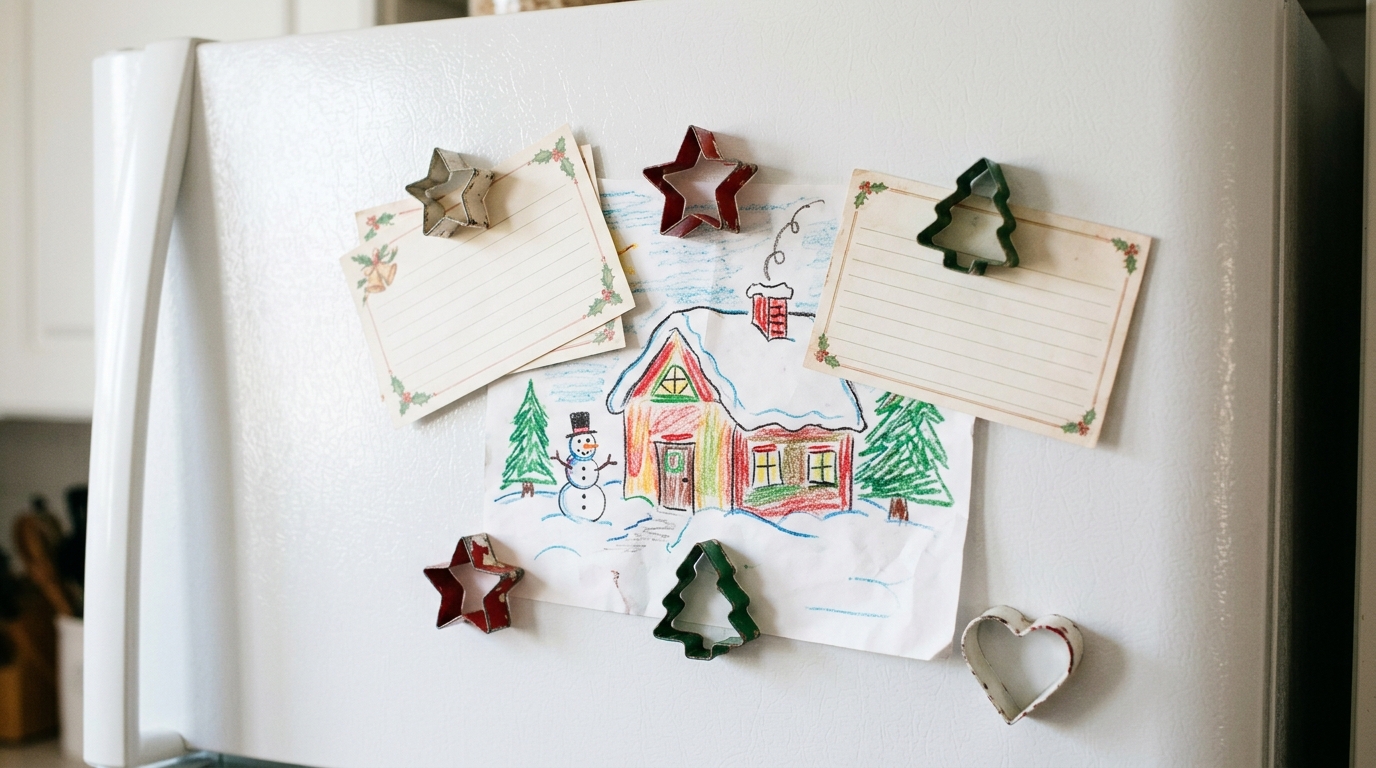
Little cutters make the cheeriest fridge magnets. Paint a few in red, green and white, glue a strong round magnet on the back and use them to hold recipe cards, holiday cards and the kids’ drawings all season. They are so quick that you can make a dozen in one afternoon and tuck sets into stockings. These Cookie Cutter Christmas Crafts are also a nice way to use cutters with bent edges that no longer cut dough well. Which drawing would earn a spot on your fridge?
You will need: Small metal cutters, spray paint or craft paint, strong round magnets, strong craft glue and a paintbrush.
How to make it: 1. Clean the cutters and paint them, letting each coat dry fully. 2. Glue a magnet across the back edge of each shape. 3. Let the glue cure overnight before using them.
Grandma’s Cutters in a Shadow Box
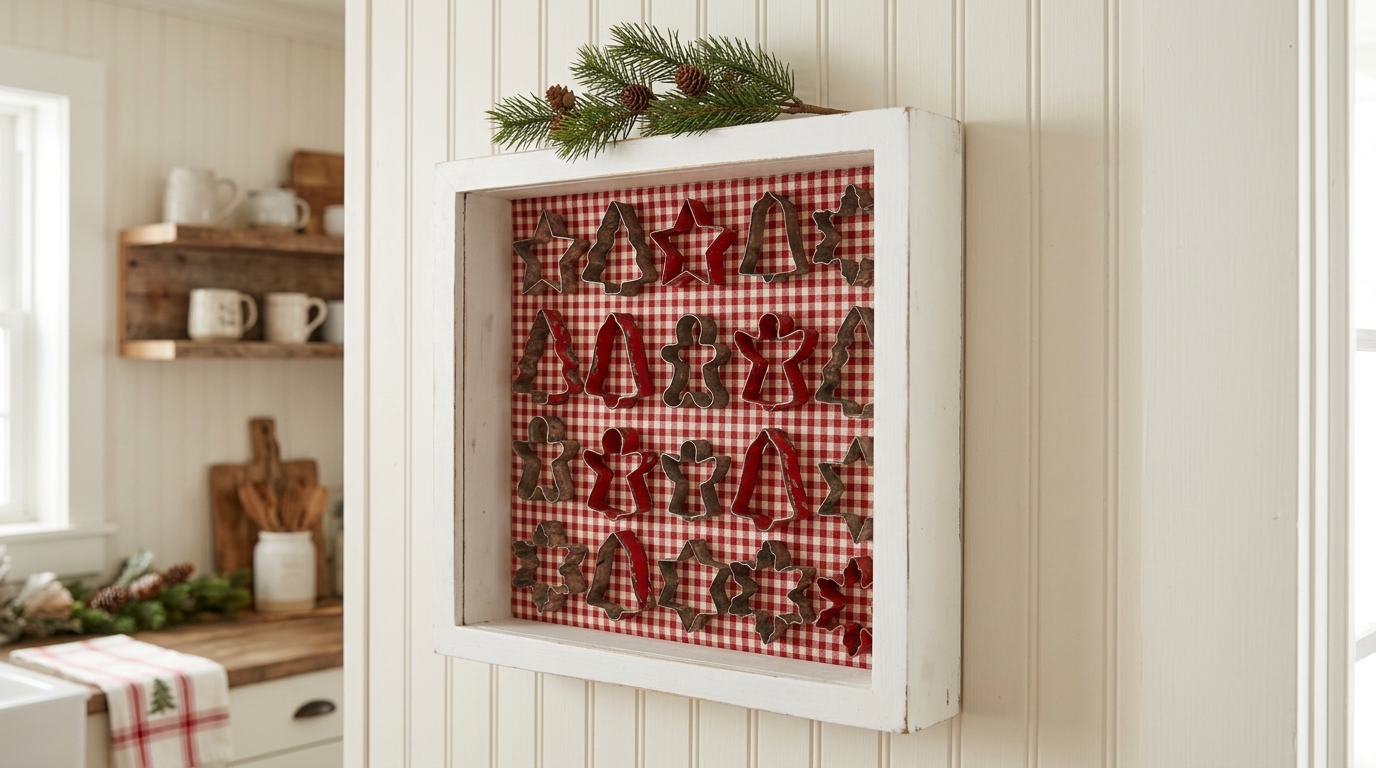
If you inherited a set of cutters from Grandma, a shadow box keeps them safe and puts them on display at the same time. Line the back of a deep frame with gingham fabric, then glue or wire the cutters in a neat grid. Hang it in the kitchen and add a little pine on top for the holidays. It is a lovely conversation piece, and you can see her old favorite shapes every day. Many families learn about the history of these tools, like the long story of the cookie cutter, from a display like this. Whose cutters would you frame?
You will need: A deep shadow box frame, gingham fabric, spray adhesive, clear craft glue or thin wire and a collection of cutters.
How to make it: 1. Cut the fabric to fit the backing board and smooth it on with spray adhesive. 2. Lay the cutters out in a grid and glue or wire each one in place. 3. Close the frame and hang it on a sturdy wall hook.
Fabric Filled Cutter Ornaments
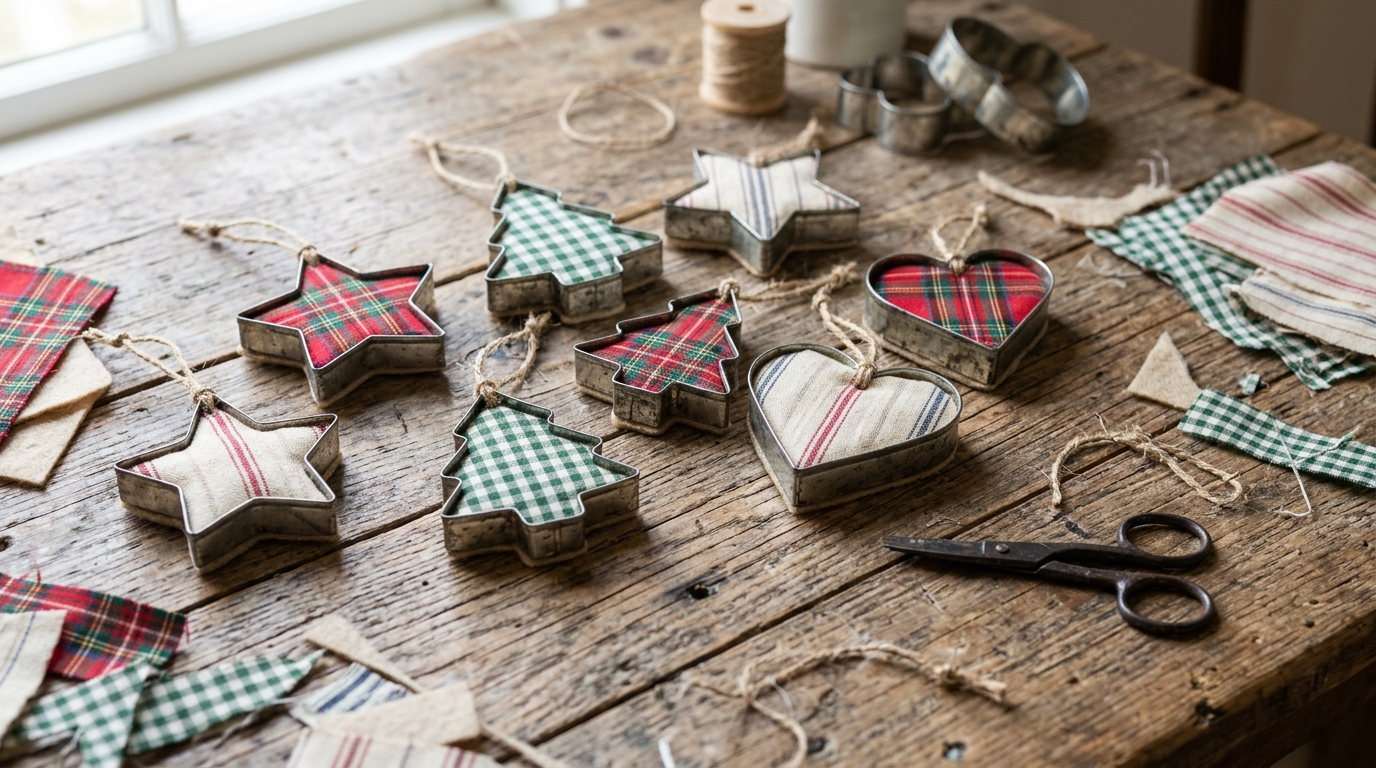
Fabric scraps and cutters were made for each other. Trace the cutter on card stock, wrap the card in plaid, check or ticking fabric, then press it inside the shape with a little glue. Back it with felt, add a jute loop and you have a cozy country ornament that looks like it came from a craft fair. They are a wonderful way to use up shirt scraps or a piece of a favorite old tablecloth. Make a set for the tree and a few to give away. Which fabric scraps are waiting in your sewing basket?
You will need: Metal cutters, plaid or check fabric scraps, card stock, felt, craft glue, scissors, a pencil and jute twine.
How to make it: 1. Trace the inside of the cutter on card stock and cut it out. 2. Wrap the card in fabric, glue the edges on the back and press it into the cutter. 3. Glue felt on the back and add a jute loop for hanging.
Cookie Cutter Christmas Crafts for Neighbors: A Cutter and Cookie Mix Jar

End the season with a gift that neighbors actually use. Layer dry cookie mix in a glass jar, then tie a gingerbread man or star cutter around the lid with red baker’s twine and a tag with the baking steps. It looks beautiful on a doorstep and makes the next family baking day easy. Of all these Cookie Cutter Christmas Crafts, this one spreads the most cheer. For more ideas with old kitchen pieces, see our Christmas cookie tin crafts. Which neighbor will get the first jar?
You will need: A 1 quart glass jar with a lid, flour, sugar, baking soda, chocolate chips and colorful candy pieces, a metal cutter, baker’s twine and a kraft tag.
How to make it: 1. Layer the flour mixture, sugars, chips and candy in the jar, pressing each layer down. 2. Close the lid and tie a cutter on with twine. 3. Write the baking steps on the tag and tie it next to the cutter.