Queen Charlotte Christmas Tree: 15 Regency Decor Ideas From the Queen Who Brought the Tree to Britain
A Queen Charlotte Christmas tree is the prettiest way to bring a little royal history into your home this year. Charlotte was the wife of King George III and Queen of Great Britain from 1761 to 1818. According to her Wikipedia biography, she introduced the Christmas tree to Britain, decorating one for a Christmas party for the children of Windsor in 1800. That was decades before the Victorian trees most of us picture today. She also loved plants and helped expand Kew Gardens, so her style leans soft, natural and elegant. Think pale blue ribbons, pearls, gilded leaves and dried fruit instead of loud tinsel. Every idea in this list of Queen Charlotte Christmas tree decor is handmade, budget friendly and easy enough for a cozy weekend. Pour a cup of tea and pick the ones you love..
The Queen Charlotte Christmas Tree in a Gold Footed Urn
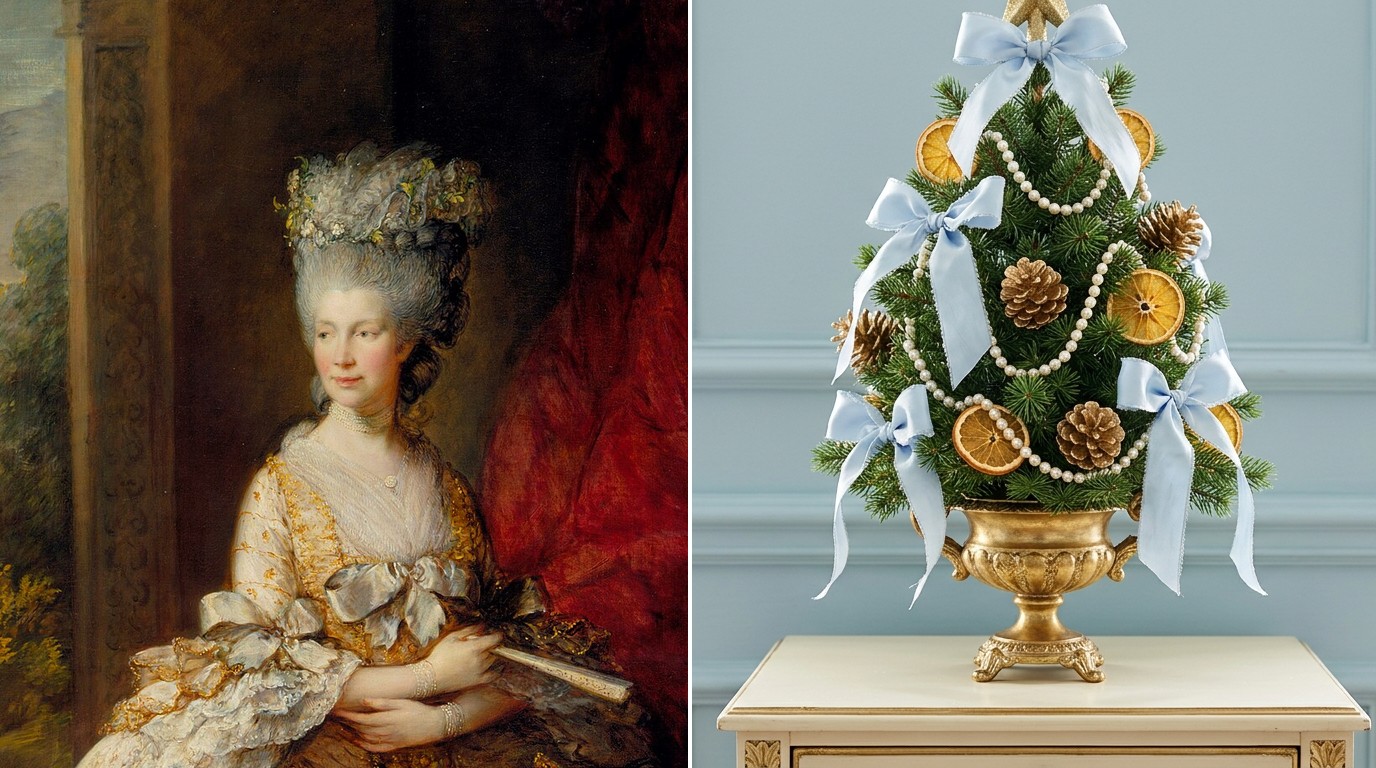
Start with the star of the show: a small tabletop tree raised up in a footed urn. A plain plastic urn from the craft store turns regal with two coats of gold paint, and suddenly a little tree looks like it belongs in a palace drawing room. Dress it with pale blue bows, pearl strands, dried orange slices and gold pine cones, all ideas you will find further down this list. It fits on a side table, a console or a kitchen hutch. Where would you set yours..
You will need: A tabletop artificial tree about 2 to 3 feet tall, a plastic or resin footed urn, gold spray paint or acrylic paint, floral foam or small rocks for weight, moss to cover the top.
How to make it: 1. Paint the urn gold in light coats outdoors and let it dry fully. 2. Fill the urn with foam or rocks and press the tree trunk in firmly. 3. Cover the top with moss and decorate the tree from the top down.
A Simple Evergreen Branch Tree in a Tub
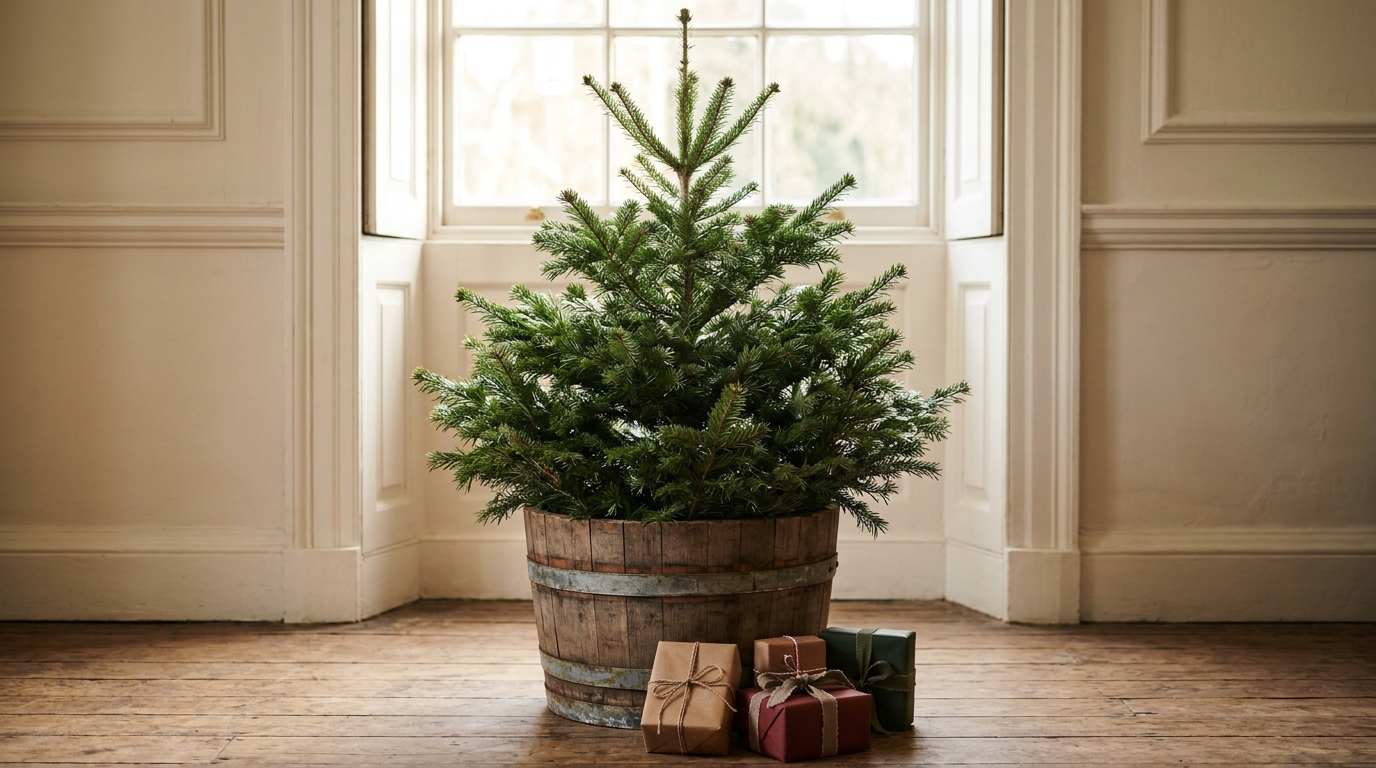
A Christmas tree does not have to come from a store. You can make a humble, old fashioned one with fresh evergreen branches from the garden or a tree lot. Bundle them upright in a wooden tub, wedge them firmly and you have a fragrant tree for almost nothing. A few small wrapped presents at the base finish the look. Would your family enjoy a cutting walk to gather branches?
You will need: Fresh evergreen branches, a wooden tub or bucket, a brick or heavy rocks, floral wire, damp sand, a plastic liner.
How to make it: 1. Line the tub with plastic and add a layer of damp sand. 2. Wire the tallest branch to a brick and stand it in the center. 3. Push shorter branches around it, fill with more sand and water lightly every few days.
Queen Charlotte Christmas Tree Orange Slice Garland
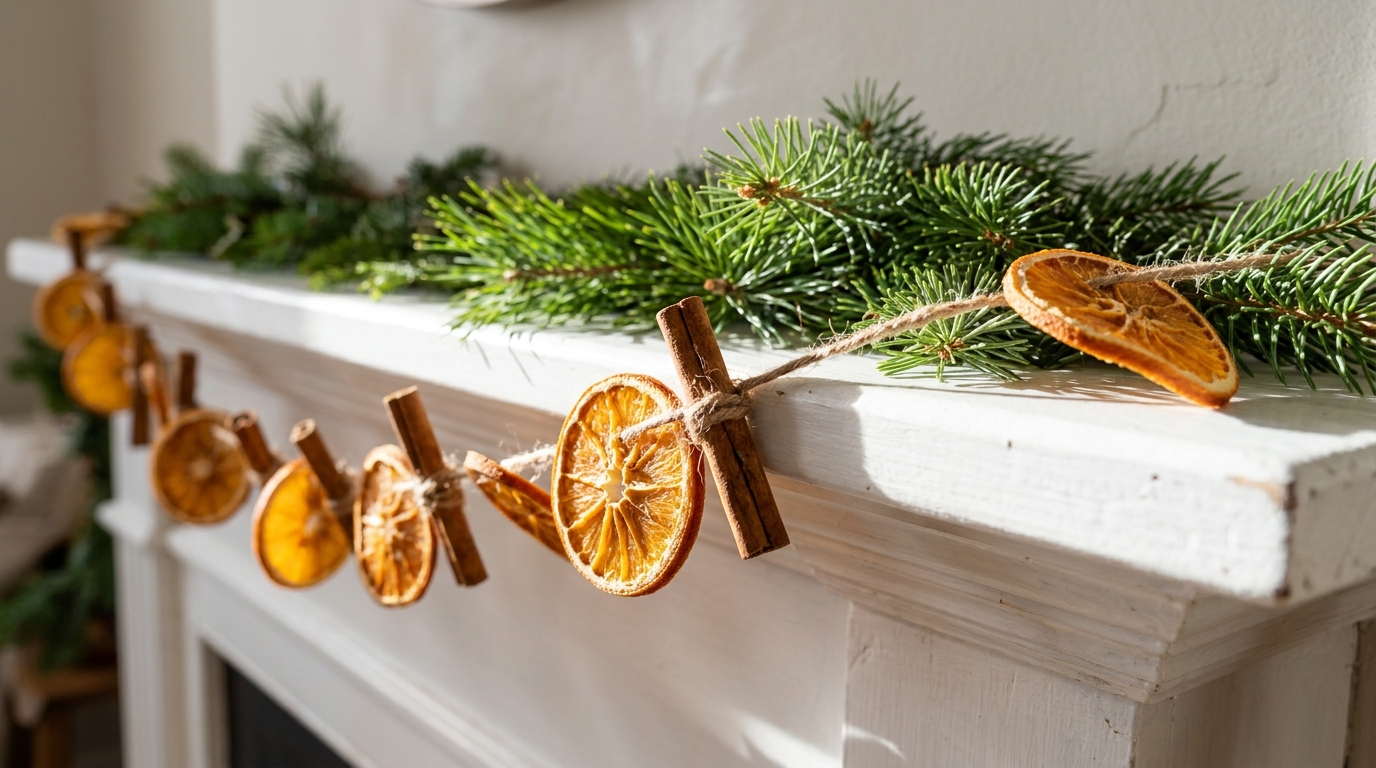
Dried orange slices glow like stained glass when the light hits them, and they bring the soft fruit colors that suit a Regency tree. Slice oranges thin, bake them low and slow until they are dry, then thread them on twine with little cinnamon sticks between. The garland smells lovely and costs a few dollars. Make extra, because it also looks beautiful along a mantel or across a window. How many oranges will you need for your tree?
You will need: 4 to 6 oranges, a sharp knife (adult use), baking paper, an oven, natural twine, a large needle, small cinnamon sticks.
How to make it: 1. Slice the oranges about a quarter inch thick and pat them dry. 2. Bake on baking paper at a low heat for 3 to 4 hours, turning now and then. 3. Thread the slices on twine with cinnamon sticks between them.
Faux Sugared Fruit Ornaments
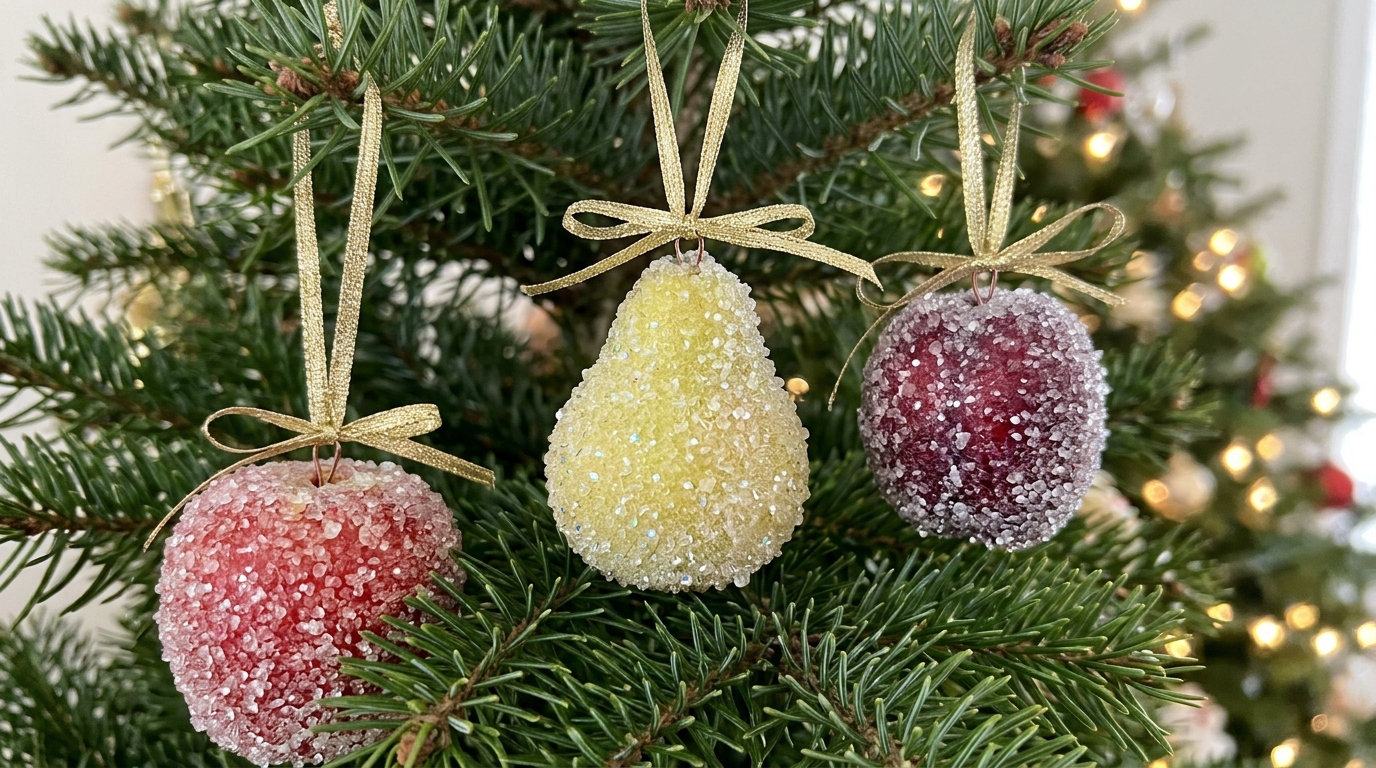
Sugared fruit feels like something from a grand Georgian dinner table, and a faux version makes a dreamy tree ornament that lasts for years. Foam fruit from the craft store gets a thin coat of glue and a roll in fine white glitter, so it sparkles like it was dusted with sugar. Hang the pears, plums and little apples from gold ribbon loops. They look rich and soft at the same time. Which fruit would you make first?
You will need: Foam or plastic craft fruit, decoupage glue or white craft glue, fine white or clear glitter, a foam brush, gold ribbon, small screw eyes.
How to make it: 1. Twist a small screw eye into the top of each fruit. 2. Brush on a thin coat of glue and roll the fruit in glitter. 3. Let it dry, then tie on a ribbon loop for hanging.
Pale Blue and Gold Ribbon Bows

Pale blue and gold is the color pair that makes a tree feel instantly Regency. Soft blue ribbon reads calm and elegant, and a thin gold edge catches the light. Tie a dozen generous bows and tuck them all over the tree, leaving the tails long so they drift down the branches. It is the quickest way to change the whole mood of a tree you already own. Do you have leftover ribbon in a drawer right now?
You will need: Wired pale blue ribbon, gold edged ribbon, sharp scissors, thin floral wire.
How to make it: 1. Cut ribbon lengths of about 30 inches. 2. Tie a classic bow, layering blue over gold, and pinch the center with floral wire. 3. Wire each bow onto a branch and trim the tails into neat V shapes.
Queen Charlotte Christmas Tree Pearl Bead Garlands
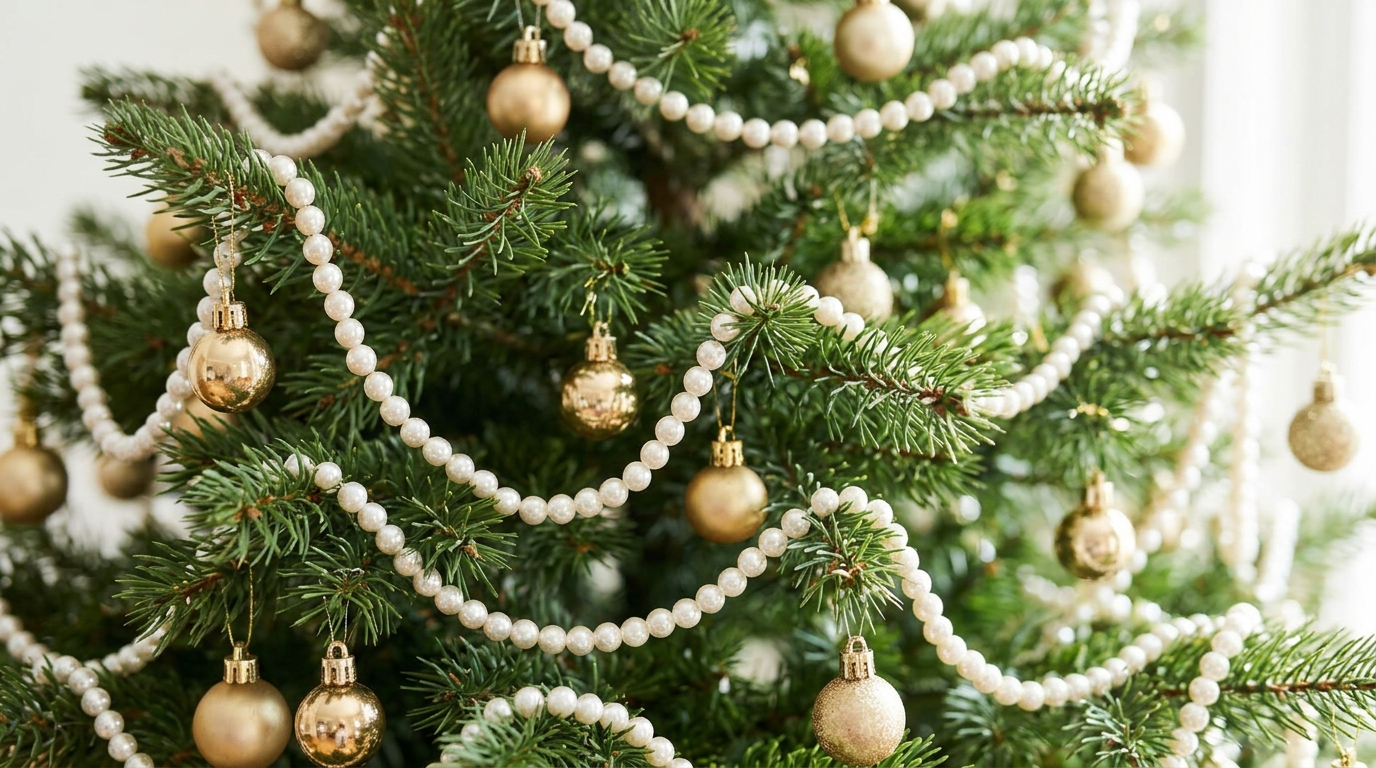
Pearls feel instantly royal, and a pearl garland gives your tree a quiet, elegant glamour. You can buy pearl strands by the yard, or string your own from a bag of faux pearl beads in two sizes. Swag them in soft loops from branch to branch rather than wrapping them tight. They mix beautifully with gold balls and pale ribbon. Would you go with one size of pearl or mix them?
You will need: Faux pearl beads in two sizes, strong beading thread or fishing line, a beading needle, crimp beads or knots, small gold ball ornaments.
How to make it: 1. Cut a long length of thread and knot one end. 2. String pearls in a pattern, such as three small and one large. 3. Knot the end and swag the garland across the tree in loose loops.
Tiny Wrapped Gift Box Ornaments

Queen Charlotte’s tree was made for a children’s party, and nothing says a happy Christmas party like a tree full of little presents. Mini gift box ornaments are easy to make from matchboxes or small cardboard cubes. Wrap them in cream and pale blue paper, tie them with gold thread and hang them all over the tree. Kids love helping with this one. Will you hide a tiny treat inside each box?
You will need: Empty matchboxes or small craft boxes, cream and pale blue wrapping paper, double sided tape, gold thread or thin ribbon, scissors.
How to make it: 1. Wrap each small box neatly like a real present. 2. Tie gold thread around it both ways and finish with a small bow. 3. Leave a loop of thread at the top for hanging.
A Lace and Tulle Tree Skirt
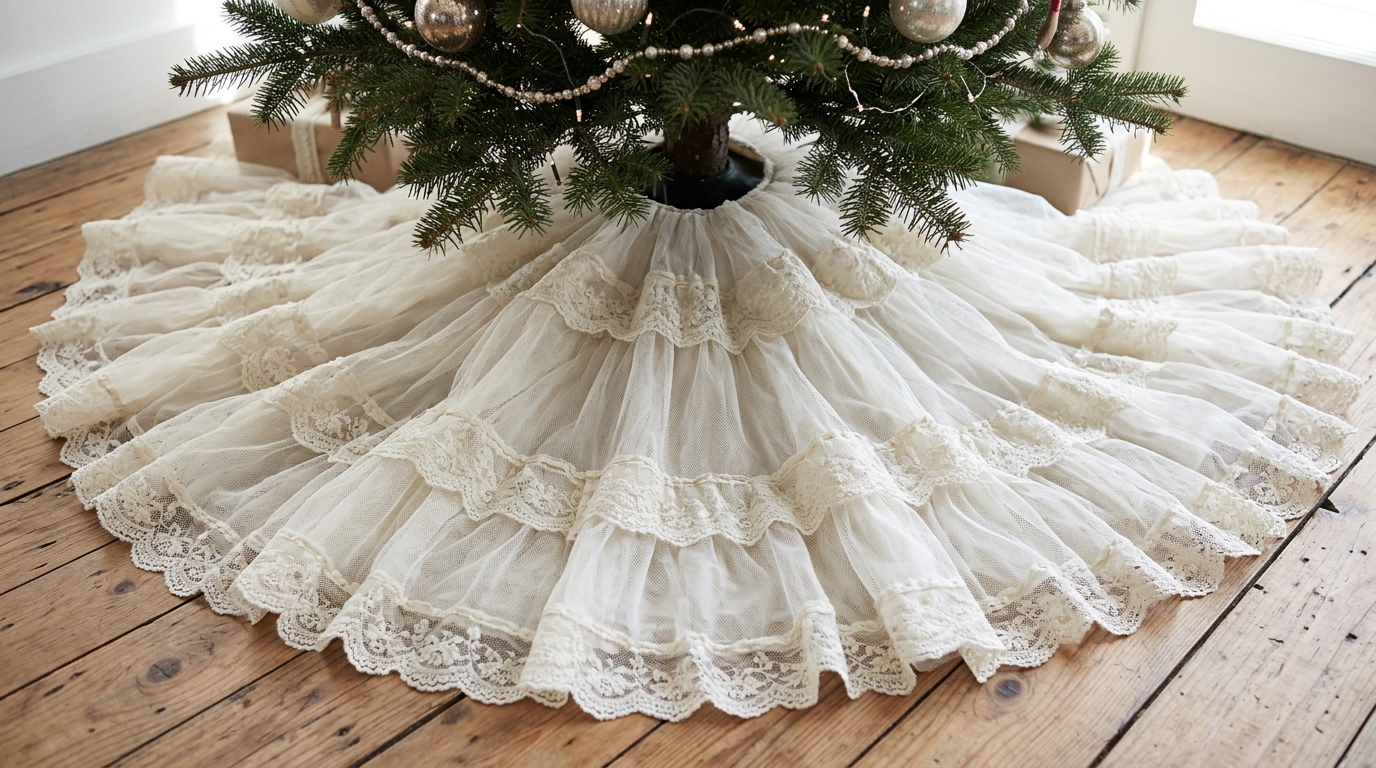
A tree skirt in ivory lace and tulle looks like the hem of a ball gown pooled on the floor. It is a no sew project if you like: layer a round of tulle under a round of lace and simply gather it around the trunk. The soft layers hide the stand and make every present underneath look special. Thrift stores often have old lace tablecloths that are perfect for this. Would you add a pale blue ribbon trim?
You will need: An old lace tablecloth or lace fabric, ivory tulle, scissors, a string and pencil for marking a circle, fabric glue or a few safety pins.
How to make it: 1. Mark and cut a large circle of tulle and a slightly smaller circle of lace. 2. Cut a slit and a small center hole in both. 3. Layer them, wrap them around the stand and pin the opening closed.
Queen Charlotte Christmas Tree Silhouette Cameos
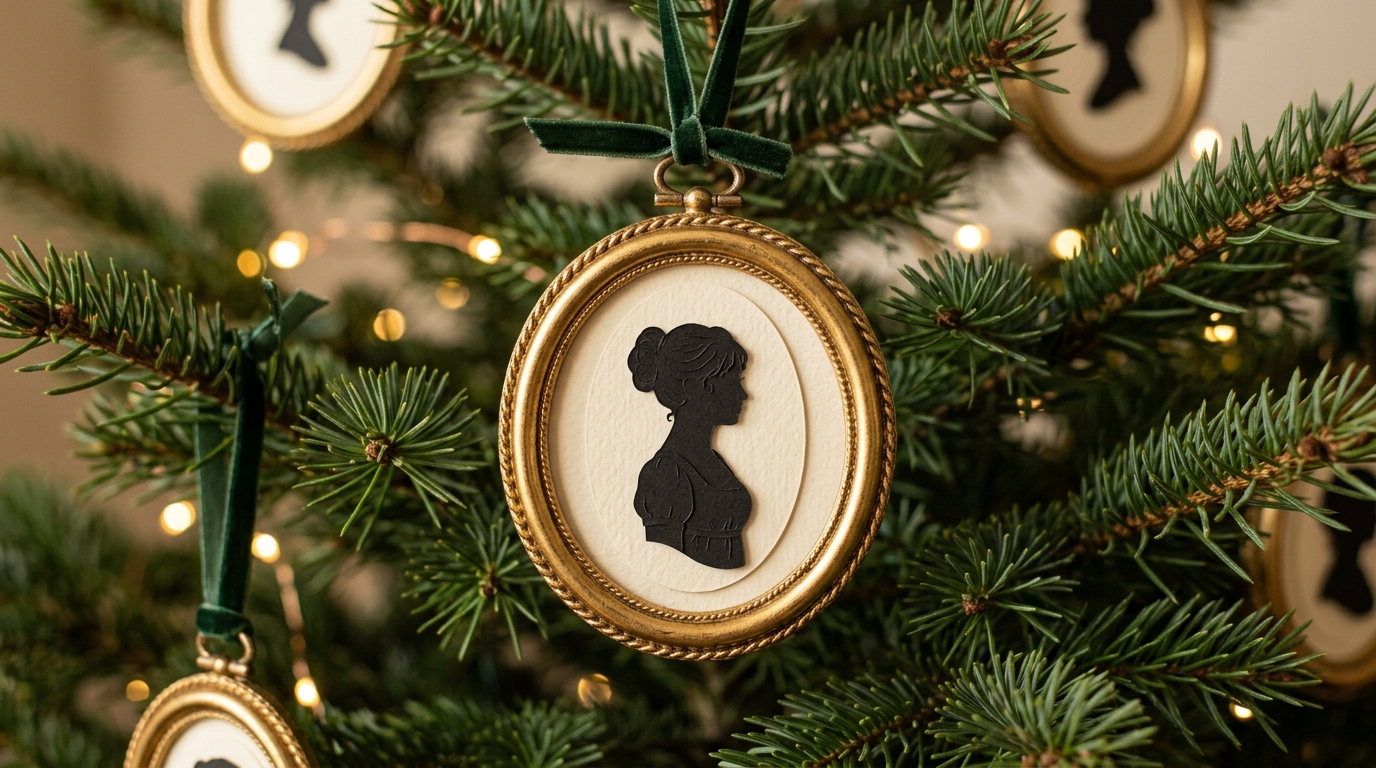
Black paper silhouettes are a classic Georgian era keepsake, when families had profiles cut as portraits. Turn that tradition into cameo ornaments for your tree. Trace a family profile from a side view photo, cut it from black card and glue it onto a cream oval inside a little gold frame. Each ornament becomes a personal heirloom. Whose profile will you cut first?
You will need: Black card stock, cream card stock, small oval gold frames or gold painted wooden ovals, a pencil, small sharp scissors, glue, ribbon.
How to make it: 1. Print a side view photo and trace the outline onto black card. 2. Cut out the silhouette carefully and glue it onto a cream oval. 3. Fit it into a gold frame and add a ribbon loop.
Gold Painted Pine Cones
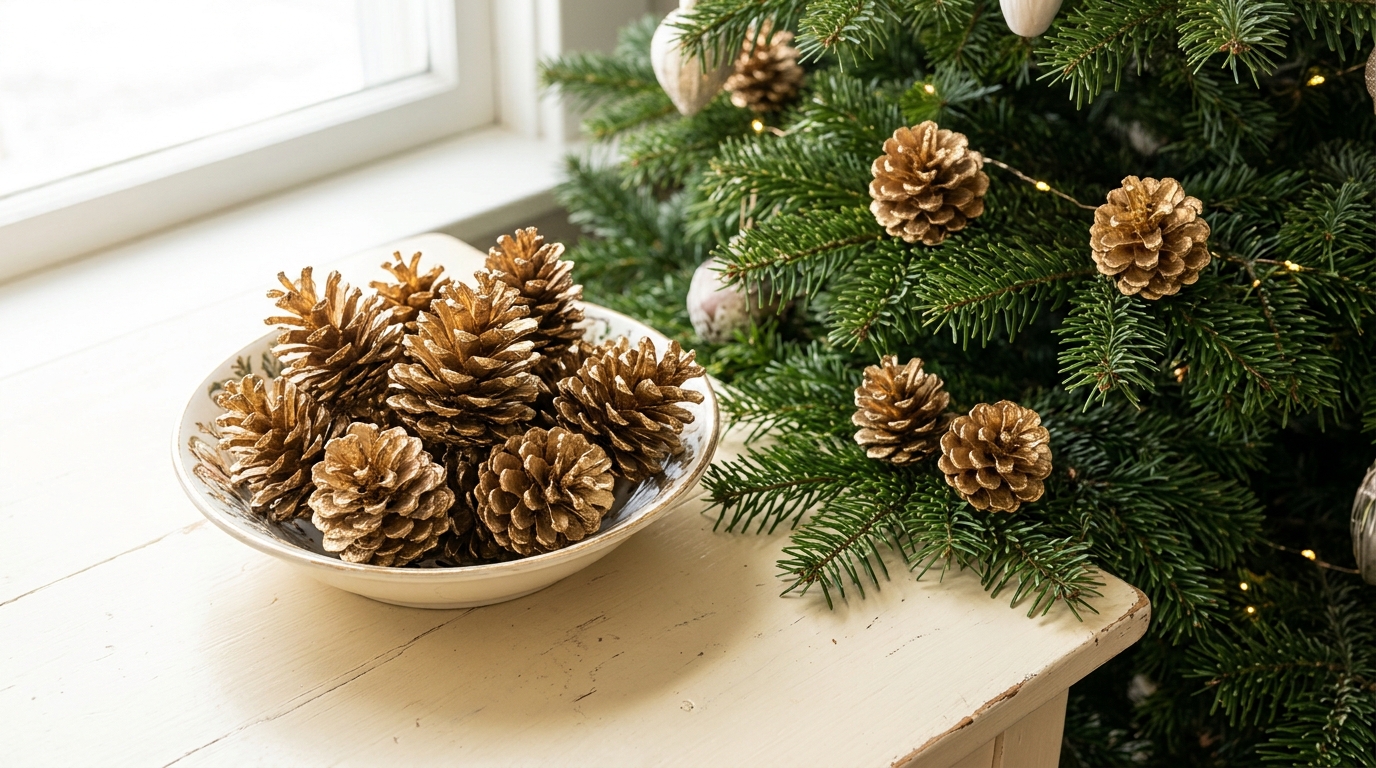
Free pine cones from a winter walk become rich golden ornaments with a little paint. Brush or spray them gold, leaving a bit of natural brown showing deep inside for depth. Tuck them into the branches, fill a bowl next to the tree, or wire a few together as a cluster at the top. Nature was very much part of Charlotte’s world, and these feel just right. Do you have a pine tree nearby to gather from?
You will need: Pine cones, gold acrylic or spray paint, a stiff brush, baking paper, thin wire or ribbon for hanging.
How to make it: 1. Brush off dirt and let the cones dry fully indoors. 2. Paint the tips gold, working outside if using spray. 3. Wrap a little wire around the base for hanging or tucking into branches.
Soft Fabric Flower Clusters
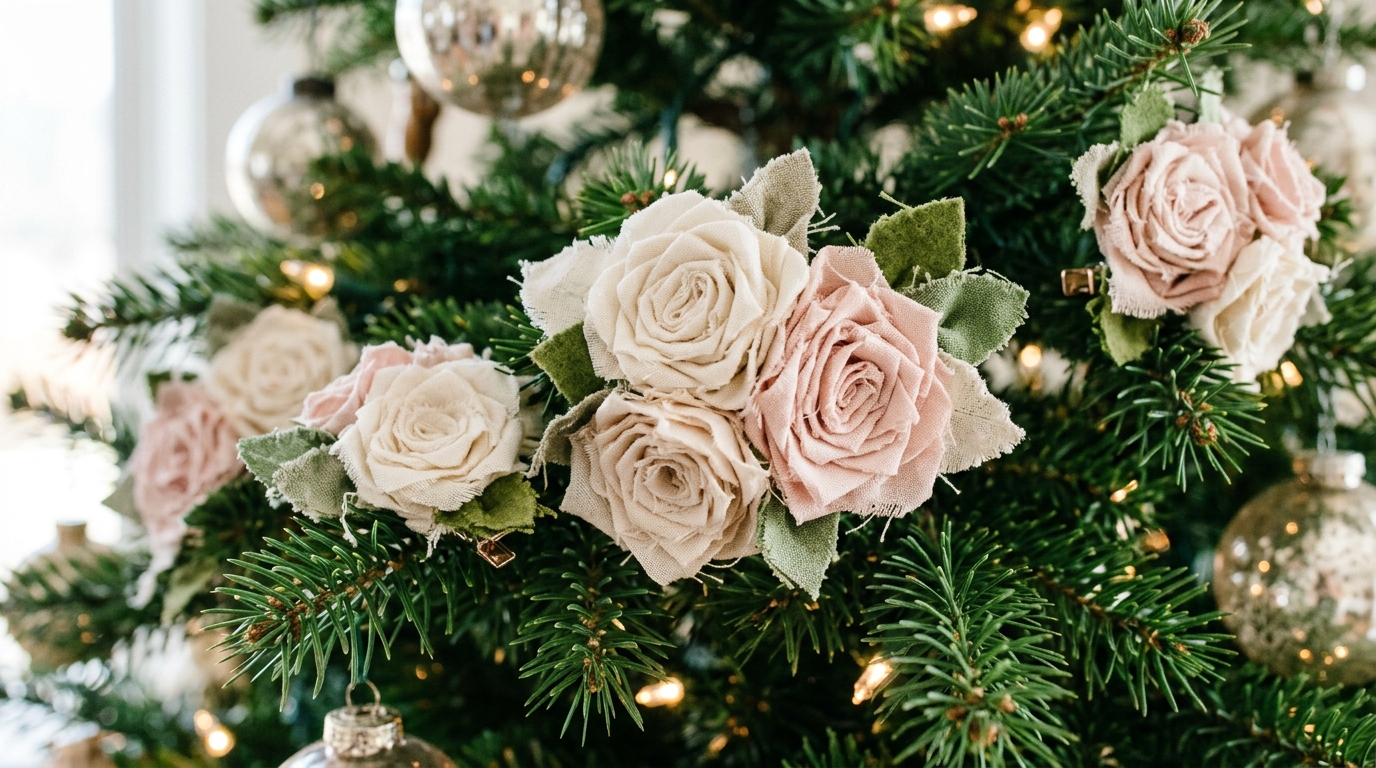
Flowers on a Christmas tree feel romantic and fresh, and fabric roses last year after year. Roll strips of ivory and blush fabric into little roses, glue them in clusters of three with a fabric leaf, and clip them onto the branches. Old shirts, scarves or leftover sewing scraps all work. They fill gaps on the tree beautifully and look lovely next to pearls and pale blue ribbon. Which colors would you choose for yours?
You will need: Fabric scraps in ivory and blush, green felt or fabric for leaves, a hot glue gun (adult help), small ornament clips.
How to make it: 1. Cut fabric strips about 1 inch wide, fold them in half and roll them tightly into roses. 2. Glue three roses together with a leaf behind them. 3. Glue an ornament clip on the back and clip the cluster onto a branch.
Queen Charlotte Christmas Tree Botanical Glass Balls

Charlotte was an amateur botanist, so a tree honoring her deserves a nod to the garden. Clear fillable ornaments with pressed flowers and ferns inside look like tiny greenhouses hanging on the branches. Press blooms in a heavy book for a week, then slide them into the balls with long tweezers. They catch the window light beautifully. You might also enjoy our Queen Victoria Christmas tree crafts for more royal tree ideas. What flowers grow in your garden?
You will need: Clear fillable plastic or glass ornaments, pressed flowers and small ferns, long tweezers, a heavy book, ribbon.
How to make it: 1. Press flowers and ferns between paper in a heavy book for about a week. 2. Slide them gently into each clear ornament with tweezers. 3. Replace the cap and add a ribbon to hang it.
A Gilded Bay Leaf Garland
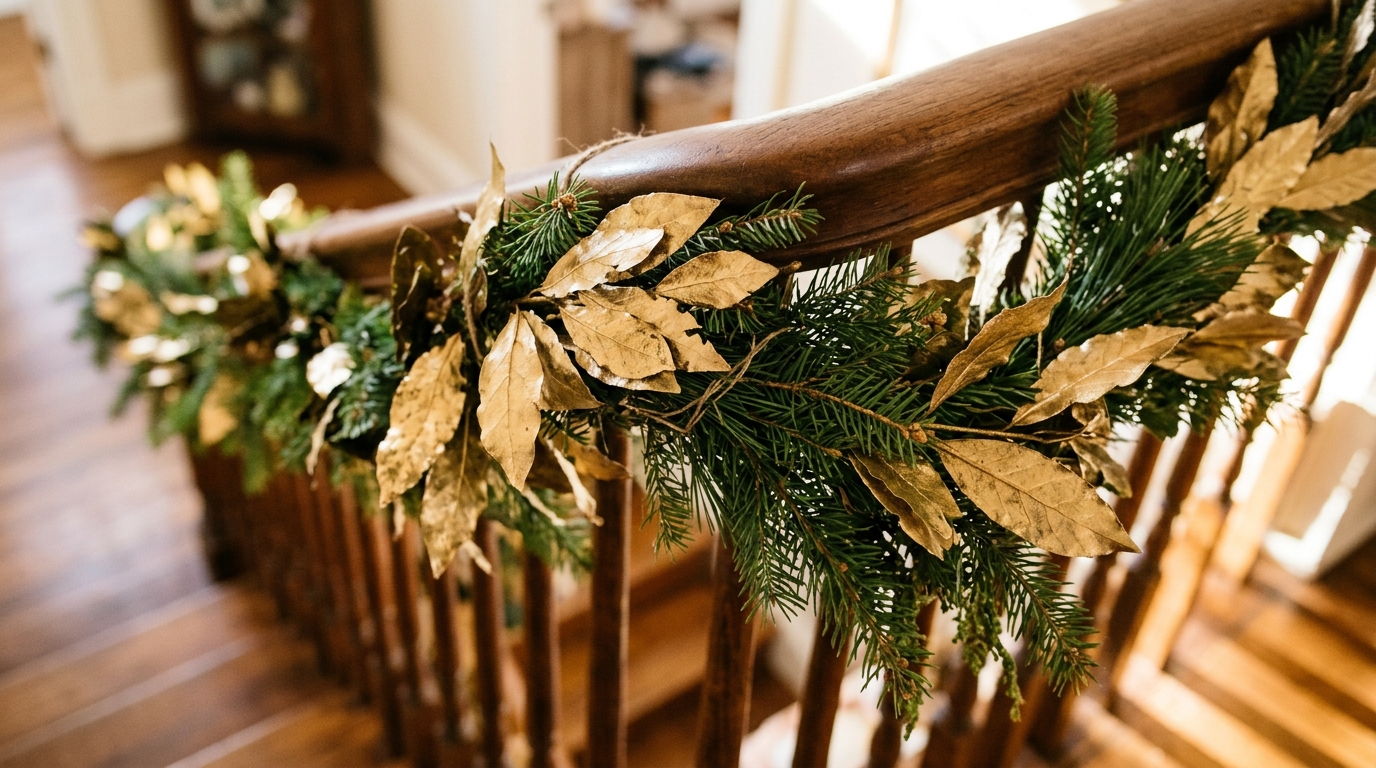
Gilded laurel and bay leaves have long been a classic symbol of honor in decor. A garland of gold bay leaves looks like jewelry for your tree or banister. Paint dried bay leaves gold on one side and glue them along a length of twine, overlapping like scales. It is calm, slow work that is perfect with a holiday movie. Would you hang yours on the tree or the stairs?
You will need: Dried bay leaves, gold acrylic paint, a small brush, natural twine, a hot glue gun (adult help).
How to make it: 1. Paint one side of each leaf gold and let them dry. 2. Glue the leaves along the twine in pairs, overlapping each pair. 3. Drape the garland on the tree or tie it along a banister.
Queen Charlotte Christmas Tree Crown Topper

Every royal tree needs a crown on top. This one is cut from gold card stock, curved into a circle and dotted with faux pearls. It weighs almost nothing, so it sits happily on even a small tree. Children love designing the points and picking the pearls. Make a few spares and use them as place card holders for Christmas dinner. How tall would you make your crown?
You will need: Gold card stock or glitter card, a pencil, scissors, glue dots or a glue gun (adult help), flat back faux pearls, a cardboard tube.
How to make it: 1. Draw a crown band with five points about 12 inches long and cut it out. 2. Glue the ends into a circle and add pearls on each point. 3. Glue a short cardboard tube inside so it slips over the top of the tree.
A Vintage Teacup Mini Tree
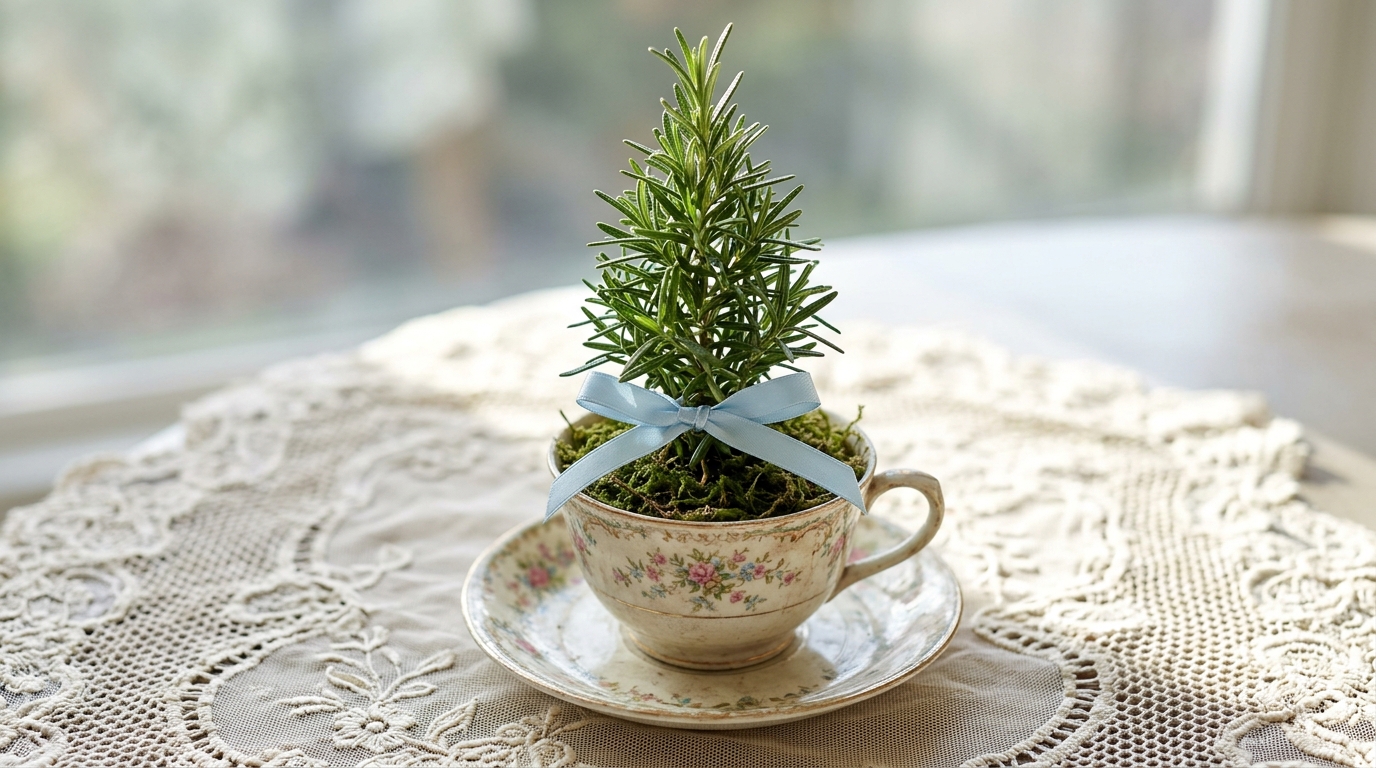
End with the sweetest small tree of all: a mini tree in a vintage teacup. A tiny potted rosemary trimmed into a cone shape fits perfectly into a thrifted china cup. Tie a pale blue ribbon around it and add one or two tiny pearls. It makes a charming place setting, a teacher gift or a little tree for the kitchen windowsill. Who in your life would love one of these?
You will need: A vintage teacup and saucer, a small potted rosemary plant, a little potting soil, small pebbles, pale blue ribbon, tiny faux pearls.
How to make it: 1. Put pebbles in the bottom of the cup for drainage. 2. Plant the rosemary with a little soil and trim it into a cone. 3. Tie ribbon around the stem and water lightly.