DIY Christmas Gift Boxes: 15 Handmade Ideas That Make Even a Tiny Gift Look Expensive
DIY Christmas gift boxes are the little secret that makes a small, simple present feel like it came from a fancy boutique. You know that moment when someone opens a gift and pauses just to look at the box first? That is what we are after. Folded and handmade boxes are some of the fastest climbing craft videos this season, with one no glue box on YouTube passing 7 million views in only three weeks. Best of all, most of these cost almost nothing, because they start with paper, cardstock, cereal boxes and empty paper tubes you already have. Below are fifteen of the prettiest ideas, from the paper tube box everyone is sharing to cookie boxes with a little window. Grab your scissors and let us get folding..
DIY Christmas Gift Boxes From Paper Towel Tubes
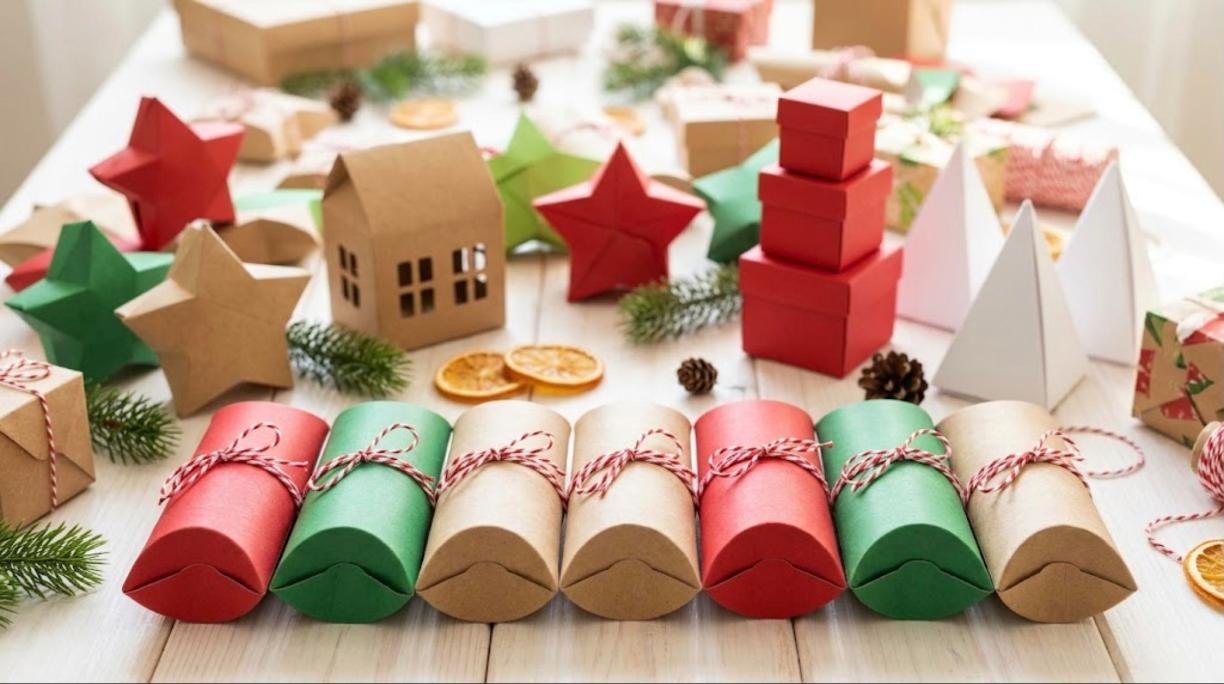
This is the idea that took over Facebook this month. One short video of mini gift boxes made from empty paper tubes passed 816,000 reactions and 43,000 shares, and it is easy to see why. You wrap a tube in pretty paper, then press each end in to make two curved flaps that close like a little pillow. It looks like something from a gift shop, yet it is pure recycling. Fill them with candy, a gift card, a lip balm or a pair of socks. A row of them in red, green and kraft makes the cutest stocking stuffers you will ever give..
You will need: Empty toilet paper or paper towel tubes, wrapping paper or thin cardstock, a glue stick, baker’s twine, scissors, a pencil.
How to make it: 1. Cut the tube to the length you want and wrap it in paper, gluing the seam. 2. Press one end flat, then push both sides in with your thumbs so the end folds into two curved flaps. 3. Add your gift. 4. Close the other end the same way and tie it with twine.
Folded Paper Star Boxes
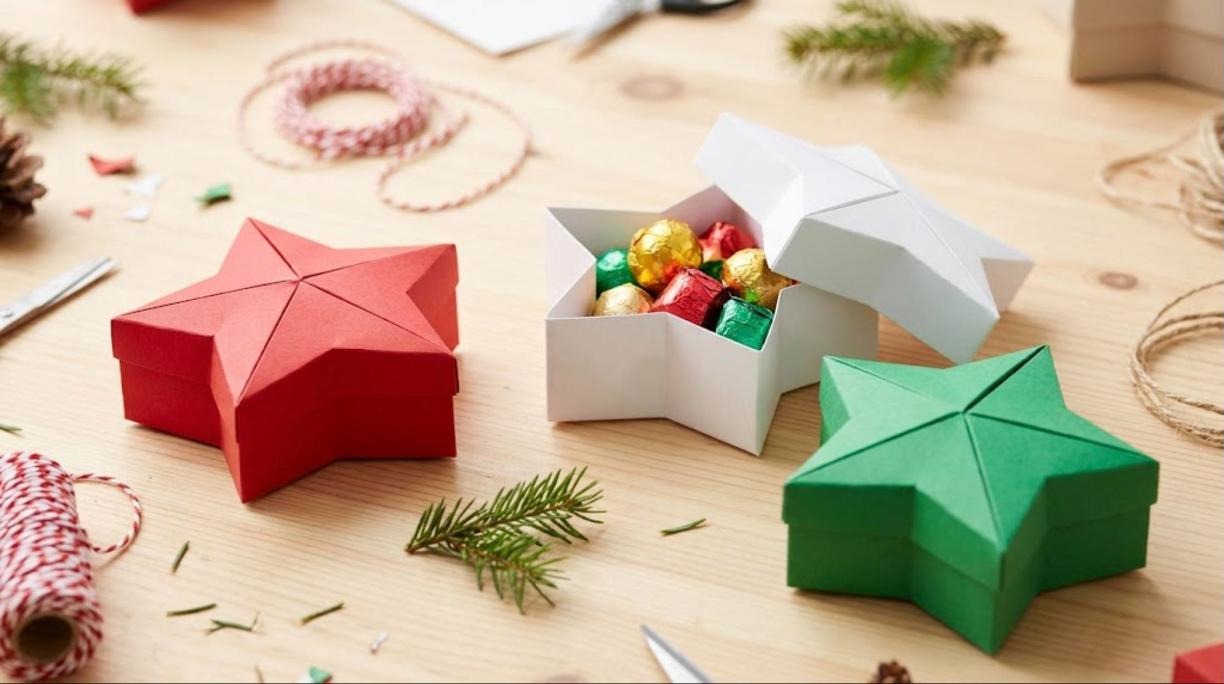
Among all DIY Christmas gift boxes, star boxes look the most like hard origami, but they are just a few folds and a little patience. The one in the viral no glue gift box video uses only paper and creases, so the whole family can make a stack in one evening. Red, white and green cardstock gives you a classic look, while kraft paper feels rustic and warm. Tuck wrapped chocolates, a tiny ornament or a pair of earrings inside. Set a few under the tree and they double as decor until gift time. Which color would you fold first?
You will need: Square sheets of cardstock or heavy paper, a ruler, a bone folder or butter knife for creasing, small treats to fill.
How to make it: 1. Fold a square into a star base following a simple star box pattern. 2. Crease every fold firmly with a bone folder. 3. Fold a slightly larger star for the lid. 4. Fill the base and slide the lid on top.
DIY Christmas Gift Boxes Made From a Cereal Box
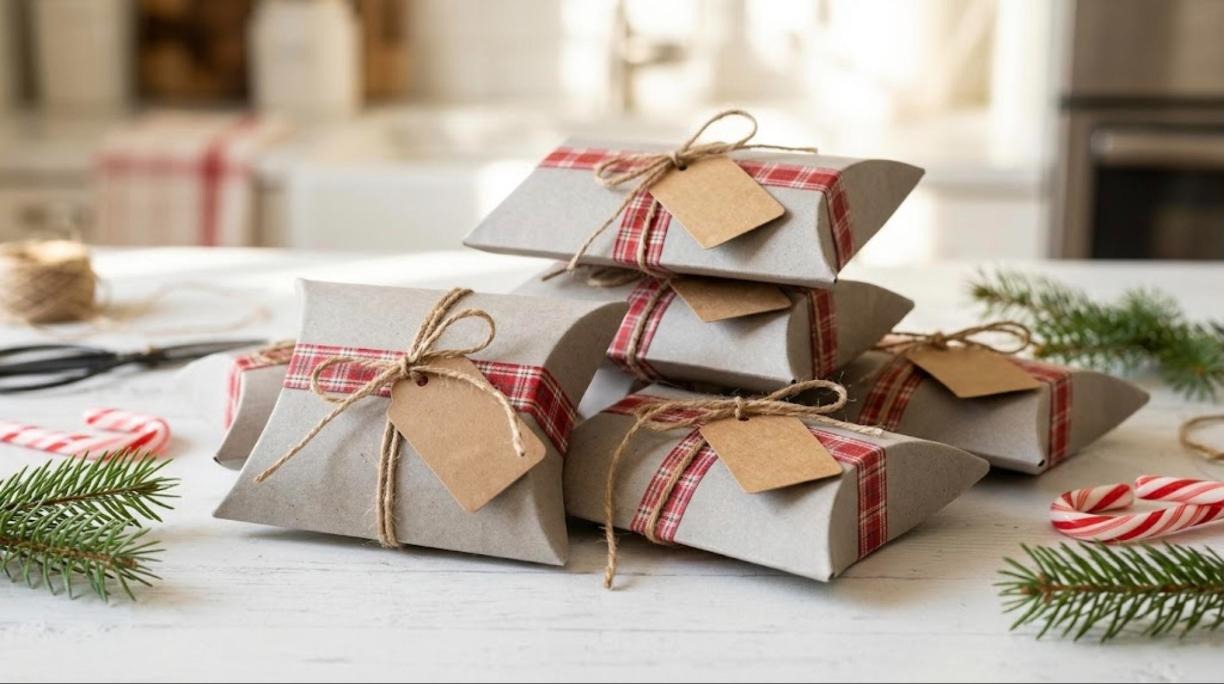
Before you toss that empty cereal box, look at it again. The plain gray inside is perfect for pillow boxes, and nobody will ever guess where they came from. Trace a pillow shape, turn the printed side in, and score the curved ends with a dull pencil so they fold in smoothly. A strip of plaid washi tape and a twine bow make them look styled and cozy. These are just right for cookies, fudge or homemade bath salts in a small bag. Is there a free craft supply more underrated than the cereal box?
You will need: An empty cereal box, a printed or hand drawn pillow box template, scissors, a dull pencil for scoring, glue stick, washi tape, twine, kraft tags.
How to make it: 1. Trace the template on the inside of the opened box and cut it out. 2. Score the curved lines with a dull pencil. 3. Fold so the plain side faces out and glue the side tab. 4. Fill, press the curved ends closed, and add tape and twine.
Nested Origami Boxes With Lids
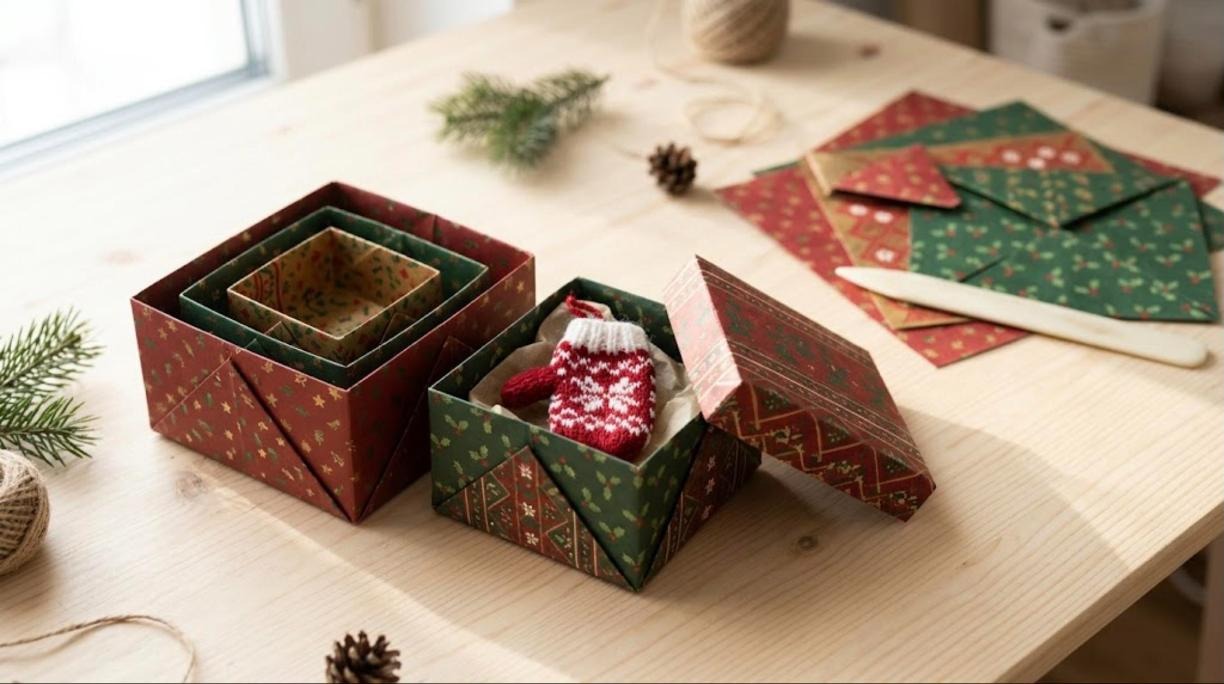
A set of nesting origami boxes is a gift and a surprise in one. Each box is folded from a single square of paper, and the lid is folded from a square just a little bigger. Make three sizes and they stack inside each other like a holiday puzzle, with a tiny treat waiting in the smallest box. Patterned Christmas paper makes them look rich and festive. They are lovely for jewelry, a hand knit ornament or a handwritten note. Who on your list would love opening box after box?
You will need: Square sheets of patterned paper in three sizes, plus three slightly larger squares for lids, a bone folder, a small gift.
How to make it: 1. Fold each square into a classic lidded box, also called a masu box. 2. Fold each lid from a square about a quarter inch larger. 3. Place the gift in the smallest box. 4. Nest the boxes from small to large and close the lids.
Christmas Tree Shaped Boxes
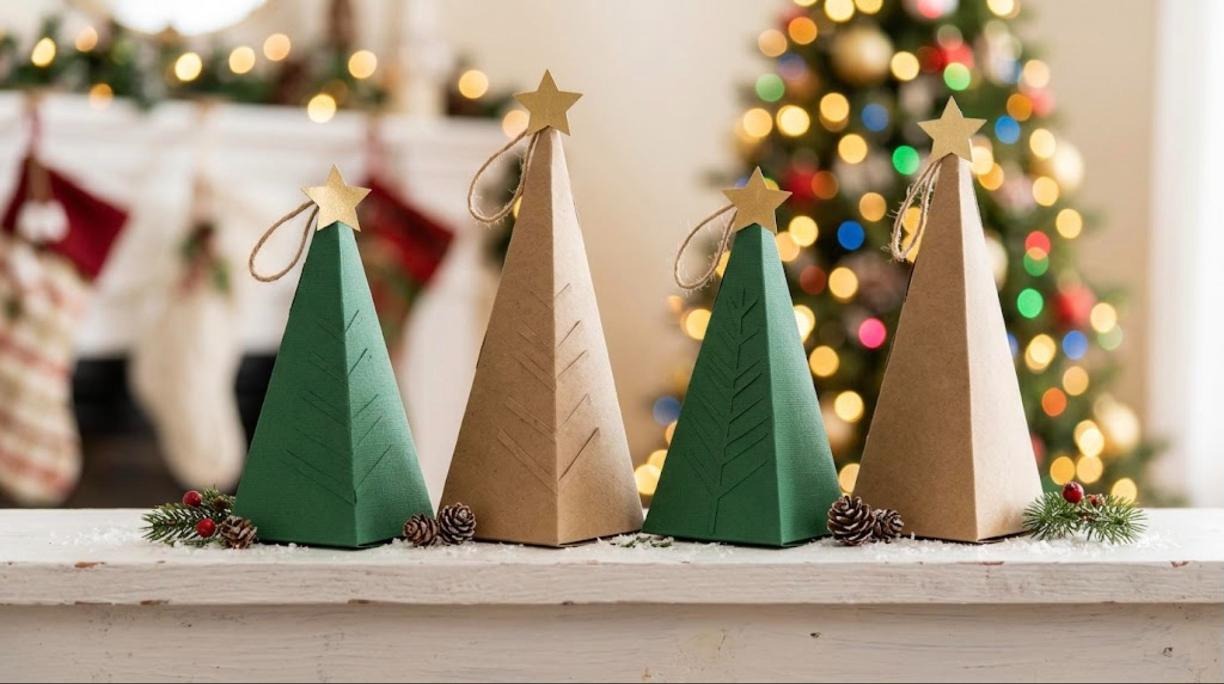
These tall tree shaped DIY Christmas gift boxes are as much decor as packaging. Each one is a simple triangle prism made from green or kraft cardstock, topped with a little gold paper star. Line them up on the mantel in different heights and they look like a tiny paper forest. Inside, they hold long skinny gifts like pens, candy sticks, rolled up socks or a cash gift. Add a twine loop on top and they can even hang on the tree. Want to see how fast a whole set comes together on a quiet Sunday afternoon?
You will need: Green and kraft cardstock, a ruler, scissors, glue stick, gold paper for stars, twine.
How to make it: 1. Draw a long triangle prism template with three tall sides and a glue tab. 2. Score the folds, fold, and glue the tab. 3. Close the bottom with small flaps. 4. Glue a paper star and twine loop to the top flap.
House Shaped DIY Christmas Gift Boxes for Cookies
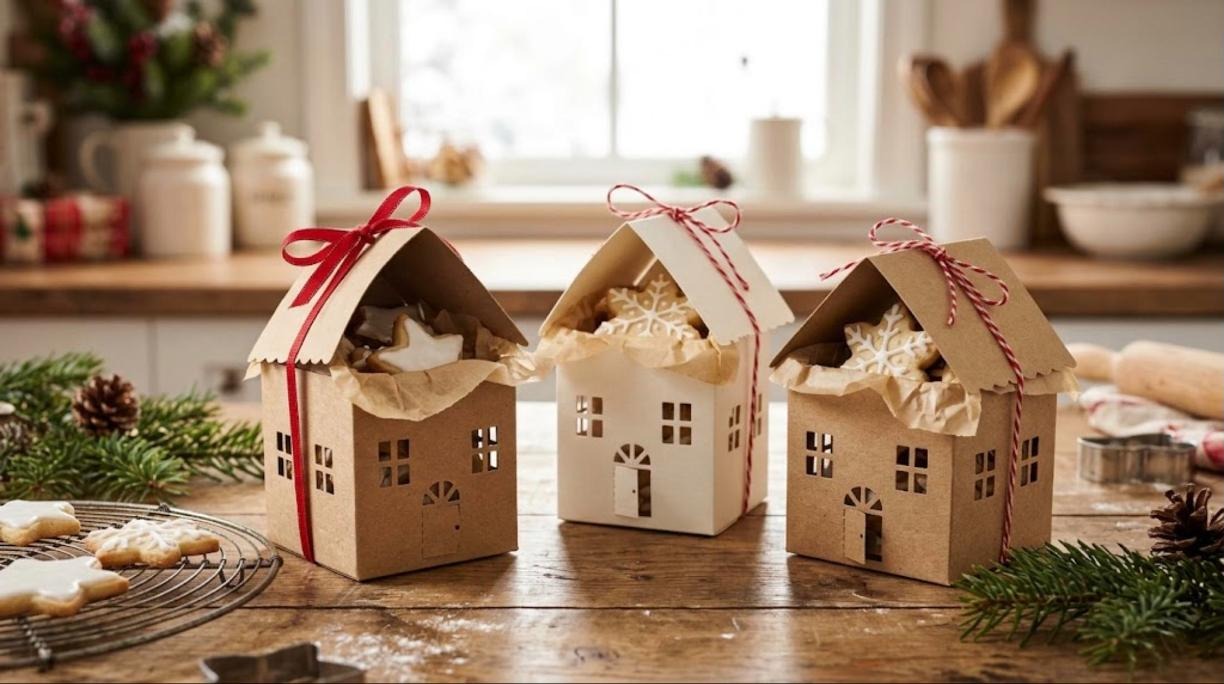
If you bake every December, this one is for you. House shaped boxes with cut out windows and a pitched roof turn a few cookies into a gift that feels like a little village. Line them with parchment, tuck in two or three iced cookies and tie the roof shut with ribbon. Kraft and white cardstock look sweet together, and the tiny windows let a little cookie peek through. Neighbors, teachers and the mail carrier will all smile. Ask an adult to cut the windows with a craft knife on a cutting mat. Which cookie would go in yours?
You will need: White or kraft cardstock, a house box template, a craft knife and cutting mat (adult use), ruler, glue, parchment paper, ribbon.
How to make it: 1. Print or draw a house box template on cardstock. 2. Have an adult cut out the shape and small windows. 3. Score, fold and glue the walls. 4. Line with parchment, add cookies and tie the roof closed with ribbon.
Stacked Candy Tower
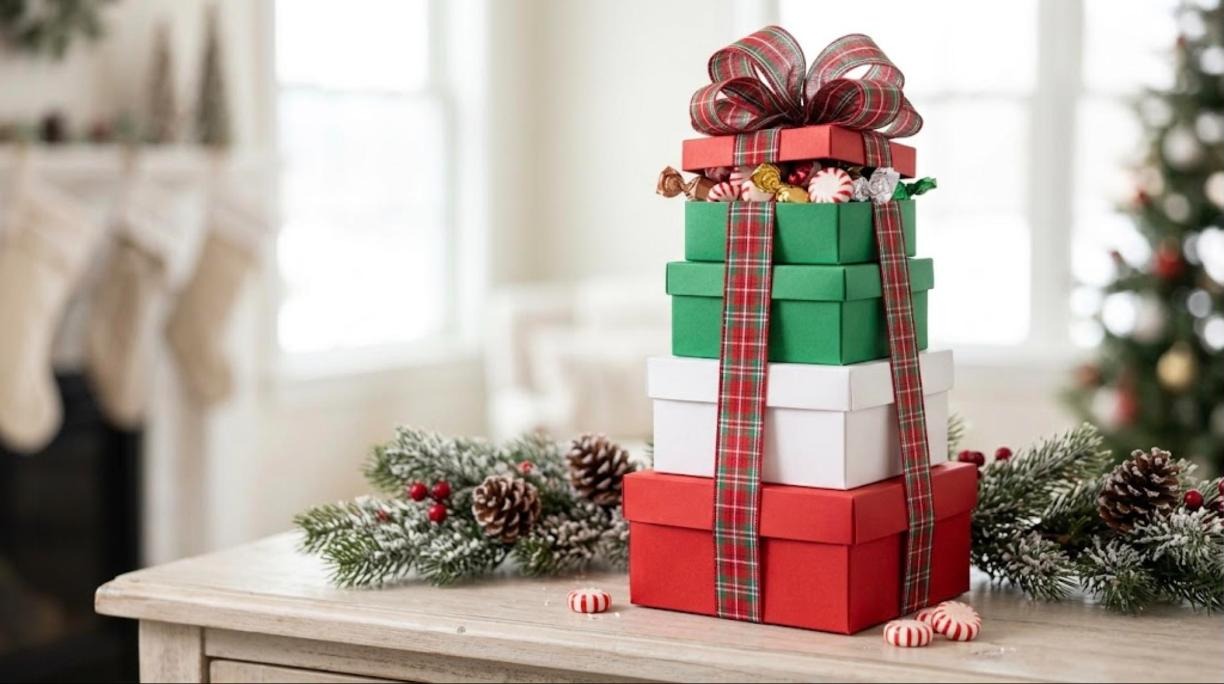
A candy tower is one of those DIY Christmas gift boxes that looks expensive from across the room. It is just four or five plain boxes in different sizes, stacked from big to small and tied with one long ribbon. Fill each layer with something different, like peppermints, toffee, cocoa packets and a small ornament on top. Red, white and green boxes look classic, while all kraft with plaid ribbon feels farmhouse. It makes a great hostess gift or a family gift that everyone can share. How many layers will your tower have?
You will need: 4 or 5 plain boxes in graduated sizes, wrapping paper or paint, wide ribbon, tissue paper, candies and small treats.
How to make it: 1. Cover each box with paper or paint the lids. 2. Fill each box with a different treat. 3. Stack them from largest to smallest. 4. Run one long ribbon under the bottom box and tie a big bow on top.
Exploding Photo Box
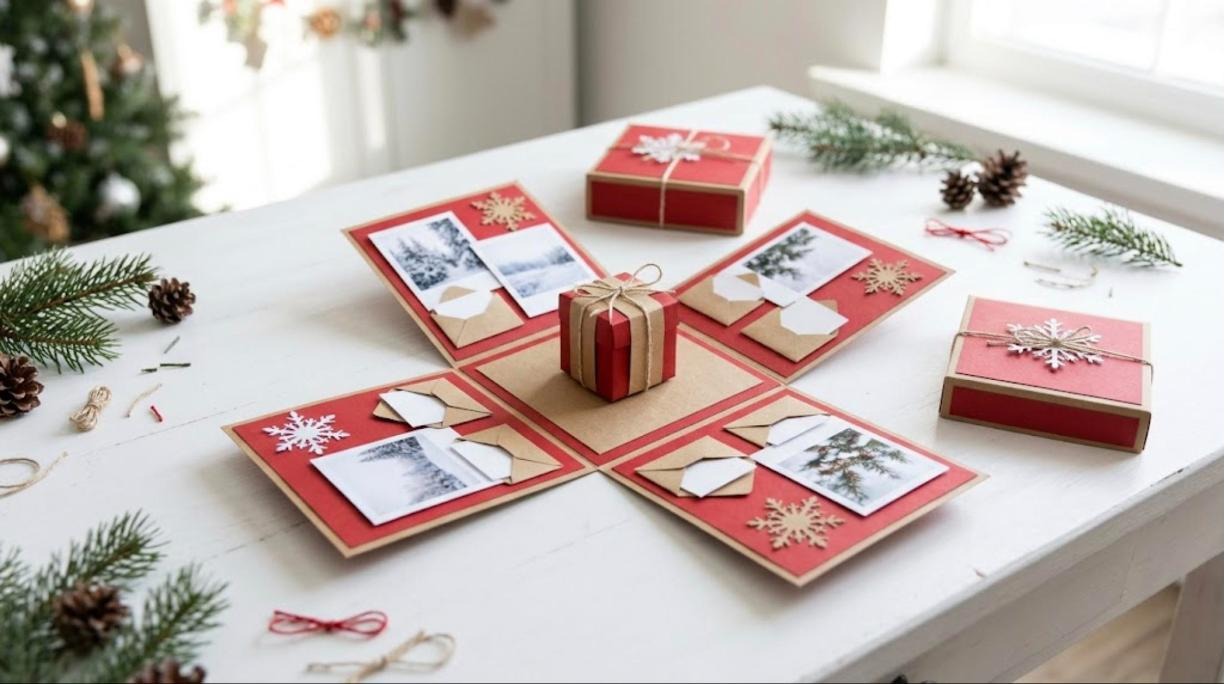
Of all the DIY Christmas gift boxes here, the exploding box is the one people keep forever. When the lid comes off, the four sides fall open and show photos, little notes and a tiny present in the middle. Each panel is a layer of cardstock decorated with pictures, paper snowflakes and mini envelopes. You can tell the story of your year, your friendship or a family trip. It takes a little more time, but it is the kind of gift that makes someone tear up in the best way. Who would you make one for?
You will need: Red and kraft cardstock, a ruler, scissors, glue, printed photos, paper snowflakes, mini envelopes, a small gift.
How to make it: 1. Cut a cross shaped base with a square center and four equal flaps. 2. Fold the flaps up and decorate the inside with photos and envelopes. 3. Make a lid a little larger than the square. 4. Set a small gift in the center and close the lid.
Hexagon DIY Christmas Gift Boxes With a Petal Lid

Hexagon boxes have a special kind of magic. This one is a modular origami design by the paper artist Tomoko Fuse, where several folded units lock together to make the box and a lid that twists closed like a flower. It looks blue and fresh here, but fold it in red, green and gold paper and it becomes a little Christmas jewel. It is perfect for rings, earrings or a small charm. Once you learn the units, you can make a whole stack while you watch a holiday movie. Ready to try something a bit more special?
You will need: Six or more squares of origami paper for the base, six for the lid, a bone folder, patience.
How to make it: 1. Fold the six base units following a hexagon box diagram. 2. Slide the units together so they lock. 3. Fold and join the six lid units the same way. 4. Twist the petals so the lid closes neatly.
Glitter Paper Lid Box

Sometimes all a plain box needs is a new lid. Cover the top of a small store box, or a box you folded yourself, with gold glitter cardstock and tie it with silver twine. Suddenly it looks like it came from a jewelry counter. Glitter paper is cheap at any craft aisle, and one sheet covers several lids. Pair it with plain white or kraft bottoms so it does not feel too busy. A row of these under the tree sparkles every time the lights come on. Would you go gold, silver or red?
You will need: Small plain boxes, glitter cardstock, a glue stick or double sided tape, scissors, silver or white twine.
How to make it: 1. Trace the top of the lid on the back of the glitter paper. 2. Cut it out with a little extra for the sides. 3. Glue it on and fold the edges down neatly. 4. Tie the box with twine and add a small bow.
Matchbox Drawer Boxes
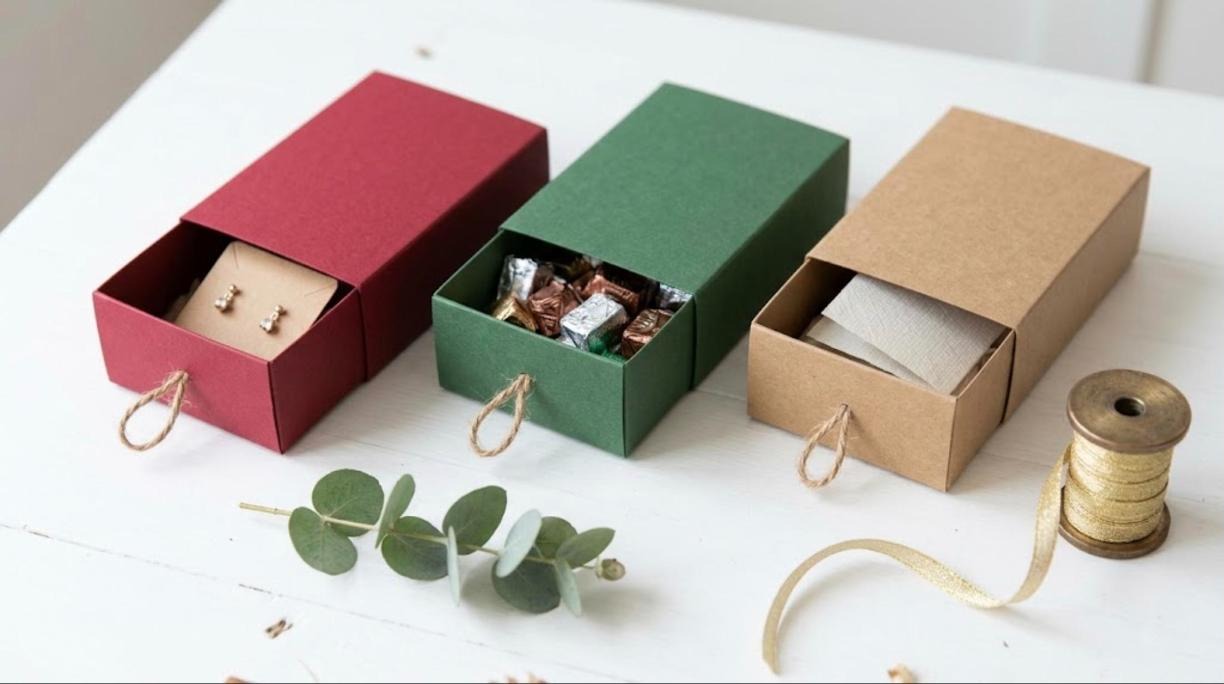
Drawer style DIY Christmas gift boxes are pure fun to open. You slide the little tray out by a twine loop and there is the gift, sitting right there. They are made from two simple pieces of cardstock: a tray and an open sleeve. Small ones are perfect for earrings, rings, chocolates or a folded love note. Bigger ones fit a bar of handmade soap. Make them in red, green and kraft for a set that looks planned. Do you have someone on your list who loves little surprises?
You will need: Cardstock in two colors, a ruler, scissors, scoring tool, glue, twine for the pull.
How to make it: 1. Cut and fold a tray with four low sides. 2. Wrap a strip of cardstock around the tray to make the sleeve and glue it closed. 3. Poke a small hole in the tray front and knot a twine loop through it. 4. Fill and slide it shut.
DIY Christmas Gift Boxes With a Cookie Window
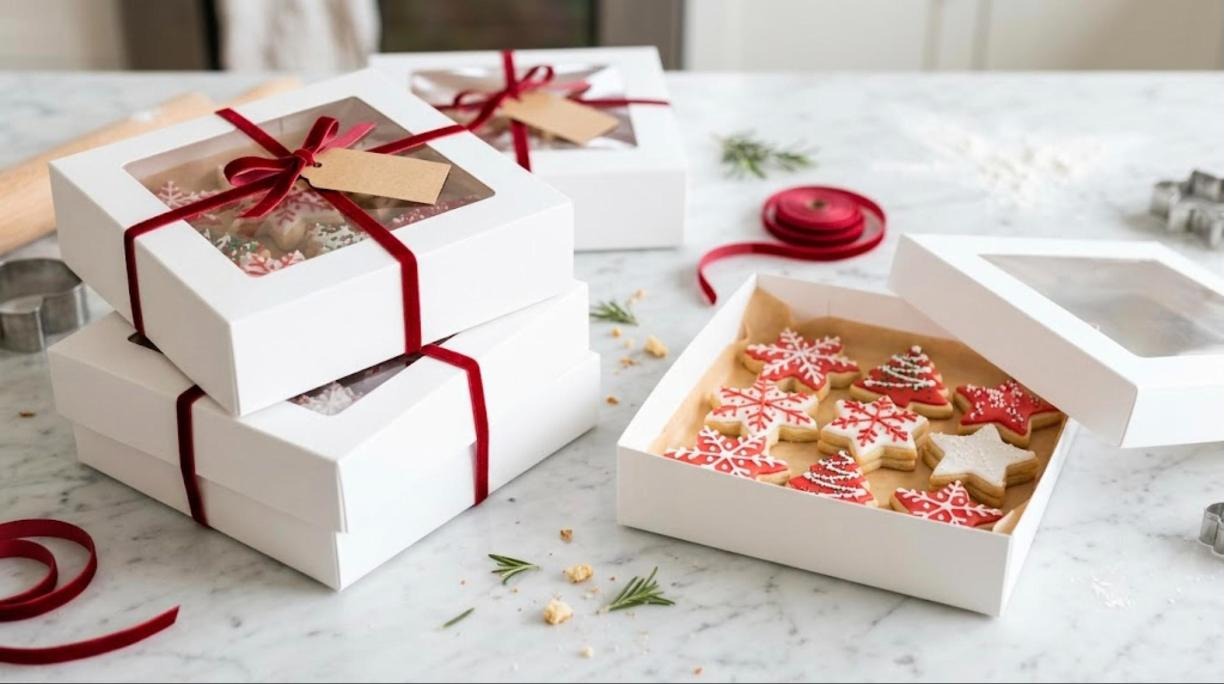
A window lid lets the cookies do the talking. Cut a square out of a plain white box lid and tape a piece of clear plastic from a clean food package behind it. Now everyone can see your star and snowflake cookies before the ribbon even comes off. Red velvet ribbon and a kraft tag give it a bakery look for very little money. Stack a few for a cookie swap and watch them disappear. Ask an adult to cut the window with a craft knife. What cookies would you show off?
You will need: Plain white boxes with lids, a craft knife and cutting mat (adult use), clear plastic from clean food packaging, tape, parchment, red ribbon, kraft tags.
How to make it: 1. Have an adult cut a square window in the lid. 2. Tape clear plastic inside the lid. 3. Line the box with parchment and add cookies. 4. Close and tie with ribbon and a tag.
Pyramid Treat Boxes
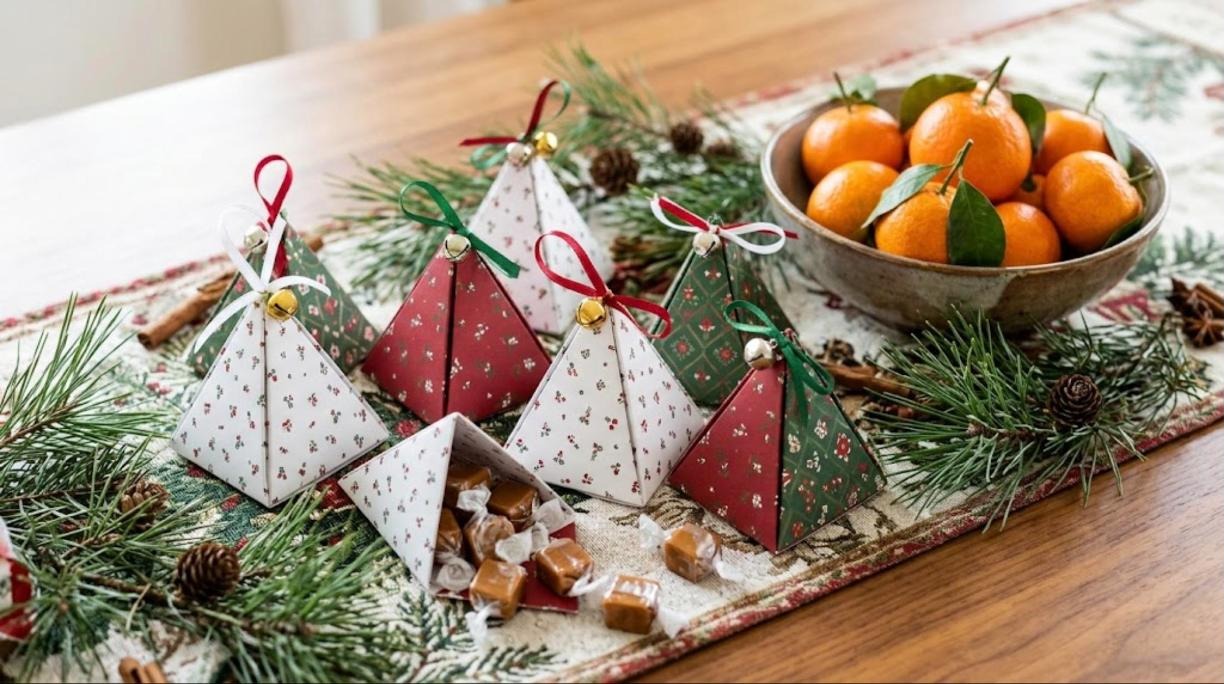
Pyramid DIY Christmas gift boxes are small, sweet and fast. Each one is a triangle template folded up into a point and closed with a ribbon loop and a tiny jingle bell. They hold just a few caramels or truffles, so they are perfect for party favors, place settings or a little thank you. Patterned cardstock in red, green and white makes them look like they belong on a holiday table. You can make a dozen in under an hour. Will you set one at every plate this year?
You will need: Patterned cardstock, a pyramid box template, scissors, scoring tool, hole punch, thin ribbon, small jingle bells, wrapped candies.
How to make it: 1. Trace and cut the pyramid template. 2. Score along the fold lines. 3. Punch a hole at each tip and fold the sides up. 4. Fill with treats and thread ribbon and a bell through the holes.
Gift Card Hideaway Box
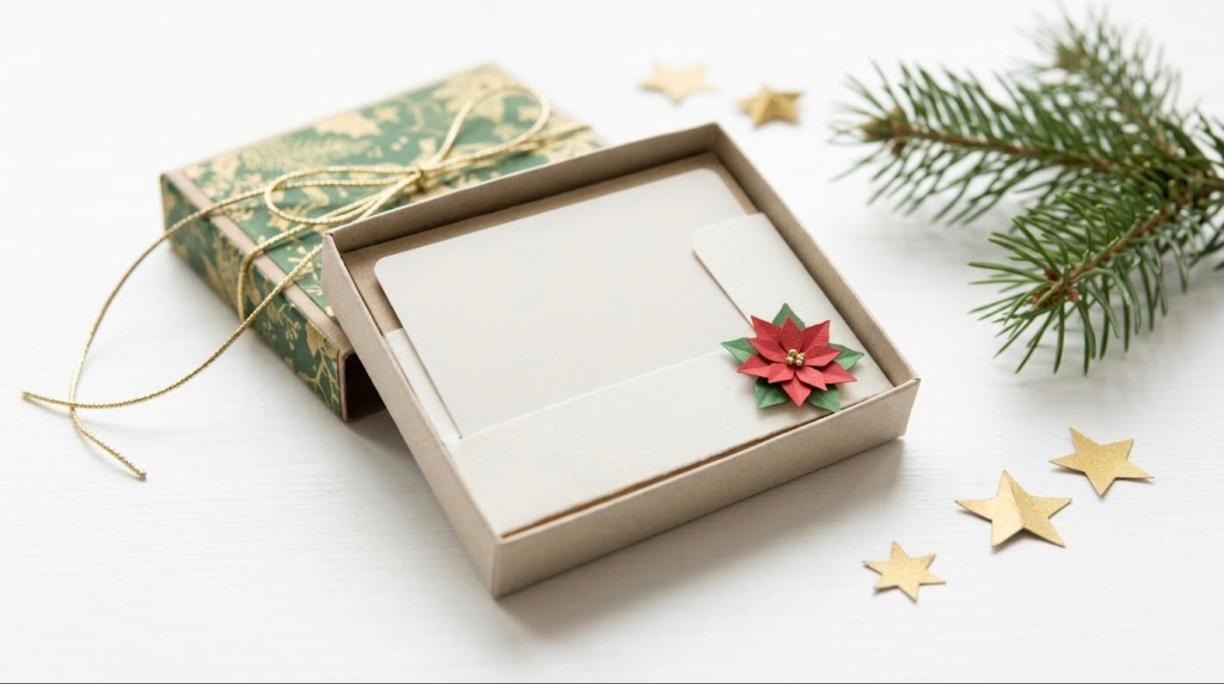
Gift cards are useful, but they can feel a little plain. This small box fixes that. A pull out tray holds a paper insert with a slit that keeps the card in place, and a tiny paper poinsettia makes it feel festive. The lid is covered in green and gold paper and tied with a gold cord. It turns a quick gift into something that feels thought out and personal. It also keeps the card from getting lost in the wrapping paper pile. Who on your list always asks for a gift card?
You will need: Thin cardboard or cardstock, Christmas paper, glue, a craft knife (adult use), a gift card, red and green paper for the flower, gold cord.
How to make it: 1. Make a small flat box and tray just bigger than a gift card. 2. Fold a paper insert and have an adult cut a slit for the card. 3. Glue a paper poinsettia to the insert. 4. Cover the lid with paper and tie with gold cord.
Kraft Tray DIY Christmas Gift Boxes With Paper Shred
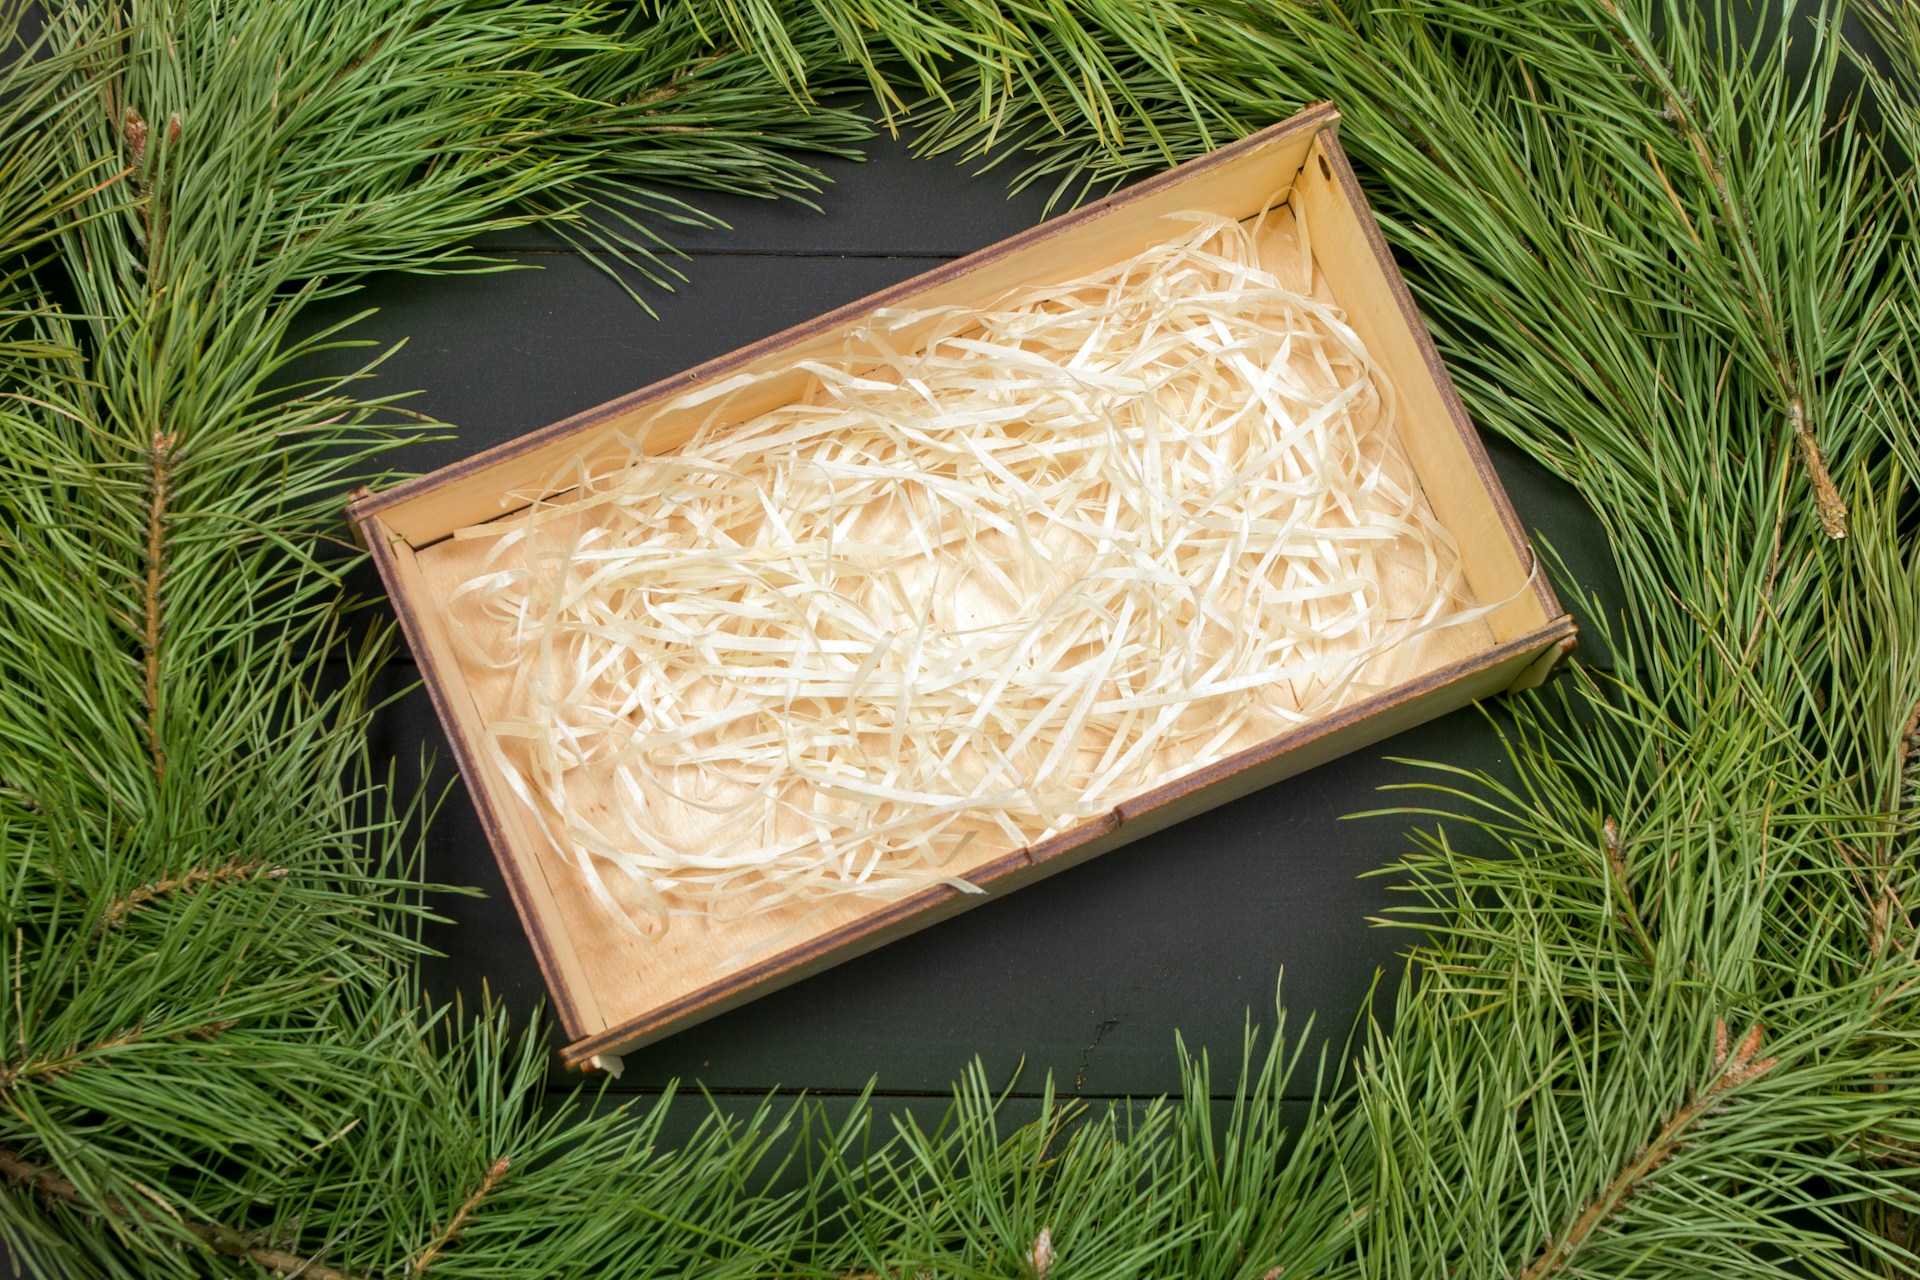
Our last idea is the simplest and maybe the most elegant. A shallow kraft tray box filled with white paper shred looks like a high end gift set before you even add anything. Nestle in a candle shaped soap, a jar of jam, a mug or a few homemade treats, then wrap the box in a sprig of fresh pine. Shred paper is easy to make with a paper shredder and plain printer paper, so it costs you nothing. Want the wrapping to match? Our gift wrapping tricks will help finish the look. Which of these DIY Christmas gift boxes will you make first?
You will need: A shallow kraft box or tray, plain white paper, a paper shredder or scissors, a few gifts, a pine sprig, twine.
How to make it: 1. Shred white paper into thin strips and fluff it up. 2. Fill the tray halfway with shred. 3. Nestle the gifts in so they sit level. 4. Add a pine sprig and tie with twine.