Gift Wrapping Tricks: 16 Ideas That Make Cheap Presents Look Expensive
Gift wrapping tricks are the secret behind those presents that look like they came from a fancy boutique, even when the gift inside cost ten dollars. The good news is that most of them use plain kraft paper, a bit of twine and things you already have in the kitchen or the backyard. Holiday shoppers are already wrapping early this year, and short videos showing clever folds are being saved and shared by the hundreds of thousands. We gathered the ideas that give you the most wow for the least money, from a simple pleat that looks designer to toppers made from cinnamon sticks and dried oranges. None of them need special skills, and several are perfect for kids to help with. Grab your scissors, clear off the table and get ready to make your gifts the prettiest ones under the tree..
Gift Wrapping Tricks Start With Kraft Paper and Dried Oranges

Plain brown kraft paper is the cheapest roll in the store, yet it is the base of almost every expensive looking gift you see online. The trick is all in the toppers. Plaid ribbon, a dried orange slice, a sprig of pine and a blank kraft tag turn a simple box into something that looks hand delivered from a farmhouse shop. It is the same idea behind a folding trick reel that passed 515,000 reactions this season: small details, big impact. Start here, and every idea below will build on this cozy look..
You will need: a roll of brown kraft paper, plaid ribbon, jute twine, dried orange slices, small pine sprigs, round kraft tags and double sided tape.
How to make it: 1. Wrap each box tightly in kraft paper and use double sided tape so no tape shows. 2. Tie plaid ribbon or twine around the box in a cross and finish with a neat bow. 3. Tuck a dried orange slice and a pine sprig under the knot and add a blank tag.
Pleated Paper Fold for a Luxe Look
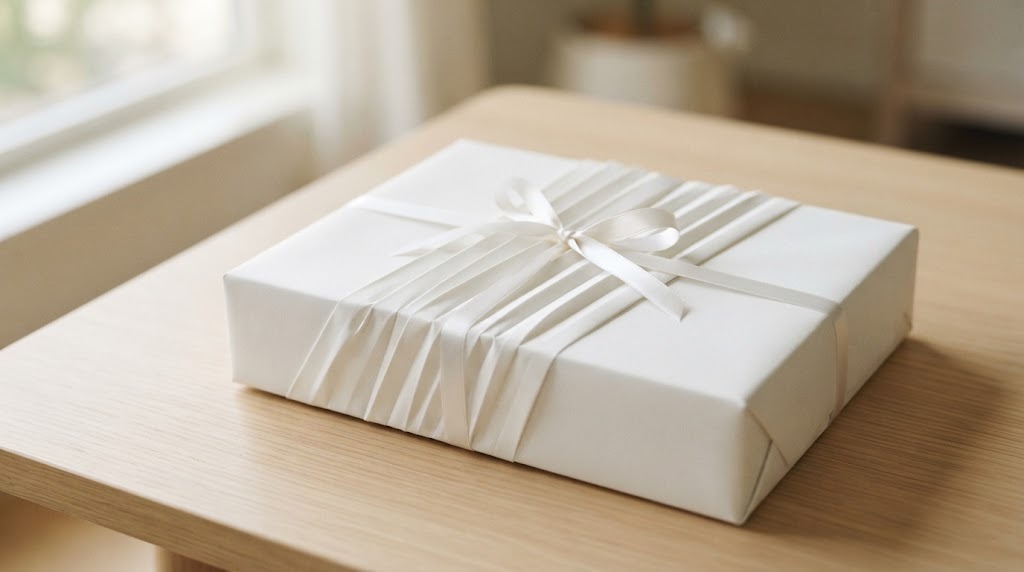
Of all the gift wrapping tricks, a band of crisp pleats across the top of a box is the fold that makes people ask which store you went to. It looks complicated, but it is really just a series of small accordion folds made before you wrap. The pleats catch the light and give plain white or solid paper a high end texture. Finish with a thin satin ribbon tucked along the pleat line. Would you try this on the most important gift on your list first?
You will need: solid colored wrapping paper, a ruler, a bone folder or the back of a spoon, double sided tape and thin satin ribbon.
How to make it: 1. Cut the paper to size, then mark a diagonal line where you want the pleats. 2. Fold the paper back and forth along that line in half inch folds and press each crease flat. 3. Wrap the box as usual with the pleats on top, then tie a ribbon along one side of the pleat band.
Diagonal Wrap When the Paper Runs Short
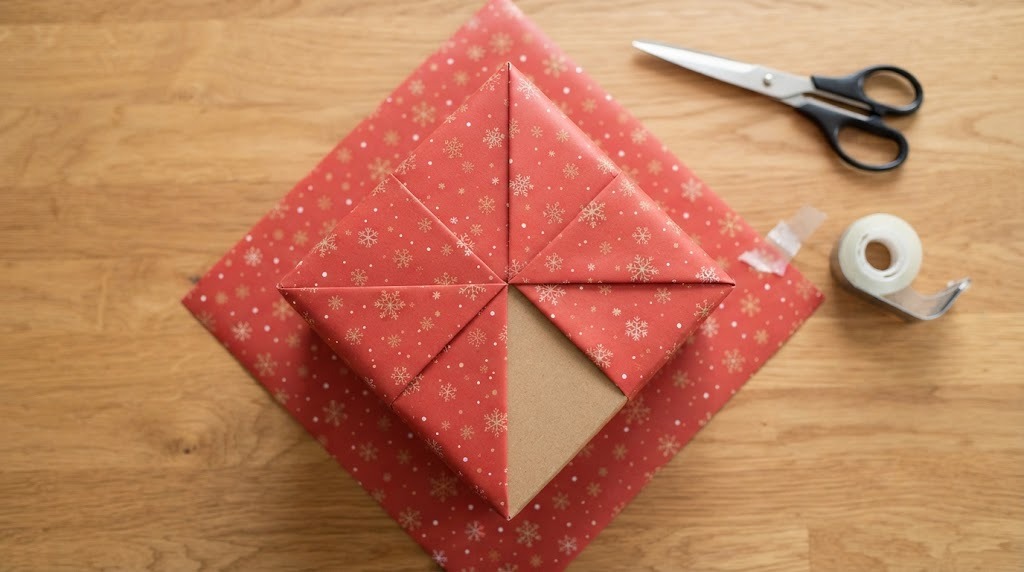
Down to the last scrap of your favorite paper? Turn the box at an angle and wrap it on the diagonal. This clever method uses far less paper than the usual way, and the corners fold up to meet neatly on top like an envelope. It is one of the most shared gift wrapping tricks every December because it saves both money and frustration. Once you try it, you may never go back. How many scraps are hiding in your wrapping bin right now?
You will need: a square of wrapping paper, scissors, clear tape and ribbon.
How to make it: 1. Set the box diagonally in the center of the paper so the corners just reach the top of the box when folded up. 2. Fold one corner up, then tuck and crease the sides of the next corner before folding it over. 3. Repeat around the box, tape the last corner in the center and cover the seam with a bow.
Fabric Furoshiki Knot Wrap
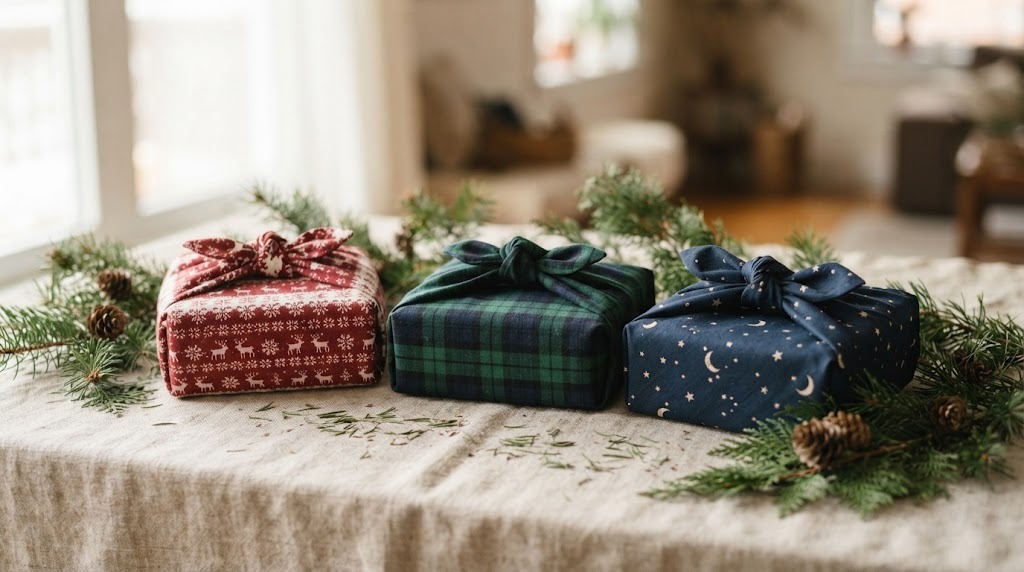
Furoshiki is a traditional Japanese way of wrapping with a square of cloth, and it makes any gift feel thoughtful and a little luxurious. A tea towel, a bandana or a scarf from the thrift store works perfectly, and the wrap becomes a second gift. As gift wrapping tricks go, there is no tape, no waste and no struggling with awkward shapes. Round items like jars and bottles are especially easy. Which fabric in your closet would make the prettiest wrap?
You will need: a square of fabric about three times as wide as the gift, such as a tea towel, scarf or bandana.
How to make it: 1. Lay the fabric flat and place the gift in the center at a slight angle. 2. Bring two opposite corners up and tie them in a firm knot on top. 3. Bring the other two corners up, tie them over the first knot and fluff the ends.
Gift Wrapping Tricks With a Homemade Stamp
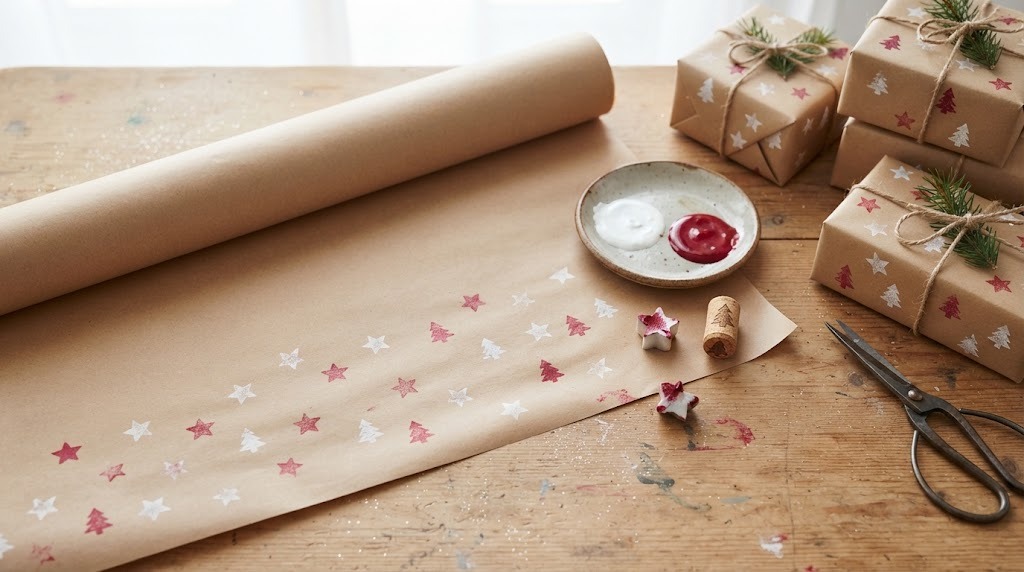
Custom wrapping paper costs a fortune, but a potato, a cork and a little paint make your own in minutes. Cut a star or a tree shape into half a potato, dip it in paint and stamp it across plain kraft paper. Kids love this job, and every sheet comes out a little different, which is exactly the charm. Let it dry flat overnight and you have a roll of paper nobody else has. What shape would your kids want to carve first?
You will need: brown kraft paper, a potato, a wine cork, a small knife used by an adult, white and red craft paint and a paper plate.
How to make it: 1. Cut the potato in half and have an adult carve a simple star or tree shape into the cut side. 2. Pour paint on a plate, dip the stamp and press it onto the paper in a loose pattern, adding dots with the cork. 3. Let the paper dry completely before wrapping.
Cinnamon Stick and Pine Sprig Topper
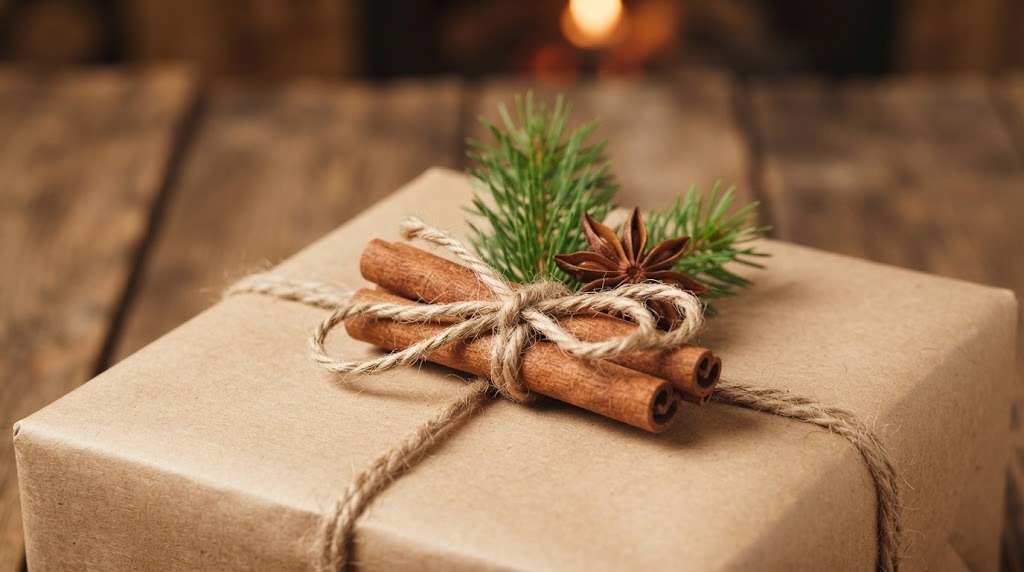
One of the sweetest gift wrapping tricks is to skip the store bought bow and reach into your spice drawer instead. A little bundle of cinnamon sticks tied with twine, a sprig of fresh pine and a star anise make a topper that looks beautiful and smells like the holidays. The person opening it gets a cozy surprise before they even see the gift. It works on kraft paper, white paper or plain brown boxes. Which spices do you already have that could dress up a present?
You will need: cinnamon sticks, star anise, small pine or cedar sprigs, jute twine and a dab of glue.
How to make it: 1. Tie the gift with twine in a simple cross. 2. Bundle two or three cinnamon sticks together and slide them under the twine knot. 3. Add a pine sprig behind the sticks and glue a star anise on top.
Woven Ribbon Lattice Top
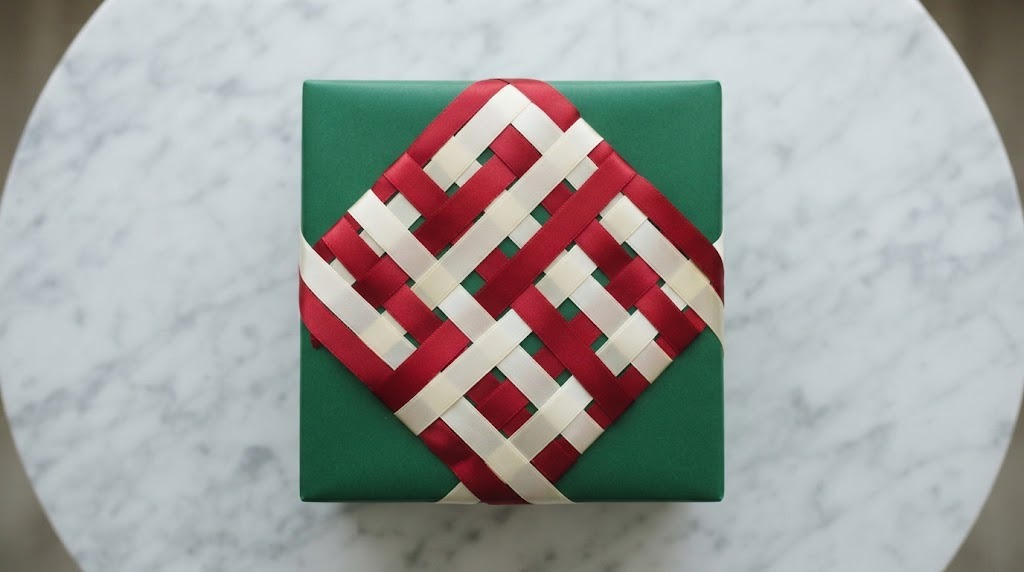
Weaving ribbon on top of a box looks like a designer move, but it is just over and under, like a basket. Two colors that contrast, such as red and cream, make the pattern pop. Ribbon ends are tucked and taped underneath, so the top stays clean. This is one of those gift wrapping tricks that turns one roll of plain paper into a dozen different looks depending on the ribbon you pick. Would you match your ribbons or mix bold colors?
You will need: a wrapped box, two colors of ribbon about one inch wide, scissors and double sided tape.
How to make it: 1. Lay four or five strips of ribbon across the top of the box in one direction and tape the ends underneath. 2. Weave strips in the other direction, going over and under. 3. Trim the ends and tape them neatly to the bottom of the box.
Candy Twist Wrap for Bottles and Tubes

Awkward shapes like bottles, rolled posters and tubes of lotion are the hardest gifts to wrap. The answer is one of our favorite gift wrapping tricks: make them look like giant candies. Roll the gift in paper, twist both ends and tie them with curly ribbon. It is fun, fast and kids think it is hilarious. Shiny paper makes it look even more like a wrapped sweet. Who on your list would laugh at a gift that looks like a giant piece of candy?
You will need: shiny wrapping paper or cellophane, clear tape, curling ribbon and scissors.
How to make it: 1. Cut paper a few inches longer than the gift on each end. 2. Roll the gift in the paper and tape the seam. 3. Twist each end and tie it tightly with curling ribbon, then curl the ends with scissors.
Gift Wrapping Tricks for a Hidden Gift Card Pocket
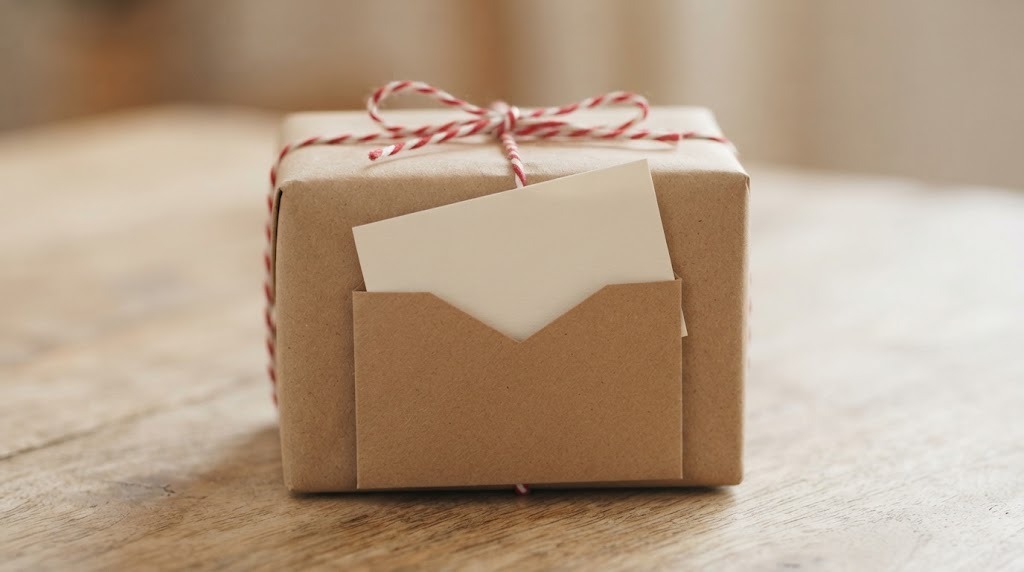
Gift cards are easy to lose in a pile of tissue, so fold a little pocket right into the wrapping. A short flap of paper folded up on the front of the box creates a sleeve that holds a card or a note. It looks thoughtful and keeps the card safe until the big moment. This is also a sweet way to add a small handwritten message. Who on your list would love a tiny surprise tucked into the paper?
You will need: wrapping paper, a gift card or note card, double sided tape and baker’s twine.
How to make it: 1. Wrap the box as usual but leave about three extra inches of paper on the front. 2. Fold that extra paper up and tape the sides to form a pocket. 3. Slide the card in and tie twine around the box to hold everything in place.
Baker’s Twine Crisscross With a Simple Tag
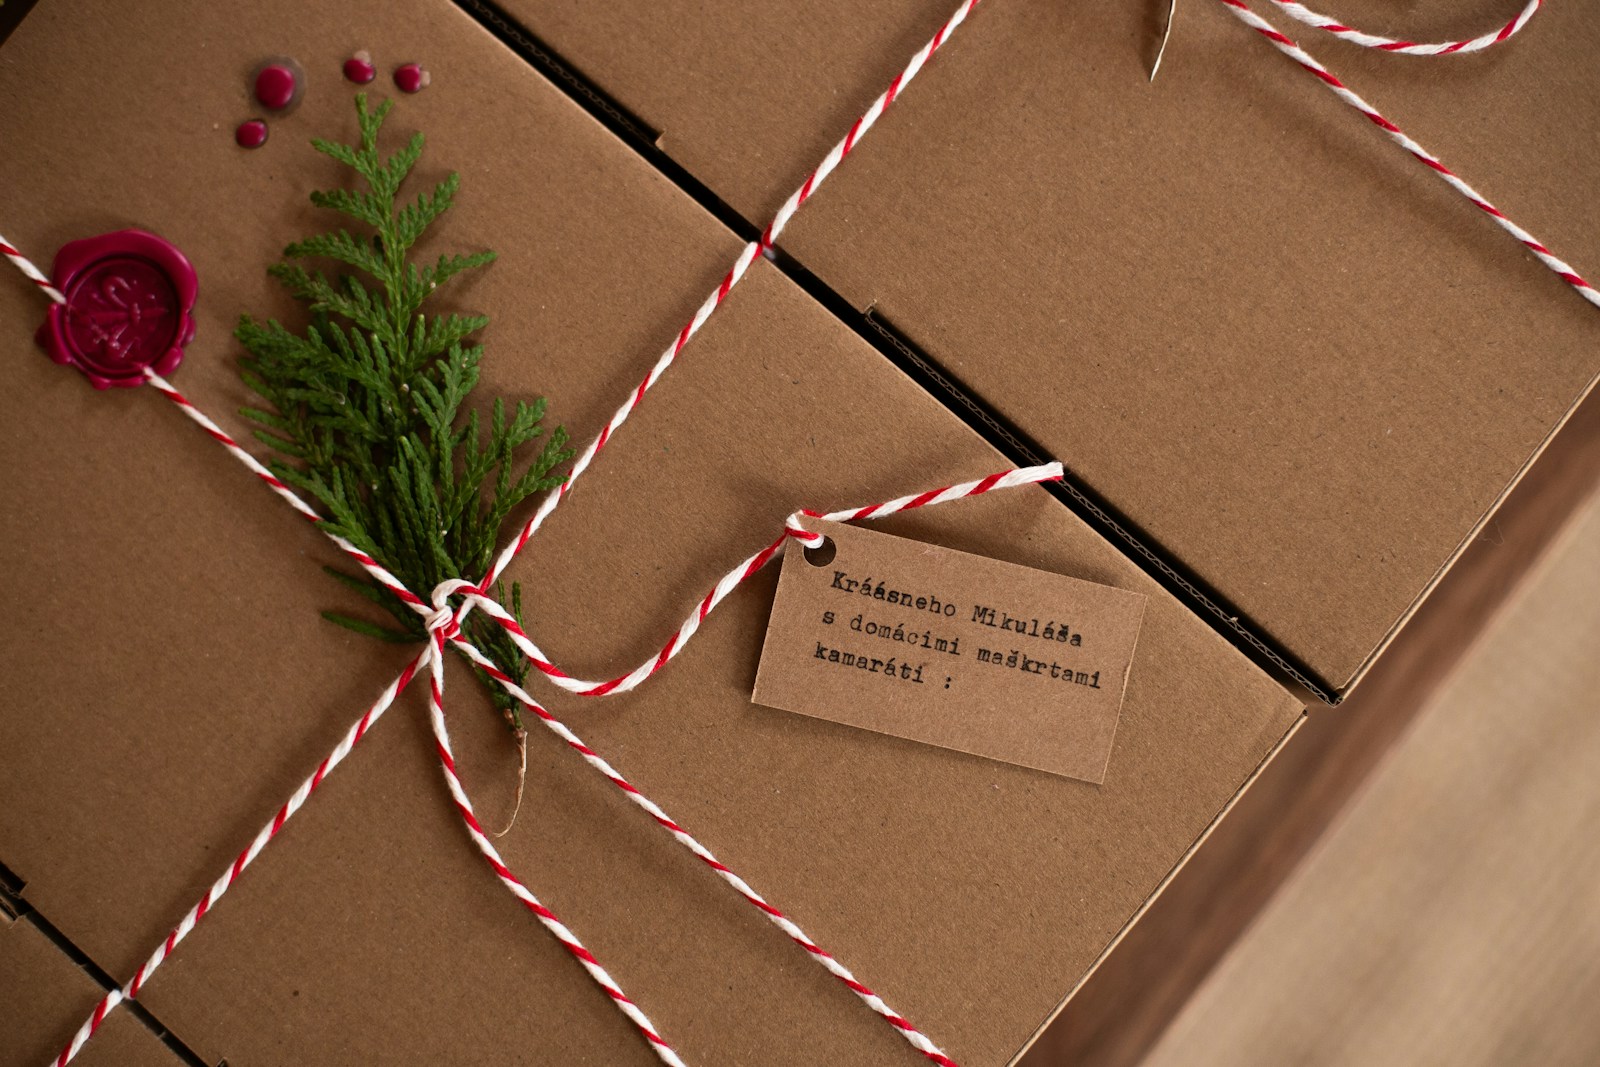
Red and white baker’s twine is one of the cheapest supplies in any craft aisle, and it instantly makes a plain box look like it came from a bakery. Wrap it around several times in a crisscross, add a tiny sprig of greenery and a handwritten tag, and you are done. Stack a few matching boxes together and they look like a set. It is the easiest of all these gift wrapping tricks for wrapping a lot of gifts fast. How many presents could you finish in one evening with this?
You will need: kraft paper or brown boxes, red and white baker’s twine, small evergreen sprigs and paper tags.
How to make it: 1. Wrap the twine around the box three or four times in each direction. 2. Tie a tight knot on top and trim the ends evenly. 3. Slide a sprig of greenery and a tag under the knot.
Old Maps and Sheet Music Wrap

Old road maps and pages of sheet music give gifts a vintage, collected look that feels personal. Use a map of a place that matters, like the town where you met or a favorite vacation spot, and the wrap becomes part of the story. Thrift stores and yard sales are full of these for pennies. Black velvet ribbon or simple twine keeps the look classic. Which place would you want on your map wrap?
You will need: old maps, used music books or copies, clear or double sided tape and velvet ribbon or twine.
How to make it: 1. Flatten the maps or pages under a heavy book overnight. 2. Tape several pages together with double sided tape if one is too small. 3. Wrap the gift and finish with a velvet bow.
Gift Wrapping Tricks Using Kids Art Paper
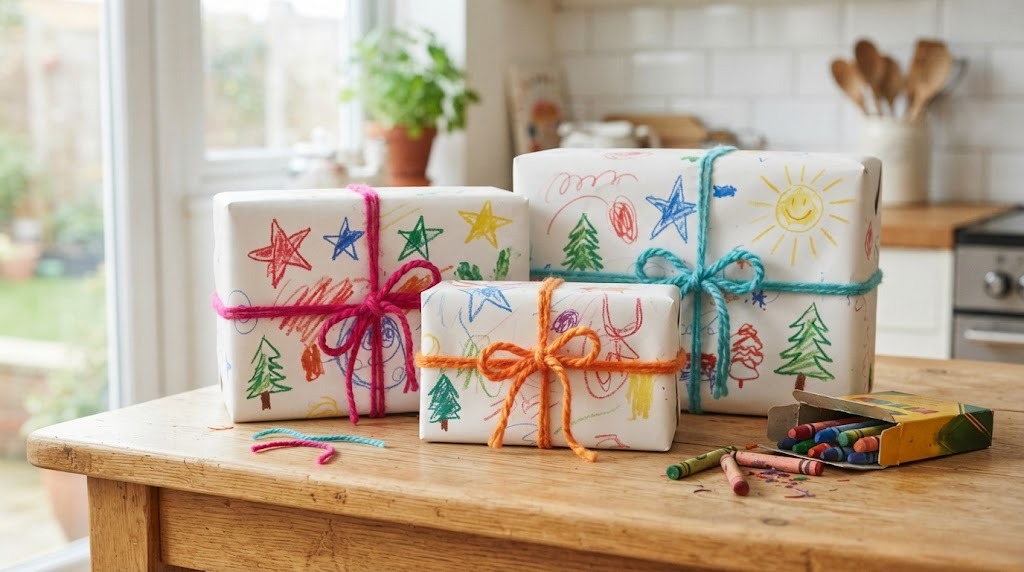
Hand a roll of white paper and a box of crayons to your kids, and you have the most loved wrapping paper of the season. Grandparents especially treasure gifts wrapped in little drawings of stars, trees and snowmen. It keeps kids busy on a cold afternoon and costs almost nothing. For more gift ideas they can help with, see our easy DIY Christmas gifts. Who would cry happy tears over a gift wrapped by your kids?
You will need: a roll of white craft or butcher paper, crayons, washable markers or finger paint and colorful yarn.
How to make it: 1. Roll out a long sheet of paper on the floor or table and tape down the corners. 2. Let the kids draw and color all over it, then let paint dry if used. 3. Wrap the gifts and tie them with bright yarn bows.
Paper Bag Turned Gift Box
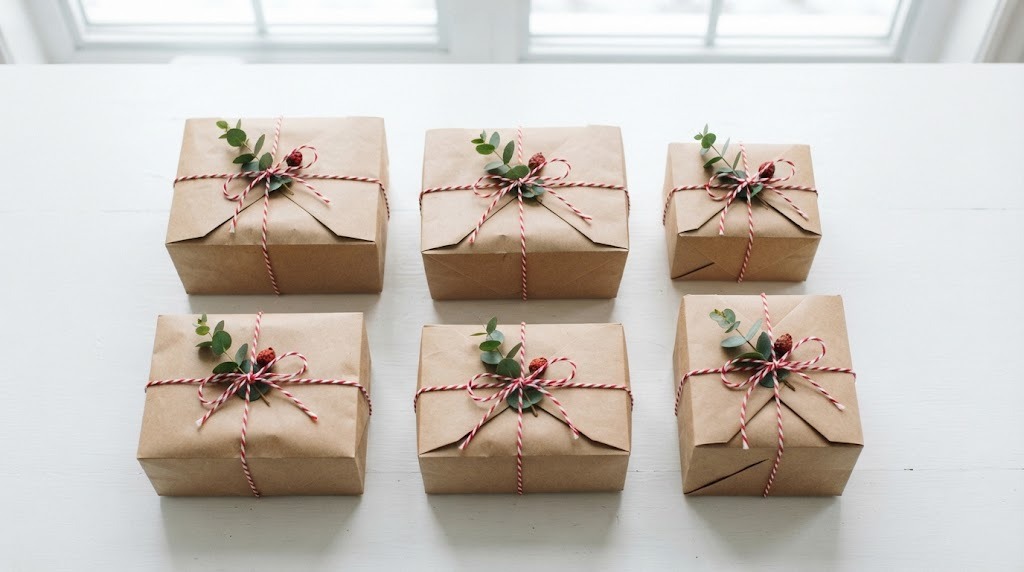
Those brown paper grocery bags in your pantry can be folded into sturdy little gift boxes. Cut the bag open, flatten it and fold it like an origami box, and you have a free, recyclable container that looks rustic and charming. It is perfect for cookies, candles, ornaments or small handmade gifts. Tie it with baker’s twine and a sprig of greenery. How many paper bags are waiting under your sink right now?
You will need: clean brown paper bags, scissors, a ruler, glue stick and twine.
How to make it: 1. Cut the bag open, trim off the bottom and cut two equal squares. 2. Fold each square into a simple origami box, making one slightly larger for the lid. 3. Fill the box, put on the lid and tie it with twine.
Pom Pom Yarn Topper

Fluffy yarn pom poms make playful toppers that cost almost nothing, especially if you have leftover yarn from a knitting project. Make one big pom pom for a bold look or a cluster of tiny ones in different colors. They are soft, cheerful and kids love making them. Best of all, they can be hung on the tree after the gift is opened. What colors would you pick for your pom poms this year?
You will need: leftover yarn in two or three colors, a fork or a piece of cardboard and scissors.
How to make it: 1. Wrap yarn around a fork or a strip of cardboard about 60 times. 2. Slide it off, tie a piece of yarn tightly around the middle and cut the loops on both sides. 3. Trim it into a round ball and tie it to the gift ribbon.
A Gift Wrapping Station on a Cart or Door
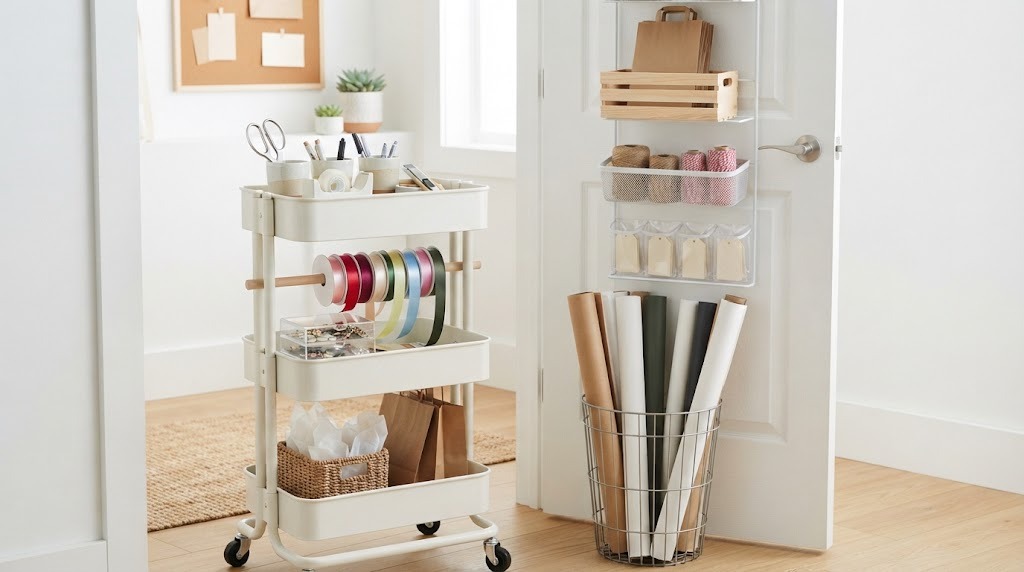
Half the stress of wrapping is hunting for the scissors and the tape. A rolling cart or the back of a closet door turns into a wrapping station that keeps everything together. Paper rolls stand upright in a bin, ribbon spools slide onto a dowel and small cups hold tape, tags and pens. When the holidays are over, it all stays ready for birthdays, so your gift wrapping tricks are always within reach. Where in your house could a little wrapping station fit?
You will need: a rolling cart or over the door organizer, a tall bin, a wooden dowel, small cups and adhesive hooks.
How to make it: 1. Stand paper rolls upright in a tall bin on the bottom shelf. 2. Slide ribbon spools onto a dowel and rest it across two hooks. 3. Fill small cups with scissors, tape, tags and pens and keep them on the top shelf.
Gift Wrapping Tricks: A Mini Ornament as a Reusable Tag
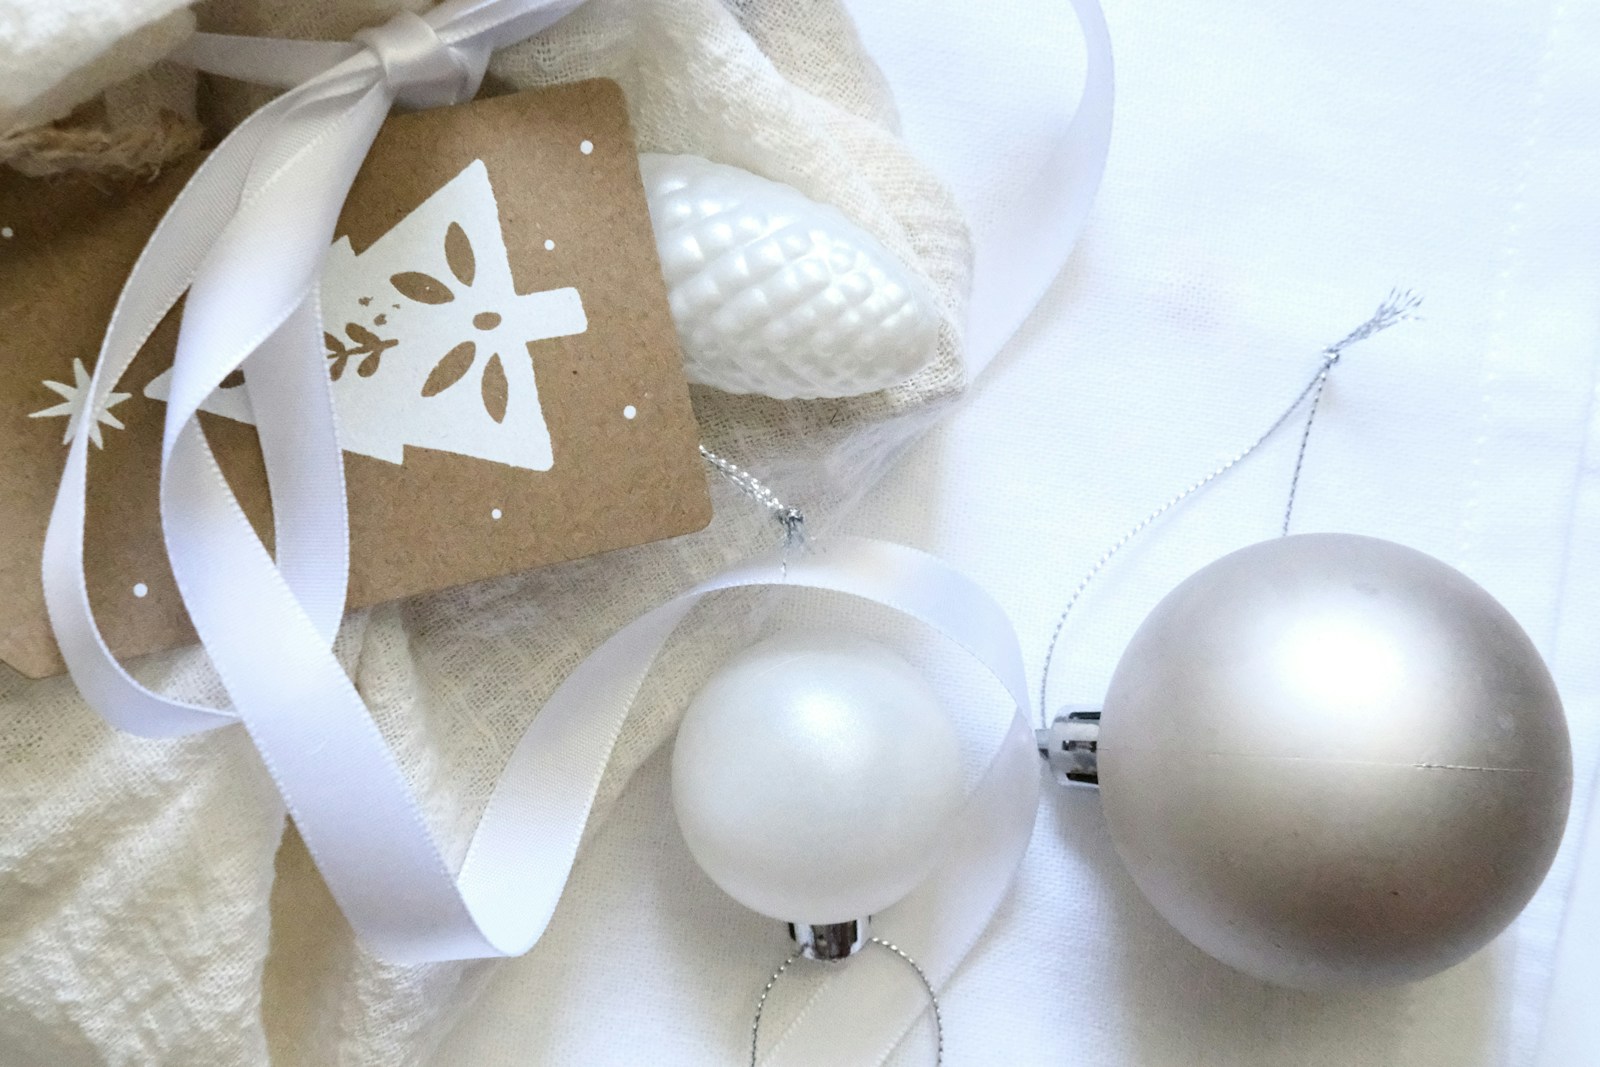
Instead of a paper tag that ends up in the trash, tie a small ornament to the bow and write the name on it with a paint pen. The gift tag becomes a keepsake that goes straight onto the tree. Clear plastic ornaments, wooden discs or felt shapes all work well. Over the years, your family will collect a little ornament from every holiday. Whose name would you write on the very first one?
You will need: small shatterproof ornaments or wooden ornament discs, a white or gold paint pen and ribbon.
How to make it: 1. Write the name on the ornament with a paint pen and let it dry. 2. Thread the ribbon through the ornament hanger. 3. Tie it onto the bow so it sits right on top of the gift.