Thanksgiving Place Cards: 16 Easy DIY Ideas Guests Will Want to Take Home
Thanksgiving Place Cards are the tiny detail that makes every guest feel truly expected. Before anyone tastes the turkey, they walk around the table looking for their own name, and that little moment of being welcomed sets the mood for the whole meal. The good news is that you do not need a stationery shop or a big budget. A pinecone from the yard, a slice of dried orange, a few wine corks or a tiny pot of thyme can hold a name card beautifully. Below are 16 easy handmade ideas, each with a short supply list and simple steps, and many of them double as a small favor guests can carry home. Pour a cup of cider, clear a corner of the kitchen table and let’s start making..
Thanksgiving Place Cards That Make Every Seat Feel Special
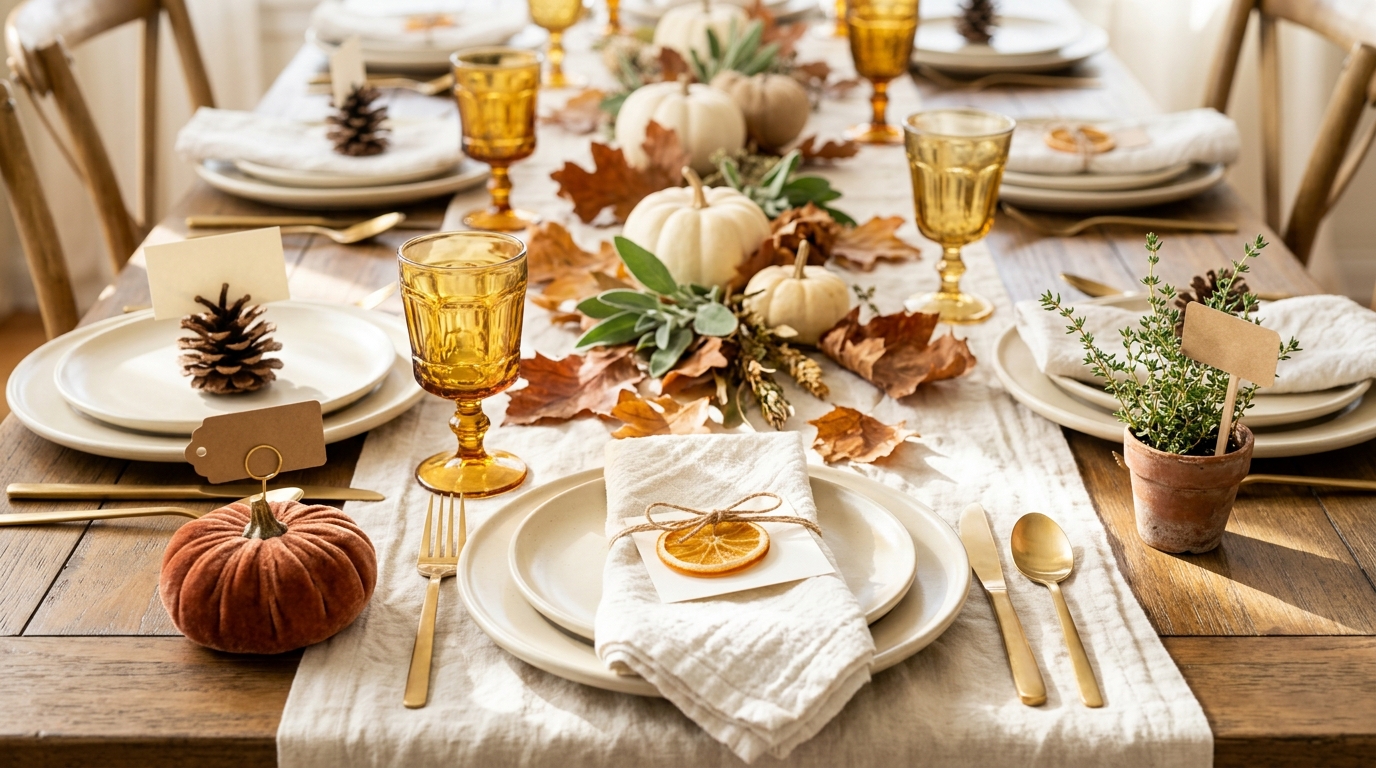
Mixing styles is the secret to Thanksgiving Place Cards that get everyone talking. Here a velvet pumpkin, a pinecone, a dried orange slice and a tiny herb pot each hold a name, and the table suddenly feels collected and warm instead of matchy. Guests love guessing which one is theirs, and kids enjoy hunting for their spot. Pick three or four of the ideas below and repeat them around the table so the look stays tidy. Which one would you sit down at first..
You will need: Plain cream card stock, a fine black pen, small kraft tags, jute twine and a few natural pieces such as pinecones, dried orange slices or mini pots.
How to make it: 1. Cut cards about 3 by 2 inches and fold some in half to make little tents. 2. Write each name in your neatest handwriting and let the ink dry. 3. Attach every card to a holder from the ideas below and set one at each plate.
Velvet Pumpkin Name Holders
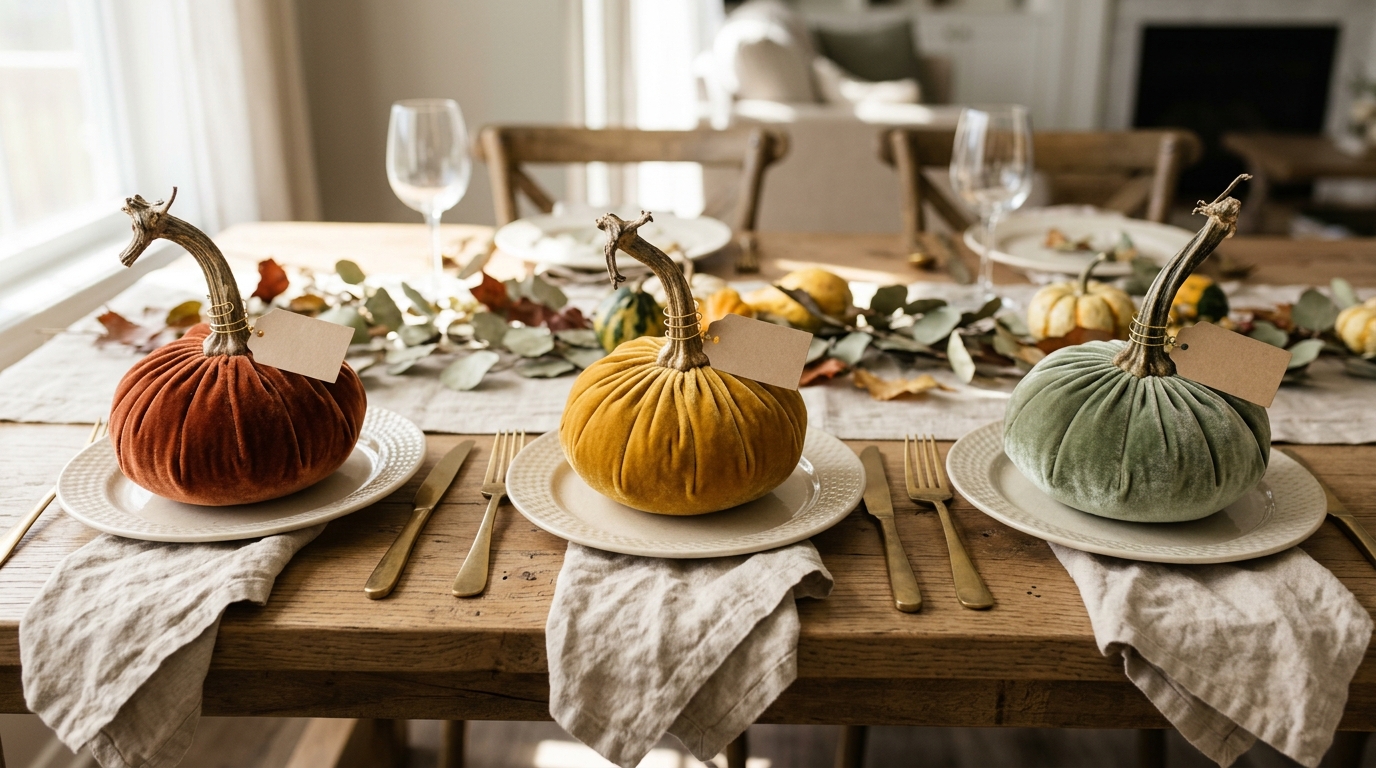
Velvet pumpkins look like something from a fancy home store, yet a scrap of fabric and a handful of rice are all it takes. Each one sits plump and soft on the plate, and a curl of gold wire holds the name tag right next to the stem. They also make a lovely keepsake, because guests can tuck theirs on a bookshelf when they get home. Save real stems from your carving pumpkins for the most natural look. Would you choose rust, mustard or sage?
You will need: Velvet fabric scraps, a needle and strong thread, rice or poly filling, dried pumpkin stems, gold craft wire and small kraft tags.
How to make it: 1. Cut a circle of velvet about 10 inches wide and sew a running stitch around the edge. 2. Fill the center with rice and filling, pull the thread tight and knot it. 3. Glue a stem into the top (adult help with hot glue), twist gold wire around it and hook on a name tag.
Pinecone Place Card Holders
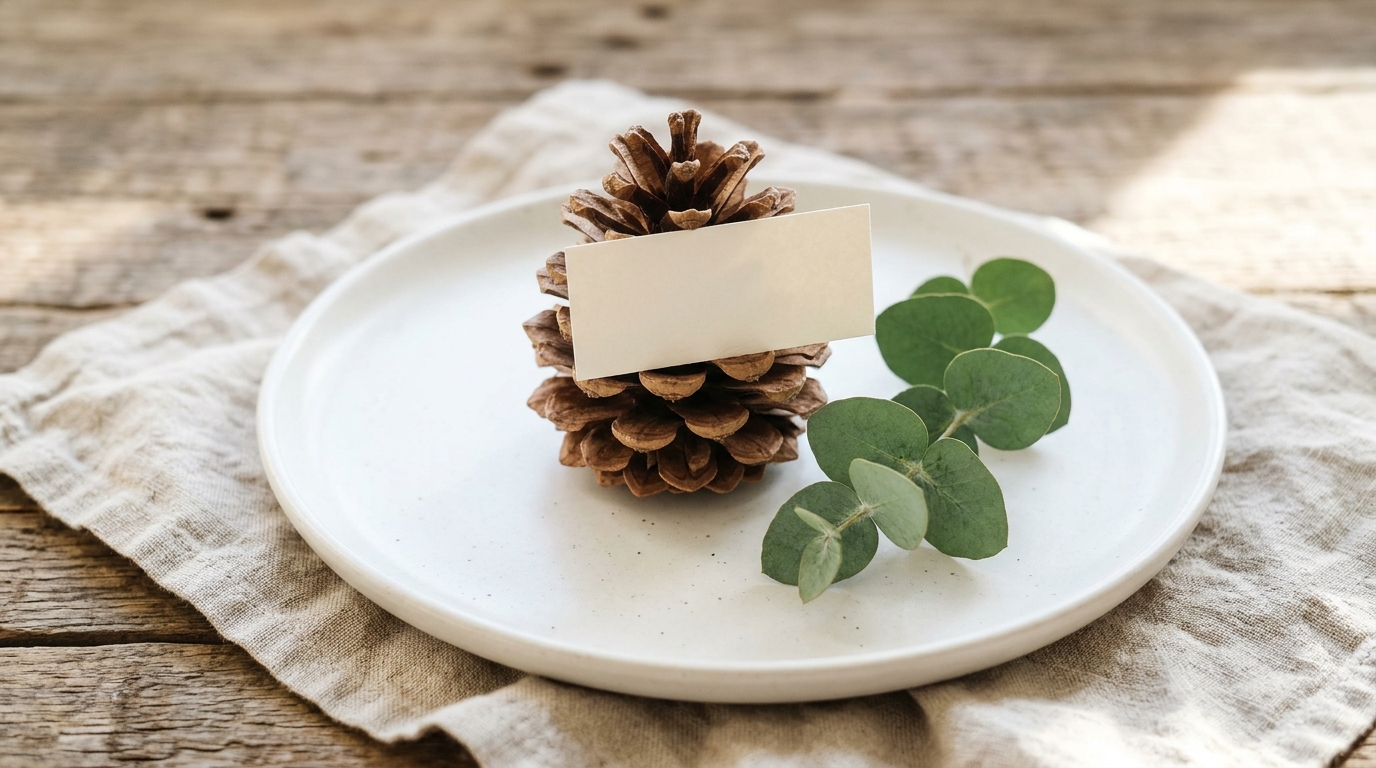
Pinecones are free, sturdy and already built to hold a card between their scales. Pick ones with a flat base so they stand up on their own, or trim the bottom with garden snips. A quick bake on low heat in the oven, with an adult in charge, dries them out and sends any little bugs packing. Leave them natural for a rustic table, or brush the tips with white paint for a frosted look. Have you got a pine tree nearby you could raid this weekend?
You will need: Medium pinecones with flat bottoms, cream card stock, a pen, garden snips and optional white craft paint.
How to make it: 1. Rinse the pinecones, let them dry, then bake on a lined tray at a low setting for about 30 minutes with adult help. 2. Trim the base if a cone wobbles. 3. Write the names on small cards and slide each one deep between two top scales.
Thanksgiving Place Cards With Dried Orange Slices
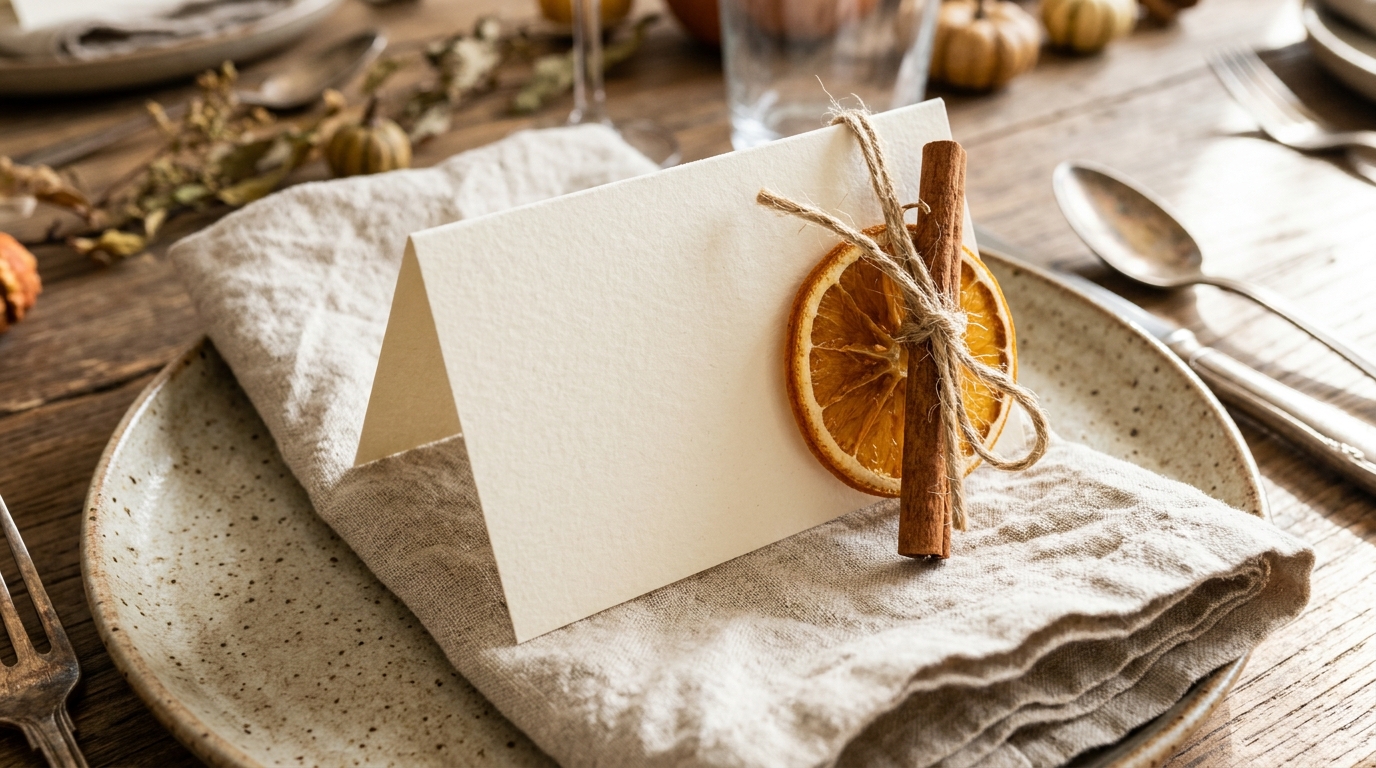
These Thanksgiving Place Cards glow like stained glass when the afternoon light hits the orange slice. They smell wonderful too, thanks to the cinnamon stick tucked under the twine. Dry a whole tray of oranges at once and keep the extras for garlands and gift wrap. The look is cozy, natural and costs only a couple of dollars for a full table. Guests always pick these up to sniff them. Could you dry a batch of oranges this week?
You will need: Two or three oranges, a sharp knife (adult job), a baking tray, cream card stock, jute twine and cinnamon sticks.
How to make it: 1. Slice the oranges thin, pat them dry and bake on a low heat for about 3 hours, turning once, with adult help. 2. Fold a card into a tent and write the name on the front. 3. Tie the orange slice and a cinnamon stick to the corner with twine.
Wine Cork Card Holders
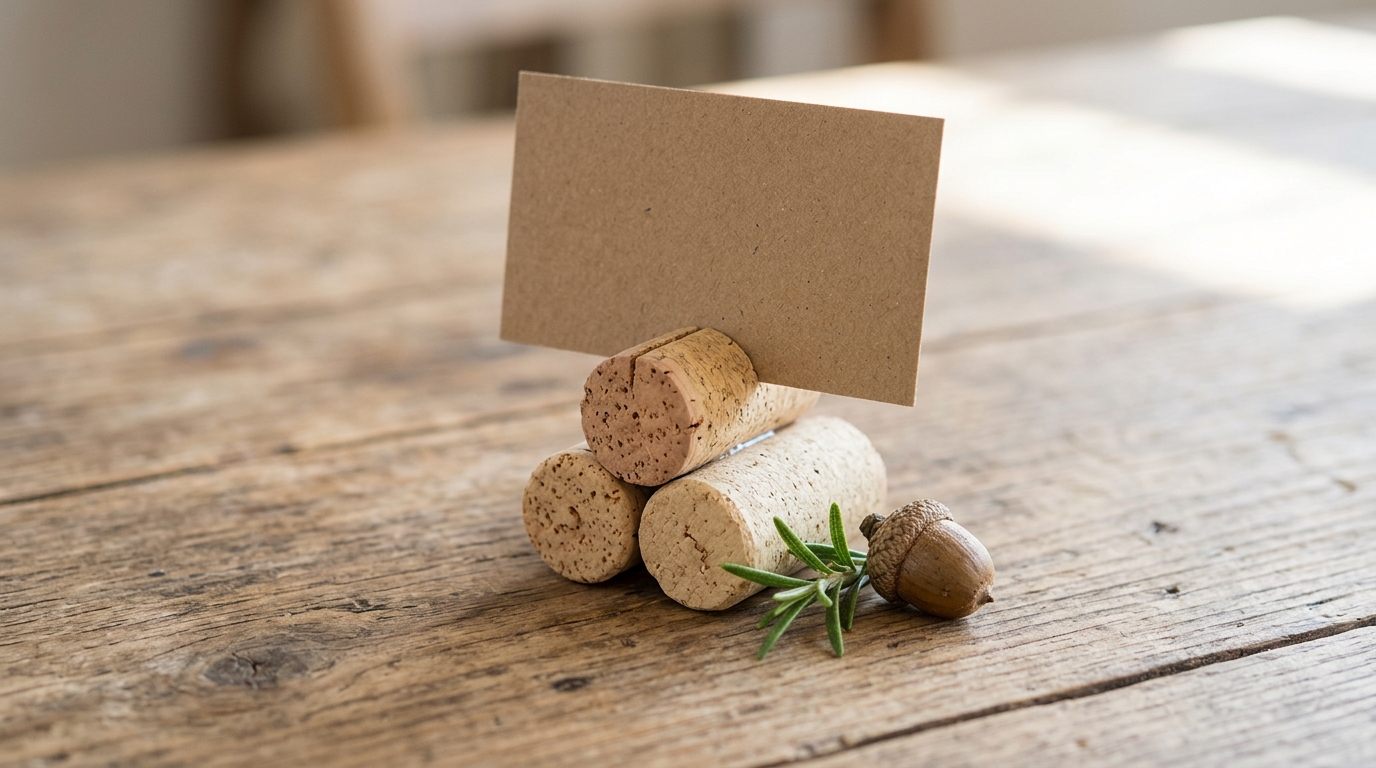
If you have been saving wine corks in a drawer, here is the perfect use for them. Three corks glued side by side make a sturdy little base, and a slit in the top cork holds the name card upright. Add a sprig of rosemary or a single acorn for a touch of the season. They take about two minutes each, and grown up guests always smile at them. How many corks are hiding in your kitchen right now?
You will need: Wine corks, a craft knife (adult help), craft glue, kraft card stock, a pen, rosemary sprigs and acorns.
How to make it: 1. Glue two corks side by side and set a third on top, then let them dry. 2. With adult help, cut a shallow slit along the top cork. 3. Slide in a small name card and tuck a sprig of rosemary or an acorn beside it.
Tiny Jam Jar Name Favors
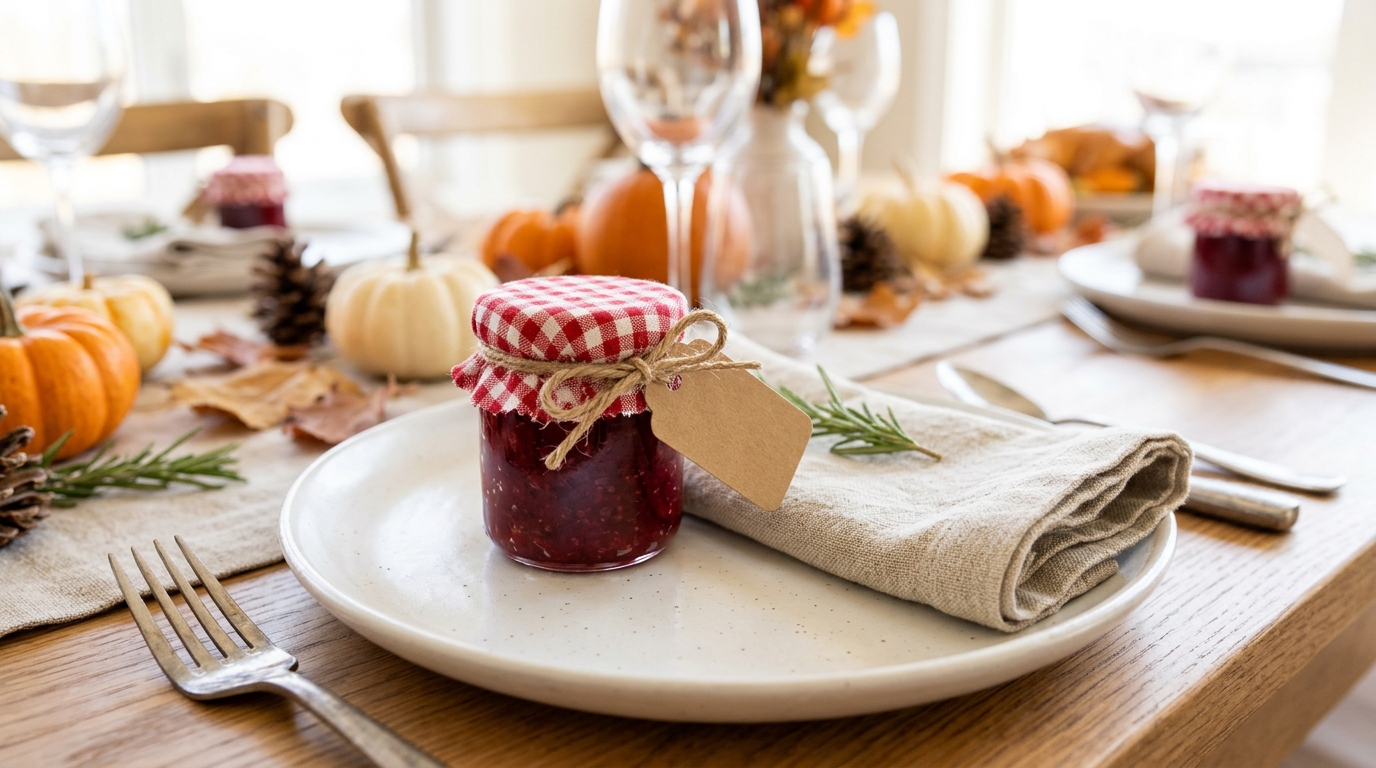
A tiny jar of homemade cranberry jam is a place card and a thank you gift at the same time. Guests find their name on the tag, then carry the jar home for tomorrow’s toast. A circle of gingham fabric on the lid gives it that country kitchen charm. If you do not make jam, fill the jars with spiced nuts or a little cocoa mix instead. Which filling would your family love most?
You will need: Small 4 ounce glass jars with lids, cranberry jam or another filling, gingham fabric, pinking shears, twine and kraft tags.
How to make it: 1. Fill each clean jar and close the lid tightly. 2. Cut a gingham circle a little larger than the lid with pinking shears and lay it on top. 3. Tie twine around the rim, add the name tag and set one jar on every plate.
Thanksgiving Place Cards That Grow: Mini Herb Pots
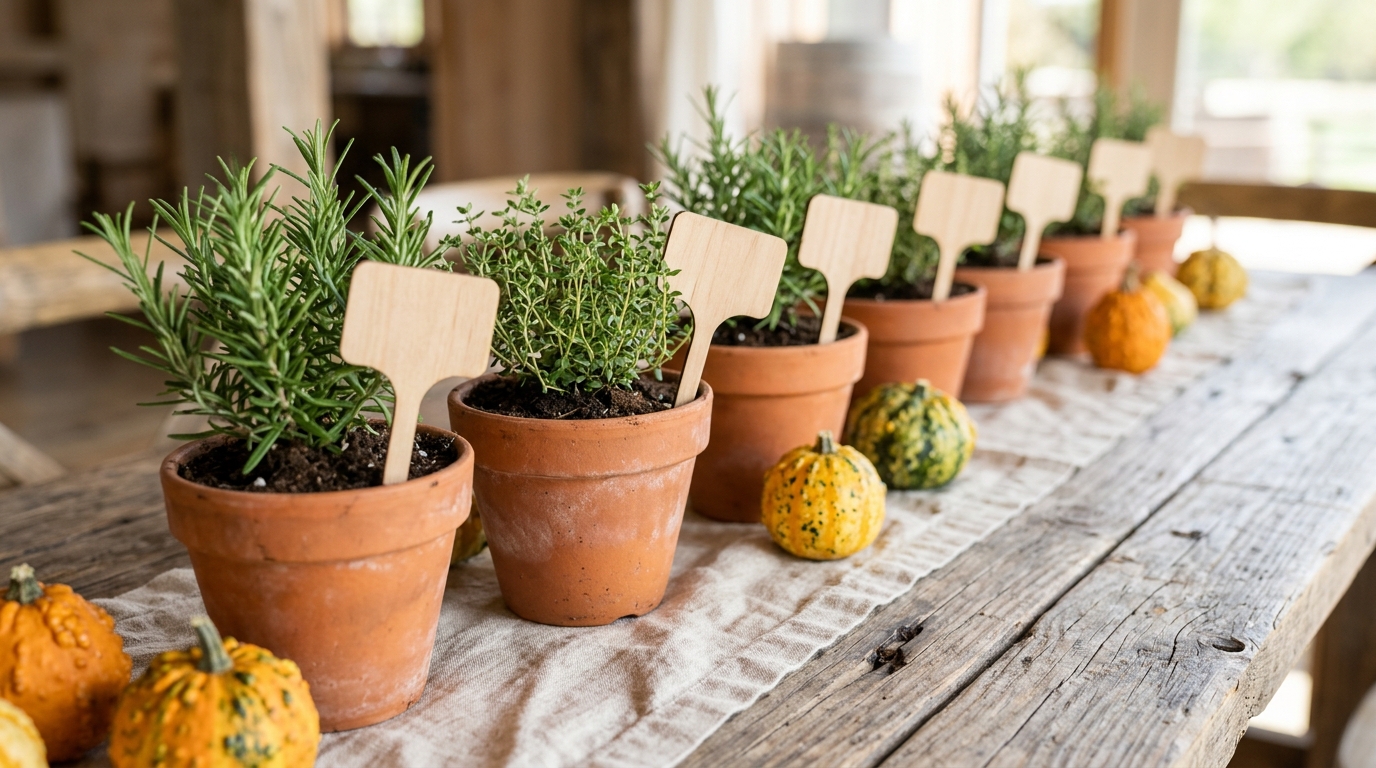
Thanksgiving Place Cards that keep growing long after the dishes are done are hard to beat. A tiny terracotta pot of thyme or rosemary fits right at the top of each plate, and a wooden plant marker carries the name. The herbs smell lovely next to the food and guests can pop the pot on a sunny windowsill at home. Buy a few larger herb plants and divide them to save money. Would your guests rather take home thyme or rosemary?
You will need: Mini terracotta pots about 2 inches wide, potting soil, small thyme or rosemary plants, wooden plant markers and a fine marker pen.
How to make it: 1. Divide larger herb plants into small clumps and plant one in each pot. 2. Write a name on every wooden marker and let it dry. 3. Push the marker into the soil and water lightly the day before the meal.
Painted Magnolia Leaf Names
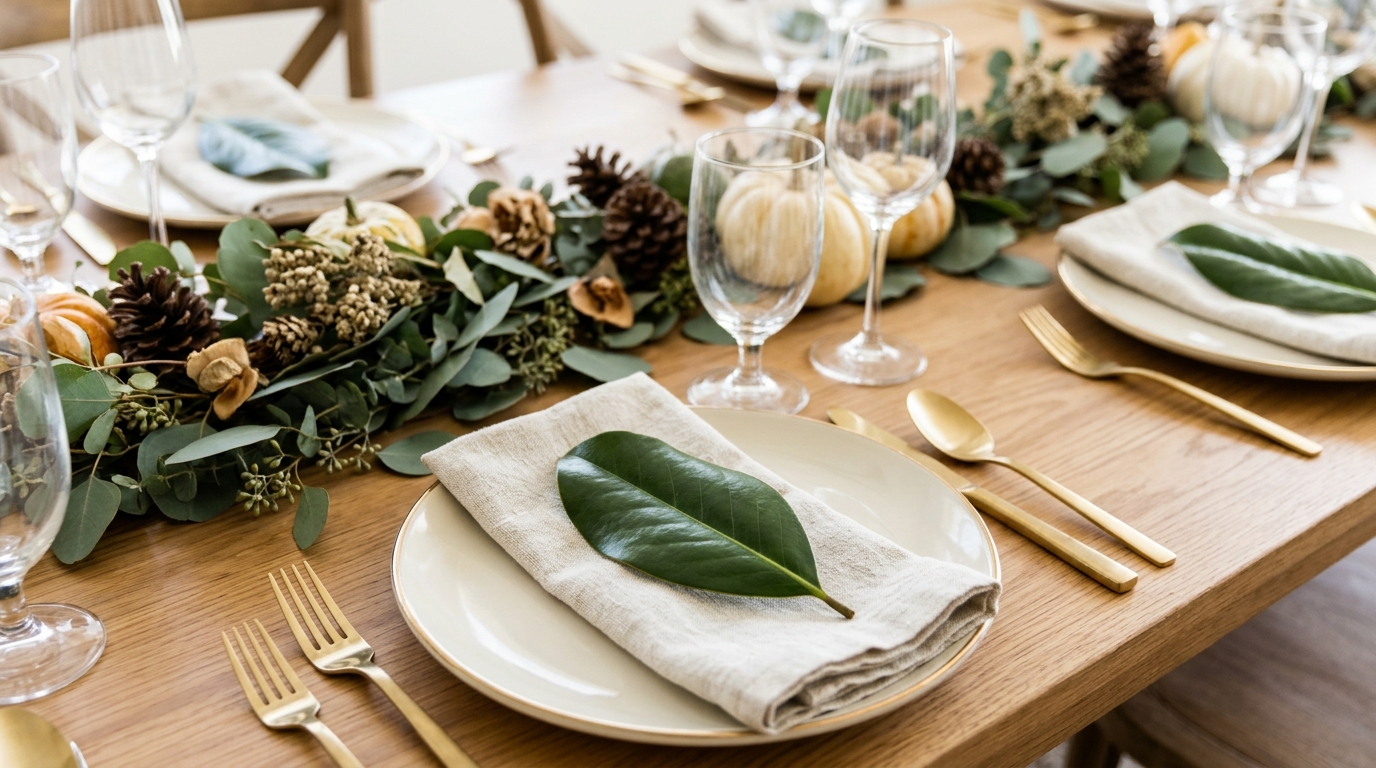
Big glossy magnolia leaves make a name look elegant without any effort. Write on the shiny top side with a white or gold paint pen and the letters pop against the deep green. They look like something from a southern wedding, yet the leaves are often free from a neighbor’s tree. Pick them the day before so they stay fresh, and wipe them with a damp cloth. Do you know someone with a magnolia tree in their yard?
You will need: Fresh magnolia leaves, a white or gold paint pen and a damp cloth.
How to make it: 1. Wipe each leaf clean and pat it dry. 2. Write the name across the widest part in your best letters and let it dry for a few minutes. 3. Lay one leaf on each plate or tuck it under the napkin.
Hand Lettered Heirloom Gourds
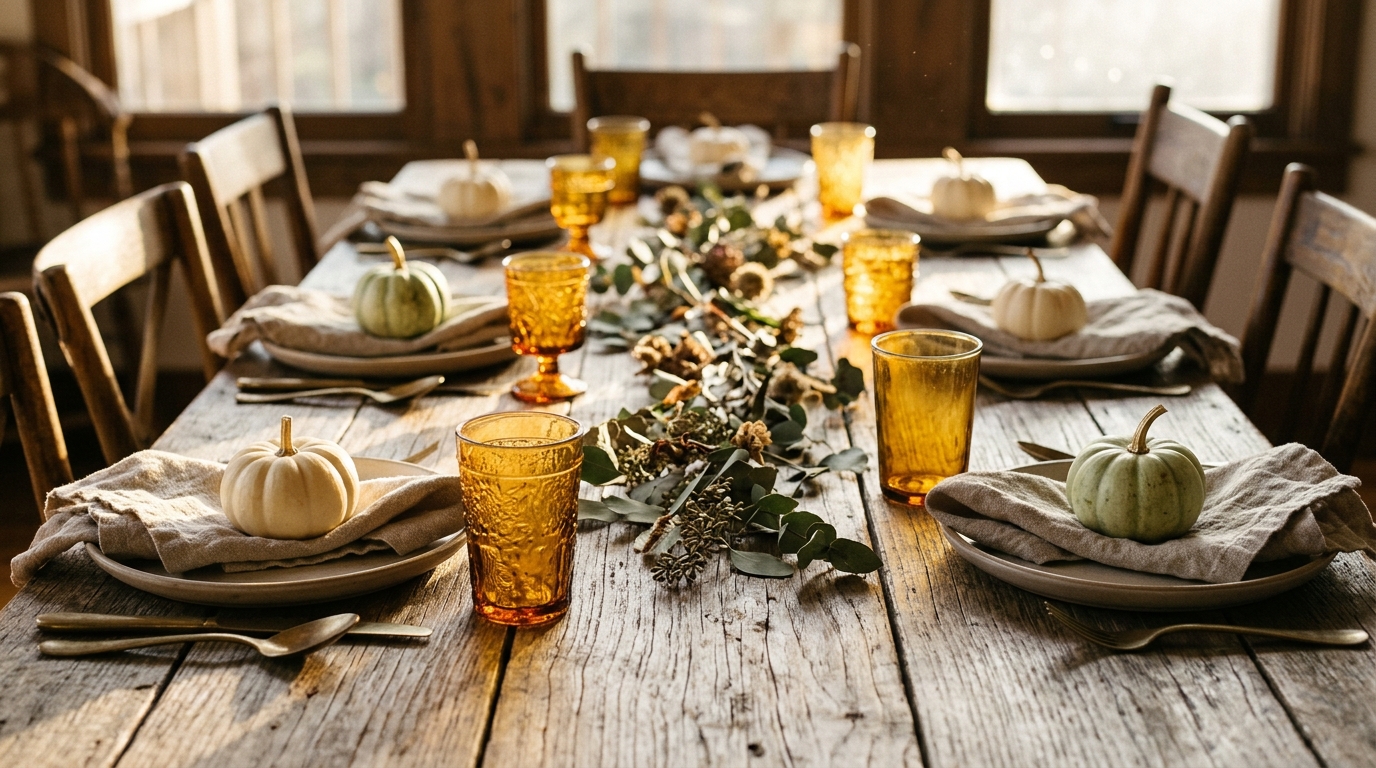
Heirloom gourds come in such pretty shapes that they barely need decorating. Paint the stem gold, then letter the name straight onto the smooth skin with a fine paint pen. They sit happily on the plate, last for weeks and work as fall decor long after the meal. Choose cream, pale green and soft orange gourds for a calm palette. Look for the flattest side when you write so the letters stay neat. Would you go gold or copper on the stems?
You will need: Small heirloom gourds, gold craft paint, a small brush and a fine paint pen.
How to make it: 1. Wash and dry the gourds well. 2. Paint the stems gold and let them dry for an hour. 3. Write each name on the flattest side with the paint pen and set one at every seat.
Thanksgiving Place Cards on Painted Wooden Spoons
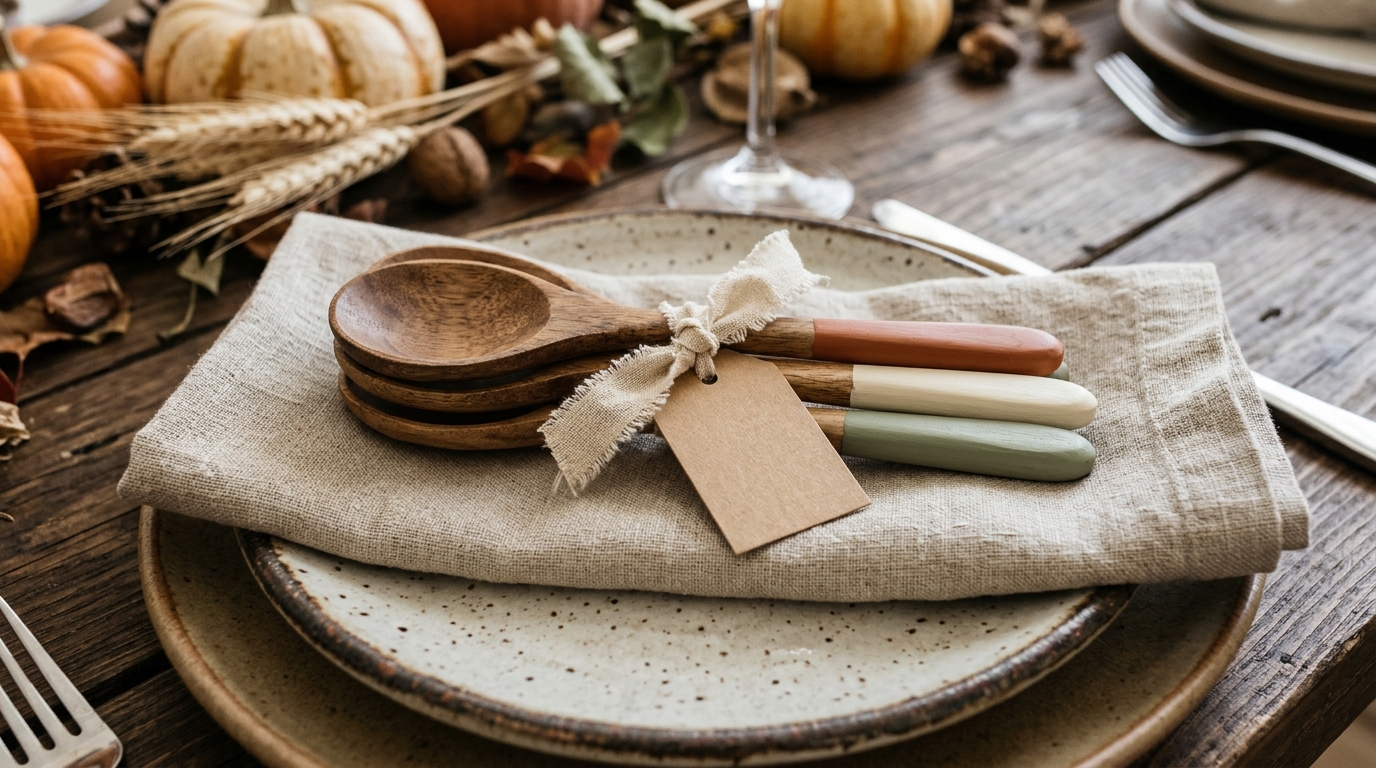
Wooden spoons are some of the most useful Thanksgiving Place Cards you can make, because guests will actually use them later. Dip the handles in soft fall colors, tie on a ribbon and add a name tag, then lay one across each napkin. The cooks in the family will be thrilled. A pack of small spoons from the dollar store covers the whole table, and the painting takes one evening. Who in your family would treasure a new kitchen spoon?
You will need: Small unfinished wooden spoons, craft paint in rust, cream and sage, painter’s tape, ribbon and small tags.
How to make it: 1. Wrap tape around each handle where you want the color to stop. 2. Paint the end of the handle in two coats and peel the tape while wet. 3. Once dry, tie on a ribbon and a name tag. Keep paint off the spoon bowl so it stays food safe.
Seed Packet Name Cards
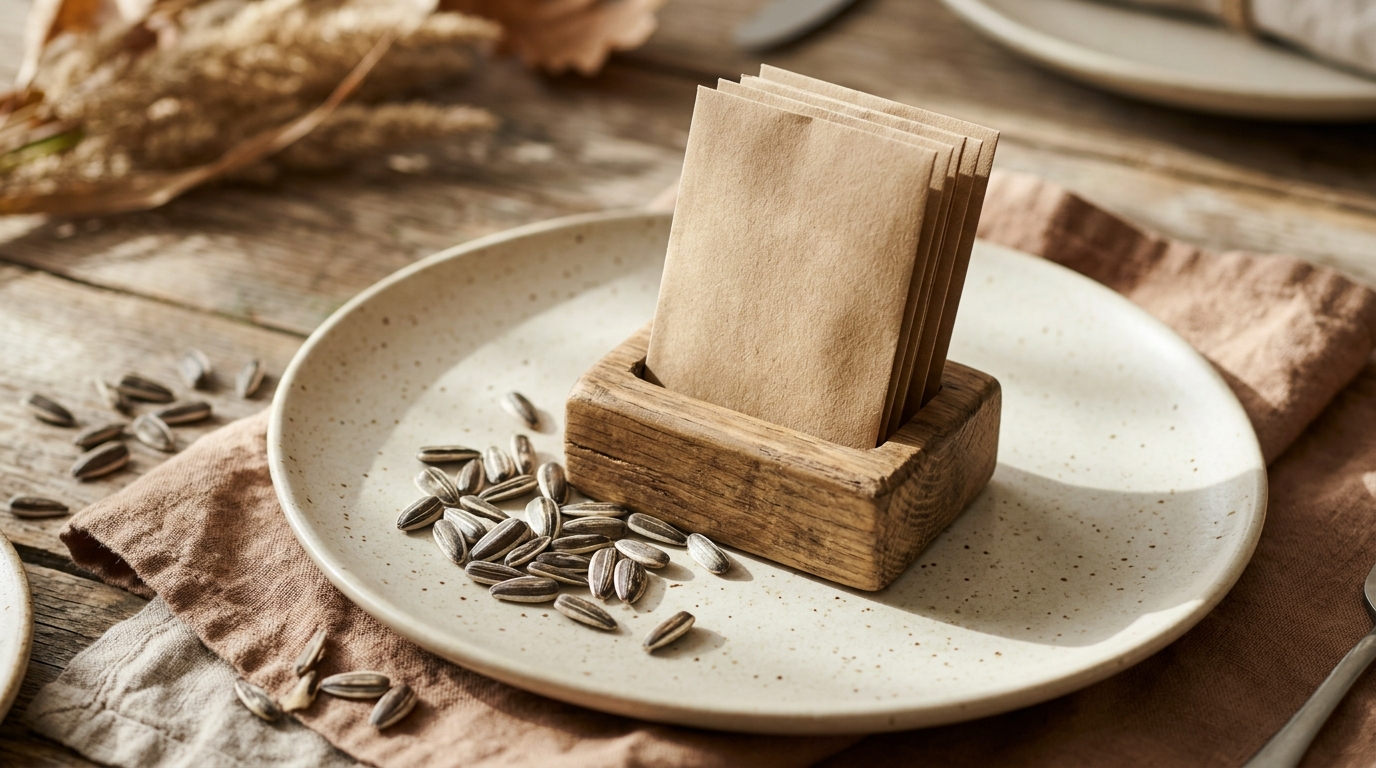
A little seed envelope with a name on the front feels like a promise of spring at a fall table. Fill each one with sunflower or wildflower seeds and guests can plant their place card next year. Plain kraft coin envelopes are cheap and come in big packs. Stand them in a slit wood block or simply prop them against the glass. It is a gentle way to say thank you for being here. What would you plant?
You will need: Small plain kraft coin envelopes, sunflower or wildflower seeds, a pen, twine and optional wood blocks.
How to make it: 1. Write each name on the front of an envelope. 2. Add a spoonful of seeds and fold the flap closed with a small piece of tape or twine. 3. Stand it in a slit wood block or lean it against the water glass.
Iced Leaf Cookie Names
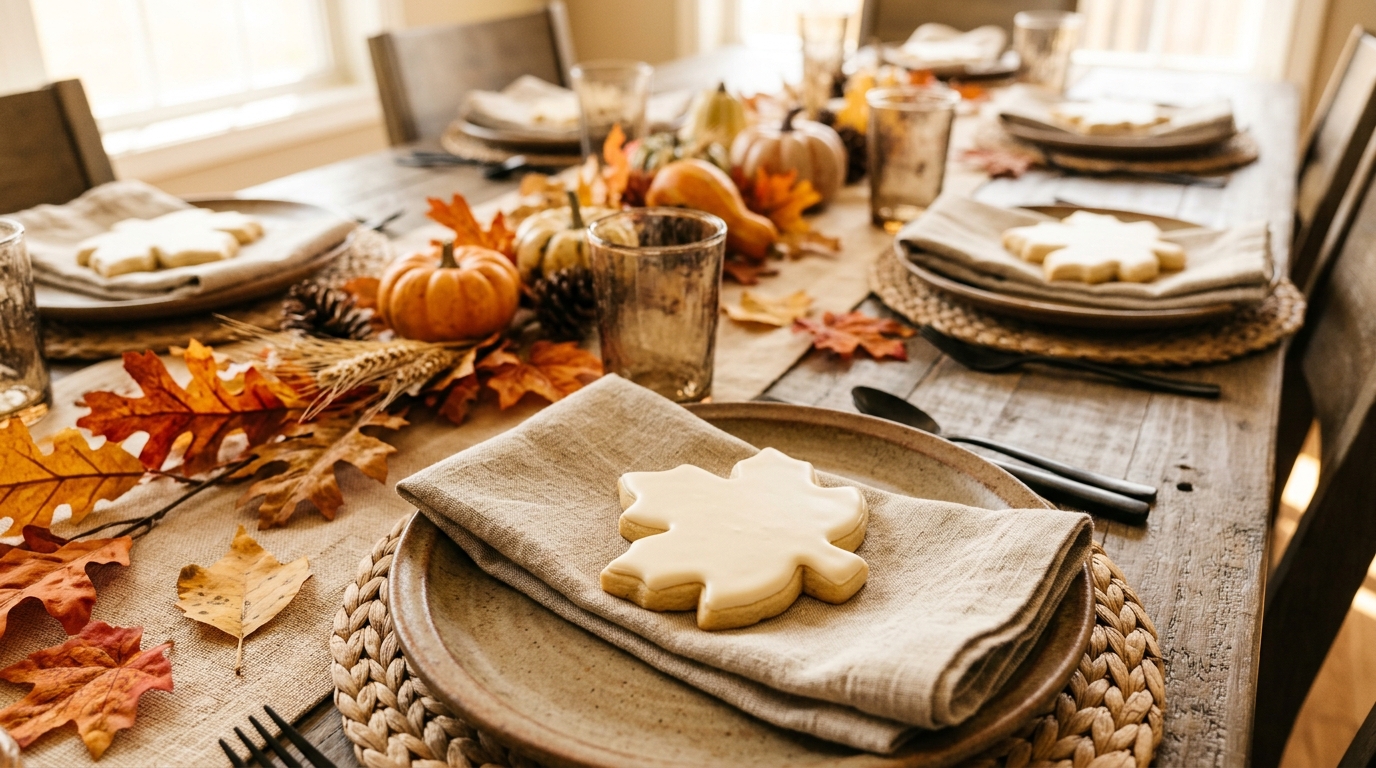
Edible place cards always vanish first. Bake leaf shaped sugar cookies, flood them with smooth cream icing and pipe each name in a darker shade once the base is set. Kids love finding their cookie and grown ups secretly love it too. Bake them two days ahead so the icing hardens fully and they travel well. Wrap leftovers in a cellophane bag for guests to take home. Will yours get eaten before dinner even starts?
You will need: Sugar cookie dough, a leaf cookie cutter, royal icing in cream and a darker fall color, piping bags and small tips.
How to make it: 1. Cut leaf shapes, bake and cool completely. 2. Outline and flood each cookie with cream icing and let it dry overnight. 3. Pipe the names in the darker icing and let them set before plating.
Thanksgiving Place Cards on the Chair: Mini Grapevine Wreaths
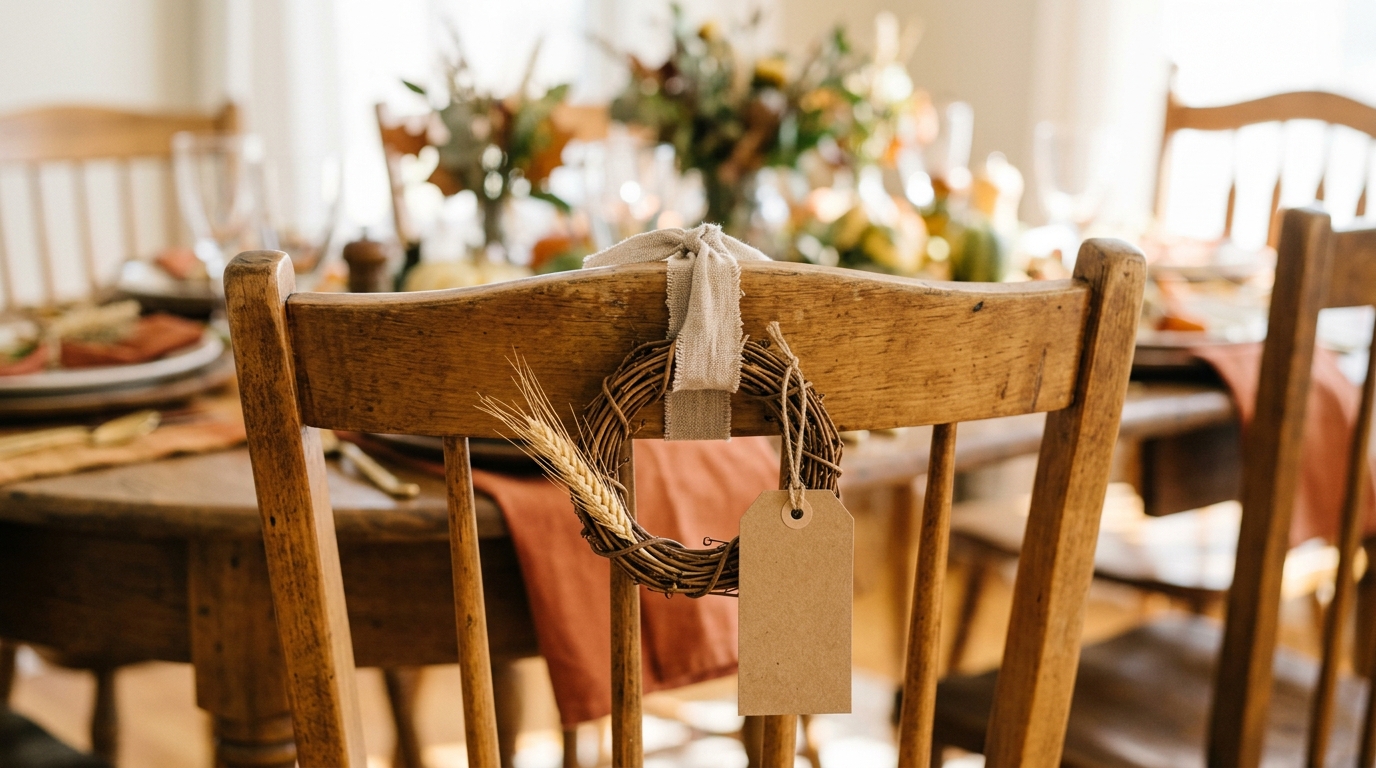
These Thanksgiving Place Cards move the welcome from the plate to the back of the chair, which leaves more room for food. A tiny grapevine wreath with a sprig of dried wheat and a ribbon looks charming from across the room. Guests can hang theirs on a door knob at home afterward. Mini wreaths come in bags at craft stores, and you can tie them on in minutes. Do your chairs have spindles or a top rail to hang them on?
You will need: Mini grapevine wreaths about 4 inches wide, dried wheat or small dried flowers, ribbon, kraft tags and a pen.
How to make it: 1. Tuck a few wheat stalks into the wreath and secure with a dab of glue. 2. Tie a ribbon loop at the top. 3. Hang the wreath on the chair back and add a name tag to the ribbon.
Painted River Rock Names
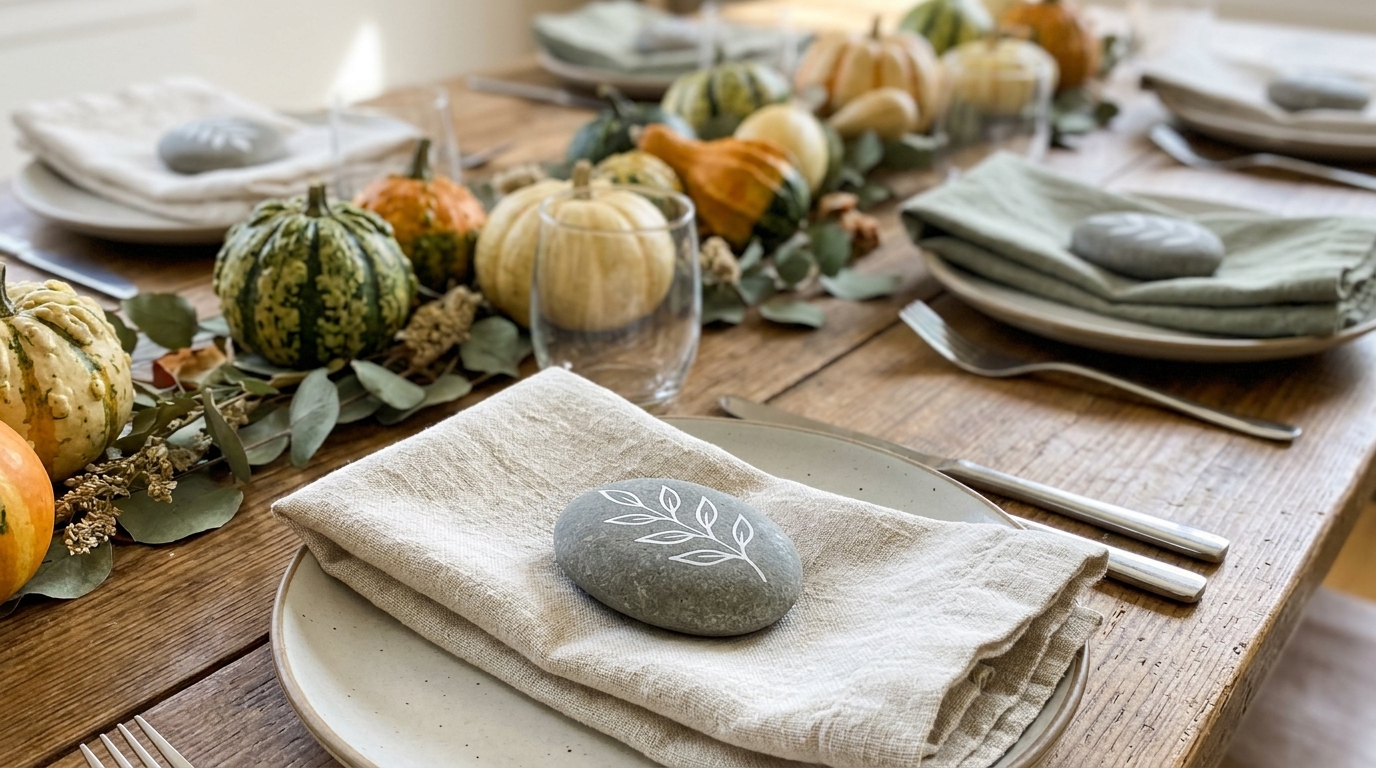
Smooth river stones turn into keepsakes with a simple white leaf and a name painted on top. They are heavy enough to hold a napkin in place on a breezy patio, and guests love keeping them as paperweights. Look for flat grey stones at a garden center if you do not have a creek nearby. A thin brush and a steady hand are all you need, and a clear sealer keeps the paint looking fresh. What would you paint next to the names?
You will need: Flat smooth stones, white acrylic paint pens or paint with a thin brush, and a clear spray sealer (adult help, outdoors).
How to make it: 1. Wash and dry the stones. 2. Paint a small leaf on one side and the guest’s name below it, then let it dry. 3. With adult help outdoors, spray on a light clear coat and let it cure overnight.
Embroidery Hoop Name Tags
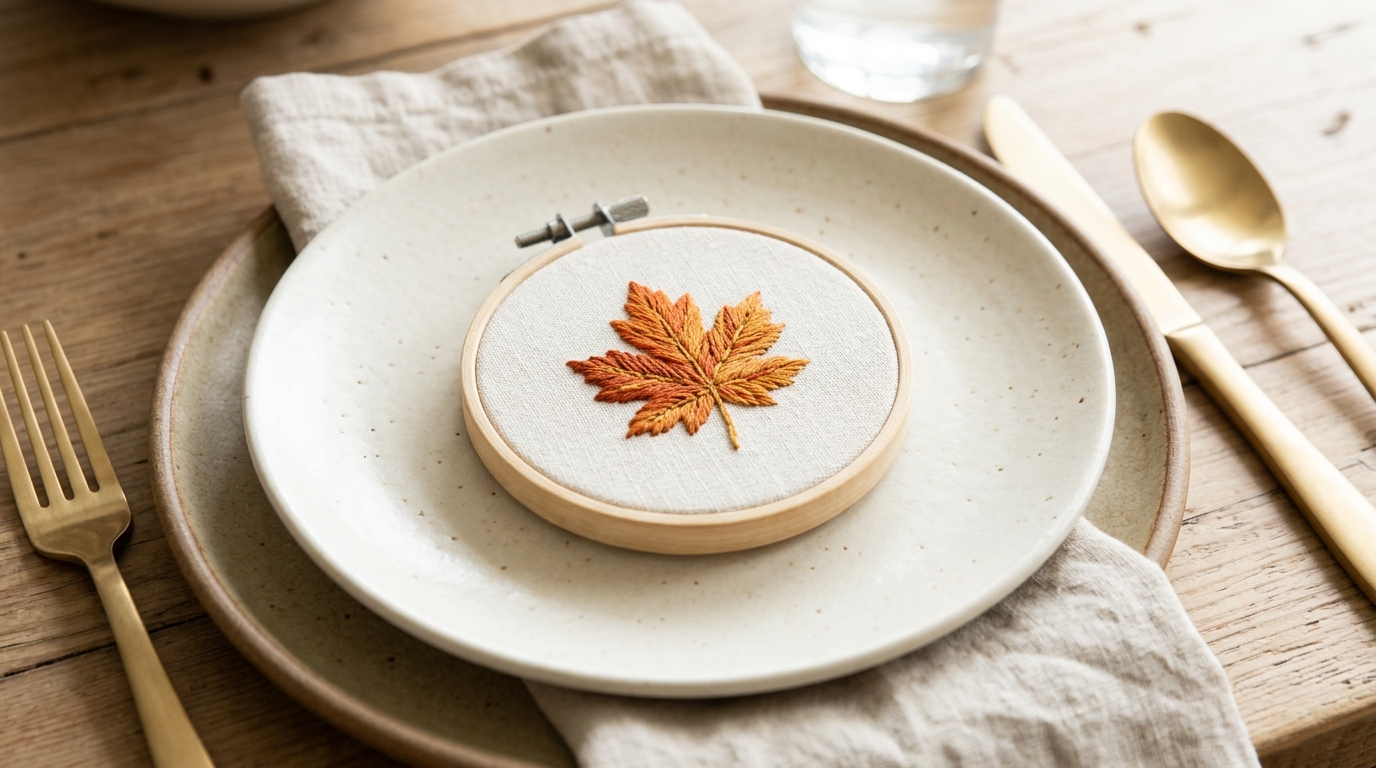
For the stitchers in the family, a tiny embroidery hoop makes a place card that becomes an heirloom. Stitch a simple autumn leaf and the guest’s initial, then trim the back neatly. Mini 3 inch hoops cost very little and turn into ornaments or wall art later. Start a few weeks early and stitch one each evening with a cup of tea. A long Thanksgiving weekend is perfect for finishing the last few. Who would you stitch one for first?
You will need: Mini 3 inch wooden embroidery hoops, linen fabric, embroidery floss in orange, gold and brown, a needle and a disappearing fabric pen.
How to make it: 1. Draw a small leaf and an initial on the linen and fit it in the hoop. 2. Stitch the leaf in back stitch and satin stitch, then the initial. 3. Trim the fabric, glue the edge to the back of the hoop and set one at each plate.
Thanksgiving Place Cards Guests Keep: Clay Leaf Tags
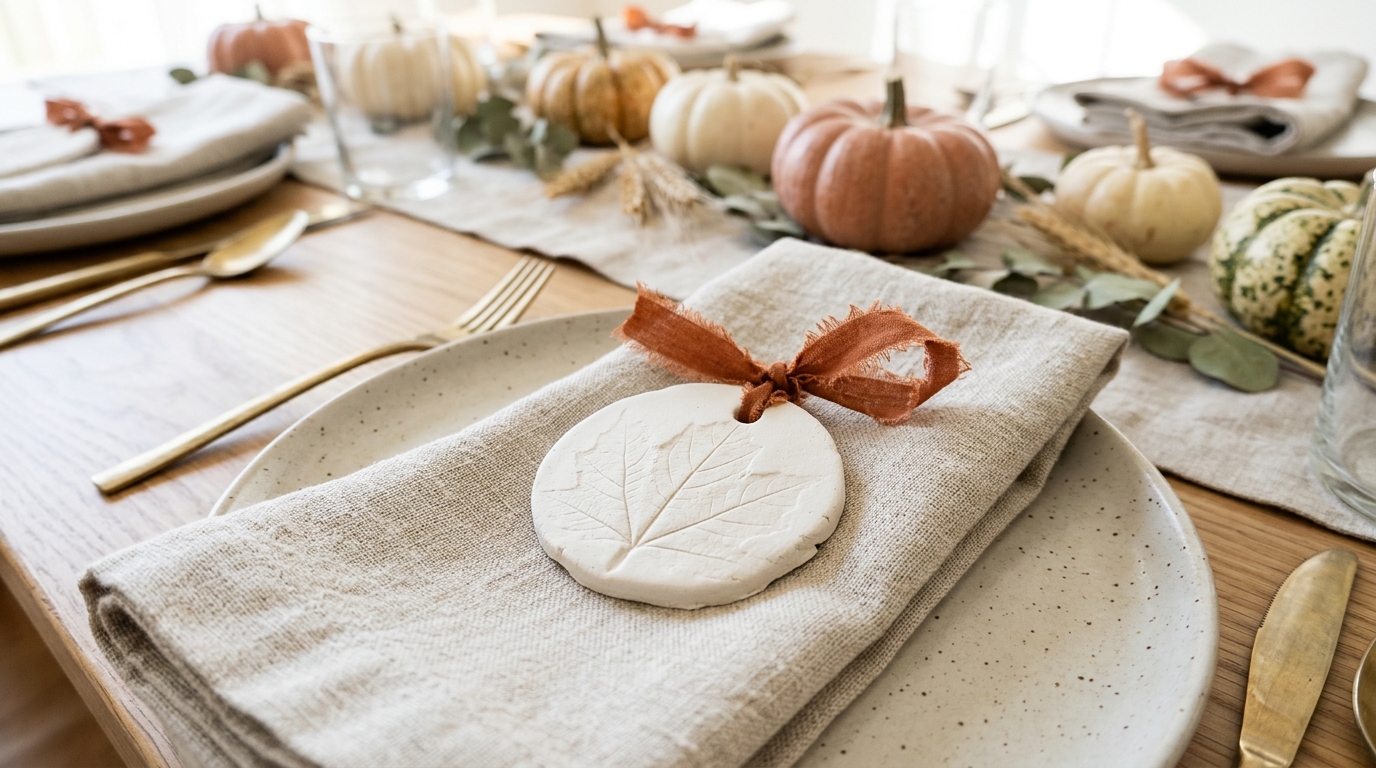
End the list with Thanksgiving Place Cards that become ornaments for years to come. Press a real leaf into soft air dry clay, cut a circle around it and stamp a name below. Once dry, the white tags look like porcelain, and guests can hang them on the tree in December. Tie them onto napkins with thin rust ribbon for a calm, elegant table. For more easy table touches, try these DIY napkin rings, and note that searches for Thanksgiving table decor ideas are climbing fast on Google Trends. Which leaf will you press first?
You will need: White air dry clay, a rolling pin, real leaves, a round cookie cutter, small letter stamps, a straw for the hole and thin ribbon.
How to make it: 1. Roll the clay flat, press a leaf in firmly and peel it away. 2. Cut a circle, stamp a name and poke a hole at the top with a straw. 3. Let the tags dry for two days, then thread with ribbon.