DIY Floating Shelves: 15 Easy Builds That Make Any Wall Look Custom
DIY floating shelves are one of the easiest ways to make a plain wall look like a designer did it, and this month a lot of people agree. One simple wooden wall shelf video on Facebook has collected more than 203,000 reactions and 12,000 shares in October 2026 alone, and another basic shelf build passed 106,000 reactions. There is something deeply satisfying about a clean board that seems to hang on the wall all by itself. It holds your favorite mugs, your plants and your family photos, and it frees up counters and tables at the same time. With the holidays coming, these shelves also give you a perfect spot for little trees, village houses and twinkling lights. Below are 15 builds for every room, from a chunky kitchen shelf to cozy book ledges for the kids. Grab a tape measure and let’s get started..
DIY Floating Shelves in Chunky Oak for the Kitchen
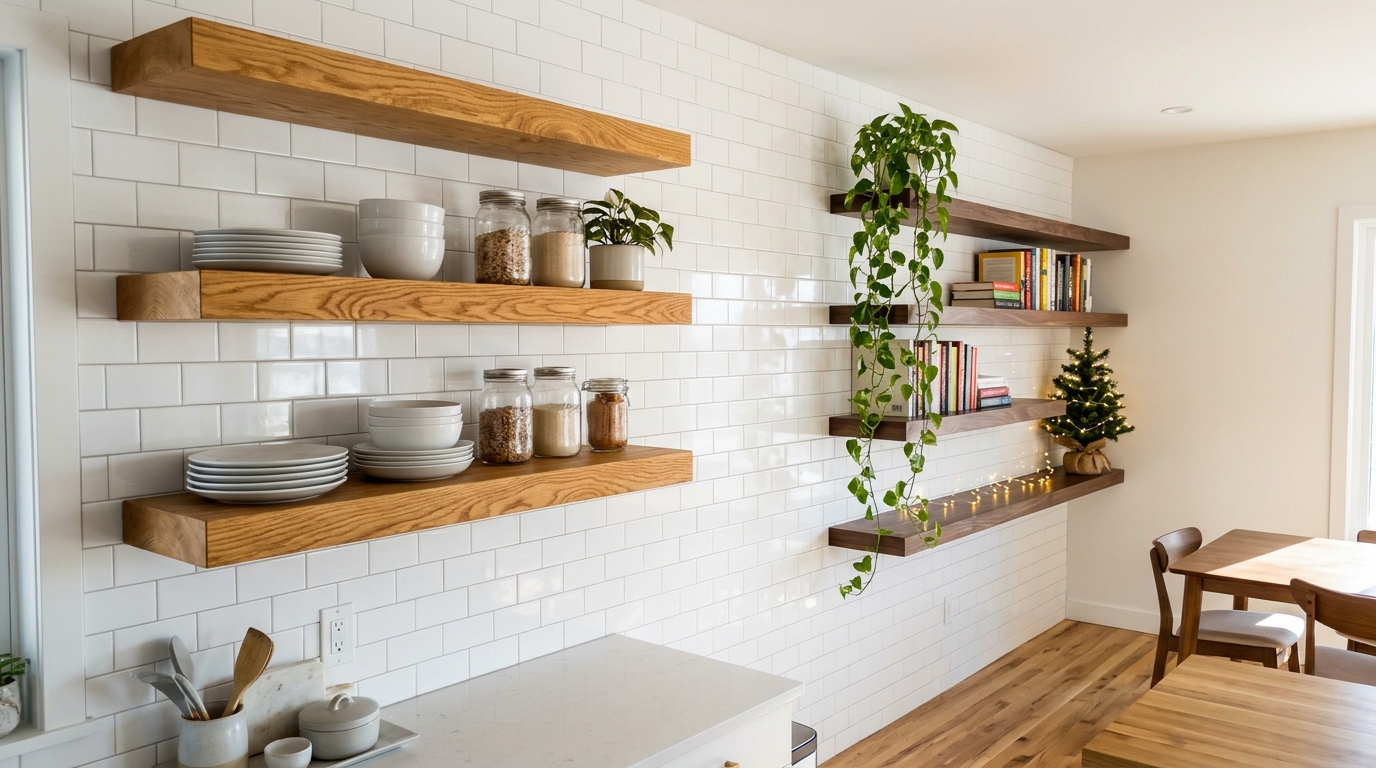
Start with the look so many people love right now. Three thick oak boards on a white tile wall give your kitchen that open, airy look you see in home magazines. Plates, glass jars and a small plant suddenly become decor instead of clutter. The secret is a hidden steel bracket, a rod style hardware that goes into the wall studs and slides into holes drilled in the back of each board. Once the board slides on, nothing shows. Start with one shelf if you are nervous, then add more once you see how easy it is..
You will need: Thick oak or pine boards about 2 inches deep, hidden floating shelf brackets, a stud finder, a level, a drill (adult use), wood screws, sandpaper and a clear wood finish.
How to make it: 1. Find the studs and mark a level line for each shelf. 2. Screw the hidden brackets into the studs, then drill matching holes in the back of each board. 3. Sand, finish and slide the boards onto the rods.
Triangle Corner Shelves That Use Wasted Space
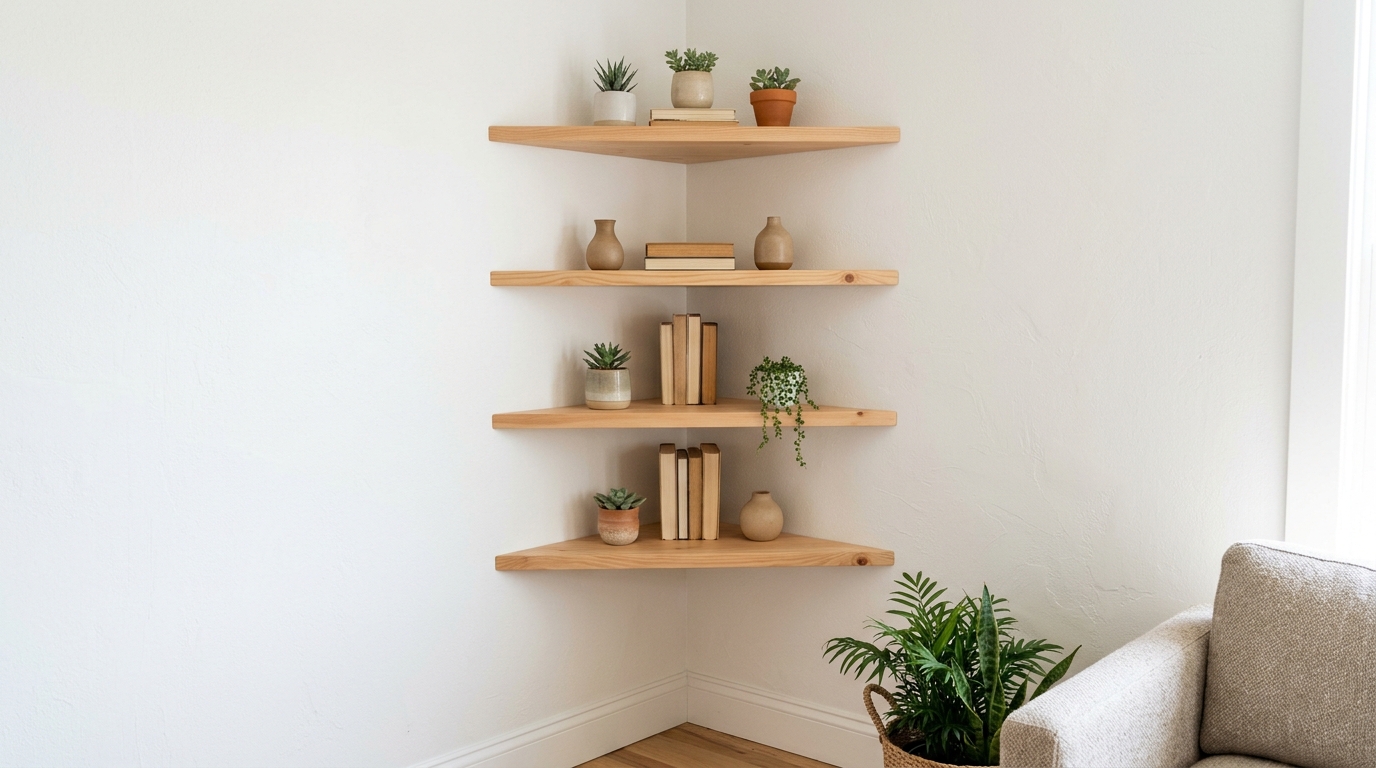
Almost every home has an empty corner that collects nothing but dust. Little triangle shelves fix that in an afternoon. Each one is just a square board cut in half from corner to corner, so one board gives you two shelves. These are some of the easiest diy floating shelves to start with. Step them up the wall about a foot apart and fill them with succulents, a few books and a small vase. Light pine keeps the look soft and bright, but a dark stain works well in a modern room. Which empty corner in your home is begging for a little shelf?
You will need: Pine boards, a saw (adult use) or a store cut, small hidden brackets or slim cleats, a level, a drill, screws, sandpaper and stain or paint.
How to make it: 1. Have an adult cut square boards in half on the diagonal. 2. Fix two small cleats into the corner studs or with wall anchors for each shelf. 3. Sand the edges, finish them and set each shelf on its cleats.
DIY Floating Shelves Above the Bathroom Toilet
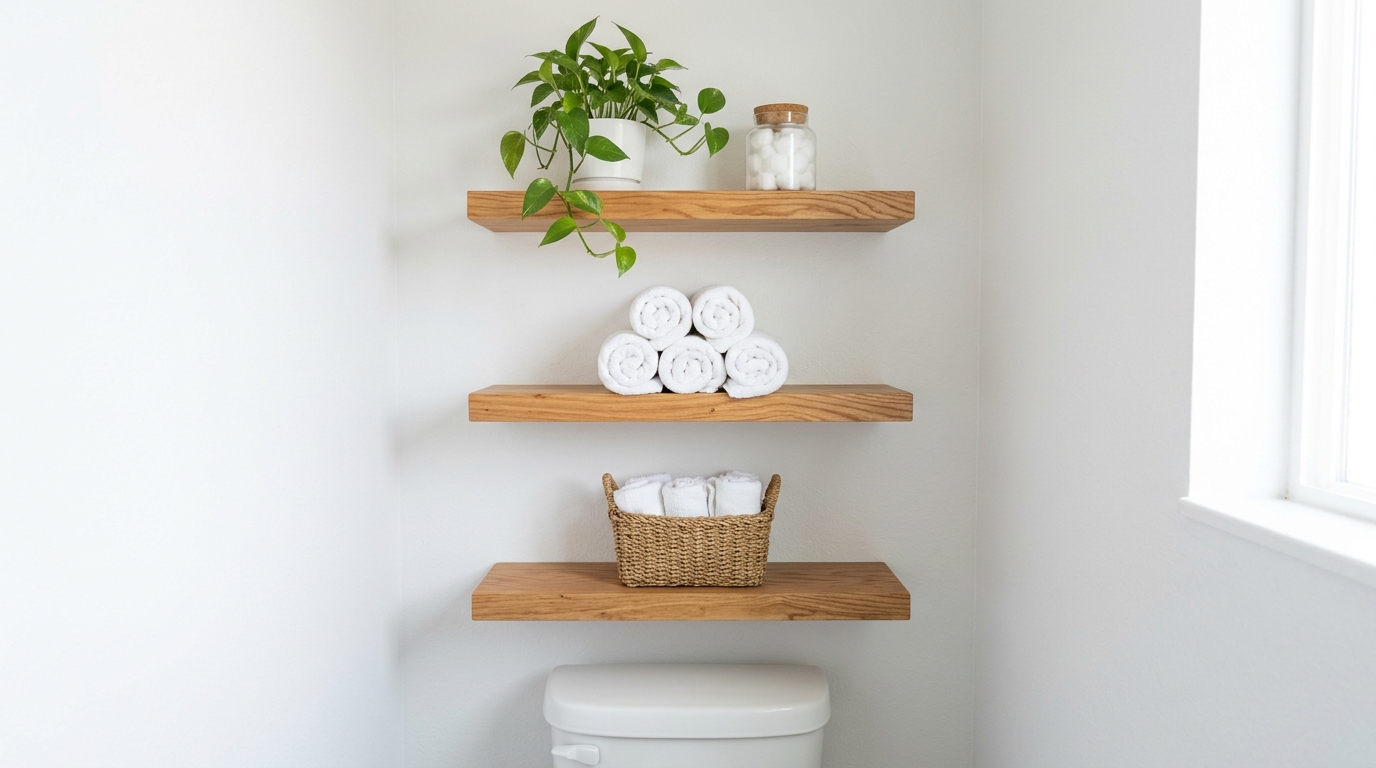
Small bathrooms never have enough storage, and the wall above the toilet is usually bare. Three short wooden shelves turn that space into a neat spot for rolled towels, a jar of cotton balls and a plant that likes a bit of humidity. Keep the shelves shallow so nobody bumps their head, and seal the wood well since bathrooms get steamy. These diy floating shelves look like they came from a spa, yet they only take a few boards. Would you style yours with white towels or a pop of color?
You will need: Three short boards about 8 inches deep, floating shelf brackets, a stud finder, wall anchors where needed, a level, a drill (adult use), sandpaper and a water resistant clear finish.
How to make it: 1. Measure the wall above the tank and space the shelves about 14 inches apart. 2. Mount the brackets level, using studs or proper wall anchors. 3. Seal the boards with two coats of water resistant finish, then slide them on.
Live Edge Wood Shelf With Natural Character
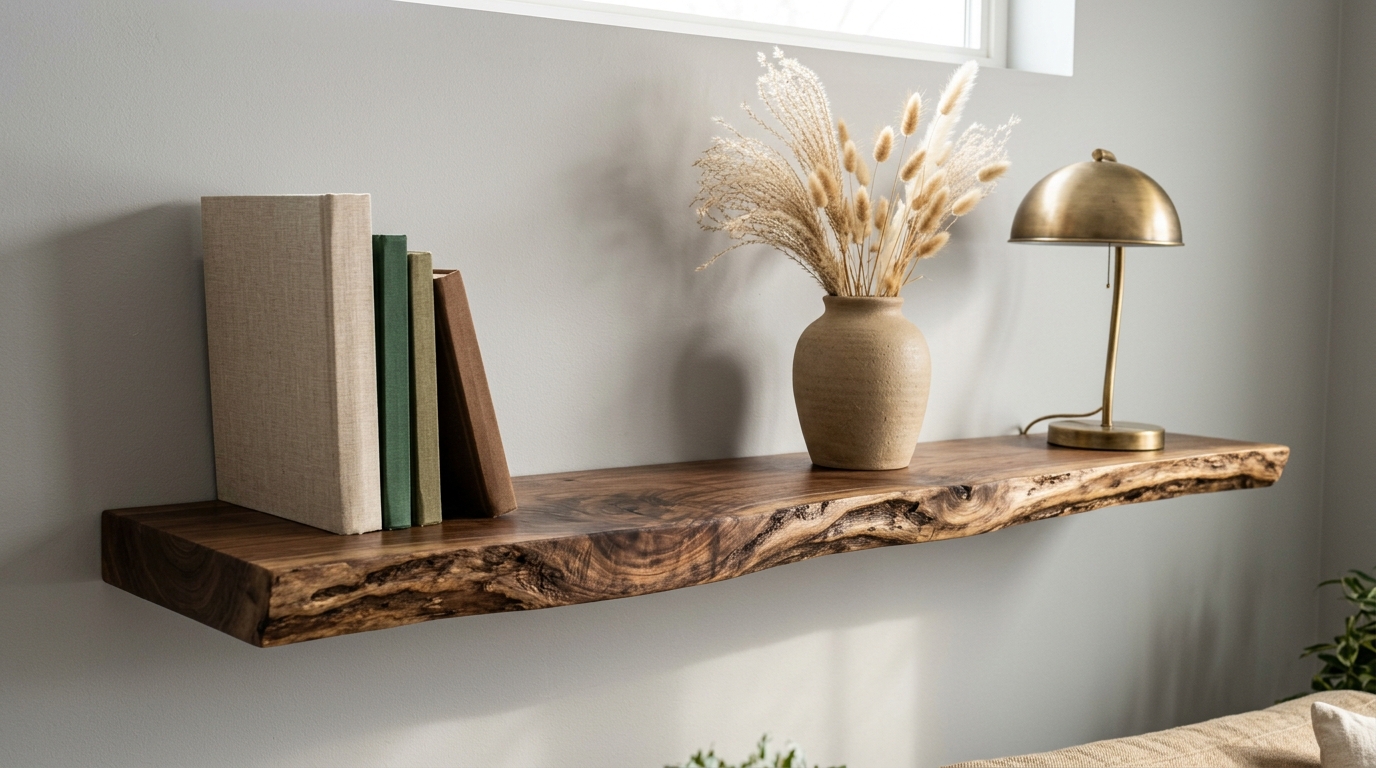
A live edge shelf keeps the wavy outer edge of the tree, so no two are ever alike. It looks like a piece of art even before you put anything on it. Many lumber yards and woodworkers sell short live edge slabs, and walnut, cherry and maple all look beautiful. Leave the bark side raw or gently brush off any loose bark, then seal it with a matte oil. Keep the styling simple with a few books and a vase of dried grasses so the wood stays the star. Where would you hang a shelf this pretty?
You will need: A short live edge slab, a stiff brush, sandpaper, matte wood oil, heavy duty hidden brackets, a stud finder, a level and a drill (adult use).
How to make it: 1. Brush off loose bark and sand the flat top smooth. 2. Rub in two coats of matte oil and let it cure. 3. Mount heavy duty brackets into studs and slide the slab on.
Rope Hung Swing Shelves for a Boho Room
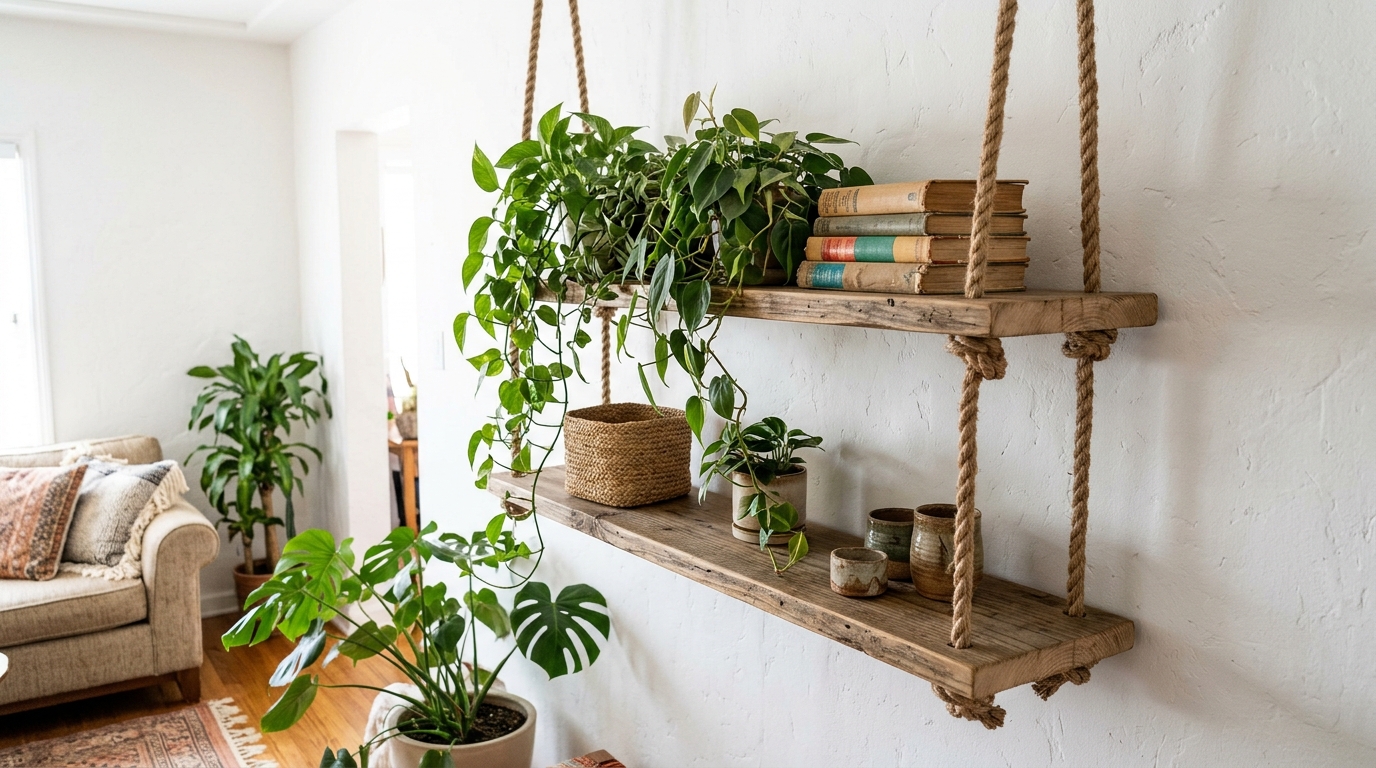
If you love a relaxed, beachy look, rope shelves are a fun twist. Two wooden planks hang from thick jute rope that runs through a hole in each corner, with a knot under every board to hold it level. They look like a little swing for your plants and books. Hang them from a sturdy ceiling hook screwed into a joist, never just into drywall, and keep the load light. An adult should handle the ladder and the hook. What would you put on yours first, plants or books?
You will need: Two planks about 30 inches long, thick jute rope, a drill with a spade bit (adult use), two strong ceiling hooks, a stud finder, sandpaper and wood stain.
How to make it: 1. Drill a hole near each corner of both planks, then sand and stain them. 2. Thread rope through the holes and tie a tight knot under each corner, checking that each board sits level. 3. Have an adult screw the hooks into a ceiling joist and hang the shelves.
Picture Ledge Shelves for Easy Art Swaps
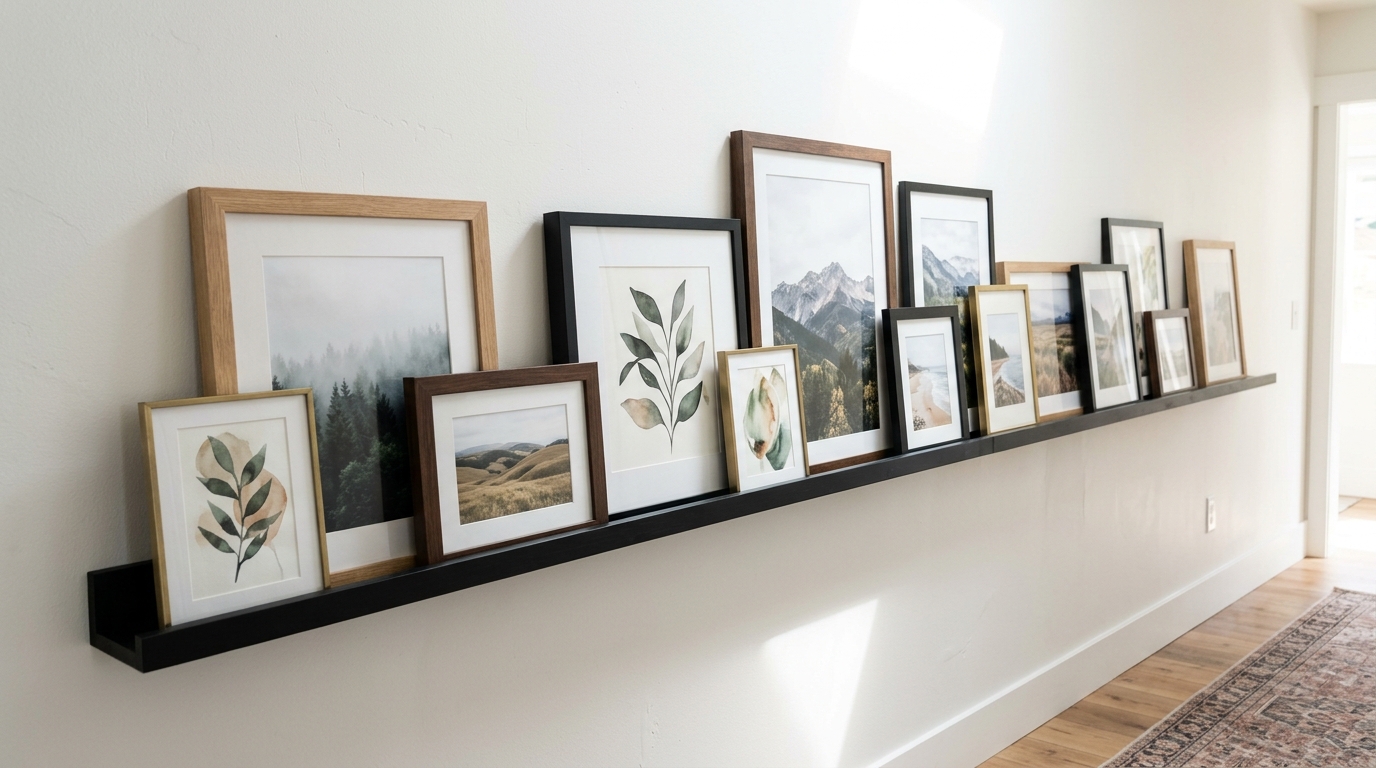
A picture ledge is a narrow shelf with a small lip on the front, so frames can lean on it without sliding off. It is the easiest way to build a gallery wall, because you can move art around anytime without putting new holes in the wall. Paint it matte black for a modern look or white to blend in, just like your other diy floating shelves. Layer big and small frames, and add a seasonal print when the holidays arrive. Which family photos or art prints would you show off first?
You will need: One 1×4 board, one 1×3 board, one 1×2 strip for the lip, wood glue, small nails, a level, wall screws, sandpaper and paint.
How to make it: 1. Glue and nail the boards into an L shape, then add the 1×2 lip along the front. 2. Sand and paint the ledge. 3. Screw it to the wall through the back board, then lean your frames in layers.
DIY Floating Shelves With a Hidden Drawer
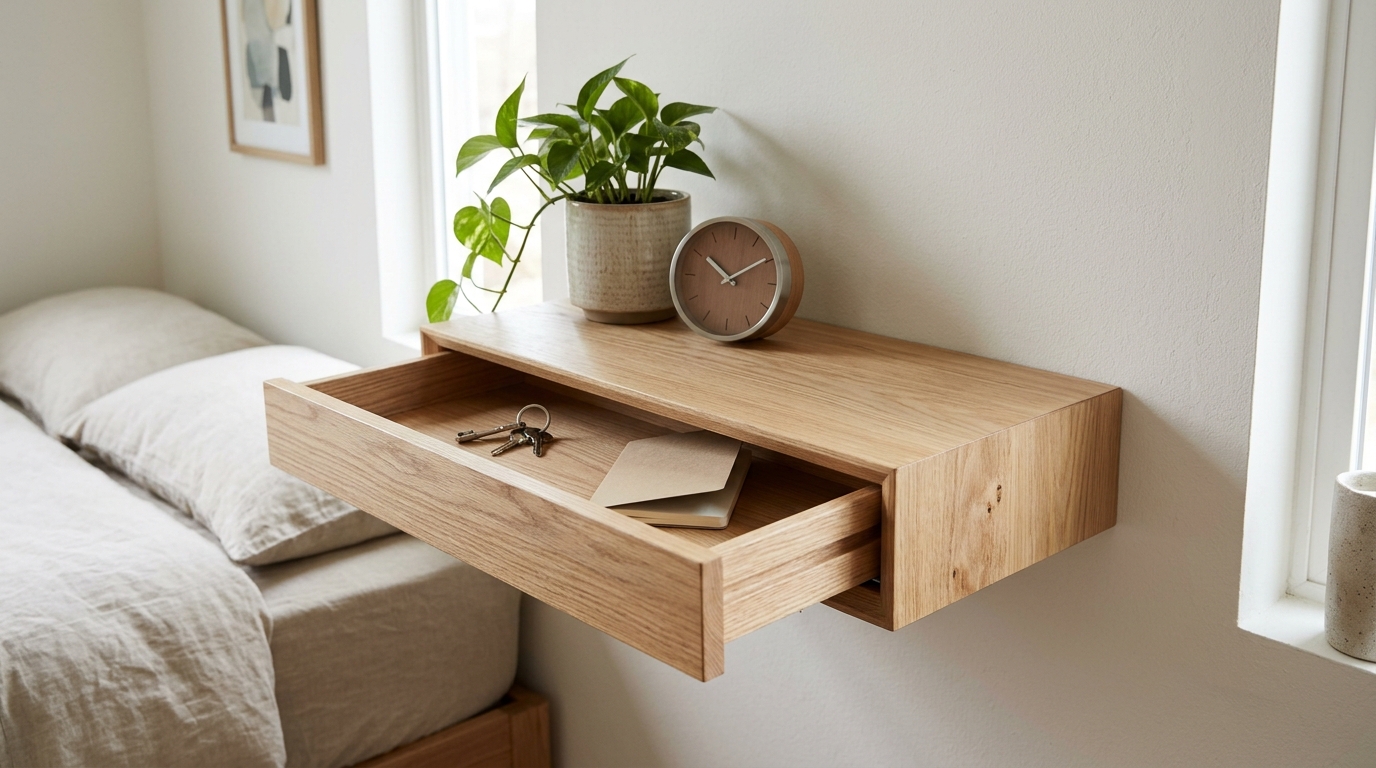
This one feels like a little secret. From the front it looks like a normal shelf, but a slim drawer slides out from underneath. It is perfect for keys, chargers, glasses or a small notebook by the bed. You build a shallow wooden box, add a thin drawer that slides on simple runners, and hang the whole thing on a wall cleat. These diy floating shelves are great in bedrooms and hallways where clutter likes to land. What would you hide in yours?
You will need: Thin plywood or pine boards, wood glue, small nails, a drawer pull or a finger notch, a hidden wall cleat, a saw (adult use), a drill, sandpaper and paint or stain.
How to make it: 1. Build an open box about 4 inches tall with a top, bottom and sides. 2. Make a slim drawer that slides inside it and add a notch to pull it. 3. Sand, finish and hang the box on a cleat screwed into a stud.
Shelves Built Around a Window
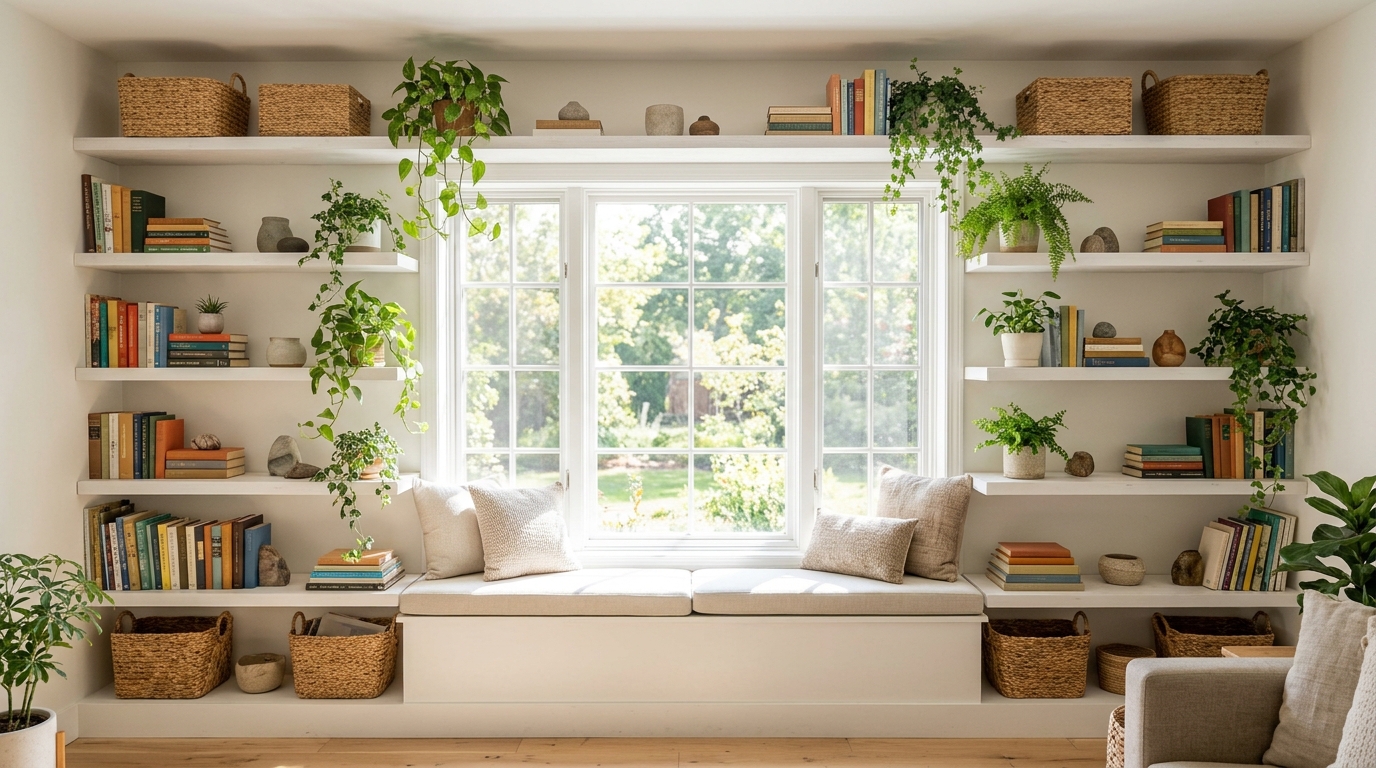
Framing a window with shelves gives any room a cozy library feel. The shelves run up both sides and across the top, so the window becomes the center of a big built in. White paint keeps everything fresh and lets the sunlight bounce around. Fill the shelves with books, baskets and a few small plants, and leave a little empty space so it does not feel crowded. It looks like a big renovation, but these diy floating shelves are really just boards and some careful measuring. Would you add a window seat below?
You will need: Pine boards, side support boards, wall cleats, a stud finder, a level, a drill (adult use), wood screws, wood filler, sandpaper and white paint.
How to make it: 1. Measure both sides and the top of the window and plan equal shelf spacing. 2. Fix cleats or side boards into the studs and set each shelf on them. 3. Fill nail holes, sand and paint everything white.
DIY Floating Shelves for a Home Coffee Bar
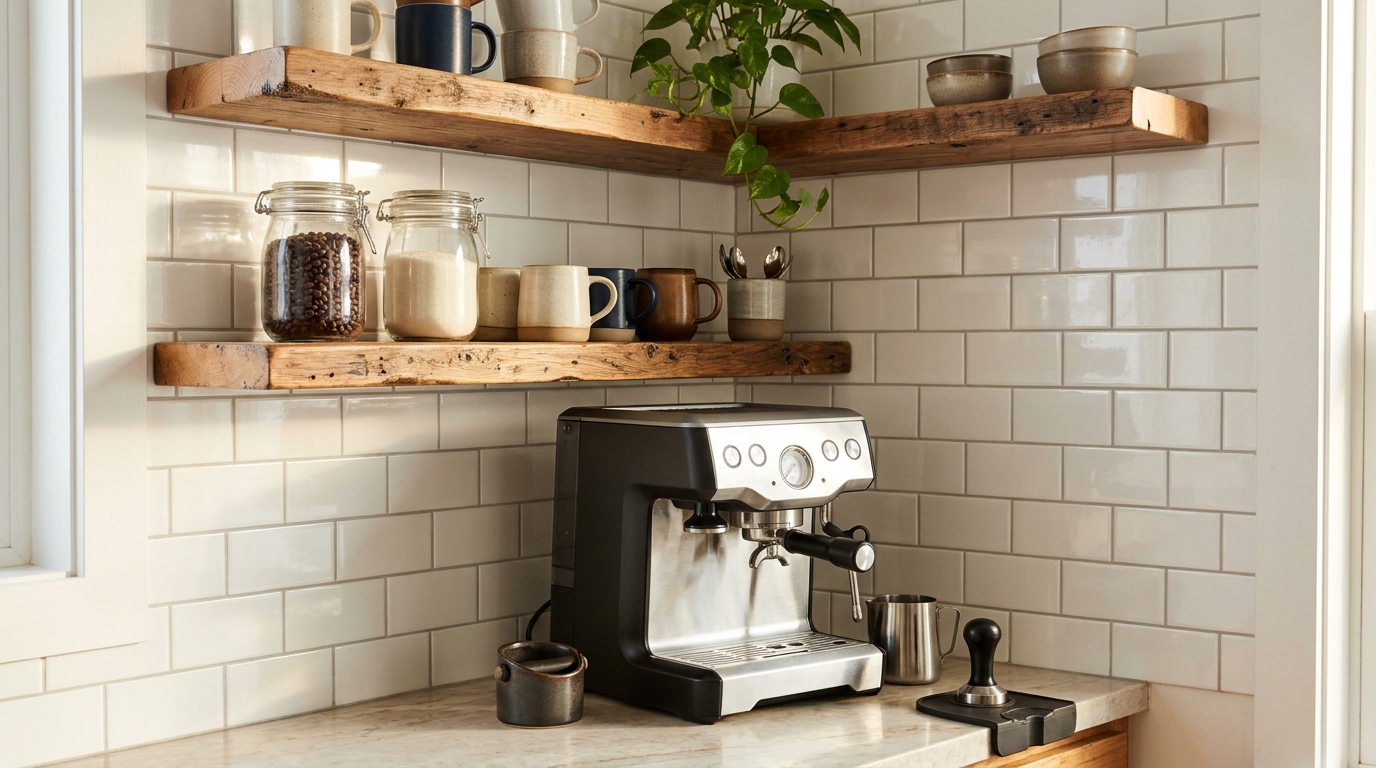
A home coffee bar makes every morning feel a little special, and two rustic shelves pull the whole corner together. The bottom shelf holds the mugs you reach for every day, while the top one shows off glass jars of beans, sugar and tea. A plant softens the look. Since the shelves sit above a counter, keep them high enough to clear your coffee maker. These diy floating shelves turn a messy counter corner into a spot you will actually want to show guests. What is your favorite mug to display?
You will need: Two rustic pine boards, dark wood stain, floating shelf brackets, a stud finder, a level, a drill (adult use), screws, a few cup hooks and glass jars.
How to make it: 1. Stain the boards and let them dry. 2. Mount the brackets level on the studs above your counter. 3. Slide the boards on, add cup hooks under the lower shelf and style it.
Staggered Shelves on a Staircase Wall
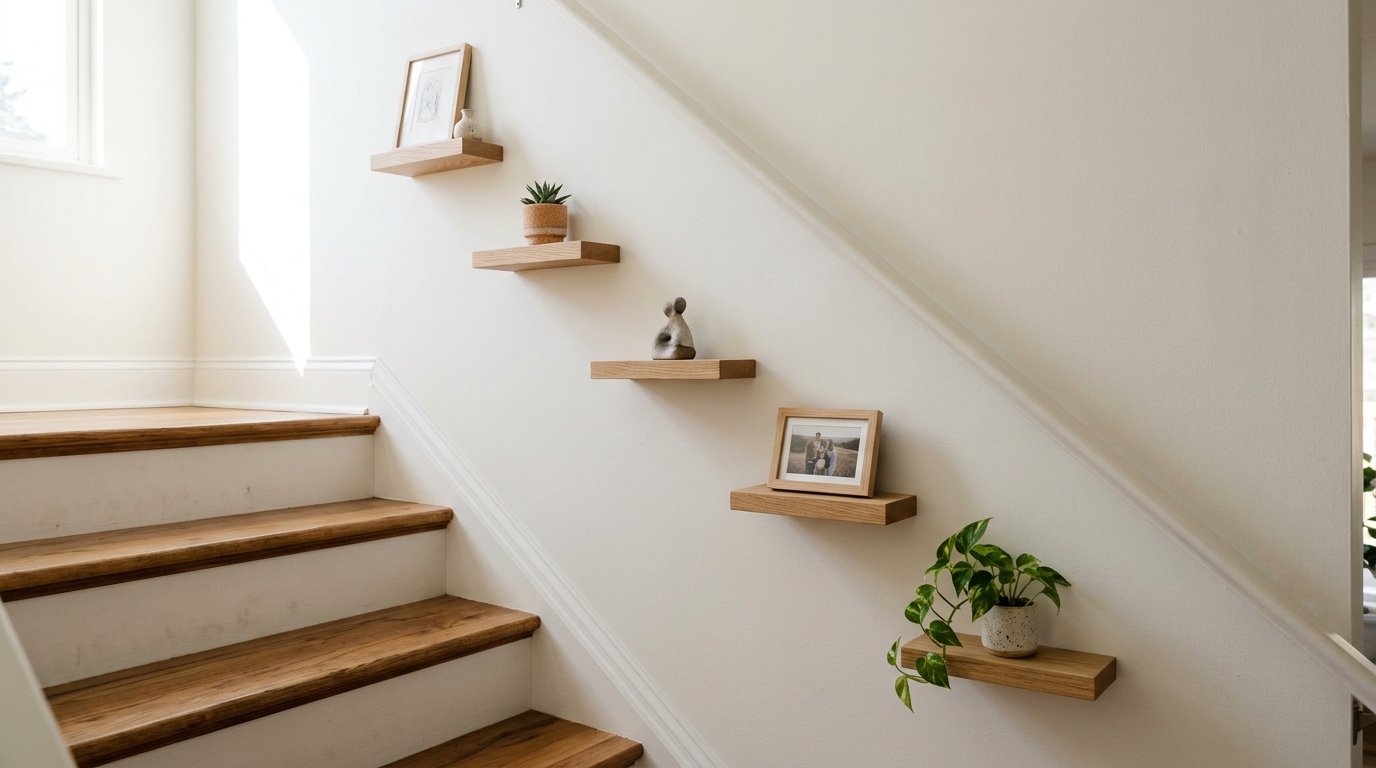
A long staircase wall can feel empty, and staggered shelves solve that beautifully. Small boards climb the wall like stepping stones, each one a step higher than the last. Put a small plant, a framed photo or a little sculpture on each one. Measure from the edge of each stair so the shelves follow the angle of the steps. Keep them short and light, and place them where nobody will grab them like a handrail. How many little shelves would your stairs need?
You will need: Five short boards, small hidden brackets, a stud finder, a level, a tape measure, a drill (adult use), sandpaper and stain.
How to make it: 1. Hold a string along the stair angle and mark an even spot for each shelf. 2. Mount the brackets level, one shelf at a time. 3. Sand and stain the boards, slide them on and add small decor.
Floating Bedside Shelf Instead of a Nightstand
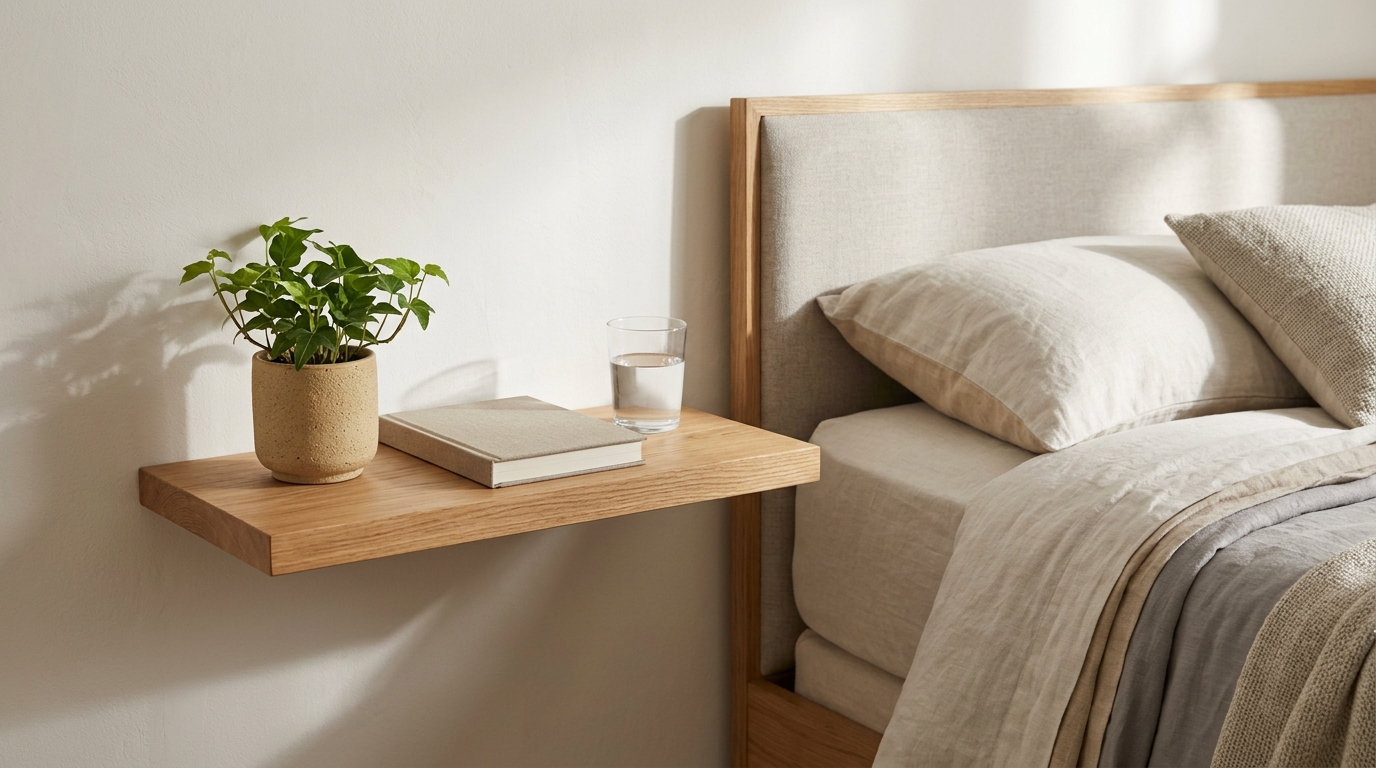
In a tiny bedroom, a nightstand can eat up precious floor space. A single wall shelf beside the bed gives you a spot for a book, a glass of water and your phone, and the floor underneath stays open. It also makes cleaning so much easier. Mount it at the same height as the top of your mattress so it is easy to reach in the dark. Make two if you share the bed. Would a shelf like this give your bedroom more breathing room?
You will need: One board about 18 inches long and 10 inches deep, floating shelf brackets, a stud finder, a level, a drill (adult use), sandpaper and stain or paint.
How to make it: 1. Mark the shelf height level with the top of your mattress. 2. Mount the bracket into a stud. 3. Sand and finish the board, then slide it on.
Entryway Shelf With Hooks Underneath
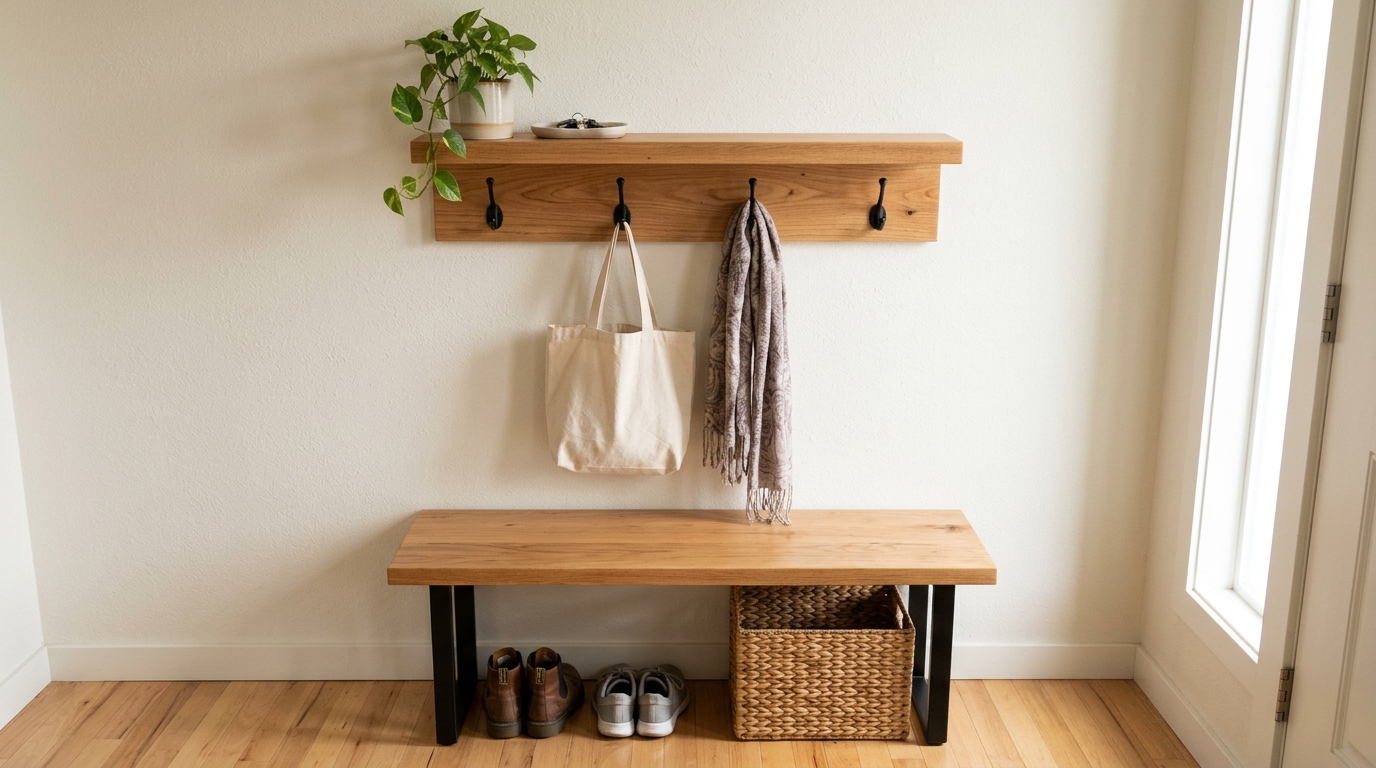
The front door is where bags, scarves and keys love to pile up. An entryway shelf with hooks underneath gives each item a home. The top holds a key tray and a small plant, and the hooks below catch tote bags and coats. Add a bench under it and you have a mini mudroom in a few hours. If you have leftover boards from other builds, this is one of the best scrap wood projects, since the shelf only needs a short piece. Which hooks would you pick, black metal or brass?
You will need: One board about 30 inches long, floating shelf brackets or a cleat, four sturdy coat hooks, a stud finder, a level, a drill (adult use), screws, sandpaper and stain.
How to make it: 1. Sand and stain the board. 2. Mount it level into the studs at about shoulder height. 3. Screw the coat hooks into the wall just below the shelf, evenly spaced.
Plant Shelves in a Sunny Window
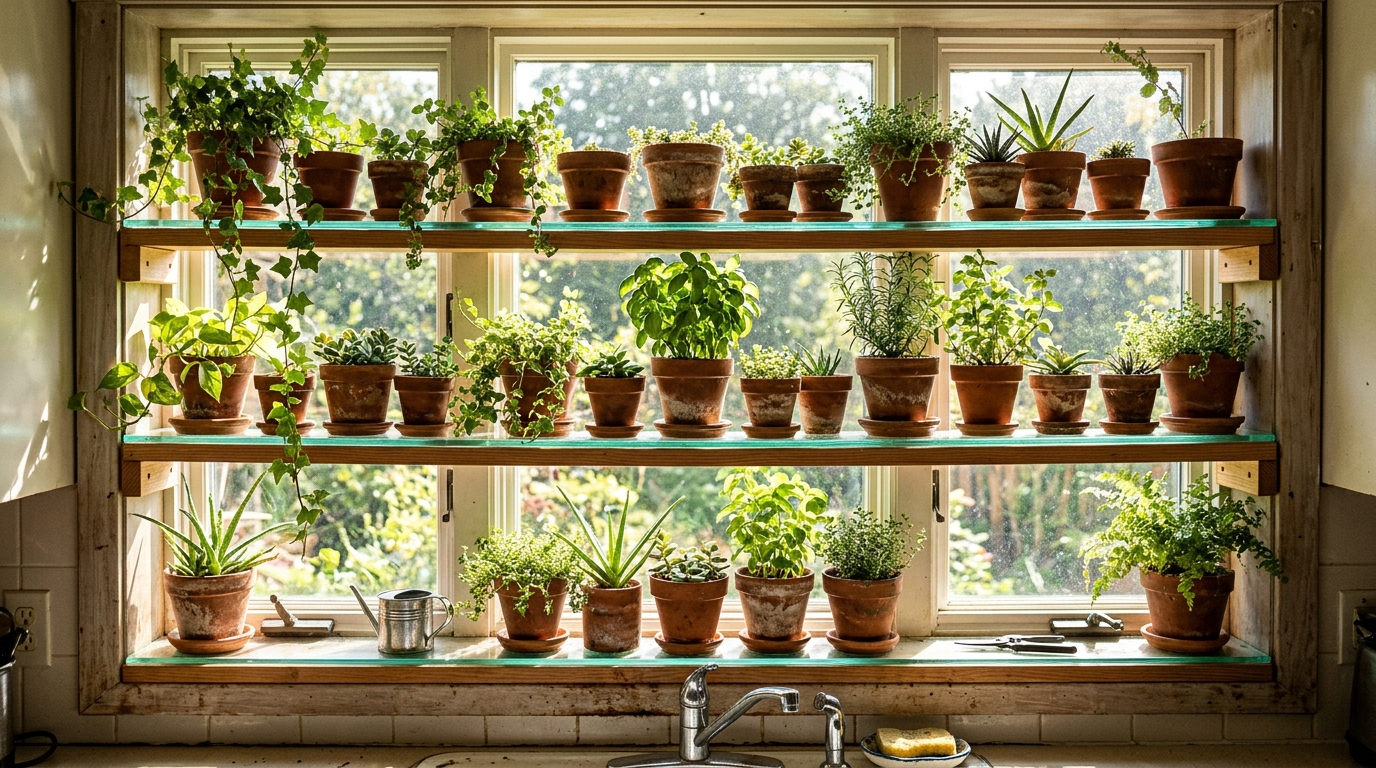
If your plants are crowding the windowsill, give them a few shelves right across the window. Herbs, succulents and trailing plants all get the sunshine they need, and the window turns into a living green curtain. Fix two side boards to the window frame, then rest the shelves on small cleats between them. Use saucers under each pot so water never sits on the wood. It is especially lovely in the kitchen, where fresh herbs are always within reach. Which plants would you grow on yours?
You will need: Two side boards, three shelf boards, small wood cleats, screws, a level, a drill (adult use), a clear water resistant finish and plant saucers.
How to make it: 1. Measure the inside of the window frame and cut the shelves to fit. 2. Screw the side boards to the frame and add level cleats for each shelf. 3. Seal everything, set the shelves on the cleats and add your plants on saucers.
Book Ledges for a Kids Room
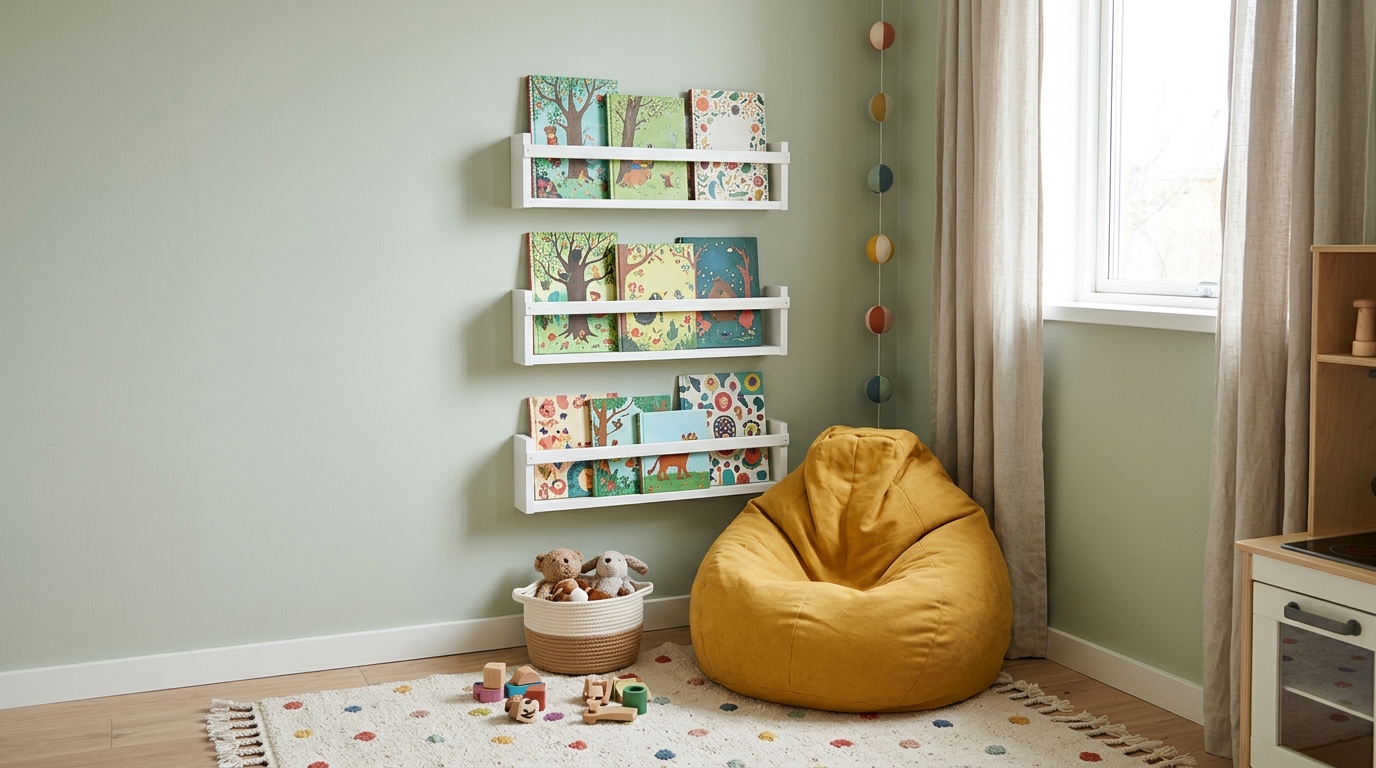
Kids pick books by their covers, so book ledges that show the front of each book make reading time more exciting. These shallow shelves have a lip in front so books stand up without falling. Hang them low enough for little hands to reach, and screw them firmly into studs. Remind kids that shelves are for books, never for climbing. Rotate the books every few weeks to keep it fresh. Building one with your kids could be a fun weekend project, so which story would go on top?
You will need: 1×4 boards, 1×2 strips for the front lip, wood glue, small nails, white paint, a stud finder, a level, a drill (adult use) and screws.
How to make it: 1. Glue and nail a 1×2 lip along the front edge of each board. 2. Paint the ledges and let them dry. 3. Screw them into studs at child height, about a foot apart.
DIY Floating Shelves Styled for Christmas
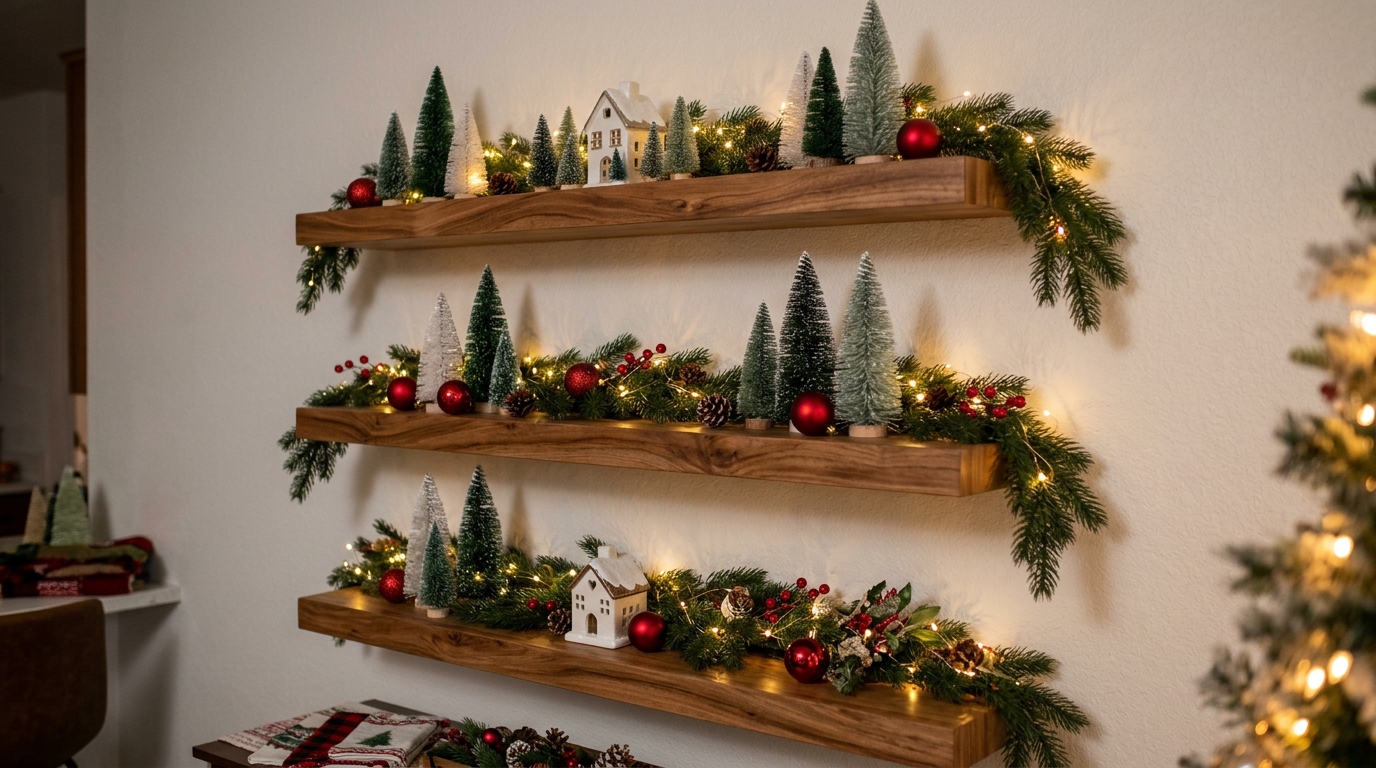
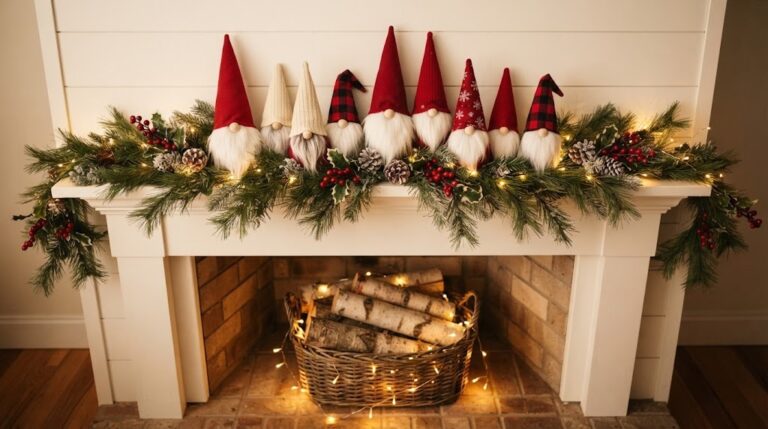
Save the best for last. Once your shelves are up, they make the perfect stage for holiday decor. Line them with small bottle brush trees, a tiny village house and some pine garland, then add battery fairy lights for a soft glow. Always use LED lights, never real candles, near wood and greenery. Want to see more? Browse the popular wooden wall shelf videos on Facebook that inspired this list. Your diy floating shelves can change with every season, but Christmas might be their best look yet. How will you style yours this year?
You will need: Small bottle brush trees, mini village pieces, faux pine garland, battery LED fairy lights, red ornaments and a few small hooks.
How to make it: 1. Drape the garland along the front edge of each shelf. 2. Group the trees and village pieces in small clusters. 3. Weave the battery LED lights through the garland and tuck the battery pack out of sight.