Furniture Flips: 15 Curbside Finds So Stunning You Will Never Pass Up an Old Dresser Again
Furniture flips have a funny way of changing how you see every curb, yard sale and thrift store aisle. One weekend you walk past a scratched old dresser, and the next you are standing in your garage with a paintbrush, grinning at something that looks brand new. That is the magic. Old wood is sturdy, it has a story, and it only needs a little love to shine again. One furniture flip post on Instagram pulled in more than 3.7 million likes, and it is easy to see why. People love watching a tired piece come back to life. Below are 15 flips you can copy at home, from a sage green armoire to a hutch that now serves coffee every morning. Each one comes with a simple supply list and easy steps, so grab a drop cloth and let’s begin..
Sage Green Armoire, the Favorite of Furniture Flips
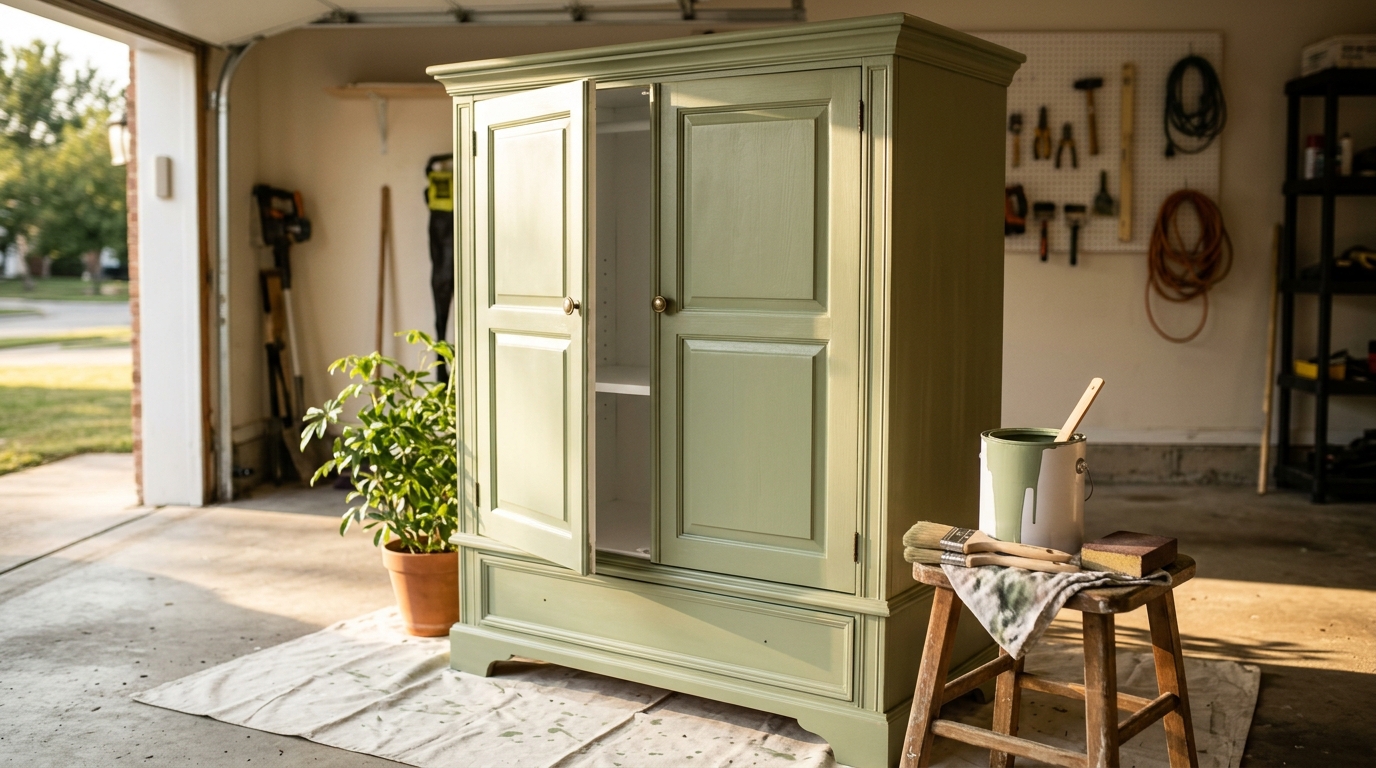
This old armoire sat in a garage for years with a yellowed finish and a sticky door. One coat of primer and two coats of soft sage green changed everything. Sage keeps showing up in the most loved furniture flips because it feels calm, fresh and a little bit vintage all at once. Simple brass knobs replaced the old pulls, and the inside got a coat of white so it glows when you open the doors. Picture it in your bedroom and tell me it does not make you smile..
You will need: Old armoire, mild soap and water, sanding sponge, bonding primer, sage green furniture paint, 2 inch brush, small foam roller, brass knobs, screwdriver, drop cloth.
How to make it: 1. Remove the doors and hardware, then wash every surface with mild soap and let it dry. 2. Scuff the finish lightly with a sanding sponge. If the piece is very old, skip sanding and rely on bonding primer, since old paint can contain lead. 3. Roll on one coat of primer and let it dry. 4. Paint two thin coats of sage green, brushing with the grain. 5. Paint the inside white, add the brass knobs and rehang the doors.
Two-Tone Curbside Dresser
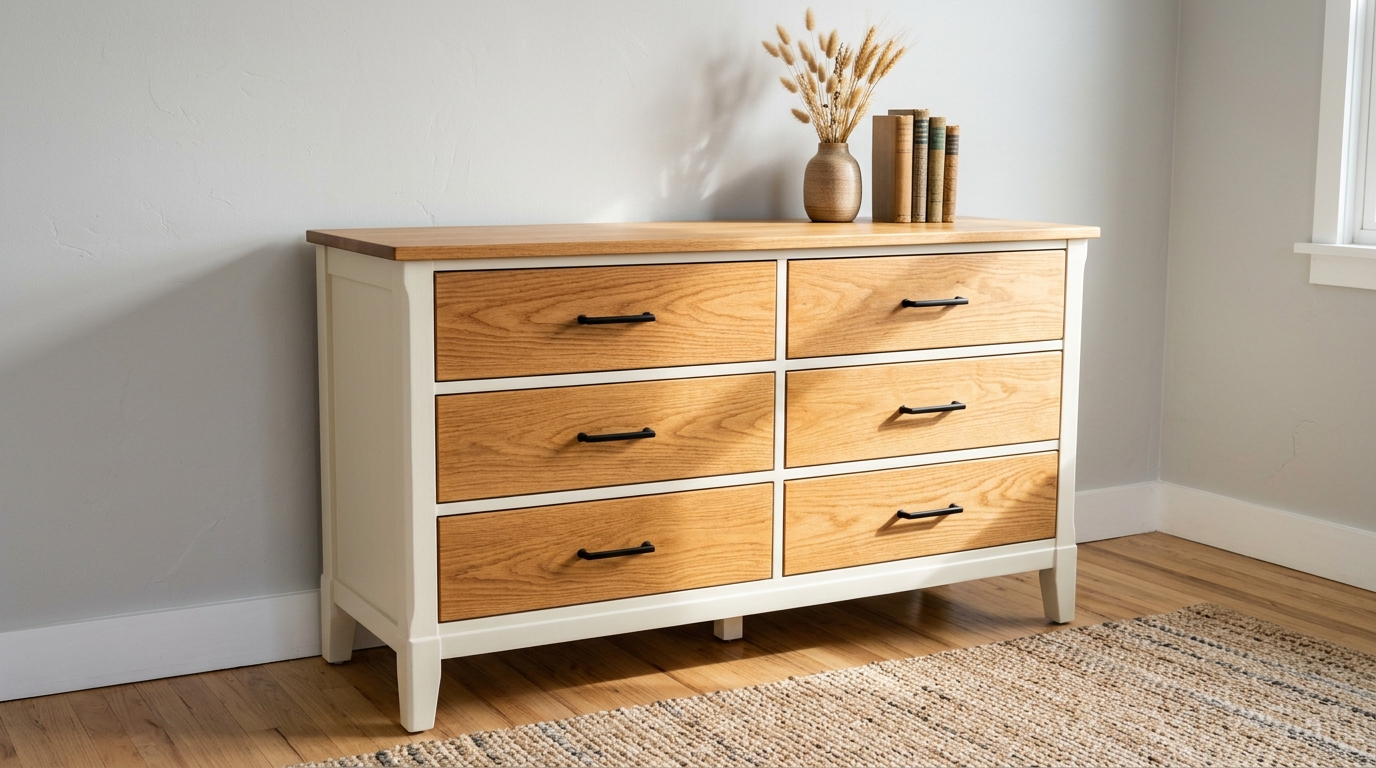
Someone left this six-drawer dresser on the curb with a sign that said free. Under a dull, scratched clear finish, the top and drawer fronts still had beautiful oak, so they got a gentle hand sanding and a fresh clear coat, while the body went creamy white. Two tones make a plain dresser look custom and expensive. The warm wood keeps it cozy and the white keeps it bright. Two-tone furniture flips like this are perfect for beginners. Next time you spot a free dresser, will you stop the car?
You will need: Solid wood dresser with a clear finish, sanding block with 120 and 220 grit paper, tack cloth, water-based clear topcoat, primer, cream white paint, brush, new black pulls.
How to make it: 1. Pull out the drawers and clean everything well. 2. Hand sand the clear finish on the top and drawer fronts until bare oak shows, then wipe off the dust. 3. Brush on two thin coats of clear topcoat. 4. Prime and paint the body cream white. 5. Attach the new black pulls.
Fluted Trim Nightstand
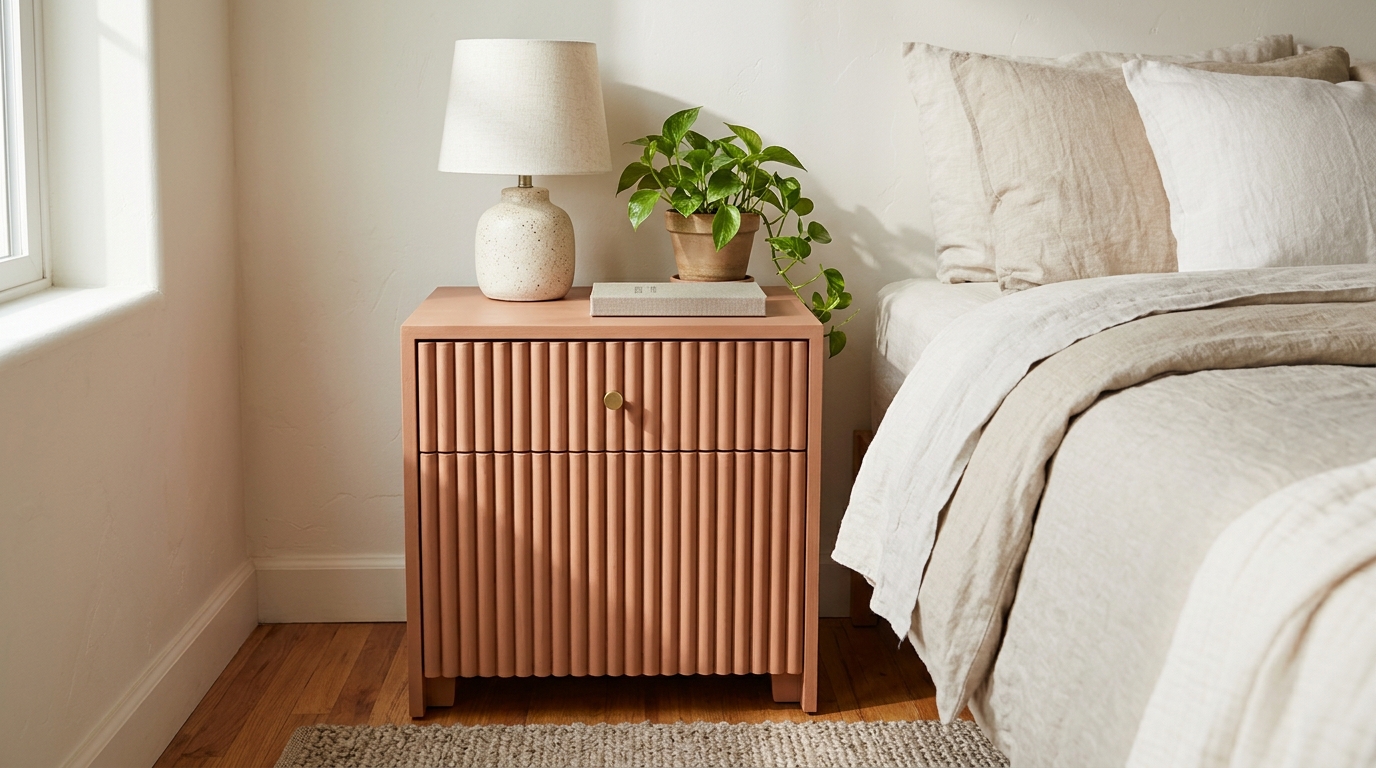
Fluted wood is everywhere right now, and you do not need a fancy workshop to get the look. This basic nightstand got strips of half round trim glued side by side across the drawer and sides. Once it was painted a soft terracotta blush, it looked like a boutique piece. The ridges catch the light and add texture without any carving at all. It is a perfect beginner project because the trim does all the work. Which room in your house would you try it in first?
You will need: Plain nightstand, half round wood trim strips, small hand saw and miter box, wood glue, painter’s tape, wood filler, primer, terracotta blush paint, small brush, round brass knob.
How to make it: 1. Measure the drawer front and sides, then cut the trim to length, with an adult handling the saw. 2. Glue the strips side by side and hold them with painter’s tape until dry. 3. Fill tiny gaps at the ends with wood filler. 4. Prime, then paint two coats of blush, working the brush into the grooves. 5. Add the brass knob.
Dresser Turned TV Console
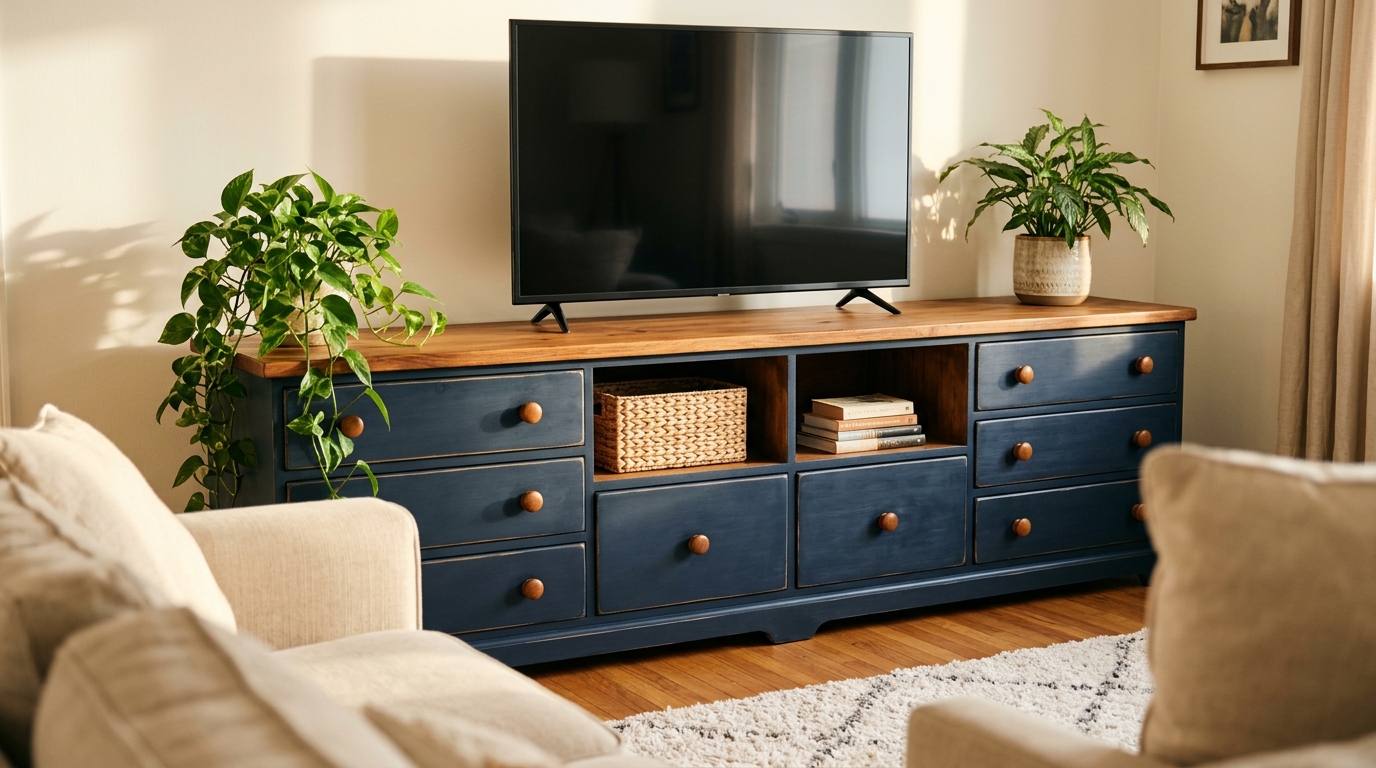
A long, low dresser makes a wonderful TV stand, and it hides far more clutter than most store-bought consoles. The trick here is removing the two middle drawers to create open cubbies for baskets, books and remotes. Deep navy paint with a warm wood top looks rich and grounded in a living room. It is one of the most useful furniture flips for a busy family room, and it also saves a perfectly good dresser from the landfill. Do you have a dresser in a spare room that could use a brand new job?
You will need: Long low dresser, screwdriver, thin wood strips, wood glue, sanding sponge, primer, navy paint, wooden knobs, woven basket, furniture anti-tip strap.
How to make it: 1. Remove the two middle drawers and their runners with a screwdriver. 2. Glue thin wood strips over any rough edges inside the opening. 3. Scuff, prime and paint the body navy, leaving the top natural. 4. Add wooden knobs and slide baskets into the cubbies. 5. Attach an anti-tip strap to the wall before setting the TV on top.
The $15 Antique Table
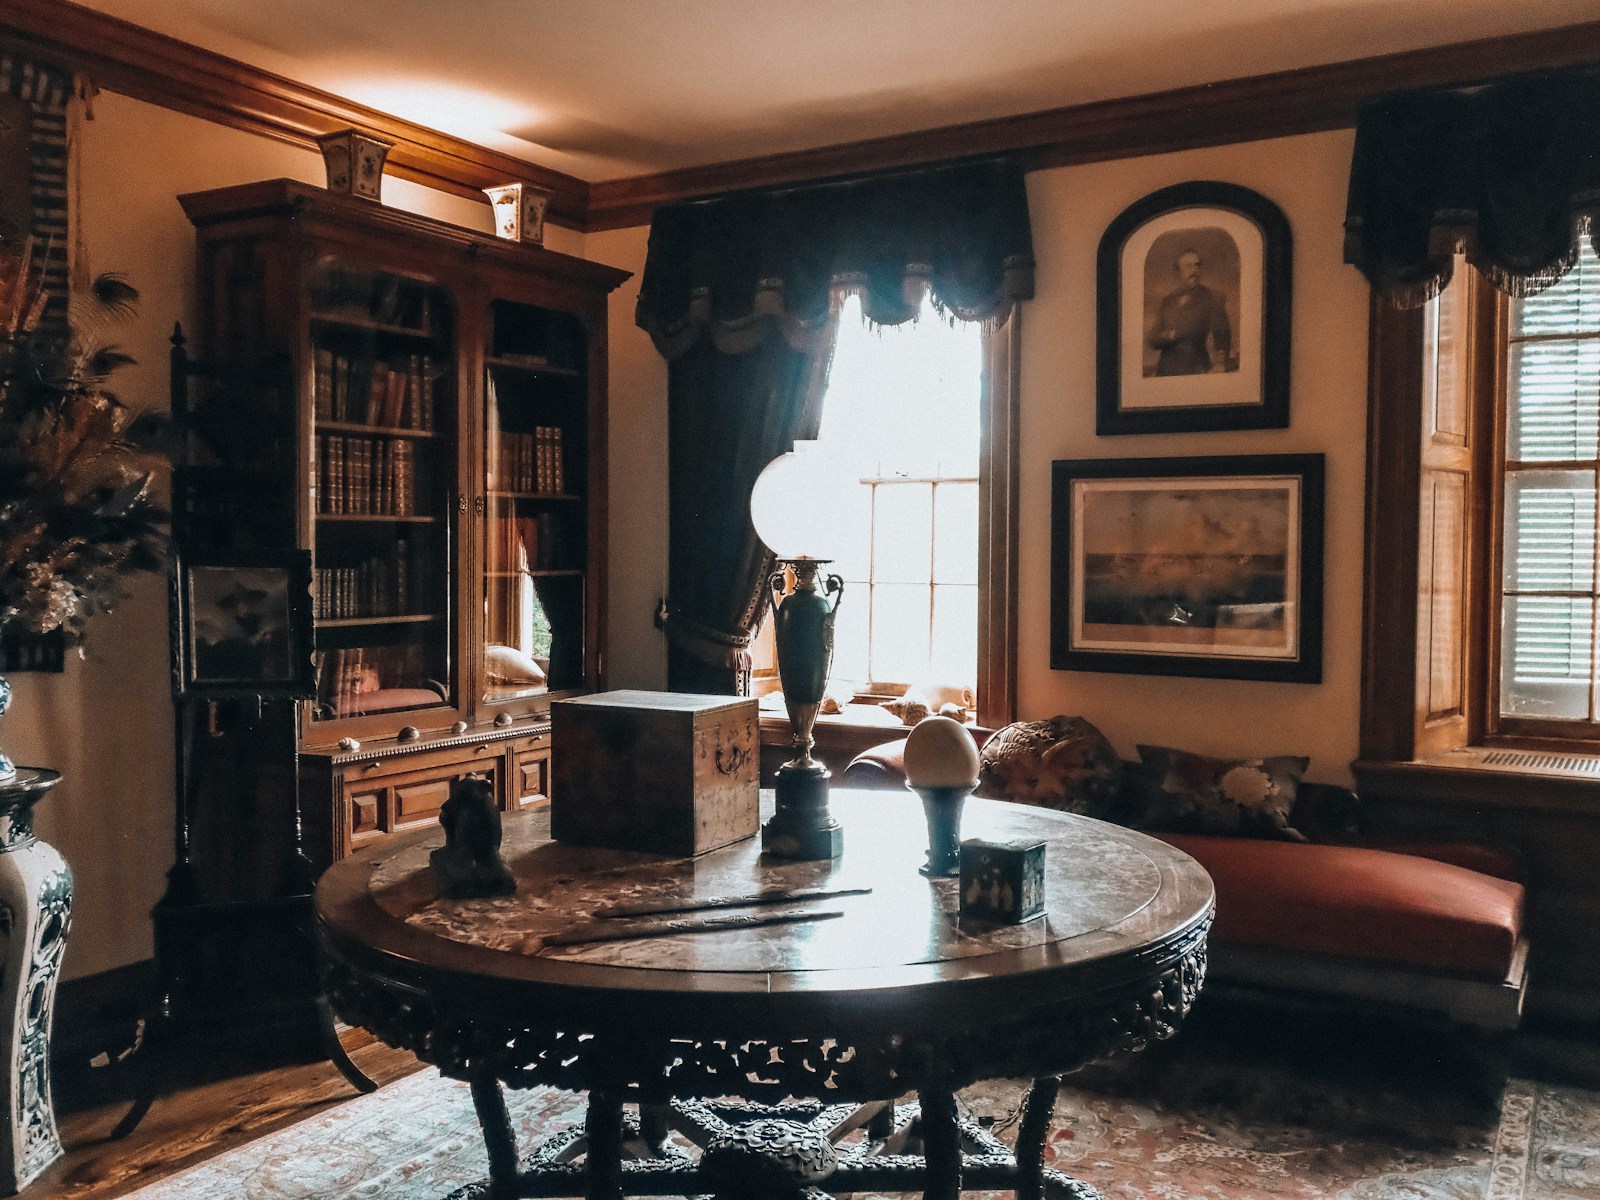
Some of the best finds cost less than lunch. A round antique table like this often turns up at estate sales for around $15 because the top looks worn. Most of the time it only needs a deep clean, a little wax and some patience. Old tables were built to last, with solid wood and sturdy legs, and a gentle refresh lets the grain glow again. Bargain wins like this are why a popular furniture flip post on Instagram keeps getting shared. Where is the best place you ever found a bargain table?
You will need: Old wood table, mild soap, soft cloths, soft scrub pad, wood glue for loose joints, clear furniture wax, buffing cloth.
How to make it: 1. Wash the table with mild soapy water and dry it right away. 2. Tighten any wobbly legs with wood glue and let it set overnight. 3. Rub clear wax into the top with a soft pad, following the grain. 4. Let it haze for a few minutes, then buff until it shines.
Cane Panel Cabinet Doors
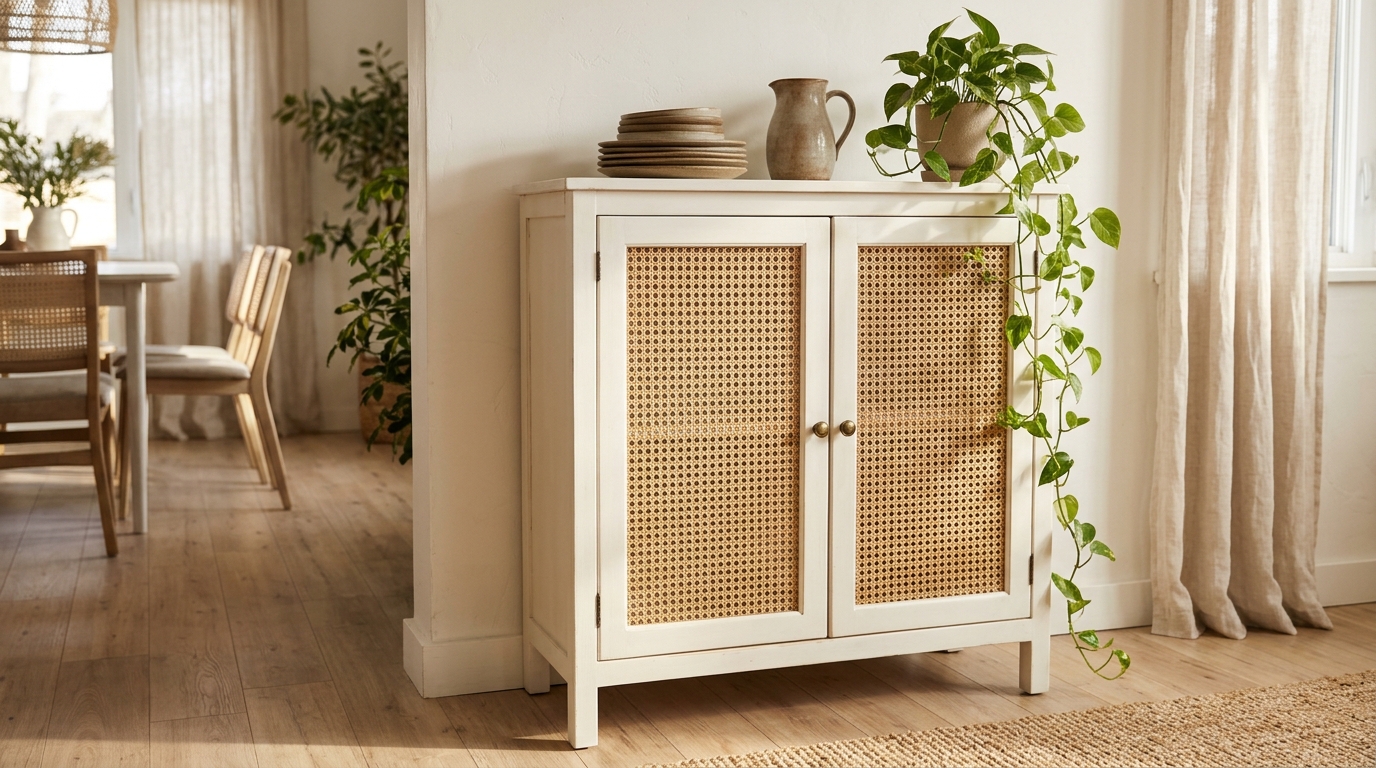
Cane webbing gives any cabinet an airy, relaxed look, and it hides clutter while still letting the piece breathe. This cabinet had flat solid panels that felt heavy and dated. The panels were cut out, the frame was painted warm white, and natural cane was stapled in from behind. Now it looks like something from a seaside cottage, and it is one of the furniture flips people ask about most. Cane comes by the roll at craft and hardware stores, so it is easier to find than you might think. Would you try cane on a cabinet or a headboard?
You will need: Cabinet with framed doors, jigsaw (adult only), sandpaper, cane webbing roll, tub of warm water, staple gun, thin trim strips, white paint, brush, small brass knobs.
How to make it: 1. Have an adult cut out the flat center panels with a jigsaw, then sand the edges smooth. 2. Paint the frames and cabinet warm white. 3. Soak the cane in warm water for about 20 minutes so it bends easily. 4. Staple it tight to the back of each door and cover the staples with thin trim. 5. As it dries, the cane shrinks and pulls flat.
Waterfall Buffet Revival
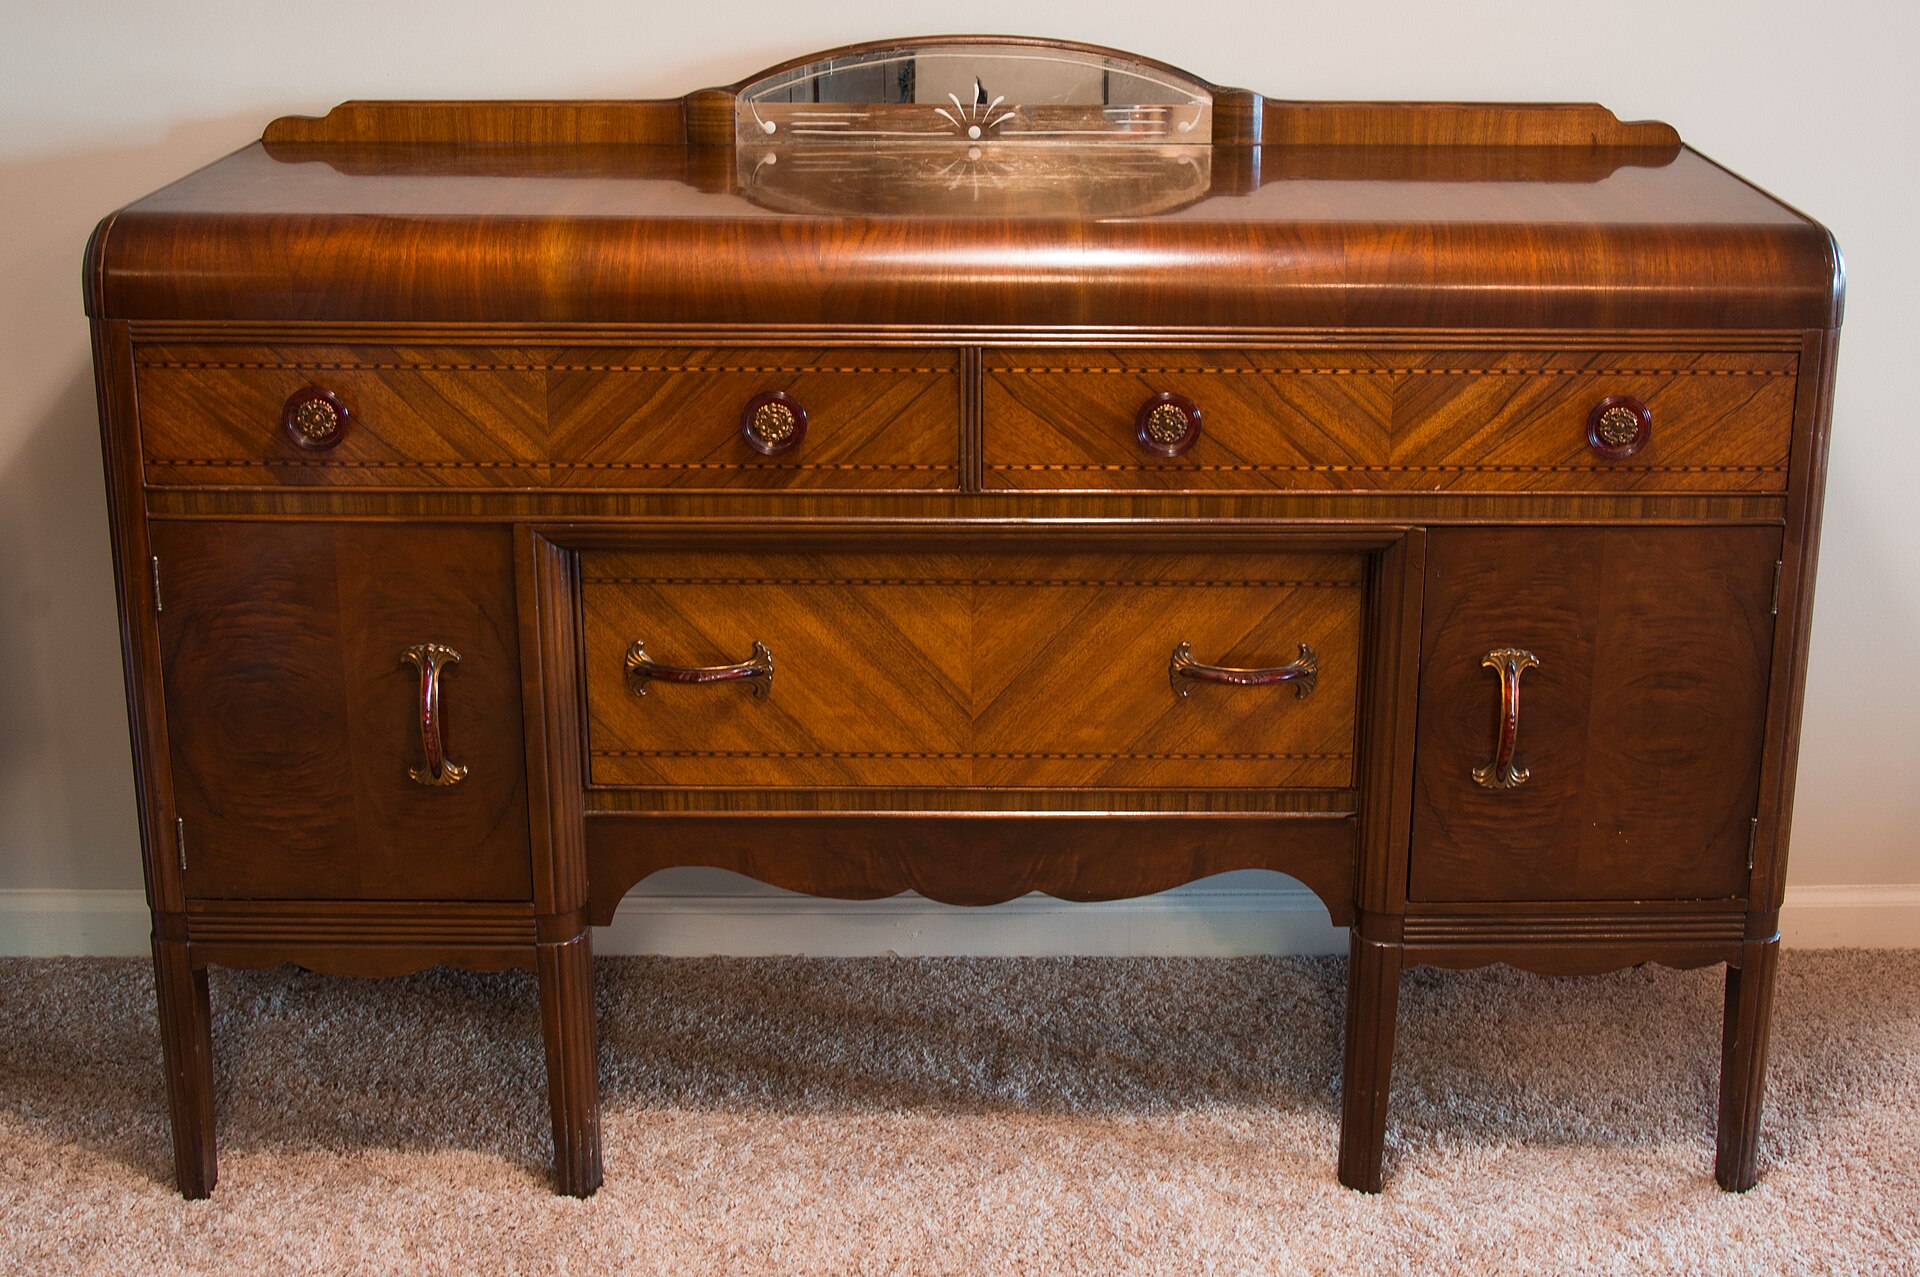
Waterfall furniture from the 1930s and 1940s has rounded edges and striped wood veneer, and it often sits forgotten in basements. Pieces like this buffet only need some care to look grand again. Clean it gently, glue down any lifted veneer and polish the original pulls. Not all furniture flips need paint. Many people keep the wood instead of painting it, because that rounded art deco shape is the real star. Would you paint a waterfall piece or keep the wood?
You will need: Waterfall dresser or buffet, mild soap, soft cloths, wood glue, painter’s tape or small clamps, cotton swabs, wood polish, soft toothbrush.
How to make it: 1. Wipe the piece with lightly soapy water and dry it at once. 2. Use a cotton swab to slip wood glue under lifted veneer, press it flat and tape or clamp it overnight. 3. Clean the pulls with a soft toothbrush and warm soapy water. 4. Polish the wood with a soft cloth and reattach the pulls.
Checkerboard Tabletop, the Playful Side of Furniture Flips
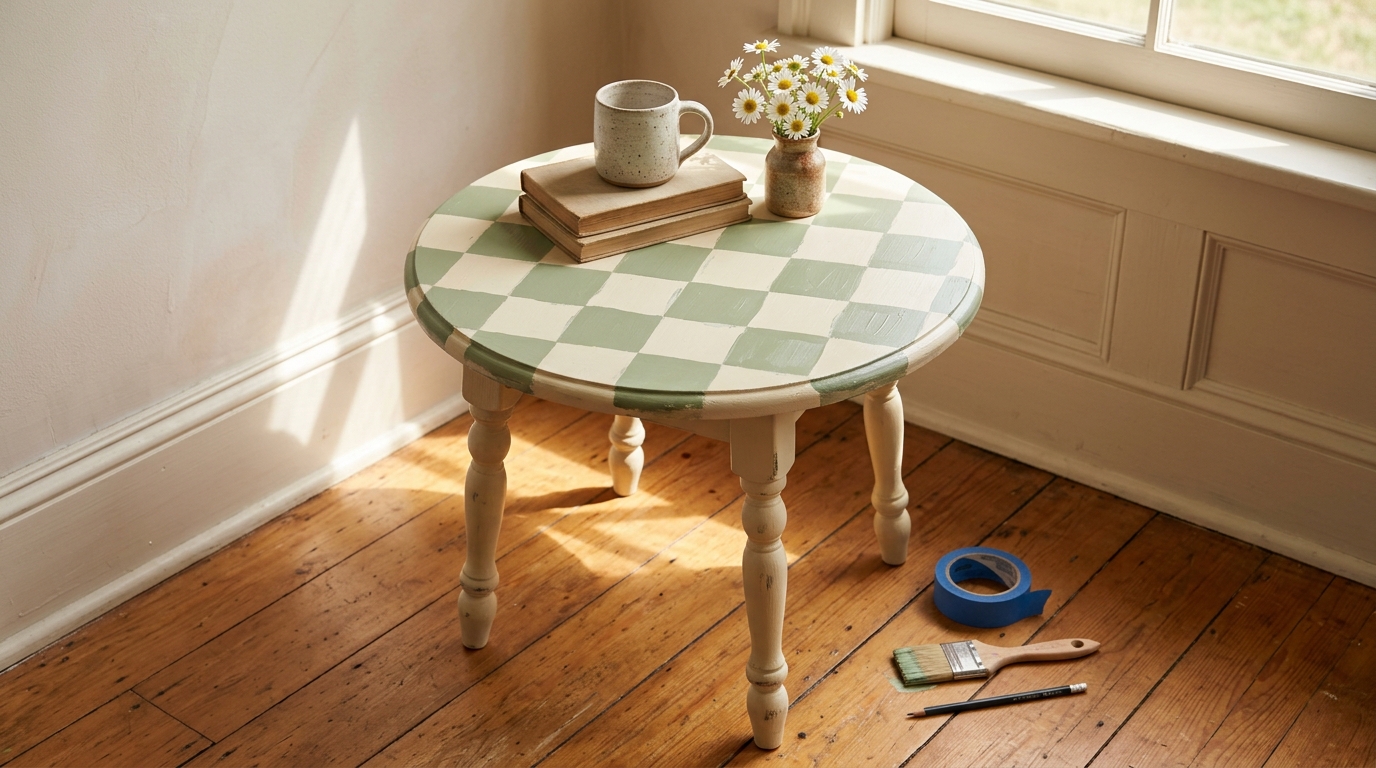
Checkerboard patterns are having a big moment, and a small side table is the perfect place to try one. This round table got a cream base coat, a pencil grid and sage green squares painted in with the help of painter’s tape. A few little wobbles in the lines only add to the handmade charm. It turns a forgettable table into a happy conversation piece, and kids love helping fill in the squares. Which two colors would you pick for yours?
You will need: Small wood table, sanding sponge, primer, cream paint, sage green paint, ruler, pencil, painter’s tape, small flat brush, clear water-based topcoat.
How to make it: 1. Scuff, prime and paint the whole table cream. 2. Draw an even grid on the top with a pencil and ruler. 3. Tape off every other square and paint them sage green. 4. Peel the tape while the paint is still a little wet, then do the next row. 5. Seal the top with two coats of clear topcoat.
Desk Turned Makeup Vanity
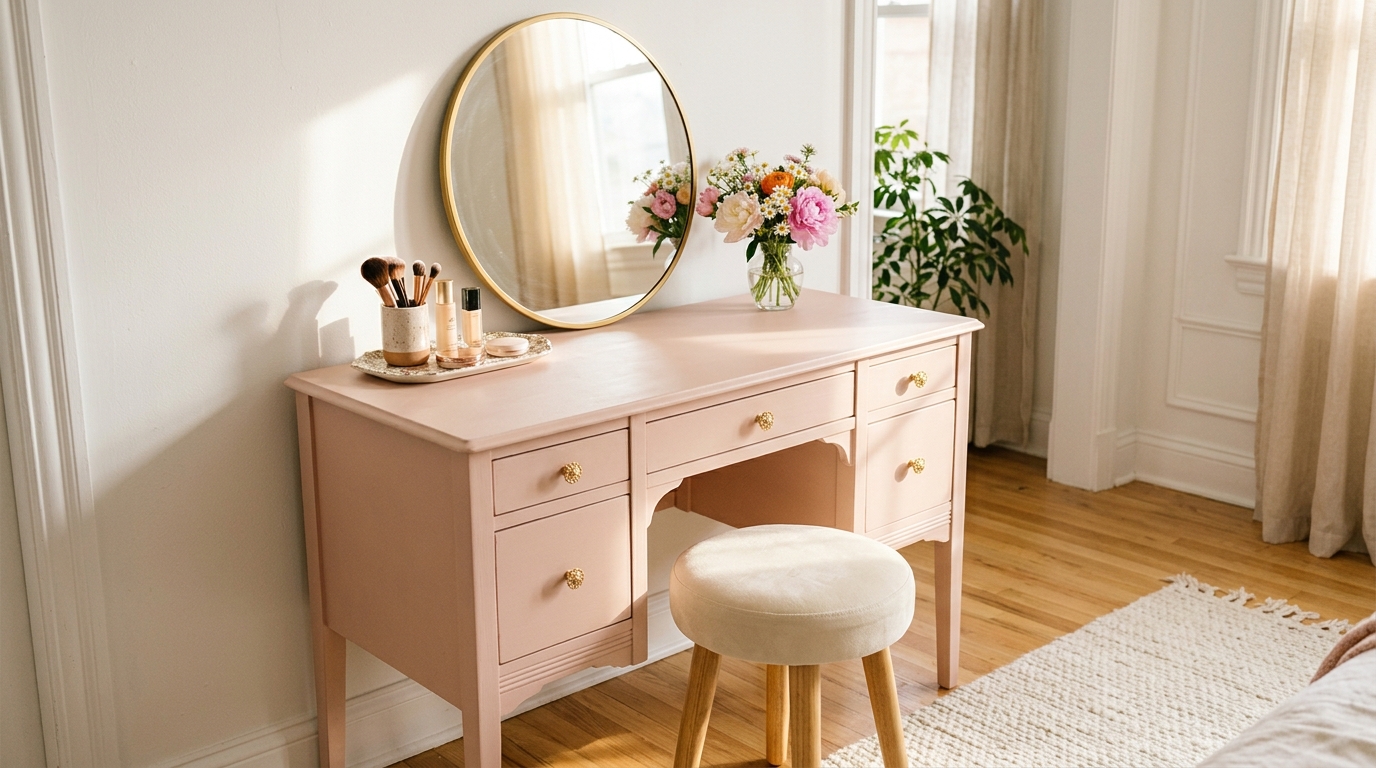
An old writing desk already has the right height and drawers for a makeup vanity. This one went from dark and dated to soft blush pink with gold knobs. A round mirror on top and a little cushioned stool finish the look. It gives a teen or a grown-up a special spot to get ready each morning, and it costs far less than a new vanity. Furniture flips like this make thoughtful gifts too. A tray and a cup for brushes keep the top tidy. Who in your home would love a corner like this?
You will need: Old writing desk, mild soap, sanding sponge, primer, blush pink paint, brush and foam roller, gold knobs, round mirror, wall hook, small tray, cushioned stool.
How to make it: 1. Clean and lightly scuff the desk, then remove the old knobs. 2. Prime and roll on two thin coats of blush pink. 3. Add the gold knobs. 4. Hang the mirror on a wall hook just above the desk so it cannot tip. 5. Style the top with a tray, a brush cup and flowers.
Wallpaper-Lined Drawers
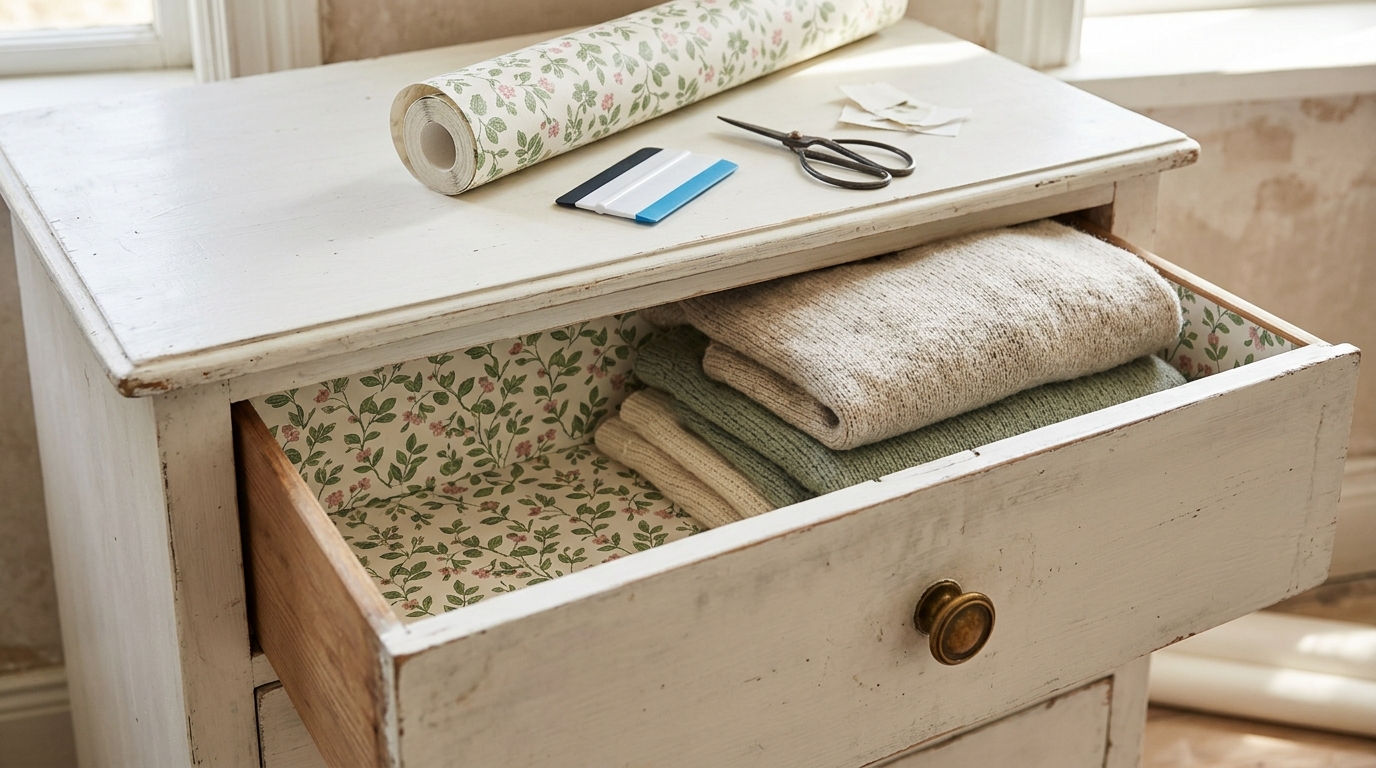
Of all the furniture flips here, this is the one that makes people smile every time they open a drawer. Lining drawers with wallpaper takes about an hour and uses leftover rolls or sale scraps. Botanical prints feel fresh, while stripes or tiny florals feel vintage. It is a sweet surprise inside a plain white dresser, and it protects the wood from scratches too. Peel and stick paper makes it even easier for beginners. What pattern would you hide inside your drawers?
You will need: Dresser drawers, peel and stick wallpaper, measuring tape, pencil, scissors, smoothing tool or old card.
How to make it: 1. Empty the drawers and wipe them clean. 2. Measure the drawer bottom and trace the size onto the back of the paper. 3. Cut the paper a tiny bit small so it lies flat. 4. Peel the backing a little at a time and smooth out bubbles as you go. 5. Repeat on the drawer sides if you like.
Hutch Turned Coffee Bar
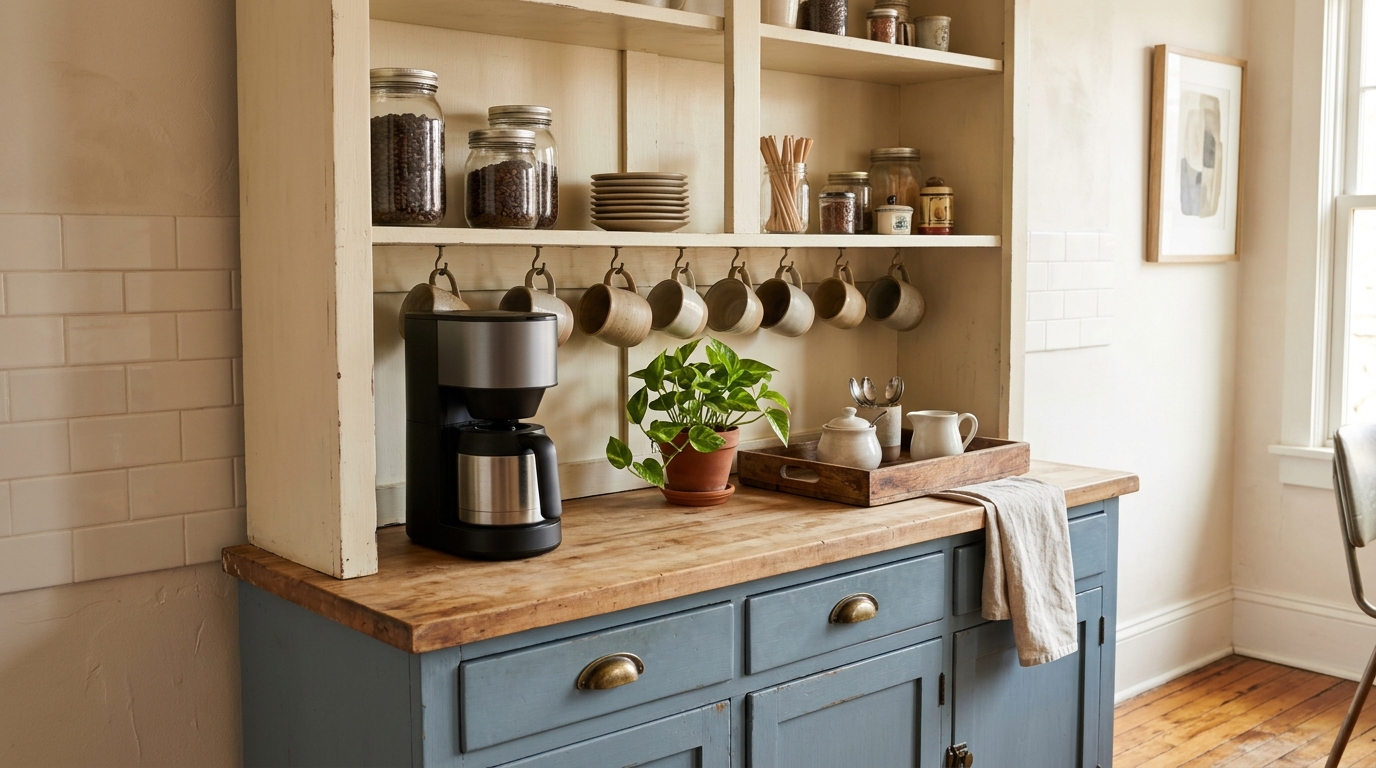
A dated hutch can become the coziest corner of your kitchen. The top shelves got a soft cream coat and a row of small hooks for mugs, while the base went dusty blue with a butcher block counter. Now there is a home for the coffee maker, jars of beans and every favorite mug. Kitchen furniture flips like this one free up counter space and make slow mornings feel a little special. If a hutch is hiding in your dining room, this could be its new life. Would you make a coffee bar or a tea station?
You will need: Old hutch, mild soap, sanding sponge, primer, cream paint, dusty blue paint, brushes, cup hooks, wood board for a new top (optional), food-safe wood oil, anti-tip strap.
How to make it: 1. Clean, scuff and prime the hutch. 2. Paint the top section cream and the base dusty blue. 3. Screw cup hooks under a shelf for mugs. 4. Rub food-safe oil into the wooden counter. 5. Anchor the hutch to the wall, then add the coffee maker, jars and mugs.
Reupholstered Thrift Chairs
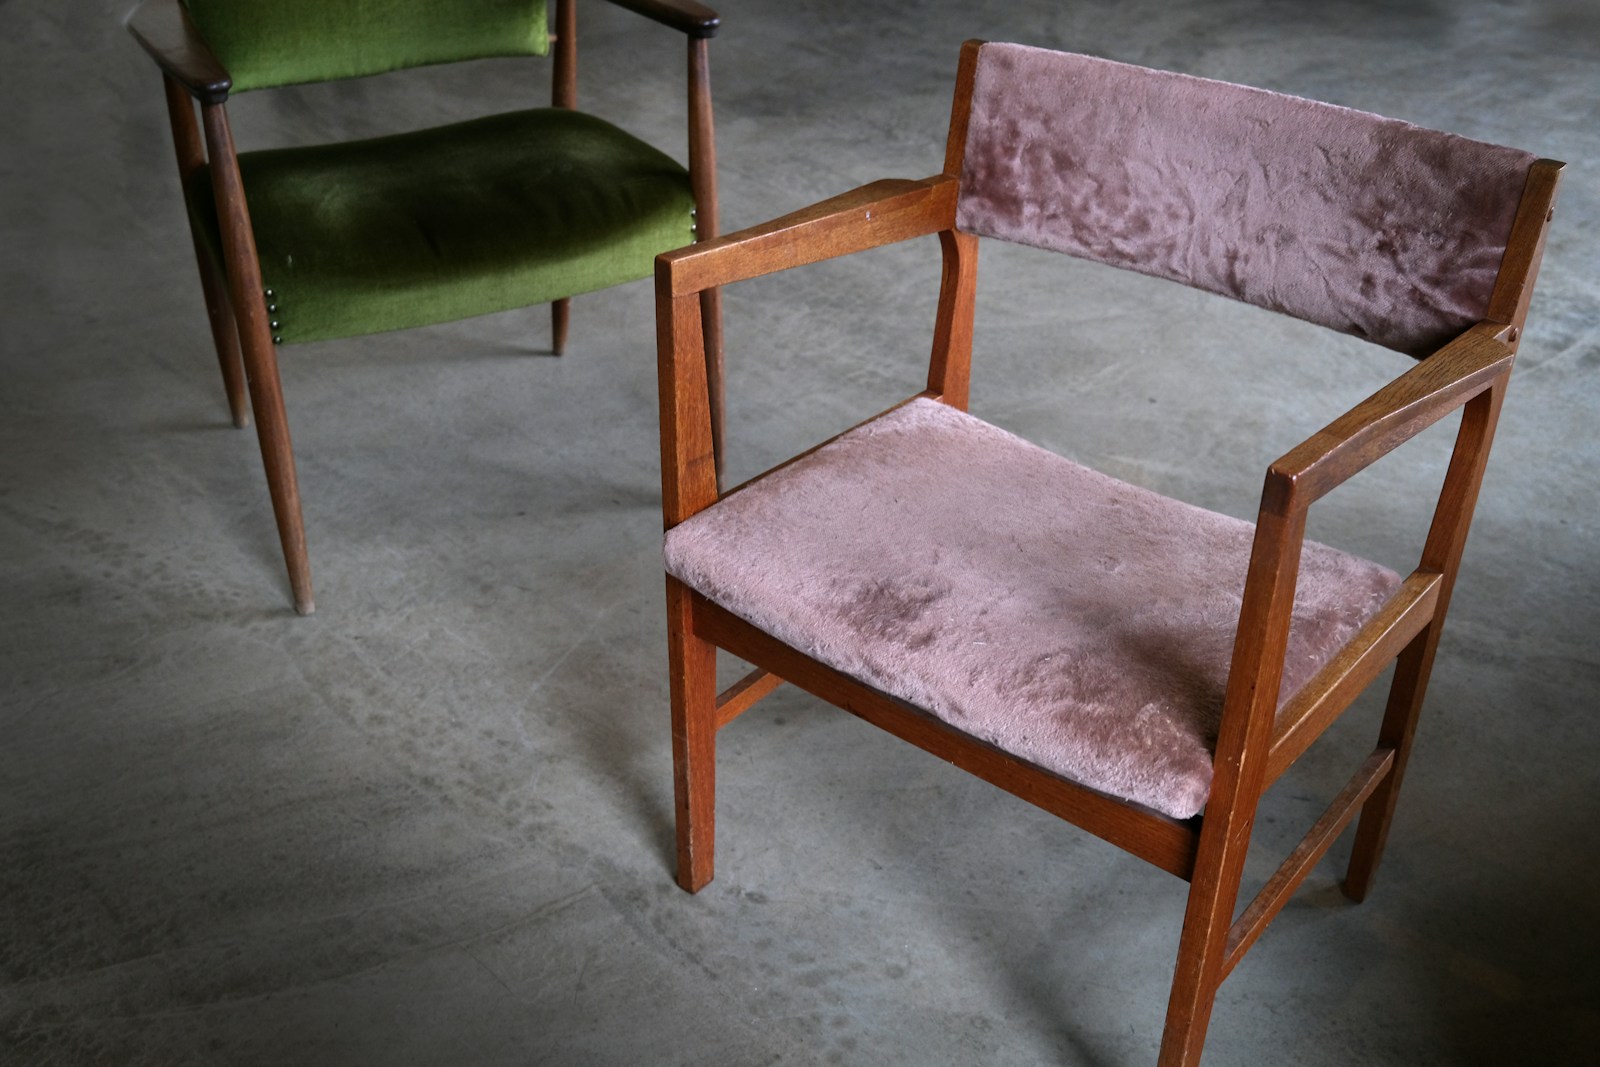
A thrift chair with a stained seat can look brand new with fresh fabric. Most dining chairs and many armchairs have seats that come off with four screws, so you can recover them in one afternoon. Velvet in blush pink or moss green feels rich, and the wood frame only needs a good polish. Furniture flips are not only about paint, after all. Mixing two fabric colors on a pair of chairs adds lots of personality to a room. What color would you choose for your thrift chair makeover?
You will need: Wood chair, screwdriver, new foam (optional), batting, upholstery fabric, staple gun, scissors, wood polish, soft cloth.
How to make it: 1. Flip the chair and unscrew the seat. 2. Pull off the old fabric and add new foam if the seat feels flat. 3. Lay batting and fabric over the seat, then staple the middle of each side first, pulling the fabric tight. 4. Fold the corners neatly and staple all around. 5. Polish the frame and screw the seat back on.
Bright White Dresser Glow-Up
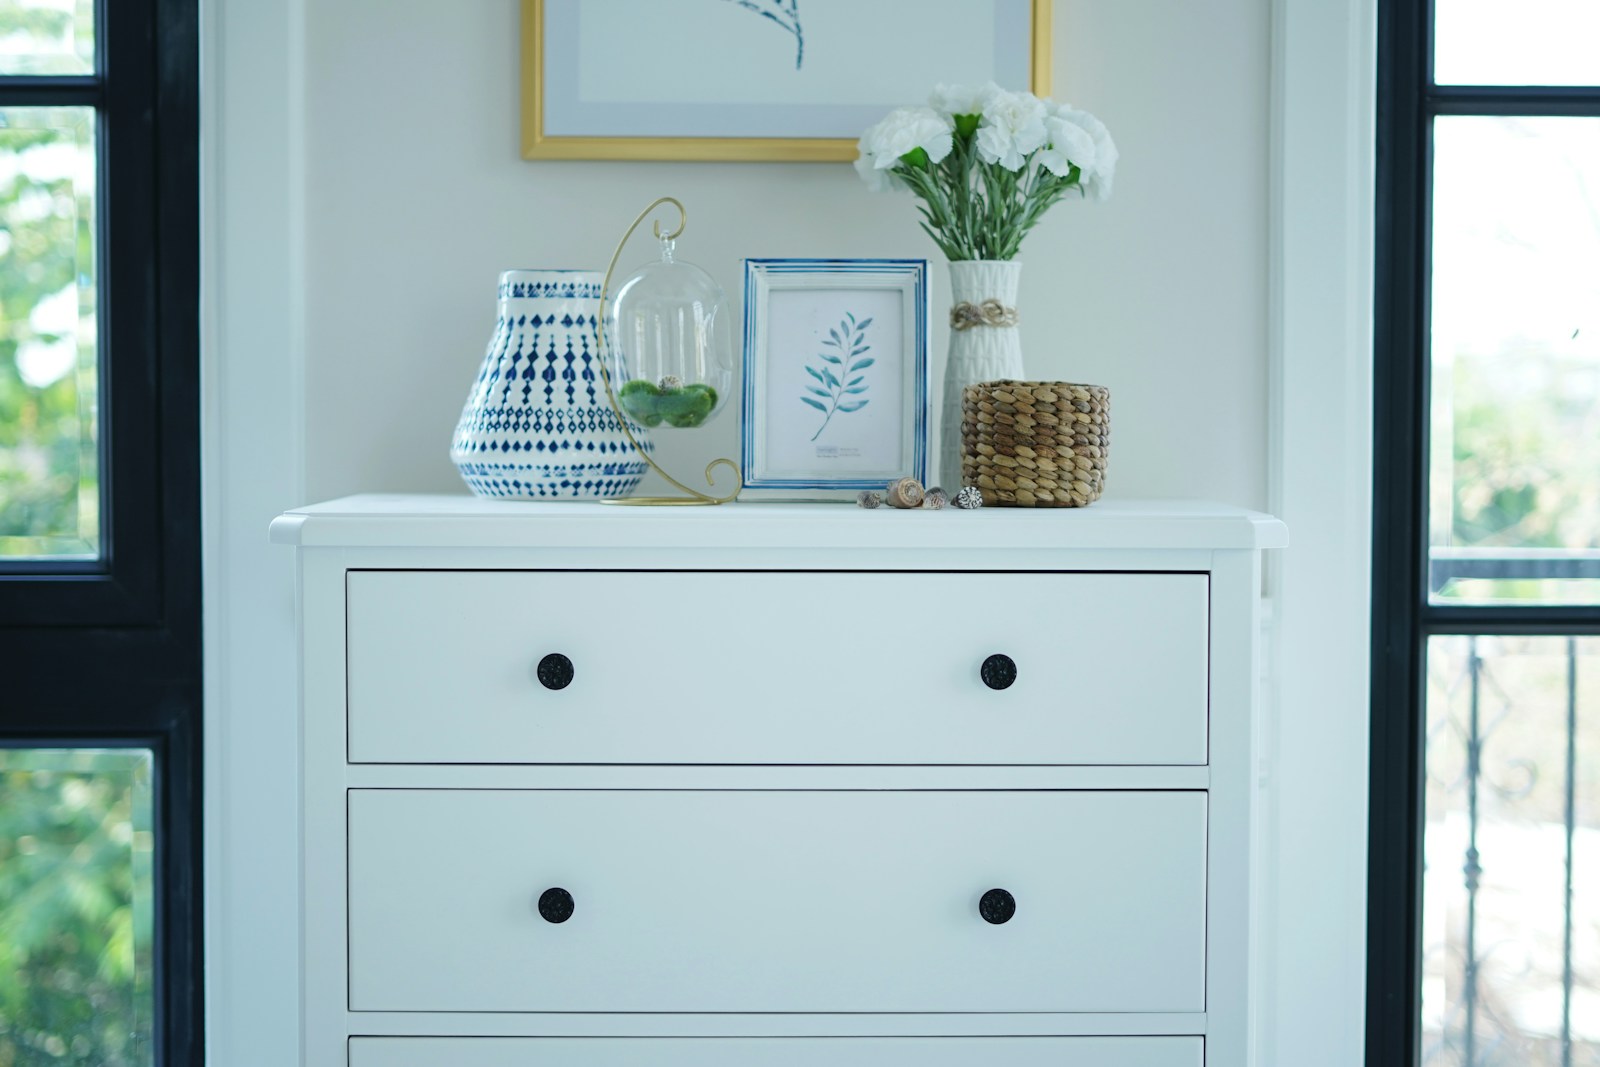
Sometimes the simplest furniture flips are the ones you love most. A tired dresser painted soft white with black knobs suddenly fits any room, from a nursery to an entryway. White makes small spaces feel bigger and lets flowers, prints and baskets stand out on top. For a gentle limewash look, thin white paint with a little water and brush it on in loose strokes so some wood peeks through. Are you team bright white or team soft washed?
You will need: Wood dresser, mild soap, sanding sponge, primer, white paint, water for thinning (optional), brush, black knobs, clear topcoat.
How to make it: 1. Clean the dresser well and scuff the surface. 2. Prime it. 3. Paint two thin coats of white, or brush on watered down white for a washed look. 4. Seal the top with clear topcoat. 5. Add black knobs and style it with fresh flowers.
Brass Hardware Swap, the Fastest of All Furniture Flips
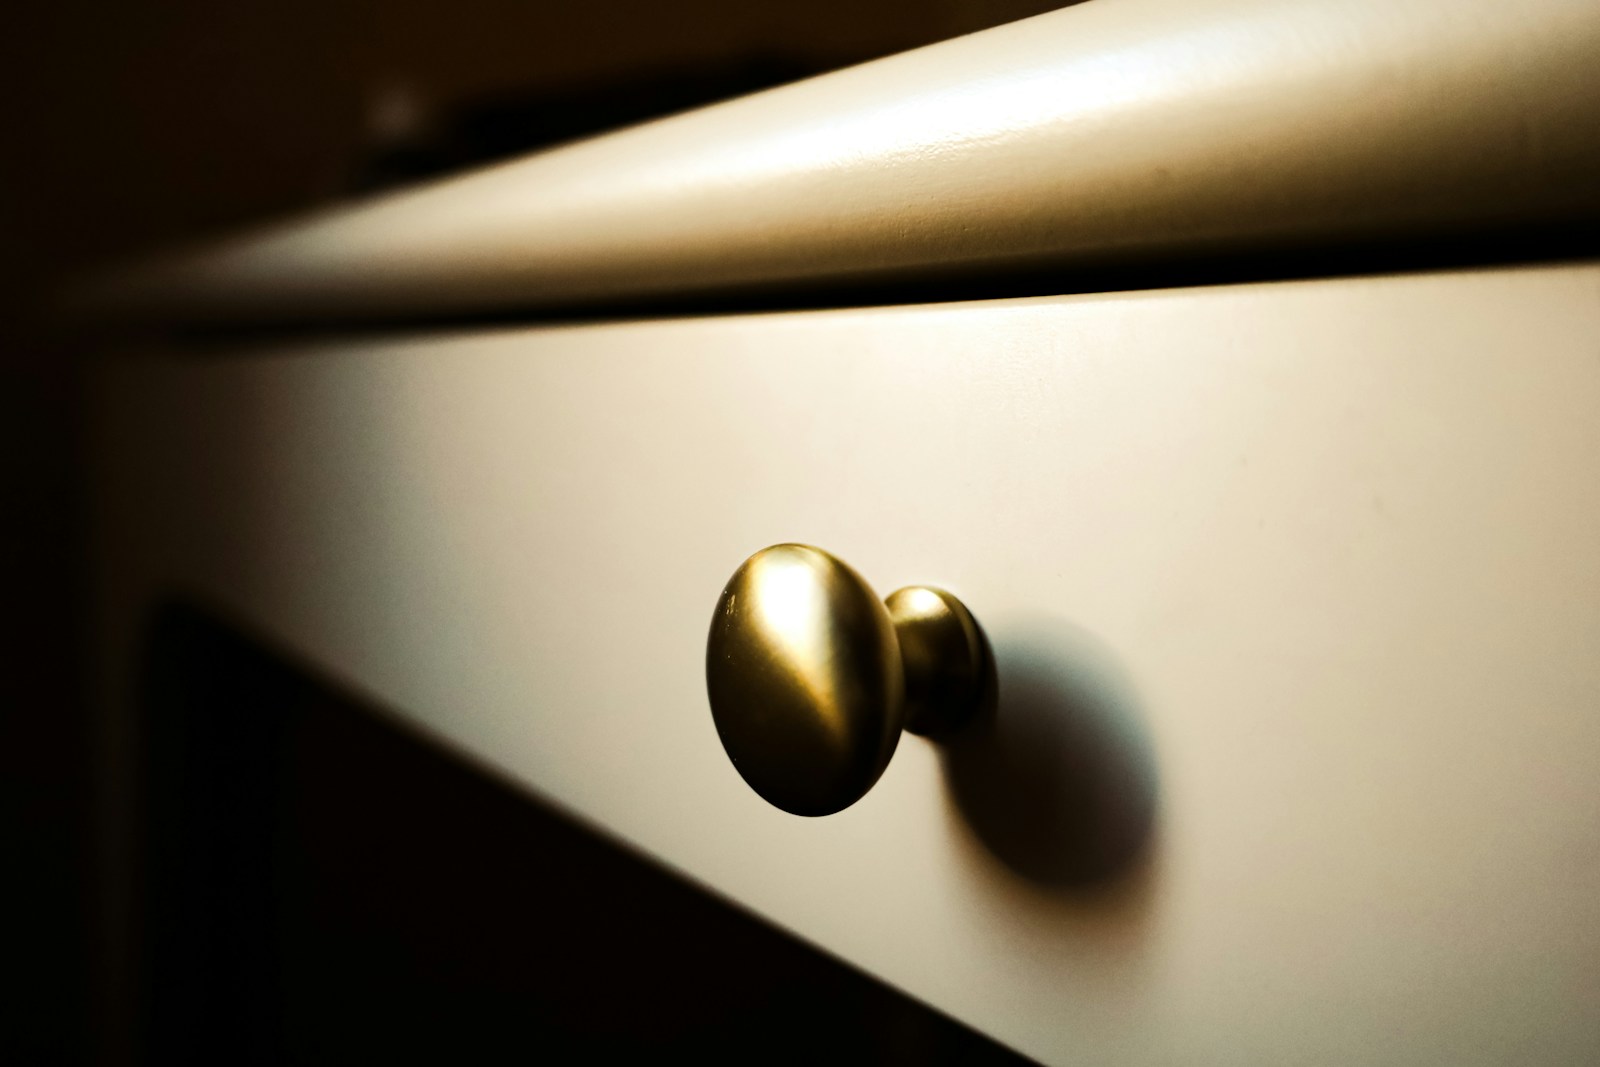
If you only have twenty minutes and a few dollars, change the hardware. New brass knobs make even an untouched dresser look upgraded and a little more grown-up. Brass warms up white, green, navy and natural wood alike. Bring an old knob to the store so the screws match, or measure the space between holes if you want pulls. It is easy to undo if you change your mind, so there is nothing to fear. Which piece in your home could use new hardware today?
You will need: New brass knobs or pulls, screwdriver, tape measure, wood filler, small brush, matching touch-up paint.
How to make it: 1. Unscrew the old knobs. 2. Measure the hole spacing if you are buying pulls. 3. Fill any holes you will not use and touch up the paint. 4. Screw on the new brass knobs and tighten them by hand so the threads do not strip.
Painted Glass Cabinet
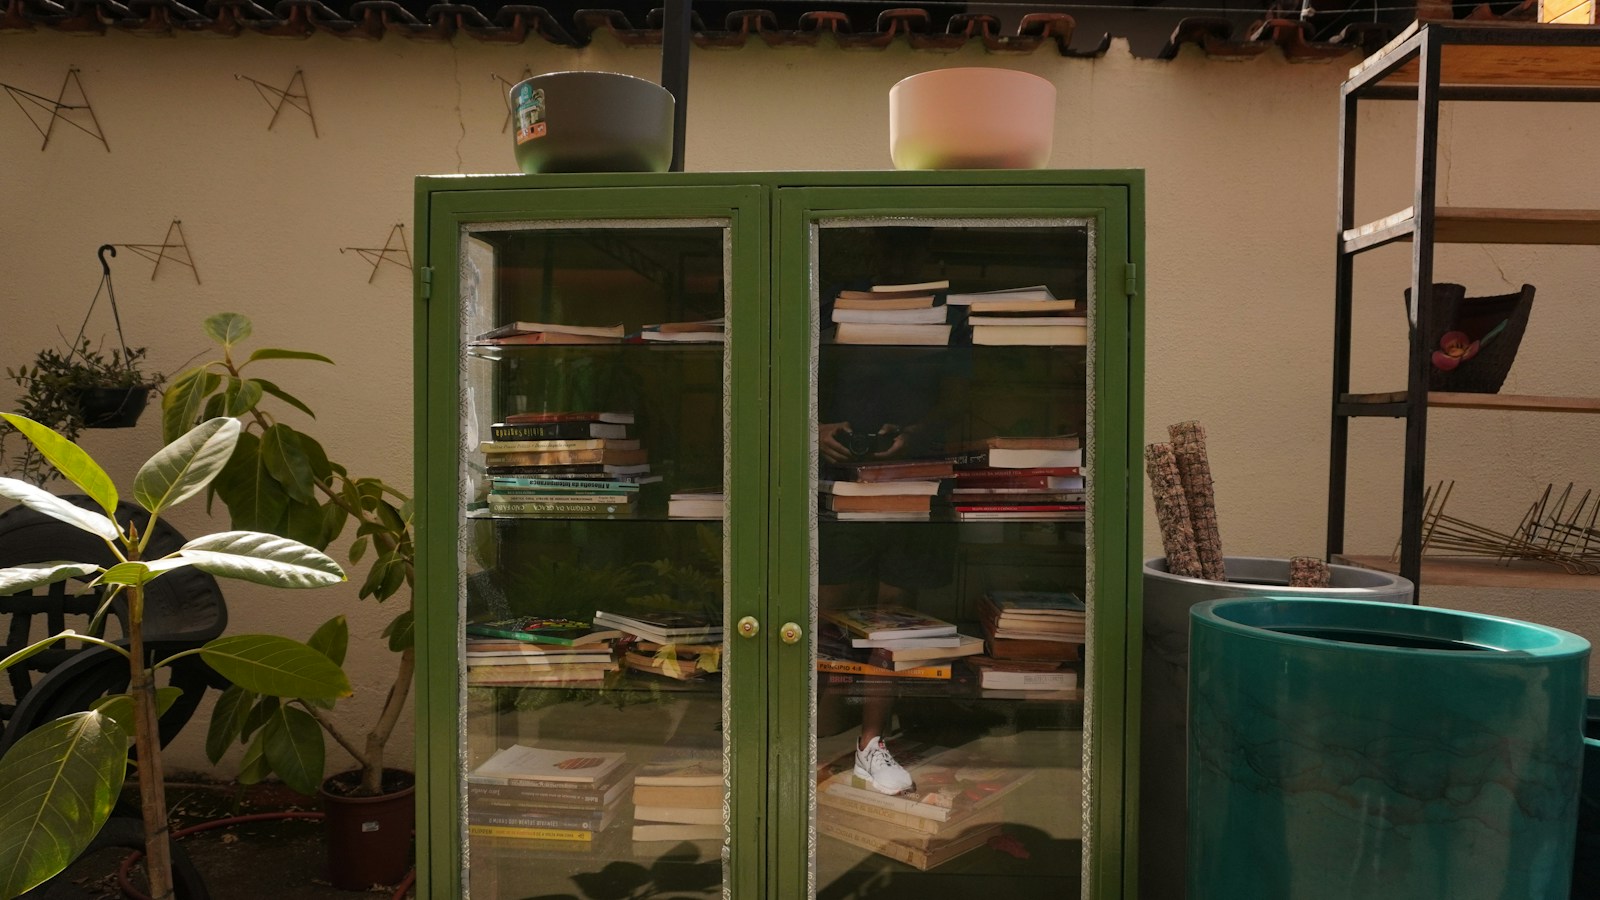
A glass front cabinet is like a little stage for your favorite things. Paint the outside a deep green and the back panel a lighter color, and suddenly books, plants and dishes pop through the glass. The idea works on china cabinets, bookcases and old curio cases. If you love budget makeovers, you will also enjoy these dollar store decor ideas. It is a calm, cozy way to end our list. Which of these furniture flips will you try first?
You will need: Glass front cabinet, painter’s tape, mild soap, sanding sponge, primer, deep green paint, lighter paint for the back panel, small brush, glass cleaner.
How to make it: 1. Tape the edges of the glass to protect it. 2. Clean, scuff and prime the frame. 3. Paint the outside deep green and the back panel a lighter shade. 4. Pull the tape while the paint is slightly wet. 5. Clean the glass and fill the shelves.