Gemstone Bracelets: 15 Personal Gifts With Beautiful Beads and Stones
Gemstone Bracelets turn a handful of favorite colors and shapes into a personal gift. These projects include simple bead strands, wider two-row designs, and bracelets assembled from ready-set stone connectors. Choose loose drilled beads for the stringing projects, or mounted components with sound attachment eyes for the linked designs. You will not need to cut stones or make metal settings. The Fire Mountain Gems elastic-knot tutorial explains the basic cord finish. Match every cord and finding to the components you buy, include the closure when measuring, and test the completed bracelet gently. A comfortable fit and careful joins make the finished gift pleasant to wear..
Gemstone Bracelets With One Pale Blue Accent
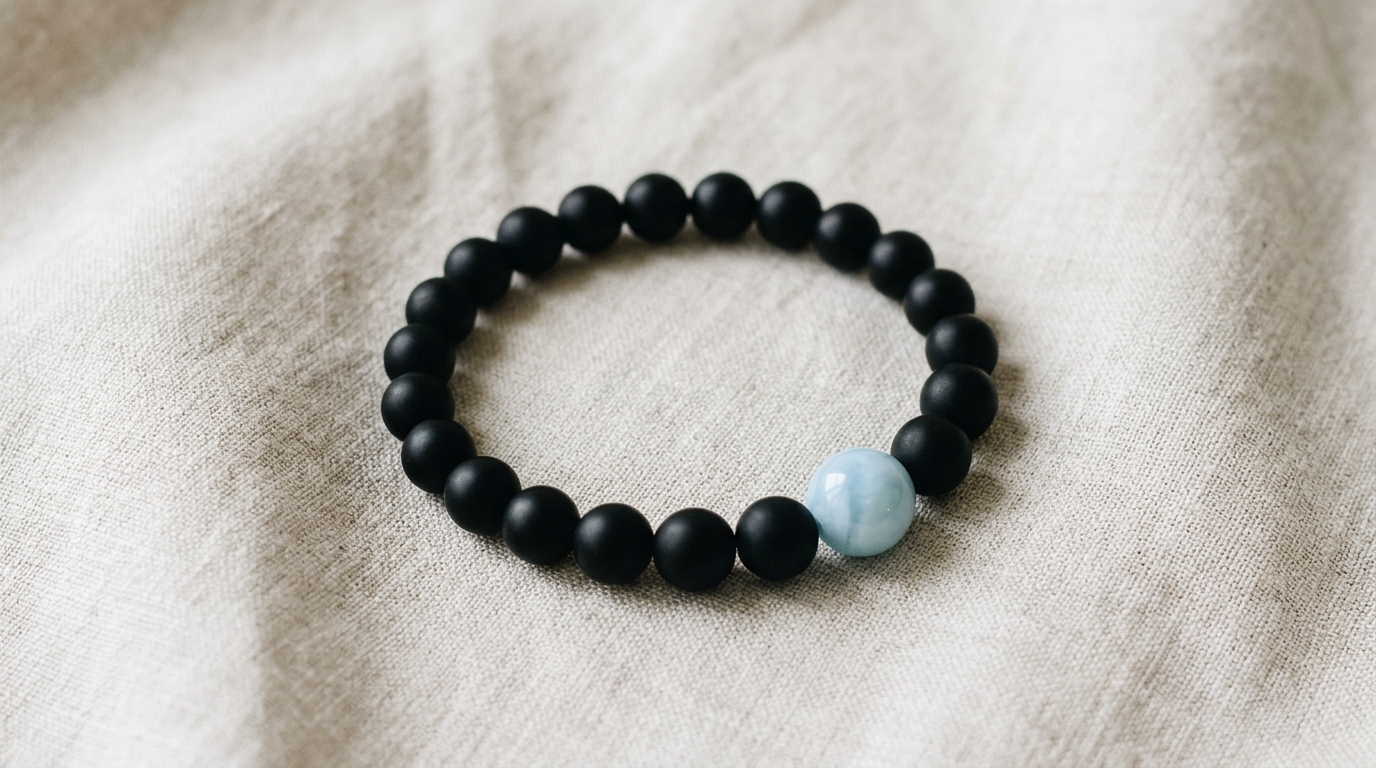
A single pale blue bead changes the mood of a dark bracelet. Keep the surrounding rounds matte and similar in size so the blue center remains easy to notice. Gemstone Bracelets like this can suit someone who usually chooses neutral clothes but enjoys one small color accent. Choose smooth drilled beads and check the blue bead sits comfortably beside its neighbors. Lay the circle flat before finishing so the focal bead lands where you want it on the wrist. Pair it with a small woven gift..
You will need: Loose drilled matte black round beads with one slightly larger pale blue round focal bead, compatible jewelry elastic, ruler, scissors and compatible elastic adhesive if recommended.
How to make it:
1. Measure the wrist for a comfortable fit and choose jewelry elastic suited to the bead channels. Gently pre-stretch it as its maker directs, leave generous working ends, and string matte black round beads with one slightly larger pale blue round focal bead.
2. Check the circle on the wrist without stretching it tight. Adjust the bead count and keep the intended order, holding both ends so no beads slip off.
3. Cross the elastic ends and wrap one end around the other twice for a secure first half. Cross the opposite way for the second half and snug the knot. Gently test it, apply only compatible adhesive if the cord maker recommends it, leave about 3 mm tails, and allow the directed full cure before wearing.
Moss-Pattern Tiles With Round Spacers
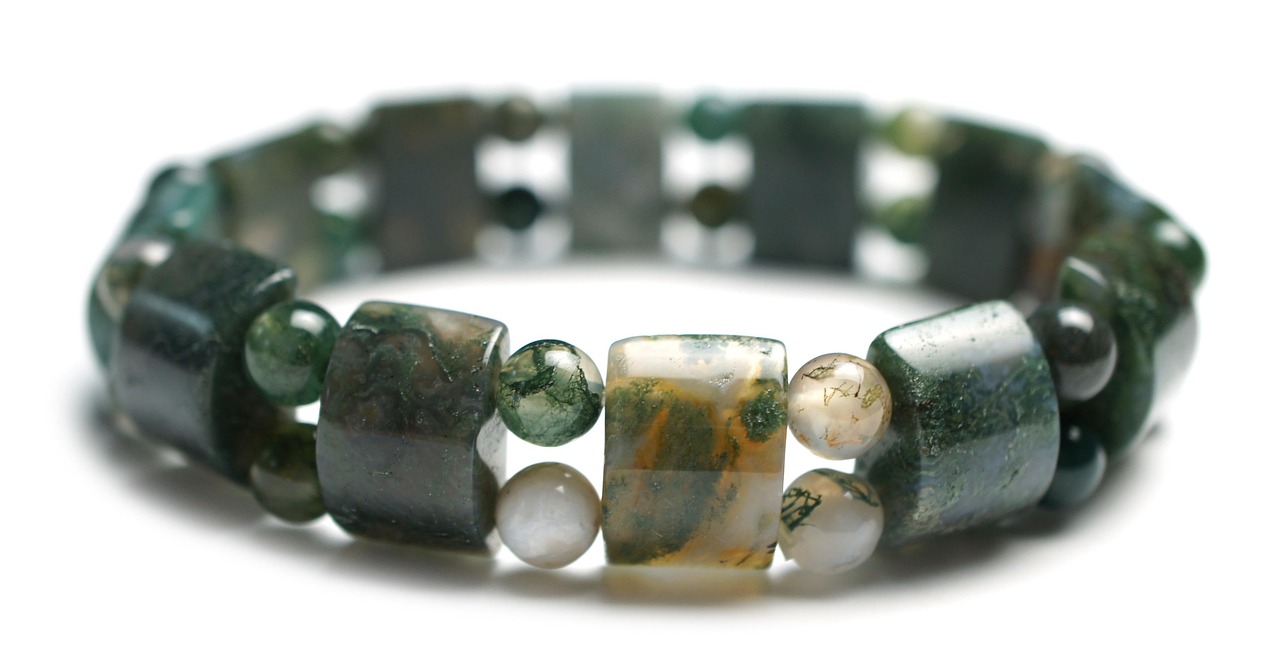
Green, cream, and smoky patterns give these curved tiles plenty of detail. Small round beads sit between the larger pieces on two separate rows, keeping the wide band flexible. Choose purpose-made two-channel tiles and round spacers that suit their height. Gemstone Bracelets do not need a large central pendant when the beads themselves have this much variation. Arrange the tiles first, turning the most interesting faces outward. Keep the two cord rows equally tensioned so the band rests evenly rather than pulling into a twist. Pair it with soft embroidery gifts.
You will need: Two-channel moss-pattern curved rectangular beads, small round stone spacers for both rows, compatible jewelry elastic, ruler, scissors and compatible elastic adhesive if recommended.
How to make it:
1. Choose curved moss-pattern rectangular beads with two separate channels and matching round spacers. Cut two lengths of suitable jewelry elastic with generous working ends; pre-stretch as its maker directs.
2. Thread one cord through each channel of every tile, adding a round spacer to each row between tiles. Keep both rows evenly tensioned and check the wrist fit.
3. Finish EACH cord separately: cross its ends, wrap one end around the other twice, then cross the opposite way for the second half and snug. Gently test both knots, use compatible adhesive only as directed, retain about 3 mm tails and allow the full directed cure.
Soft Colors in Two Parallel Rows
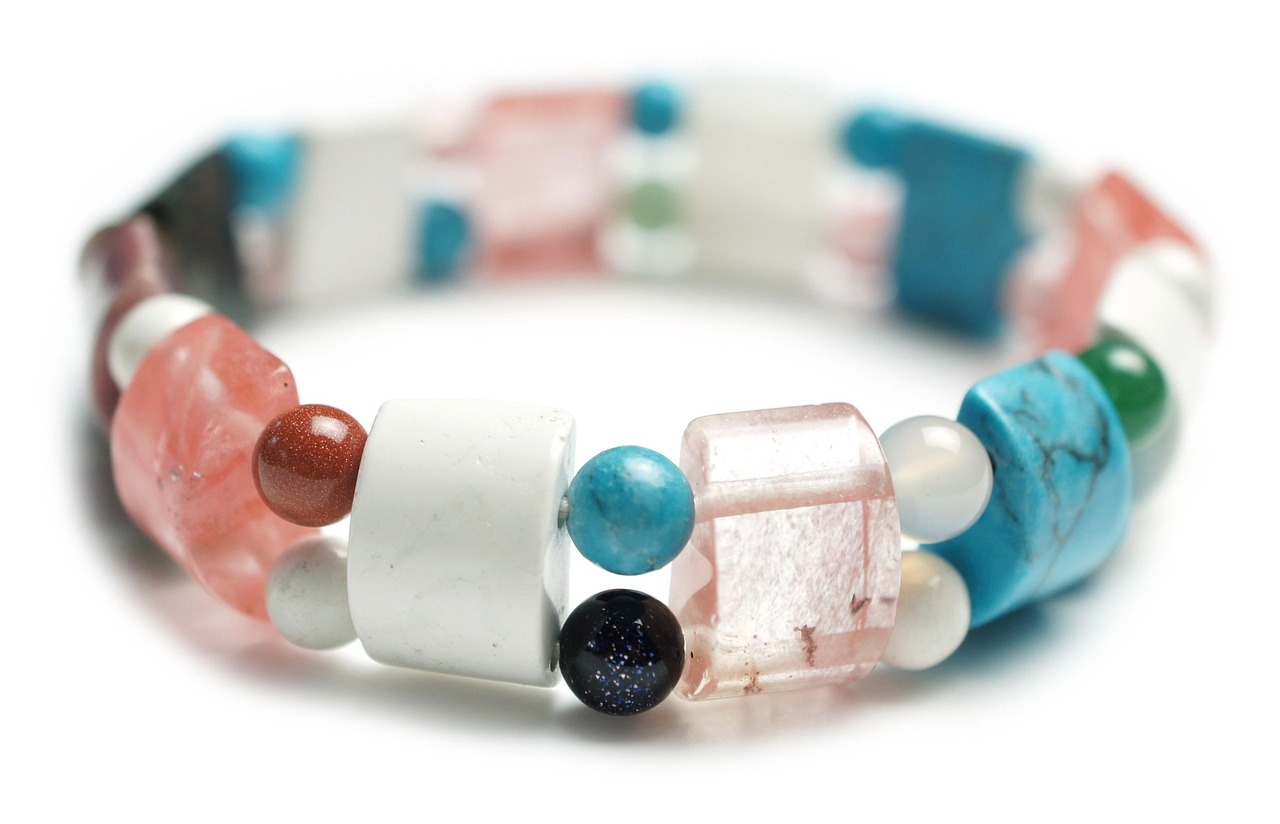
Pale pink, white, and blue tiles create a softer wide-band design. Tiny round spacers bring different colors into the gaps on both rows. The large beads give the bracelet its shape, while the smaller ones keep the joins from feeling crowded. Choose two-channel tiles with compatible spacers and lay out the entire sequence before threading. This is a good project for using a restrained selection of loose beads rather than mixing every color you own. Pair it with neat gift packaging.
You will need: Two-channel pale pink, white and blue curved rectangular beads, round spacers for both rows, compatible jewelry elastic, ruler, scissors and compatible adhesive if recommended.
How to make it:
1. Choose pale pink, white and blue curved rectangular beads with two separate channels and matching round spacers. Cut two lengths of suitable jewelry elastic with generous working ends; pre-stretch as its maker directs.
2. Thread one cord through each channel of every tile, adding a round spacer to each row between tiles. Keep both rows evenly tensioned and check the wrist fit.
3. Finish EACH cord separately: cross its ends, wrap one end around the other twice, then cross the opposite way for the second half and snug. Gently test both knots, use compatible adhesive only as directed, retain about 3 mm tails and allow the full directed cure.
Faceted Pink Gemstone Bracelets
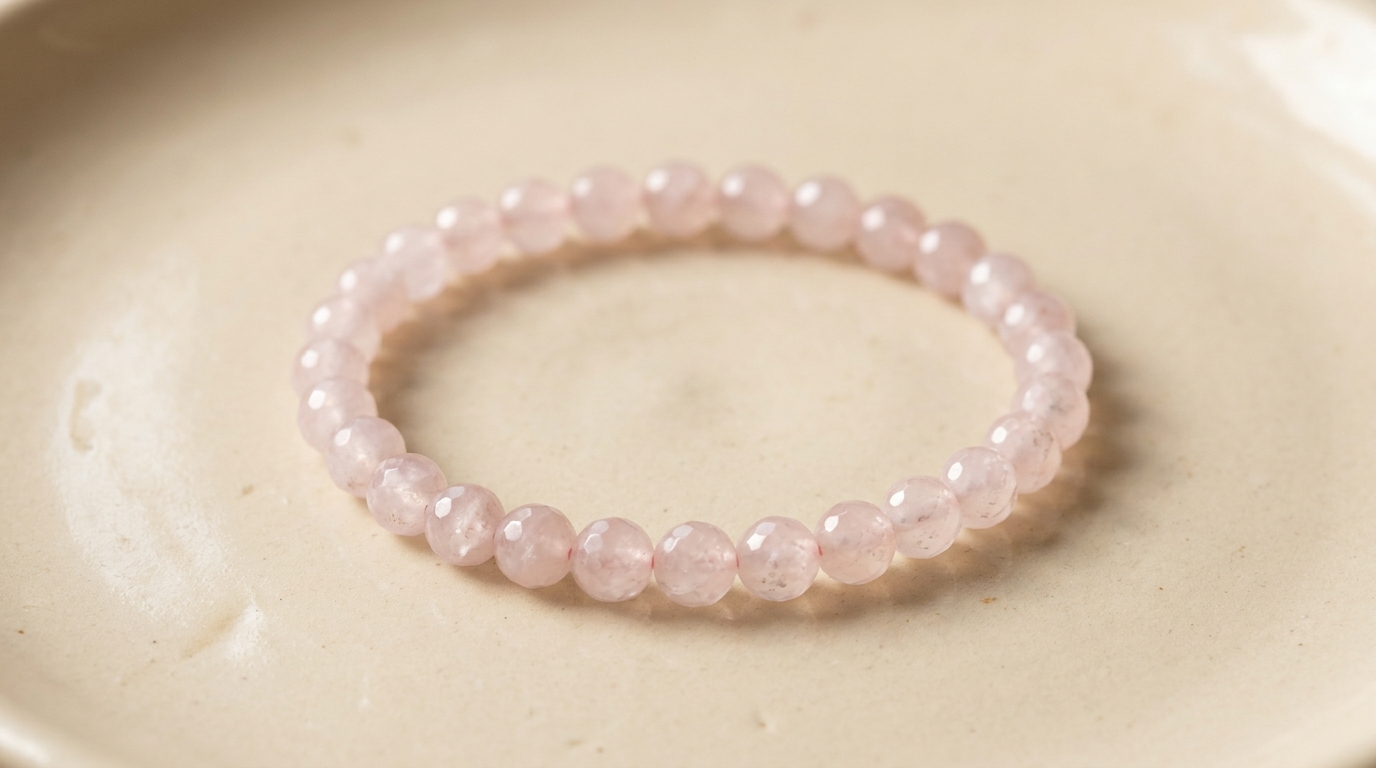
Faceted pink rounds give a simple circle a little extra light. The beads can stay close in color while their small flat faces make the surface interesting. Gemstone Bracelets in a gentle shade make thoughtful gifts for someone who prefers quiet accessories. Compare the beads before stringing and set aside any with rough edges near the drilled channels. A consistent size keeps the bracelet tidy, and a comfortable fit matters more than squeezing in one final bead. Pair it with gifts for couples.
You will need: Loose drilled matching faceted pale pink round beads, compatible jewelry elastic, ruler, scissors and compatible elastic adhesive if recommended.
How to make it:
1. Measure the wrist for a comfortable fit and choose jewelry elastic suited to the bead channels. Gently pre-stretch it as its maker directs, leave generous working ends, and string matching faceted pale pink round beads.
2. Check the circle on the wrist without stretching it tight. Adjust the bead count and keep the intended order, holding both ends so no beads slip off.
3. Cross the elastic ends and wrap one end around the other twice for a secure first half. Cross the opposite way for the second half and snug the knot. Gently test it, apply only compatible adhesive if the cord maker recommends it, leave about 3 mm tails, and allow the directed full cure before wearing.
Snowflake Teardrops Linked in Silver Tones
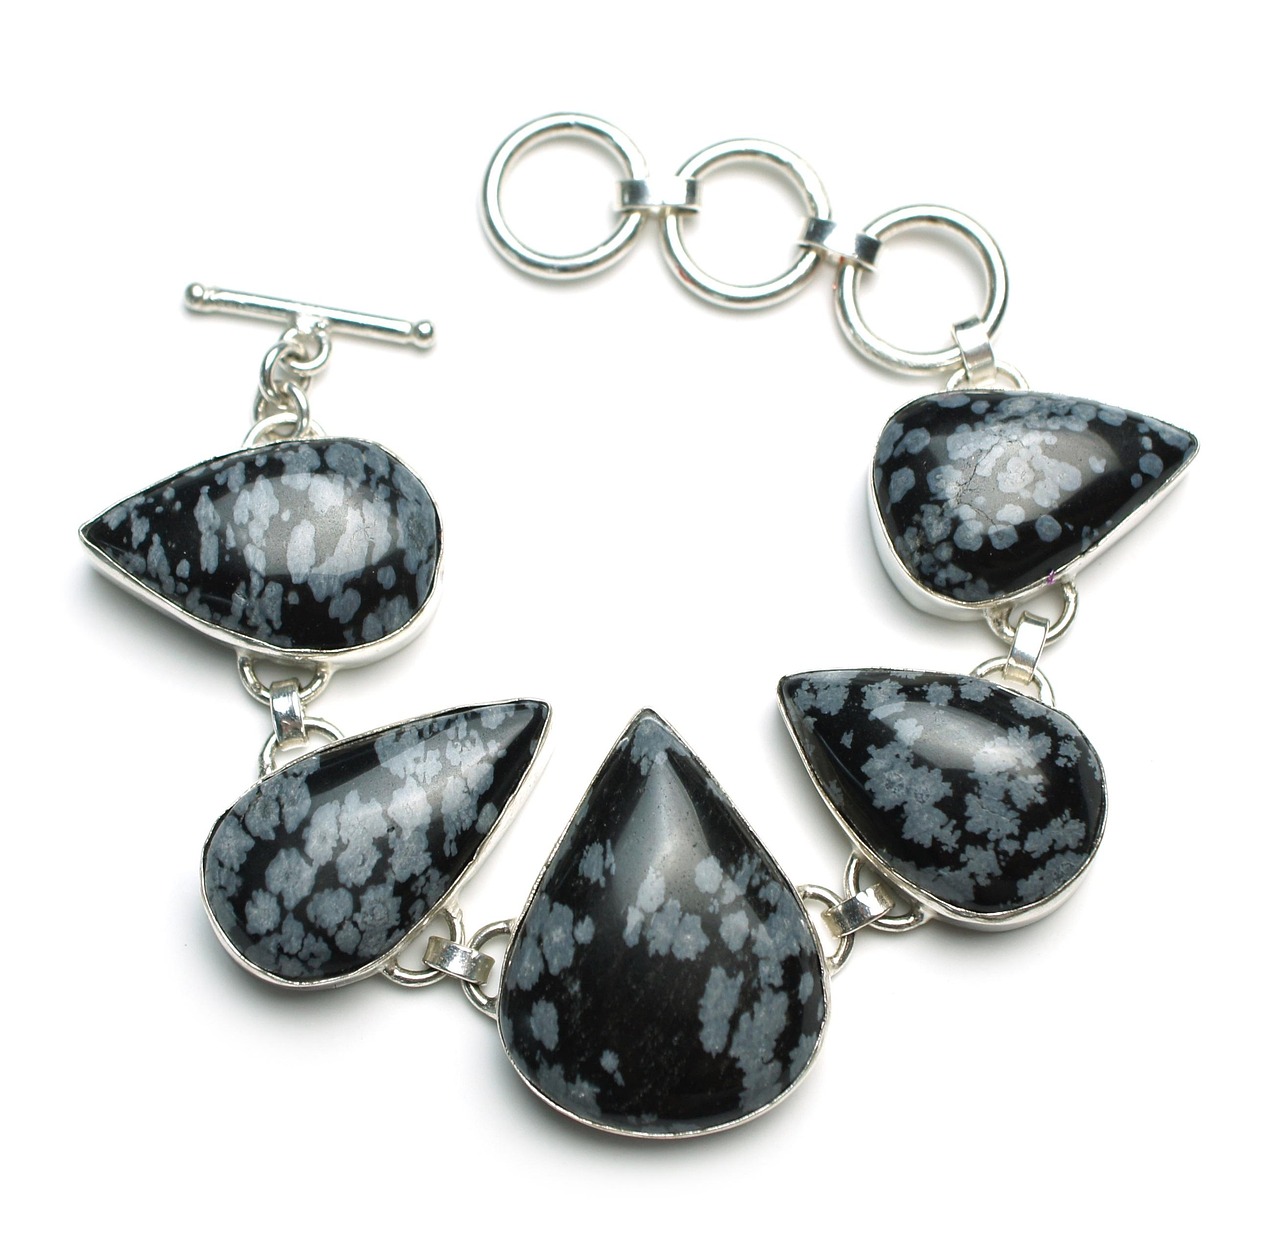
Black teardrops with pale snowflake-like marks form a bold linked bracelet. Each stone is already held in a metal setting with attachment eyes, so this project begins with ready-set connectors. Alternate the direction of the drops to recreate the flowing line, then add a toggle closure and large adjustment rings. Check the length with the clasp included before closing the final joins. Leave room for every connector to move so the bracelet bends around the wrist without pressing one stone against another. Pair it with a handmade picture frame.
You will need: Five ready-set snowflake-pattern teardrop connectors with two attachment eyes, compatible connecting rings, toggle bar and large-ring adjustment section, two pliers and ruler.
How to make it:
1. Choose ready-set stone connectors with sound attachment eyes, compatible connecting rings and a toggle bar and large-ring adjustment section. Arrange five snowflake-pattern teardrops in alternating directions and measure the complete wrist length, including the closure.
2. Using two pliers, open connecting rings sideways, link the adjacent connector eyes, then close each ring flush. Keep every stone face outward and check that the joined row bends freely.
3. Attach a toggle bar and large-ring adjustment section through suitable end rings, closing each join flush. Test the opening and closure, check the fit, and gently tug every connection before wearing.
Fossil-Pattern Rectangles With an S-Hook
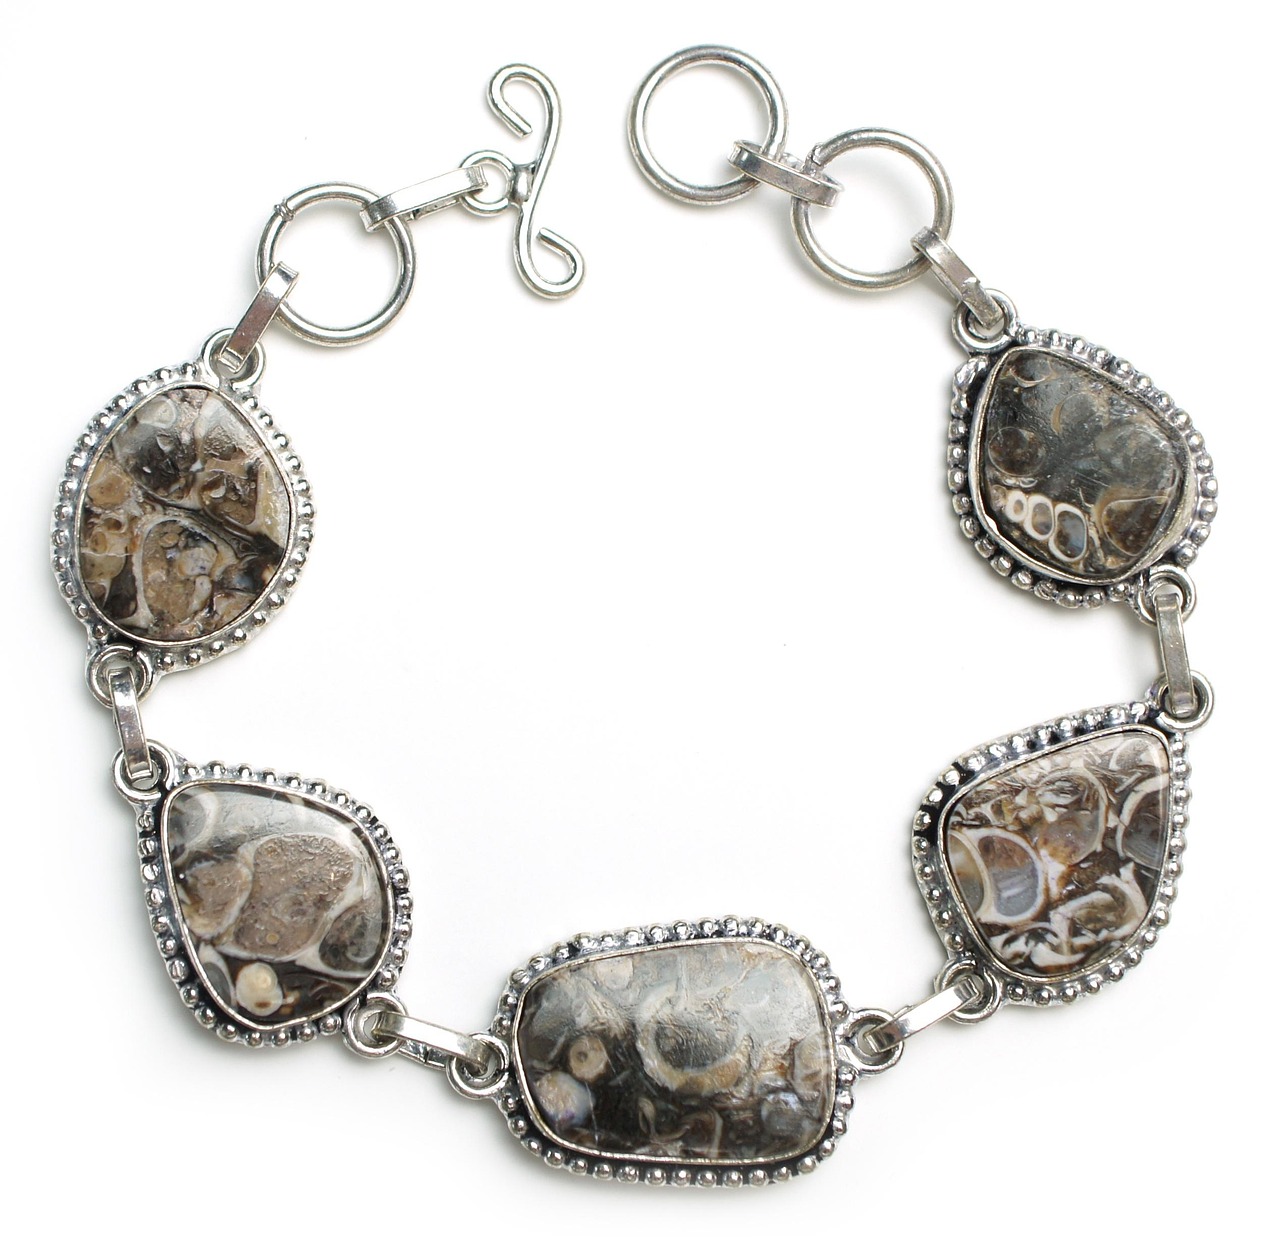
Brown fossil patterns make these rounded rectangles interesting before any extra decoration is added. The textured silver-colored settings provide the border and the connecting eyes. Start with five ready-set components, then assemble the links and an S-hook closure. This keeps the project focused on a wearable bracelet rather than cutting stones or making their mounts. Similar proportions help the row feel balanced, while small differences in the stone faces give the finished gift its own character. Pair it with small table favors.
You will need: Five ready-set fossil-pattern rounded rectangular connectors, compatible rings, an S-hook and ring adjustment section, two pliers and ruler.
How to make it:
1. Choose ready-set stone connectors with sound attachment eyes, compatible connecting rings and an S-hook and ring adjustment section. Arrange five fossil-pattern rounded rectangles and measure the complete wrist length, including the closure.
2. Using two pliers, open connecting rings sideways, link the adjacent connector eyes, then close each ring flush. Keep every stone face outward and check that the joined row bends freely.
3. Attach an S-hook and ring adjustment section through suitable end rings, closing each join flush. Test the opening and closure, check the fit, and gently tug every connection before wearing.
Gemstone Bracelets With Dark Cubes and Red Rounds
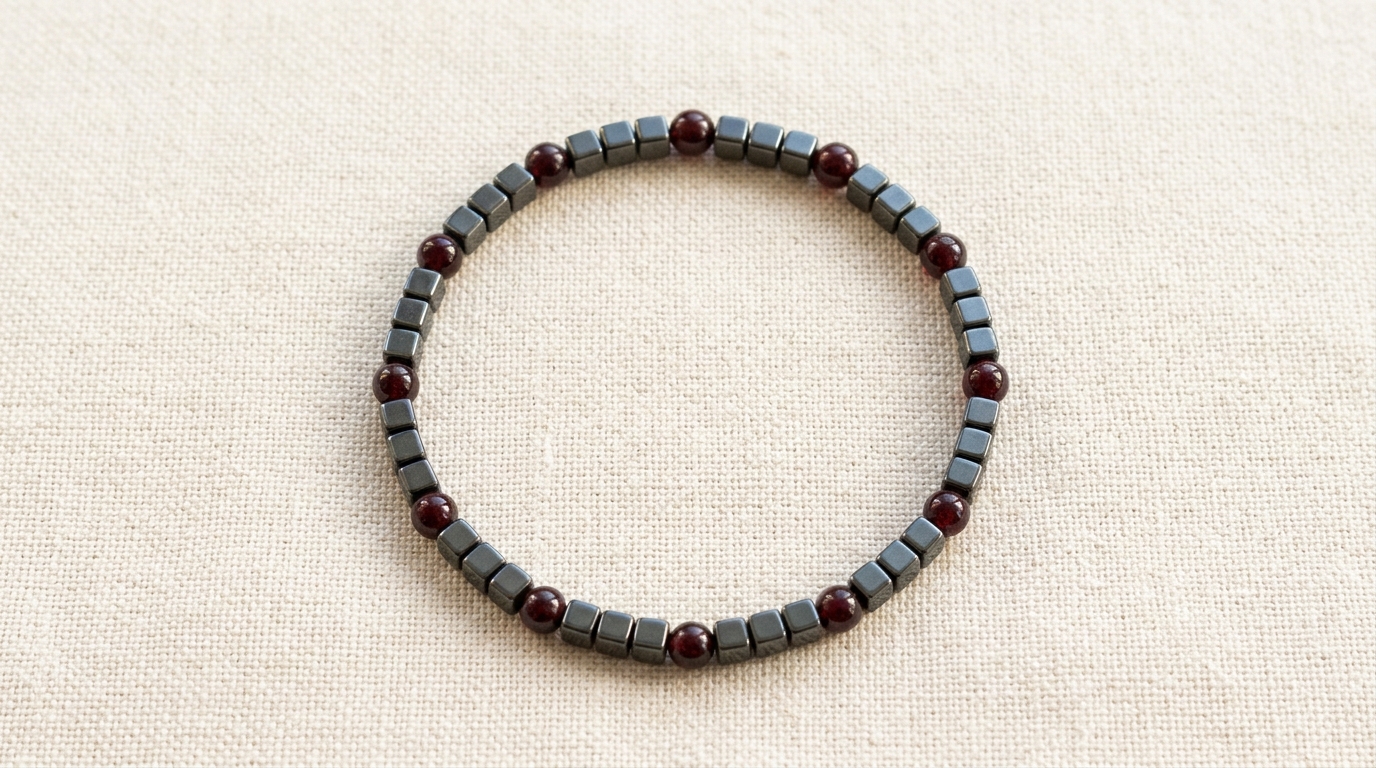
Dark metallic cubes and deep red rounds make a compact repeating pattern. Short groups of cubes between red beads create a measured rhythm without turning the bracelet into a bright mixed-color stack. Gemstone Bracelets can feel striking through shape as well as color. Choose smooth channels for the cord. Let the beads meet naturally without forcing their corners against one another. A little movement in the finished circle helps the different shapes sit comfortably around the wrist. Pair it with a handmade gift tag.
You will need: Loose drilled repeating groups of three or four small dark metallic cube beads and one deep red round bead, compatible jewelry elastic, ruler, scissors and compatible elastic adhesive if recommended.
How to make it:
1. Measure the wrist for a comfortable fit and choose jewelry elastic suited to the bead channels. Gently pre-stretch it as its maker directs, leave generous working ends, and string repeating groups of three or four small dark metallic cube beads and one deep red round bead.
2. Check the circle on the wrist without stretching it tight. Adjust the bead count and keep the intended order, holding both ends so no beads slip off.
3. Cross the elastic ends and wrap one end around the other twice for a secure first half. Cross the opposite way for the second half and snug the knot. Gently test it, apply only compatible adhesive if the cord maker recommends it, leave about 3 mm tails, and allow the directed full cure before wearing.
A Green Center With Warm Brown Stones
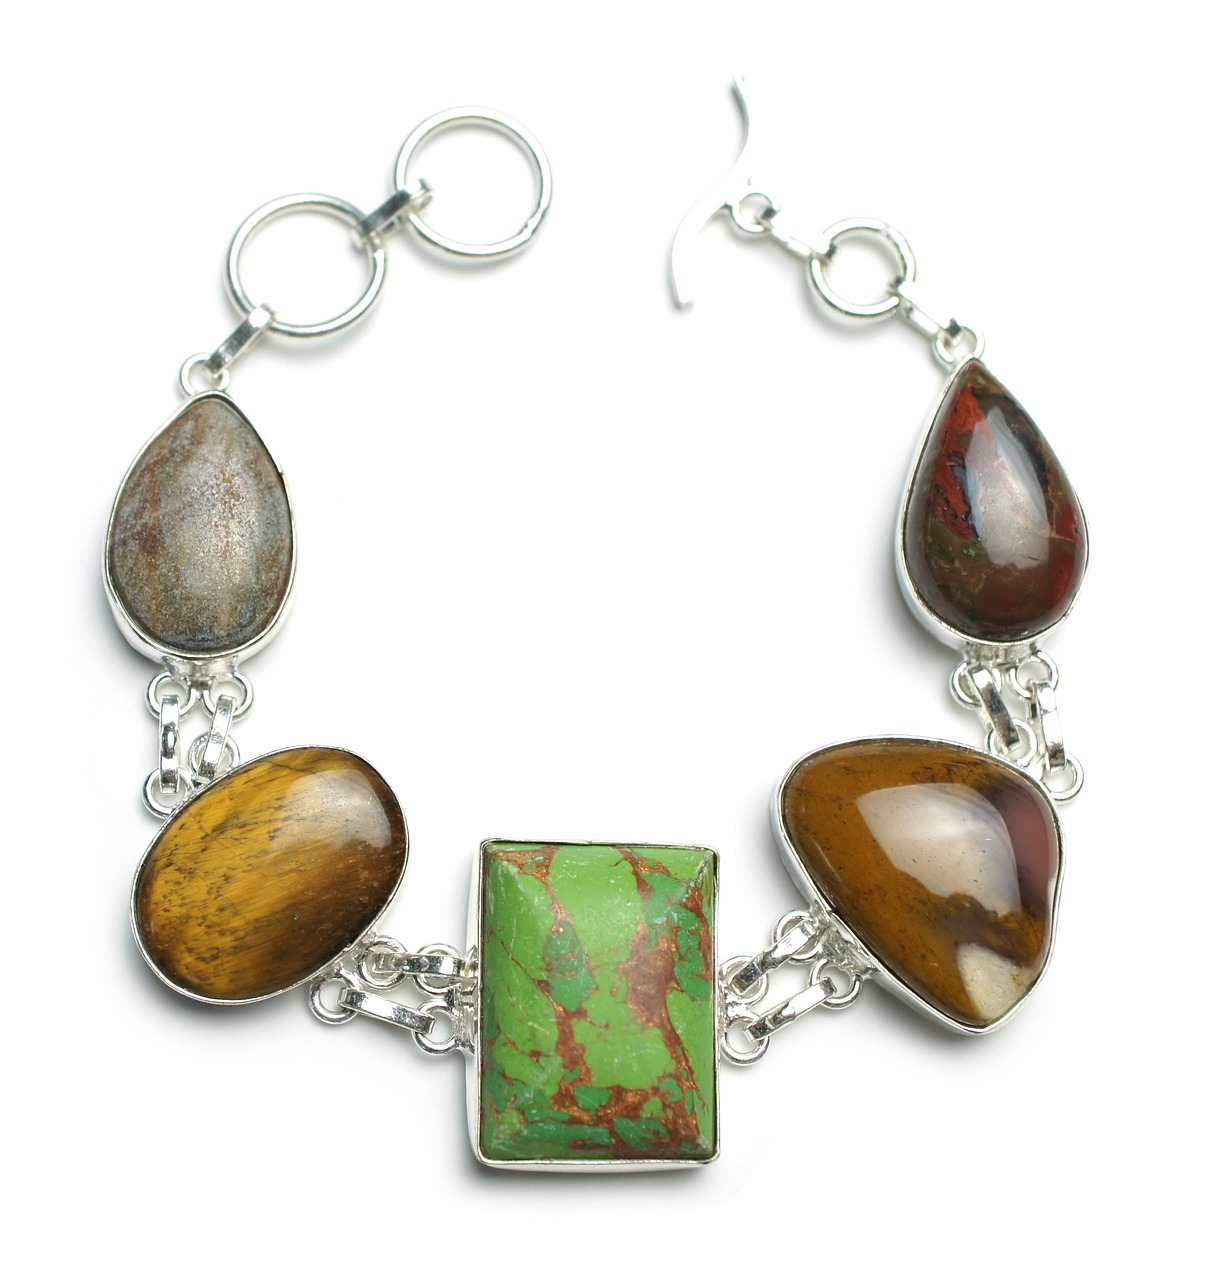
A green rectangular center gives this bracelet a clear focal point. Warm amber-colored ovals sit beside it, followed by brown teardrops toward the ends. The stones are ready-mounted, and paired connecting links keep the broader joins balanced. Arrange both sides around the center before adding the closure, checking that the teardrops point the same way as the finished design. The result has a strong mix of shapes without needing extra charms or a second strand of beads. Pair it with gifts for Grandpa.
You will need: One ready-set green rectangular center, two amber-colored oval connectors, two brown teardrop ends, eight compatible oval connecting links for four paired joins, end rings, S-hook, two pliers and ruler.
How to make it:
1. Choose one ready-set green rectangular center, two amber-colored oval connectors and two brown teardrop ends, each with paired eyes at the broad joins. Lay them out symmetrically and measure with the S-hook and end rings included.
2. At EACH adjacent stone pair, use two separate oval connecting links, one through each corresponding eye pair. Open links sideways with two pliers and close flush; preserve the paired connection at all four joins.
3. Add compatible end rings and an S-hook at the outer teardrop eyes. Close the rings flush, check that the two sides move evenly, and gently test every link and the closure.
Two White Stone Bracelets to Give Together
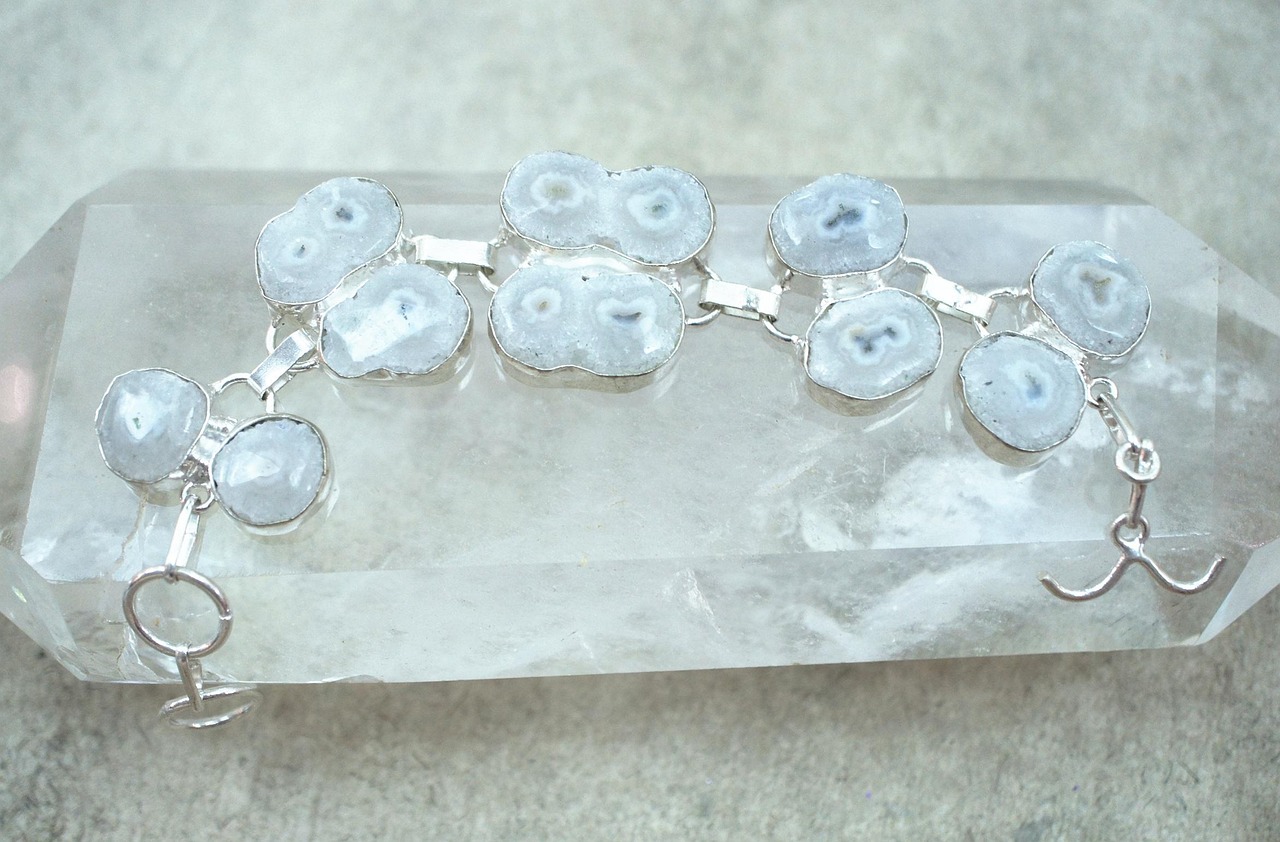
Two pale stone bracelets make a coordinated gift without looking perfectly identical. Each uses five ready-set white patterned components, with gentle changes in outline and markings. You will assemble two separate bracelets, checking the fit and closure of each one individually. Lay the components out in two rows before joining them so the pair feels related in scale. The pale stones and silver-colored borders give the finished set a quiet appearance that works well together. Pair it with gifts for creative teens.
You will need: Ten ready-set pale patterned connectors, five for each bracelet, compatible connecting rings, one toggle and one S-hook closure with suitable ring ends, two pliers and ruler.
How to make it:
1. Choose ten ready-set pale patterned stone connectors for TWO bracelets, five per row, plus two compatible closures and end rings. Arrange each bracelet and measure its full finished wrist length.
2. Join the five components in each row through their existing eyes using compatible connecting rings. Open rings sideways with two pliers and close flush, keeping the pale stone faces outward.
3. Finish one bracelet with a toggle and ring closure, and the other with an S-hook and ring section, matching the pictured pair. Check each fit and gently test all joins separately.
Gemstone Bracelets With Graduated Green Beads
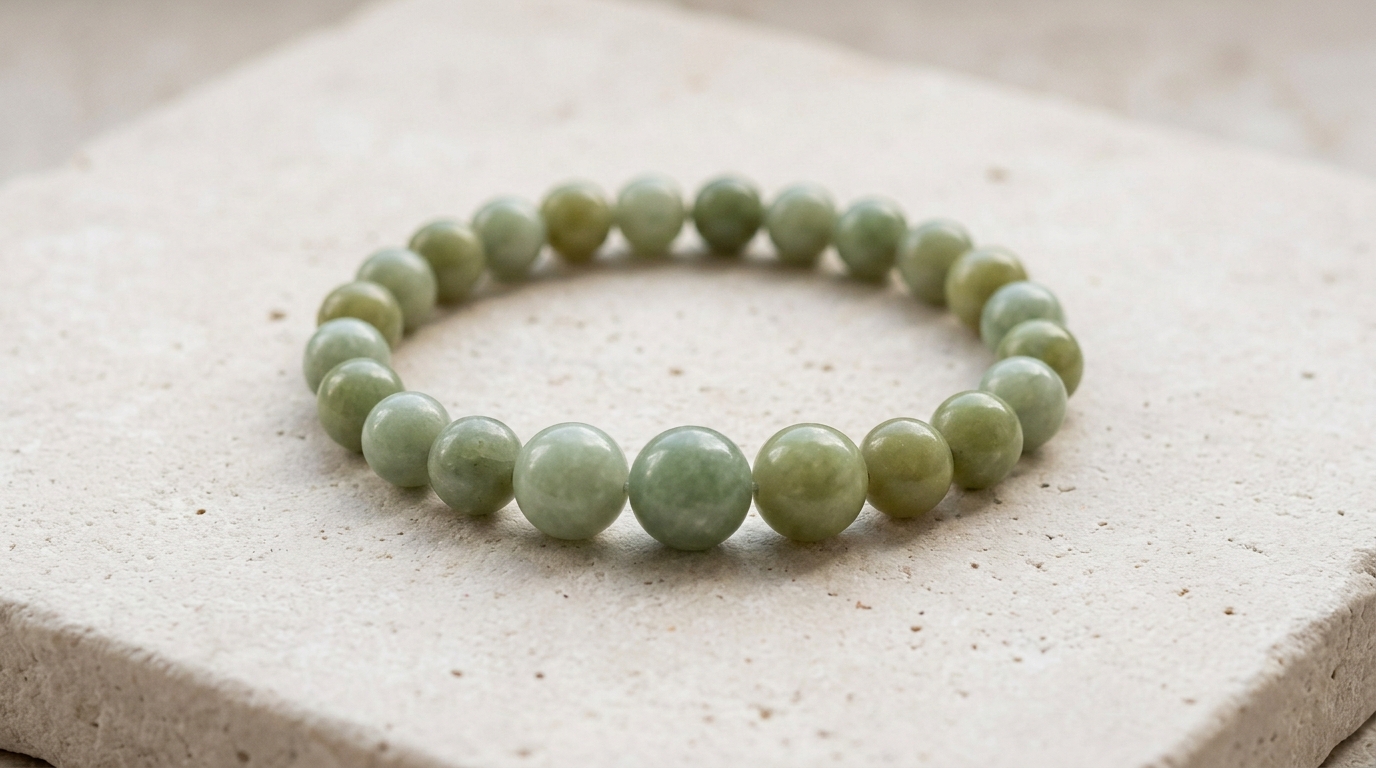
Graduated green rounds put the largest beads at the front and smaller ones toward the back. Gemstone Bracelets in one color can still feel varied when the beads have different tones and proportions. Arrange the two sides as mirror images around the front section, then check the length before finishing. Keep the steps between sizes gentle enough for the beads to sit together. The finished circle should curve comfortably without leaving a long exposed section of cord. Pair it with a little gift basket.
You will need: Loose drilled soft green round beads arranged symmetrically from larger front beads to smaller back beads, compatible jewelry elastic, ruler, scissors and compatible elastic adhesive if recommended.
How to make it:
1. Measure the wrist for a comfortable fit and choose jewelry elastic suited to the bead channels. Gently pre-stretch it as its maker directs, leave generous working ends, and string soft green round beads arranged symmetrically from larger front beads to smaller back beads.
2. Check the circle on the wrist without stretching it tight. Adjust the bead count and keep the intended order, holding both ends so no beads slip off.
3. Cross the elastic ends and wrap one end around the other twice for a secure first half. Cross the opposite way for the second half and snug the knot. Gently test it, apply only compatible adhesive if the cord maker recommends it, leave about 3 mm tails, and allow the directed full cure before wearing.
Purple Chips With an Irregular Outline
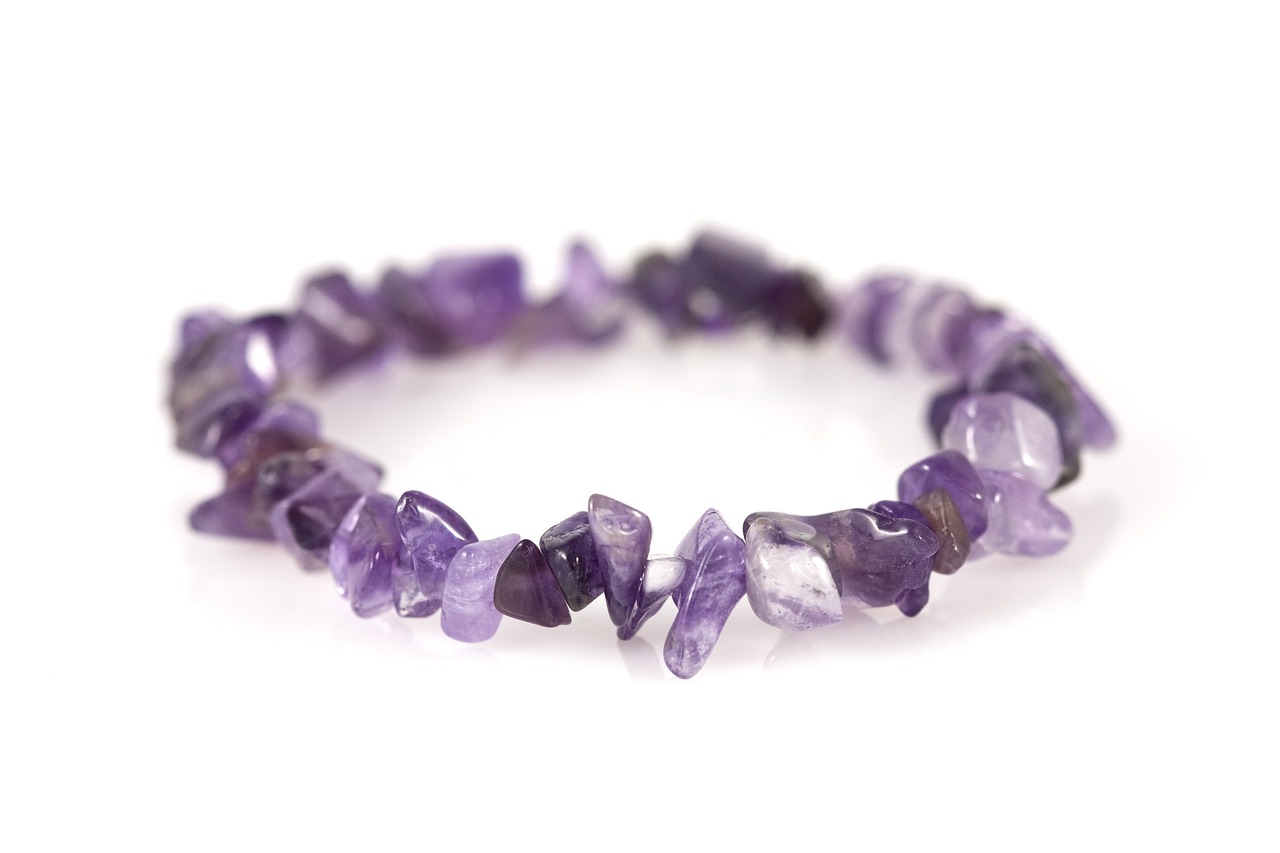
Irregular purple chips give a simple strand a lively edge. Choose polished drilled chips with smooth edges and arrange a mix of pale and darker pieces before threading. The little variations should feel balanced around the circle rather than gathering all the largest chips in one spot. Check the bracelet against the wrist as you work. Leave the chips enough freedom to turn slightly, which helps the strand settle comfortably instead of becoming a rigid uneven ring. Pair it with another weaving project.
You will need: Smooth drilled purple chip beads, compatible jewelry elastic, ruler, scissors and elastic-compatible adhesive if recommended.
How to make it:
1. Measure the wrist for a comfortable fit and choose jewelry elastic suited to the bead channels. Gently pre-stretch it as its maker directs, leave generous working ends, and string smooth polished purple chip beads in a balanced mix of sizes.
2. Check the circle on the wrist without stretching it tight. Adjust the bead count and keep the intended order, holding both ends so no beads slip off.
3. Cross the elastic ends and wrap one end around the other twice for a secure first half. Cross the opposite way for the second half and snug the knot. Gently test it, apply only compatible adhesive if the cord maker recommends it, leave about 3 mm tails, and allow the directed full cure before wearing.
Orange and Cream Rounds With Natural Bands
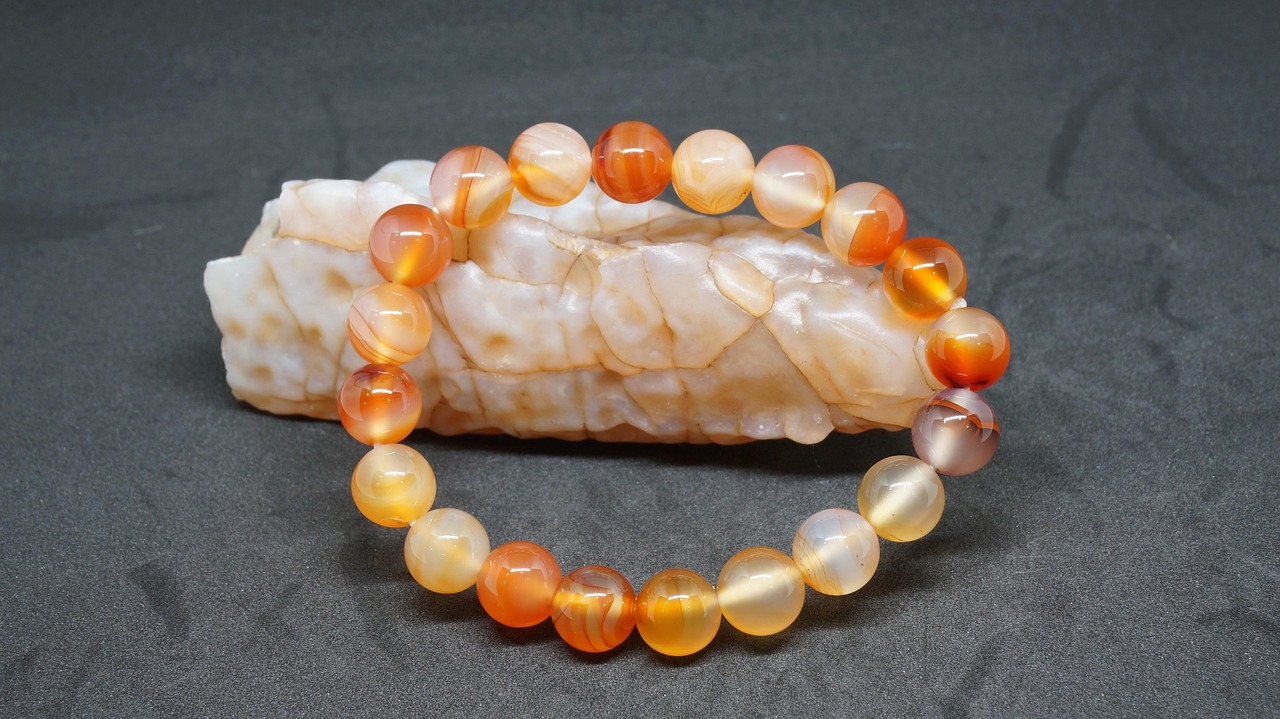
Orange and cream beads bring a warm banded pattern to a single strand. Smooth round shapes keep the design simple while the natural-looking marks provide the detail. Arrange the colors before threading so the brightest orange pieces do not all collect on one side. Choose beads of a similar diameter and check their drilled channels for rough edges. The finished bracelet should move comfortably over the hand and return to a relaxed fit rather than gripping the wrist tightly. Pair it with a reusable fabric gift bag.
You will need: Drilled orange and cream banded round beads, compatible jewelry elastic, ruler, scissors and elastic-compatible adhesive if recommended.
How to make it:
1. Measure the wrist for a comfortable fit and choose jewelry elastic suited to the bead channels. Gently pre-stretch it as its maker directs, leave generous working ends, and string round orange and cream banded beads in an evenly varied sequence.
2. Check the circle on the wrist without stretching it tight. Adjust the bead count and keep the intended order, holding both ends so no beads slip off.
3. Cross the elastic ends and wrap one end around the other twice for a secure first half. Cross the opposite way for the second half and snug the knot. Gently test it, apply only compatible adhesive if the cord maker recommends it, leave about 3 mm tails, and allow the directed full cure before wearing.
Gemstone Bracelets With Quiet Oval Beads
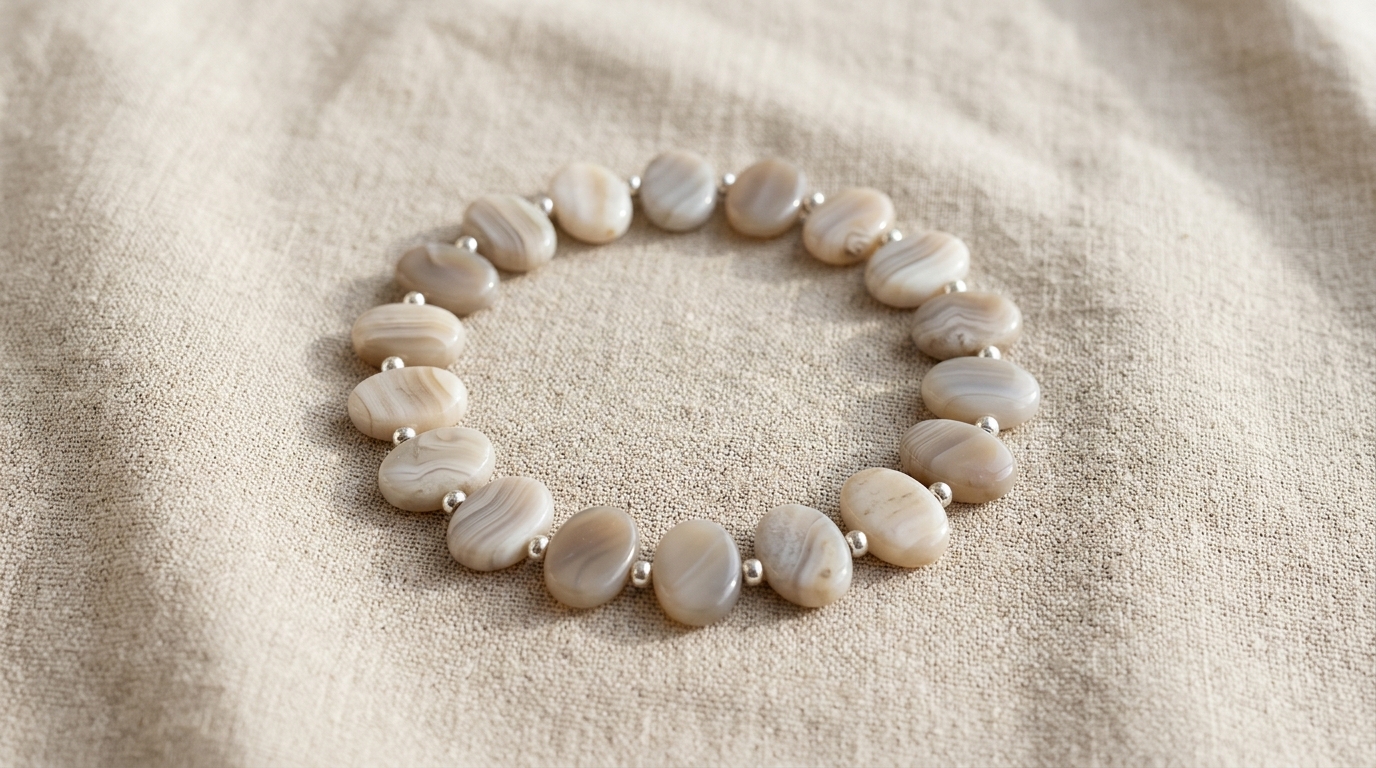
Quiet cream, taupe, and gray ovals make a soft, flat row around the wrist. Gemstone Bracelets with oval beads can feel different from a round-bead strand even when the construction stays simple. Turn the patterned faces upward as you arrange them, then check how the ovals sit beside their spacers. Keep the metal pieces small and smooth so the larger beads remain comfortable against the skin. A restrained palette makes the variations easier to appreciate. Pair it with textured handmade art.
You will need: Loose drilled flat cream, taupe and gray oval beads with one tiny silver-colored round spacer between each oval, compatible jewelry elastic, ruler, scissors and compatible elastic adhesive if recommended.
How to make it:
1. Measure the wrist for a comfortable fit and choose jewelry elastic suited to the bead channels. Gently pre-stretch it as its maker directs, leave generous working ends, and string flat cream, taupe and gray oval beads with one tiny silver-colored round spacer between each oval.
2. Check the circle on the wrist without stretching it tight. Adjust the bead count and keep the intended order, holding both ends so no beads slip off.
3. Cross the elastic ends and wrap one end around the other twice for a secure first half. Cross the opposite way for the second half and snug the knot. Gently test it, apply only compatible adhesive if the cord maker recommends it, leave about 3 mm tails, and allow the directed full cure before wearing.
Cobalt Tiles in a Wide Band
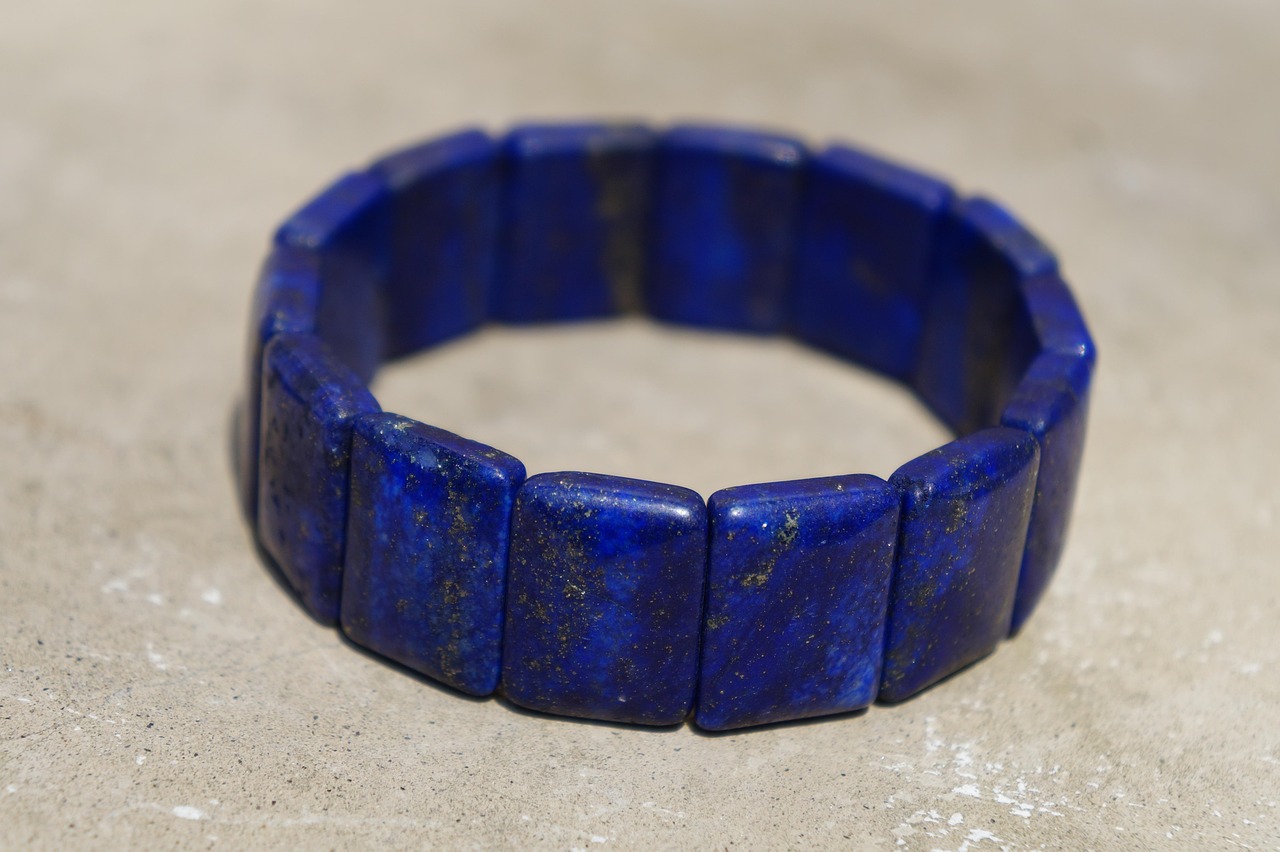
Cobalt blue tiles form a broad band with very little space between the stones. Small pale and gold-colored marks add detail without a second bead color. Choose purpose-made curved rectangular beads with two parallel channels so the finished row stays upright. Lay out the tiles with their best faces outward, then check that their curves work together around the wrist. The clean outline suits a recipient who enjoys bold color but prefers a bracelet without dangling details or extra charms. Pair it with an upcycled gift bag.
You will need: Curved cobalt rectangular beads with two parallel channels, compatible jewelry elastic, ruler, scissors and compatible adhesive if recommended.
How to make it:
1. Choose purpose-made cobalt rectangular beads with two parallel channels. Cut two lengths of suitable jewelry elastic, leaving generous ends, and pre-stretch as its maker directs.
2. Thread one cord through each bead channel, keeping the tiles close together without round spacers. Maintain equal row tension and test the curved band against the wrist.
3. Tie EACH cord separately: cross the ends, wrap one end around the other twice, then cross the opposite way and snug the second half. Gently test, use compatible adhesive only as directed, leave about 3 mm tails and allow the directed full cure.
Gemstone Bracelets With Banded Purple Ovals
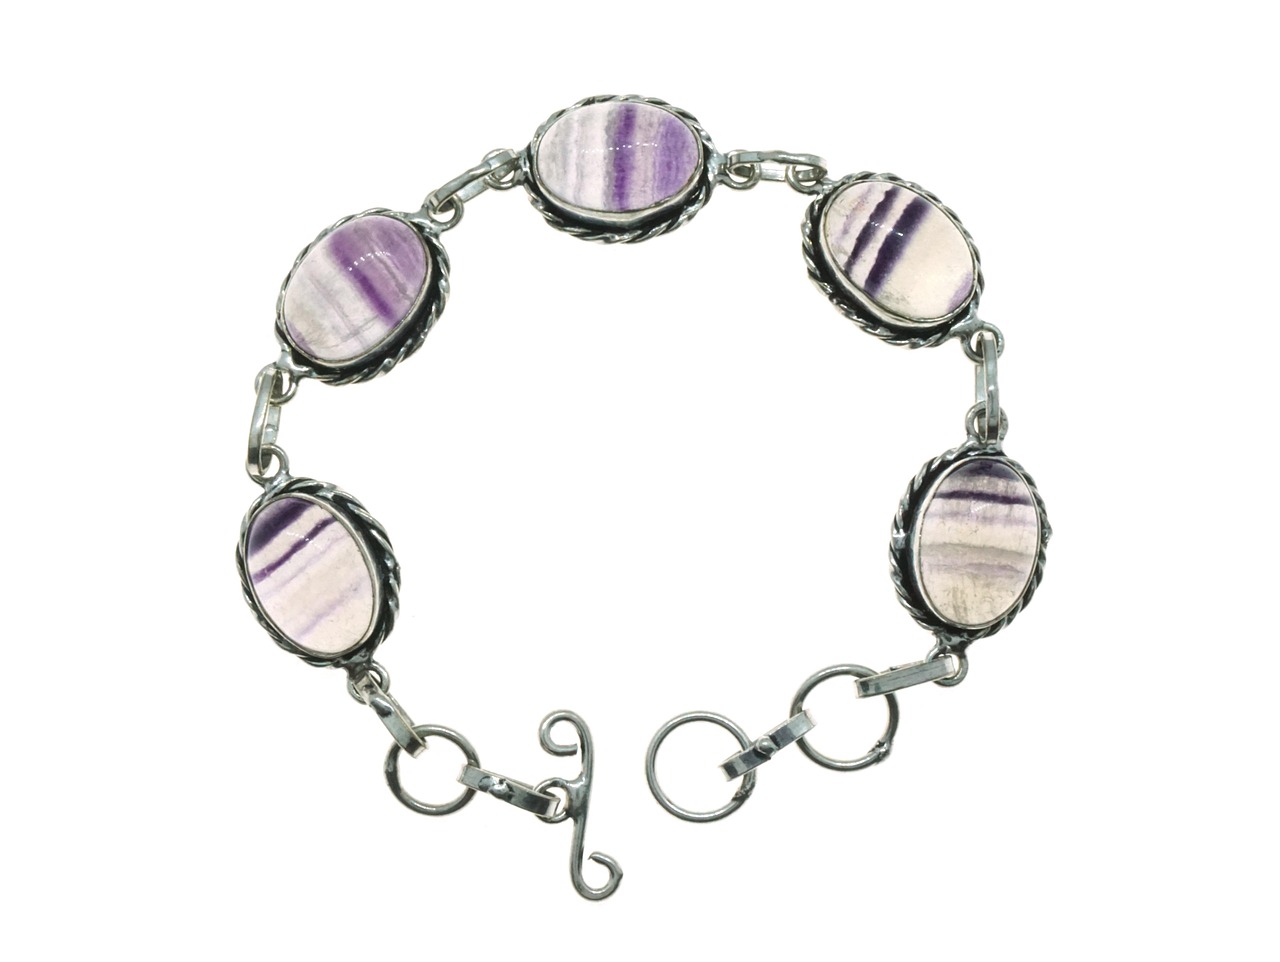
Pale purple and cream bands give these oval stones a calm repeating pattern. Five ready-set connectors form the bracelet, with small joining links between them and an S-hook at the end. Gemstone Bracelets can show the stone faces clearly when the metalwork stays narrow. Arrange the ovals before assembly so the darker bands do not all face the same direction. Check that each mount has sound attachment eyes and that the connectors move freely after joining. Pair it with hand-painted decorations.
You will need: Five ready-set purple-banded oval connectors, compatible joining rings, S-hook and ring adjustment section, two pliers and ruler.
How to make it:
1. Choose ready-set stone connectors with sound attachment eyes, compatible connecting rings and an S-hook and ring adjustment section. Arrange five purple-banded oval connectors and measure the complete wrist length, including the closure.
2. Using two pliers, open connecting rings sideways, link the adjacent connector eyes, then close each ring flush. Keep every stone face outward and check that the joined row bends freely.
3. Attach an S-hook and ring adjustment section through suitable end rings, closing each join flush. Test the opening and closure, check the fit, and gently tug every connection before wearing.