Foil Embossed Art: 15 Dollar Store Pieces That Look Like Hammered Silver
Foil Embossed Art is the cheapest way to get the look of antique silver on your walls and your Christmas tree this year. Real hammered silver and old pewter cost a small fortune, but a few disposable foil baking pans, some cardboard and a dull pencil can fake that rich metal shine for a few dollars. You simply press a pattern into soft metal, then rub on a little dark paint so the lines pop like an old heirloom. It is quiet, relaxing work you can do at the kitchen table on a cold evening, and the results honestly fool people. Below are 15 easy pieces to try, from framed wall art and snowflake ornaments to trays, gift tags and bookmarks. Grab a pair of cotton gloves, clear a spot on the table and let’s make something that shines..
Foil Embossed Art That Looks Like Antique Silver
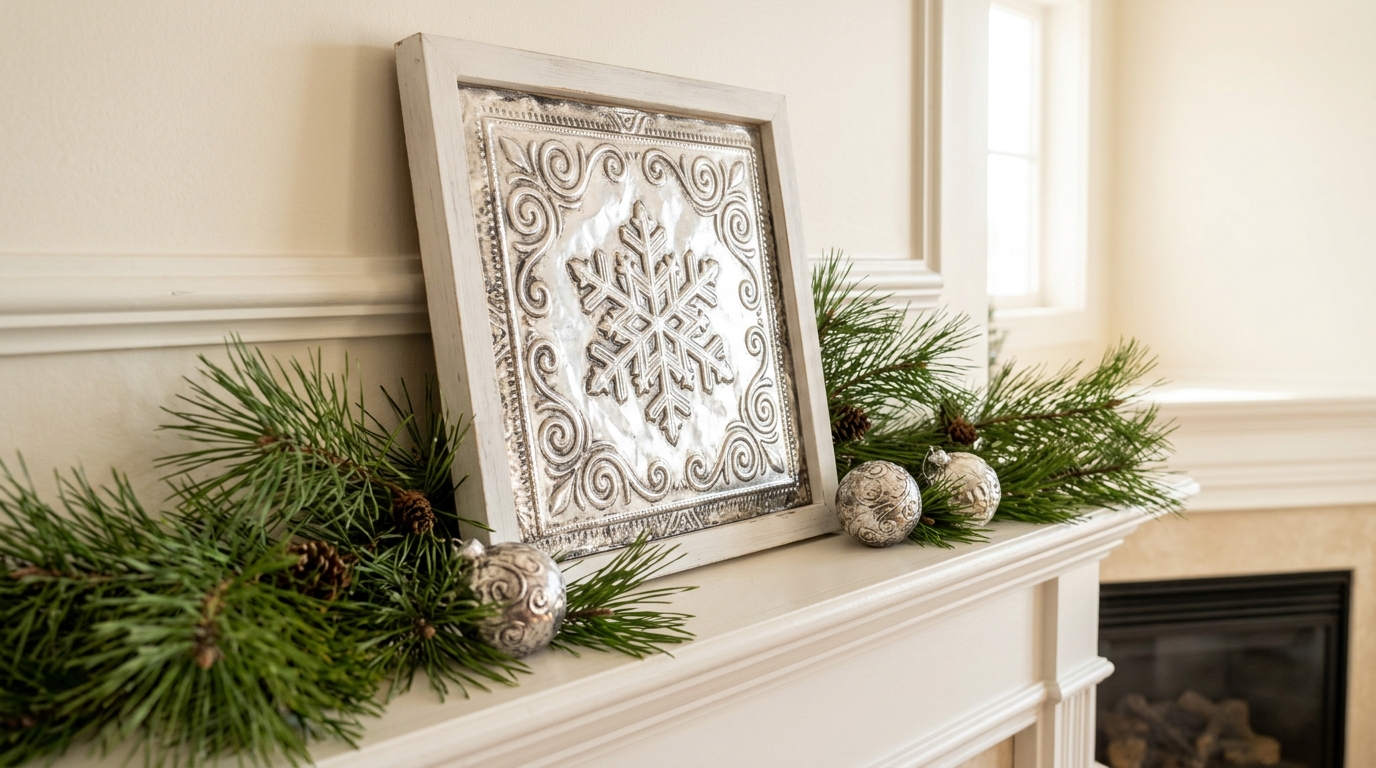
Foil Embossed Art went viral when a creator named Yulia showed a framed piece made from a $3 foil baking pan, and her short video passed 40 million views. The trick is simple. Cut the flat bottom from a foil pan, lay it on a soft surface and draw swirls and a snowflake with a dull pencil. The lines sink in and the metal puffs up around them. Rub on a little black paint, wipe it off and frame it. Would your guests ever guess it was a baking pan..
You will need: A disposable foil baking pan, old scissors, cotton gloves, a dull pencil, a mouse pad or folded towel, black acrylic paint, paper towels and a cheap frame.
How to make it: 1. Wear gloves, cut out the flat bottom of the pan and fold the cut edges under. 2. Tape a paper pattern on top and trace it firmly on a soft surface. 3. Dab on black paint, wipe most of it away and set the panel in the frame.
Snowflake Ornaments That Sparkle Like Sterling

Snowflakes are made for metal. Trace a simple six point snowflake onto foil pan metal, cut it out with old scissors and then press dots and lines into it with a ballpoint pen that has run dry. Flip it over and the dots stand up like tiny rivets that catch the tree lights. Each one takes about ten minutes, and a single pan gives you a whole set. They are light, so they never pull a branch down. How many will your tree need?
You will need: Foil pan metal, a snowflake template, old scissors, a dry ballpoint pen, a soft pad, a hole punch and silver thread.
How to make it: 1. Trace and cut out the snowflake, then fold any sharp tips slightly round. 2. Press dots and lines from the back on a soft pad. 3. Punch a hole in one point and tie on a loop of thread.
A Hammered Silver Look Tray for the Coffee Table
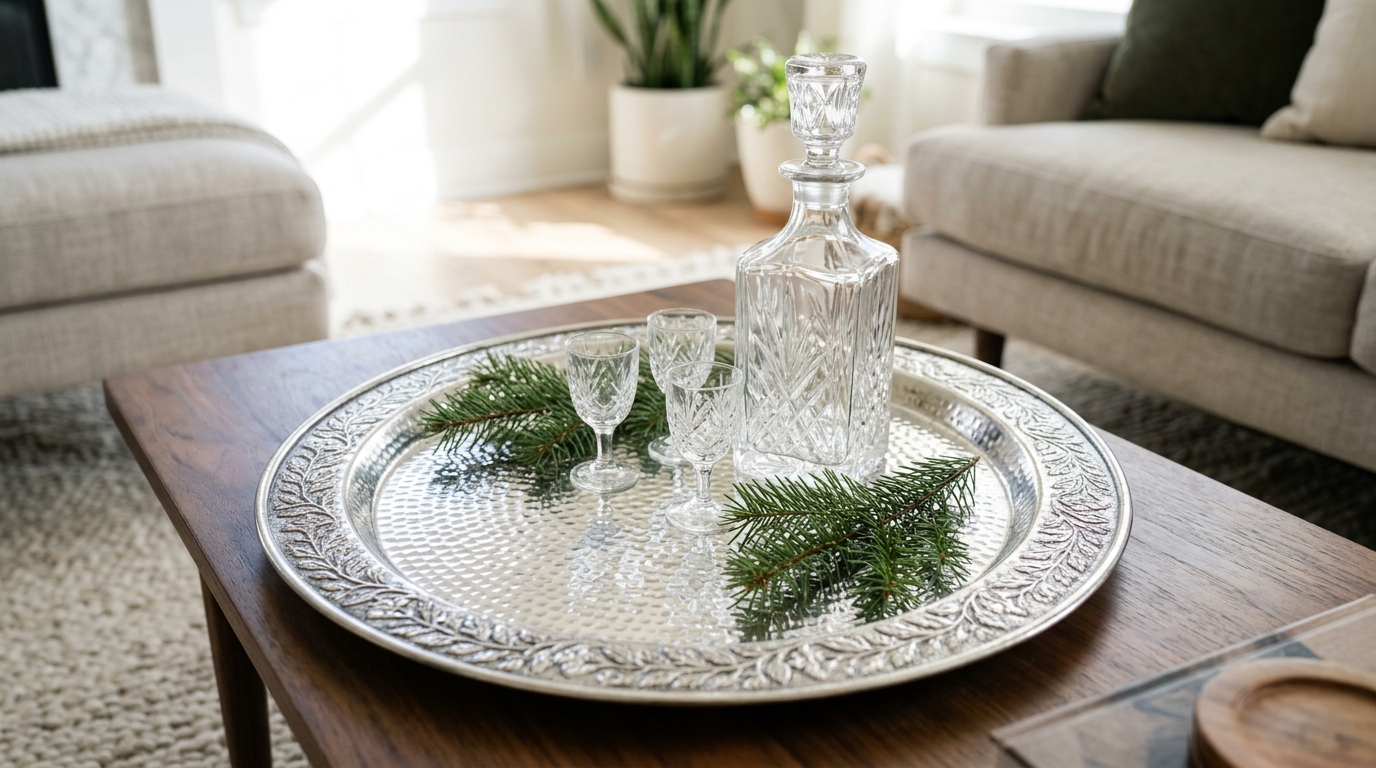
Hammered silver trays sell for a lot of money, but an old plastic or wooden tray can wear the same look. Glue a sheet of foil pan metal to a piece of cardboard cut to fit the tray. Tap the whole surface with the round end of a pen or a marker cap to make hundreds of little dimples, then press a leafy border around the edge. Glue it into the tray and rub on dark paint to bring out the texture. Who would believe it was a thrift store tray?
You will need: An old tray, foil pan metal, cardboard, strong craft glue, a pen cap or round tool, black paint and a soft cloth.
How to make it: 1. Cut cardboard to fit the tray and glue the foil on top, folding edges under. 2. Tap dimples all over and press a border design. 3. Antique with black paint, wipe back and glue it into the tray.
Foil Embossed Art on a Handmade Christmas Card
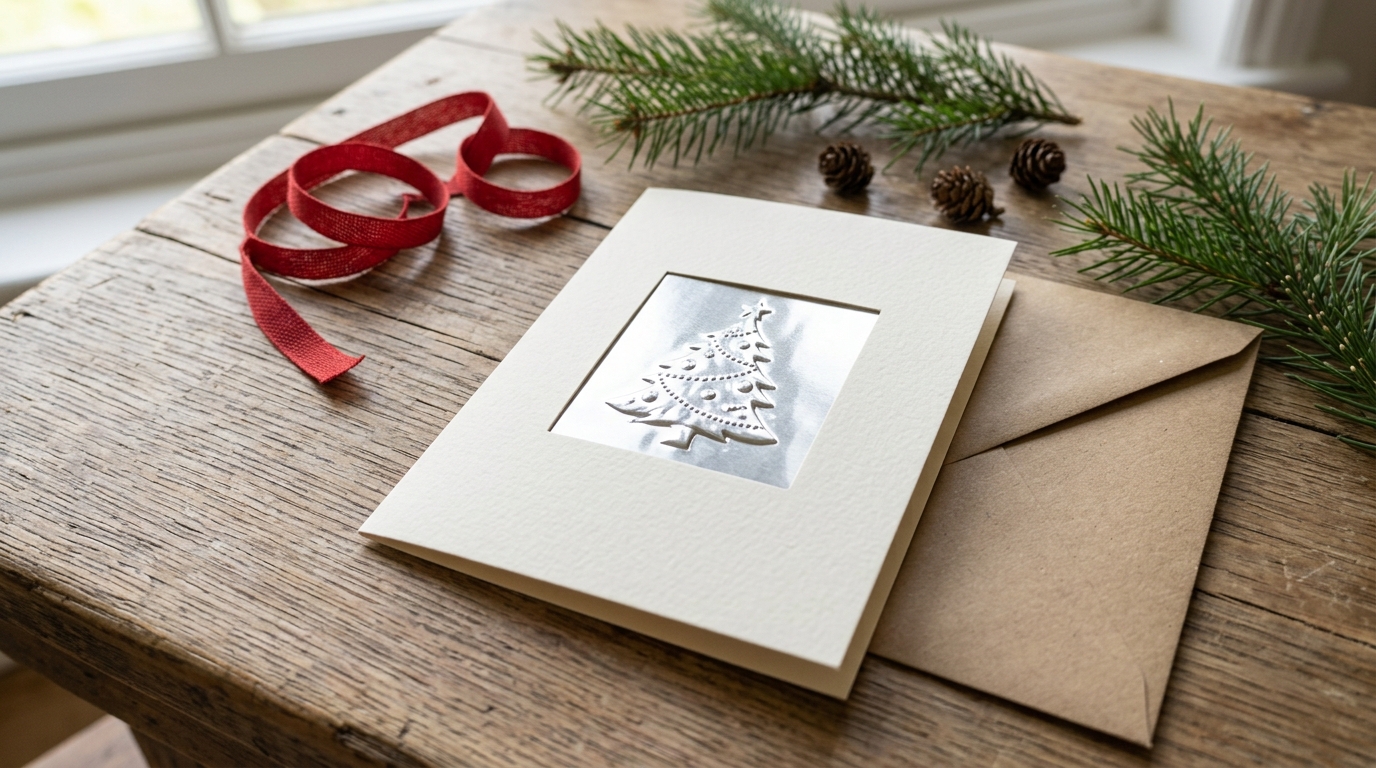
Foil Embossed Art turns an ordinary card into a little keepsake people pin on the fridge for years. Cut a small square of foil, emboss a simple tree with dotted ornaments and glue it behind a window cut in the front of the card. The shiny tree stands out against cream or kraft paper, and it feels special in the hand. Make a batch at once while the tea is warm, and save the leftover scraps for the gift tags further down. Who gets the first card this year?
You will need: Cream card stock, a craft knife, foil scraps, a dry ballpoint pen, a soft pad, glue dots and envelopes.
How to make it: 1. Fold the card and, with adult help, cut a small window in the front. 2. Emboss a tree on a foil square slightly bigger than the window. 3. Glue it behind the window and add a piece of paper inside to hide the back.
A Faux Pewter Picture Frame
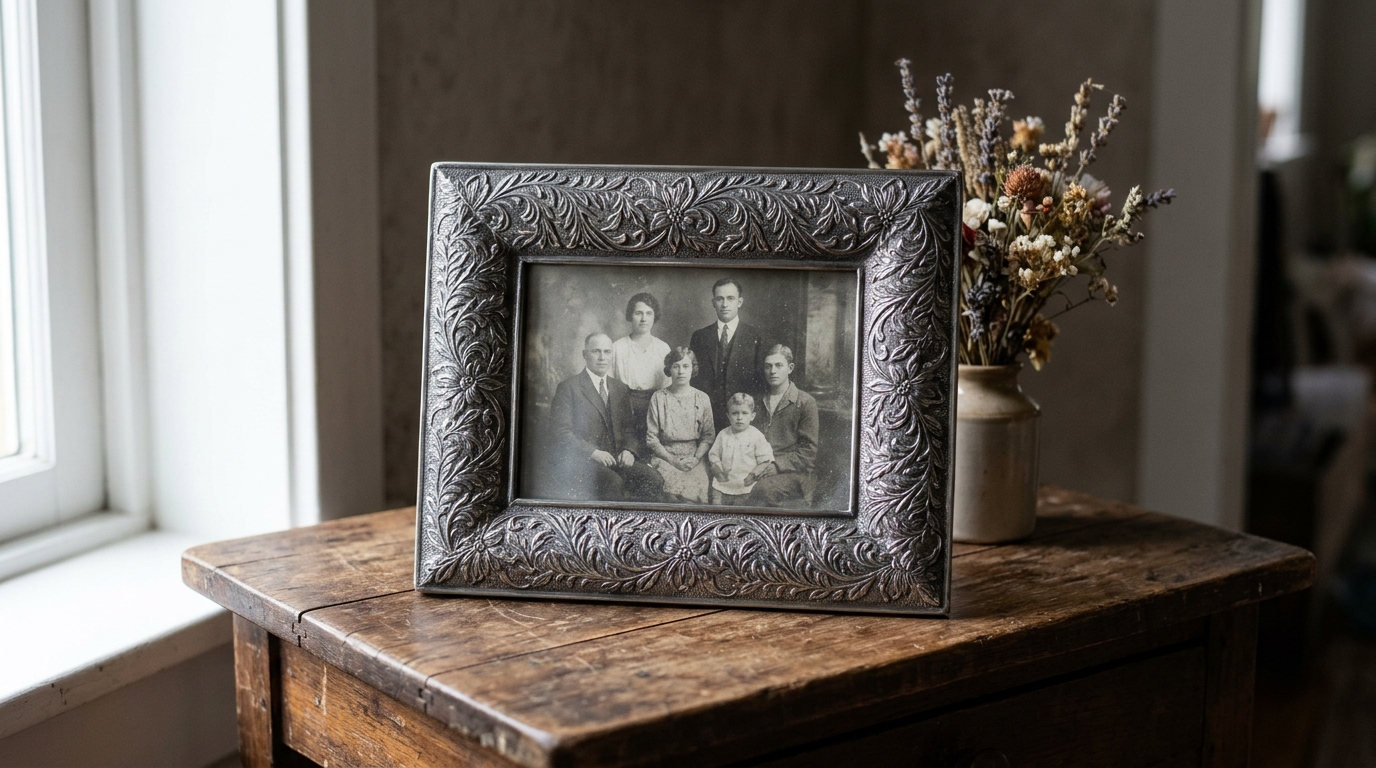
Pewter has that soft, grey, old world glow that makes any photo look like a family treasure. To fake it, cover a plain flat frame with foil pan metal and press a simple flower pattern into it. Then paint the whole thing with thin black paint, let it sit a minute and wipe it off with a damp cloth. Black stays in the low spots and the high spots turn soft grey. Put an old family photo inside and it becomes a gift grandma will treasure. Whose photo will you frame?
You will need: A flat wooden frame, foil pan metal, strong glue, a dry ballpoint pen, black acrylic paint, a damp cloth and gloves.
How to make it: 1. Cut foil strips a little wider than each side of the frame. 2. Emboss a flower pattern and glue the strips on, folding the edges around the back. 3. Paint black, wipe back to grey and let it dry.
Foil Embossed Art Leaf Panel for a Blank Wall
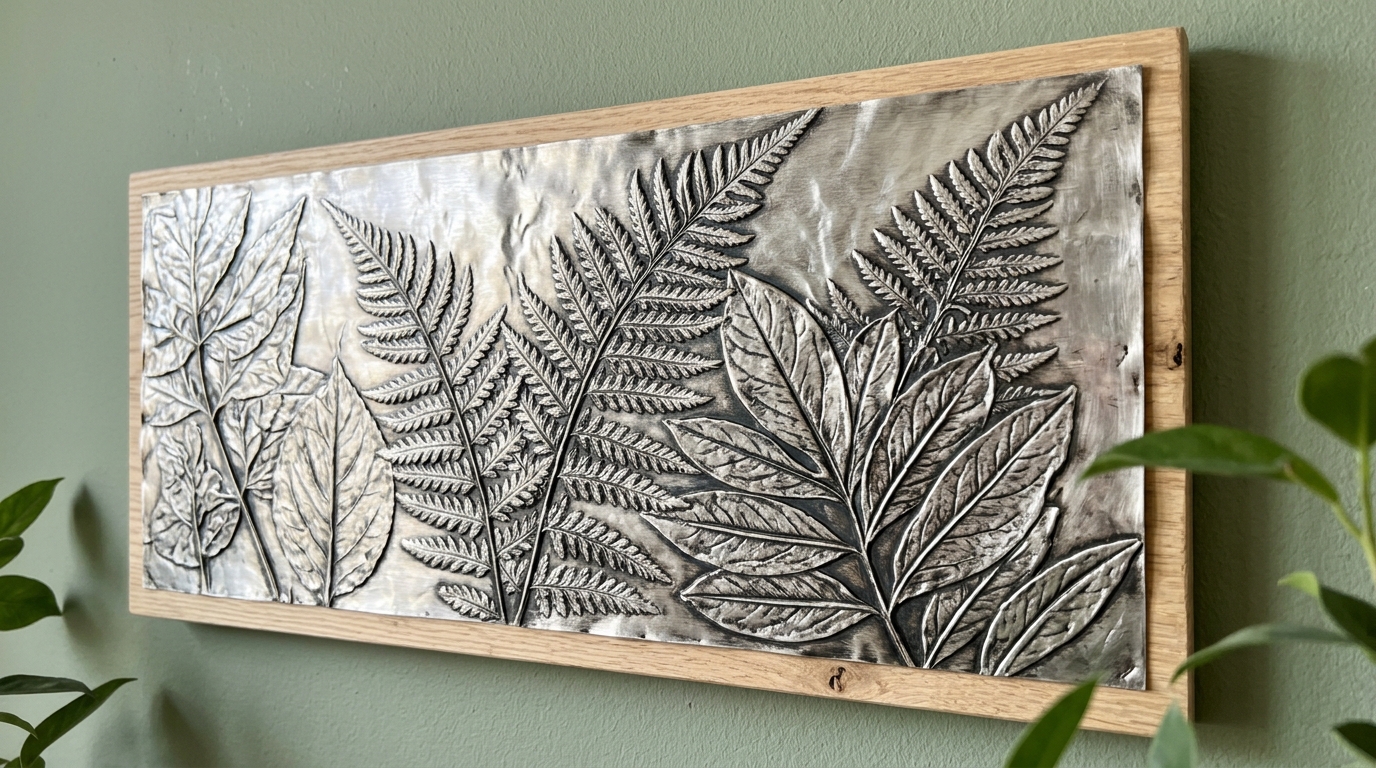
Foil Embossed Art can fill a big blank wall too, and leaves are the easiest thing to draw. Join two or three pan bottoms side by side with glue on a backing board, then trace real leaves and ferns from the garden right onto the metal. Press firmly around each outline, add every little vein and the shapes come alive. A rub of dark paint makes the details pop. Mount it on a plain wood board and hang it over a console or a bed. Which leaves grow near your door?
You will need: Two or three foil pans, a thin wood board, strong glue, real leaves to trace, a dry ballpoint pen, black paint and a picture hanger.
How to make it: 1. Glue the flat foil pieces onto the board with the seams lined up. 2. Lay leaves on top, trace around them and add the veins. 3. Antique with dark paint, wipe back and add a hanger.
An Embossed Star for the Top of the Tree

A glittering topper is often the priciest thing on a tree, but this one costs pennies. Cut two matching star shapes from cardboard and two from foil pan metal. Emboss lines that spread out from the center of each foil star and press tiny dots along the points. Glue the foil to the cardboard, then glue the two stars back to back with a cardboard tube between them that slips over the top branch. The raised lines bounce the fairy lights all around the room. Is your tree ready for a star?
You will need: Cardboard, foil pan metal, a dry ballpoint pen, a soft pad, strong glue and a short cardboard tube.
How to make it: 1. Cut two cardboard stars and two foil stars a little larger. 2. Emboss the foil and wrap it over the cardboard edges. 3. Glue the stars together around the tube and slide it onto the top branch.
Foil Gift Tags That Become Ornaments Later

Paper tags get thrown away, but metal tags get saved and hung on the tree next year. Use the scraps left over from your bigger projects. Cut simple tag shapes, round the corners and press a border of dots or holly leaves. Write the name on the back with a dry pen and it shows up raised on the front. Punch a hole, add twine and tie them onto plain kraft paper. The shine makes cheap wrapping look like a boutique package. How many gifts are on your list?
You will need: Foil pan scraps, old scissors, a corner rounder or nail file, a dry ballpoint pen, a hole punch and baker’s twine.
How to make it: 1. Cut tag shapes and round the corners so they are smooth. 2. Emboss a border and the name from the back. 3. Punch a hole and tie each tag onto a wrapped gift.
Foil Embossed Art Coasters With an Antique Tin Tile Look
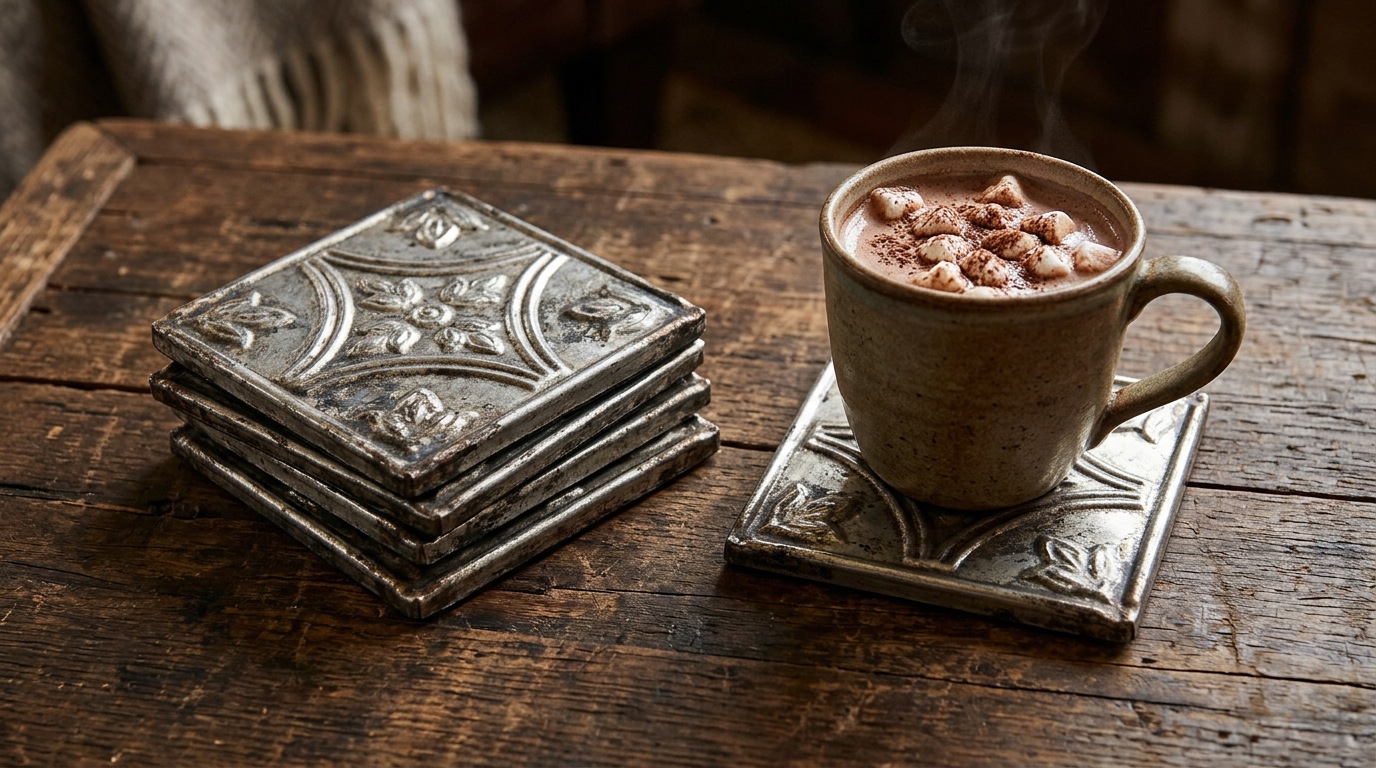
Foil Embossed Art is perfect for copying old pressed tin ceiling tiles, the kind you see in antique shops and old diners. Glue foil onto squares of cork or thick cardboard and press a simple pattern, like a circle inside a square with little petals at the corners. Rub on dark paint, wipe it back and seal the top with two coats of clear sealer. Felt dots on the bottom protect the table. A set of four tied with twine makes a great gift for a host. Who would you give a set to?
You will need: Cork or thick cardboard squares, foil pan metal, strong glue, a dry ballpoint pen, a ruler, black paint, clear sealer and felt dots.
How to make it: 1. Glue foil on each square and fold the edges under. 2. Press the pattern using a ruler for straight lines. 3. Antique, seal twice and add felt dots underneath.
Ornaments With a Black Wash That Look Like Heirlooms

This is the trick behind many viral foil videos. Draw swirls and dots on an old plastic ornament with thick craft glue and let it dry hard. Brush on a thin coat of glue, lay a piece of kitchen foil over the top and rub it gently with a cotton swab until every raised line shows through. Then brush on black paint and wipe it off right away. The dark color sinks into the low spots and the old ornament looks like it came from a family attic. Which old ornaments could get a makeover?
You will need: Old plastic ornament balls, thick craft glue or puffy paint, kitchen foil, a cotton swab, black acrylic paint and a soft cloth.
How to make it: 1. Draw the design with thick glue and let it dry overnight. 2. Cover with foil and rub it down so the pattern shows. 3. Brush on black paint and wipe it off quickly to leave it in the grooves.
Foil Embossed Art Wreath Plaque for the Front Door
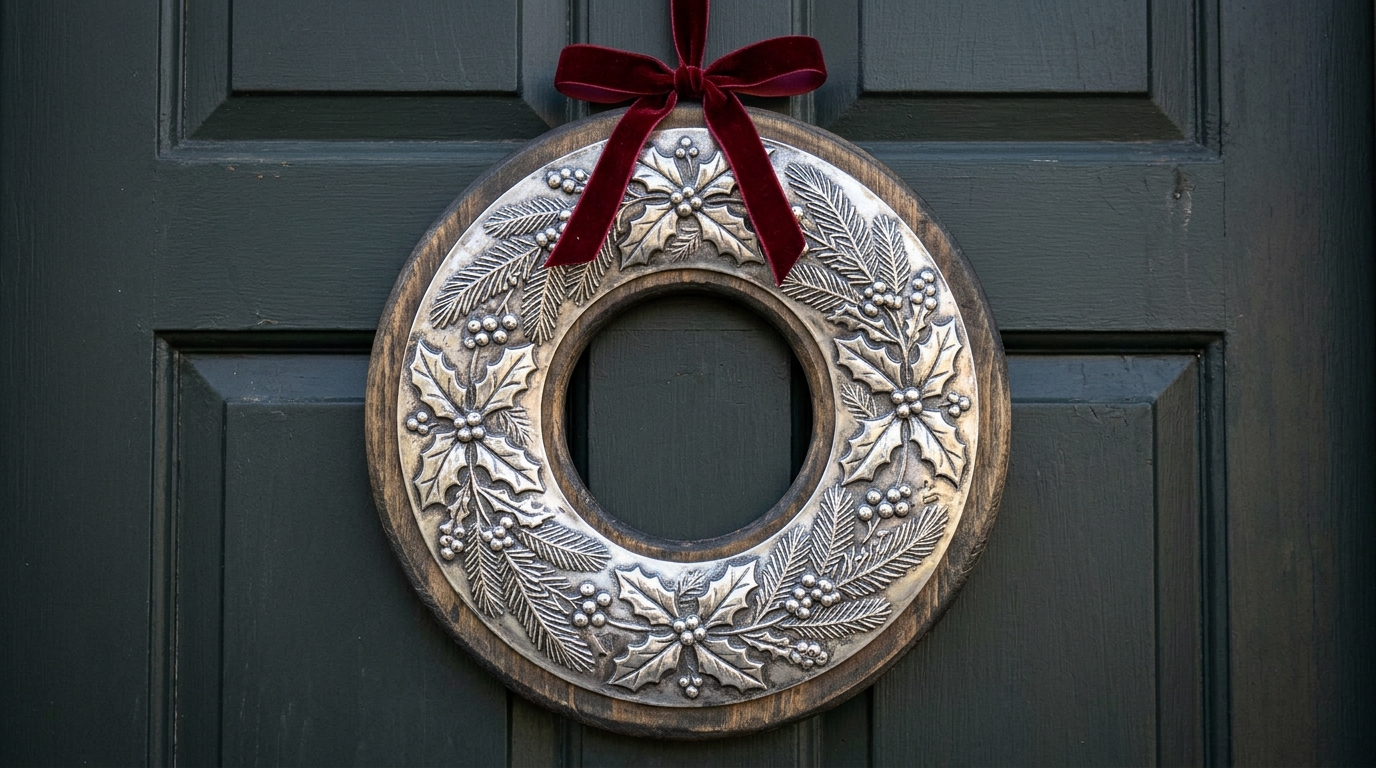
Foil Embossed Art makes a lovely door wreath that never sheds a needle. Cut a large circle of foil and trace a ring of holly leaves, berries and pine sprigs around the edge, leaving the middle plain. Press the details in, flip it over and the wreath stands up in shiny relief. Glue it to a round wood slice or a cork board, antique it with a little dark paint and hang it on a red velvet ribbon. If your door gets rain, seal it well. Where will yours hang?
You will need: A large foil pan, a round wood board or cork round, strong glue, a dry ballpoint pen, black paint, clear sealer and velvet ribbon.
How to make it: 1. Cut a circle of foil to fit the round. 2. Draw the wreath ring and press in leaves, berries and needles. 3. Glue it to the round, antique, seal and tie on the ribbon.
Slim Foil Bookmarks for the Readers You Love

Every family has a reader, and this little gift costs almost nothing. Cut long strips of foil, round the corners and glue each one to a strip of thin card so it stays flat and smooth in a book. Press a trailing vine or a row of leaves down the middle. Punch a hole at the top and add a homemade tassel. Tuck one into a secondhand novel and the gift feels thoughtful and finished. For more shiny window crafts, see our faux stained glass ideas. Who on your list always has a book open?
You will need: Foil pan metal, thin card stock, glue, a dry ballpoint pen, a hole punch and embroidery thread for tassels.
How to make it: 1. Cut foil and card strips about 2 by 7 inches and glue them together. 2. Round the corners and emboss a vine down the middle. 3. Punch a hole and tie on a thread tassel.
Foil Embossed Art With a Bronze Patina
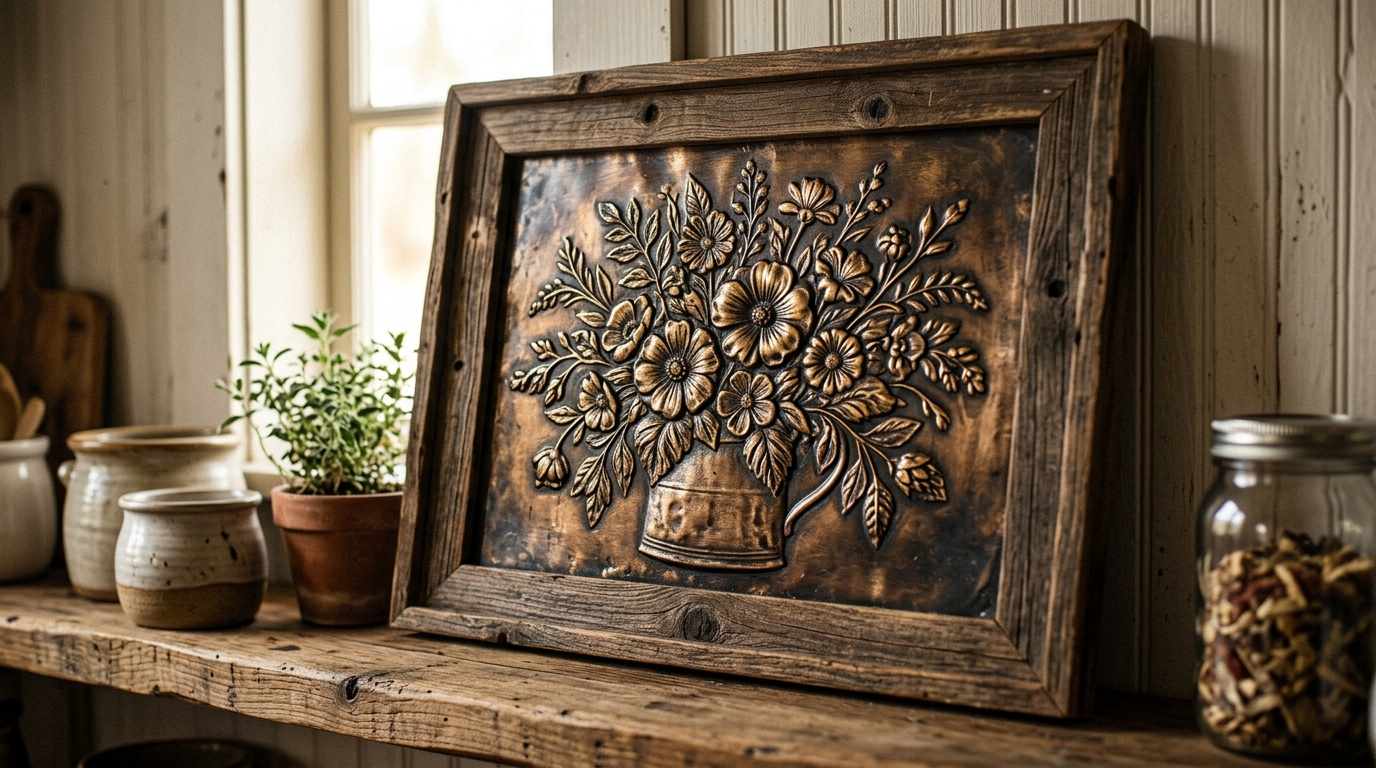
Foil Embossed Art does not have to stay silver. Crafters love rubbing brown shoe polish over the finished piece to get a warm, old bronze color in seconds. Dab the polish on with a soft cloth, work it into every groove and then buff the raised parts so they shine through gold and copper. The darker it sits, the older the piece looks. It suits farmhouse kitchens and rustic frames beautifully. Put gloves on for this one, because polish stains fingers. Would you pick silver or bronze?
You will need: A finished embossed foil panel, brown or dark tan shoe polish, a soft cloth, cotton gloves and a rustic frame.
How to make it: 1. Emboss your design first and wipe it clean. 2. Rub shoe polish over everything, pushing it into the lines. 3. Let it sit a few minutes, then buff the high spots until they glow.
A Journal Cover That Looks Like Old Silverwork
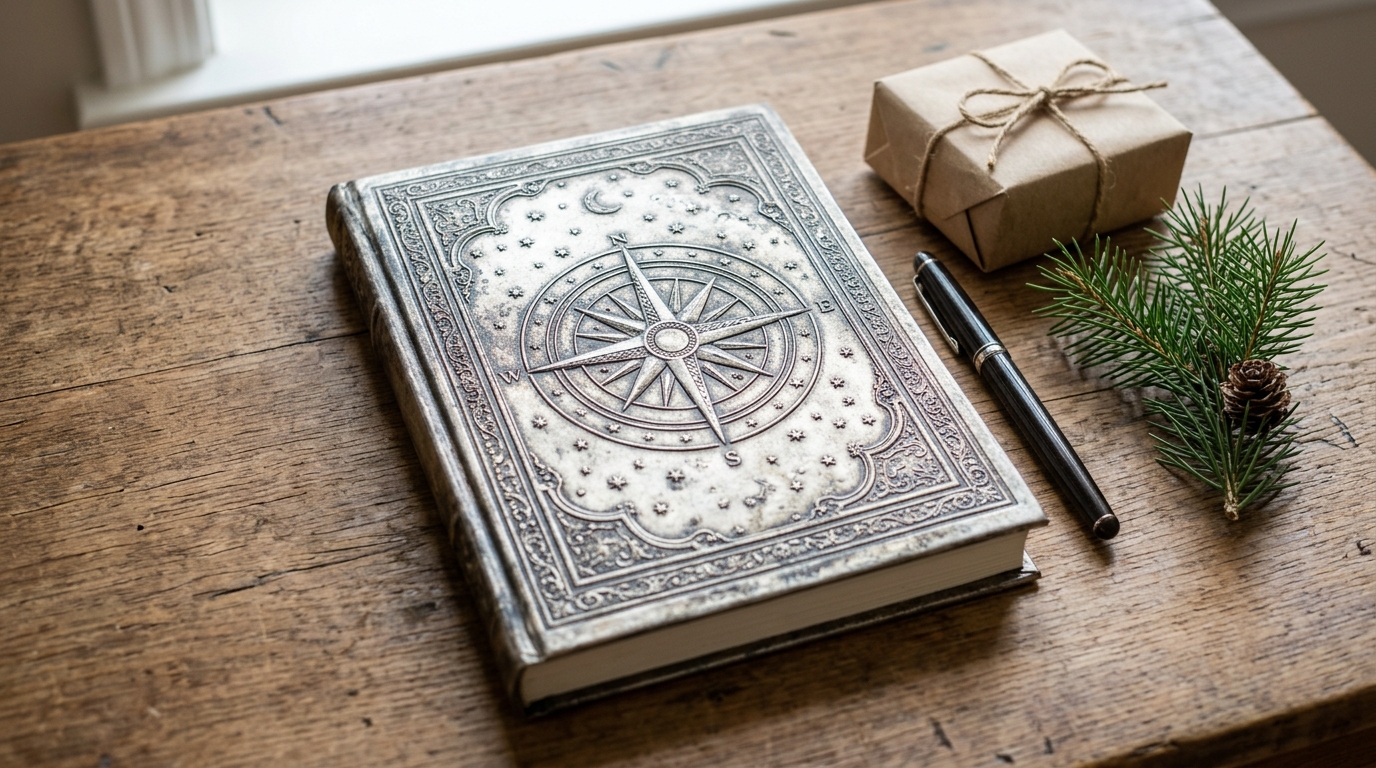
A plain notebook from the dollar store can become a gift that looks like it came from a fancy stationery shop. Emboss a panel with a compass rose, stars, a tree or a simple border, antique it and glue it to the front cover with a strong glue. Fold the edges over a thin card so nothing is sharp. It is a perfect gift for a traveler, a student or a friend who keeps lists. Pair it with a nice pen and you are done. Who on your list loves to write things down?
You will need: A hardcover notebook, foil pan metal, thin card, strong glue, a dry ballpoint pen, a ruler, black paint and a soft cloth.
How to make it: 1. Cut a foil panel a little smaller than the cover and back it with thin card. 2. Emboss your design, antique and wipe back. 3. Glue it to the cover and press under heavy books overnight.
A Trio of Framed Pieces to Finish Your Winter Wall
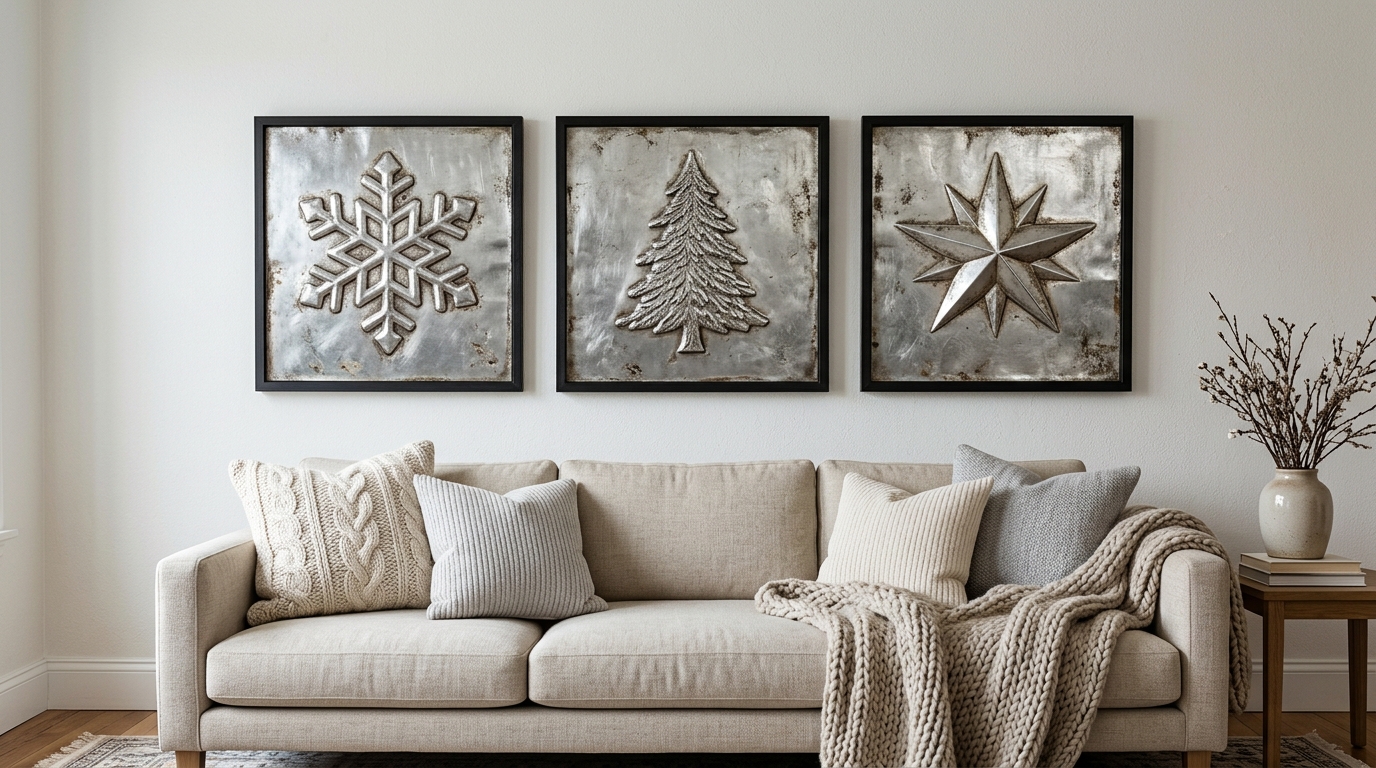
Save your best work for this last idea, because three pieces hung together look like a real art collection. Pick one theme, like a snowflake, a pine tree and a star, and make three panels the same size. Use matching cheap black frames from the dollar store, space them evenly over a sofa or a bed and step back. It looks like something from a home decor catalog, yet the whole wall costs less than one store bought print. Which of these Foil Embossed Art ideas will you try first?
You will need: Three foil pans, three matching frames, a dry ballpoint pen, a soft pad, black paint, a soft cloth and a level.
How to make it: 1. Cut three panels the same size and plan three designs that go together. 2. Emboss, antique and frame each one. 3. Hang them in a row with equal gaps using a level.