Gift Bag Upcycles: 15 Clever Ways to Reuse Old Gift Bags Instead of Tossing Them
These gift bag upcycles are for everyone with a closet, a drawer or a big bag stuffed with old gift bags from birthdays, baby showers and last Christmas. Those sturdy, pretty bags are far too nice to throw away, yet most of them never get used again. With a pair of scissors, a glue stick and a little imagination, they turn into drawer organizers, desk files, gift tags, mail pockets and festive decor that costs nothing at all. It is the perfect calm craft for a cozy evening, and it clears out clutter right before a whole new pile of bags arrives this holiday season. Only use bags with simple patterns you love, cut off any store names, and keep the sturdy handles for later. Ready to see how far one old bag can go..
Gift Bag Upcycles Start With a Free Organizer Box
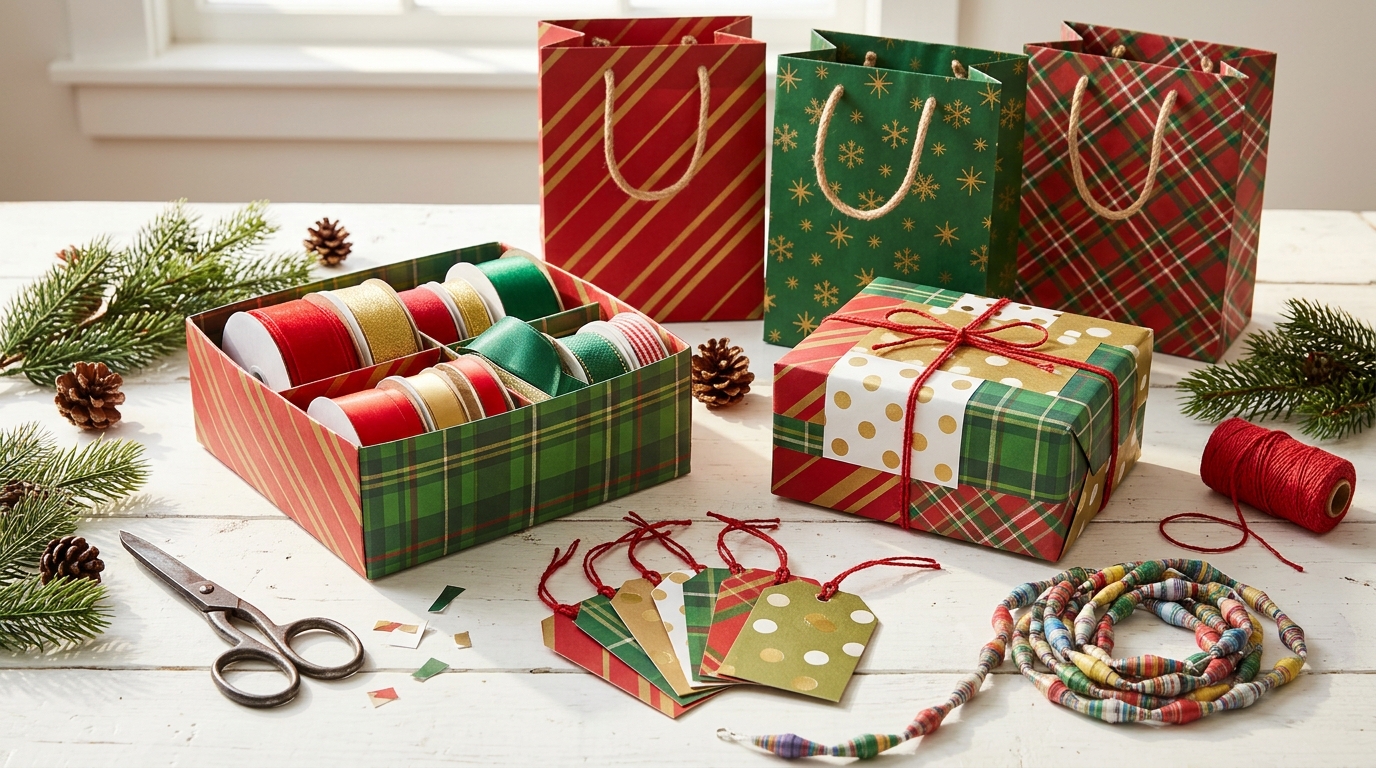
The ribbon pile and the junk drawer are where gift bag upcycles shine first. Cut the bottom few inches off a few sturdy bags and you get neat little boxes that sit side by side in a drawer or a tray, already lined and already pretty, perfect for ribbon spools, utensils or craft bits. This exact idea racked up more than 234,000 likes in a popular gift bag organizer video on Instagram, because it costs nothing and looks like a boutique drawer set. Mix stripes and plaid for a cheerful look, and the tags, patchwork wrap and bead garland on this table all come later in the list. Which messy drawer will you fix first..
You will need: Three or four sturdy gift bags, scissors, a ruler, a pencil and a glue stick or double sided tape.
How to make it: 1. Measure your drawer depth and mark a line that height around each bag. 2. Cut the bottom section off along the line. 3. Fold the cut top edge inward and glue it for a clean rim, then fit the boxes into the drawer.
A Fabric Covered Storage Bin
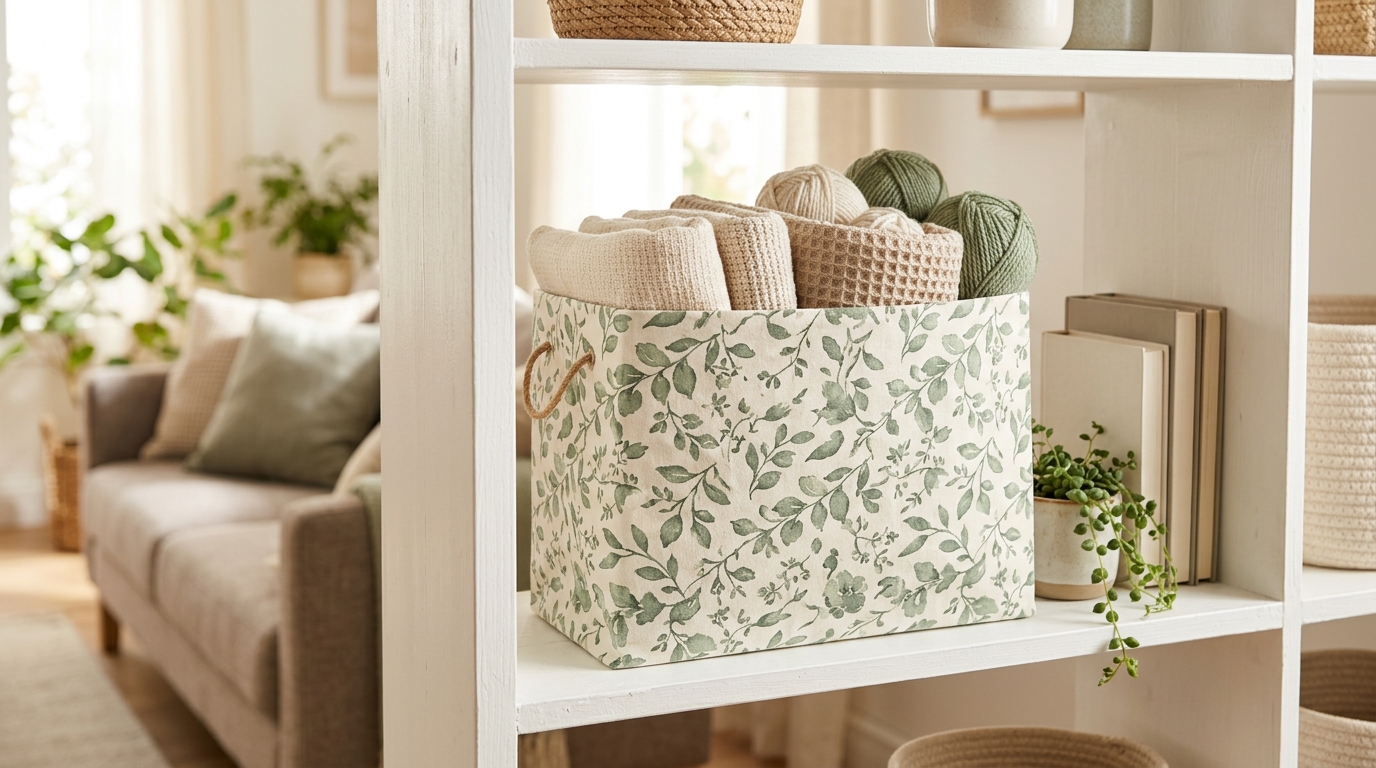
Large gift bags from the holidays are tall and stiff, which makes them a great base for a soft storage bin. Cut off the handles, fold down the top, and wrap the whole bag in a pretty cotton fabric. It looks like an expensive basket from a home store, and it holds throws, yarn or toys on an open shelf. Nobody will guess there is a gift bag inside. What would you keep in yours?
You will need: One large sturdy gift bag, a fat quarter or old pillowcase of cotton fabric, fabric glue or a glue gun (adult help) and scissors.
How to make it: 1. Cut off the handles and fold the top of the bag inward to the height you want. 2. Wrap fabric around the outside and glue it, folding the raw edge over the rim. 3. Glue a square of fabric to the bottom and let it dry.
Gift Bag Upcycles for the Desk: A Magazine File
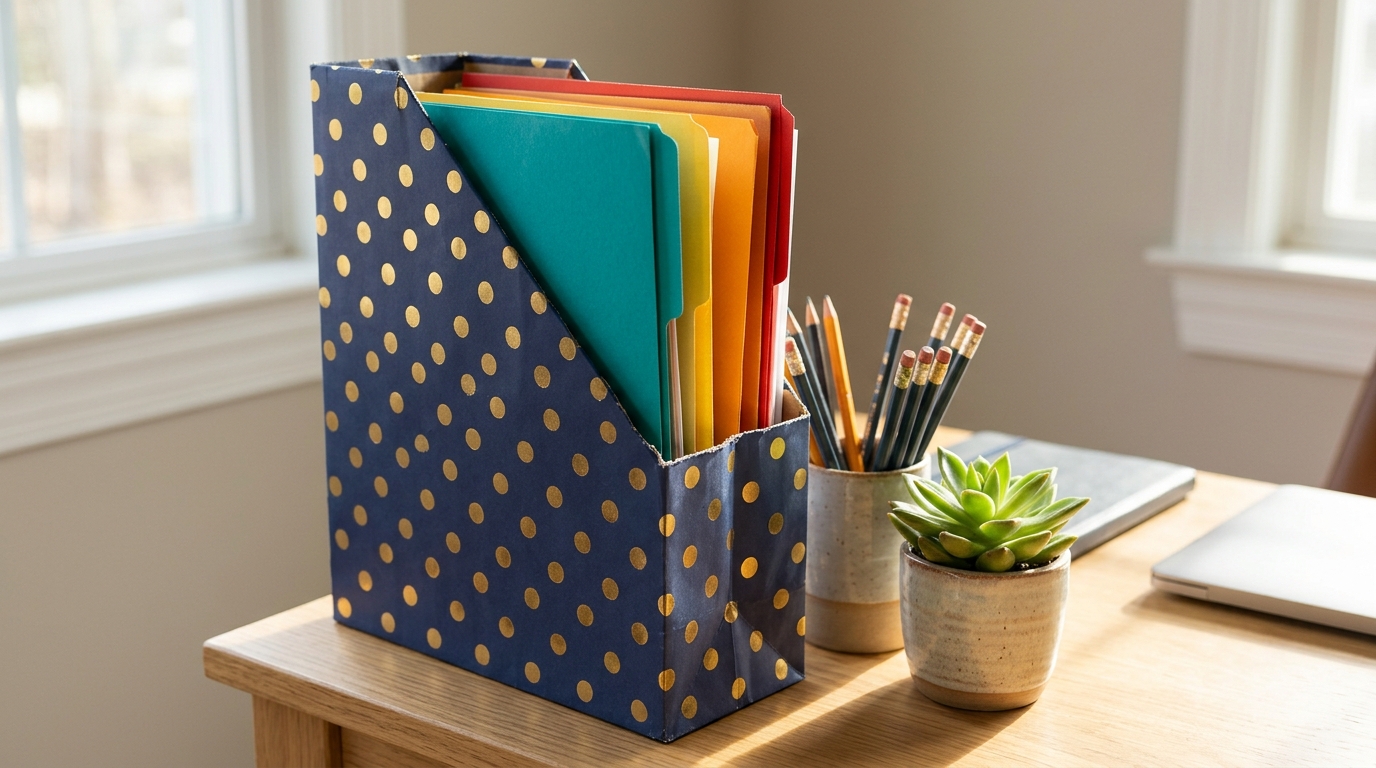
Tall gift bags have the perfect shape for a desk file. Cut a slanted line down the sides and you have an upright holder for folders, catalogs and kids school papers. These gift bag upcycles look polished in navy and gold or any bold pattern, and they keep a home office corner tidy all season. Slip a piece of cereal box inside the back panel if you want it extra stiff. Could your desk use one?
You will need: A tall sturdy gift bag, scissors, a ruler, a pencil, a glue stick and a cereal box panel.
How to make it: 1. Cut off the handles and draw a slanted line from the top back corner to halfway down the front. 2. Cut along the line on both sides. 3. Glue a cereal box panel inside the back for strength and fold the cut edges inward.
Pretty Gift Tags Cut From the Best Patterns
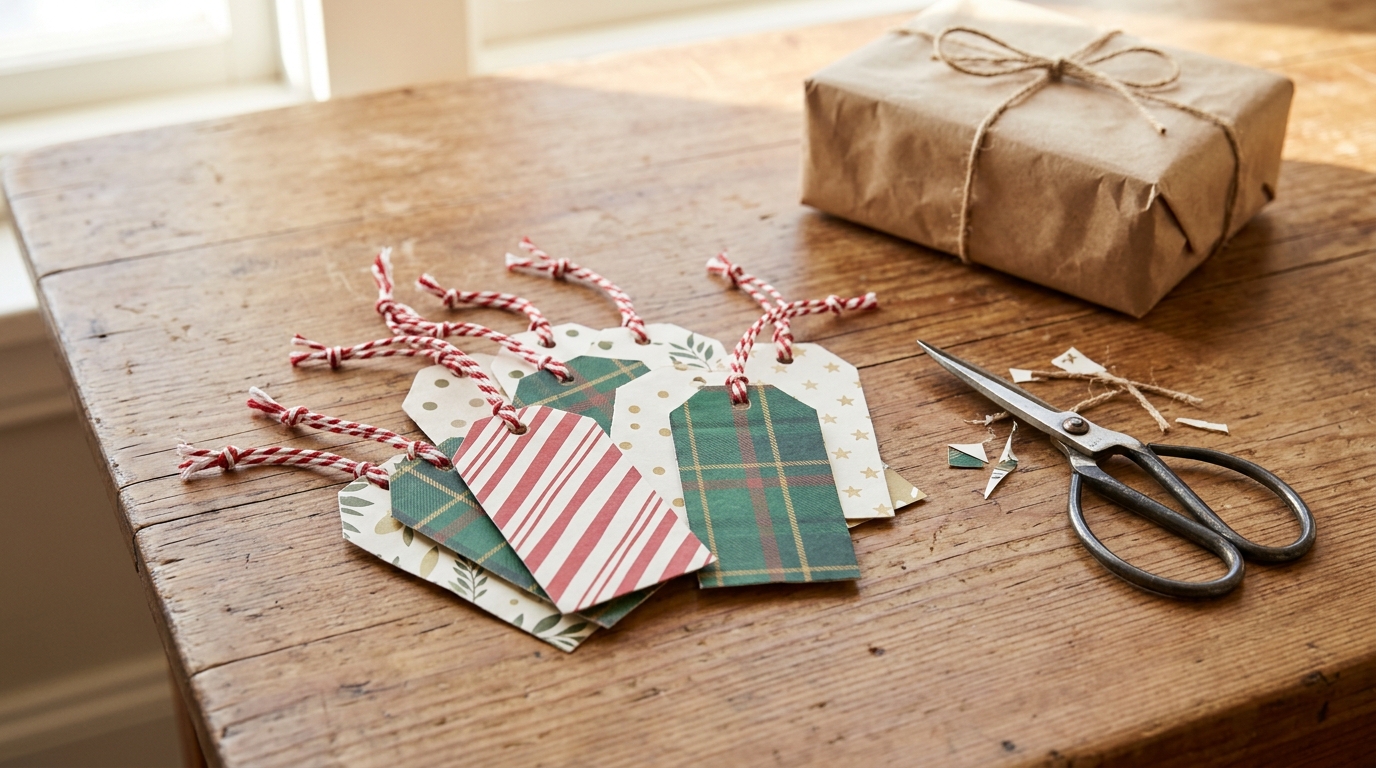
Even a bag with a torn corner still has plenty of pretty paper left. Trace a simple tag shape onto the best panels, punch a hole and add a loop of baker’s twine. A whole stack takes about ten minutes, and they match your wrapping perfectly when you use the same patterns. Keep them in an envelope with your wrapping supplies. How many tags do you use each Christmas?
You will need: Old gift bags, a tag template or a cardboard tag to trace, scissors, a hole punch and red and white twine.
How to make it: 1. Trace tag shapes onto the flat panels of the bags. 2. Cut them out and punch a hole at the top. 3. Thread a loop of twine through each tag.
Gift Bag Upcycles for the Entry: A Wall Mail Pocket
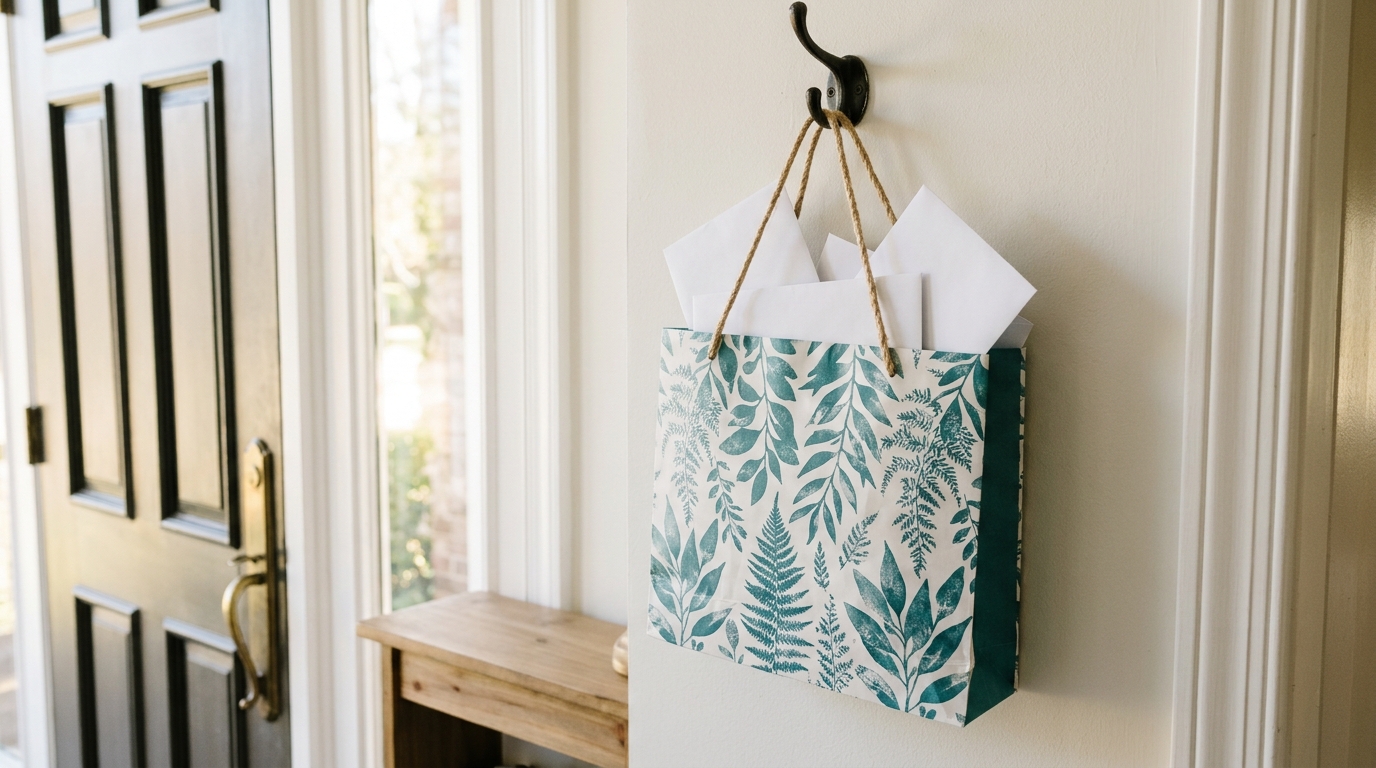
Mail, school notes and coupons always seem to pile up by the door. Among the easiest gift bag upcycles, this one needs just one cut. Trim a pretty bag to about half its height, keep one handle as a hanging loop, and hang it on a hook near the door. Letters stay in one spot and the entry looks fresh and green. Try a botanical print for a calm look all year. Where does your mail usually land?
You will need: One sturdy gift bag with a rope handle, scissors, a glue stick and a wall hook.
How to make it: 1. Cut the front and sides of the bag down to half height, leaving the back panel and one handle tall. 2. Fold and glue the cut edges for a neat rim. 3. Hang it on a hook by the handle.
Ornament Storage Bags That Protect Your Glass Balls
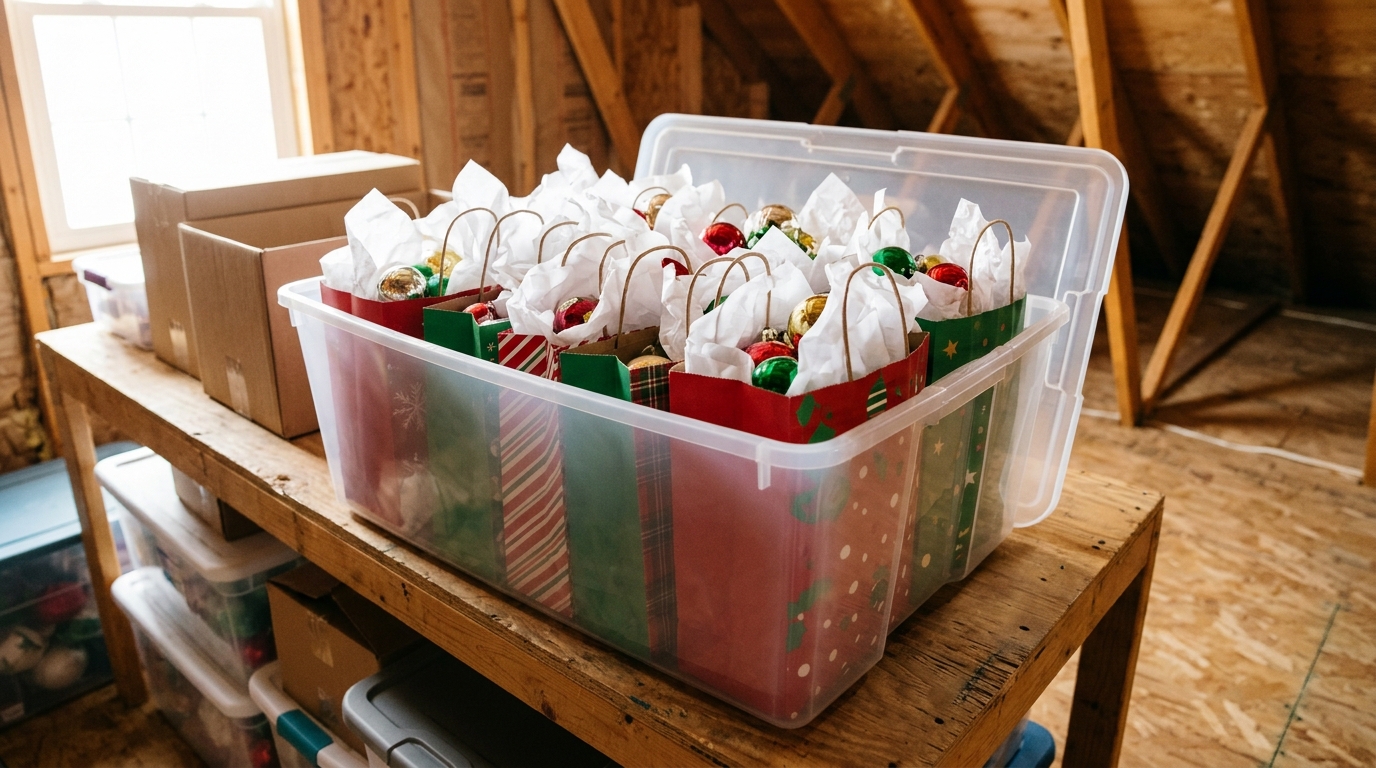
When the tree comes down, sturdy gift bags make wonderful ornament keepers. Wrap each glass ball in tissue, tuck a few into a bag, and stand the bags upright in a plastic tub. The handles make it easy to lift out one set at a time next year, and the patterns tell you at a glance which bag holds which colors. It is a simple trick that saves a lot of broken ornaments. How do you store yours now?
You will need: Sturdy gift bags, tissue paper, a plastic storage tub and a marker for a plain sticker on the tub.
How to make it: 1. Wrap each ornament gently in tissue paper. 2. Place five to eight wrapped ornaments in each bag. 3. Stand the bags upright in the tub so they support each other.
Patchwork Collage Gift Wrap
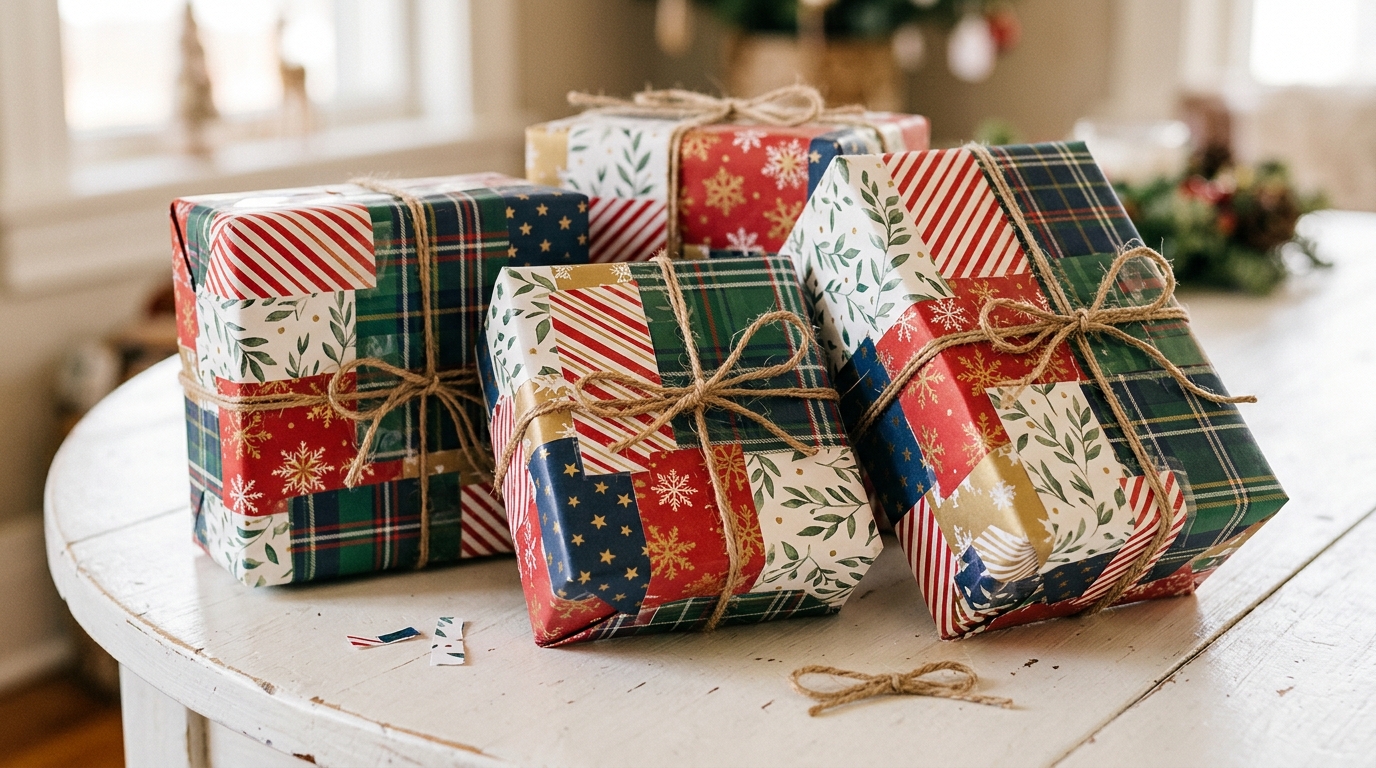
Short on wrapping paper? Cut the flat panels from several old bags and piece them together on a plain box like a quilt. Stripes next to plaid next to stars looks surprisingly stylish, and every gift turns out one of a kind. Finish with simple twine so the patterns shine. It is a great way to use the smaller scraps left over from the bigger gift bag upcycles in this list. Who gets the first patchwork present?
You will need: Panels from three or four gift bags, a plain box, scissors, a glue stick or tape and twine.
How to make it: 1. Cut the bag panels into squares and rectangles. 2. Glue them onto the box, overlapping the edges like a quilt. 3. Tie it with twine and add a tag.
A Pennant Banner for Holiday Cards
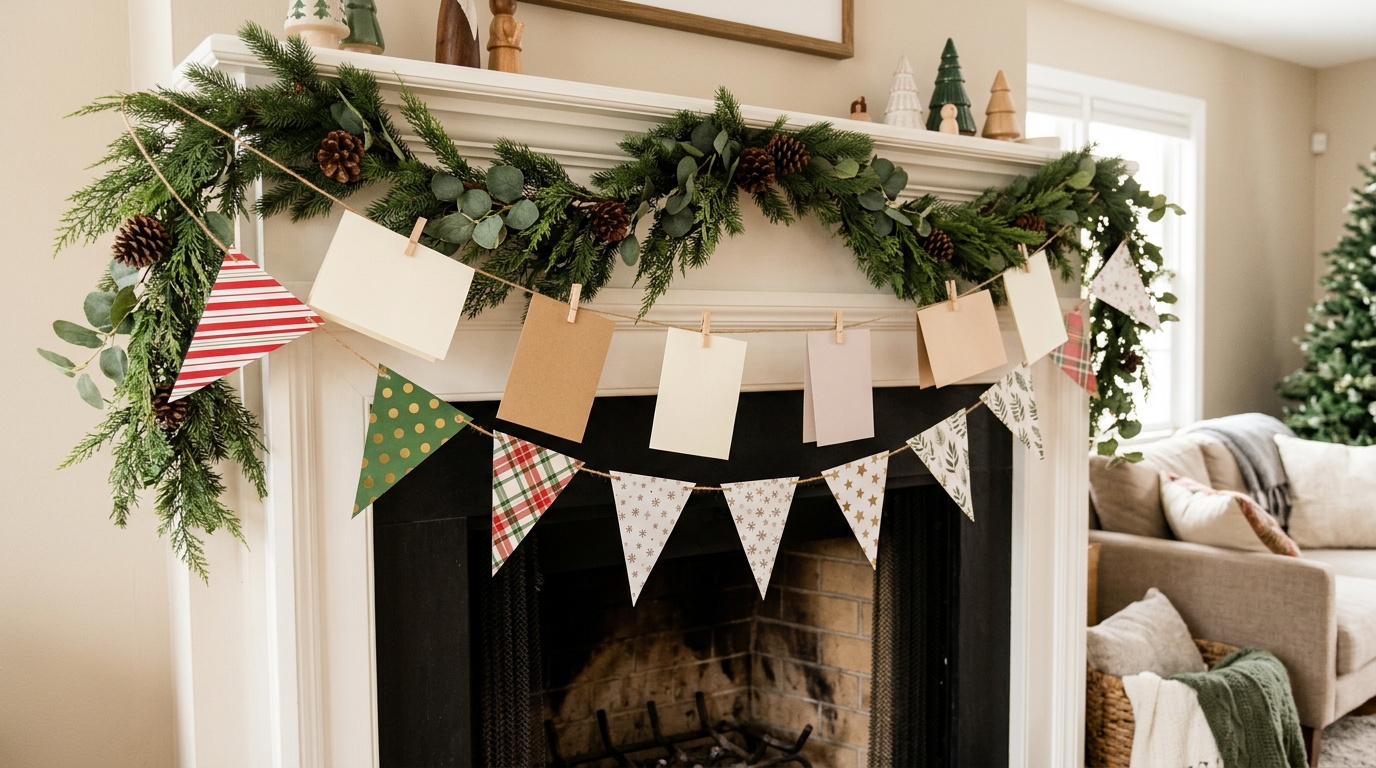
Holiday cards deserve a better home than a pile on the counter. Cut triangles from your prettiest bags, string them on twine across a mantel or doorway, and clip the cards between the flags with mini clothespins. The banner looks festive on its own and gets fuller every day as the cards arrive. Mix red stripes, green dots and plaid for a cheerful look. Where would you hang yours?
You will need: Old gift bags, a triangle template, scissors, a hole punch, twine and mini wooden clothespins.
How to make it: 1. Trace and cut triangles from the bags. 2. Punch two holes along the top of each triangle and thread them onto the twine. 3. Hang the banner and clip cards between the flags.
Gift Bag Upcycles for a Christmas Village Backdrop
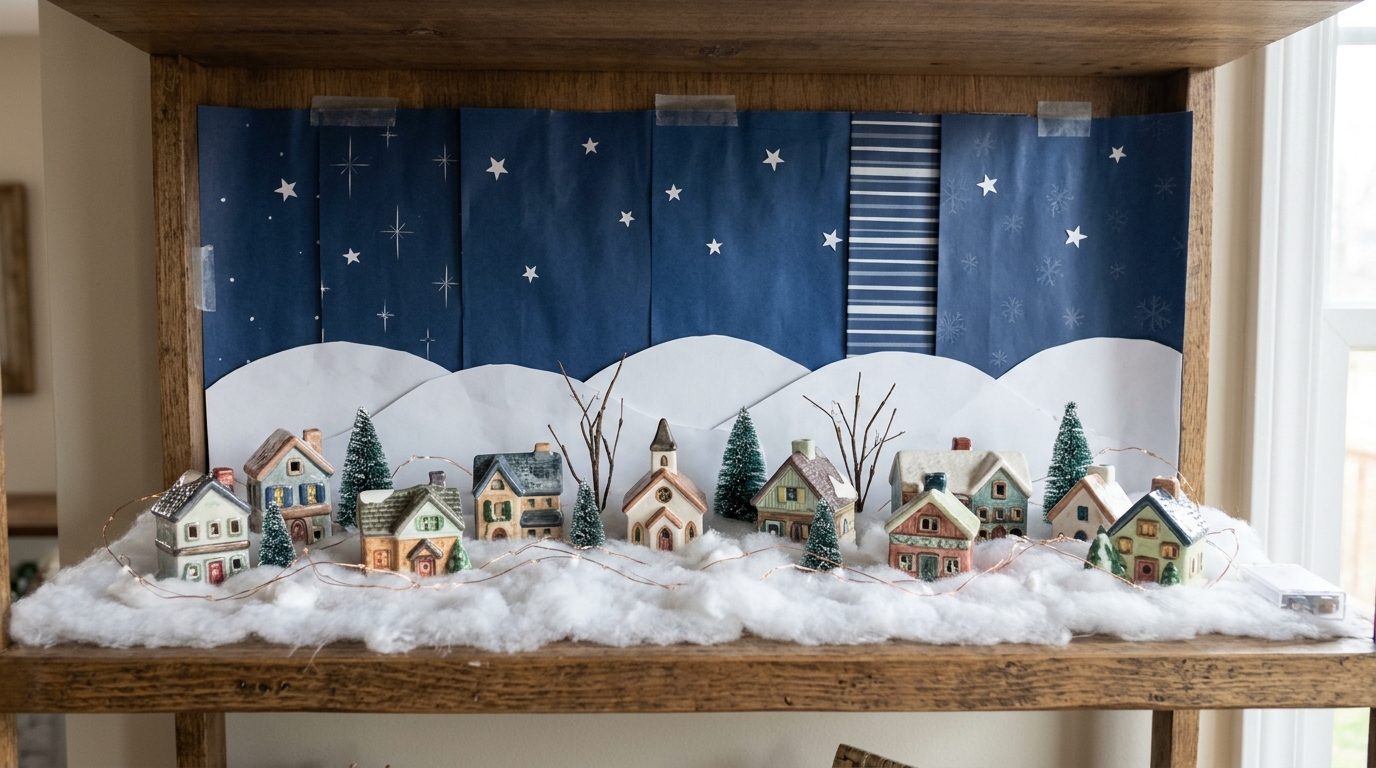
A tabletop Christmas village looks magical with a night sky behind it. Dark blue bags with tiny stars make the perfect backdrop. Flatten them, tape them together behind the shelf, and add rolling snowy hills cut from white paper. These gift bag upcycles give a little village real depth for zero dollars. Add cotton batting snow at the front and the scene is complete. Do you set up a village every year?
You will need: Two or three dark patterned gift bags, white paper or card stock, scissors, tape and cotton batting.
How to make it: 1. Cut the bags open along one side and flatten them. 2. Tape the panels together and fix them behind the village. 3. Cut snowy hills from white paper, tape them along the bottom and add batting snow.
Decoupage a Keepsake Box Lid
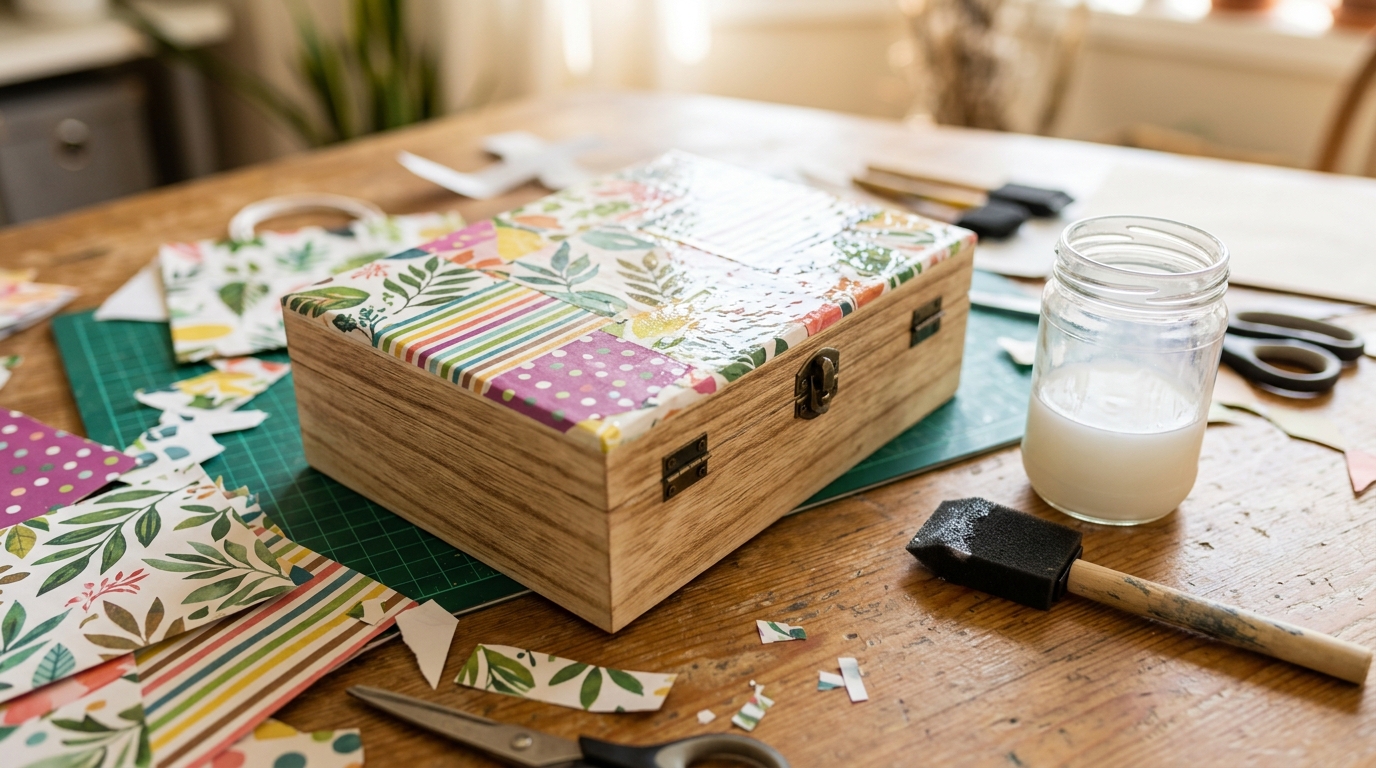
Gift bags printed on smooth paper are perfect for decoupage. Cut out the prettiest flowers and leaves, brush them onto a plain wooden box lid with decoupage glue, and seal with a few clear coats. The result looks hand painted, and it makes a sweet gift box for jewelry, letters or recipe cards. Thin bag paper lies flattest, so peel off any thick backing first. Which box would you dress up?
You will need: A plain wooden box, a floral gift bag, scissors, decoupage glue and a foam brush.
How to make it: 1. Cut out flowers and leaves from the bag. 2. Brush glue on the lid, lay the cutouts down and smooth out bubbles. 3. Brush two or three clear coats on top, letting each one dry.
Gift Bag Upcycles Using the Handles as Ribbon
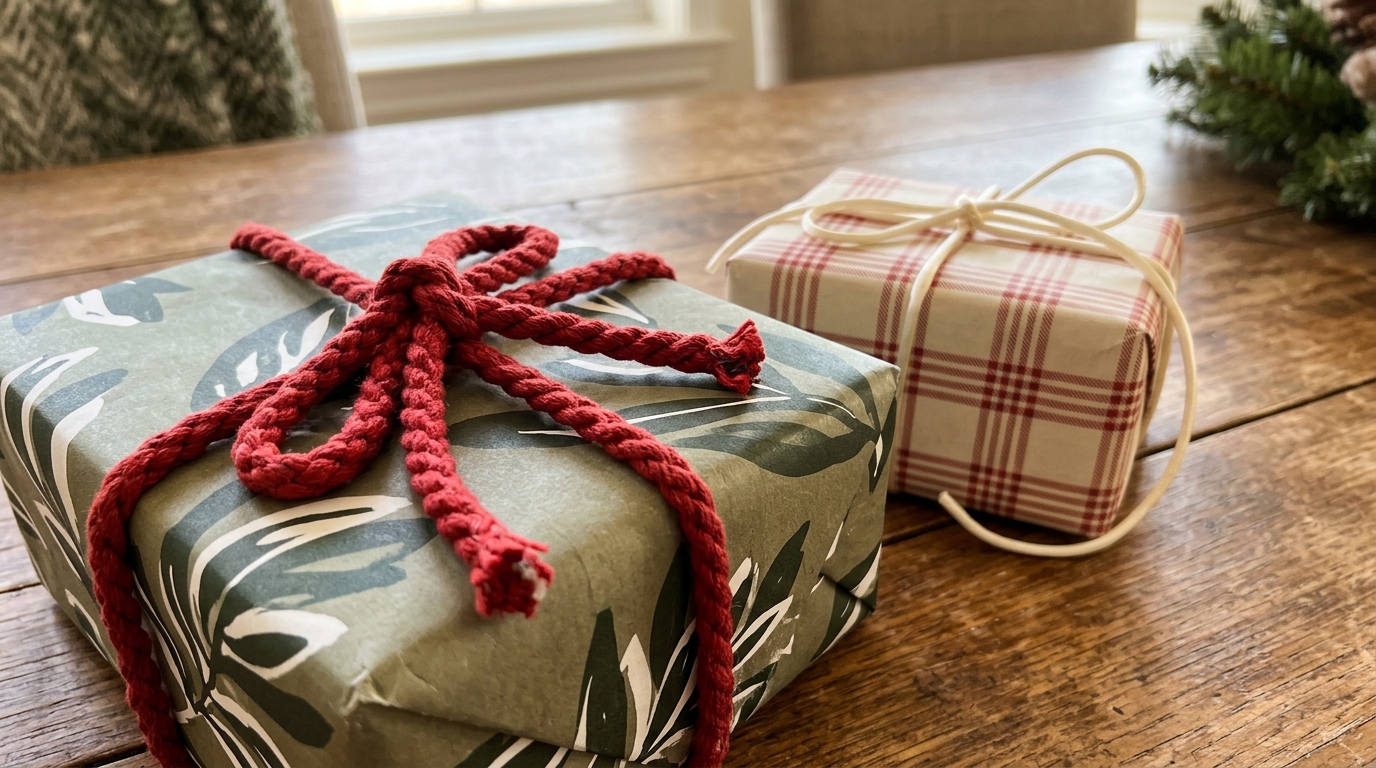
Before you recycle a bag, snip off the handles. Thick braided rope and soft satin cords make beautiful ribbon for wrapping gifts, and they look far more expensive than a plastic bow. Tie them in a loose knot or a big floppy bow on kraft paper packages. Save them in a jar and you will always have pretty ties on hand. These little gift bag upcycles cost nothing. Do you save ribbon from gifts you receive?
You will need: Rope and cord handles cut from old bags, scissors and kraft wrapped gifts.
How to make it: 1. Snip the handles off close to the bag. 2. Pull out any knots and smooth the cords. 3. Tie them around wrapped gifts in a knot or bow.
Flattened Bags as Drawer Liners
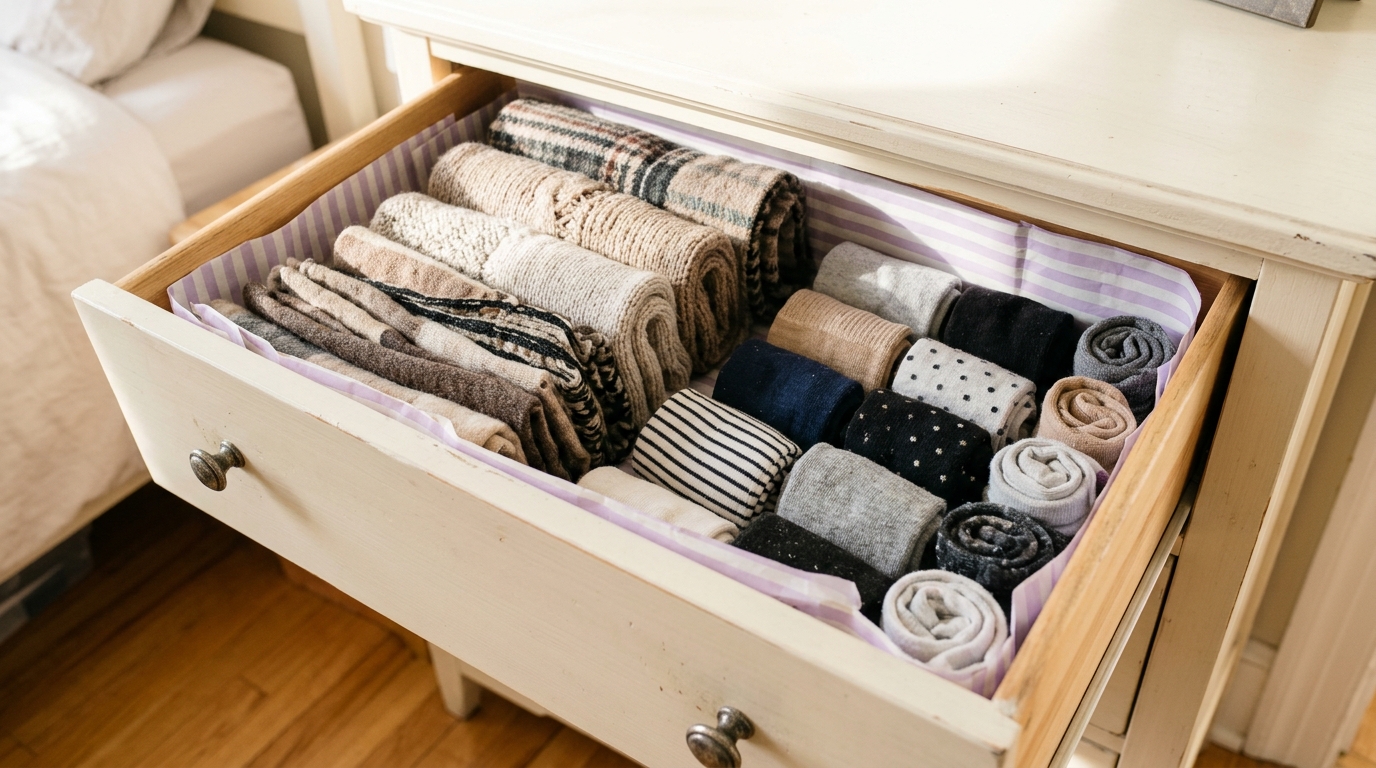
Plain wooden drawers get scratched and dusty, and liner paper is surprisingly pricey. Flatten a few large bags, trim them to the size of the drawer bottom, and lay them in pattern side up. The drawer feels fresh and pretty every time you open it. A soft stripe works well in a bedroom dresser for socks and scarves. How long has it been since you cleaned out your dresser?
You will need: Large gift bags, scissors, a ruler and a pencil.
How to make it: 1. Cut the bags open along the seams and flatten them. 2. Measure the drawer bottom and trim the panels to fit. 3. Lay them in the drawer pattern side up.
A Kids Craft Paper Chain
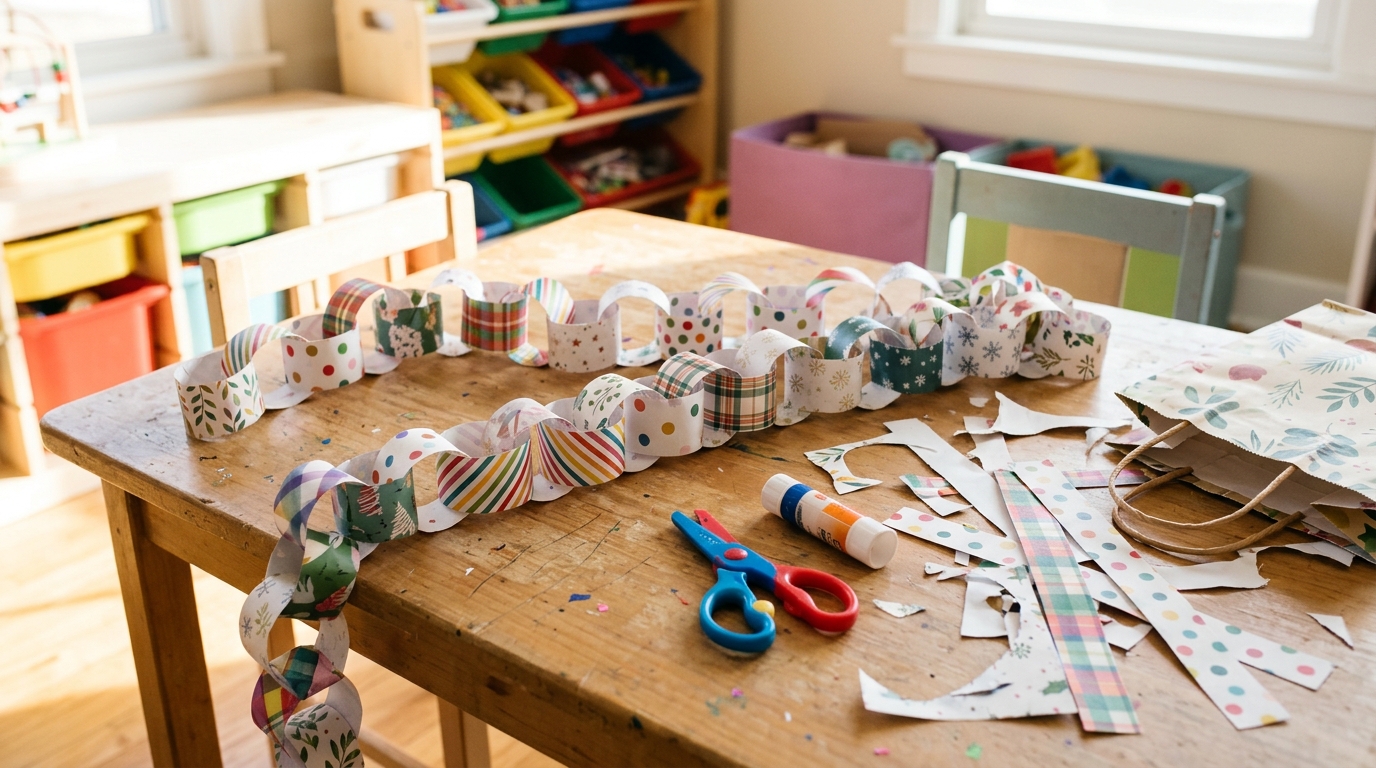
Kids love helping with holiday crafts, and old gift bags give them a free stack of colorful paper. Cut the panels into strips and let little hands loop them into a long paper chain for the tree or a doorway. It is a gentle, calm activity for a snowy afternoon, and grown ups can do the cutting. Count the links to make a countdown to Christmas too. How long can your chain get?
You will need: Old gift bags, scissors (grown ups cut), safety scissors for kids and a glue stick or stapler.
How to make it: 1. Cut the bags into strips about one inch wide and six inches long. 2. Glue the first strip into a loop. 3. Thread the next strip through and glue it, then keep going.
Gift Bag Upcycles Into Handmade Envelopes
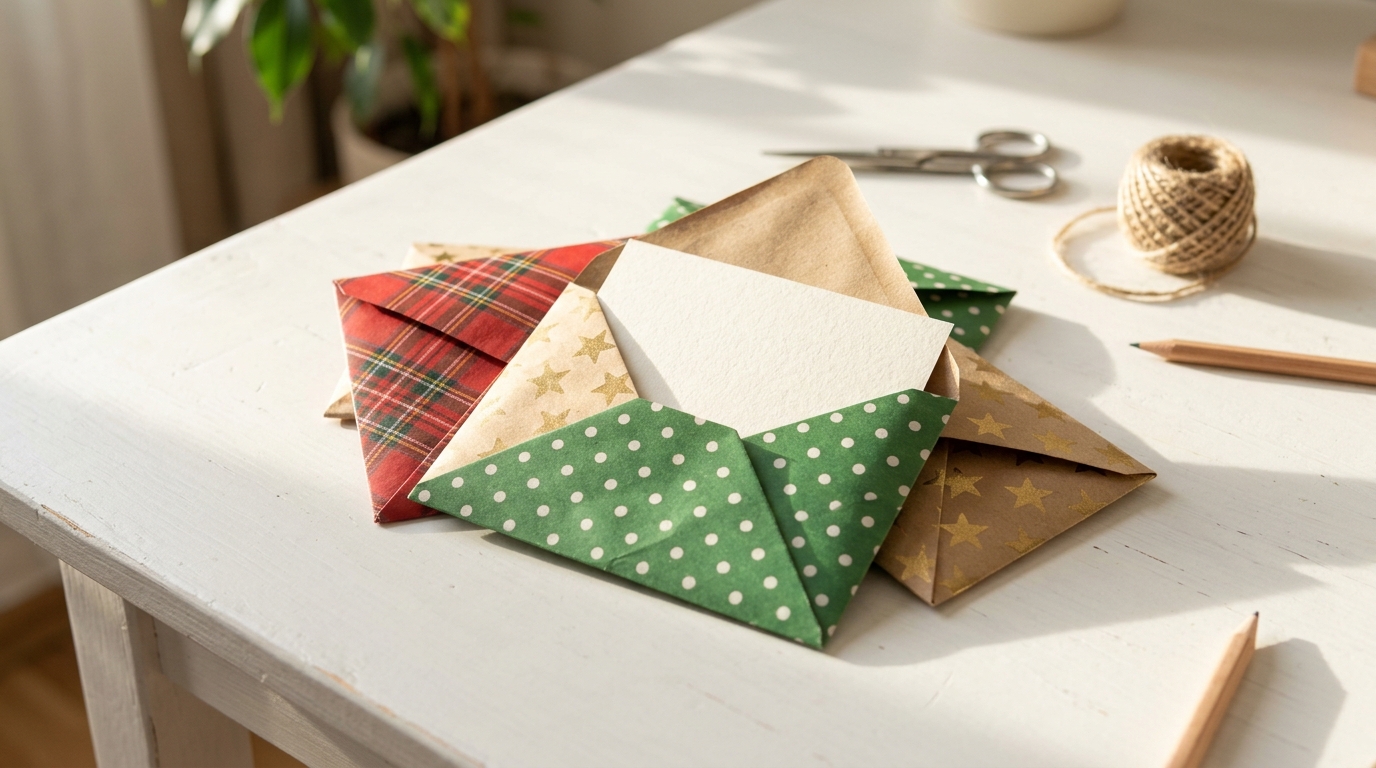
Pretty envelopes make a simple card feel special. Unfold a store envelope to use as a template, trace it onto flattened gift bag paper, and fold it up. These gift bag upcycles are wonderful for gift cards, thank you notes and money gifts at Christmas. A dot of glue holds them closed, or add a small sticker seal. Who on your list will get a card in a patterned envelope?
You will need: Flattened gift bags, an old envelope to use as a template, a pencil, scissors and a glue stick.
How to make it: 1. Carefully unfold an old envelope and trace it onto the bag paper. 2. Cut out the shape and fold along the same lines. 3. Glue the side and bottom flaps.
Rolled Paper Bead Garland for the Tree
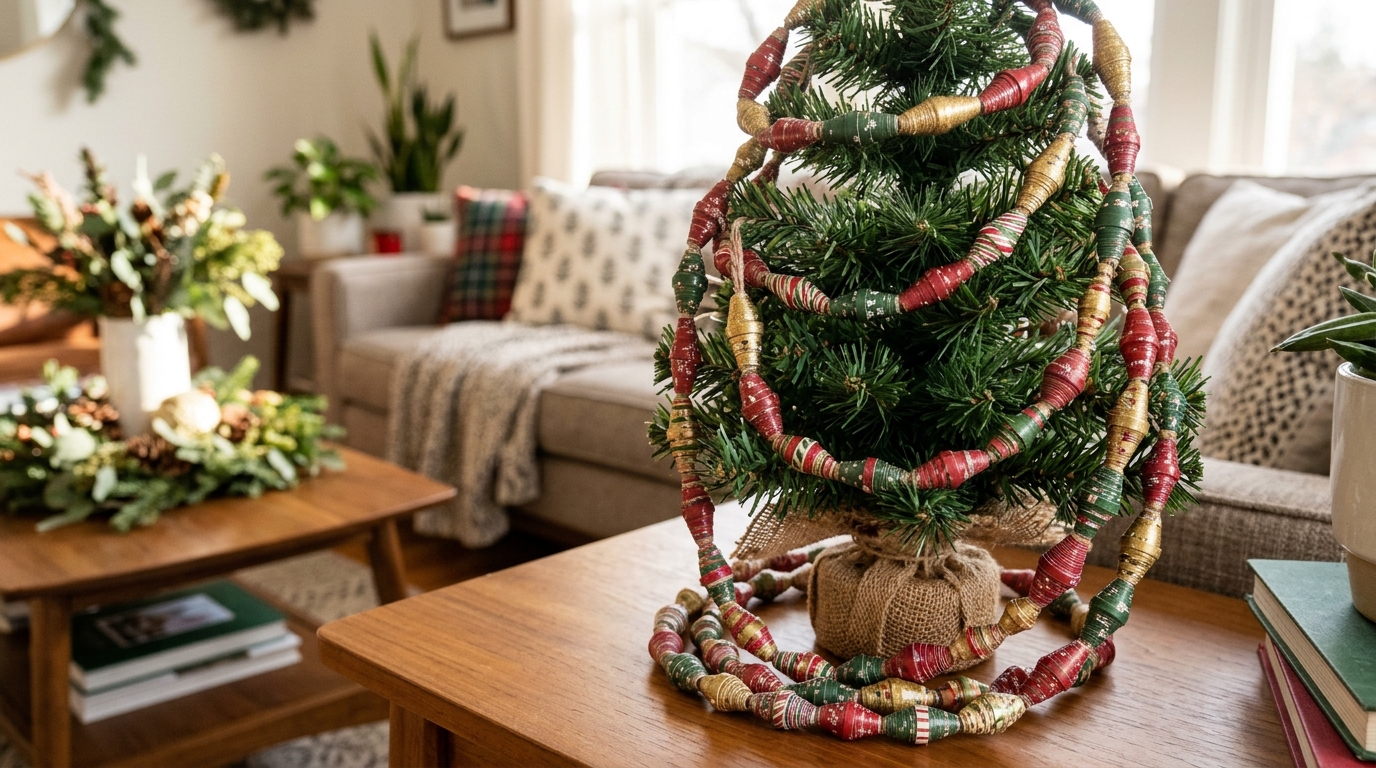
Our last idea turns the final scraps into a cozy tree garland. Cut long, thin triangles from the bags, roll each one tightly around a skewer and seal it with glue to make a bead. String the beads on twine and drape them around a small tree. It looks like a vintage handmade garland from a craft fair. For more ways to give old things a new job, see our upcycled storage ideas gallery. Which pattern would you roll first?
You will need: Leftover gift bag scraps, scissors, a wooden skewer, a glue stick, clear glue and twine.
How to make it: 1. Cut long thin triangles about one inch wide at the base. 2. Roll each one tightly around a skewer from the wide end, glue the tip and slide it off. 3. Brush on clear glue to seal, let dry and thread onto twine.